Jakie są kluczowe umiejętności projektowania biżuterii? Materiały, techniki i prezentacja wizualna?

Ten przewodnik jest idealny dla sklepów jubilerskich, studiów, marek, projektantów i sprzedawców. Obejmuje on sposoby rysowania i projektowania biżuterii przy użyciu różnych materiałów, takich jak diamenty, perły, jadeit i metale. Poznaj krok po kroku techniki szkicowania, kolorowania i tworzenia widoków 3D za pomocą ołówków, akwareli, markerów i tabletów. Świetnie nadaje się do niestandardowych elementów i projektów celebrytów.

Jakie są kluczowe umiejętności projektowania biżuterii? Materiały, techniki i prezentacja wizualna?

Kompletny przewodnik po projektowaniu biżuterii: Materiały, techniki i rendering dla profesjonalistów

Wprowadzenie:

Chcesz poznać tajniki projektowania biżuterii? Ten przewodnik zagłębia się w świat materiałów jubilerskich i technik projektowania. Odkryj skład kamieni szlachetnych, takich jak diamenty, perły, jadeit, agat i inne. Poznaj typowe kombinacje materiałów, które wyróżniają Twoje projekty. Dowiedz się, jak ożywić swoje pomysły na biżuterię dzięki szczegółowym, ręcznie rysowanym technikom i reprezentacjom 3D przy użyciu kolorowych ołówków, akwareli, markerów i narzędzi cyfrowych. Od standardowych diagramów trójwymiarowych po oszałamiające prezentacje wizualne, ten przewodnik obejmuje wszystko, czego potrzebujesz, aby tworzyć piękne i profesjonalne projekty biżuterii.
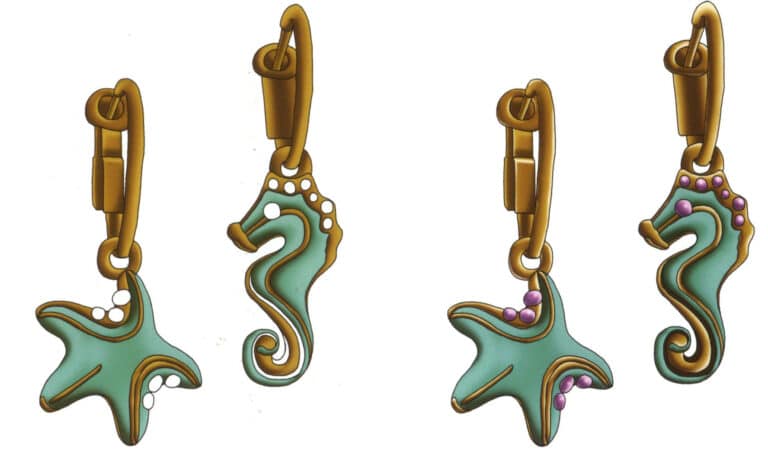
Krok 13 Utwórz warstwę "Right Earring Pendant Color". Kontynuuj kolorowanie prawej zawieszki w kształcie konika morskiego. Krok 14 Utwórz warstwę "Pearl Color". Zastosuj magentę jako podstawowy kolor pereł. Zdefiniuj cienie/podświetlenia. Zakończ, dostosowując ogólny kontrast jasno-ciemny i balans kolorów.

Spis treści

Sekcja I Reprezentacja tekstur

W poprzednich rozdziałach wyjaśniono istotną wiedzę na temat biżuterii, podstawy rysunku odręcznego i użycie koloru. Następnie omówimy reprezentację materiału w projektowaniu biżuterii.

Rozdział ten przedstawia głównie skład materiałowy kamieni szlachetnych, typowe kombinacje materiałów, reprezentację diamentów, pereł, jadeitu, agatu, metali szlachetnych, kolorowego szkła, turkusu, granatu i materiałów kryształowych oraz odpowiadające im reprezentacje biżuterii.

1. Skład materiałowy kamieni szlachetnych

Naturalne kamienie szlachetne są podzielone na trzy rodzaje w oparciu o ich charakterystykę składu: kamienie szlachetne, jadeit i kamienie ozdobne. Ogólnie rzecz biorąc, kamienie szlachetne są jaskrawo zabarwione, mają dobrą przezroczystość i twardość większą niż 6. Są one częścią naturalnie występujących kryształów mineralnych, z popularnymi kamieniami szlachetnymi, w tym rubinami, szafirami, szmaragdami i perydotami; jadeit zazwyczaj ma dobry połysk i delikatną teksturę i nadaje się do rzeźbienia. Łączy w sobie wiele małych kryształów tego samego minerału z popularnymi rodzajami jadeitu, w tym jadeitem, opalem i agatem; kamienie ozdobne mają unikalne, wzorzyste struktury i łączą w sobie różne małe kryształy minerałów. Są one na ogół bardziej miękkie i nadają się do rzeźbienia stalowymi narzędziami, często używanymi do wyrobu rękodzieła, pieczęci itp. i mogą być również polerowane na architektoniczne panele dekoracyjne. Następnie przeanalizujemy skład materiałowy różnych kamieni szlachetnych.

Diamenty to kryształy węgla o dużej gęstości; rubiny i szafiry to korund, który ma różne kolory, podczas gdy sam korund jest bezbarwnym i przezroczystym kryształem, którego głównym składnikiem jest tlenek glinu; szmaragdy należą do minerału berylu i są rodzajem minerału berylowo-glinokrzemianowego; kocie oko jest minerałem układu rombowego; kwarc jest rodzajem kryształu kwarcu, którego głównym składnikiem chemicznym jest dwutlenek krzemu; opal jest rodzajem opalu; turmalin jest rodzajem turmalinu; jadeit jest twardym jadeitem; jadeit Hetian jest nefrytem.

2. Typowe kombinacje materiałów

Na rynku dostępnych jest wiele różnych rodzajów biżuterii, więc jakie są konkretne kombinacje materiałów dla tych projektów biżuterii? Poniżej przedstawimy typowe kombinacje materiałów w projektowaniu biżuterii, aby każdy mógł je zrozumieć.
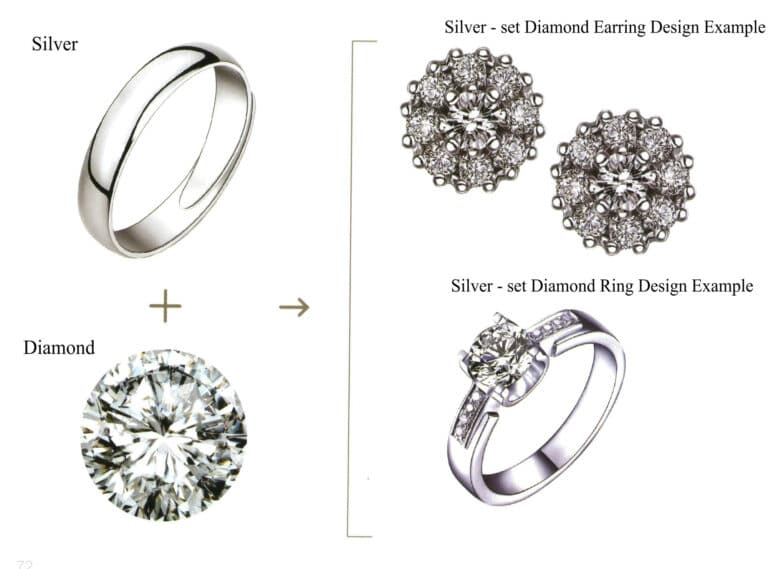
2.1 Srebro + Diament
Silver + Diamond
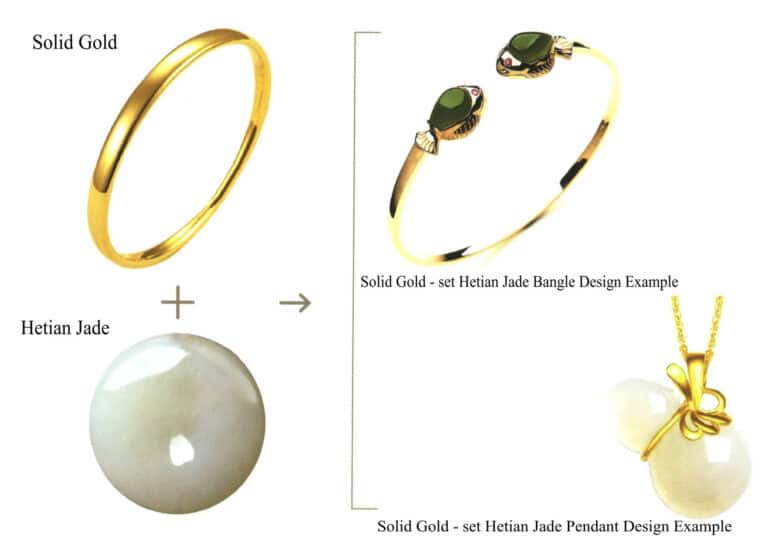
2.2 Lite złoto + jadeit
Solid Gold + Jade
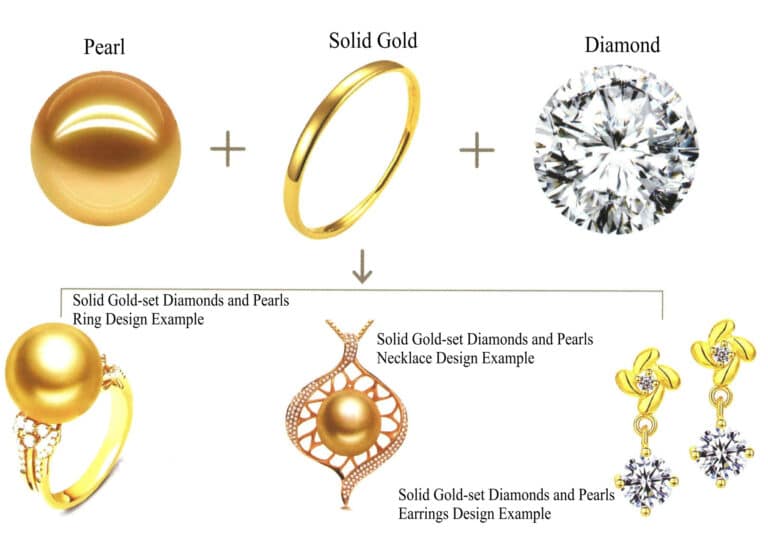
2.3 Perła + lite złoto + diament
Pearl + Solid Gold + Diamond
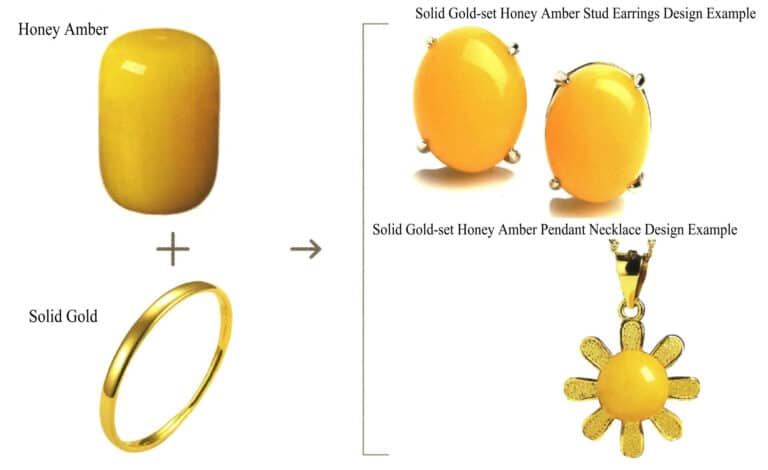
2.4 Miodowy bursztyn + lite złoto
Honey Amber + Solid Gold
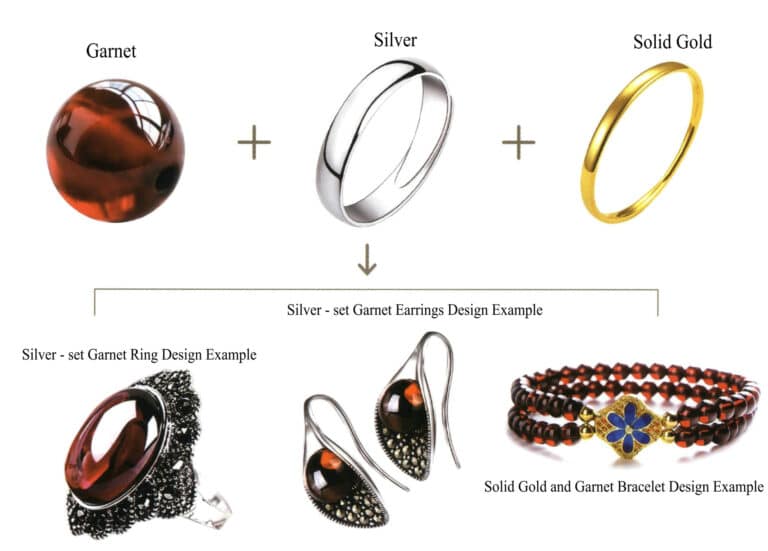
2.5 Granat + metale szlachetne
Garnet + Precious Metals
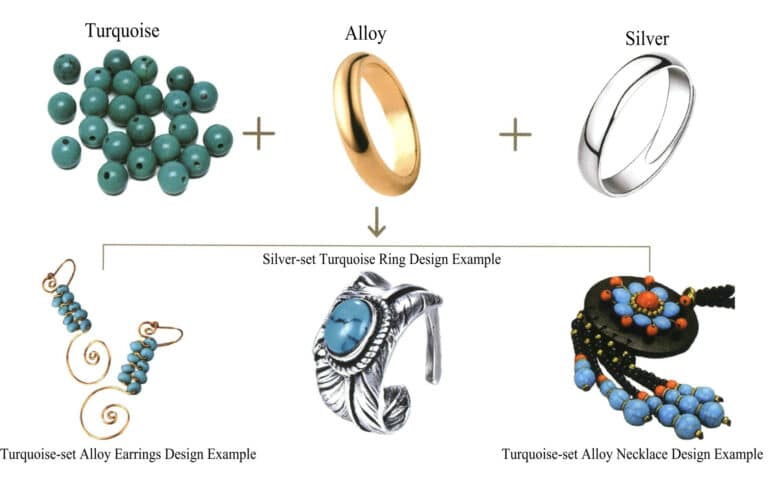
2.6 Turkus + metale szlachetne
Turquoise + Precious Metals
2.7 Przykład projektowania kombinacji różnych materiałów
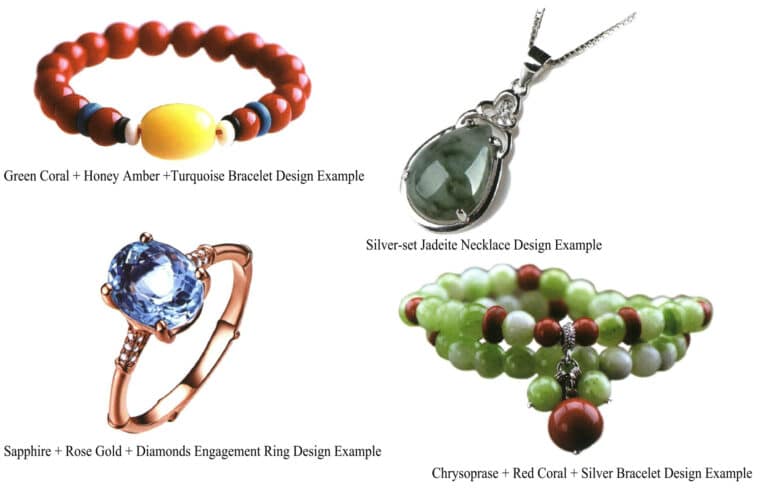
Mixed Material Combinations Design Example

3. Diament

Diamenty są generalnie przezroczyste, co utrudnia ich przedstawienie na rysunkach, dlatego do ilustracji można wybrać kolorowe diamenty. Typowe kolory to złoty żółty, brązowy, zielony, różowy i niebieski. Następnie wyjaśnimy, jak narysować niebieskie diamenty.
3.1 Reprezentacja surowego materiału diamentowego
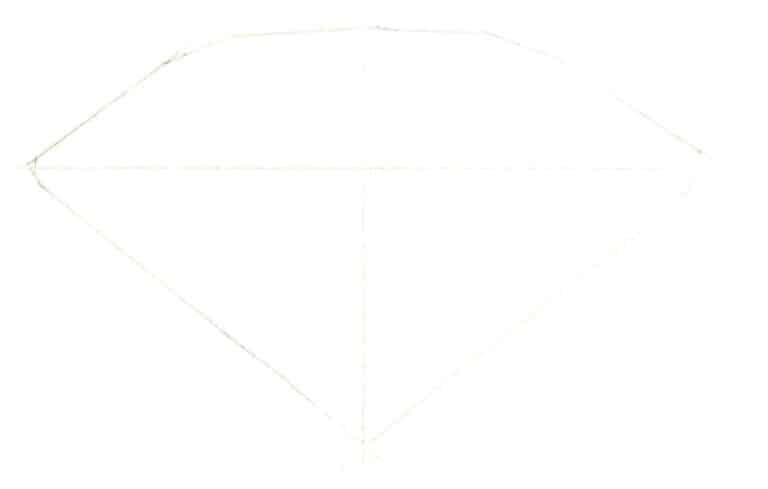
Krok 01 Użyj linii prostych, aby narysować prowadnicę w kształcie krzyża. Nakreśl podstawowy kształt luźnego diamentu na podstawie proporcjonalnych pomiarów.
Krok 01 Użyj linii prostych, aby narysować prowadnicę w kształcie krzyża. Nakreśl podstawowy kształt luźnego diamentu na podstawie proporcjonalnych pomiarów.

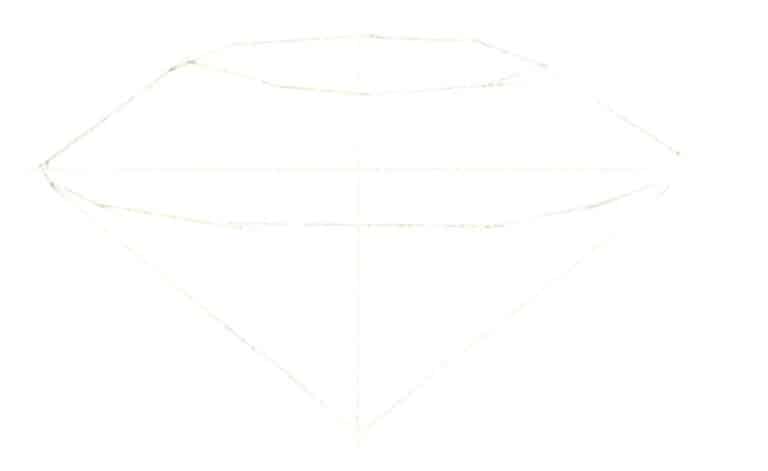
Krok 02 Dopracuj główne linie strukturalne diamentu na wstępnym szkicu, zapewniając dokładną perspektywę.
Krok 02 Dopracuj główne linie strukturalne diamentu na wstępnym szkicu, zapewniając dokładną perspektywę.

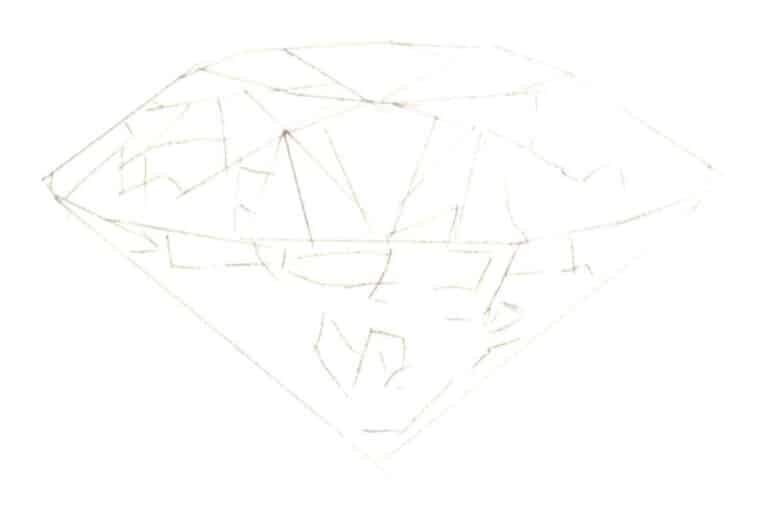
Krok 03 Lekko naszkicuj wewnętrzne fasety ołówkiem, uzupełniając rysunek wyraźnymi, precyzyjnymi liniami.
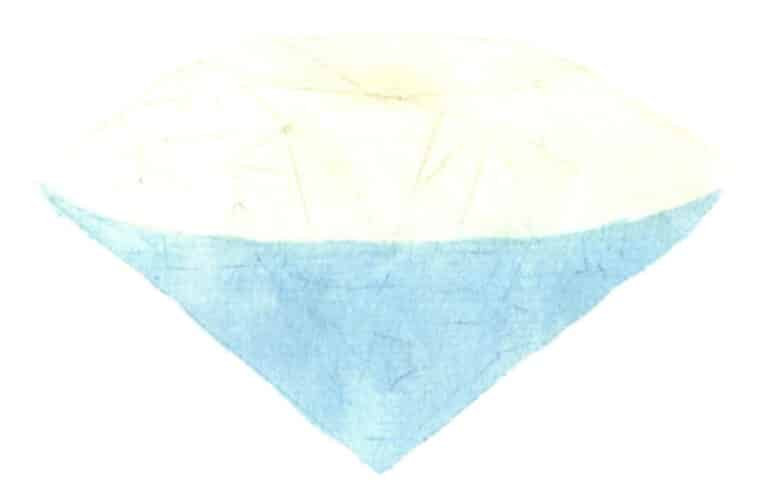
Krok 03 Lekko naszkicuj wewnętrzne fasety ołówkiem, uzupełniając rysunek wyraźnymi, precyzyjnymi liniami.

Krok 04 Pokryj papier czystą wodą. Po lekkim wchłonięciu nałóż rozcieńczoną warstwę bazową, używając błękitu cerulean i cytrynowej żółci.
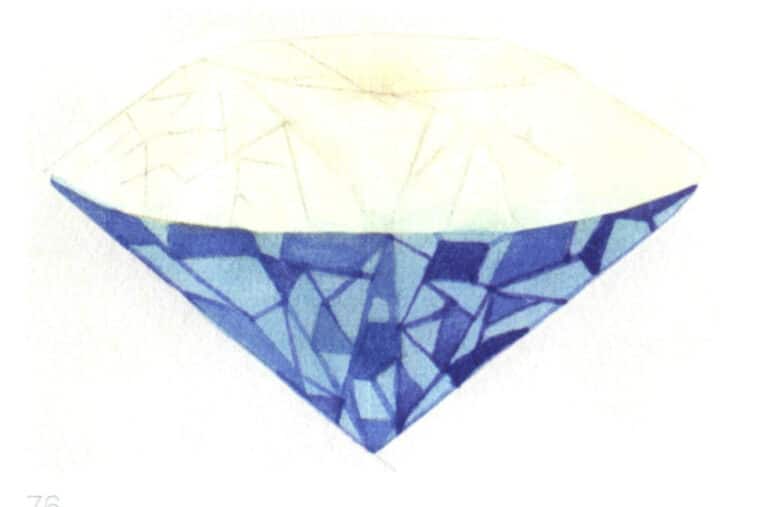
Krok 04 Pokryj papier czystą wodą. Po lekkim wchłonięciu nałóż rozcieńczoną warstwę bazową, używając błękitu cerulean i cytrynowej żółci.

Krok 05 Zmieszaj ultramarynę z odrobiną fioletu, aby pomalować ciemniejsze obszary u podstawy diamentu.
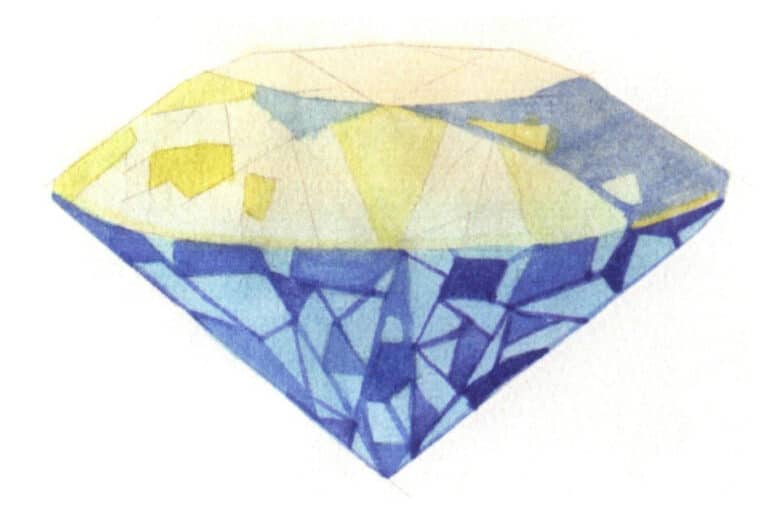
Krok 05 Zmieszaj ultramarynę z odrobiną fioletu, aby pomalować ciemniejsze obszary u podstawy diamentu.

Krok 06 Pogłęb cienie w górnych partiach za pomocą ultramaryny. Dla rozjaśnienia, zmieszaj cytrynową żółć i trwałą jasną zieleń.
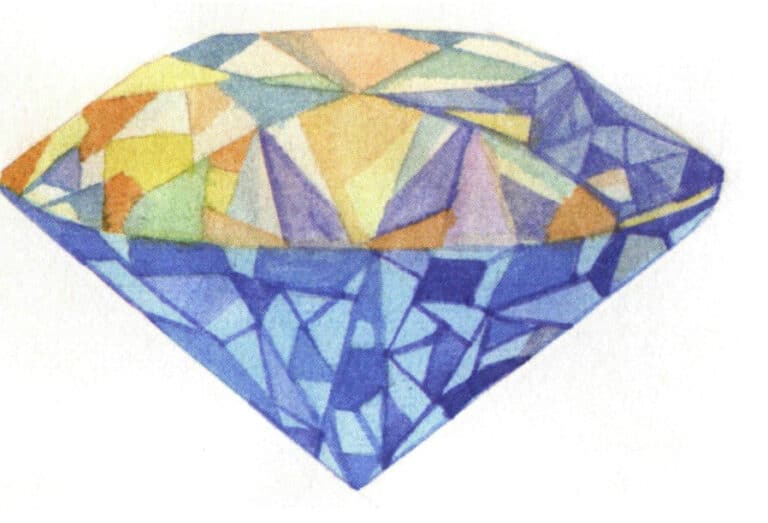
Krok 06 Pogłęb cienie w górnych partiach za pomocą ultramaryny. Dla rozjaśnienia, zmieszaj cytrynową żółć i trwałą jasną zieleń.

Krok 07 Wzmocnij pozostałe obszary za pomocą sjeny palonej, fioletu i żółtej ochry. Zachowaj subtelność - unikaj przesycenia.
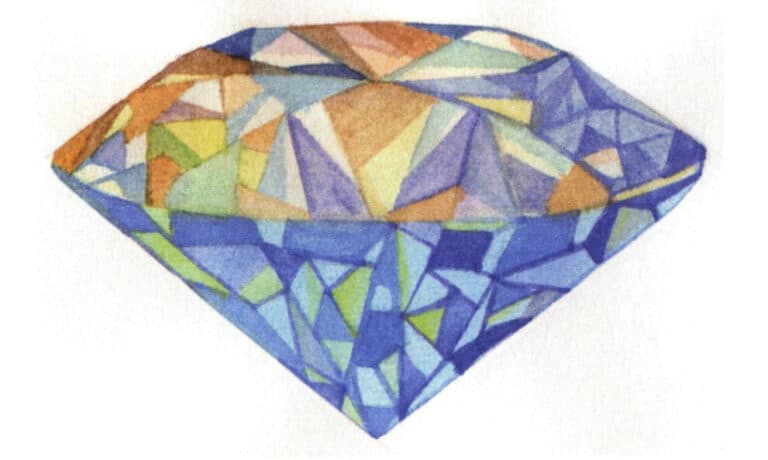
Krok 07 Wzmocnij pozostałe obszary za pomocą sjeny palonej, fioletu i żółtej ochry. Zachowaj subtelność - unikaj przesycenia.

Krok 08 Zintensyfikuj efekty fasetowe za pomocą średniej żółci, trwałej jasnej zieleni i szafirowego błękitu. Wzmocnij kontrast jasny-ciemny.
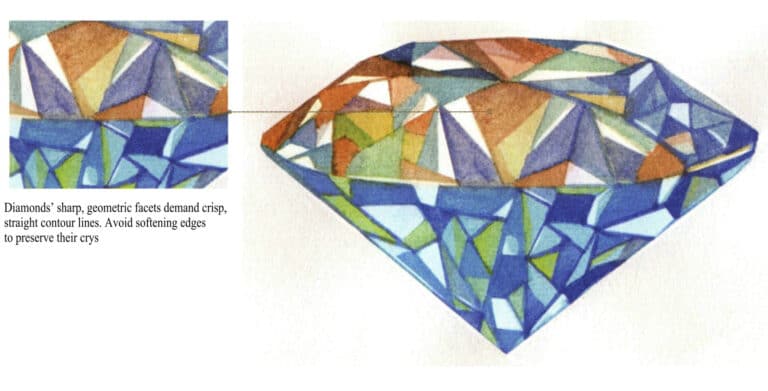
Krok 08 Zintensyfikuj efekty fasetowe za pomocą średniej żółci, trwałej jasnej zieleni i szafirowego błękitu. Wzmocnij kontrast jasny-ciemny.

Krok 09 Użyj białego gwaszu, aby podkreślić światła i odbicia. Dostosuj ogólny balans, aby zakończyć renderowanie.

Krok 09 Użyj białego gwaszu, aby podkreślić światła i odbicia. Dostosuj ogólny balans, aby zakończyć renderowanie.

3.2 Szkic projektu diamentowego naszyjnika
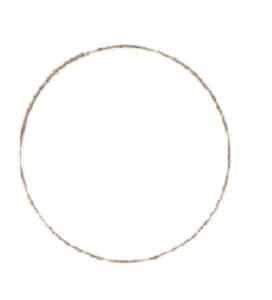
Krok 01 Użyj okrągłej linijki szablonu, aby narysować okrąg o umiarkowanym rozmiarze.
Krok 01 Użyj okrągłej linijki szablonu, aby narysować okrąg o umiarkowanym rozmiarze.

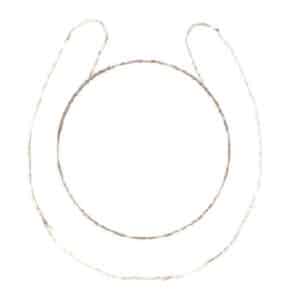
Krok 02 Naszkicuj ołówkiem zewnętrzny kontur diamentowej zawieszki w kształcie litery "U".
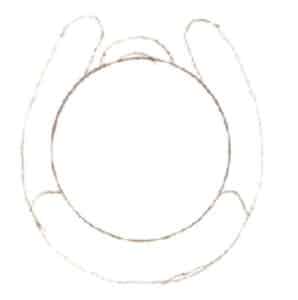
Krok 02 Naszkicuj ołówkiem zewnętrzny kontur diamentowej zawieszki w kształcie litery "U".

Krok 03 Dopracuj kształt diamentowego wisiorka i dodaj lokalne szczegóły.
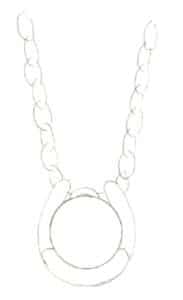
Krok 03 Dopracuj kształt diamentowego wisiorka i dodaj lokalne szczegóły.

Krok 04 Narysuj ogólny zarys łańcuszka naszyjnika luźnymi, swobodnymi liniami, aby uzupełnić kompozycję.
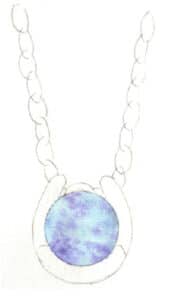
Krok 04 Narysuj ogólny zarys łańcuszka naszyjnika luźnymi, swobodnymi liniami, aby uzupełnić kompozycję.

Krok 05 Rozjaśnij szkic ołówkiem za pomocą miękkiej gumki, aby ułatwić kolorowanie. Nałóż delikatną warstwę bazową błękitu cerulean na obszar diamentu, a następnie szybko nanieś kropkę fioletu, aby kolory naturalnie połączyły się na papierze.
Krok 05 Rozjaśnij szkic ołówkiem za pomocą miękkiej gumki, aby ułatwić kolorowanie. Nałóż delikatną warstwę bazową błękitu cerulean na obszar diamentu, a następnie szybko nanieś kropkę fioletu, aby kolory naturalnie połączyły się na papierze.

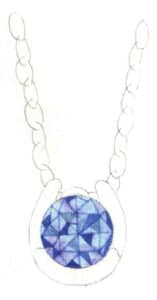
Krok 06 Po całkowitym wyschnięciu powierzchni, obrysuj wewnętrzne fasety diamentu ultramaryną i zdefiniuj obszary cienia.
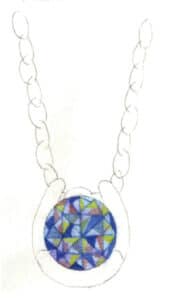
Krok 06 Po całkowitym wyschnięciu powierzchni, obrysuj wewnętrzne fasety diamentu ultramaryną i zdefiniuj obszary cienia.

Krok 07 Wymieszaj cytrynową żółć, cynober i błękit cerulean, aby wzbogacić schemat kolorów, upewniając się, że poprzednie warstwy pozostaną częściowo widoczne.
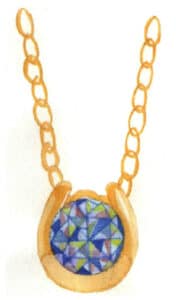
Krok 07 Wymieszaj cytrynową żółć, cynober i błękit cerulean, aby wzbogacić schemat kolorów, upewniając się, że poprzednie warstwy pozostaną częściowo widoczne.

Krok 08 Nałóż warstwę bazową żółtej ochry na metaliczny łańcuch, sugerując podstawowe relacje jasno-ciemne, pozostawiając celowe przerwy dla oddychalności.

Krok 08 Nałóż warstwę bazową żółtej ochry na metaliczny łańcuch, sugerując podstawowe relacje jasno-ciemne, pozostawiając celowe przerwy dla oddychalności.

Krok 09 Użyj pędzla do konturowania zanurzonego w spalonej sjenie, aby wyszczególnić cienie metalu, a następnie zmieszaj z czystą wodą, aby uzyskać naturalne przejścia kolorów.
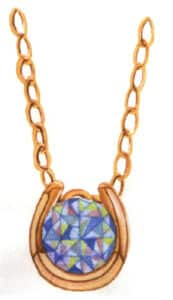
Krok 09 Użyj pędzla do konturowania zanurzonego w spalonej sjenie, aby wyszczególnić cienie metalu, a następnie zmieszaj z czystą wodą, aby uzyskać naturalne przejścia kolorów.

Krok 10 Zmieszaj umber palony i umber surowy, aby pogłębić cienie, zwiększając kontrast i trójwymiarowość.
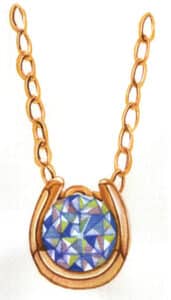
Krok 10 Zmieszaj umber palony i umber surowy, aby pogłębić cienie, zwiększając kontrast i trójwymiarowość.

Krok 11 Podkreśl obszary odbijające światło i dodaj wykończeniowego blasku białą farbą za pomocą pędzla do kresek.

Krok 11 Podkreśl obszary odbijające światło i dodaj wykończeniowego blasku białą farbą za pomocą pędzla do kresek.

4. Perły

Perły mają zazwyczaj cztery odcienie: biały, żółty, ciemny i wielokolorowy. Typowe kolory to biały, różowy, jasnożółty, jasnozielony, jasnofioletowy i czarny. Ich kształty, takie jak okrągły, gruszkowy i jajowaty, są również zróżnicowane. Następnie wyjaśnimy, jak narysować okrągłe, jasnożółte perły i bransoletki.
4.1 Reprezentacja materiału perłowego
Krok 01 Użyj okrągłej linijki szablonu, aby narysować okrąg o umiarkowanym rozmiarze.
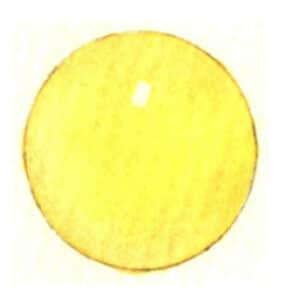
Krok 01 Użyj okrągłej linijki szablonu, aby narysować okrąg o umiarkowanym rozmiarze.

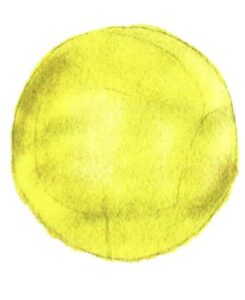
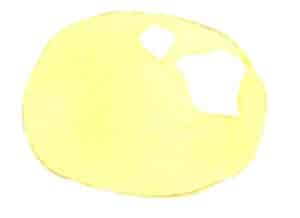
Krok 02 Zwilż pędzel akwarelowy czystą wodą i nałóż bazową warstwę średnio żółtej farby na perłową powierzchnię.
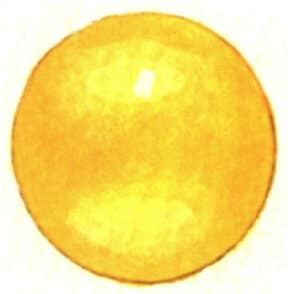
Krok 02 Zwilż pędzel akwarelowy czystą wodą i nałóż bazową warstwę średnio żółtej farby na perłową powierzchnię.

Krok 03 Zlokalizuj główny obszar cienia. Użyj żółtej ochry do pomalowania zacienionych części perły, upewniając się, że poprzednia warstwa pozostaje częściowo widoczna.
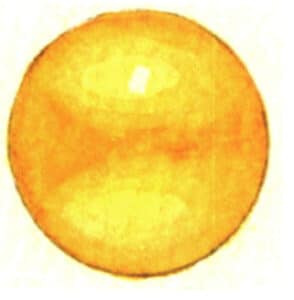
Krok 03 Zlokalizuj główny obszar cienia. Użyj żółtej ochry do pomalowania zacienionych części perły, upewniając się, że poprzednia warstwa pozostaje częściowo widoczna.

Step 04 Continue defining shadows with orange to intensify light-dark contrast.
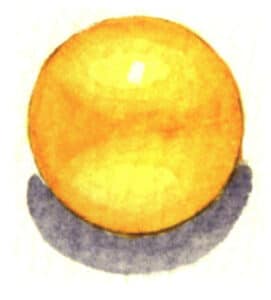
Step 04 Continue defining shadows with orange to intensify light-dark contrast.

Step 05 Paint the cast shadow with Payne’s grey. Adjust and finalize the artwork to complete.

Step 05 Paint the cast shadow with Payne’s grey. Adjust and finalize the artwork to complete.

4.2 Pearl Bracelet Design Sketch Representation
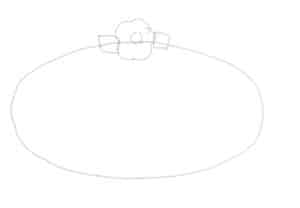
Step 01 Use curved lines to lightly sketch the general outline of the pearl bracelet.
Step 01 Use curved lines to lightly sketch the general outline of the pearl bracelet.

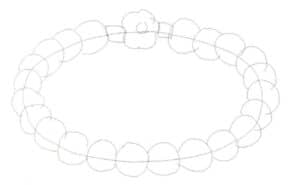
Step 02 Over the initial sketch, loosely define pearl shapes with casual lines, establishing their positions and sizes.
Step 02 Over the initial sketch, loosely define pearl shapes with casual lines, establishing their positions and sizes.

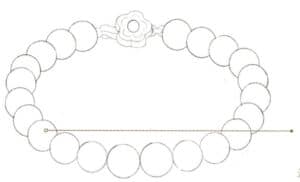
Step 03 Lighten the draft with a soft eraser. Use a circular template ruler and pencil to refine the clean line art, maintaining neatness.
Step 03 Lighten the draft with a soft eraser. Use a circular template ruler and pencil to refine the clean line art, maintaining neatness.

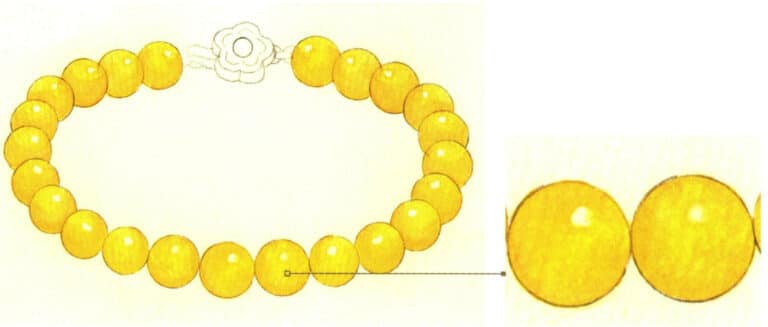
Step 04 Apply a base layer of medium yellow to the pearls, reserving highlight areas and ensuring even color blending.

Step 04 Apply a base layer of medium yellow to the pearls, reserving highlight areas and ensuring even color blending.

Step 05 Add yellow ochre to the pearls' shadow areas to enhance volume and spatial depth.

Step 05 Add yellow ochre to the pearls' shadow areas to enhance volume and spatial depth.

Step 06 Paint the metal connector areas with ivory black. Use diluted pigment (more water, less paint) to mimic silver's subtle metallic sheen.
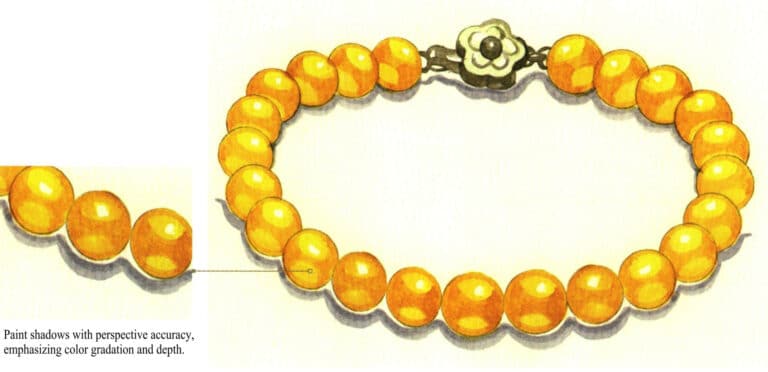
Step 06 Paint the metal connector areas with ivory black. Use diluted pigment (more water, less paint) to mimic silver's subtle metallic sheen.

Step 07 Use Payne's grey to render the bracelet's cast shadow. Finalize details and complete the artwork.

Step 07 Use Payne's grey to render the bracelet's cast shadow. Finalize details and complete the artwork.

5. Jade

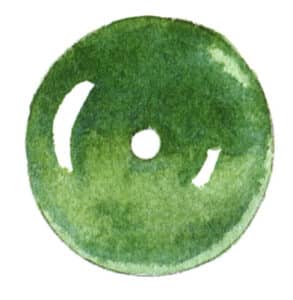
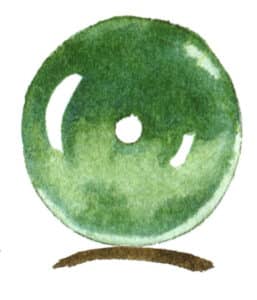
Jade has a wide variety of colors, with green being the best. Its translucency and reflectivity are good, so it is important to grasp the tone and handle highlights, reflections, and ambient and light source colors well when drawing.
5.1 Jadeite Safety Pendant Material Representation
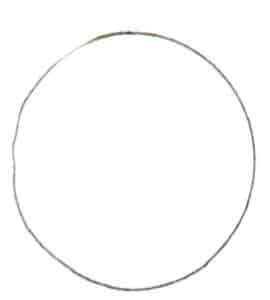
Krok 01 Użyj okrągłej linijki szablonu, aby narysować okrąg o umiarkowanym rozmiarze.

Krok 01 Użyj okrągłej linijki szablonu, aby narysować okrąg o umiarkowanym rozmiarze.

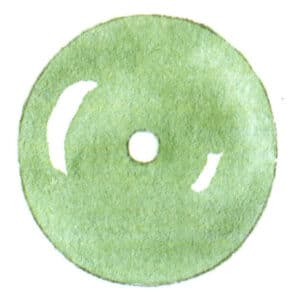
Step 02 Draw a smaller circle at the center of the first one to refine the structure.

Step 02 Draw a smaller circle at the center of the first one to refine the structure.

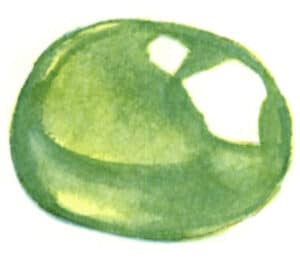
Step 03 Mix cerulean blue with lemon yellow. Apply a diluted base layer to create a translucent texture, reserving highlight areas.

Step 03 Mix cerulean blue with lemon yellow. Apply a diluted base layer to create a translucent texture, reserving highlight areas.

Step 04 Before the base layer fully dries, use a watercolor brush dipped in phthalocyanine blue and sap green to add shadows and enhance color variation.

Step 04 Before the base layer fully dries, use a watercolor brush dipped in phthalocyanine blue and sap green to add shadows and enhance color variation.

Step 05 Paint the jade pendant’s cast shadow with ivory black and raw umber to complete the artwork.

Step 05 Paint the jade pendant’s cast shadow with ivory black and raw umber to complete the artwork.

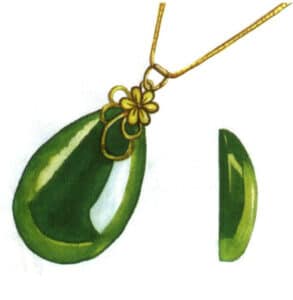
5.2 Hand-Drawn Representation of Jadeite Necklace Design
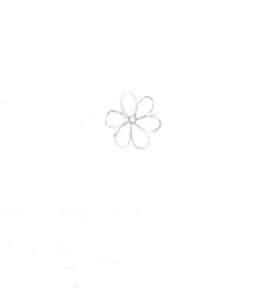
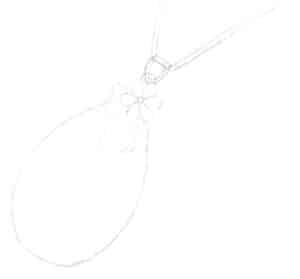
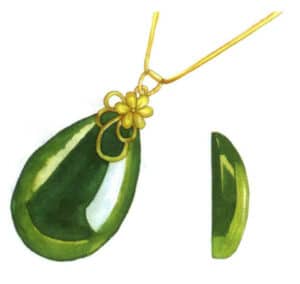
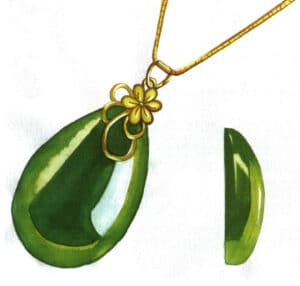
Step 01 Start from a partial section and sketch the floral contour on the jade pendant of the necklace with a pencil.

Step 01 Start from a partial section and sketch the floral contour on the jade pendant of the necklace with a pencil.

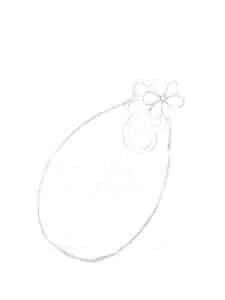
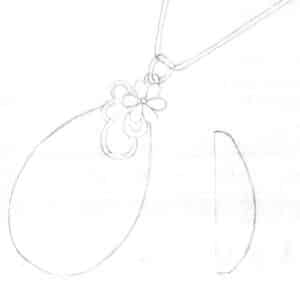
Step 02 Use curved lines to outline the remaining parts of the jade pendant and refine the pendant’s form.

Step 02 Use curved lines to outline the remaining parts of the jade pendant and refine the pendant’s form.

Step 03 Draw the chain’s outline with loose lines.

Step 03 Draw the chain’s outline with loose lines.

Step 04 Sketch the jade’s side view contour in the blank area on the right, adjust lines for accuracy, and maintain a clean layout.

Step 04 Sketch the jade’s side view contour in the blank area on the right, adjust lines for accuracy, and maintain a clean layout.

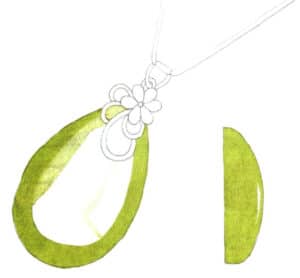
Step 05 Mix Permanent Light Green with Lemon Yellow to paint the jade’s highlight areas.

Step 05 Mix Permanent Light Green with Lemon Yellow to paint the jade’s highlight areas.

Step 06 Blend Gem Green and Sap Green to color the central and edge sections, capturing the jade’s local color.

Step 06 Blend Gem Green and Sap Green to color the central and edge sections, capturing the jade’s local color.

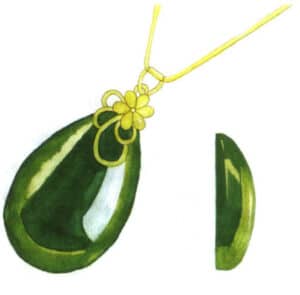
Step 07 Apply Medium Yellow as the base layer for the metal floral motifs and chain.

Step 07 Apply Medium Yellow as the base layer for the metal floral motifs and chain.

Step 08 Use Yellow Ochre to darken shadow areas on the metal, hinting basic light-dark relationships.

Step 08 Use Yellow Ochre to darken shadow areas on the metal, hinting basic light-dark relationships.

Step 09 Mix Raw Umber and Burnt Sienna to deepen shadows on the metal, enhancing color contrast.

Step 09 Mix Raw Umber and Burnt Sienna to deepen shadows on the metal, enhancing color contrast.

Step 10 After the artwork fully dries, use a liner brush with white pigment to define highlights and reflections, completing the piece.

Step 10 After the artwork fully dries, use a liner brush with white pigment to define highlights and reflections, completing the piece.

6. Agate

There are many types of agate, commonly including pictorial agate, southern red agate, and green agate. Agate is generally semi-transparent, with a flat, smooth surface with a glassy luster. It is important to grasp the rich color variations and the expression of reflective properties when drawing.
6.1 Agate Material Representation
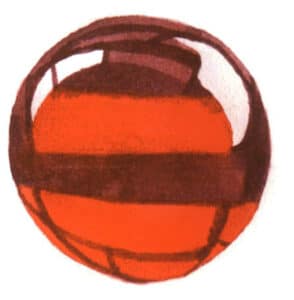
Krok 01 Użyj okrągłej linijki szablonu, aby narysować okrąg o umiarkowanym rozmiarze.

Krok 01 Użyj okrągłej linijki szablonu, aby narysować okrąg o umiarkowanym rozmiarze.

Step 02 Sketch the material’s internal structures (e.g., light-dark boundaries) with loose, casual lines.

Step 02 Sketch the material’s internal structures (e.g., light-dark boundaries) with loose, casual lines.

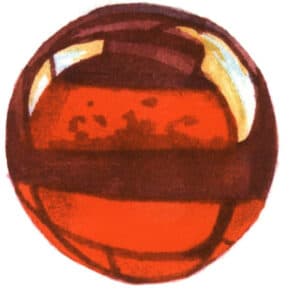
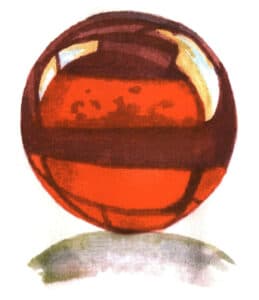
Step 03 Paint the agate’s local color with vermilion. Add violet to the mixture and apply it to shadow areas.

Step 03 Paint the agate’s local color with vermilion. Add violet to the mixture and apply it to shadow areas.

Step 04 Introduce ultramarine to deepen shadows, enrich color layers, and refine details. Use lemon yellow for subtle highlights on illuminated surfaces.

Step 04 Introduce ultramarine to deepen shadows, enrich color layers, and refine details. Use lemon yellow for subtle highlights on illuminated surfaces.

Step 05 Mix Payne’s grey with the previous agate colors to paint the cast shadow, noting the interplay of environmental hues.

Step 05 Mix Payne’s grey with the previous agate colors to paint the cast shadow, noting the interplay of environmental hues.

6.2 Hand-Drawing Representation of Agate Bangles Design
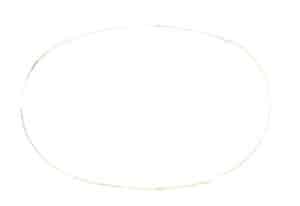
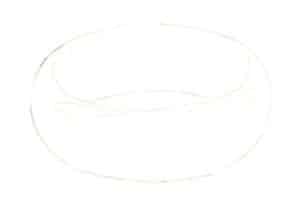
Step 01 Lightly sketch the general oval-shaped outline of the agate bracelet with a pencil.

Step 01 Lightly sketch the general oval-shaped outline of the agate bracelet with a pencil.

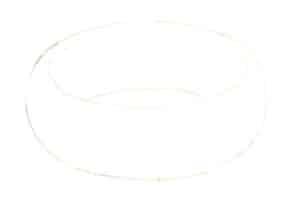
Step 02 Define the bracelet’s precise contour within the oval, clarifying its structure, perspective, and thickness.

Step 02 Define the bracelet’s precise contour within the oval, clarifying its structure, perspective, and thickness.

Step 03 Identify the illuminated areas based on the light source, outline highlight shapes, and finalize the line drawing.

Step 03 Identify the illuminated areas based on the light source, outline highlight shapes, and finalize the line drawing.

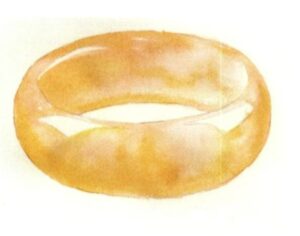
Step 04 Mix crimson with ample water for a diluted base layer. Apply it to the bracelet, then quickly blend yellow ochre into shadow areas for natural blending.

Step 04 Mix crimson with ample water for a diluted base layer. Apply it to the bracelet, then quickly blend yellow ochre into shadow areas for natural blending.

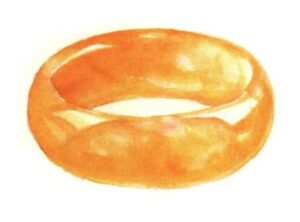
Step 05 Enrich shadow tones with vermillion, carefully handling color gradients.

Step 05 Enrich shadow tones with vermillion, carefully handling color gradients.

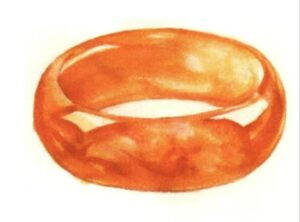
Step 06 Deepen shadows with darker vermillion and purplish red to emphasize the material’s translucency and veined texture.

Step 06 Deepen shadows with darker vermillion and purplish red to emphasize the material’s translucency and veined texture.

Step 07 Paint the cast shadow using ivory black and raw umber, ensuring light-dark variation in the shadow’s coloration.

Step 07 Paint the cast shadow using ivory black and raw umber, ensuring light-dark variation in the shadow’s coloration.

7. Precious Metals

Precious metals mainly refer to gold, silver, and platinum, which are commonly used in jewelry designs for chains and inlays. When drawing, it is important to pay attention to the expression of the metal material’s texture, such as its strong reflective properties.
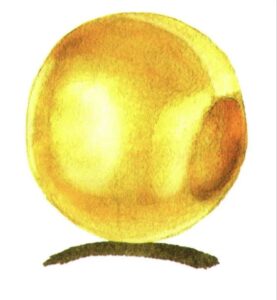
7.1 Gold Bead Material Representation
Krok 01 Użyj okrągłej linijki szablonu, aby narysować okrąg o umiarkowanym rozmiarze.

Krok 01 Użyj okrągłej linijki szablonu, aby narysować okrąg o umiarkowanym rozmiarze.

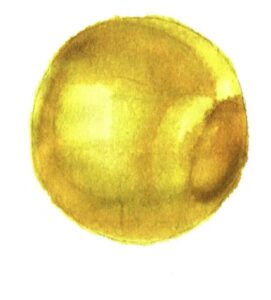
Step 02 Lightly sketch the light-dark boundary line inside the gold bead with casual, loose lines.

Step 02 Lightly sketch the light-dark boundary line inside the gold bead with casual, loose lines.

Step 03 Paint the gold bead’s base color with Medium Yellow, suggesting basic light-dark variations.

Step 03 Paint the gold bead’s base color with Medium Yellow, suggesting basic light-dark variations.

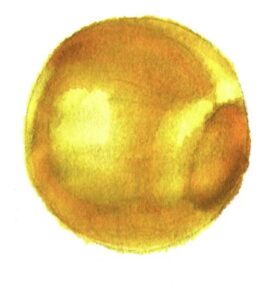
Step 04 Use Yellow Ochre to define the artwork’s shadow areas, maintaining a sense of color layering.

Step 04 Use Yellow Ochre to define the artwork’s shadow areas, maintaining a sense of color layering.

Step 05 Add a small amount of orange to the shadows to enrich color depth and intensify contrast.

Step 05 Add a small amount of orange to the shadows to enrich color depth and intensify contrast.

Step 06 Paint the gold bead’s cast shadow with Ivory Black. Adjust highlights using white pigment to complete the artwork.

Step 06 Paint the gold bead’s cast shadow with Ivory Black. Adjust highlights using white pigment to complete the artwork.

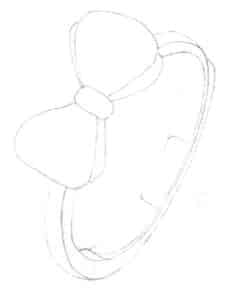
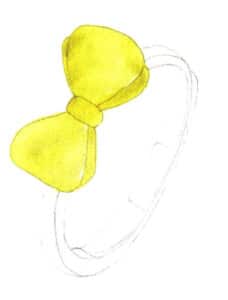
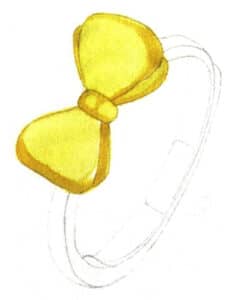
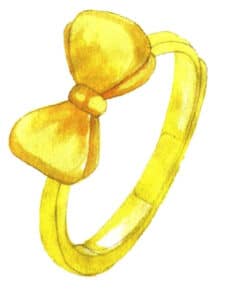
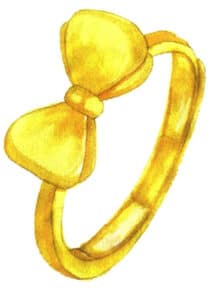
7.2 Hand-Drawing Representation of Gold Rings
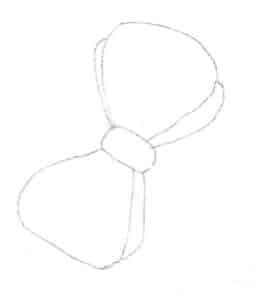
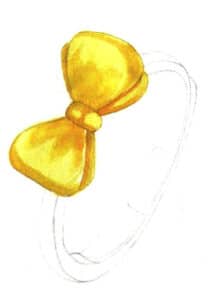
Step 01 Accurately sketch the bow’s contour with a pencil, using double layers to enhance its shape.

Step 01 Accurately sketch the bow’s contour with a pencil, using double layers to enhance its shape.

Step 02 Draw the ring band’s outline with loose lines following perspective rules, ensuring clear structural definition.

Step 02 Draw the ring band’s outline with loose lines following perspective rules, ensuring clear structural definition.

Step 03 Apply Lemon Yellow as the base layer to the bow.

Step 03 Apply Lemon Yellow as the base layer to the bow.

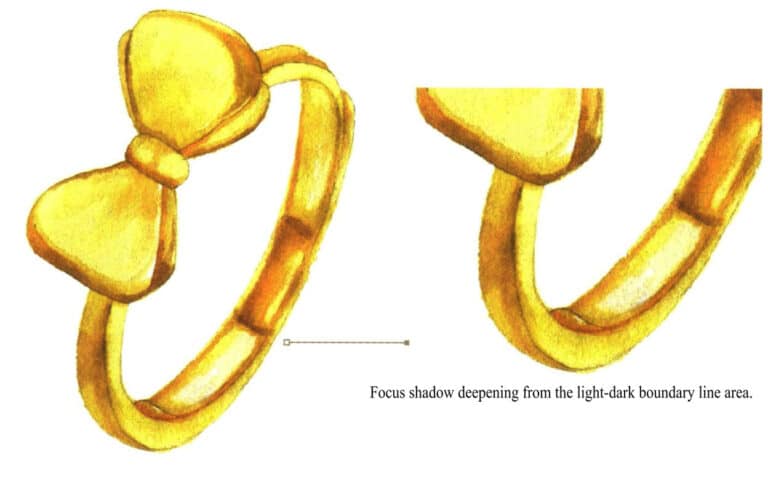
Step 04 Once slightly dry, use Medium Yellow to define the bow’s shadows and suggest light-dark relationships.

Step 04 Once slightly dry, use Medium Yellow to define the bow’s shadows and suggest light-dark relationships.

Step 05 Add orange to the color mixture to further deepen the bow’s shadows.

Step 05 Add orange to the color mixture to further deepen the bow’s shadows.

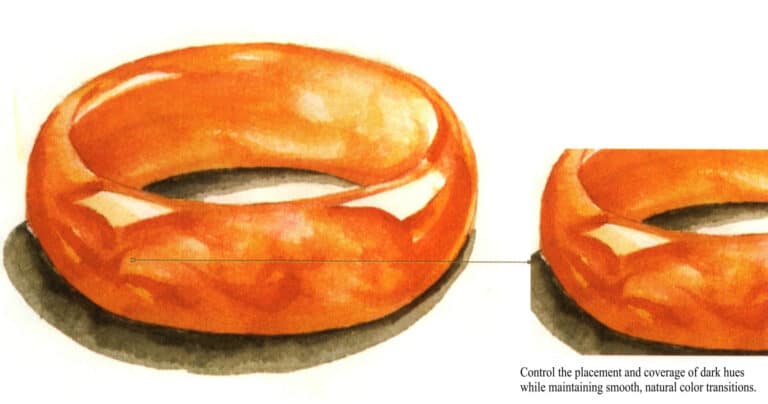
Step 06 Paint the ring band’s base layer with Lemon Yellow, ensuring even color blending and reserving highlights.

Step 06 Paint the ring band’s base layer with Lemon Yellow, ensuring even color blending and reserving highlights.

Step 07 Initially define the ring band’s shadows with Medium Yellow.

Step 07 Initially define the ring band’s shadows with Medium Yellow.

Step 08 Use Yellow Ochre and orange to deepen overall shadows and refine local details.

Step 08 Use Yellow Ochre and orange to deepen overall shadows and refine local details.

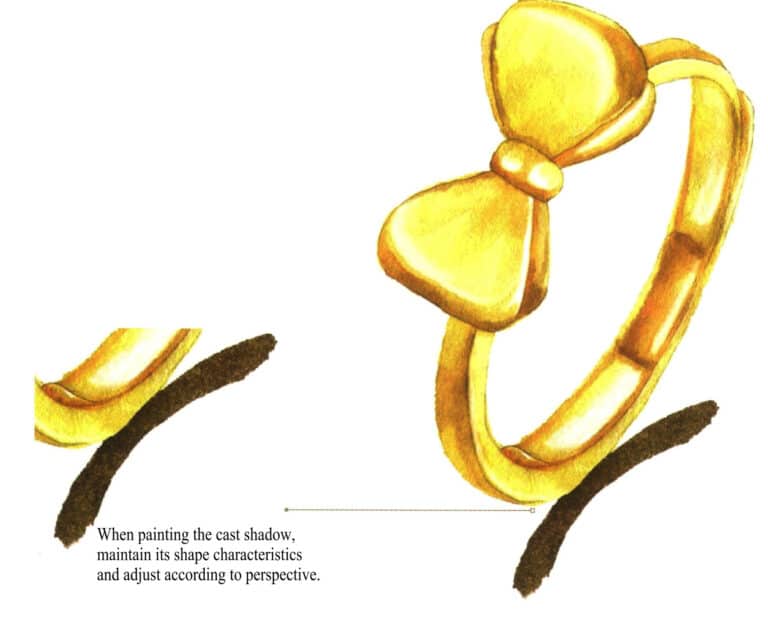
Step 09 Paint the gold ring’s cast shadow with Ivory Black and Yellow Ochre. Use white pigment to define highlights and reflections, completing the artwork.

Step 09 Paint the gold ring’s cast shadow with Ivory Black and Yellow Ochre. Use white pigment to define highlights and reflections, completing the artwork.

8. Colored Glass

Colored glass is made from various colored artificial crystals, and its texture is crystal clear and dazzling, giving an overall impression of flowing light and color. The common types include ancient method colored glass, water colored glass, and Taiwan colored glass. Below, we will explain the material of water colored glass and the drawing of colored glass bracelets.
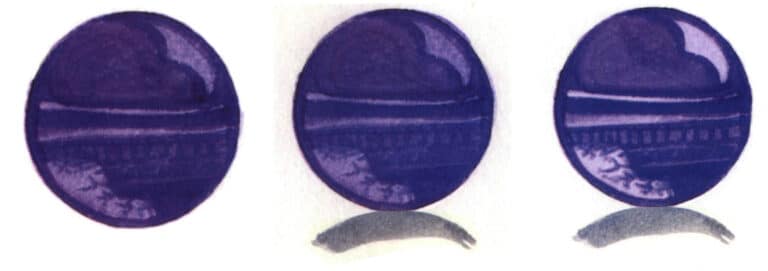
8.1 Colored Glass Material Representation

Krok 01 Użyj okrągłej linijki szablonu, aby narysować okrąg o umiarkowanym rozmiarze.
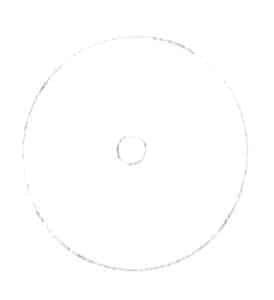
Step 02 Apply violet as the base layer for the glass material. Coat the paper with water first to ensure even and natural color distribution.

Step 03 Once the surface is slightly dry, mix violet with magenta to paint the shadows, reserving the illuminated areas without full coverage.

Step 01 Use a circular template ruler to draw a moderately sized circle. Step 02 Apply violet as the base layer for the glass material. Coat the paper with water first to ensure even and natural color distribution. Step 03 Once the surface is slightly dry, mix violet with magenta to paint the shadows, reserving the illuminated areas without full coverage. Step 04 Enrich color variation by adding more violet and a small amount of ultramarine to the shadows.

Step 04 Enrich color variation by adding more violet and a small amount of ultramarine to the shadows.

Step 05 Use Payne’s grey to paint the glass material’s cast shadow, emphasizing three-dimensionality and spatial depth.

Step 06 Highlight and define reflections with white pigment to complete the artwork.

Step 04 Enrich color variation by adding more violet and a small amount of ultramarine to the shadows. Step 05 Use Payne’s grey to paint the glass material’s cast shadow, emphasizing three-dimensionality and spatial depth. Step 06 Highlight and define reflections with white pigment to complete the artwork.
8.2 Hand-Drawing Representation of Colored Glass Bead Bracelets

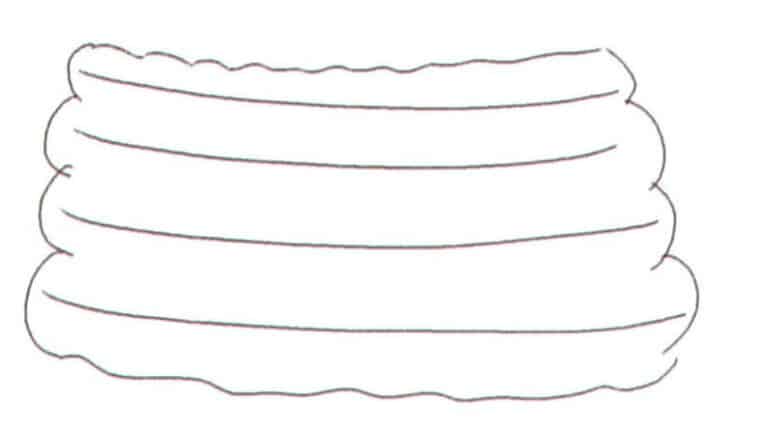
Step 01 Lightly sketch the glass bracelet’s perspective lines and general shape with a pencil.

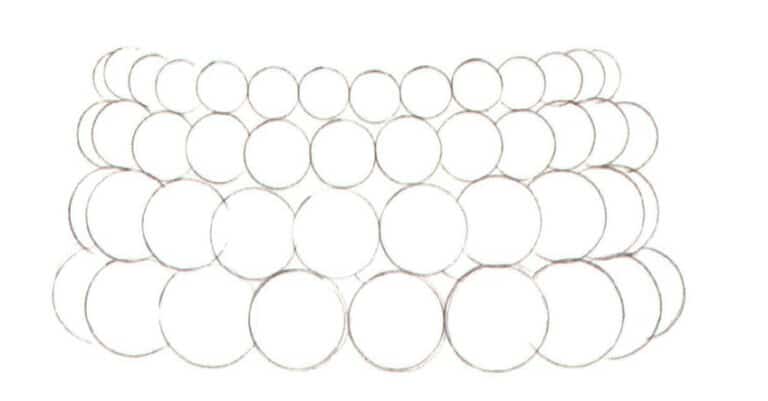
Step 02 Soften the draft with a soft eraser. Refine the bracelet’s line art using a circular template ruler, ensuring accurate perspective and proportional sizing.

Step 01 Lightly sketch the glass bracelet’s perspective lines and general shape with a pencil.
Step 02 Soften the draft with a soft eraser. Refine the bracelet’s line art using a circular template ruler, ensuring accurate perspective and proportional sizing.


Step 03 Outline the glass beads’ internal structures (e.g., light-dark boundaries, highlights) with loose lines.

Step 04 Mix violet with water for a diluted base layer and apply it to the bracelet.

Step 03 Outline the glass beads’ internal structures (e.g., light-dark boundaries, highlights) with loose lines. Step 04 Mix violet with water for a diluted base layer and apply it to the bracelet.


Step 05 Once slightly dry, blend violet with a small amount of magenta to define shadows, hinting basic light-dark relationships.
Step 06 Combine violet and ultramarine to deepen shadows and strengthen contrast.

Step 05 Once slightly dry, blend violet with a small amount of magenta to define shadows, hinting basic light-dark relationships. Step 06 Combine violet and ultramarine to deepen shadows and strengthen contrast.


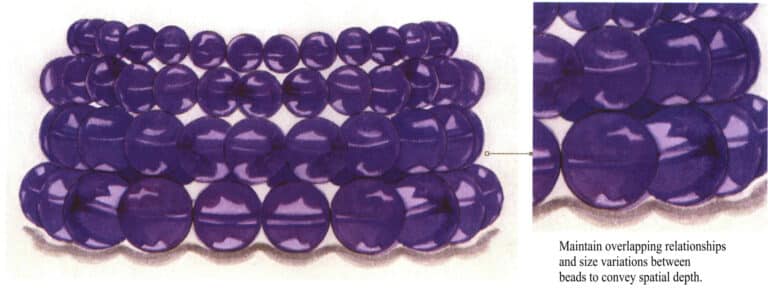
Step 07 Mix ivory black with violet to paint the cast shadow. Highlight reflections and add sparkle with white pigment to finish.

Step 07 Mix ivory black with violet to paint the cast shadow. Highlight reflections and add sparkle with white pigment to finish.

9. Turquoise

Turquoise is a combination of copper and aluminum. Its shape resembles a pine cone, and its color is close to pine green, with common variations being sky blue, light blue, and blue-green. Generally, the color is uniform, with a soft luster, and the best specimens do not have brown iron veins. Below, we will explain the material performance of turquoise and the performance of turquoise bracelets.
9.1 Turquoise Material Representation

Krok 01 Użyj okrągłej linijki szablonu, aby narysować okrąg o umiarkowanym rozmiarze.
Step 02 Apply cerulean blue as the base layer to the turquoise, reserving highlight areas.

Step 03 Once slightly dry, mix cerulean blue with phthalocyanine blue to paint the turquoise’s local color, using a more saturated tone.

Step 04 Add ultramarine to deepen shadows. Paint the turquoise’s cast shadow with Payne’s grey. Highlight the overall composition with white pigment to complete the artwork.

Step 01 Use a circular template ruler to draw a moderately sized circle. Step 02 Apply cerulean blue as the base layer to the turquoise, reserving highlight areas. Step 03 Once slightly dry, mix cerulean blue with phthalocyanine blue to paint the turquoise’s local color, using a more saturated tone. Step 04 Add ultramarine to deepen shadows. Paint the turquoise’s cast shadow with Payne’s grey. Highlight the overall composition with white pigment to complete the artwork.
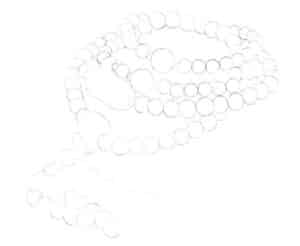
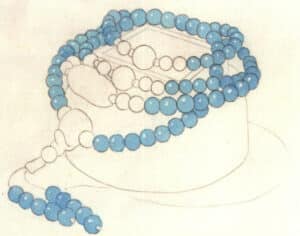
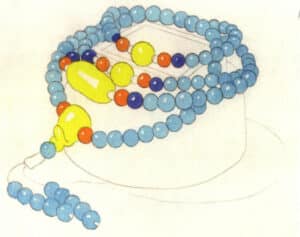
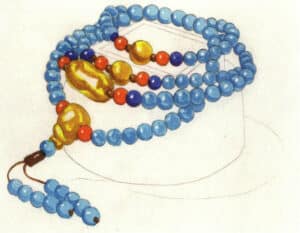
9.2 Hand-drawing Representation of Turquoise Bracelet Design
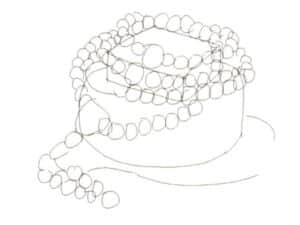
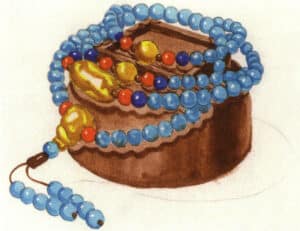
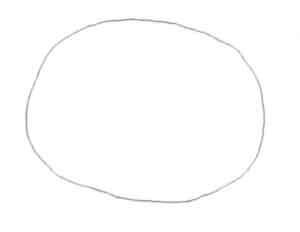
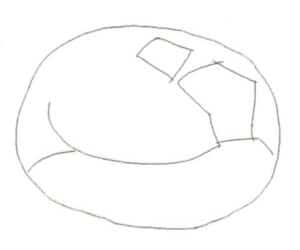
Step 01 Sketch the jewelry box’s general shape with a pencil, establishing perspective.

Step 01 Sketch the jewelry box’s general shape with a pencil, establishing perspective.

Step 02 Lightly outline the turquoise bracelet with loose, light lines to finalize the composition, maintaining proper layering.

Step 02 Lightly outline the turquoise bracelet with loose, light lines to finalize the composition, maintaining proper layering.

Step 03 Lighten the draft with a soft eraser. Precisely define the bracelet and other elements’ contours using a circular template ruler and pencil, refining the line art.

Step 03 Lighten the draft with a soft eraser. Precisely define the bracelet and other elements’ contours using a circular template ruler and pencil, refining the line art.

Step 04 Apply cerulean blue as the base layer to the turquoise sections, reserving whites for highlights to ensure breathability.

Step 04 Apply cerulean blue as the base layer to the turquoise sections, reserving whites for highlights to ensure breathability.

Step 05 Paint the remaining beads with orange, ultramarine, and lemon yellow, balancing warm and cool tones across the composition.

Step 05 Paint the remaining beads with orange, ultramarine, and lemon yellow, balancing warm and cool tones across the composition.

Step 06 Begin defining shadow areas with phthalocyanine blue, yellow ochre, violet, and vermilion, keeping shadow color coverage restrained.

Step 06 Begin defining shadow areas with phthalocyanine blue, yellow ochre, violet, and vermilion, keeping shadow color coverage restrained.

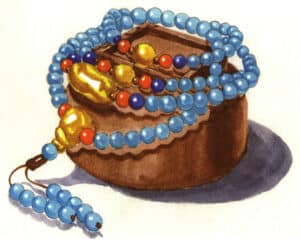
Step 07 Apply burnt umber as the jewelry box’s base layer. Use raw umber to paint its shadows and the bracelet’s cast shadow on the box, emphasizing volume and spatial depth.

Step 07 Apply burnt umber as the jewelry box’s base layer. Use raw umber to paint its shadows and the bracelet’s cast shadow on the box, emphasizing volume and spatial depth.

Step 08 Paint ground cast shadows for both the box and bracelet with Payne’s grey. Finalize highlights and reflections using white pigment, then adjust the entire composition to complete.

Step 08 Paint ground cast shadows for both the box and bracelet with Payne’s grey. Finalize highlights and reflections using white pigment, then adjust the entire composition to complete.

10. Garnet

Garnet is a combination of different elemental substances, and its chemical and material composition is quite complex. It has a glassy luster and slight transparency, with various colors commonly seen in blood red, purplish red, green, blue, yellow, and brown, among others.
10.1 Garnet Material Representation
Step 01 Sketch the garnet’s general shape with loose, fluid lines.

Step 01 Sketch the garnet’s general shape with loose, fluid lines.

Step 02 Lightly outline the garnet’s internal light-dark boundary line with a pencil.

Step 02 Lightly outline the garnet’s internal light-dark boundary line with a pencil.

Step 03 Lighten the pencil sketch with a soft eraser. Apply a base layer of lemon yellow to the garnet, reserving whites on illuminated surfaces.

Step 03 Lighten the pencil sketch with a soft eraser. Apply a base layer of lemon yellow to the garnet, reserving whites on illuminated surfaces.

Step 04 Before the surface fully dries, paint the garnet’s shadows with cerulean blue, allowing colors to blend naturally with the paper’s moisture.

Step 04 Before the surface fully dries, paint the garnet’s shadows with cerulean blue, allowing colors to blend naturally with the paper’s moisture.

Step 05 Mix emerald green and sap green to deepen shadows. Combine Payne’s grey and emerald green to paint the garnet’s cast shadow, completing the artwork.

Step 05 Mix emerald green and sap green to deepen shadows. Combine Payne’s grey and emerald green to paint the garnet’s cast shadow, completing the artwork.

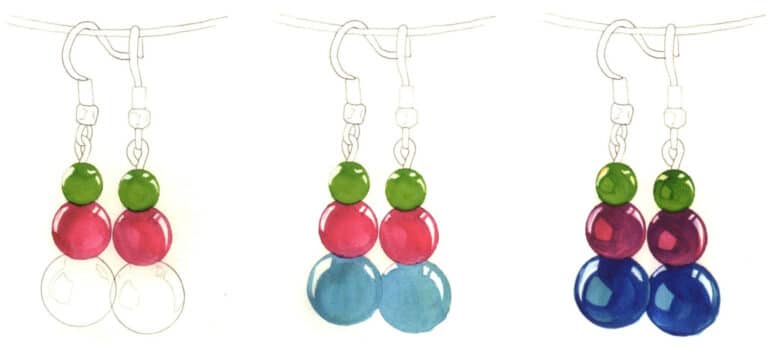
10.2 Hand-Drawing Representation of Garnet Earring Design

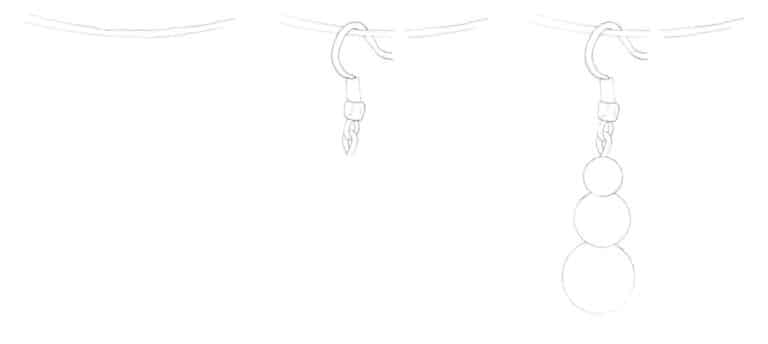
Step 01 Sketch the outline of a thin string with loose, casual lines.

Step 02 Accurately draw the contour of an earring hook on the left side of the string with a pencil, maintaining proper overlapping and perspective relationships.

Step 03 Use a circular template ruler to draw three circles of varying sizes to finalize the earring’s shape.

Step 01 Sketch the outline of a thin string with loose, casual lines. Step 02 Accurately draw the contour of an earring hook on the left side of the string with a pencil, maintaining proper overlapping and perspective relationships. Step 03 Use a circular template ruler to draw three circles of varying sizes to finalize the earring’s shape.

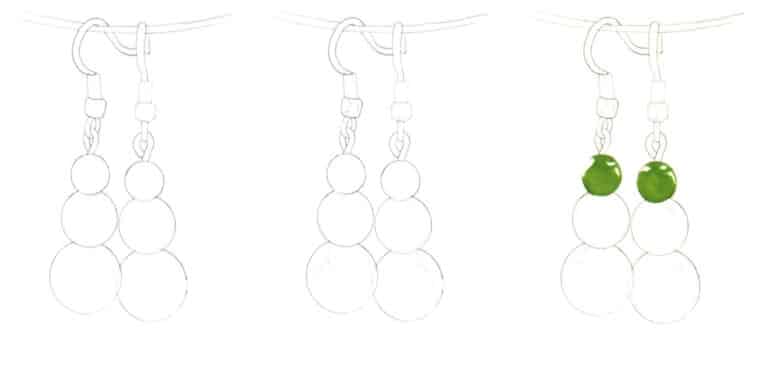
Step 04 Repeat the method to sketch another earring from a different perspective on the right side of the string, solidifying the composition.

Step 05 Outline the earrings’ light-dark boundary lines and highlighted areas with relaxed lines to complete the line art.

Step 06 Mix Permanent Light Green with Lemon Yellow to apply a base layer to the smallest garnet bead.

Step 04 Repeat the method to sketch another earring from a different perspective on the right side of the string, solidifying the composition. Step 05 Outline the earrings’ light-dark boundary lines and highlighted areas with relaxed lines to complete the line art. Step 06 Mix Permanent Light Green with Lemon Yellow to apply a base layer to the smallest garnet bead.

Step 07 Blend Rose Madder with magenta to paint the base layer for the middle garnet bead.

Step 08 Apply Cerulean Blue evenly as the base layer for the largest bottom garnet bead.

Step 09 Once slightly dry, use Sap Green, Violet, and Sapphire Blue to define the garnets’ shadows, intensifying light-dark contrast.

Step 07 Blend Rose Madder with magenta to paint the base layer for the middle garnet bead. Step 08 Apply Cerulean Blue evenly as the base layer for the largest bottom garnet bead. Step 09 Once slightly dry, use Sap Green, Violet, and Sapphire Blue to define the garnets’ shadows, intensifying light-dark contrast.
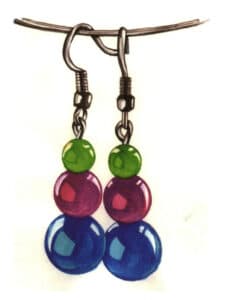
Step 10 Paint the metal hook with Ivory Black, differentiating highlighted and reflective areas with tonal variation. Adjust and finalize the artwork to complete.

11. Crystal

Crystals generally appear in pink, purple, yellow, brown, and blue colors. Amethyst contains manganese and iron, citrine contains iron, and rose quartz contains manganese and titanium. In addition, there are types of crystals, such as smoky quartz and obsidian. The transparency of crystals is generally related to their luster; strong luster indicates better transparency, while weak luster indicates poorer transparency, which is semi-transparent.
11.1 Crystal Material Representation

Step 01 Sketch the crystal’s general contour with natural, flowing lines, capturing its characteristic shape.

Step 02 Lightly outline the crystal’s internal structure with a pencil, roughly distinguishing highlighted and shadowed areas.

Step 03 Soften pencil lines with a soft eraser. Dilute cerulean blue with ample water and apply a base layer. Quickly add permanent light green to the bottom edge for color variation.

Step 01 Sketch the crystal’s general contour with natural, flowing lines, capturing its characteristic shape. Step 02 Lightly outline the crystal’s internal structure with a pencil, roughly distinguishing highlighted and shadowed areas. Step 03 Soften pencil lines with a soft eraser. Dilute cerulean blue with ample water and apply a base layer. Quickly add permanent light green to the bottom edge for color variation.

Step 04 Mix darker cerulean blue with phthalocyanine blue to paint the crystal’s local color. Blend edges with clean water.

Step 05 Blend ultramarine, violet, and emerald green to define shadows and highlights, showcasing the crystal’s chromatic complexity while avoiding excessive saturation.

Step 06 Mix diluted ivory black with cerulean blue to paint the cast shadow, finalizing the artwork.

Step 04 Mix darker cerulean blue with phthalocyanine blue to paint the crystal’s local color. Blend edges with clean water. Step 05 Blend ultramarine, violet, and emerald green to define shadows and highlights, showcasing the crystal’s chromatic complexity while avoiding excessive saturation. Step 06 Mix diluted ivory black with cerulean blue to paint the cast shadow, finalizing the artwork.
11.2 Hand-Drawing Representation of Crystal Bracelet Design

Step 01 Sketch the general oval-shaped outline of the crystal bracelet with a pencil.

Step 02 Using the oval as the bracelet’s central line, lightly outline the crystals’ positions and sizes.

Step 01 Sketch the general oval-shaped outline of the crystal bracelet with a pencil. Step 02 Using the oval as the bracelet’s central line, lightly outline the crystals’ positions and sizes.

Step 03 Lighten the draft with a soft eraser. Precisely define the bracelet’s contours with confident, steady pencil lines, emphasizing its structural features.

Step 04 Apply cerulean blue as the base layer to the blue crystals, spacing color distribution intentionally.

Step 03 Lighten the draft with a soft eraser. Precisely define the bracelet’s contours with confident, steady pencil lines, emphasizing its structural features. Step 04 Apply cerulean blue as the base layer to the blue crystals, spacing color distribution intentionally.

Step 05 Once slightly dry, mix ultramarine and lemon yellow to define shadows and details on blue crystals, creating facet effects.

Step 06 Dilute magenta with water for the purple crystals’ base layer. After drying, blend violet and rose madder to paint shadows and suggest light-dark relationships.
Step 05 Once slightly dry, mix ultramarine and lemon yellow to define shadows and details on blue crystals, creating facet effects. Step 06 Dilute magenta with water for the purple crystals’ base layer. After drying, blend violet and rose madder to paint shadows and suggest light-dark relationships.

Step 07 Apply yellow ochre to the remaining yellow crystals, reserving whites for highlights.

Step 08 Once partially dry, use orange with burnt umber to refine yellow crystals’ details, balancing warm-cool tones.
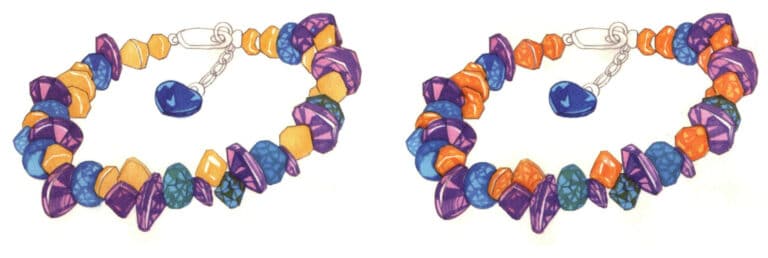
Step 07 Apply yellow ochre to the remaining yellow crystals, reserving whites for highlights. Step 08 Once partially dry, use orange with burnt umber to refine yellow crystals’ details, balancing warm-cool tones.

Step 09 Paint the metal chain and connectors with ivory black. Keep colors subtle to preserve material’s local color and texture.

Step 10 Lightly paint the bracelet’s cast shadow with Payne’s grey, adjusting its shape and light-dark variation based on perspective.

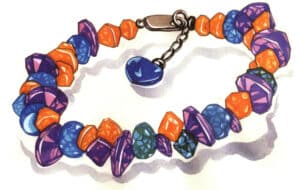
Step 09 Paint the metal chain and connectors with ivory black. Keep colors subtle to preserve material’s local color and texture. Step 10 Lightly paint the bracelet’s cast shadow with Payne’s grey, adjusting its shape and light-dark variation based on perspective.
Step 11 Highlight reflective areas with white pigment, add environmental colors, and finalize adjustments to complete.

Section II Jewelry Design and Presentation

Designers must express the appearance and certain internal structures of jewelry accurately and completely in their design drafts. Understanding the internal structure of the jewelry will be reflected in its appearance, so jewelry design drawings should possess a strong sense of rigor, logic, and precision. Once the design concept is finalized and the sketch details are thoroughly discussed, the designer can proceed to the final drawing stage, the final version of the design that fully expresses the design ideas and creative intentions. This chapter mainly introduces the standard hand-drawn three-view of jewelry, colored pencil three-dimensional representation, watercolor three-dimensional representation, and marker three-dimensional representation.

1. Standard Hand-Drawn Three-View Diagram
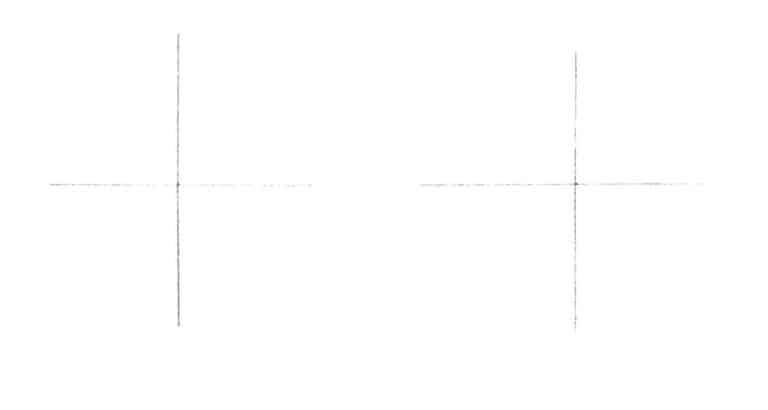
Step 01 First, use a pencil to position and compose on the paper, drawing the three-dimensional coordinate axes for the front and side views. The three-dimensional coordinate axes are used as auxiliary lines for drawing three-view diagrams.
Step 01 First, use a pencil to position and compose on the paper, drawing the three-dimensional coordinate axes for the front and side views. The three-dimensional coordinate axes are used as auxiliary lines for drawing three-view diagrams.

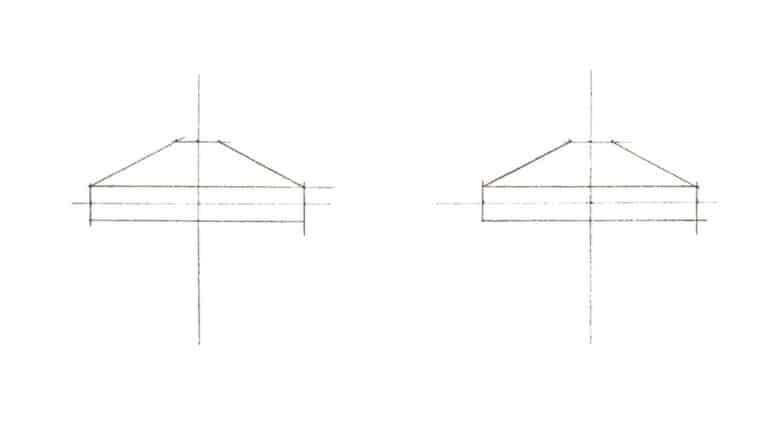
Step 02 Based on the size specifications of the women's ring, outline the main parts of the front view and side view of the ring with straight lines, paying close attention to the overall structure and perspective relationships of the three-view diagram of the ring.
Step 02 Based on the size specifications of the women's ring, outline the main parts of the front view and side view of the ring with straight lines, paying close attention to the overall structure and perspective relationships of the three-view diagram of the ring.

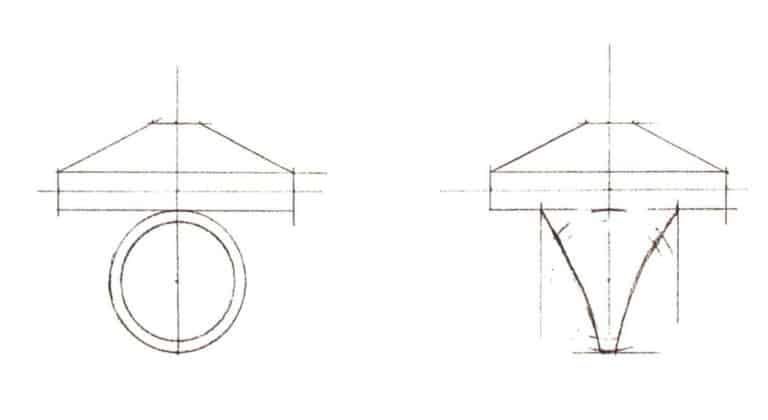
Step 03 Use a circular arc to draw the general outline of the ring; you can use a compass or a circular drawing template for this.
Step 03 Use a circular arc to draw the general outline of the ring; you can use a compass or a circular drawing template for this.

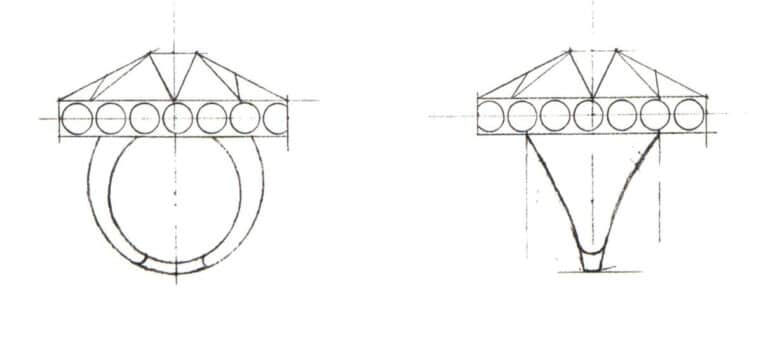
Step 04 Delve into the details, depicting the internal structure of the ring's front and side views, and adjust the overall composition.
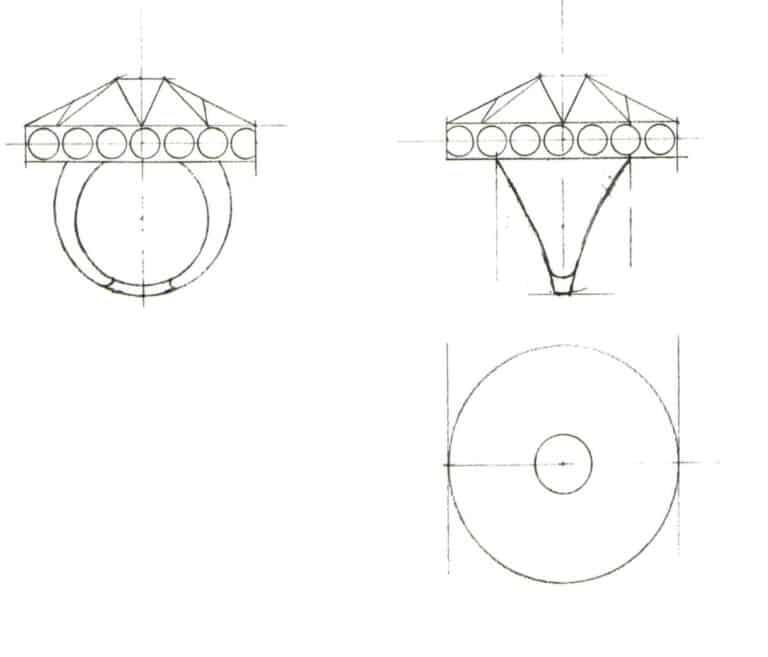
Step 04 Delve into the details, depicting the internal structure of the ring's front and side views, and adjust the overall composition.

Step 05 Based on the horizontal coordinate dimensions of the ring's side view, casually draw the outer contour of the ring's top view with relaxed lines.
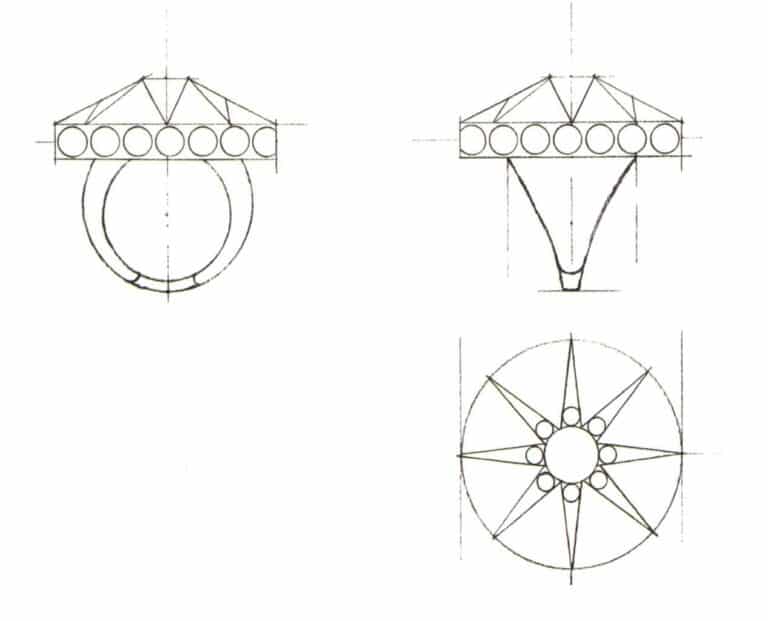
Step 05 Based on the horizontal coordinate dimensions of the ring's side view, casually draw the outer contour of the ring's top view with relaxed lines.

Step 06 Depict the internal structure of the ring's top view, and clearly explain the shape and pattern, ensuring that everything is drawn with a ruler to ensure accuracy.
Step 06 Depict the internal structure of the ring's top view, and clearly explain the shape and pattern, ensuring that everything is drawn with a ruler to ensure accuracy.

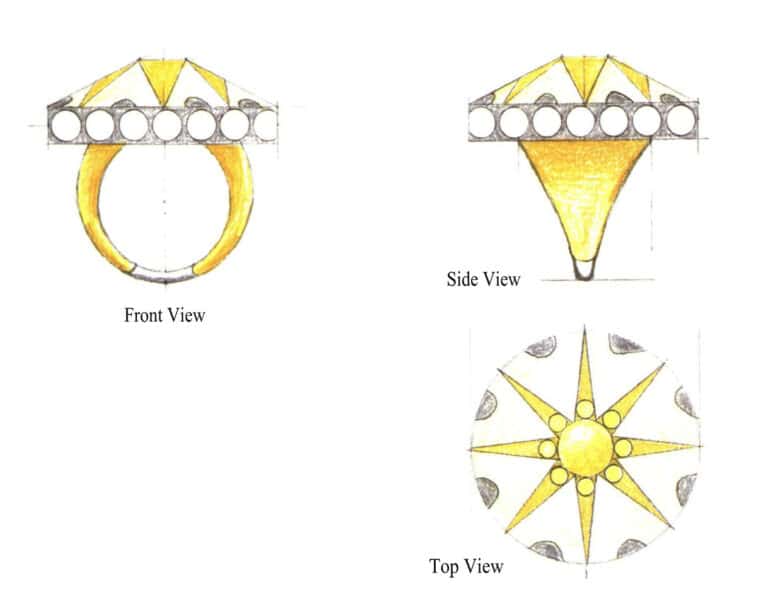
Step 07 Use colored pencils No. 407, No. 409 and No. 495 to color the three-view drawing of the ring and complete the drawing.

Step 07 Use colored pencils No. 407, No. 409 and No. 495 to color the three-view drawing of the ring and complete the drawing.

2. Colored Pencil Three-Dimensional Representation

Coloring with colored pencils is easy to master, and the drawing process is convenient and quick. It is now widely used in commercial jewelry design drawings. It is important to make the lines even, consistent, and rich in layers during the coloring process. If, after the first coloring, the tone seems too light, you can apply additional layers of color.

The method for drawing the standard three-view of women’s rings has been introduced earlier. Next, we will explain the representation of three-dimensional images using colored pencils. Below is the specific method for hand-drawing the seahorse brooch with colored pencils.

Step 01 Use a pencil to sketch the general outline of the head and body of the seahorse brooch.

Step 02 Use curves to outline the curled tail of the seahorse brooch.
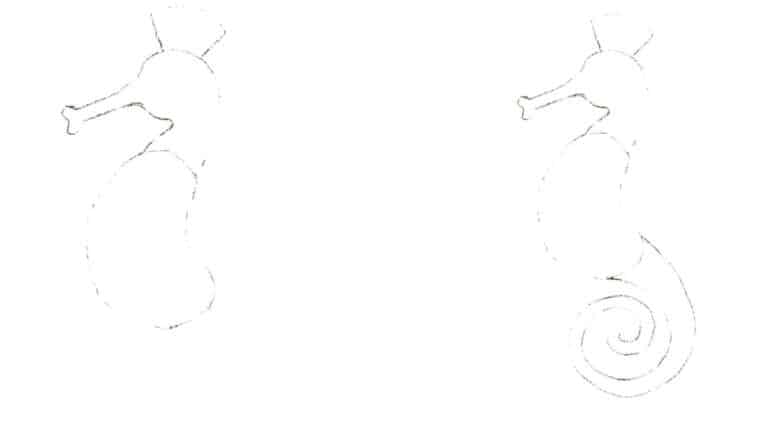
Step 01 Use a pencil to sketch the general outline of the head and body of the seahorse brooch. Step 02 Use curves to outline the curled tail of the seahorse brooch.

Step 03 According to the overall size ratio, use relaxed and casual lines to outline the approximate shape of the wings of the seahorse brooch.

Step 04 Based on the previous step, add details and refine the internal structure of the seahorse brooch while erasing any excess lines.
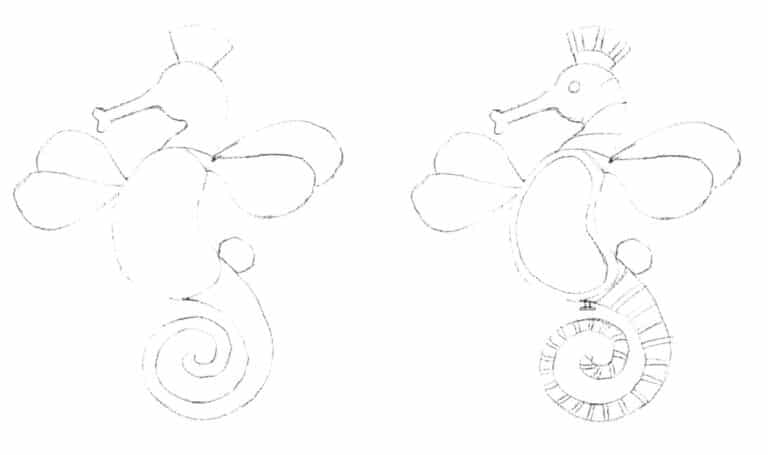
Step 03 According to the overall size ratio, use relaxed and casual lines to outline the approximate shape of the wings of the seahorse brooch. Step 04 Based on the previous step, add details and refine the internal structure of the seahorse brooch while erasing any excess lines.

Step 05 After completing the line draft, use an eraser to lighten the lines and start coloring. Use colored pencils 404, 483 and 487 to depict the golden edging on the belly of the seahorse brooch, and use colored pencils 447 and 445 to color the middle blue gemstone part.

Step 06 Use colored pencils 487 to accurately outline the wings of the seahorse brooch, and use colored pencils 443, 445, 439, and 429 to depict the colored diamonds on the wings.
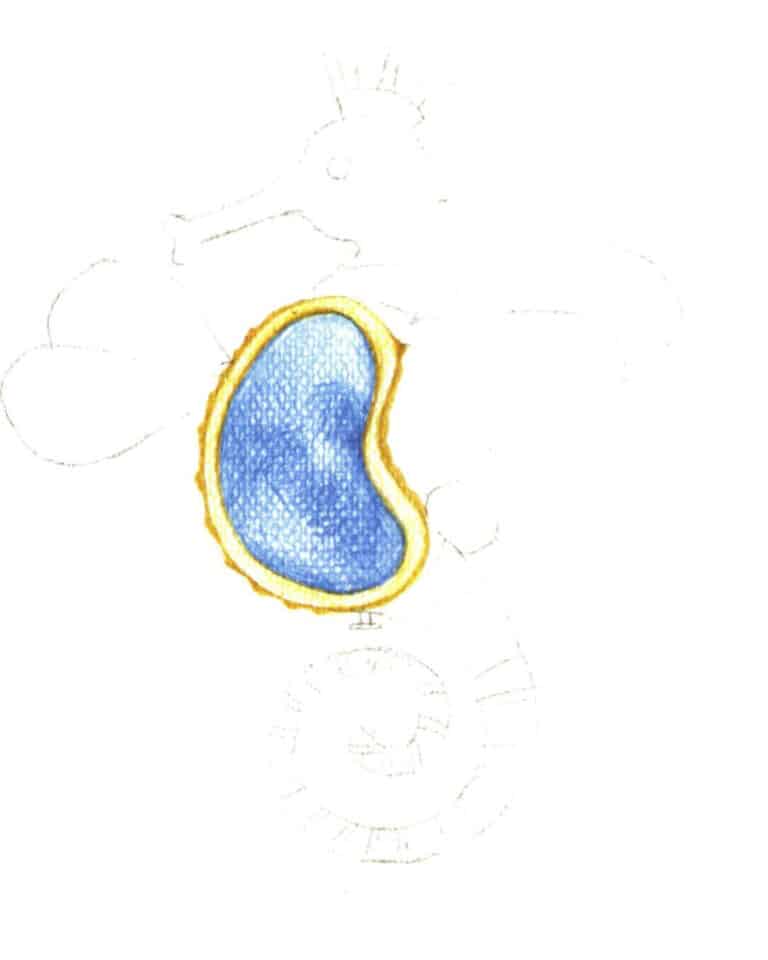
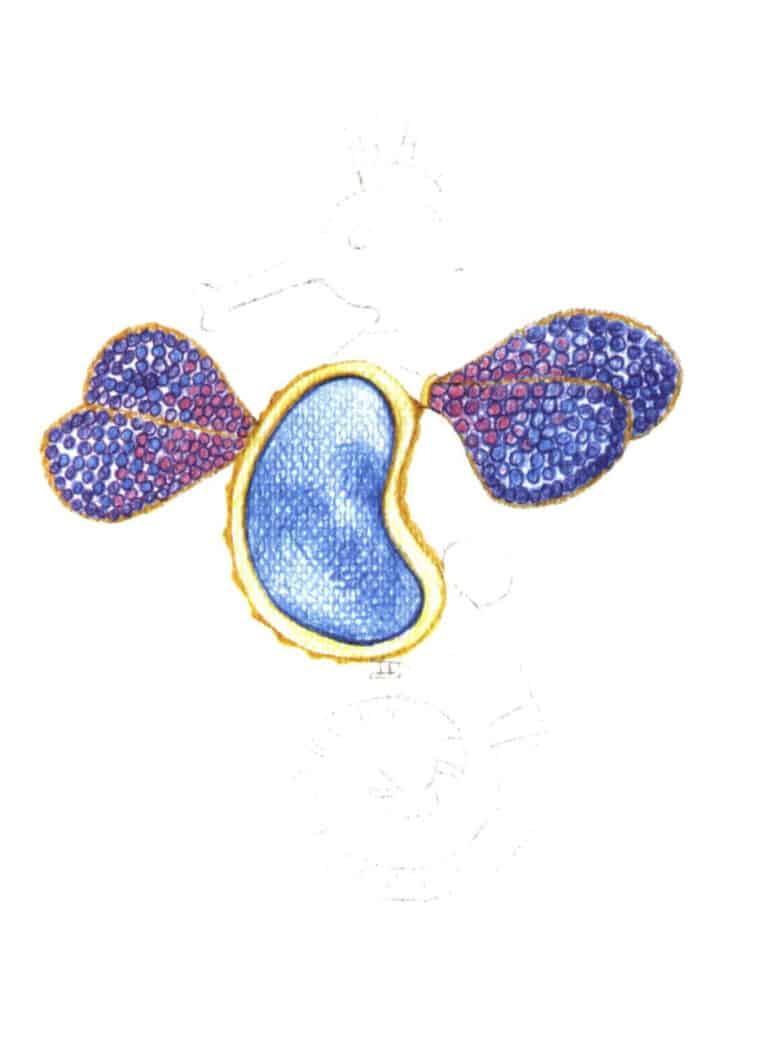
Step 05 After completing the line draft, use an eraser to lighten the lines and start coloring. Use colored pencils 404, 483 and 487 to depict the golden edging on the belly of the seahorse brooch, and use colored pencils 447 and 445 to color the middle blue gemstone part.
Step 06 Use colored pencils 487 to accurately outline the wings of the seahorse brooch, and use colored pencils 443, 445, 439, and 429 to depict the colored diamonds on the wings.


Step 07 Use colored pencil 487 to outline the head of the seahorse brooch, and use colored pencils 404, 437, 426, 429, and 430 to depict purple and pink colored diamonds, among others.

Step 08 Use colored pencils 487, 404 to outline the tail of the seahorse brooch and refine the internal structure, and use colored pencils 443, 463, and 437 to depict the colored diamond part.
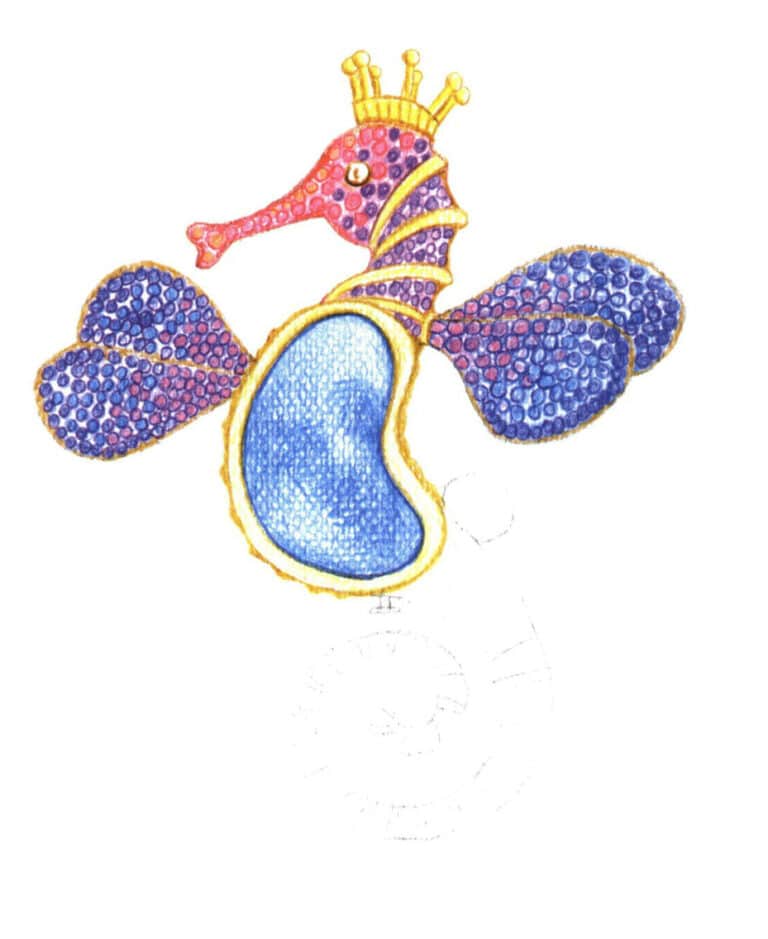
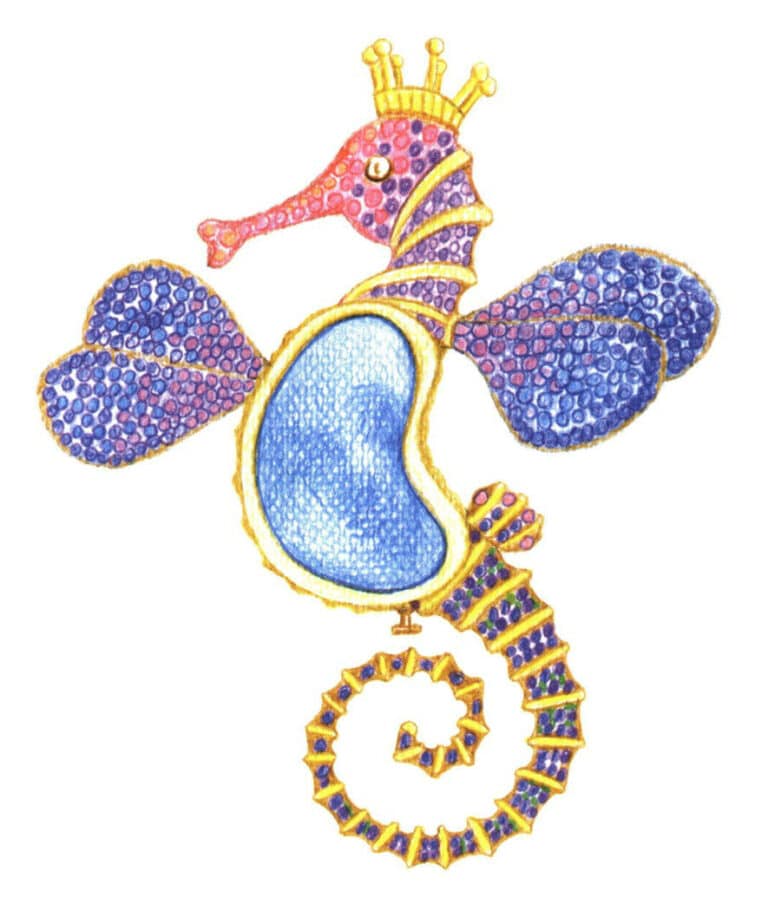
Step 07 Use colored pencil 487 to outline the head of the seahorse brooch, and use colored pencils 404, 437, 426, 429, and 430 to depict purple and pink colored diamonds, among others.
Step 08 Use colored pencils 487, 404 to outline the tail of the seahorse brooch and refine the internal structure, and use colored pencils 443, 463, and 437 to depict the colored diamond part.


Step 09 Use colored pencils 443, 439, and 480 to further adjust the picture and depict local details, completing the drawing.
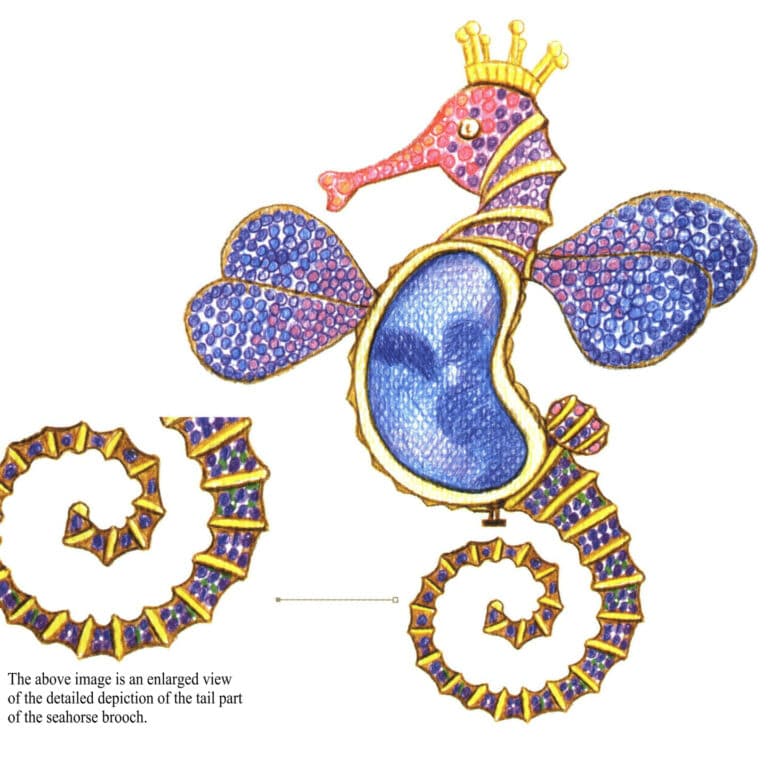
Step 09 Use colored pencils 443, 439, and 480 to further adjust the picture and depict local details, completing the drawing.


Tips

The key to representing gold material lies in the purity of color, especially in the dark areas. Warm tones such as earth yellow, and ochre can be employed when using colors. Some beginners like to use black in the dark areas to enhance the contrast of the metallic material, which instead makes the color of gold appear dull. Therefore, remember not to use too much black or to avoid it as much as possible, and try not to pair black with other colors.

3. Watercolor Three-Dimensional Representation

Watercolor is the fusion of water and color. Its painting method has high transparency, and the underlying color will show through when colors overlap. The brightness of watercolor colors is not as high as that of colored ink, but the coloring is deeper, and the colors are not easily changed over long-term storage.

The basic watercolor techniques include two types: dry painting and wet painting. Dry painting can be divided into specific methods such as layering, glazing, color gradation, and dry brush techniques; wet painting can be divided into wet-on-wet blending and wet-in-wet gradation. Below, we will explain the representation of watercolor 3D images of gemstone rings.

Step 01 Sketch the gemstone’s outer contour with loose, casual curves, using an oval shape as the base.
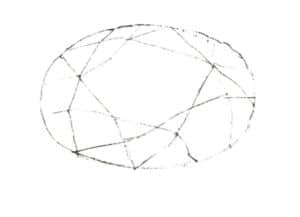
Step 01 Sketch the gemstone’s outer contour with loose, casual curves, using an oval shape as the base.

Step 02 Lightly outline the gemstone’s faceted shape with a pencil.
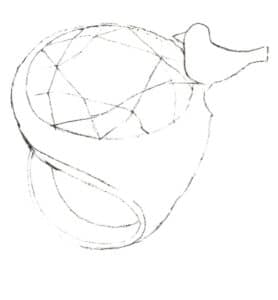
Step 02 Lightly outline the gemstone’s faceted shape with a pencil.

Step 03 Draw the ring band and decorative bird’s general contours based on perspective principles.
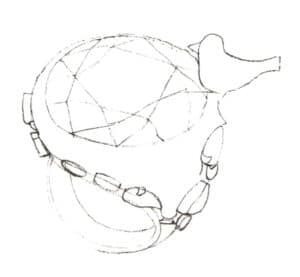
Step 03 Draw the ring band and decorative bird’s general contours based on perspective principles.

Step 04 Add gemstone embellishments along the ring’s edges to enrich the design.
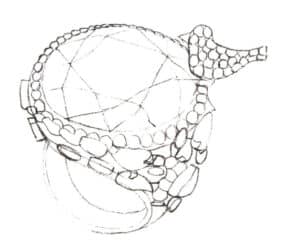
Step 04 Add gemstone embellishments along the ring’s edges to enrich the design.

Step 05 Refine the ring’s internal structures (e.g., diamonds). Prioritize proportional accuracy and structural clarity with light pencil pressure.

Step 05 Refine the ring’s internal structures (e.g., diamonds). Prioritize proportional accuracy and structural clarity with light pencil pressure.

Step 06 Soften the previous pencil lines with a soft eraser to prepare for coloring, avoiding smudging. Ensure faint guidelines remain visible.
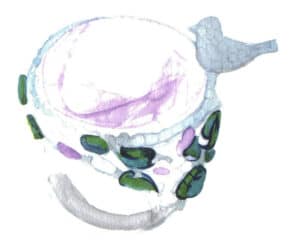
Step 06 Soften the previous pencil lines with a soft eraser to prepare for coloring, avoiding smudging. Ensure faint guidelines remain visible.

Step 07 Begin coloring: Use a small watercolor brush to apply premixed green tones along the gemstone’s outlined areas, suggesting basic light-dark relationships; Paint the remaining ring sections with pink (magenta + lemon yellow) and muted green (emerald green + Payne’s grey + Chinese white) for the first wash, keeping colors thin and translucent.

Step 07 Begin coloring: Use a small watercolor brush to apply premixed green tones along the gemstone’s outlined areas, suggesting basic light-dark relationships; Paint the remaining ring sections with pink (magenta + lemon yellow) and muted green (emerald green + Payne’s grey + Chinese white) for the first wash, keeping colors thin and translucent.

Step 08 Gradually deepen colors to enhance three-dimensionality and refine details (e.g., gemstone’s translucent effects). Maintain layered color variation.
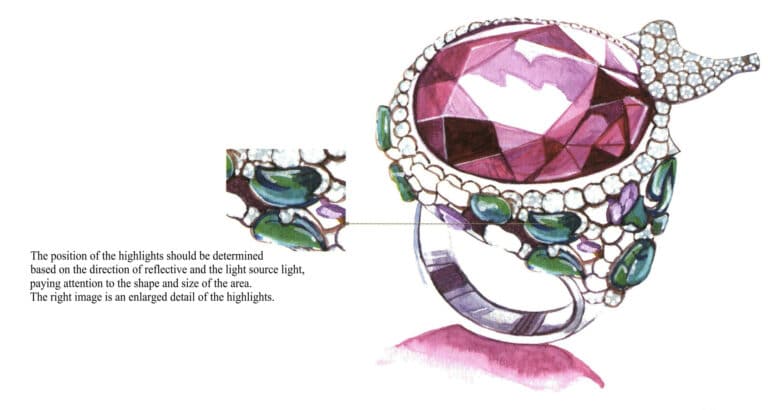
Step 08 Gradually deepen colors to enhance three-dimensionality and refine details (e.g., gemstone’s translucent effects). Maintain layered color variation.

Step 09 Paint the ring’s cast shadow with pink (magenta + lemon yellow), emphasizing layered tonal shifts. Highlight reflective areas and reserved whites with white pigment. Adjust and finalize the artwork to complete.

Step 09 Paint the ring’s cast shadow with pink (magenta + lemon yellow), emphasizing layered tonal shifts. Highlight reflective areas and reserved whites with white pigment. Adjust and finalize the artwork to complete.


Tips

The representation of platinum, white gold, and silver can rely on ambient and light source colors when using watercolor to mix and enrich the picture’s colors. The mid-tone parts can be represented using shades of gray.

4. Marker Three-Dimensional Representation

Generally, markers are used to quickly represent design renderings. Many designers favor them due to their rich colors, easy coloring, quick rendering, and portability. In hand-drawn jewelry design, it is important to pay attention to the rules of color layering with markers and the brush strokes of the marker and to ensure that the transitions between colors are natural.

The following will explain how to use markers to hand-draw a three-dimensional representation of a bracelet.
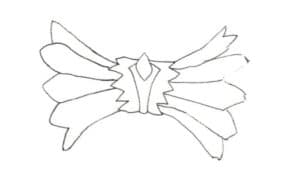
Step 01 Start from a partial section and sketch the bracelet’s central structure with a pencil.
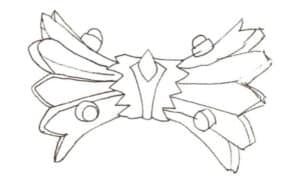
Step 01 Start from a partial section and sketch the bracelet’s central structure with a pencil.

Step 02 Based on perspective, lightly define local thickness over the previous sketch.
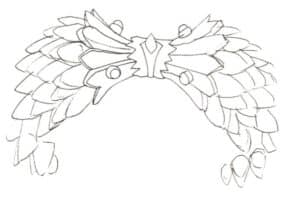
Step 02 Based on perspective, lightly define local thickness over the previous sketch.

Step 03 Outline the triangular gemstone decorations on both sides of the bracelet with a pencil, maintaining overall symmetry.
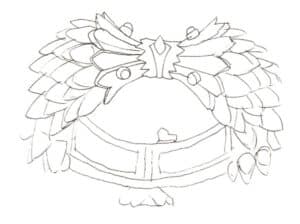
Step 03 Outline the triangular gemstone decorations on both sides of the bracelet with a pencil, maintaining overall symmetry.

Step 04 Continue sketching the bracelet’s clasp contours to finalize the composition.
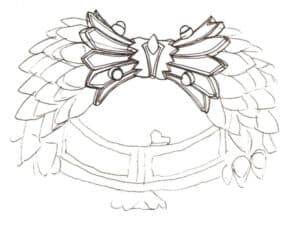
Step 04 Continue sketching the bracelet’s clasp contours to finalize the composition.

Step 05 Precisely outline the central design atop the bracelet with a technical pen, ensuring structural clarity.
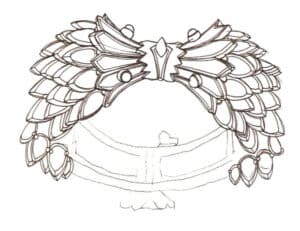
Step 05 Precisely outline the central design atop the bracelet with a technical pen, ensuring structural clarity.

Step 06 Draw triangular gemstone contours with curved lines, maintaining accurate perspective and overlapping relationships.
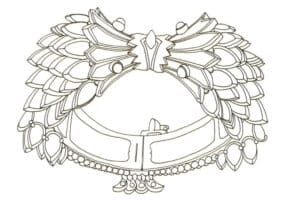
Step 06 Draw triangular gemstone contours with curved lines, maintaining accurate perspective and overlapping relationships.

Step 07 Complete the bracelet’s remaining outlines with a technical pen. Erase pencil lines to preserve cleanliness.
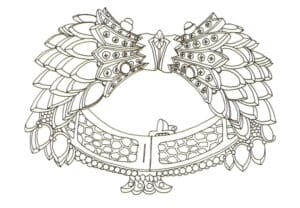
Step 07 Complete the bracelet’s remaining outlines with a technical pen. Erase pencil lines to preserve cleanliness.

Step 08 Add and refine localized details for enhanced precision.
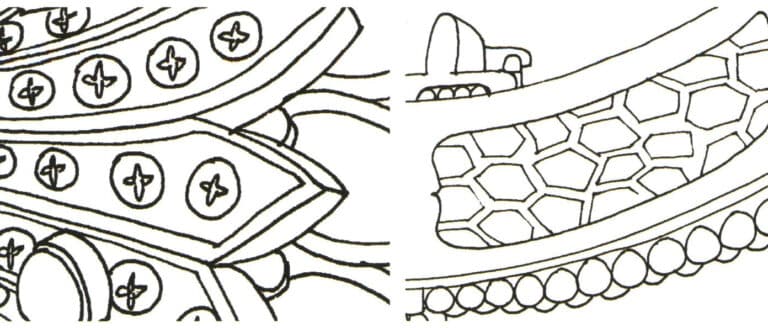
Step 08 Add and refine localized details for enhanced precision.

Detailed texture additions are also drawn with lines based on perspective. The picture on the left is an enlarged view of the local detail engraving
Detailed texture additions are also drawn with lines based on perspective. The picture on the left is an enlarged view of the local detail engraving

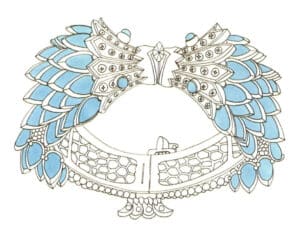
Step 09 Apply the first color layer to the triangular gems on both sides using No.67 marker.
Step 09 Apply the first color layer to the triangular gems on both sides using No.67 marker.

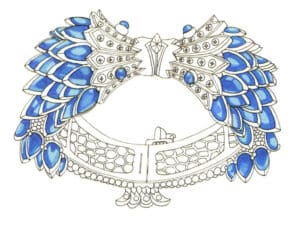
Step 10 Use No.63 and No.183 markers to define the gems’ shadow areas, intensify light-dark contrast, and achieve three-dimensional and realistic textures.
Step 10 Use No.63 and No.183 markers to define the gems’ shadow areas, intensify light-dark contrast, and achieve three-dimensional and realistic textures.

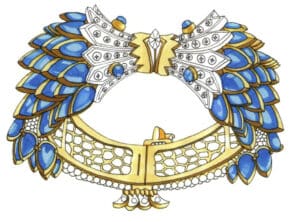
Step 11 Paint the metal trim’s local color with No.141 marker. Use No.100 marker to deepen shadows, shaping light-shadow relationships, volume, and spatial depth.
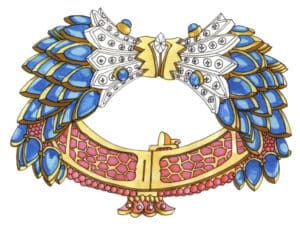
Step 11 Paint the metal trim’s local color with No.141 marker. Use No.100 marker to deepen shadows, shaping light-shadow relationships, volume, and spatial depth.

Step 12 Apply No.17 marker to the bottom gemstones. Use No.16 marker to moderately deepen shadows, avoiding excessive coverage of previous layers.
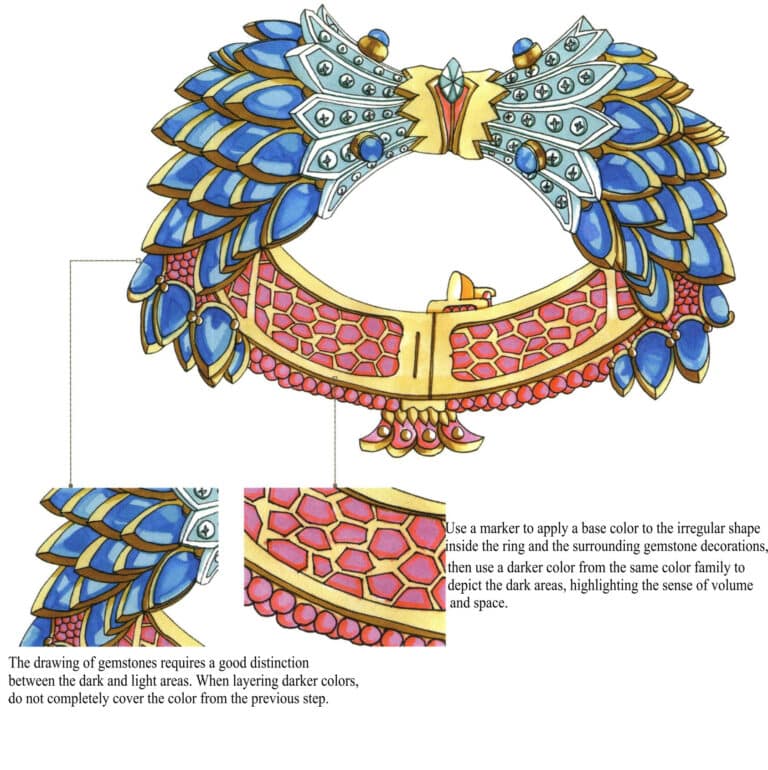
Step 12 Apply No.17 marker to the bottom gemstones. Use No.16 marker to moderately deepen shadows, avoiding excessive coverage of previous layers.

Step 13 Refine remaining sections with No.68 marker and No.461 colored pencil. Highlight with a white gel pen, adjust details, and complete the artwork.

Step 13 Refine remaining sections with No.68 marker and No.461 colored pencil. Highlight with a white gel pen, adjust details, and complete the artwork.


Tips

When drawing gemstones, appropriately depicting the reflective parts is beneficial for expressing their lustrous sheen and transparent reflective quality, but be careful not to make the reflective areas too eye-catching.

5. Graphics Tablet Three-Dimensional Representation

Previously, we discussed the representation of 3D images using colored pencils, watercolors, and markers. Next, we will use a graphics tablet to explain the methods for representing pearl material, cat’s eye stone, ruby material, amber material, bracelet effect images, and earring effect images.
5.1 Representing Pearl Material with a Graphics Tablet

Step 01 Create a new canvas. Select the “Hard Round Pressure Opacity” brush tool and set the brush size to 1600 pixels. Paint a moderately sized circle using yellow ochre.

Step 02 Use the “Magic Wand” tool to select the yellow ochre circle. Switch to the “Soft Round Pressure Opacity” brush tool and paint the pearl’s shadows with dark brown.

Step 03 Apply a lighter shade of yellow ochre to the pearl’s top and bottom highlights, avoiding fully covering the base color and ensuring natural transitions.
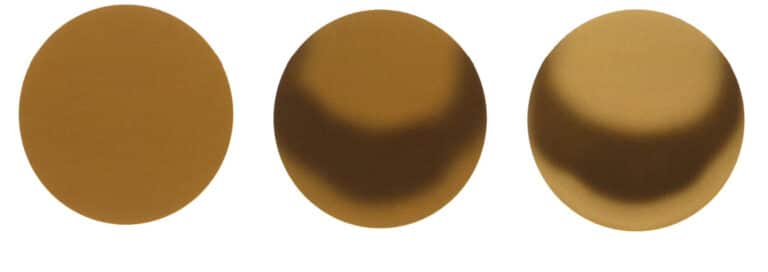
Step 01 Create a new canvas. Select the "Hard Round Pressure Opacity" brush tool and set the brush size to 1600 pixels. Paint a moderately sized circle using yellow ochre. Step 02 Use the "Magic Wand" tool to select the yellow ochre circle. Switch to the "Soft Round Pressure Opacity" brush tool and paint the pearl’s shadows with dark brown. Step 03 Apply a lighter shade of yellow ochre to the pearl’s top and bottom highlights, avoiding fully covering the base color and ensuring natural transitions.

Step 04 Add reflections with pale yellow to enhance color layering.

Step 05 Reduce brush opacity to 40%. Paint highlights with white to intensify light-dark contrast and emphasize three-dimensionality.
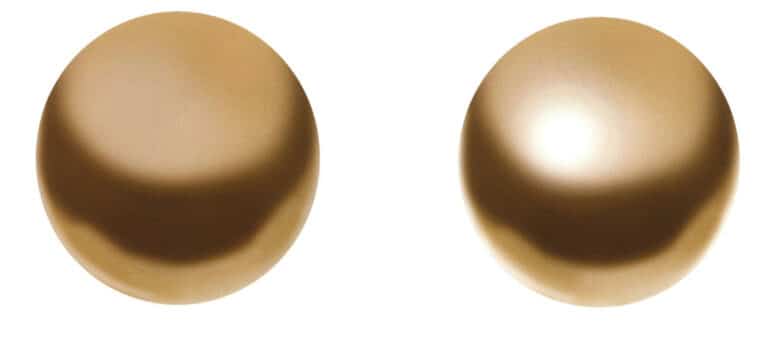
Step 04 Add reflections with pale yellow to enhance color layering. Step 05 Reduce brush opacity to 40%. Paint highlights with white to intensify light-dark contrast and emphasize three-dimensionality.


Tips

When drawing highlights, you can appropriately lower the opacity. If the effect is not enough after one attempt, you can draw several times in the same position, making the color transition more natural.

5.2 Representing Cat's Eye Stone Texture with a Graphics Tablet

Step 01 Create a new canvas. Select the “Hard Round Pressure Opacity” brush tool and set the brush size to 1600 pixels. Paint a moderately sized circle using hunter green.

Step 02 Use the “Magic Wand” tool to select the hunter green circle. Switch to the “Soft Round Pressure Opacity” brush tool and apply sap green as the cat’s eye stone’s local color, reserving shadow areas along the light-dark boundary line.

Step 03 Paint a semicircle on the right side with olive green to enrich color variation.
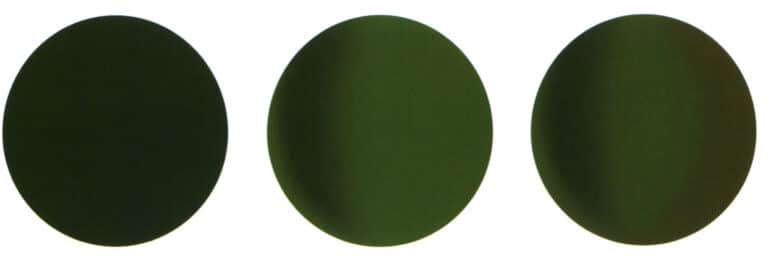
Step 01 Create a new canvas. Select the "Hard Round Pressure Opacity" brush tool and set the brush size to 1600 pixels. Paint a moderately sized circle using hunter green. Step 02 Use the "Magic Wand" tool to select the hunter green circle. Switch to the "Soft Round Pressure Opacity" brush tool and apply sap green as the cat’s eye stone’s local color, reserving shadow areas along the light-dark boundary line. Step 03 Paint a semicircle on the right side with olive green to enrich color variation.

Step 04 Apply light green vertically to the stone’s central highlight area, ensuring natural transitions.

Step 05 Add environmental colors with aquamarine on the left and right edges, keeping coverage minimal.

Step 06 Reduce brush opacity to 60%. Highlight with white to enhance three-dimensionality. Adjust and finalize the artwork to complete.
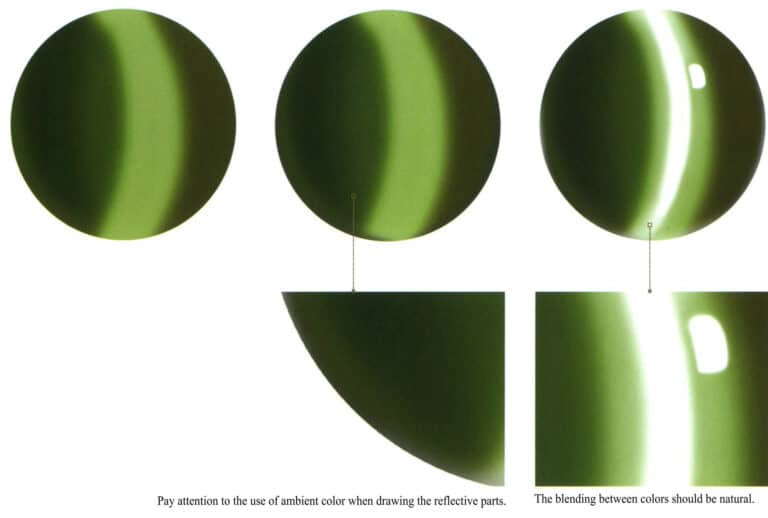
Step 04 Apply light green vertically to the stone’s central highlight area, ensuring natural transitions. Step 05 Add environmental colors with aquamarine on the left and right edges, keeping coverage minimal. Step 06 Reduce brush opacity to 60%. Highlight with white to enhance three-dimensionality. Adjust and finalize the artwork to complete.
5.3 Representing the Ruby Material with a Graphics Tablet

Step 01 Create a “Draft” layer. Select gray and the “Hard Round Pressure Opacity” brush tool. Sketch the ruby’s general outline based on perspective principles.

Step 02 Lower the “Draft” layer’s opacity. Create a “Line Art” layer and accurately outline the ruby over the draft. Then hide the “Draft” layer’s visibility.

Step 03 On the “Line Art” layer, draw the ruby’s internal structure to showcase facet effects.

Step 01 Create a "Draft" layer. Select gray and the "Hard Round Pressure Opacity" brush tool. Sketch the ruby’s general outline based on perspective principles. Step 02 Lower the "Draft" layer’s opacity. Create a "Line Art" layer and accurately outline the ruby over the draft. Then hide the "Draft" layer’s visibility. Step 03 On the "Line Art" layer, draw the ruby’s internal structure to showcase facet effects.

Step 04 Create a “Color” layer and set its blending mode to “Multiply”. Paint the ruby’s base color with crimson, staying within the outlines.

Step 05 Determine the light source direction. Use maroon to paint shadows, reserving reflection areas.

Step 06 Apply light red to the ruby’s highlighted surfaces.

Step 07 Deepen shadows with dark red to add color depth. Use the “Soft Round” brush tool to blend highlights and reflections naturally. Finalize details to complete the artwork.
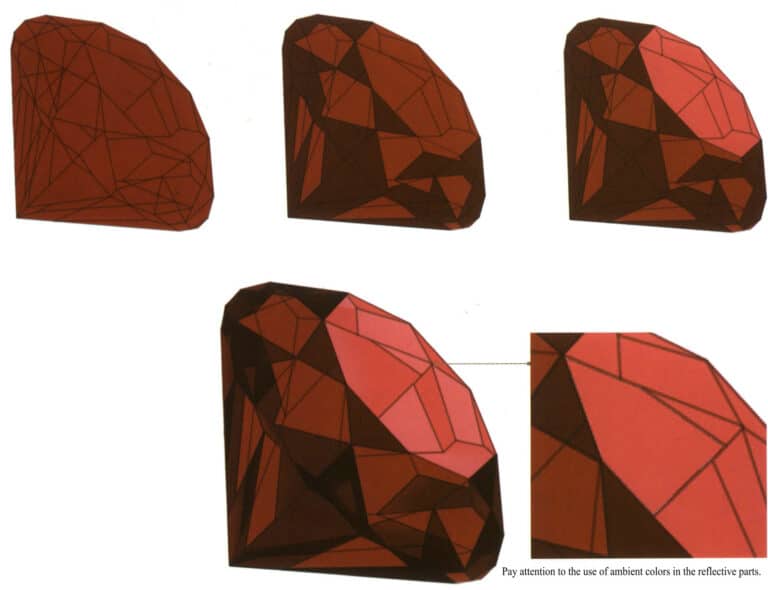
Step 04 Create a "Color" layer and set its blending mode to "Multiply". Paint the ruby’s base color with crimson, staying within the outlines. Step 05 Determine the light source direction. Use maroon to paint shadows, reserving reflection areas. Step 06 Apply light red to the ruby’s highlighted surfaces. Step 07 Deepen shadows with dark red to add color depth. Use the "Soft Round" brush tool to blend highlights and reflections naturally. Finalize details to complete the artwork.
5.4 Representing the Amber Material with a Graphics Tablet
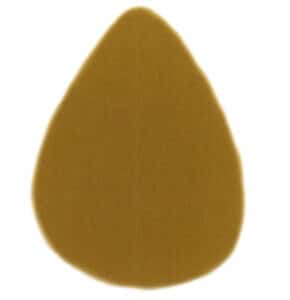
Step 01 Create a new canvas. Select the "Soft Round Pressure Opacity" brush tool and set the brush size to 80 pixels. Use yellow ochre ( to paint the amber’s general shape and base color, capturing its characteristic form.
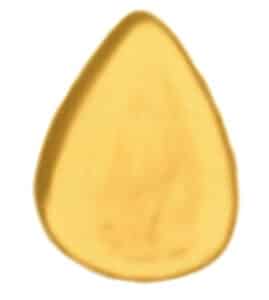
Step 01 Create a new canvas. Select the "Soft Round Pressure Opacity" brush tool and set the brush size to 80 pixels. Use yellow ochre ( to paint the amber’s general shape and base color, capturing its characteristic form.

Step 02 Apply pale yellow to the amber’s central area, preserving edges from the previous layer to suggest thickness.
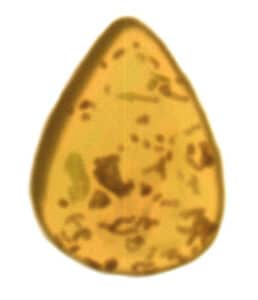
Step 02 Apply pale yellow to the amber’s central area, preserving edges from the previous layer to suggest thickness.

Step 03 Create a "Texture 1" layer. Select dark brown and reduce opacity to paint internal impurities and forms, conveying the amber’s translucent quality through simplified rendering.
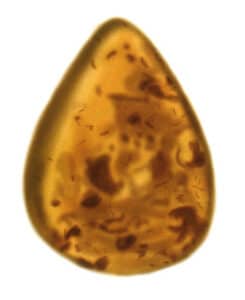
Step 03 Create a "Texture 1" layer. Select dark brown and reduce opacity to paint internal impurities and forms, conveying the amber’s translucent quality through simplified rendering.

Step 04 Create a "Texture 2" layer. Use bright yellow and dark red to define internal shadows and adjust color balance. Further refine light-dark relationships, then finalize the artwork to complete.

Step 04 Create a "Texture 2" layer. Use bright yellow and dark red to define internal shadows and adjust color balance. Further refine light-dark relationships, then finalize the artwork to complete.

5.5 Drawing the Bracelet Rendering with a a Graphics Tablet
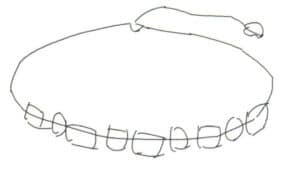
Step 01 Create a "Draft Reference" layer. Select the "Pencil" brush tool and set the brush size to 6 pixels. Sketch the bracelet’s composition roughly with black.
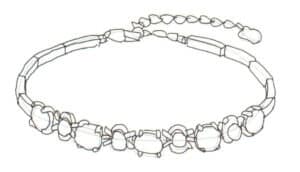
Step 01 Create a "Draft Reference" layer. Select the "Pencil" brush tool and set the brush size to 6 pixels. Sketch the bracelet’s composition roughly with black.

Step 02 Lower the "Draft Reference" layer’s opacity. Create a "Draft" layer and outline the bracelet’s overall shape, emphasizing local features and perspective accuracy.

Step 02 Lower the "Draft Reference" layer’s opacity. Create a "Draft" layer and outline the bracelet’s overall shape, emphasizing local features and perspective accuracy.

Step 03 Lower the "Draft" layer’s opacity. Create a "Line Art" layer. Use the "Hard Round Pressure Opacity" brush tool to outline the central gemstone’s contour.
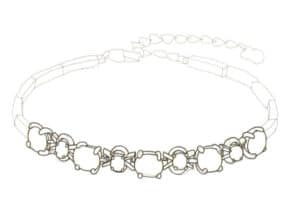
Step 03 Lower the "Draft" layer’s opacity. Create a "Line Art" layer. Use the "Hard Round Pressure Opacity" brush tool to outline the central gemstone’s contour.

Step 04 Outline other decorative gemstones with precise lines and clear structural definition.

Step 04 Outline other decorative gemstones with precise lines and clear structural definition.

Step 05 Draw the metal chain’s contour.
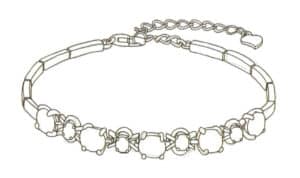
Step 05 Draw the metal chain’s contour.

Step 06 Outline remaining sections like the bracelet’s tail.
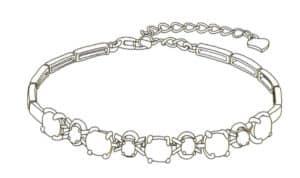
Step 06 Outline remaining sections like the bracelet’s tail.

Step 07 Refine details and metal chain structures to complete the line art.
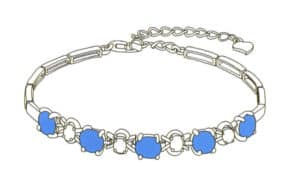
Step 07 Refine details and metal chain structures to complete the line art.

Step 08 Create a "Sapphire Color" layer. Use the "Hard Round Pressure Opacity" brush tool to apply sky blue as the main gemstone’s base color.
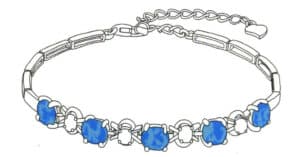
Step 08 Create a "Sapphire Color" layer. Use the "Hard Round Pressure Opacity" brush tool to apply sky blue as the main gemstone’s base color.

Step 09 Switch to the "Soft Round Pressure Opacity" brush tool. Paint highlights with light blue.
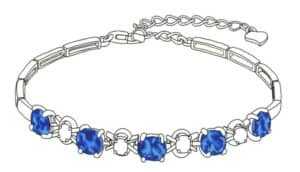
Step 09 Switch to the "Soft Round Pressure Opacity" brush tool. Paint highlights with light blue.

Step 10 Define shadows with dark blue to enhance three-dimensionality and light-dark contrast.
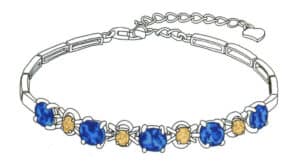
Step 10 Define shadows with dark blue to enhance three-dimensionality and light-dark contrast.

Step 11 Create a "Yellow Gem Color" layer. Use yellow tones to model the gemstone’s volume.
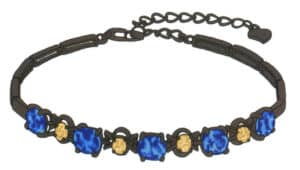
Step 11 Create a "Yellow Gem Color" layer. Use yellow tones to model the gemstone’s volume.

Step 12 Create a "Metal Chain Color" layer. Use the "Hard Round Pressure Opacity" brush tool to apply gray as the base color.
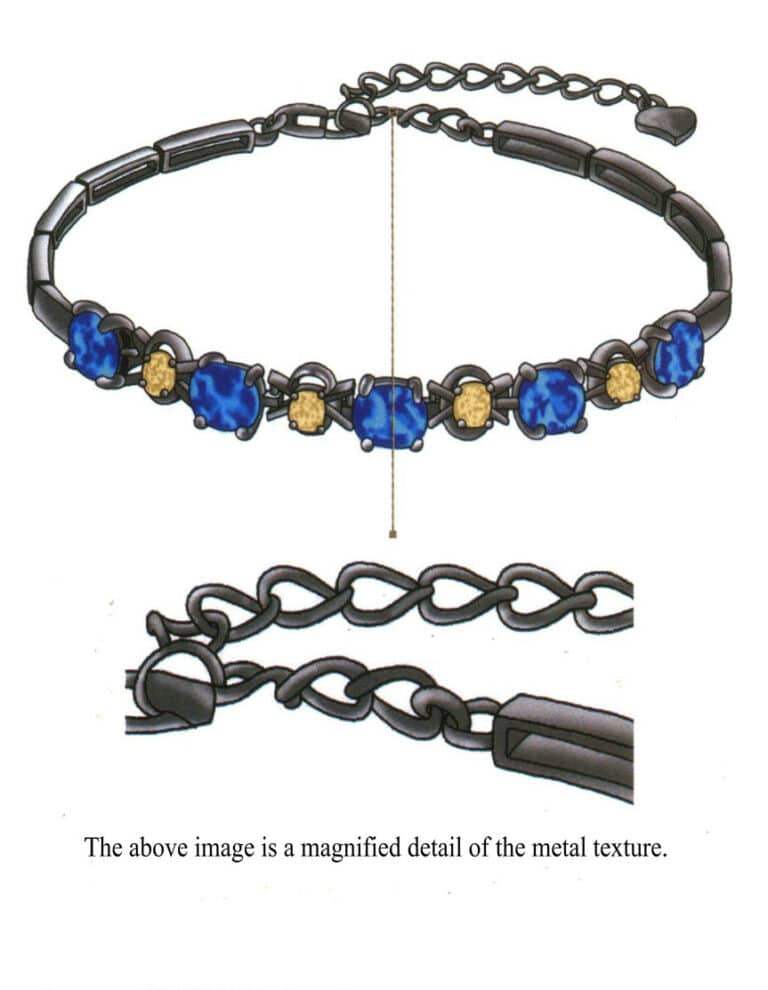
Step 12 Create a "Metal Chain Color" layer. Use the "Hard Round Pressure Opacity" brush tool to apply gray as the base color.

Step 13 Select the "Soft Round" brush tool. Reduce opacity to 75% and paint highlights/reflections on the metal chain based on the light source.
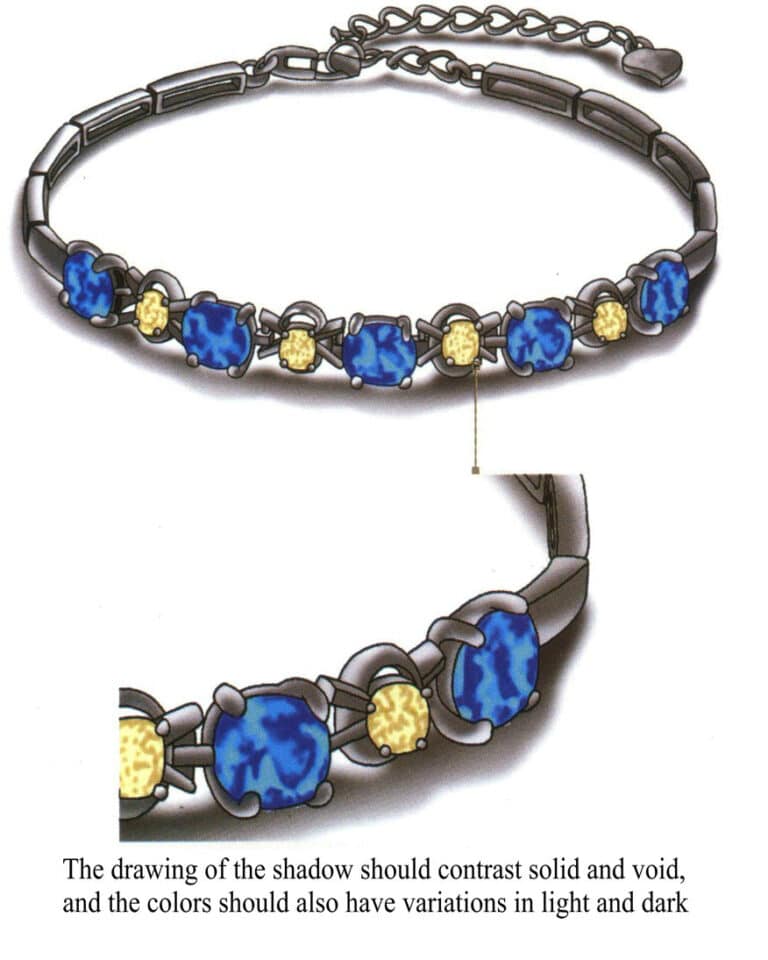
Step 13 Select the "Soft Round" brush tool. Reduce opacity to 75% and paint highlights/reflections on the metal chain based on the light source.

Step 14 Create a "Shadow" layer. Use the "Magic Wand" tool (check "Contiguous"), hold "Shift" to select inner/outer blank areas. Paint shadows with gray using the "Soft Round Pressure Opacity" brush tool. Adjust and complete the artwork.

Step 14 Create a "Shadow" layer. Use the "Magic Wand" tool (check "Contiguous"), hold "Shift" to select inner/outer blank areas. Paint shadows with gray using the "Soft Round Pressure Opacity" brush tool. Adjust and complete the artwork.

5.6 Drawing the Earrings Rendering with a Graphics Tablet

Step 01 Create a “Draft Reference” layer. Select the “Pencil” brush tool and set the brush size to 6 pixels. Roughly sketch the bracelet composition with black.

Step 02 Lower the “Draft Reference” layer’s opacity. Create a “Line Art” layer. Use the “Hard Round Pressure Opacity” brush tool to outline the left earring’s hook connector.
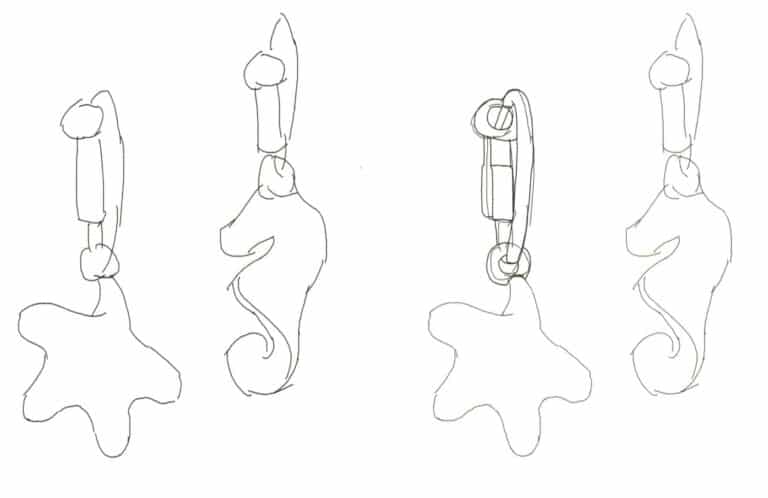
Step 01 Create a "Draft Reference" layer. Select the "Pencil" brush tool and set the brush size to 6 pixels. Roughly sketch the bracelet composition with black. Step 02 Lower the "Draft Reference" layer’s opacity. Create a "Line Art" layer. Use the "Hard Round Pressure Opacity" brush tool to outline the left earring’s hook connector.

Step 03 Draw the left earring pendant’s curves with loose lines and refine its internal structure.

Step 04 Continue outlining the contour of the right seahorse-shaped earring.
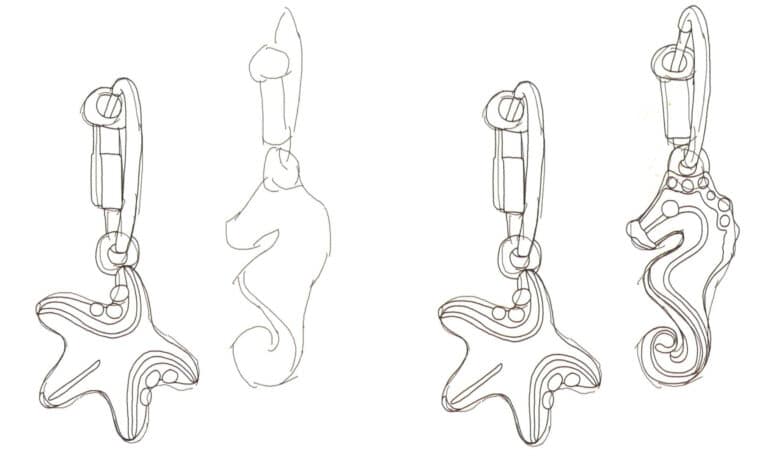
Step 03 Draw the left earring pendant’s curves with loose lines and refine its internal structure. Step 04 Continue outlining the contour of the right seahorse-shaped earring.

Step 05 Hide the “Draft Reference” layer. Adjust and refine local details of the line art.

Step 06 Create a “Left Earring Metal” layer set to “Multiply” blending mode. Apply yellow ochre as the hook’s base color.
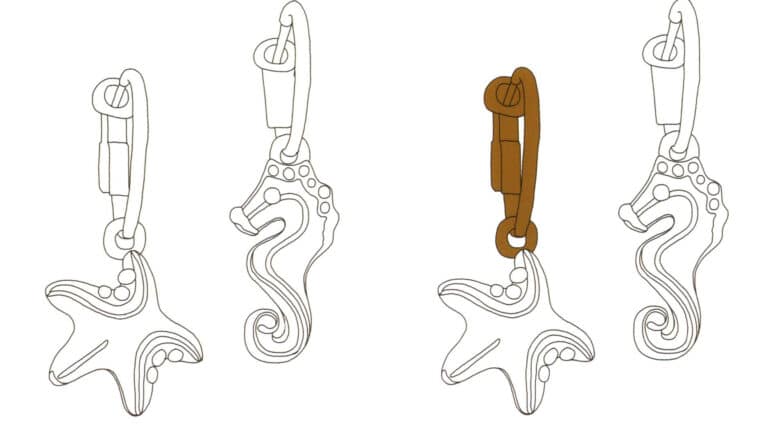
Step 05 Hide the "Draft Reference" layer. Adjust and refine local details of the line art. Step 06 Create a "Left Earring Metal" layer set to "Multiply" blending mode. Apply yellow ochre as the hook’s base color.

Step 07 Paint shadows with dark brown. Use the “Soft Round Opacity” brush tool to add metallic highlights.

Step 08 Repeat the method to color metal parts on the left earring’s pendant.
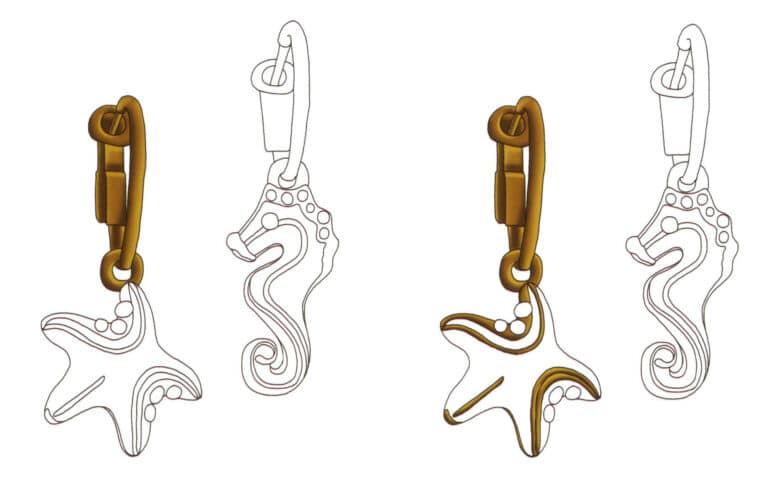
Step 07 Paint shadows with dark brown. Use the "Soft Round Opacity" brush tool to add metallic highlights. Step 08 Repeat the method to color metal parts on the left earring’s pendant.

Step 09 Create a “Left Earring Pendant Color” layer set to “Multiply”. Apply cyan as the starfish pendant’s base color.

Step 10 Use darker cyan for shadows and white for highlights to create three-dimensionality and spatial depth.
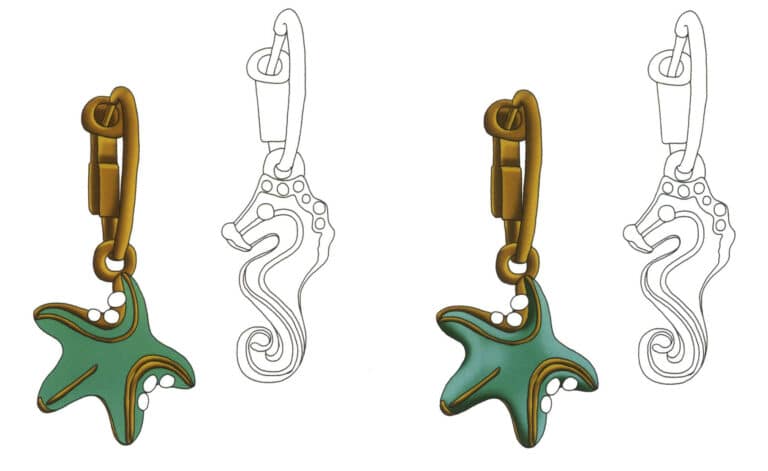
Step 09 Create a "Left Earring Pendant Color" layer set to "Multiply". Apply cyan as the starfish pendant’s base color. Step 10 Use darker cyan for shadows and white for highlights to create three-dimensionality and spatial depth.

Step 11 Create a “Right Earring Metal” layer. Apply yellow ochre as the base color for the right earring’s metal parts.

Step 12 Use the same colors and methods as the left earring to paint shadows and highlights and model volume.
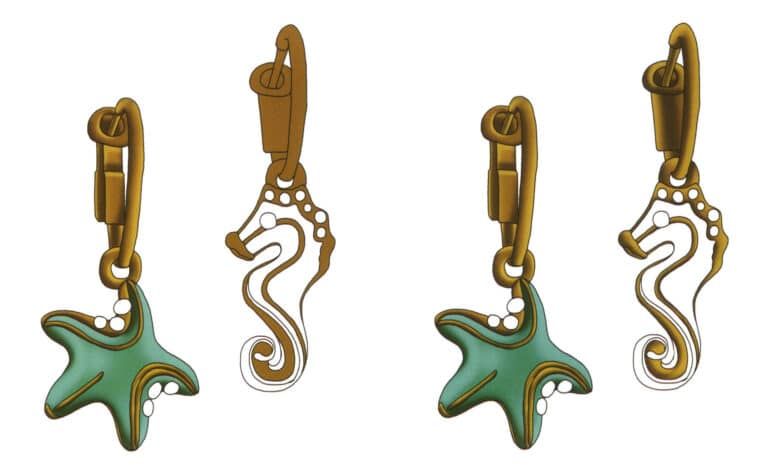
Step 11 Create a "Right Earring Metal" layer. Apply yellow ochre as the base color for the right earring’s metal parts. Step 12 Use the same colors and methods as the left earring to paint shadows and highlights and model volume.

Step 13 Create a “Right Earring Pendant Color” layer. Continue coloring the right seahorse-shaped pendant.

Step 14 Create a “Pearl Color” layer. Apply magenta as the pearls’ base color. Define shadows/highlights. Finalize by adjusting the overall light-dark contrast and color balance to complete.

Krok 13 Utwórz warstwę "Right Earring Pendant Color". Kontynuuj kolorowanie prawej zawieszki w kształcie konika morskiego. Krok 14 Utwórz warstwę "Pearl Color". Zastosuj magentę jako podstawowy kolor pereł. Zdefiniuj cienie/podświetlenia. Zakończ, dostosowując ogólny kontrast jasno-ciemny i balans kolorów.
Zdjęcie Hemana
Heman

Ekspert ds. produktów jubilerskich --- 12 lat bogatego doświadczenia

Cześć Drogi,

Jestem Heman, tata i bohater dwójki wspaniałych dzieci. Cieszę się, że mogę podzielić się moim doświadczeniem jako ekspert w dziedzinie produktów jubilerskich. Od 2010 roku obsługiwałem 29 klientów z całego świata, takich jak Hiphopbling i Silverplanet, pomagając im i wspierając ich w kreatywnym projektowaniu biżuterii, rozwoju produktów jubilerskich i produkcji.

Jeśli masz jakiekolwiek pytania dotyczące produktu jubilerskiego, zadzwoń lub napisz do mnie, a omówimy odpowiednie rozwiązanie dla Ciebie, a otrzymasz bezpłatne próbki biżuterii, aby sprawdzić kunszt i szczegóły jakości biżuterii.

Rozwijajmy się razem!

Dodaj komentarz

Twój adres e-mail nie zostanie opublikowany. Wymagane pola są oznaczone *

Kategorie postów

Potrzebujesz wsparcia w produkcji biżuterii?

Wyślij zapytanie do Sobling
202407 heman - Ekspert ds. produktów jubilerskich
Heman

Ekspert ds. produktów jubilerskich

Cześć Drogi,

Jestem Heman, tata i bohater dwójki wspaniałych dzieci. Cieszę się, że mogę podzielić się moim doświadczeniem jako ekspert w dziedzinie produktów jubilerskich. Od 2010 roku obsługiwałem 29 klientów z całego świata, takich jak Hiphopbling i Silverplanet, pomagając im i wspierając ich w kreatywnym projektowaniu biżuterii, rozwoju produktów jubilerskich i produkcji.

Jeśli masz jakiekolwiek pytania dotyczące produktu jubilerskiego, zadzwoń lub napisz do mnie, a omówimy odpowiednie rozwiązanie dla Ciebie, a otrzymasz bezpłatne próbki biżuterii, aby sprawdzić kunszt i szczegóły jakości biżuterii.

Rozwijajmy się razem!

Podążaj za mną

Dlaczego warto wybrać Sobling?

Członkowie zespołu Sobling Producent i fabryka biżuterii srebrnej
CERTYFIKATY

Sobling przestrzega standardów jakości

Sobling jest zgodny z certyfikatami jakości TUV CNAS CTC

Najnowsze posty

Technologia SLA 3D steruje drukarkami 3D

Technologia druku 3D wykorzystywana w produkcji biżuterii - Współczesna technologia formowania oparta na danych

Przekształć swoje projekty biżuterii za pomocą druku 3D i technologii CNC! Dowiedz się, jak korzystać z fajnego oprogramowania, takiego jak JeweICAD i Rhinoceros, aby tworzyć szczegółowe modele woskowe i metalowe elementy. Przygotuj się na tworzenie niestandardowej, opłacalnej biżuterii, która jest gotowa na przyszłość.

Czytaj więcej "
where to find the world's largest diamonds

Where to Find the World’s Largest Diamonds?

This guide details the world’s largest rough diamonds over 400 carats. Discover giant stones like Sewelô (1758 ct) from Botswana, Lesotho’s Legend (910 ct), and Sierra Leone’s Star (969.8 ct). Learn about their discovery in mines, cutting into polished gems, D color, high clarity, and famous buyers. Essential for jewelry professionals sourcing exceptional diamonds for custom designs and retail.

Czytaj więcej "
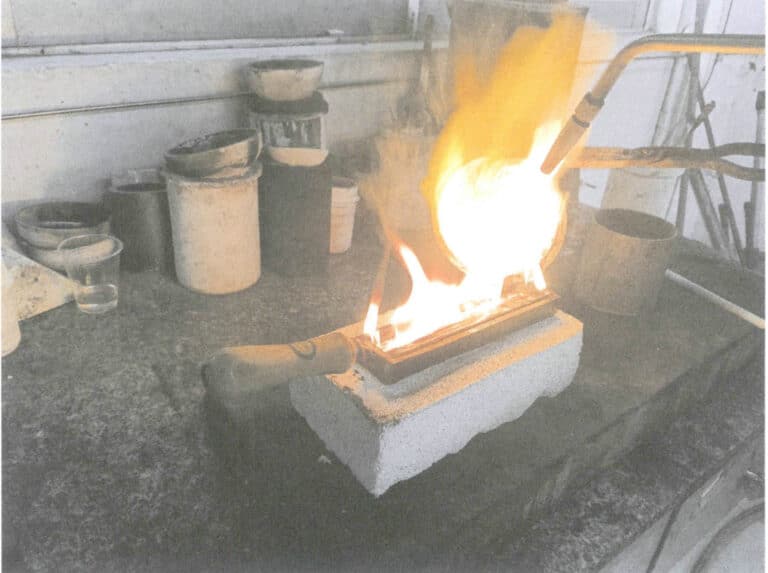
Rysunek 6-25 Wylewanie wlewka

Co należy wiedzieć o wstępnym topieniu metalu w procesie odlewania biżuterii

Dowiedz się, jak topić metale na biżuterię jak profesjonalista! Ten przewodnik obejmuje kluczowe techniki, takie jak topienie palnikiem i indukcyjne, pomagając w tworzeniu doskonałych stopów. Jest to świetne rozwiązanie dla sklepów jubilerskich, studiów, marek, projektantów i celebrytów, którzy chcą mieć niestandardowe elementy. Uzyskaj wskazówki dotyczące obchodzenia się ze złotem, srebrem i platyną, aby tworzyć piękną biżuterię wysokiej jakości.

Czytaj więcej "
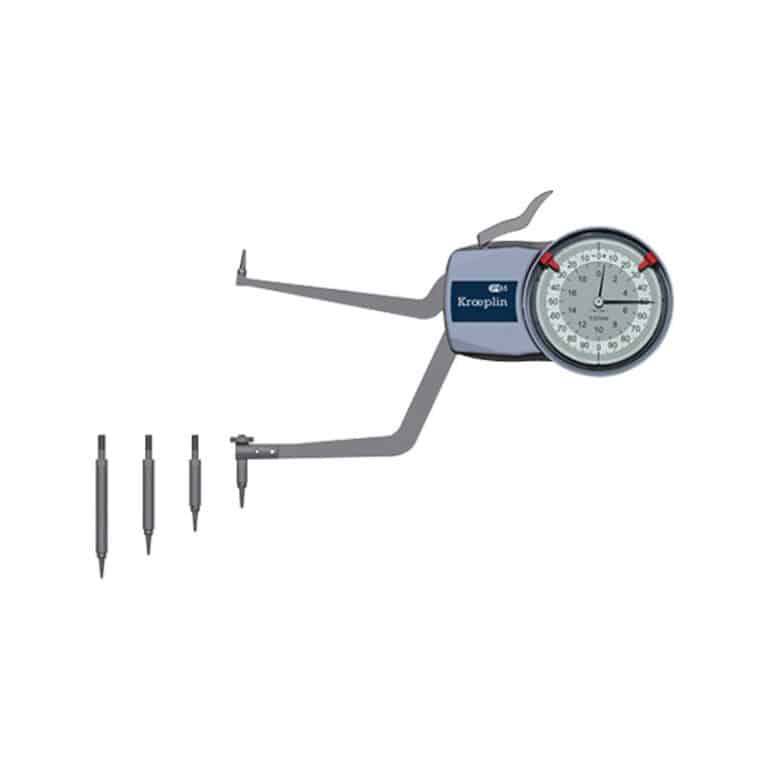
Miernik średnicy wewnętrznej

Przyrządy do kontroli jakości i sprzęt wykorzystywany w produkcji biżuterii

Zapoznaj się z naszym przewodnikiem po narzędziach, dzięki którym Twoja biżuteria będzie wyglądać idealnie! Opisujemy, w jaki sposób suwmiarki, mikroskopy, a nawet mierniki pierścieni pomagają zapewnić, że każdy element jest idealny. Dowiedz się, jakich sztuczek używają profesjonaliści, aby dostrzec wady i zachować blask.

Czytaj więcej "
Złota bransoletka nanmu

Odkryj ponadczasowy urok drewnianych ozdób wykonanych z najlepszych naturalnych materiałów

Odkryj piękno drewnianych ozdób wykonanych z rzadkich gatunków drewna, takich jak agarwood, huanghuali i palisander. Dowiedz się o ich unikalnych cechach i sposobie tworzenia oszałamiającej biżuterii. Od starożytnego zatopionego drewna po skamieniałe drewno, każdy kawałek opowiada historię. Idealny dla sklepów jubilerskich, projektantów i sprzedawców e-commerce, którzy chcą dodać naturalną elegancję do swoich kolekcji.

Czytaj więcej "
Jak testować i odzyskiwać złocenia do biżuterii

Jak przetestować i odzyskać pozłacanie biżuterii?

W artykule omówiono metody testowania grubości powłoki złota, twardości, naprężeń wewnętrznych i odporności na zużycie. Wyjaśnia również odzyskiwanie złota z odpadów dla producentów biżuterii. Poznaj techniki mikroskopowe, chemiczne i rentgenowskie. Idealny dla sklepów jubilerskich, studiów, marek, sprzedawców detalicznych, projektantów i sprzedawców internetowych.

Czytaj więcej "
Rysunek 6-5-4 Zmontowana muszla małży 2

Wprowadzenie do muszli i masy perłowej - 6 rodzajów wyglądu przypominającego perły bez warstwy perłowej

Odkryj tajemnice klejnotów organicznych, takich jak konchy, melo, perły abalone i muszle. Dowiedz się więcej na temat ich naturalnego formowania, koloru, połysku i tego, jak są cenione w świecie biżuterii. Niezależnie od tego, czy jesteś projektantem, sprzedawcą detalicznym, czy po prostu kochasz wyjątkową biżuterię, ten przewodnik jest dla Ciebie. Uzyskaj wgląd w te piękne, rzadkie skarby z morza.

Czytaj więcej "

10% Off !!!

We wszystkich przypadkach pierwszego rzędu

Dołącz do naszego newslettera

Subskrybuj i otrzymuj najnowsze informacje i oferty!

Producent biżuterii Sobling uzyskaj wycenę swojej biżuterii
Ostateczny przewodnik po sourcingu - 10 wskazówek, które pozwolą zaoszczędzić miliony na pozyskiwaniu nowych dostawców
Bezpłatne pobieranie

Kompletny przewodnik po pozyskiwaniu klientów biznesowych

10 cennych wskazówek może zaoszczędzić miliony na pozyskiwaniu biżuterii od nowych dostawców
Producent biżuterii Sobling bezpłatne dostosowywanie projektów biżuterii

Fabryka biżuterii, personalizacja biżuterii, fabryka biżuterii Moissanite, biżuteria z mosiądzu miedzianego, biżuteria półszlachetna, biżuteria z klejnotów syntetycznych, biżuteria z pereł słodkowodnych, biżuteria CZ ze srebra szterlingowego, personalizacja klejnotów półszlachetnych, biżuteria z klejnotów syntetycznych