Unlocking Jewelry Crafting: A Guide to Casting & Stamping Techniques
Making methods and process of Jewelry casting & Jewelry stamping
Introduction:
The commonly used jewelry-forming processes are divided into two main categories: one is casting, which involves creating a mold cavity, injecting heated and melted metal into the cavity, and waiting for the temperature to drop so that the metal solidifies, thus obtaining the corresponding metal shape according to the mold. This method is usually called casting or pouring, involving chemistry, mechanics, and physics knowledge. It is a liquid-forming technology; the other is stamping, which consists of making a steel mold for the jewelry and then using mechanical stamping to shape it.

Common forming processes include lost-wax casting, cuttlefish bone casting, sand casting, hollow electroforming, mechanical stamping, and ceramic mold casting. Among them, lost-wax casting is currently the most commonly used jewelry casting process, while cuttlefish bone casting and sand casting are suitable for small designer studios. Hollow electroforming is suitable for making larger jewelry and decorative items, mechanical stamping is suitable for mass commercial jewelry processing, and ceramic mold casting was used in ancient Shang and Zhou dynasties for casting bronze vessels.
Table of Contents
Section I Lost-wax Casting
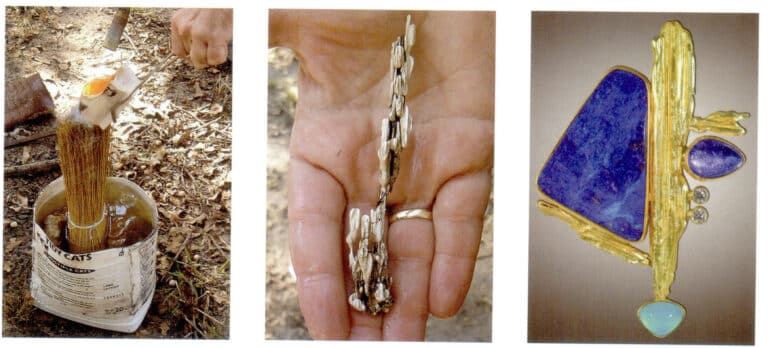
Lost-wax casting, abbreviated as the lost-wax method, as the name suggests, involves removing the “wax” to obtain the cast shape. Due to wax’s low melting point, it can be removed through burnout. Other materials with relatively low melting points, such as nylon and resin models made using today’s commonly used 3D printing technology, can also be cast using the same method. Some artists wish to replicate the textures of nature by casting items like insect specimens, nuts, and branches using the principles of lost wax casting, which can yield excellent results.


The lost wax casting method is a widely used and mature refined casting technique. Its invention significantly improved the precision of castings, allowing for many intricate settings and lifelike shapes to be completed through lost wax casting.
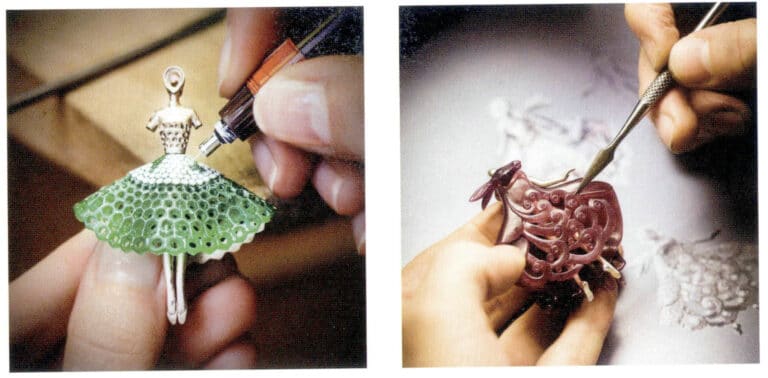
1. The primary Process of lost-wax casting
1.1 Master mold making
Model making is also the first sample of model production, commonly made from materials such as silver, copper, and jewelry wax. Considering issues like shrinkage and loss during later casting, if the model is made from wax, the volume produced is generally more significant than the final volume cast in metal 5% -10% to ensure that the final product is closer to the design specifications.
Suppose the model is made from metals like silver or copper. In that case, it is necessary to create a rubber mold by pressing the mold, cutting it, and opening it, then using a vacuum wax injector to inject wax into the rubber mold, allowing for the creation of identical wax models that can be replicated. Once the wax model is prepared, lost-wax casting can proceed, allowing for commercial mass replication.
Jewelry. Suppose the material of the jewelry master mold is wax or low melting point materials like nylon or resin. In that case, you can skip pressing the rubber mold, cast the metal product using the lost wax method, and then use the mold-making method to attain the rubber mold.
When creating the jewelry master mold, it is important to note that if you plan to make a mold and cast metal later, the thinnest part of the jewelry model should not be less than 0.2 mm. If there are no special requirements, the thickness should be kept above 0.5 mm as much as possible. This is because the casting limit is 0.2 mm; if it is too thin, the molten metal will not easily flow into fine areas, which may ultimately lead to incomplete cast objects.




1.2 Welding the Sprue
When welding the pouring gate, choosing the best sprue position for the casting is important, considering whether it is conducive to polishing after the casting is completed. The flow rate should be maximized while not damaging the exquisite jewelry shape.
1.3 Planting wax trees (investment casting)
Connect the prepared jewelry wax model to a cylinder; at this point, the shape resembles a small tree, so investment casting is often referred to as planting a wax tree. The roots of the wax tree correspond to the pouring gate, the trunk is the main pouring channel, the Sprue is the secondary pouring channel, and the wax of the casting is like the fruit. Items cast from a wax tree that conform to flow patterns will have higher precision. It is important to note that in jewelry processing and casting, in order to better control costs, a Flask of wax models will be gathered for wax tree planting, and the works cast in the same Flask can only choose the same metal.
During operation, it is important to note that the Sprue should be smooth and have no sharp angles or curves. The junction between the Sprue and the branches and trunk of the wax model should be as smooth as possible. If the wax model has a complex shape, multiple Sprues can be set up for assistance. The length of the branch Sprues should generally be at most 15 mm to avoid rapid cooling during the casting process, and the main sprues should be at most 7 mm.
Secondly, when planting the wax tree, the wax models should be evenly distributed on the branches according to their shape, size, and type, paying attention to the center of gravity and balance of the wax tree. Each wax model should be close enough to each other, leaving at least a 2 mm gap. There should be at least a 5 mm gap between the planted wax tree and the outer wall of the gypsum flask and about a 10 mm distance between the wax tree and the bottom of the gypsum flask. If the distance is too close, the subsequent production of the gypsum mold may cause the cavity wall of the model to be too thin, leading to cracking. Furthermore, the wax tree should be properly cleaned, with no stains or impurities left. Finally, after planting the wax tree, it must be weighed and recorded to calculate the corresponding metal weight during casting.
Generally, the specific gravity ratio of metal to wax is as follows:
| Metal Type | 1 gram Wax model = Metal weight after casting |
|---|---|
| Sterling Silver | 10 grams |
| 24K Gold | 20 grams |
| 18K Gold | 16 grams |
| 14K Gold | 14 grams |
| 10K Gold | 10 grams |
1.4 gypsum Investment
Place the wax tree into the steel casting flask, which can be a centrifugal casting cylinder (without holes) or a vacuum casting flask (with shoulders and holes). The grouting material used for making gypsum molds is made from
Vacuum machine 25% -30% calcined gypsum powder mixed with calcite, quartz sand, reducing agents, and solidifying additives. This mixed casting powder must meet fire resistance, high-temperature resistance, low thermal expansion rate, and a smooth surface of the castings that are easy to de-mold, referred to in the industry as fire-resistant casting powder slurry material.
The mixing ratio of casting powder to water is approximately 38-40g for every 100g of powder, and the water temperature should be controlled between 21-27℃. If it is too high, it will accelerate the solidification time; if too low, it will prolong the solidification time. After mixing the powder and water, solidification begins. Generally, the casting powder should be mixed into slurry and poured into the steel casting cylinder within 9 ~ 10 minutes. If the time is longer, the powder and water will not mix sufficiently; if too long, it will affect the fluidity of the casting slurry, potentially leading to the loss of details in the castings.
Different brands of casting powder should be used according to their respective product manuals for mixing ratios.
1.5 Vacuum Treatment (Vacuum Pumping)
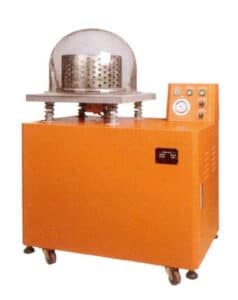
Vacuum treatment, also known as the vacuum de-bubbling step, uses a vacuum pump to remove bubbles generated during the grouting Process due to air adhesion, effectively reducing the probability of sand holes and defects appearing on the casting during metal pouring. Typically, two vacuum treatments are required.
1.6 Wax Loss Burnout
The wax loss process is divided into steam wax loss and burnout furnace wax loss, which is more commonly used. After the casting slurry hardens, the casting cylinder is placed in the burnout furnace for heating. Due to the low melting point of the wax, the wax will melt and flow out from the cavity, leaving a negative shape, which becomes a gypsum mold and prepares for pouring the molten metal.
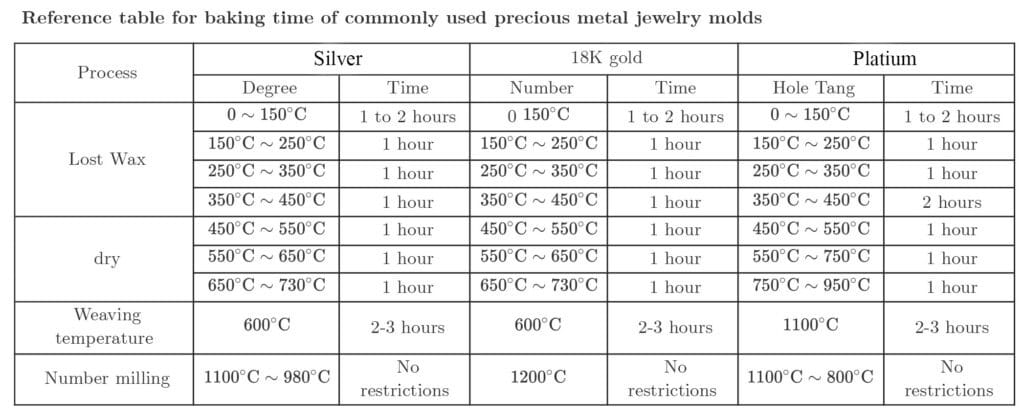
There are a few points to note during this operation. First, the gypsum mold should be placed with the pouring gate facing down during the wax loss operation. Second, the temperature of the burnout furnace can reach around 1000℃, but the actual temperature should be adjusted according to the metal material being cast. If casting K gold products (gold, silver, copper), it should be maintained within 750℃. If casting platinum products, the temperature should reach 950-1000℃. Third, the temperature needs to be gradually increased during heating. After reaching the highest temperature, it should be maintained for about 3 hours to ensure a more uniform temperature of the gypsum mold inside the furnace, after which the temperature of the gypsum mold should be allowed to drop to the optimal level.
The purpose of burnout is to increase the strength of the mold shell and to bring the temperature of the mold closer to the temperature during metal melting so that during casting, the metal will not cool too quickly and cause sand holes, pitting, and other defects. Before casting, it is necessary to control the temperature of the molten metal; insufficient temperature can lead to uneven melting of the metal, affecting the casting effect; too high a temperature can cause elements with lower melting points, such as copper and zinc, to evaporate, resulting in sand holes.
1.7 Melting and Casting
Standard jewelry casting methods include pouring, centrifugal casting, vacuum centrifugal casting, vacuum pressure casting, and negative pressure suction casting. Casting can be divided into two parts from a process perspective: one is melting, and the other is casting.
Melting: Accurately weigh the required metals and the filler (a term used in alloy preparation. For example, to melt 18K gold, 75% of the weight must be pure gold 999, and the remaining 25% metals are relatively cheaper metals like copper and silver used as molten mixed materials, which are heated and fused. This 25% weight of molten mixed alloy is called filler. They can be cast after evenly mixing and melting the two metals in the melting pot. To achieve the desired effect in the cast items, it is essential to understand the melting points and characteristics of the metals used, commonly referred to as mastering the heat, and to control the temperature based on the melting points and characteristics of different metal ratios.
The semi-liquid metal solution appears to have fluidity. Still, it needs to be sufficiently heated, which may lead to cooling pits in the cast products, and more seriously, it may result in incomplete casting of the products. The practical components evaporate if the metal melt is overheated, leading to overheating pits. Therefore, mastering the appropriate temperature can keep the metal melt in good fluidity, merging into a completely liquid state, which is closely related to the experience of the operators.
Casting: The types of casting processes are divided into two main categories.
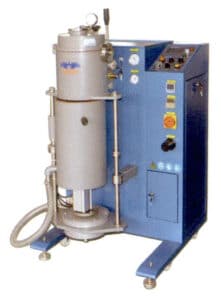
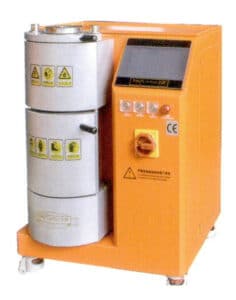
One category involves injecting molten metal into gypsum molds using vacuum casting machines, which consists of two steps: melting and casting;
the other category uses more advanced vacuum centrifugal casting machines or vacuum pressure casting machines for processing. This method can combine the melting and casting processes into one. These casting machines use pressure, vacuum, and centrifugal force to ensure that the molten metal fills all the mold details, which can reduce sand holes in the items and improve the surface finish.
Currently, the first type of casting process is relatively common in market applications and is more suitable for small to medium-sized jewelry processing workshops; the second type of casting process is more refined, but the machines used are large and relatively expensive, resulting in lower market application.
1.8 Demolding and Cleaning (Blasting investment)
After casting, the casting cylinder must still be left for 15- 30 minutes. After slight cooling, demolding and cleaning can be performed, commonly known as blasting investment or water. If the operation is done too early, it may cause the casting to break; if done too late, it will lead to difficulties in demolding the gypsum, which is labor-intensive and time-consuming.
After the mold has cooled slightly, rinse it with tap water starting from the bottom. The metal casting will separate from most of the gypsum mold upon encountering cold water. Then, a high-pressure water gun is used to spray and rinse the casting, thoroughly cleaning the gypsum mold attached to the metal casting. Finally, soak the metal casting in a sulfuric acid or hydrofluoric acid solution to remove all fine impurities on the metal casting. It is important to choose different concentrations of the solution based on the type of metal, and the soaking time may vary. After soaking, remove the metal casting, rinse it thoroughly with clean water, and dry it. The steps for demolding and cleaning are then complete.
1.9 Removing the Sprue and Polishing the Mold
First, weigh the cleaned metal casting tree to facilitate the calculation of loss. Then, tools such as cutting pliers are used to cut off the metal objects on the metal casting tree, making sure to cut at a sprue position about 1.5 mm away from the metal casting to leave some space for subsequent operations like mold polishing.
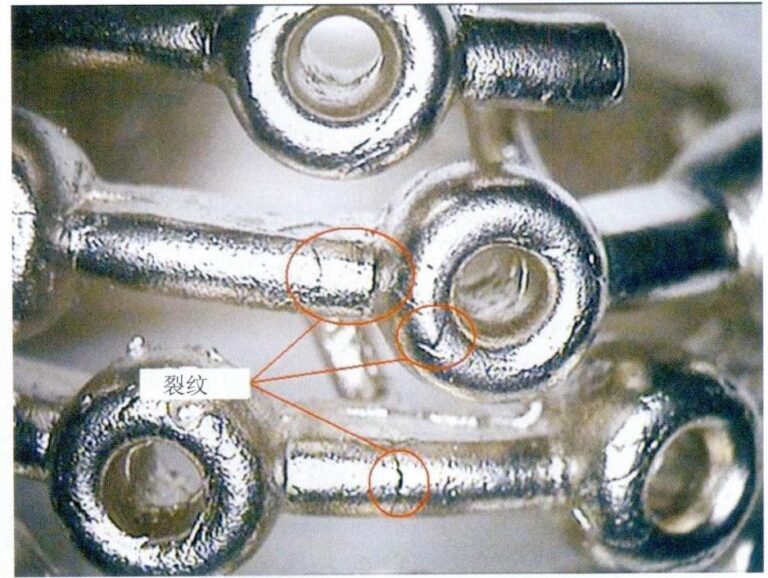
Conduct a quality inspection of the cut metal objects to check for issues such as sand holes, defects, cracks, deformation, and insufficient content, and classify them based on quality. Finally, sanding and polishing on the metal objects, removing sprue traces such as sprues, and conducting comprehensive surface refurbishment to present the desired state, thus completing the lost-wax casting process.
The operational details of the lost-wax casting method can be referred to in the appendix
Reference table for baking time of commonly used precious metal jewelry molds
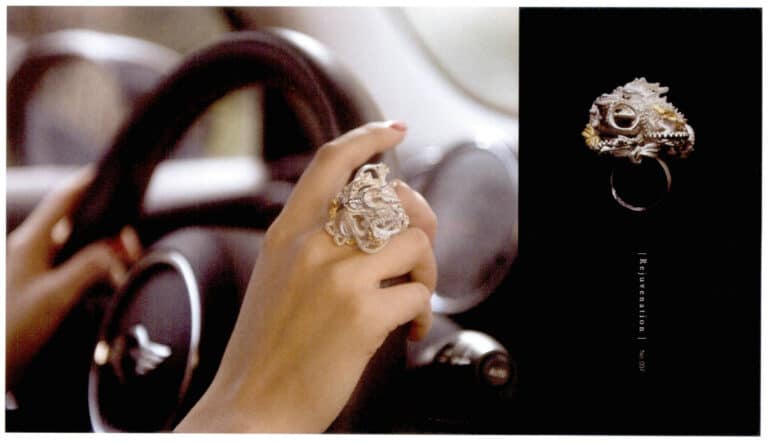
Case Study: The “Rejuvenation” series works comprise many defective “knockoff” copies of commercial jewelry wax molds that have been reassembled. Unique characteristics that the copies do not possess have been obtained by replicating the replicas. Various familiar classic brands overlap and obscure each other, dissolving the brands, values, and symbols they aim to replicate, allowing lifeless copies and worthless defects to gain a new life.

2. Specific Process for Jewelry Casting
2.1 Welding the Sprue

2.2 Planting the Wax Tree

2.3 Investment Process:
Mix the casting slurry; wrap the steel flask with newspaper and transparent tape to prevent the casting slurry from overflowing; place the wax tree along with the base into the steel flask, and slowly pour the prepared casting slurry into the steel flask, ensuring the slurry covers the wax tree.
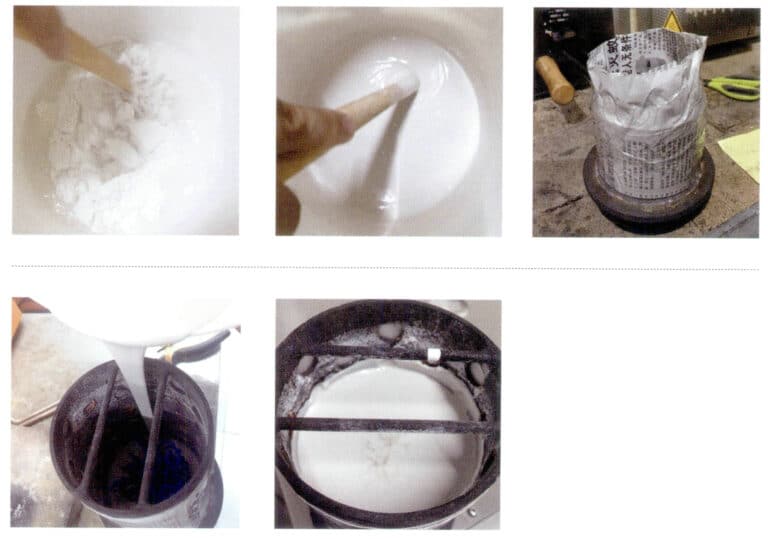
2.4 Vacuum treatment:
After the investment, it needs to be placed in the machine for vacuum degassing; after vacuuming, leave it for 6-12 hours to wait for the casting to solidify.
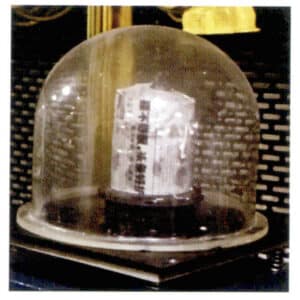
2.5 Wax loss burnout:
Bake the gypsum mold, de-wax, dry, and maintain temperature during casting.
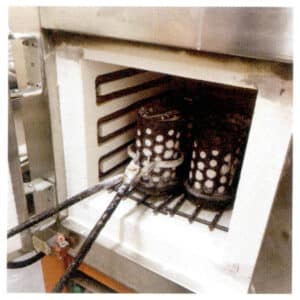
2.6 Melting and casting:
Melt the metal; inject the melted metal liquid, which has been proportioned, into the cavity from the water Sprue of the baked gypsum mold, and use a vacuum casting machine for casting.
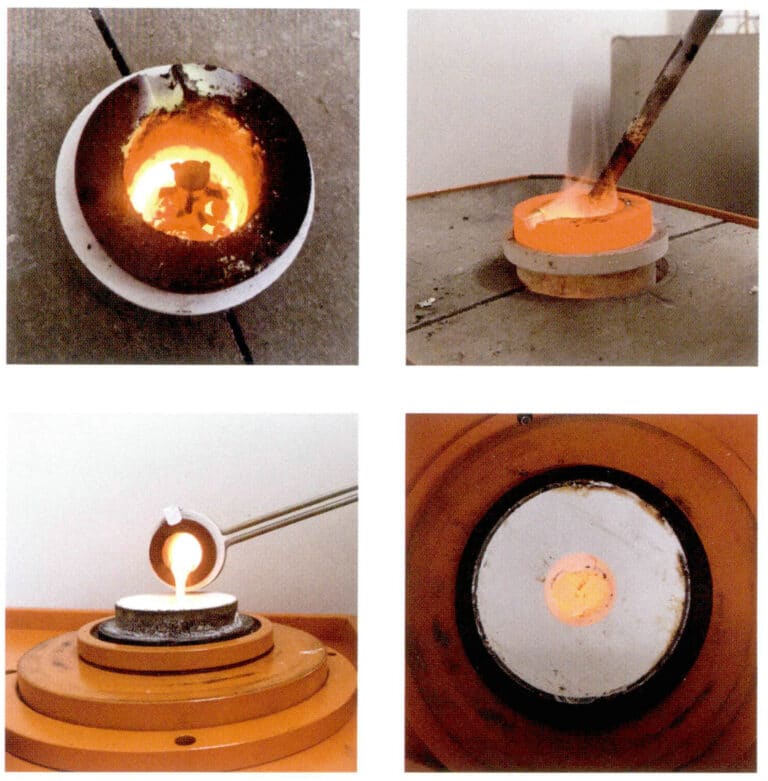
2.7 Demolding and cleaning (blasting investment):
After taking the mold out of the casting machine, leave it for 15 – 30 minutes to cool slightly, then place it in cold water for washing; the mold shrinks and cracks upon cooling, allowing the metal casting tree to be removed; use a steel brush to remove large pieces of gypsum, then rinse off the residual gypsum attached to the metal casting tree with a high-pressure water gun, and then soak it in sulfuric acid or hydrofluoric acid with a concentration of around 30% for about 10 minutes, finally clamp out the metal casting tree, rinse it with clean water, and dry it.

2.8 Finishing:
After the metal casting tree, after cleaning, the white color material is 925 silver, and the yellow color material is brass.

2.9 Mold polishing
Remove the Sprue, use pliers to cut the metal casting from the tree, and then various polishing and grinding tools can be used for mold polishing.

Reference table for baking time of precious metal jewelry molds in jewelry casting
Section II Cuttlefish Bone Casting Method
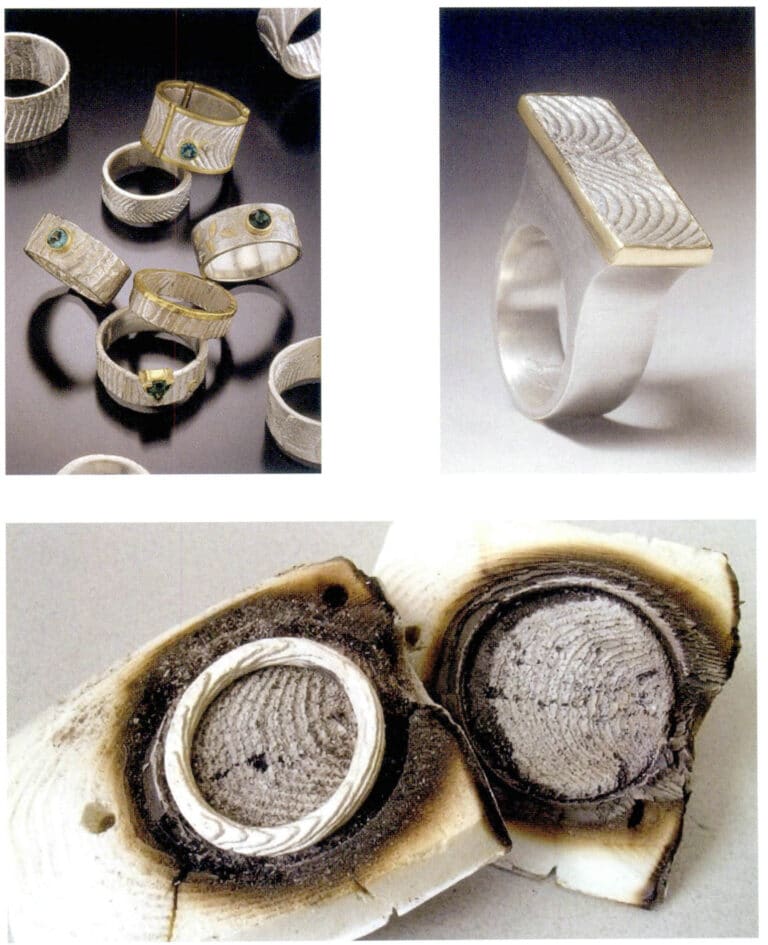
The cuttlefish bone casting method is an ancient technique introduced from the West. Compared to other methods, the cuttlefish bone casting process is convenient and easy to operate, making it suitable for small studios or designers. This method was also commonly used by ancient European craftsmen to cast jewelry with lower precision requirements. The texture of cuttlefish bone, resembling water patterns, is unique, and many jewelry creators love this natural and rugged feel. They also use this ancient casting method to preserve its original style in contemporary jewelry creation.
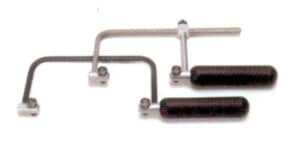
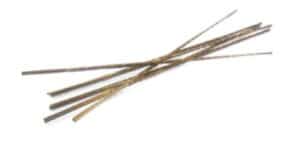
1. Essential tools and materials for cuttlefish bone casting.
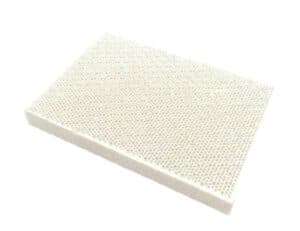
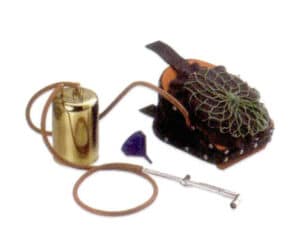
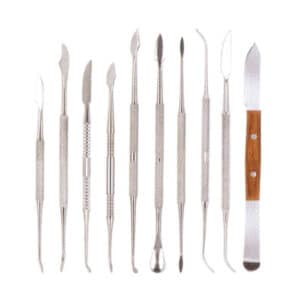
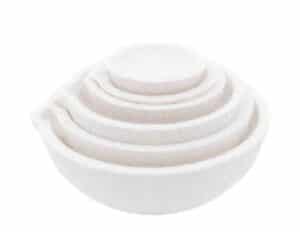
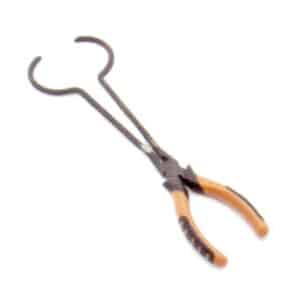
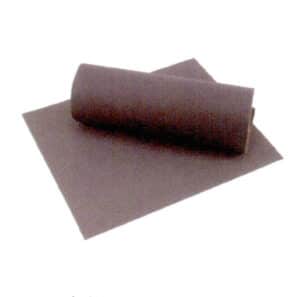
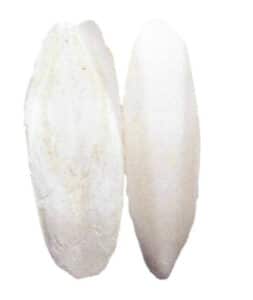
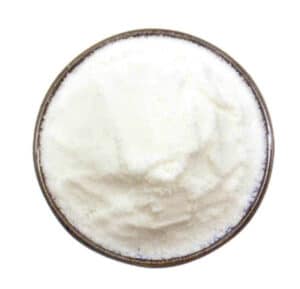
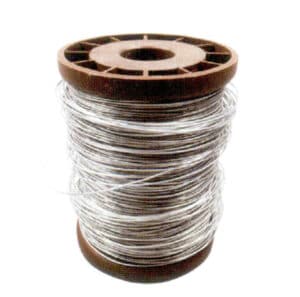
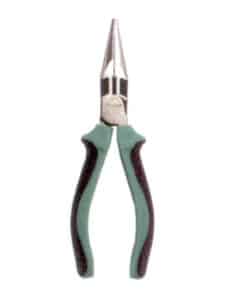
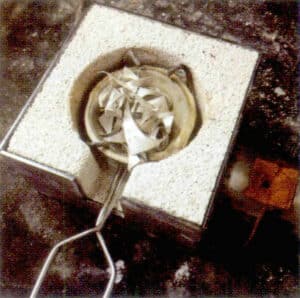

2. Basic Process of Cuttlefish Bone Casting (Demonstration by Gustavo Paradiso)
2.1 Take a piece of cuttlefish bone, cut it in half from the middle, and use sandpaper to smooth the inner sides of the two cut pieces.

2.2 Use a brush to remove the attached cuttlefish bone powder
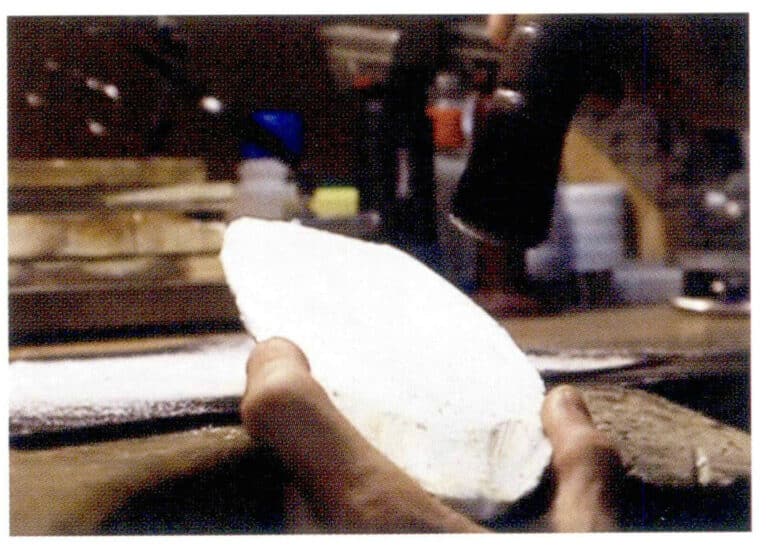
2.3 Combine the two trimmed cuttlefish bones and sew off the thickest section in the middle.

2.4 Use a pencil to mark the metal casting gate’s position on the cuttlefish bone’s cross-section.
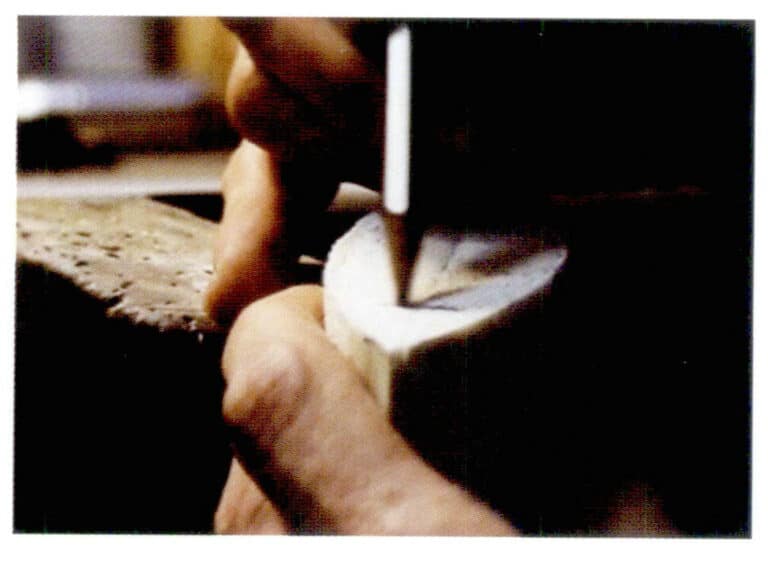
2.5 Press the item to be recast onto the polished surface of the cuttlefish bone. Due to the cuttlefish bone’s relatively soft and loose material, it will leave a relatively straightforward imprint. You can use an electric grinder or carving knife to refine the imprint if needed.
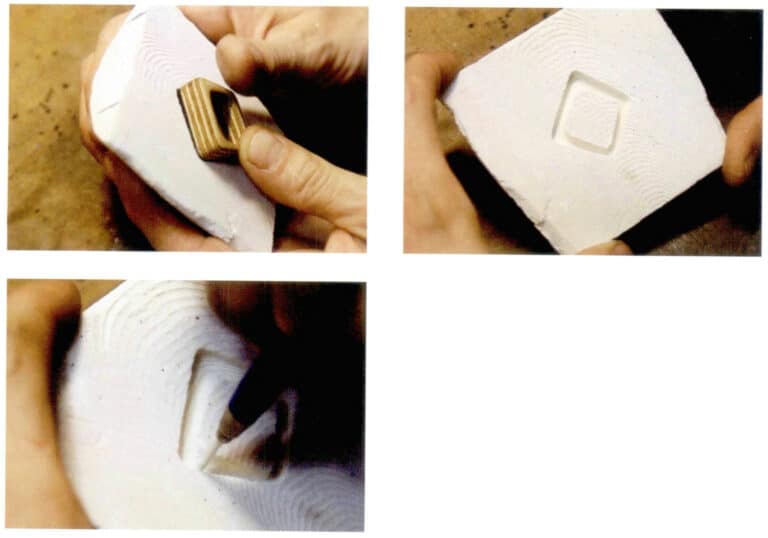
2.6 Carve a funnel-shaped channel at the top of the two cuttlefish bones, ensuring that both sides are symmetrical and tight.
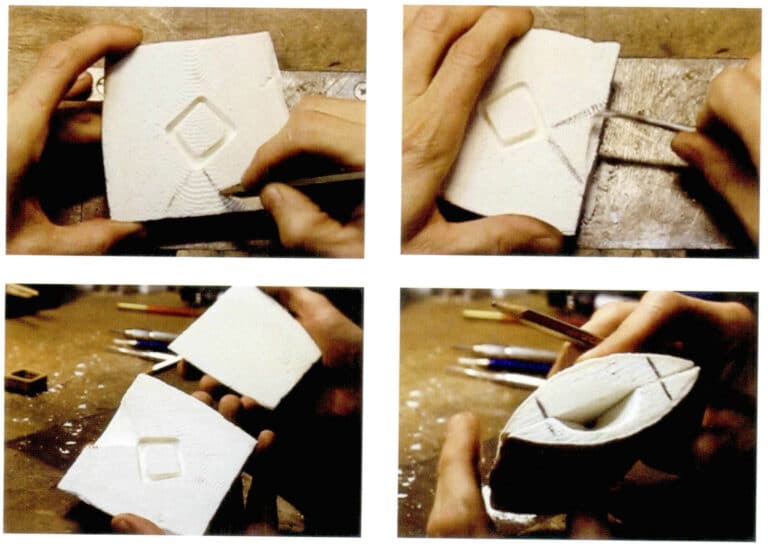
2.7 Fit the two cuttlefish bones together tightly, wrap them with metal wire to secure them, and place them on a welded brick
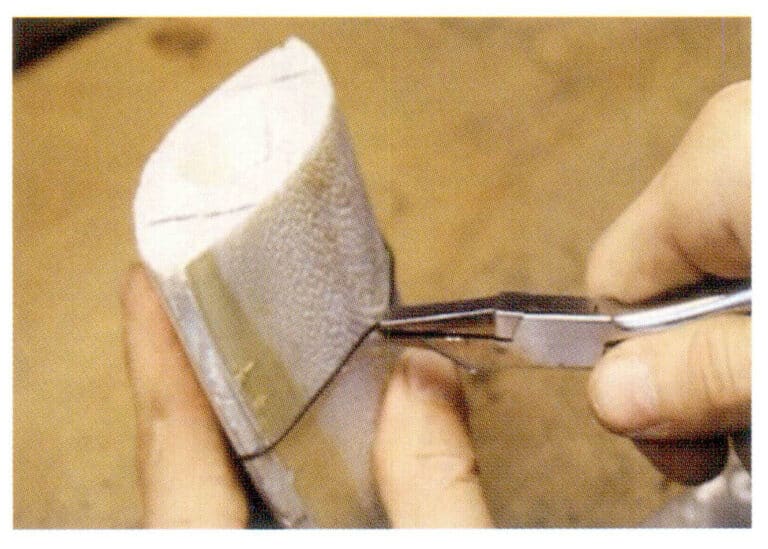
2.8 Take an appropriate amount of silver scraps and borax, place them in a crucible, and heat them with a torch. Once the silver melts, use tongs to hold the crucible and pour the molten metal into the squid bone mold.

2.9 After the squid bone and metal cool down, cut the metal wire. The squid bone will start to turn black from the casting center and can no longer be used; ensure it is completely cooled before removing the casting. If concerned about residual heat, it can be quickly cooled in cold water before removal. Then, a saw was cut off the metal at the pouring gate, and a file and other polishing tools were used to finish the casting. The entire squid bone casting process is now complete.

Section III Sand Casting Method
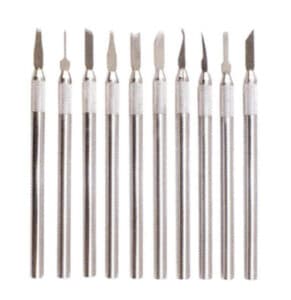
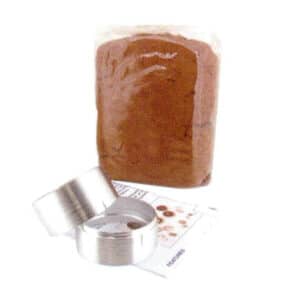
The sand casting method is an ancient casting technique that artisans worldwide have used for casting. This method is also a low-cost casting process that still plays a vital role in modern society. We use a Delphi sand casting device to cast jewelry or small items. This device consists of two aluminum interlocking circular frames, and the casting sand is a clay containing oil that cannot be carved. The principle of casting is to obtain a cavity by compressing the physical object and then pouring the metal. Hence, the sand casting method is more suitable for reproducing finished products. Small items with certain hardness, such as keys, buttons, shells, and bones, can all be reproduced using this Process.
1. Essential tools and materials for sand casting
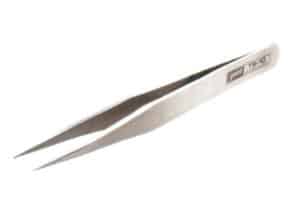
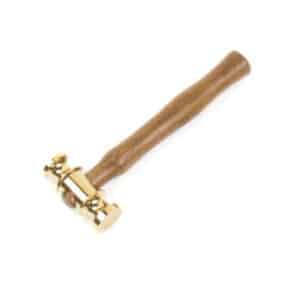
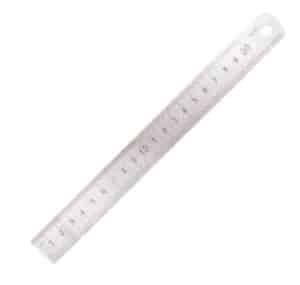
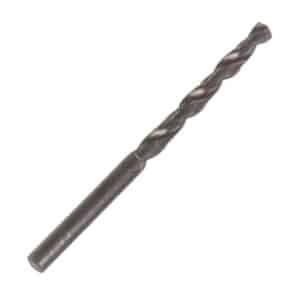



2. The basic Process of sand casting
The specific steps of the sand casting process can be summarized as core making, box assembly, casting, sand cleaning, and sprue removal.
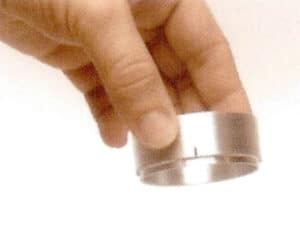
2.1 Take a shorter aluminum frame and place the raised edge facing down on a level table
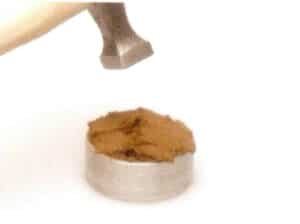
2.2 Fill the aluminum frame with Delphic clay and compact it with a hammer.
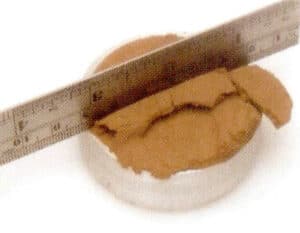
2.3 Use a ruler to scrape off the excess clay to flatten the entire surface.
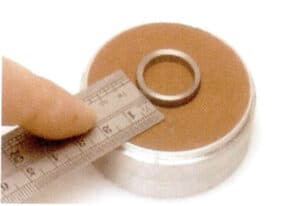
2.4 Turn the clay frame over, press half of the item to be cast into the clay, leaving the other half exposed, and finally smooth out the uneven clay.
Use a ruler to flatten the clay.
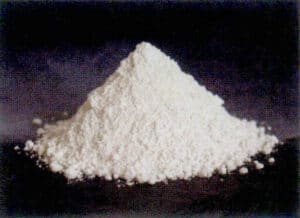
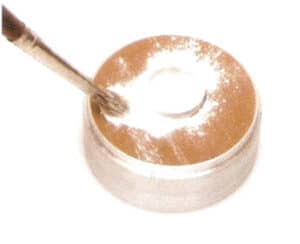
2.5 Evenly brush talcum powder on the finished clay frame’s surface to prevent the clay’s two sides from sticking together when closing the other half of the frame.
2.6 Cover with the other half of the aluminum frame, ensuring the scale lines on both sides are aligned.e facing down on a level table.
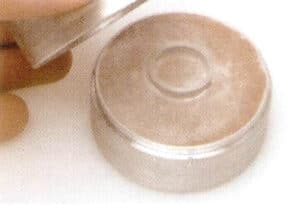
2.7 Fill the second aluminum frame with clay, compact it with a hammer, and finally scrape off the excess clay with a ruler
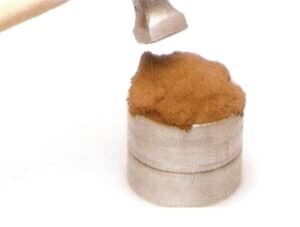
2.8 Separate the two aluminum frames and remember to align the scale line markings.
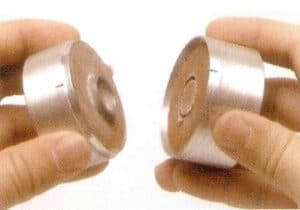
2.9 Carefully use tweezers to remove the item; if you encounter resistance, gently rotate the item before removing it.
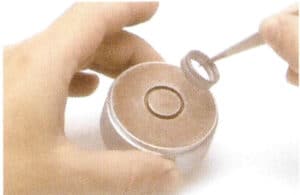
2.10 With a twist drill bit or a small rod from the casting cavity on the casting of a water outlet, pay attention to the water outlet needs to run through the entire clay layer; in the casting of the water outlet and then drilled through the opposite side of the three exhaust holes, and with a small carving knife in the clay planes dug out of the three channels, connecting the casting cavity and three small exhaust holes
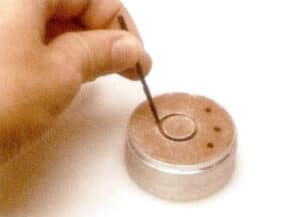
2.11 Use a small knife to carve a funnel shape at the casting Sprue and vent hole to facilitate the subsequent pouring of molten metal, and carefully clean up the clay debris generated during the operation.
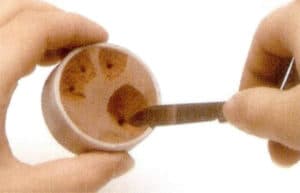
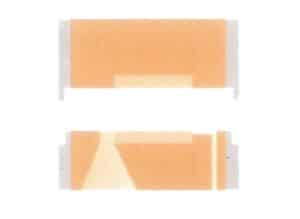
2.12 Cross-sectional diagram of the aluminum frame for casting; note that the funnel and channel of the casting Sprue should be directly connected to the casting cavity, and the channel should be smooth with a diameter of no less than 5 mm.
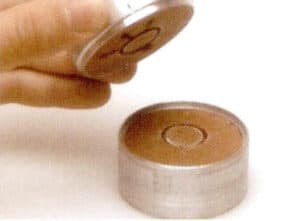
2.13 After aligning the two trimmed aluminum frames according to the marked signs, place them together on the fireproof surface of the safe operating table or on fireproof bricks, and prepare for casting
2.14 Estimate the required silver material, noting that the silver material in the Sprue must also be included; after placing the silver material and borax powder into the crucible, heat it until the silver material melts, then use crucible tongs to hold the crucible and pour the molten metal into the casting cavity from the Sprue.
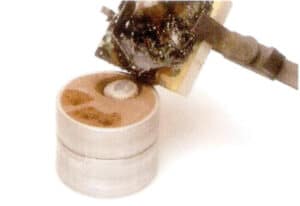
2.15 After casting is complete, wait for the entire frame to cool before opening it, remove the metal casting, rinse with clean water, and perform acid cleaning and other detailed cleaning. Then, use a saw to remove the Sprue, file down any excess parts, and proceed with a series of mold polishing. The cast item is then completed.
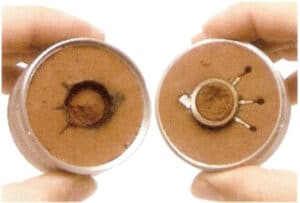
Section Ⅳ Hollow Electroforming Method
The hollow electroforming method is a fascinating technique for processing jewelry and crafts. Since the electroforming products are hollow in the middle, they are very light even if they are large, making them very suitable for creating larger jewelry and crafts. The hollow electroforming process has many similarities with the lost-wax casting process, but electroforming does not require the production of a plaster mold; it only requires a sensitization treatment of the wax mold surface with silver oil to make the surface conductive, and then it is placed in a special electroforming tank with electroforming solution for processing. After completion, it is placed in a steam furnace to melt away the wax mold, and finally, it is cleaned and polished to create jewelry. Some jewelry processing also skips the final steam mold removal process.
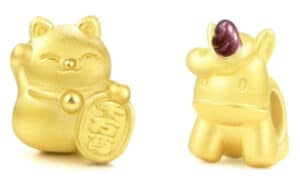
The popular processing method for 3D intricate gold jewelry on the market commonly uses the hollow nano electroforming method. Its production concept is very similar to the hollow electroforming method, but the core of the Process is to improve the gold content, pH value, working temperature, organic light agent content, and stirring speed in the electroforming solution, enhancing the hardness and wear resistance of the gold. The hardness of its products is four times that of traditional pure gold 999. Since the interior of 3D hard gold is hollow, the weight of jewelry of the same volume is only about 30% of that of traditional pure gold 999. 3D intricate gold jewelry is highly durable, wear-resistant, large in volume, and light in weight, making it very popular among everyone.
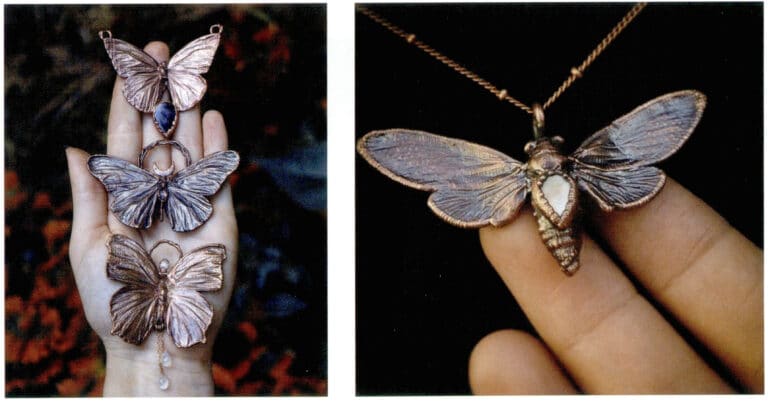
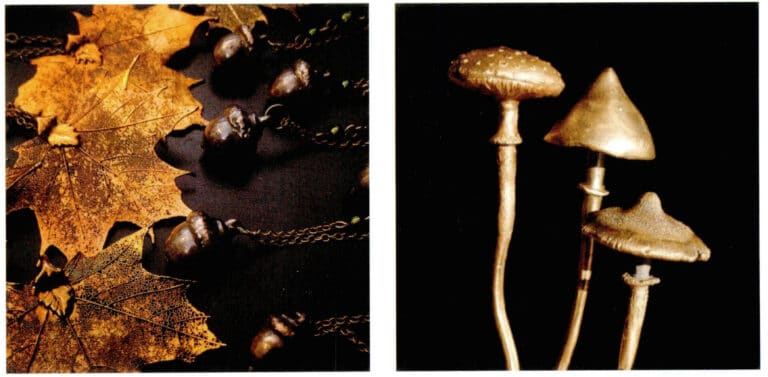
Some designers have also attempted to electroform after sensitizing materials such as insect specimens, leaves, and textiles. Due to the lower melting points of these materials, the internal substances can be removed using a steam furnace after electroforming, leaving only the electroformed part, resulting in a very realistic final effect. For example, electroformed leaves can vividly showcase their veins, achieving high realism.
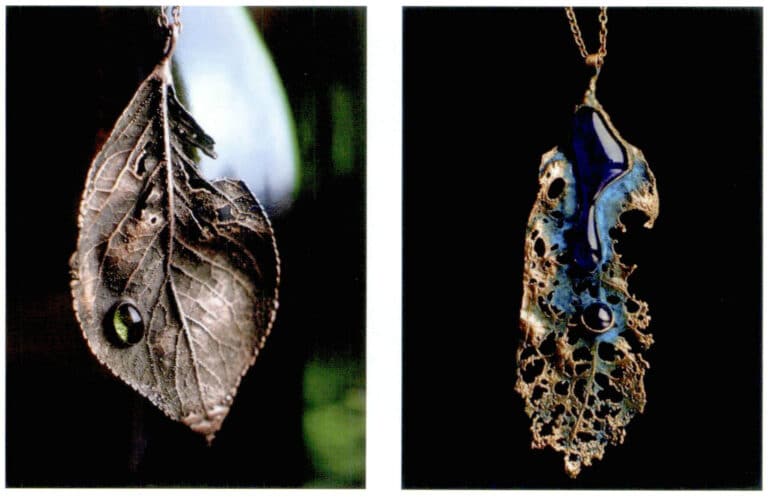
The basic process flow of hollow electroforming is as follows:
1. Sensitization treatment (silver paint)
Items coated with silver paint need to air dry naturally and then be placed in the electroforming tank with the process settings according to the requirements. The weight of the electroforming item is determined by the thickness of the electroforming layer, which is controlled by the electroforming time, so the operator must master the electroforming time.
2. Wax removal
After thoroughly cleaning the electroformed items, please place them in a steam furnace to remove the wax. To make the shape of the electroformed items more defined, you can first use an agate knife to outline the contours before wax removal.
3. Electroforming
Items coated with silver paint need to air dry naturally and then be placed in the electroforming tank with the process settings according to the requirements. The weight of the electroforming item is determined by the thickness of the electroforming layer, which is controlled by the electroforming time, so the operator must master the electroforming time.
4. Cleaning and polishing
After wax removal, the items coated with silver foil and hollow in shape must be repeatedly rinsed with deionized water before polishing and drying.
After the above Process, the electroformed items are complete.
Section Ⅴ Mechanical stamping method
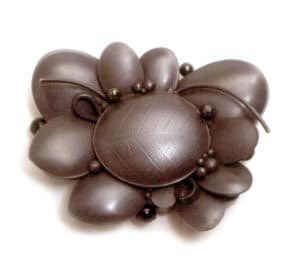
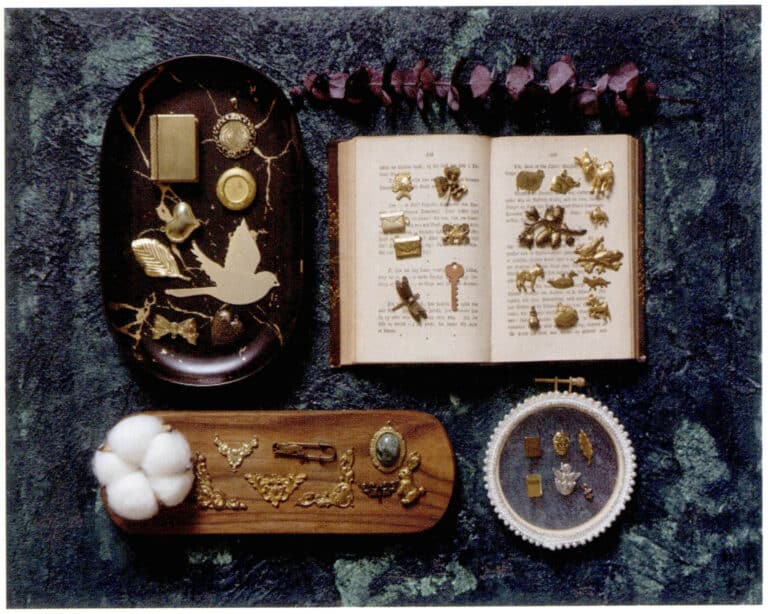
The mechanical stamping method is usually used for mass production of commercial-type jewelry. Using this Process can reduce production costs; many artists also create jewelry works using the ideas of the stamping method.
The production process of the mechanical stamping method has two main categories.
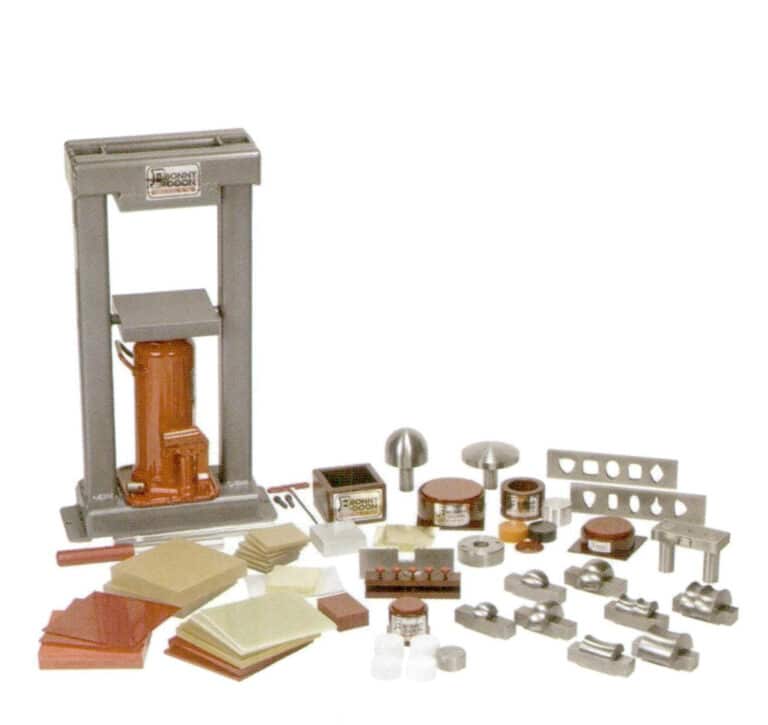
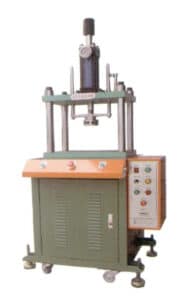
One is the industrial stamping process. First, a 1:1 steel mold of the jewelry to be replicated must be made; second, the steel mold is fixed on stamping equipment such as a hydraulic press; third, the metal raw materials prepared for making jewelry are placed on the stamping equipment for stamping processing, generally choosing metals with good ductility such as gold, silver, and copper; finally, the stamped jewelry is welded, polished, and otherwise finished according to its shape.
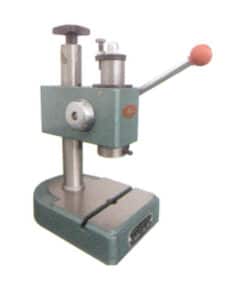
The other category is stamProcessmple shapes, such as stamping out semi-circular heart shapes, circles, etc. This Process can use process molds and hydraulic presses for stamping. First, take a piece of acrylic board with a thickness of 1 cm, draw the pattern to be stamped on it, and cut it out according to the pattern to obtain the negative shape of the stamped pattern, smoothing and leveling the edges;
second, prepare a metal sheet more significant than the acrylic harmful mold, usually using highly ductile gold, silver, or copper, and fix it on the mold after annealing, placing several pieces of rubber on top, and positioning it at the center of the hydraulic press;
third, gradually raise the hydraulic workbench, releasing pressure to perform stamping on the metal sheet and acrylic mold. After completion, remove the metal sheet to obtain a positive curved pattern; finally, use a saw to cut off the excess metal sheet and rework the stamped part.


Section Ⅵ Ceramic mold method
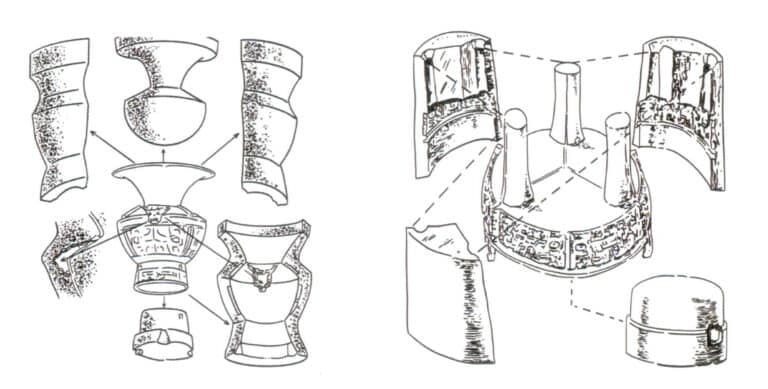
The ceramic mold method was used to cast bronze vessels during the Shang and Zhou dynasties, also known as the combined mold method. Its Processes include processing the mold and mold base, making the outer & inner mold, combining the molds, creating the casting hole, casting, retrieving the object, and polishing.
1. Making the mold, mold base
The casting of bronze vessels is different from that of jewelry; first, a “mold” must be made. If casting solid bronze objects, the actual object can be used directly as a “mold”; if casting complex-shaped bronze vessels, such as bronze jars or bottles, a clay model of the bronze vessel must first be shaped, referred to as “mud mold” or “initial mold”. The platform made of clay is called a “mold base.”
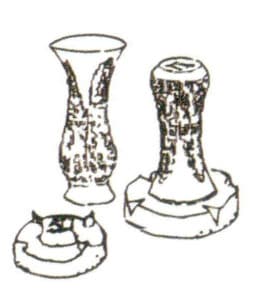
2. Making an outer mold (making an external mold)
Place the “mold” on the mold base, and apply and compact clay around the “mold” or “initial mold”; this layer of clay is called the “outer mold”. When the clay is semi-dry, cut the “outer mold” into several pieces for easier demolding later; the cutting marks should be neat; then make several triangular tenons on the adjacent two fragments of the outer mold for connection; finally, remove the outer mold to air dry and bake it with a low flame; this Process is called processing the outer mold” or “copy the mold”.
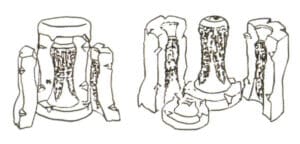
3. Making the inner mold
Calculate the thickness of the bronze vessel. While the mud mold used for the outer mold is still moist, scrape off a layer according to the thickness; the thickness scraped off is the thickness of the cast bronze object. After scraping is complete, The mold is called “inner mold.”
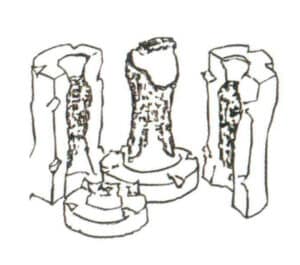
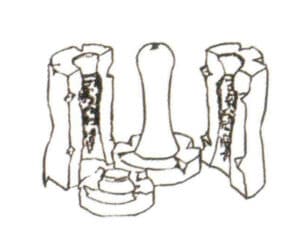
4. Assembling the mold
Invert the “inner mold” onto the base mold, then wrap the “outer mold” around the outer side of the inner mold, with the outer mold blocks fixed together using mortise and tenon joints. During “mold assembly,” copper shims must be placed between the inner and outer molds to adjust their position. Generally, the copper shims are placed at the bottom or lower half of the object, and care should be taken to avoid areas with decorations when placing them
5. Creating casting holes and casting
After assembling the mold, a closed mold cover needs to be made on top of the entire clay mold, and casting holes and vent holes should be created on the mold cover for pouring molten copper and releasing air. The melted bronze is poured into the mold through the casting hole.
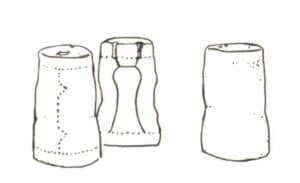
6. Taking Objects
After the bronze liquid cools and solidifies, the outer mold is broken, and the inner mold is removed, allowing the cast bronze vessels to be removed. Therefore, only this Process’s inner and outer molds can be processed.
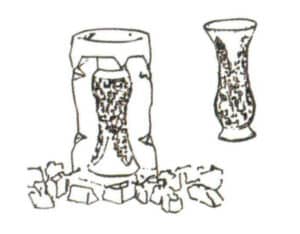
7. Polishing and Finishing
After the bronze vessel is cast, clean the surface, then use a whetstone to smooth and polish the ship’s surface, and finally rub and polish with charcoal.
Section Ⅶ Other casting processes
Some artists also experiment with metal casting techniques using wood blocks, wheat straw, and potatoes. This non-industrial casting technology has relatively more uncontrollable factors, which may lead to random effects during the Process. The work process is irreproducible, making it more attractive for artistic creation.

