What Are the Essential Metalworking Techniques for Jewelry Crafts?
Basic Metal Fabrication Crafts
Pendahuluan:
Master the art of metal jewelry making with our comprehensive guide. From cutting and sawing to filing and shaping, we cover the basics of metal fabrication. Learn the crucial steps of drilling and forming, plus the essential processes of annealing and quenching for enhanced metal workability. Discover acid washing for a clean slate and welding techniques for secure joins. Bending, hammering, and doming are revealed for creating diverse jewelry pieces. Polishing and buffing tips ensure a professional, finished look. Tailored for jewelry stores, studios, brands, retailers, designers, e-commerce platforms, and custom creators.
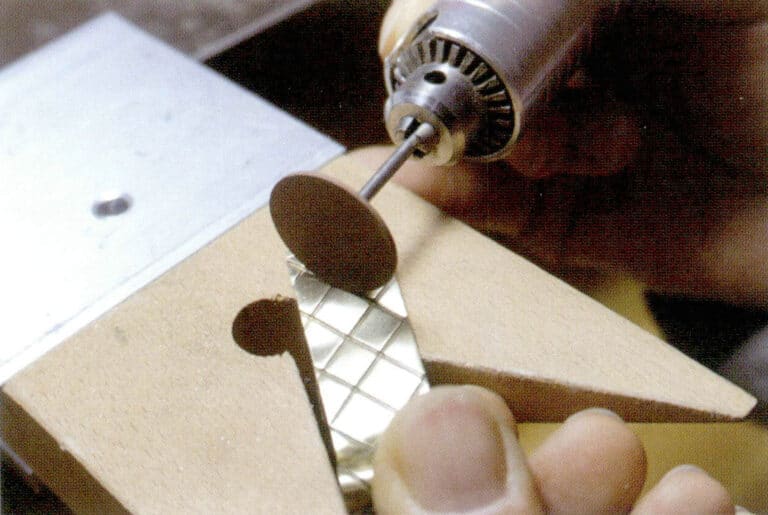
Doll Museum series, crumpled craft earrings, brass, baroque pearls, sea bamboo coral, zircon, etc.
Daftar Isi
Section I Cutting metal
In the basic jewelry-making process, the methods of cutting metal are generally divided into three types: trimming, cutting, and sawing.
1. Trimming
We can imagine metal sheets as paper, using tools such as hand shears and cutting pliers that can cut metal for trimming. It is important to note that this direct cutting is only suitable for thinner metal sheets and wires, and the metal is prone to deformation during trimming.
2. Cutting
Using machines to cut metal can greatly improve efficiency, while the resulting slices are relatively straight. Common metal cutting machines are divided into hand plate shears, pedal shears, and electric shears. Hand plate shears can be installed on a tabletop for manual operation to cut metal; pedal shears are generally placed directly on the ground and use foot pressure to cut metal; electric shears are used to cut large metal sheets. Small workshops usually equip hand plate shears, and the thickness of the metal sheets cut should preferably be at most 2 mm, as thicker metal sheets are prone to deformation during cutting, which can also affect the lifespan of the hand plate shears.
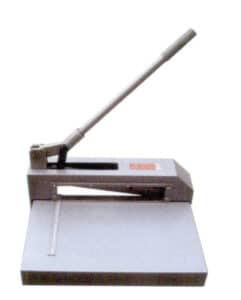
Hand plate shears
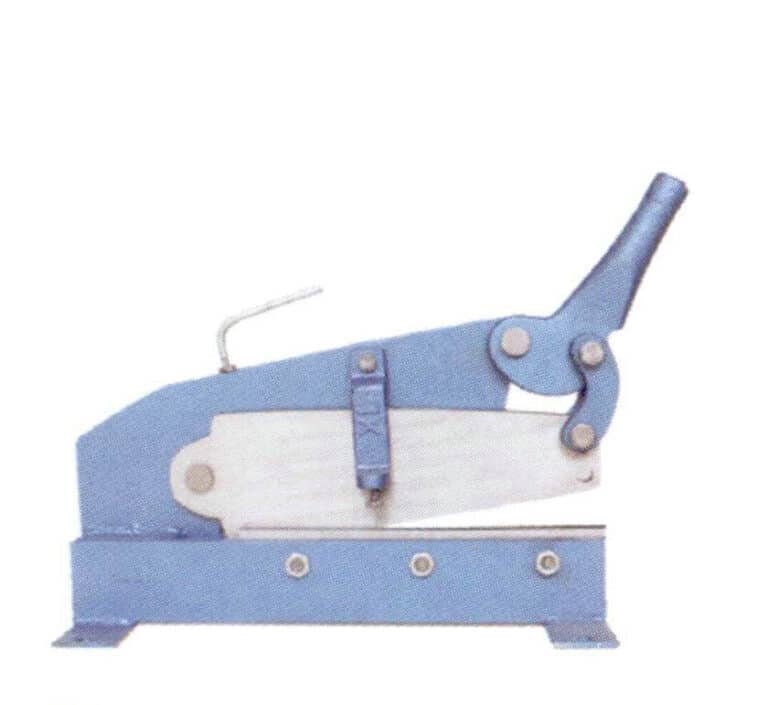
Hand plate shears

Pedal shears
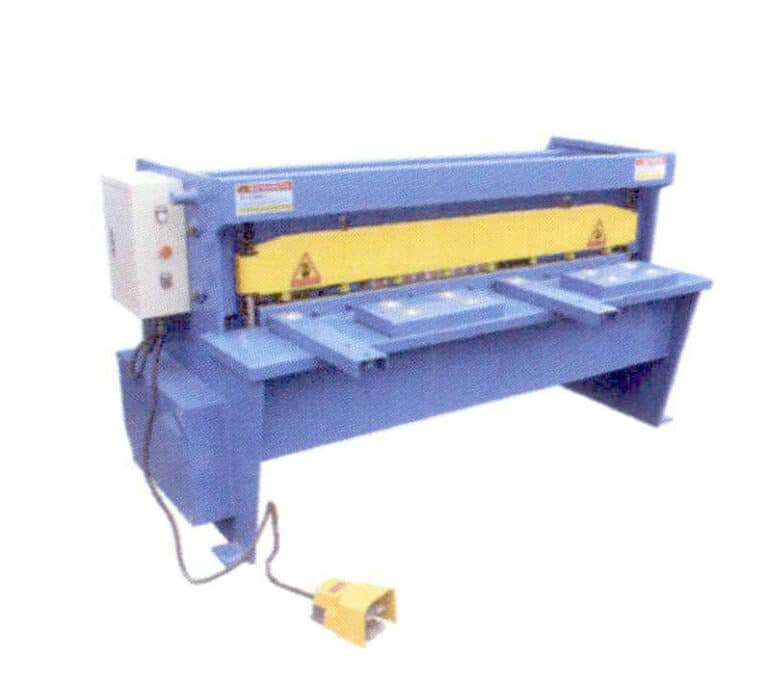
Electric shears
3. Sawing
Sawing technology is very important for metal craftsmanship. Mastering this technology allows one to cut out desired patterns and designs. Sawing can not only handle the shape of the patterns but can also serve as a decorative expression technique.
(1) Steps to install the saw blade
① Loosen the nuts at both ends of the saw frame, fully insert one end of the saw blade into the upper slot, ensuring that the teeth of the saw blade are facing outward and the tips of the teeth are directed towards the handle, then tighten the nut at the upper end.
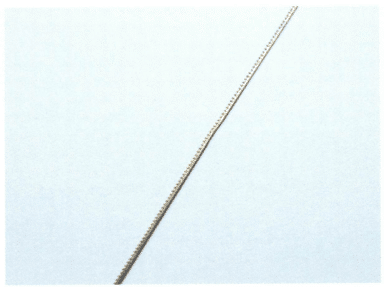

② Sit down, unscrew the screw at the other end of the saw frame, adjust the other end of the saw blade to fit into the slot, hold the tightened end of the saw frame against the workbench, and use your chest to brace the handle part of the saw frame, then tighten the nut. Finally, slowly release the pressure on the handle; this will make the installed saw blade tighter, but also be careful about the tension, as too tight can cause the saw blade to break.
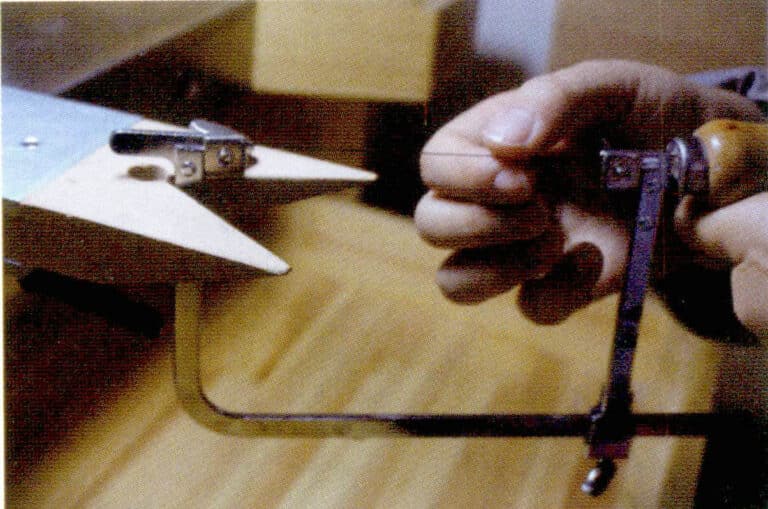
(2) Usage tips
① When holding the saw handle, keep it relaxed, and do not tense your body. The general direction of the saw should have the handle down, but it can be adjusted according to personal habits; holding it from above is also correct.
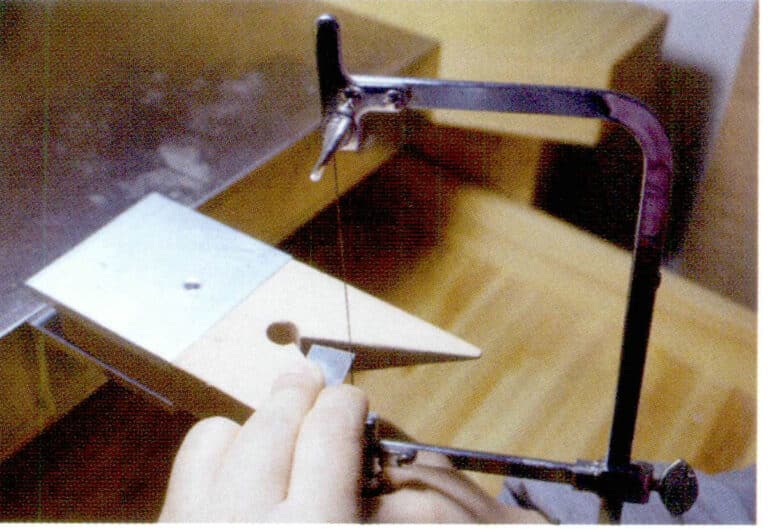
② When sawing up and down, the saw blade and the metal cutting surface should be as vertical as possible at 90°. If a special angle needs to be cut, the angle can be adjusted for operation.
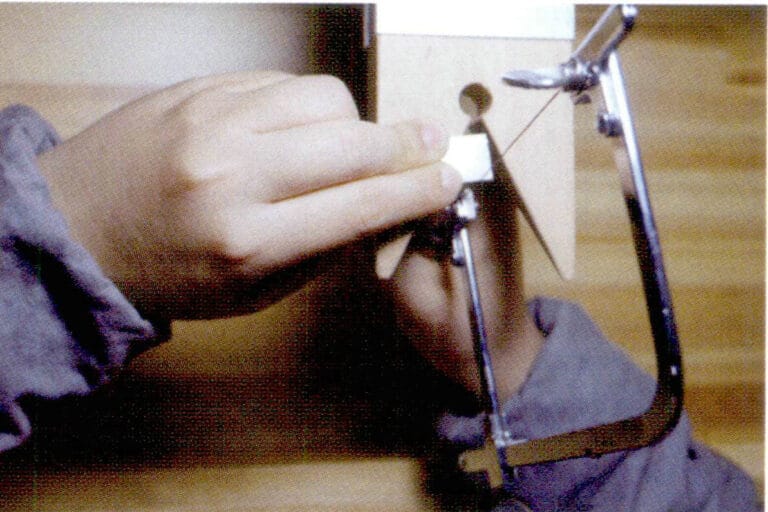
③ When cutting corners or bends, use the smooth back of the saw blade to wrap around the corner and wait for the saw blade angle to adjust before continuing to cut.
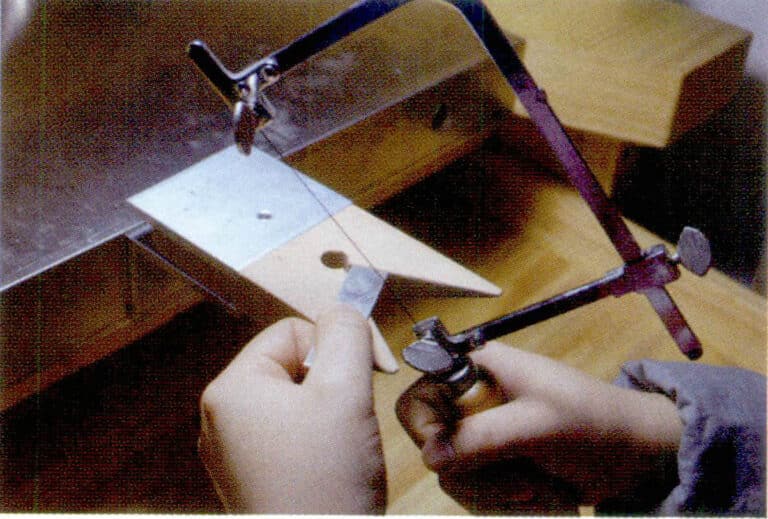
④ For areas that need to be hollowed out, you can first drill a hole, loosen one end of the saw blade to pass through the hole, and then install it, allowing cutting to be performed from that hole.

Section II Filing and Shaping
Filing can remove excess material and refine the shape of the workpiece more precisely. The file is an important part of the filing tools, available in various models and styles. It is crucial to choose the appropriate file and the correct filing procedure. If you want the workpiece to become glossier, the file must be used from coarse to fine in sequence. Filing is a subtractive process, and during operation, one must concentrate and constantly observe the degree of filling. If not careful, you may file away areas that should not be removed, and later remediation will be very troublesome.
1. Filing Techniques
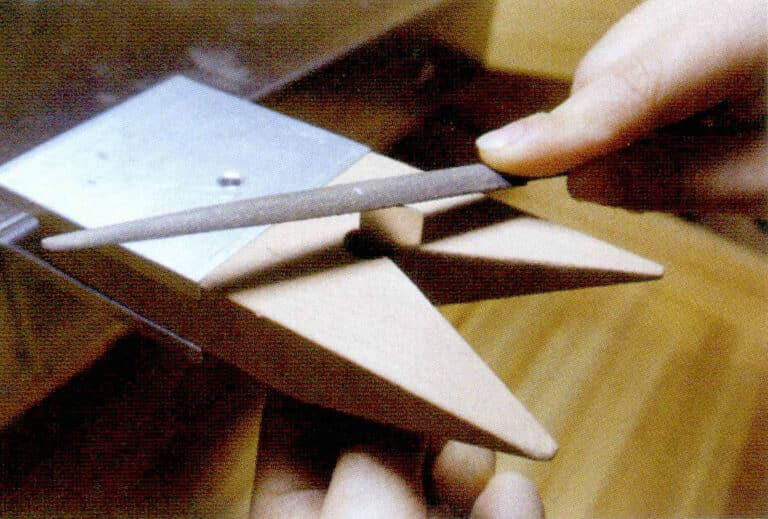
① Hold the file in one hand while stabilizing the metal against the workbench with the other hand if the metal part is too small to control with fingers, a wooden clamp can be used for fixation.
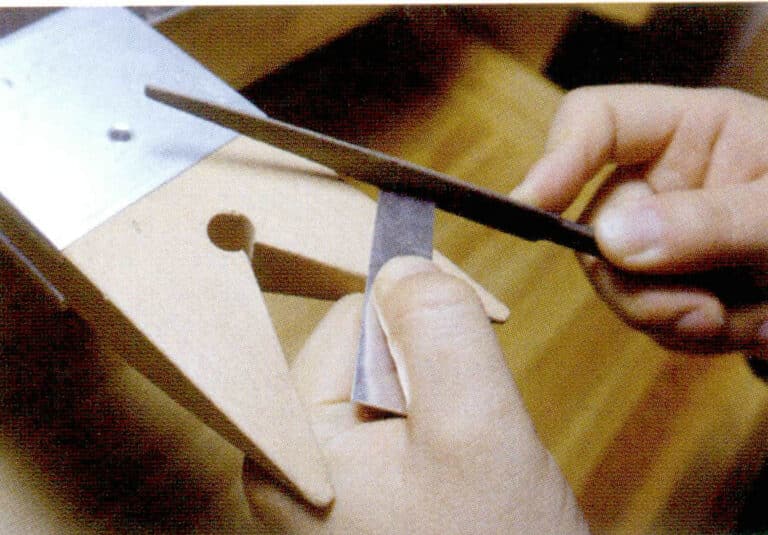
② When using a file, try maintaining its level, especially when filing in a straight line; the file and the filing surface must remain horizontal to achieve a smooth cross-section.
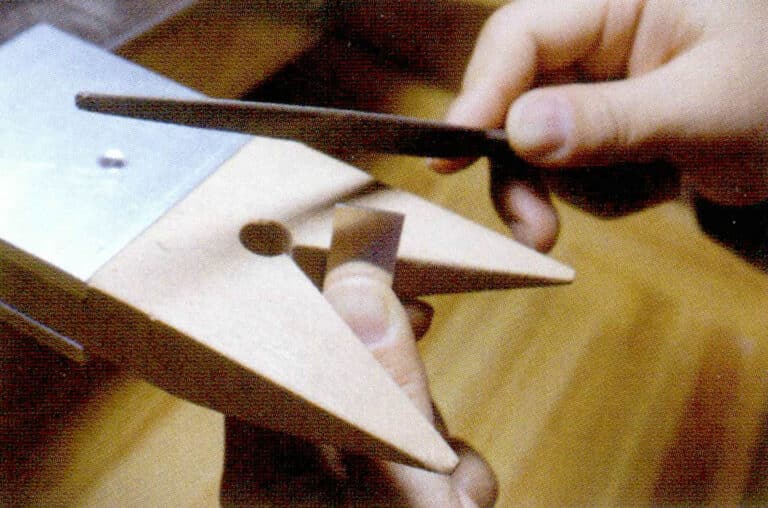
③ When filing, always push the file forward in one direction, and when pulling back, slightly lift the file away from the object. There is no need to file back; moving the file back and forth will not yield a smooth finish. A coarser file can be used to shape the object quickly and later switch to a finer file for adjustments, which saves time and effort.
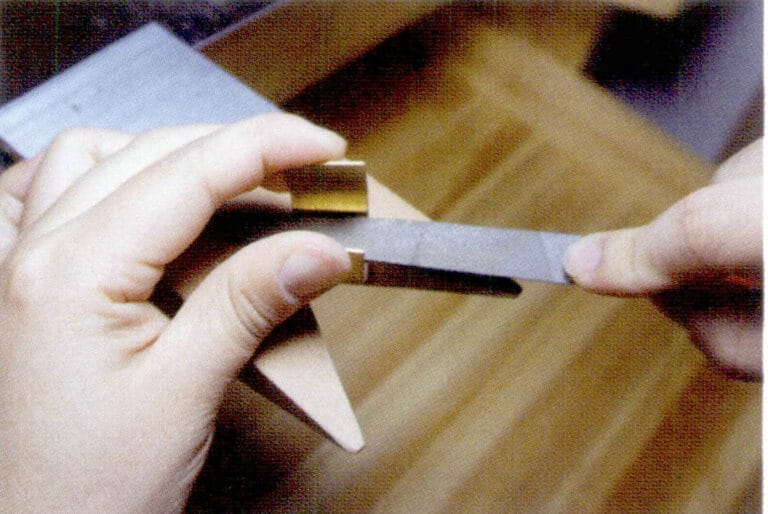
④ A half-round file can be used to file curved metal parts.
2. File Maintenance
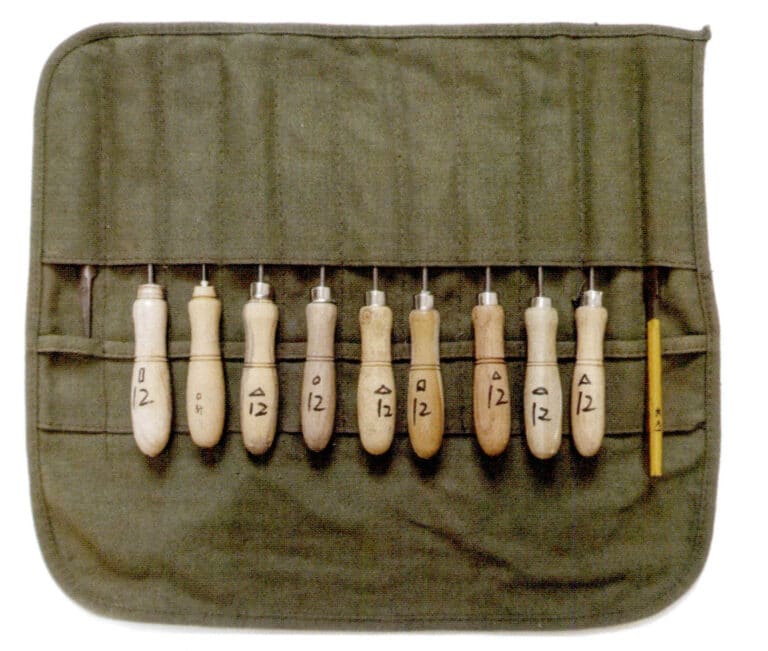
(1) When filing, the grooves of the file often get clogged with metal powder, resulting in poor filing performance. At this time, it is necessary to use a brass brush to clean the metal powder from the file grooves to restore good filing function.
(2) Do not grip the file directly on the teeth, as hand sweat can easily cause the file to rust. Files should be stored in a relatively dry environment.
(3) Each file should be stored separately to avoid collisions that can cause wear.
Section III Drilling
1. Drilling Tools
(1) Hanging grinder:
A hanging grinder equipped with a drill bit is a commonly used drill tool. The drill bit must be installed perpendicular to the handle axis.
(2) Bench Drill:
This is the commonly used tabletop drilling machine. The drill bit must be perpendicular to the drilled object, so it is important to ensure vertical alignment when installing the drill bit. If there is any deviation, the drill bit may easily break during operation, and it will be impossible to drill a perfect hole.
(3) Hand Drill:
This is a simple, non-electric drilling tool, mostly used for drilling wooden materials. Similarly, the drill bit of a hand drill must also be installed perpendicular to the axis.
2. Drilling Method Matters
(1) Marking the drilling position:
Before drilling, the position should be marked to ensure the accuracy of the hole. A sharp tool can mark a dent, allowing the drill bit to start from the dent and avoid scratching other areas.
(2) Fixing objects:
The drilled object must be securely fixed; otherwise, the rotation of the electric drill may cause the object to shift or bounce.
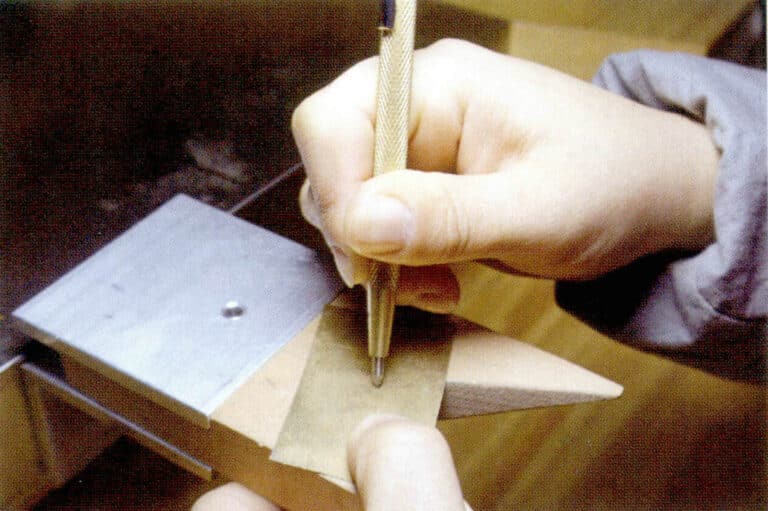
Marking the drilling position
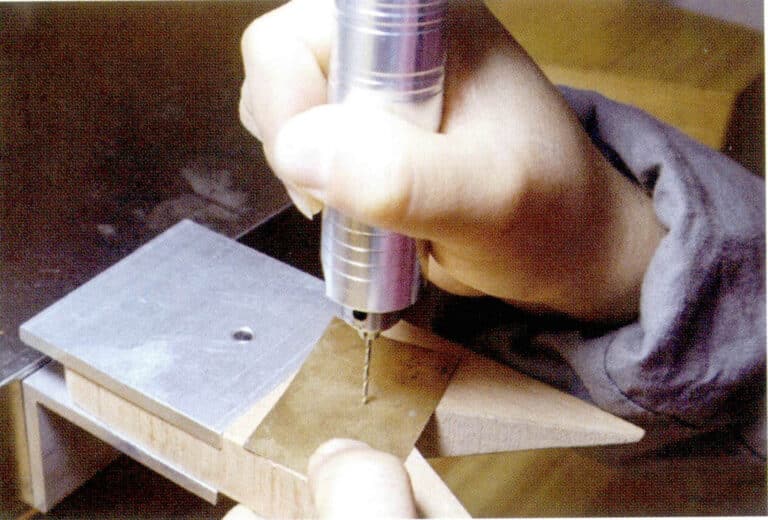
Marking the drilling position
(3) Intermittent pressure:
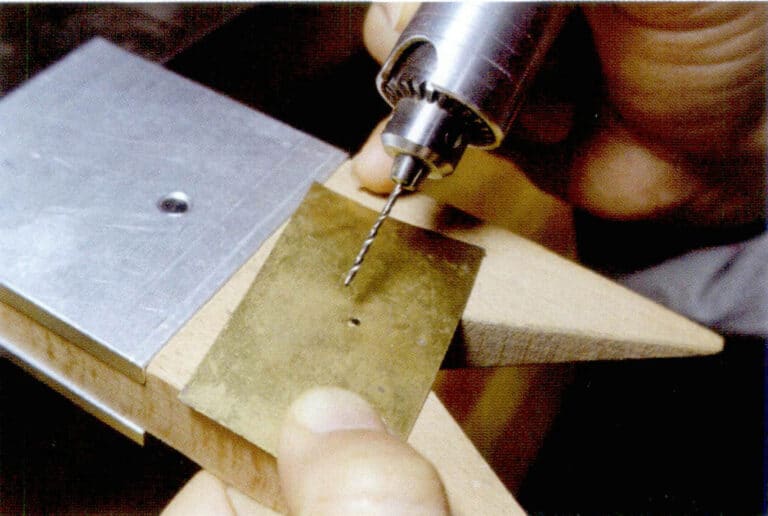
Avoid continuous high-speed operation when drilling with a hanging grinder and bench drill. Intermittent pressure should be applied while drilling to reduce heat from high-speed friction. Also, lifting the drill bit can help remove the metal shavings around it, allowing for quicker drilling.
(4) Apply appropriate force:
When pressing the drill bit, be careful not to apply too much pressure. Otherwise, the drill bit may break and fly out, causing danger.
(5) Check the drill bit:
If you cannot drill smoothly under standard operating conditions, you need to check whether the drill bit is excessively worn and promptly replace it with a new one.
Section IV Annealing and quenching
Before forging metal, it must undergo the annealing process, during which the metal is heated and softened, making it easier to bend and shape through a series of operations. During the manufacturing process, the metal gradually hardens with continuous bending, stretching, and hammering; at this point, it needs to be annealed again; otherwise, the hard metal will be difficult to process.
1. Metal Annealing Temperature
Copper: 600 〜 700℃ ;
Silver: 600 〜 650℃ ;
Gold: 650 〜 750℃ ;
Platinum: 600 〜 1000℃.
2. Annealing Tools and Matters
Each metal has its own melting point and annealing temperature. Pure gold and pure silver have very good flexibility, so the frequency of annealing during processing is relatively low. Copper is a jewelry metal that requires frequent annealing; during annealing, it is important to closely observe the changes in the metal’s color to avoid excessive annealing that could melt the metal.
Annealing requires using a torch, refractory bricks, etc., and preparing quenching bowls and clean water after annealing.
(1) Annealing of metal wires
① Loose metal wires are prone to melting during annealing, so they should be bundled together first.
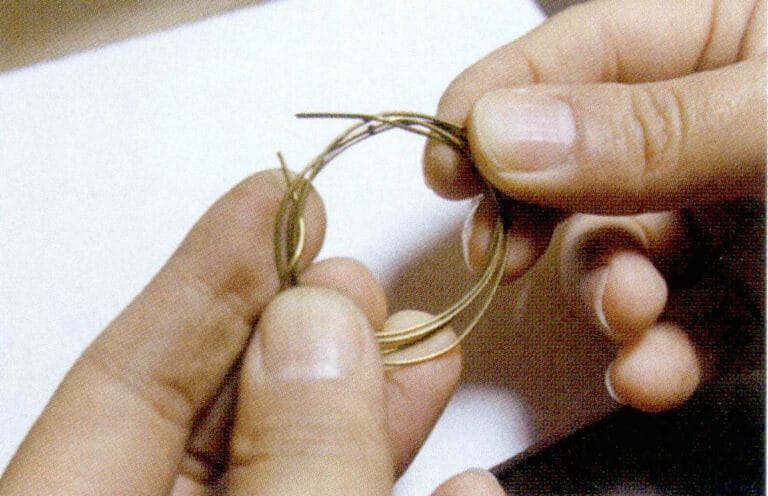
② After bundling, heat with a large and soft flame. Once one side is heated, use heat-resistant tweezers to flip it, repeat the process, and then quench it in clean water.

(2) Annealing of metal sheets
① Place the copper sheet on the refractory brick and heat it with a torch, adjusting the flame size according to the area of the metal sheet.
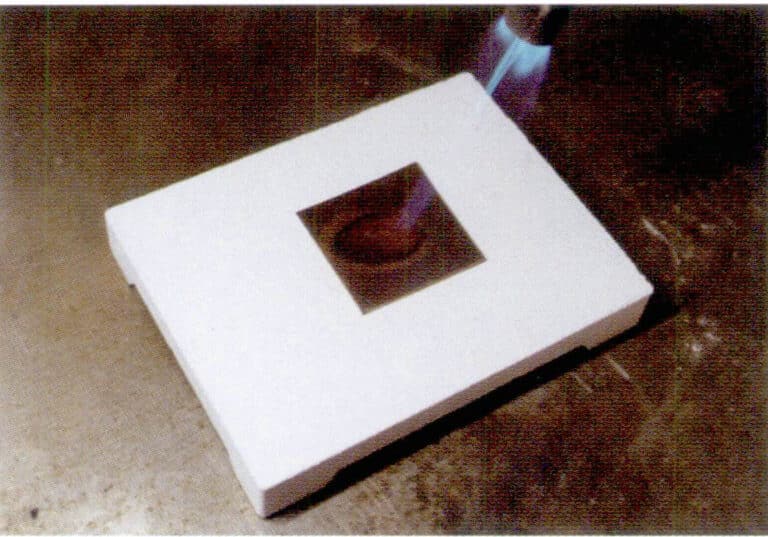
② Extinguish the flame when the copper sheet turns deep pink, and proceed with quenching.
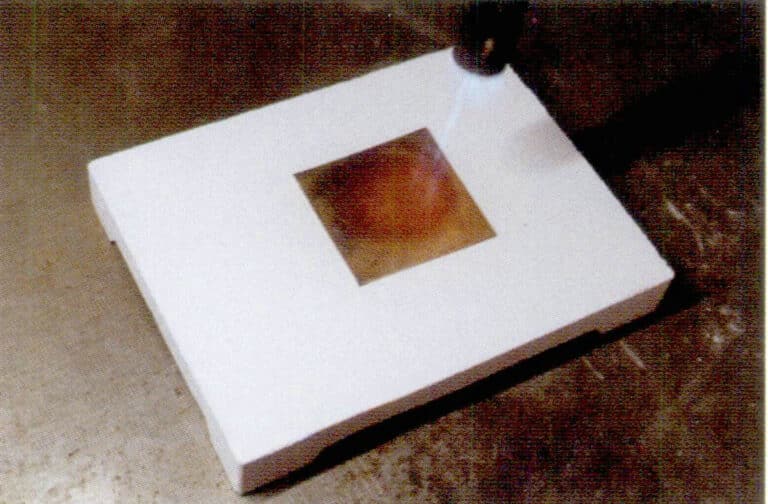
③ If annealing a silver sheet, wait a few seconds before quenching.
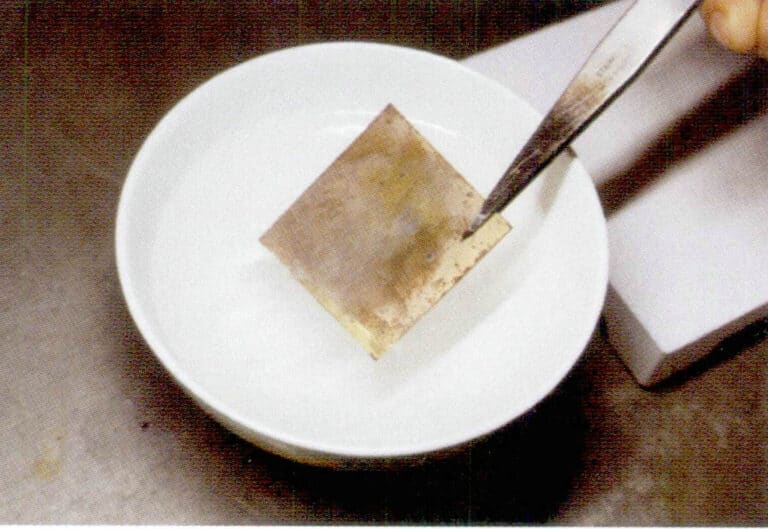
3. Quenching
After the metal has been annealed, it must be quenched, usually using water as the quenching medium. After annealing or welding, we let the metal cool for a few seconds, then use tweezers to place it into a quenching bowl filled with clean water for cooling. The high-temperature metal makes a “sizzling” sound upon contact with water, and larger pieces of metal may cause steam to rise from the bowl.

Section V Acid Washing
After completing annealing and quenching, metals will oxidize to varying degrees due to heating. This oxidation can create a layer of oxide or melted residue on the surface, which can be removed by soaking in a dilute acid solution, known as the acid washing process. It can also be ground off using sandpaper or other abrasive tools, but this will cause wear to the metal itself.
1. Alum Washing Solution
The scientific name for alum is potassium aluminum sulfate dodecahydrate, with the chemical formula KAl(SO4)2·12H2O . It is a double salt containing crystallized water of potassium sulfate and aluminum sulfate, appearing as colorless transparent block crystals or crystalline powder, available at pharmacies. As a metal washing solution, alum is relatively safe and suitable for small workshops or home studios. The alum-washing solution can be prepared in a specialized metal bowl, where an appropriate amount of alum and water can be added. Heat it with a torch or alcohol lamp until the block alum dissolves in water, then place the metal items to be cleaned into the solution, maintaining the heating state. Residues on the metal will be cleaned off within a few minutes. Alum is often used to clean oxides from silver and copper.
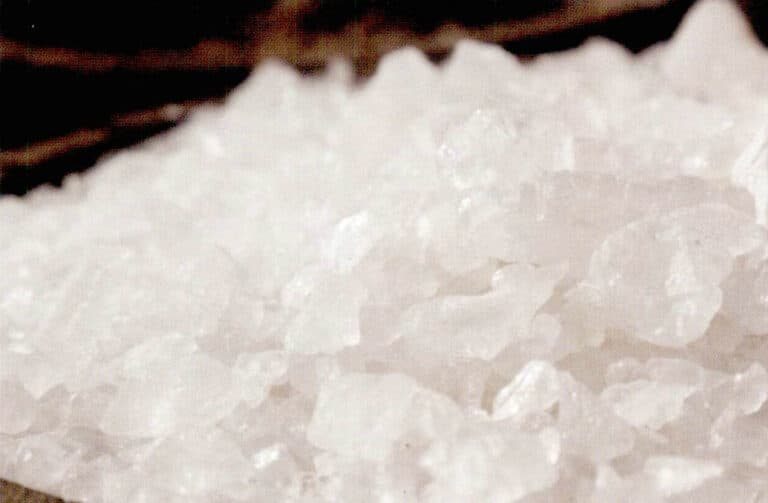
① Heat the metal that needs to be cleaned in a bowl filled with alum water.

② After removing the attached residues, rinse the metal until clean.

2. Citric Acid Cleaning Solution
Citric acid is widely found in plants. In some European and American countries, citric acid is commonly mixed with water to make metal cleaning solutions, with a typical ratio of citric acid to water 1:7. The method is to add citric acid to water, and it should not be done in reverse. Once the cleaning solution is properly mixed, it must be heated. Compared to alum and dilute sulfuric acid cleaning solutions, citric acid cleaning solutions take longer to remove residues, so they are generally not used in factories. Citric acid cleaning solutions are relatively safe and suitable for small studios or home workshops.
3. Dilute Sulfuric Acid
Generally, factories use dilute sulfuric acid for metal pickling because it can quickly and effectively remove oxides and residues. However, this operation has certain dangers, so it is not recommended for small studios or home workshops.
(1) Dilute sulfuric acid ratio and safety operation matters
- Dilute sulfuric acid is usually prepared in a ratio of 1:10 of sulfuric acid to water.
- A pungent smell will be produced when sulfuric acid is added to water, so it should be done in a well-ventilated area.
- Ensure that running water is in the area so the acid solution can be cleaned promptly if it spills or leaks.
- Wear rubber gloves, goggles, and a lab coat during operation.
- Remember to add acid to water; do not reverse the operation.
(2) Acid cleaning process and safety operation matters
- Place the metal into the prepared dilute sulfuric acid solution, let it sit for a few minutes, then use tweezers to take it out and rinse it under running water; a brush can also be used for scrubbing.
- The washing solution used for cleaning copper cannot be reused for cleaning silver or other metals to avoid secondary contamination of other metals, so the prepared acid cleaning solution should be placed in different containers and labeled with the type of metal used for cleaning.
- After multiple uses of the dilute sulfuric acid cleaning solution, its effectiveness will decrease, the acid cleaning time will lengthen, the cleaning effect will worsen, and it will gradually turn deep blue. At this point, a new cleaning solution can be replaced. When disposing of the waste cleaning solution, please turn on the faucet to let water flow, then slowly pour it out while maintaining the water flow throughout. After pouring, do not close the faucet immediately. Remember, this is only a method for handling small amounts of waste cleaning solution; never use this method for cleaning solutions that have just started being used, as it may cause corrosion and pollution in the drainage pipes. Professional institutions should handle large amounts of waste-cleaning solutions.
- During the acid cleaning, wear safety goggles, rubber gloves, and a protective gown to operate safely.
- After acid cleaning, the cleaning solution should be covered and sealed. Therefore, when selecting a container for the cleaning solution, choose one with a sealed lid and corrosion-resistant properties, such as a covered ceramic container, glass container, or thick plastic container.
- When placing and removing metals from the acid-cleaning solution, do not use your hands; you must use bamboo or plastic tweezers to pick them up.
Section VI Welding
In metal design and fabrication, it is often necessary to connect multiple metal components, and welding is one of the processes that securely connect them.
1. Solder and Classification
Solder is an alloy that does not contain iron and is made from different proportions of metals, with melting points lower than the metals being welded. Once melted, solder can connect metals and has good fluidity, commonly found in sheets, granules, rods, and paste.
Solder can be classified into high, medium, and low temperatures based on melting points, with commonly used materials being gold, silver, and copper. Silver solder can be further divided into five types: ultra-high temperature, high temperature, medium temperature, low temperature, and ultra-low temperature.
(1) Gold solder
Each type of K gold has its solder, mostly as metal sheets. Each type of K gold solder is also divided into high, medium, and low temperatures, with different colors of K gold corresponding to the same color of solder. Currently, K gold solder is divided into three colors: yellow, red, and white.
(2) Silver solder
It is divided into five types: ultra-high temperature, high temperature, medium temperature, low temperature, and ultra-low temperature. During the manufacturing process, metals may need to be welded multiple times, so it is necessary to use solder from high temperature to low temperature in sequence, which prevents the previously welded areas from being affected by repeated heating. Silver solder is mostly silver-white metal sheets. Welding flower wire uses powdered or welding powder, while paste solder is commonly used for welding large vessels.
(3) Copper solder
The solder is made from copper and zinc, each accounting for 50%. It is yellow and is used for welding various copper products. If the welding gap is small or if gold plating or other processing is to be done later, silver solder is generally used instead of copper solder, as silver solder has better fluidity and is easier to work with.
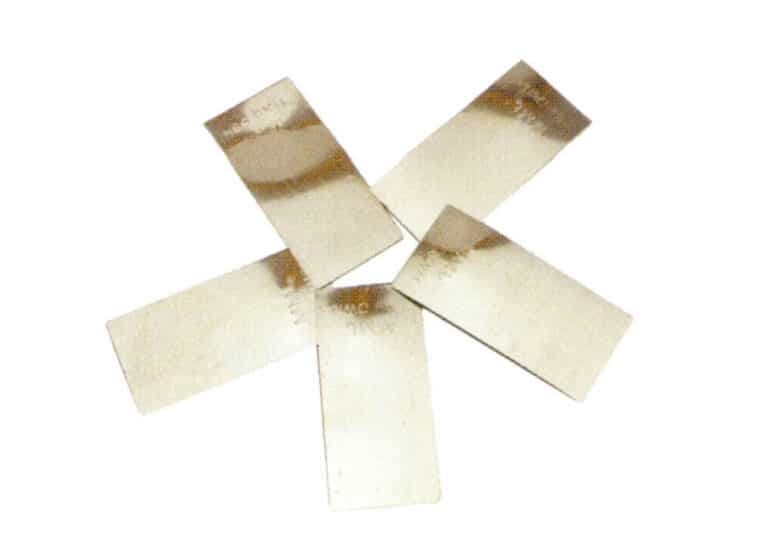
2. Welding steps
(1) Cleaning work: The metal surface must be clean and free of oxides or oil stains before welding. Otherwise, it will affect the welding effect; the two objects to be welded should be as closely fitted as possible without gaps. If the gap is too large, it may cause the solder to flow to one side during welding, resulting in an unsatisfactory welding effect
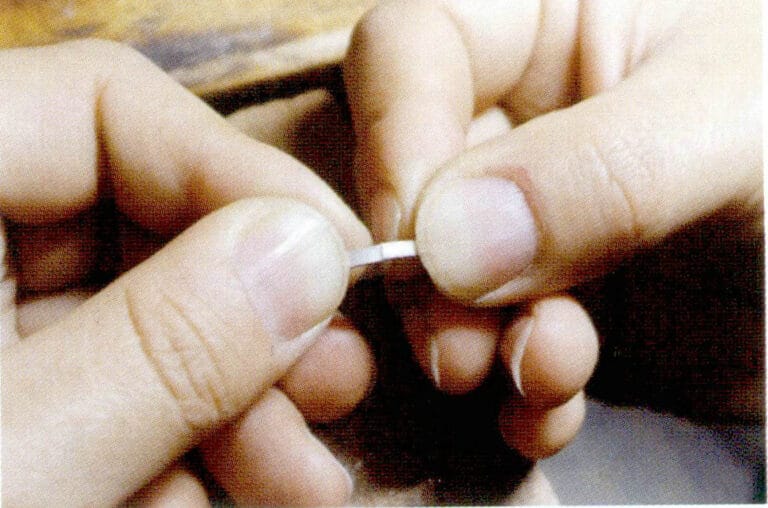
(2) Preparation of soldering materials: Apply borax flux carefully with a brush at the areas to be soldered, then place the soldering material. Note that the soldering material should be cut into small pieces with small steel scissors. In the early stage of soldering, arrange the soldering material near the gap to be soldered. If the soldering material is very thin, it can also be clamped in the solder joint, and after securing it with iron wire or tweezers, place it on fireproof bricks or tiles.
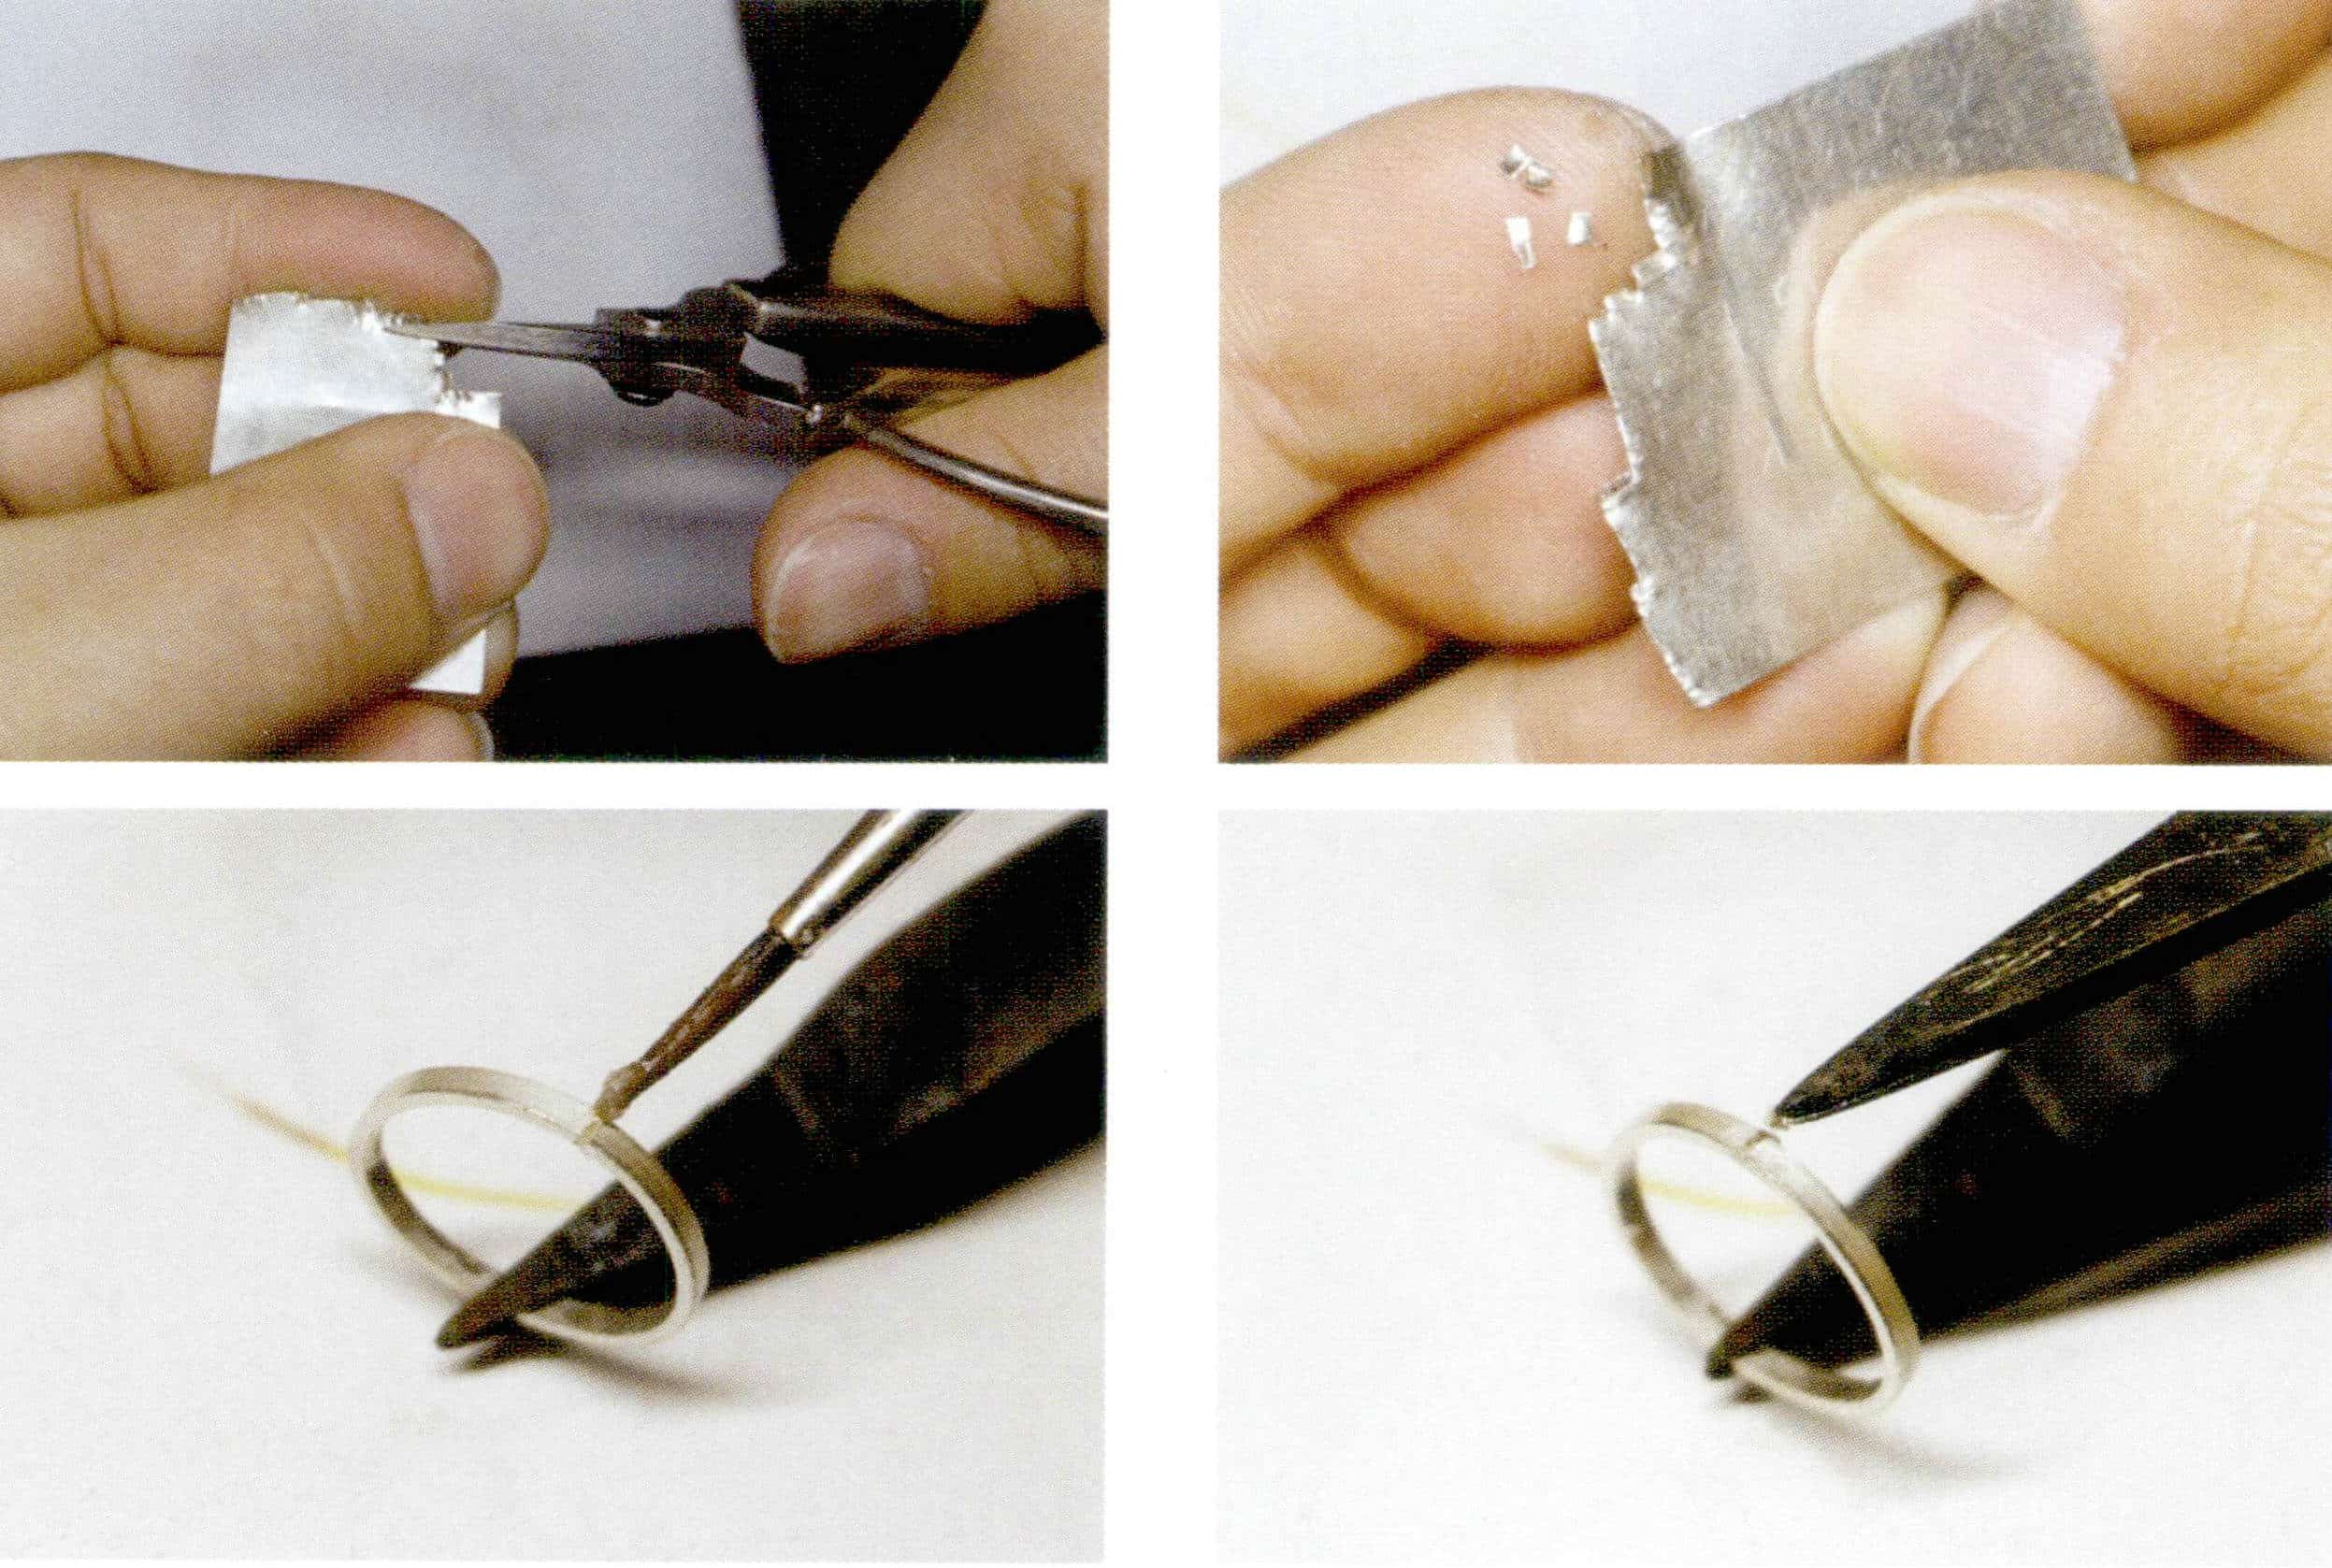
(3) Overall heating: First, use a medium-sized flame to heat the entire metal body, then lock the flame around the weld seam for heating. Pay attention to the metal’s color and the solder’s melting condition.
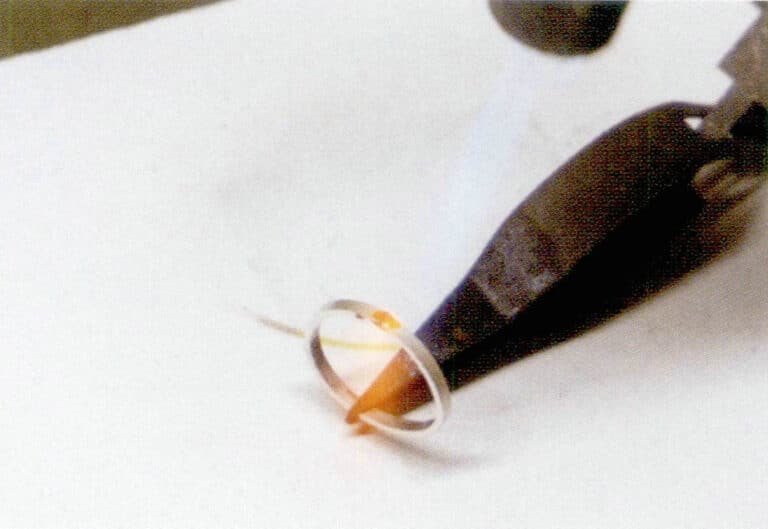
(4) Local heating: When the temperature at the weld seam approaches the melting point of the solder, the solder tends to melt. At this point, local heating of the weld seam and solder is applied until melting begins. A flame is then used to direct the flow of the liquid solder, allowing it to flow smoothly into the weld seam. Once the solder has flowed in, let the flame stay for 1〜2 seconds before removing the welding gun; at this moment, the solder will quickly solidify, completing the welding. If there is insufficient solder during the welding process, it can be added using tweezers or a helper needle.
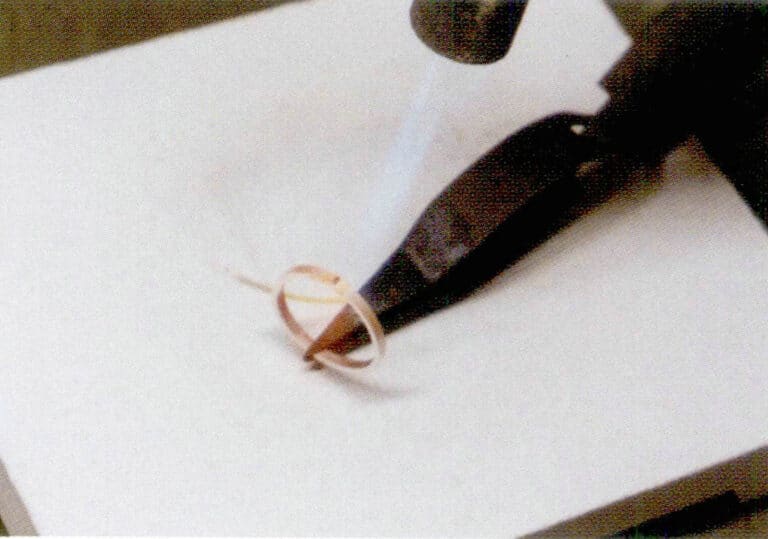
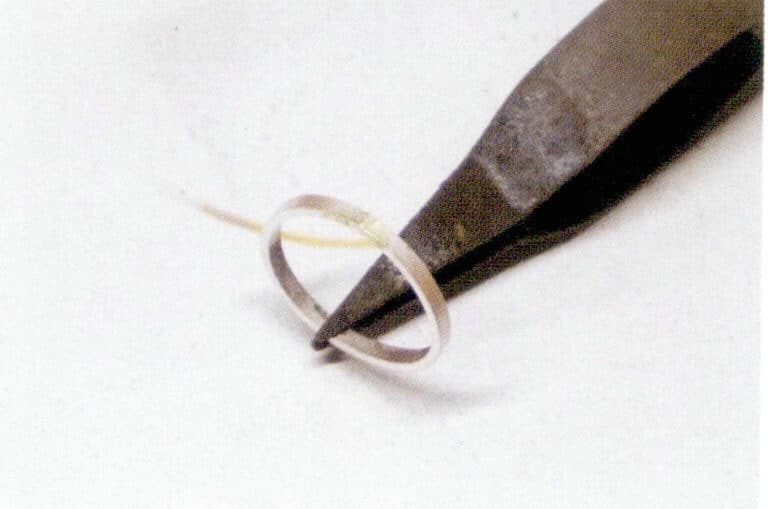
(5) Inspecting the weld: After welding, you can either let the metal cool on its own or cool it in water, then perform pickling, at which point you can more clearly see whether the weld is secure. Additional welding is required if there are gaps or signs of false welding.
Copywrite @ Sobling.Jewelry - Produsen perhiasan khusus, pabrik perhiasan OEM dan ODM
3. Melting
In the absence of solder, metals can also be melted and joined simply by heating, but this welding method can affect the state of the metal itself, causing wrinkles and other surface imperfections. These naturally formed, non-reproducible textures also reflect the charm of metal craftsmanship. Melting can also lead to the wrinkling process, allowing for the creation of many beautiful and unique metal ornaments.


Section VII Bending metal
We can change the shape of metal through bending, twisting, curling, and other techniques to enrich the form of the work. The metal must first be annealed to enhance its flexibility to perform bending operations.
The auxiliary tools for bending metal usually include pliers, hammers, etc. Generally, they are harder than metal, so avoiding unnecessary collisions and friction during operation is important, as this can easily leave marks on the metal surface.
1. Bending Metal Wire
(1) Earring making
① Earring production
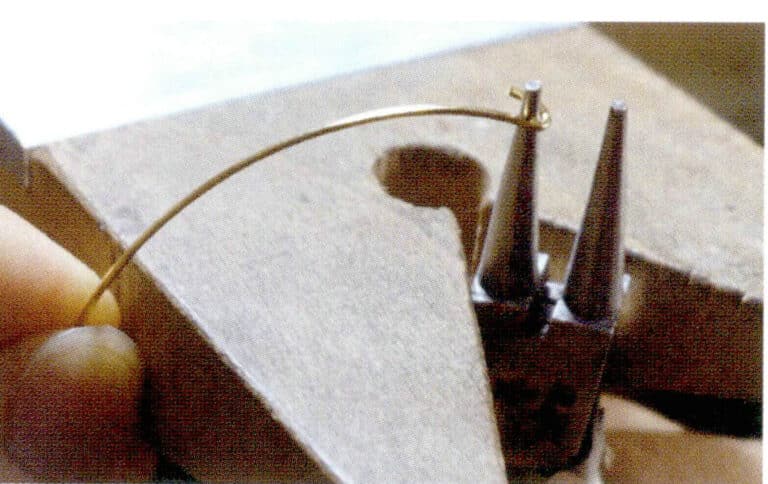
1. Cut a piece of metal wire and bend one end with round-nose pliers
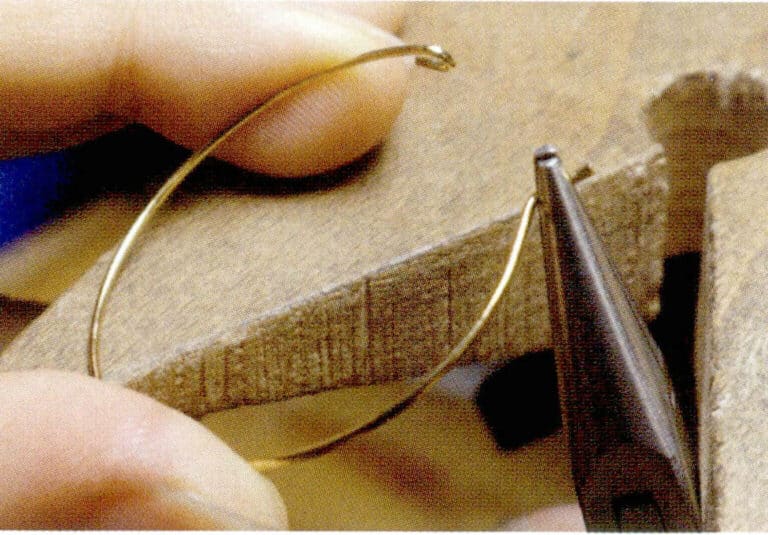
2. Use needle-nose pliers to bend the other end of the metal wire vertically upwards by 5 mm
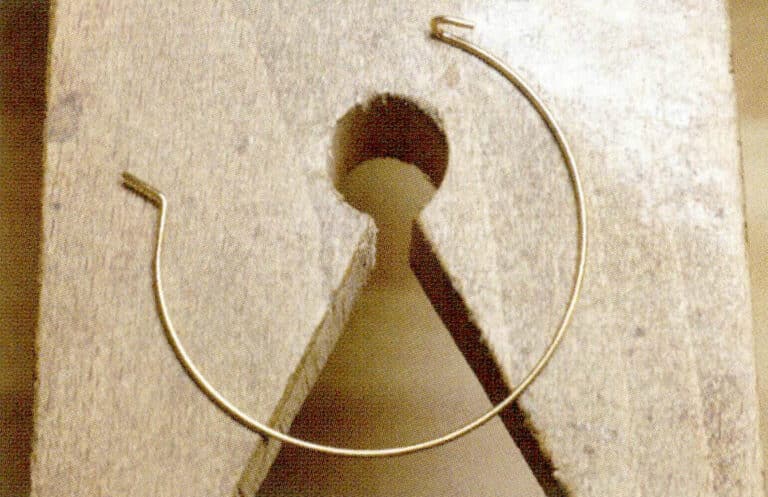
3. The two ends of the metal wire are shown in the figure, and this structure allows the two ends to open and close freely.
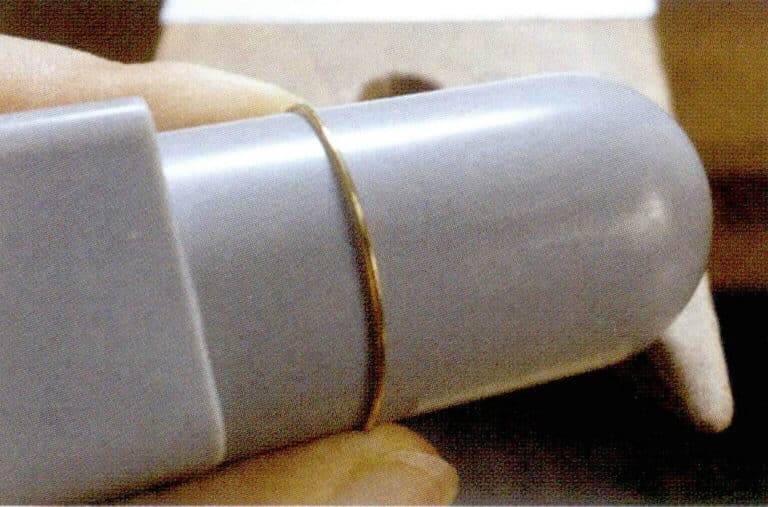
4. Use a cylindrical object to adjust the metal wire into a perfect circle
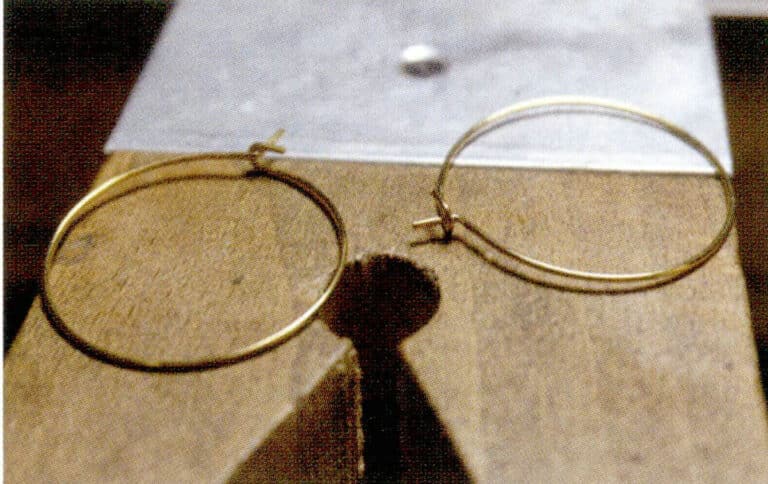
5. The earrings are completed
② Making ear studs
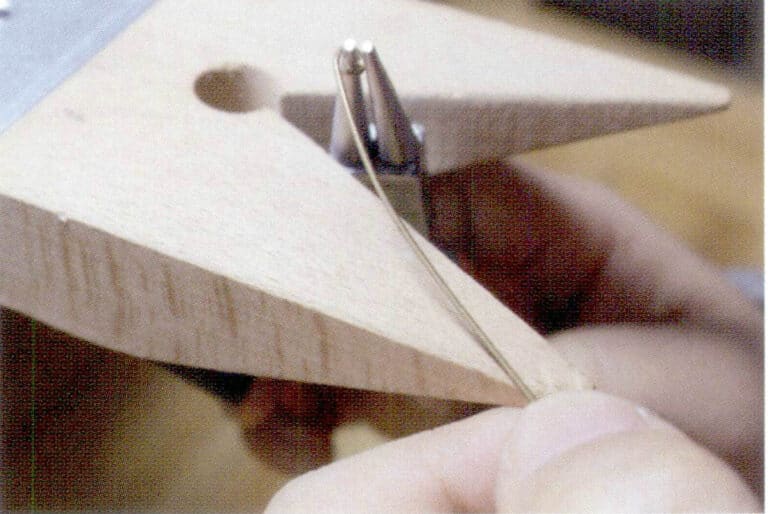
1. Cut a suitable length of metal wire and make a small loop at one end with round-nose pliers.
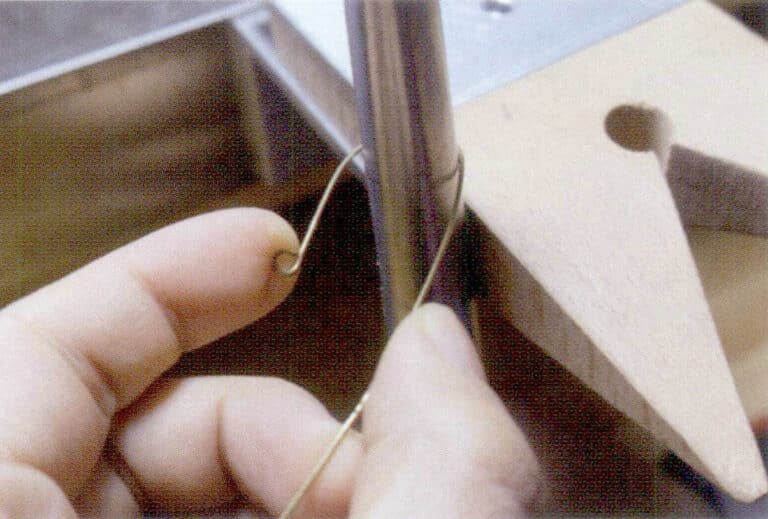
2. Use a round rod to bend the metal wire into a U-shape
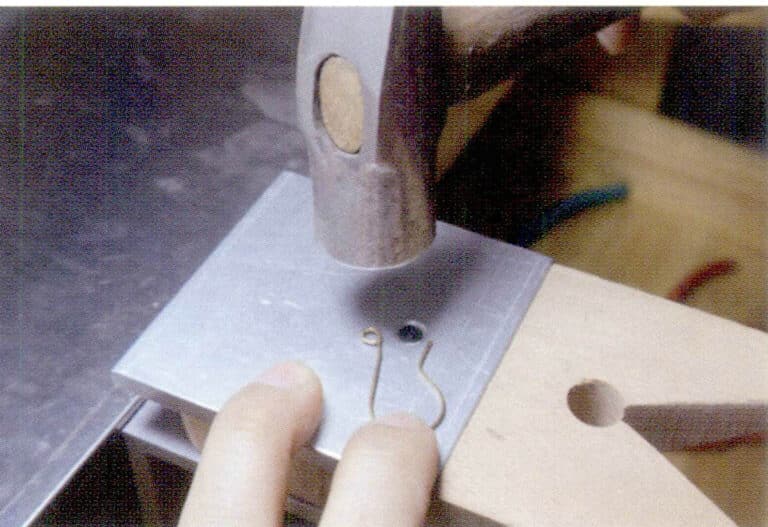
3. Use flat-nose pliers to adjust the shape of the ear hook, then use a hammer to refine the flatness of the ear hook.
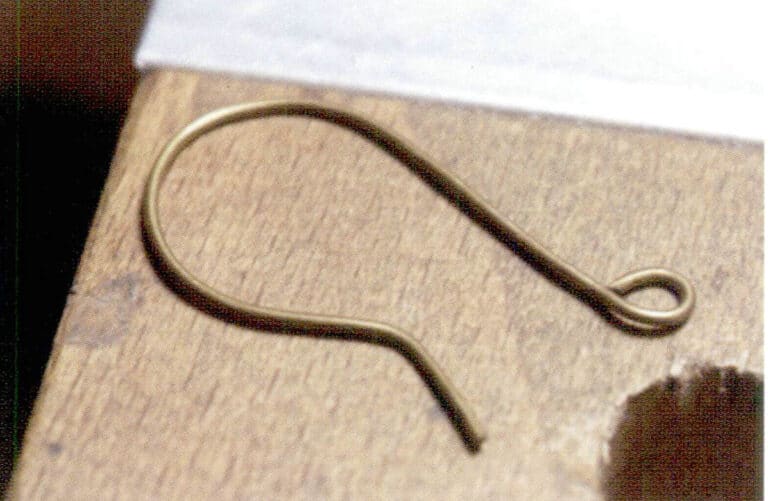
4. The ear hook is now complete.
(2) Making the open ring
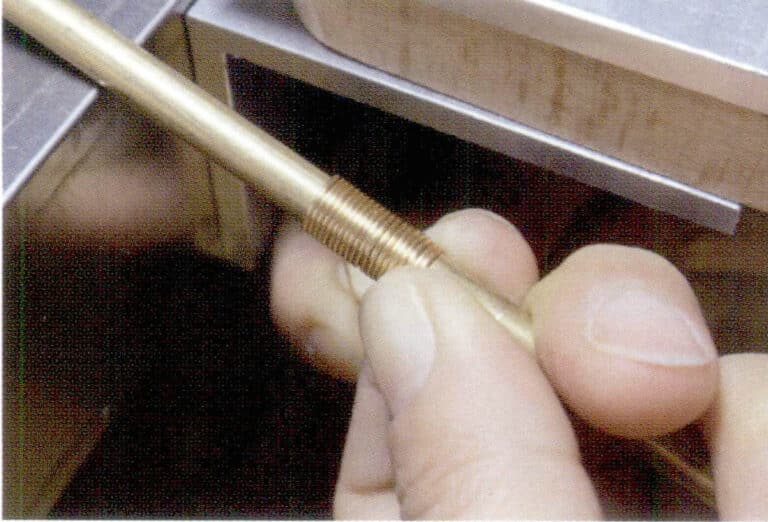
1. Wrap the metal wire around a cylindrical winding rod, tightening it.

2. Cut the wound metal wire into individual open rings.

3. Since the metal wire is wound in a spiral, the ends of the cut opening ring are misaligned and can be adjusted with pliers.
2. Bending metal sheets to make rings

1. Use flat-nose pliers to symmetrically bend the two ends of the metal sheet 90°.

2. Tekuk kedua ujungnya menjadi setengah lingkaran tertutup.
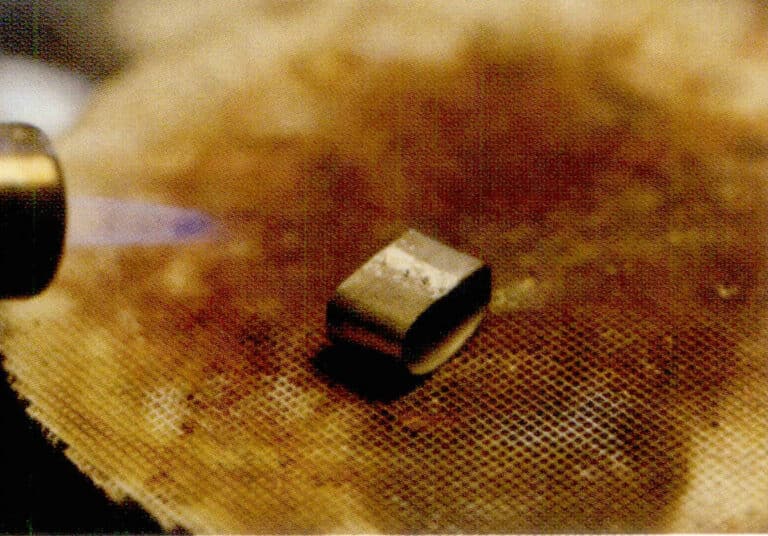
3. Weld the ends of the metal sheets.
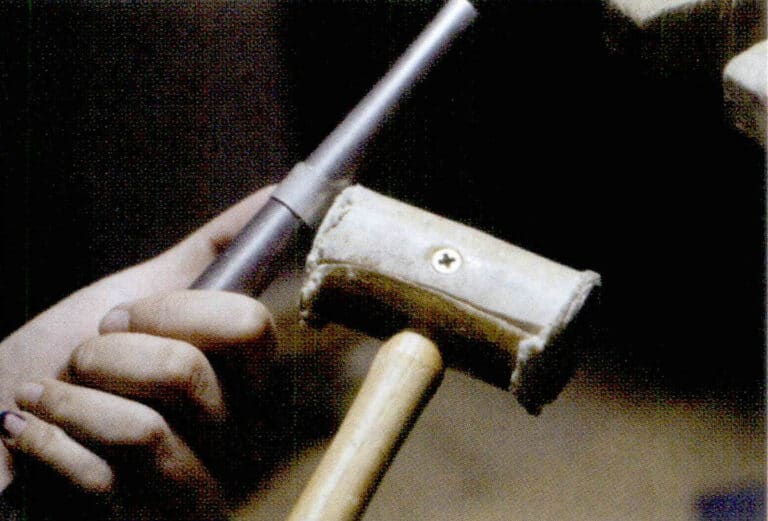
4. Use a ring mandrel and a wooden mallet to shape the metal ring.
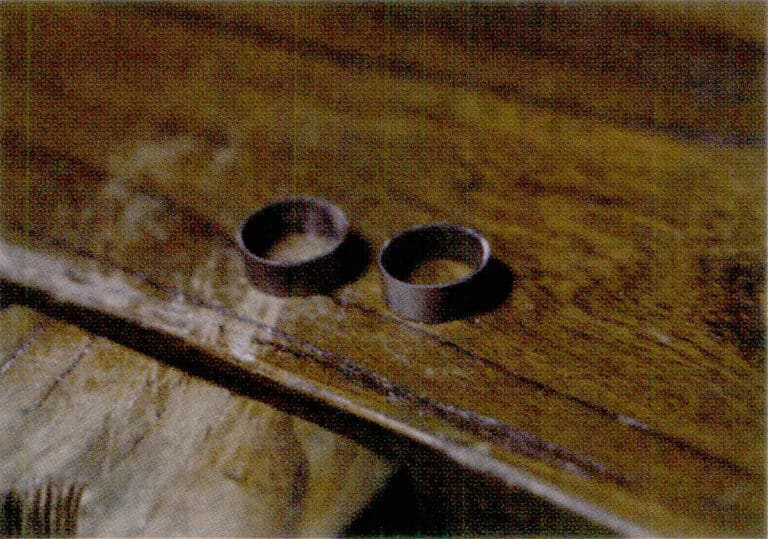
5. Completion of production
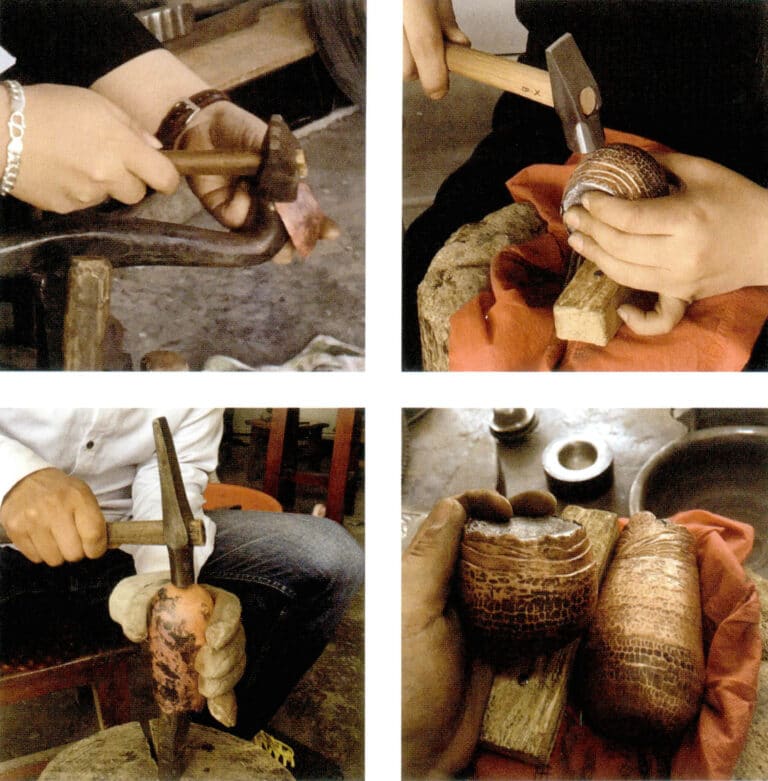
Section VIII Hammering metal
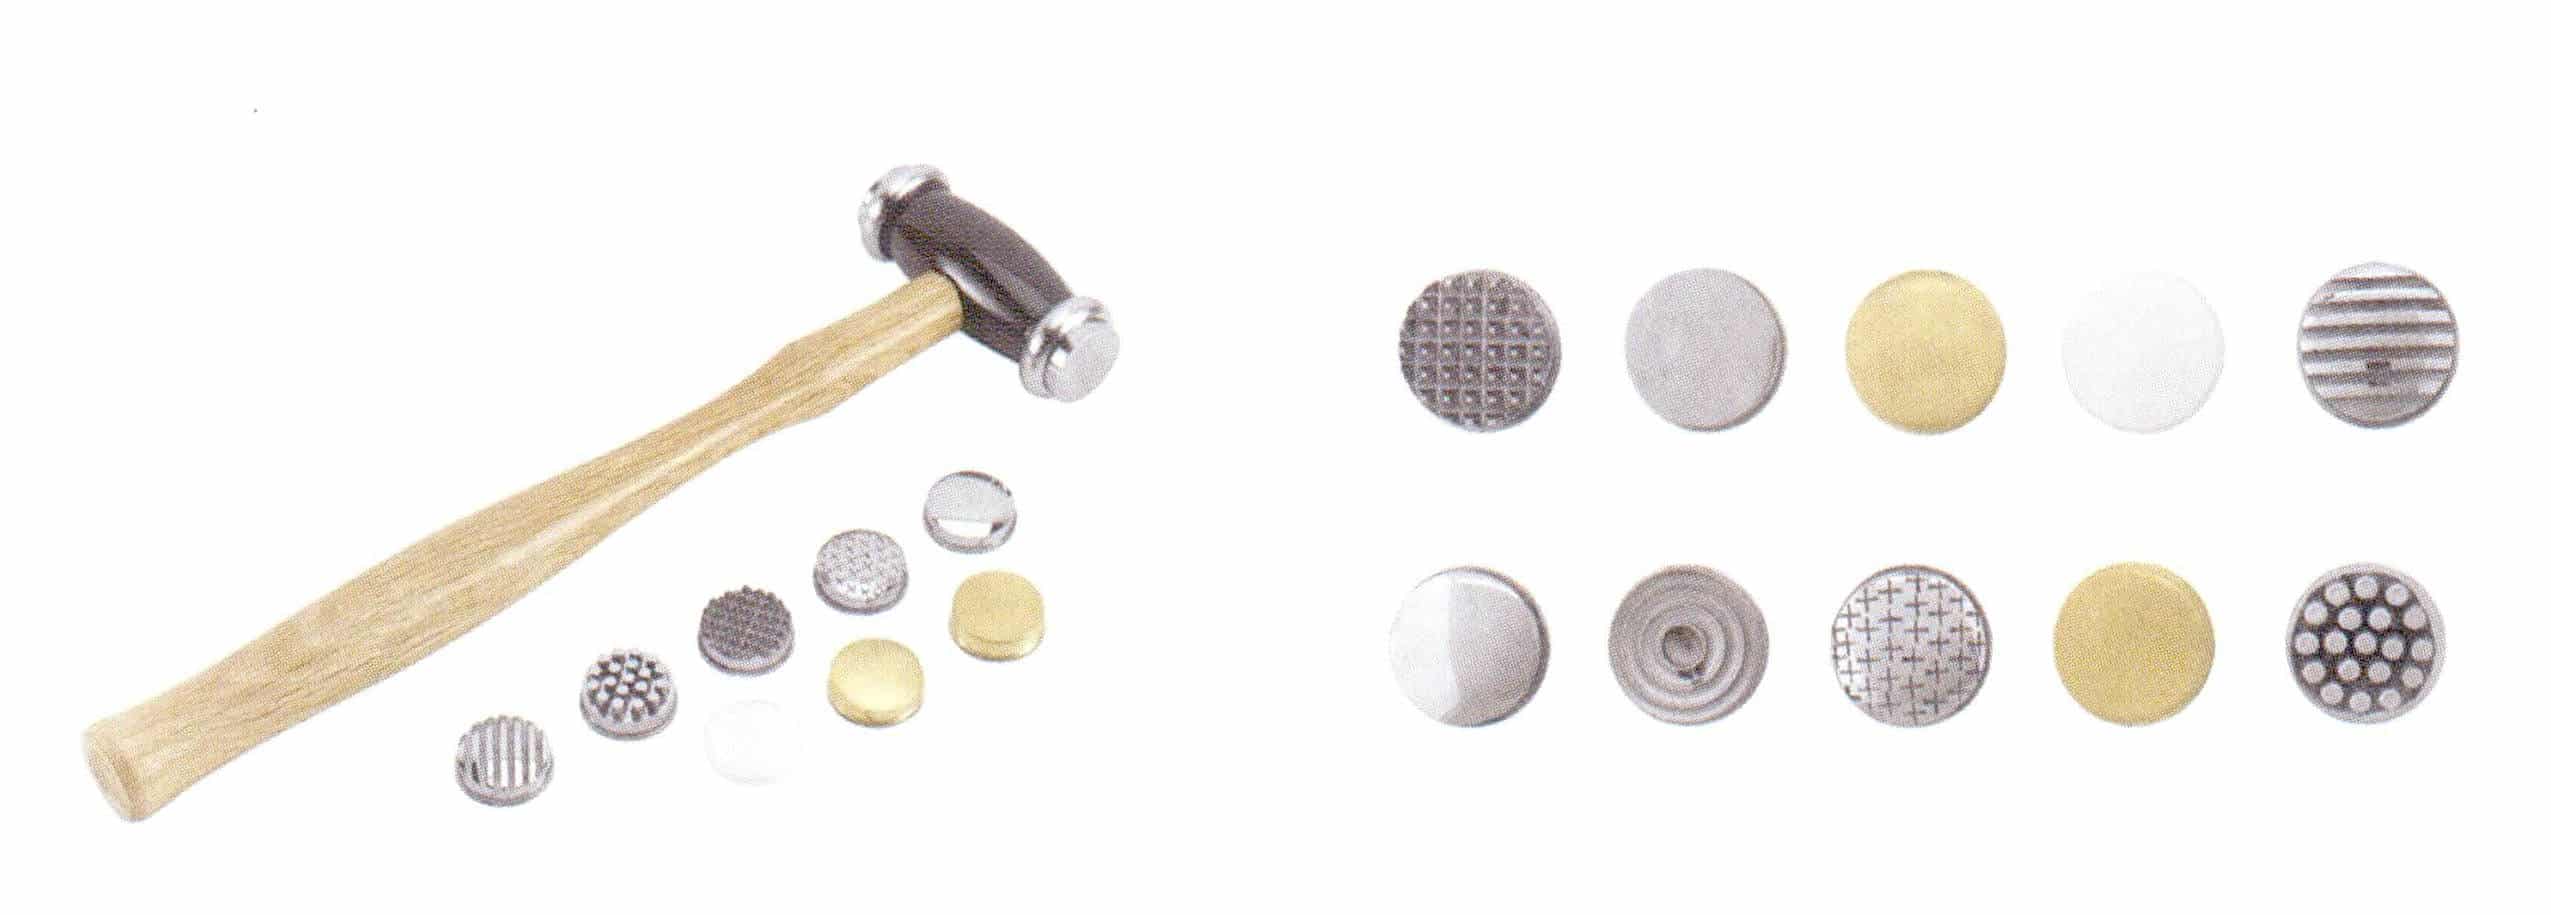
In metalworking, hammers are often used to strike and shape metal, changing its thickness and texture. Many types of hammers vary in weight; light hammers are generally used for detailed engraving and other fine work, while heavy hammers are mostly used for forging shapes and altering the form of the metal. When hammering metal, it is necessary to first anneal the metal. During the hammering process, if the metal regains hardness, it needs to be annealed again; otherwise, the metal may lose its toughness and crack.
How a hammer is used is very important; the hammerhead should ideally maintain a flat, even contact with the metal to avoid leaving edge marks on the surface. It is important to keep a steady rhythm and even force when striking to achieve a smooth effect. If you want to intentionally create hammer marks, you can adjust the tools and hammering method according to your needs.
Section IX Doming
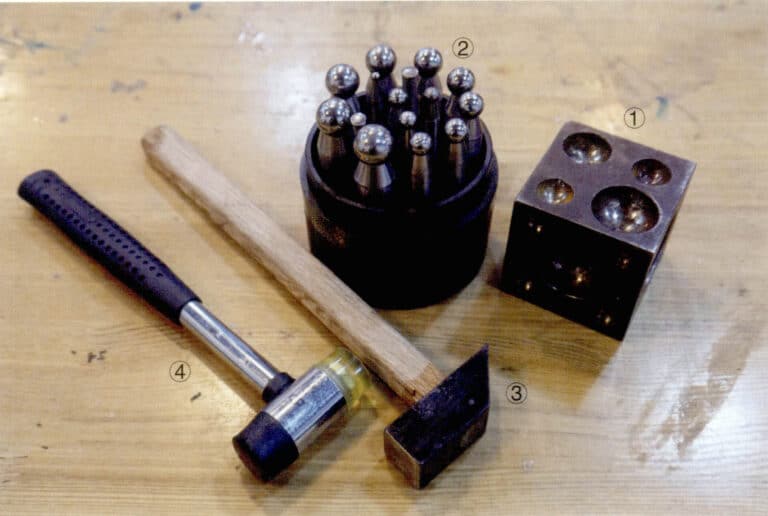
Tools such as the dapping block and dapping punch combined with hammers are good assistants for metal dome forming.
1. Semicircle making
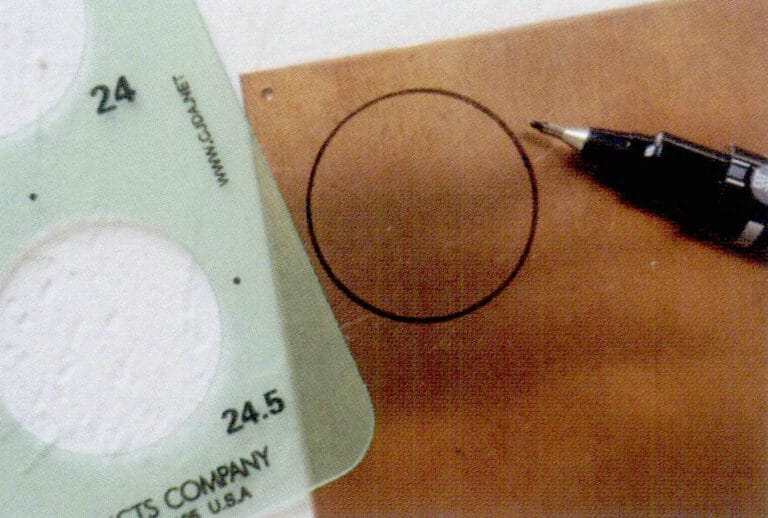
1. Use a measuring ruler to draw a perfect circle on the metal sheet
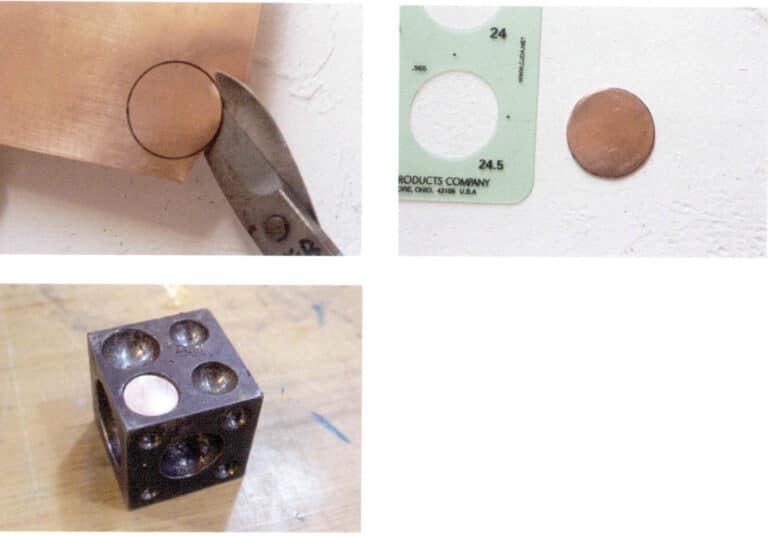
2. Cut out the metal sheet and place it into a pit with a diameter larger than the circle.

3. Use a hammer to tap the dapping punch, causing the metal sheet to indent.

4. Gradually switch to smaller pits and dapping punches to create the desired curvature of the semicircle.
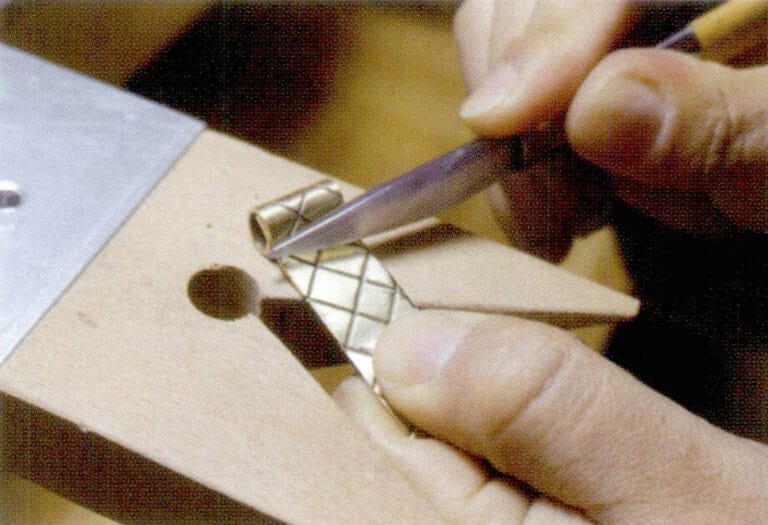
2. Fabrication of curved tubes
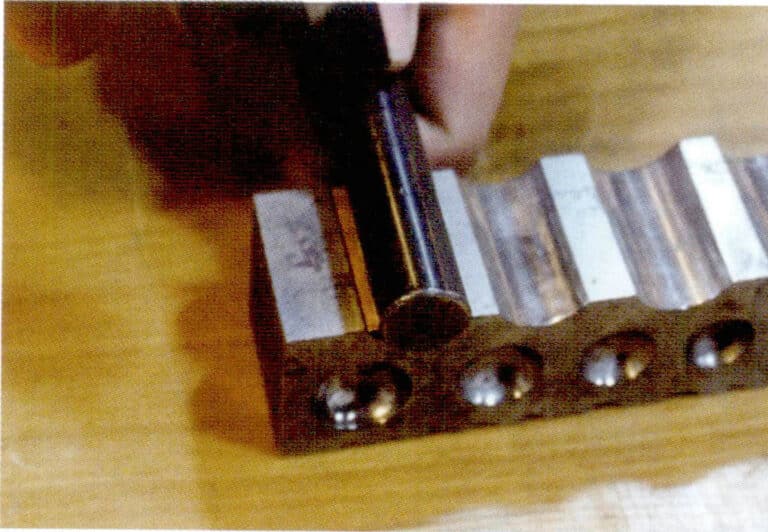
1. Place the cut metal sheet in the groove, and choose the corresponding dapping punch to lay horizontally on the metal sheet.
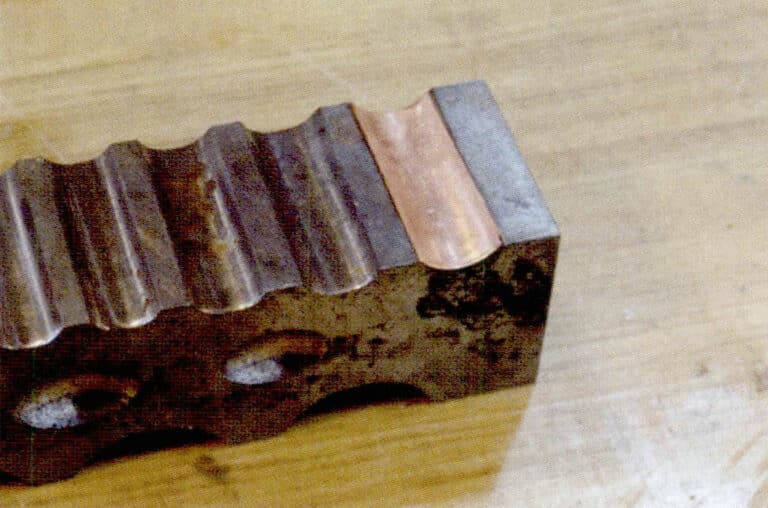
2. A hammer strikes the dapping punch, causing the metal sheet to indent.
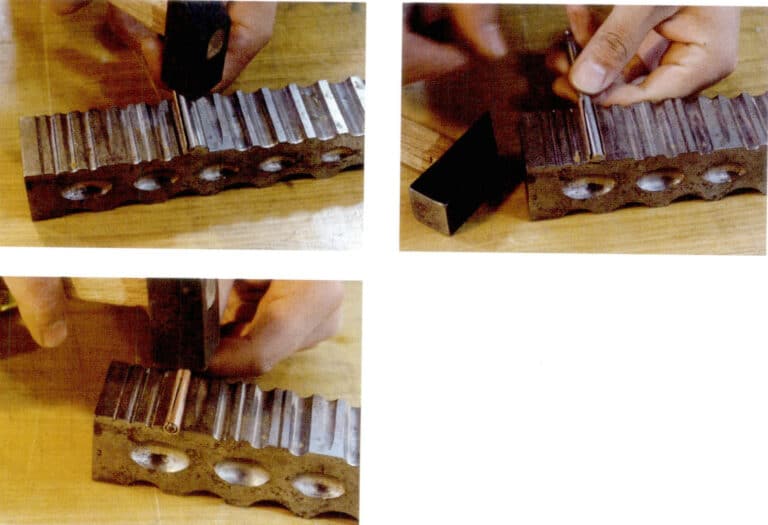
3. Gradually switch to narrower grooves and dapping punches and continue to strike
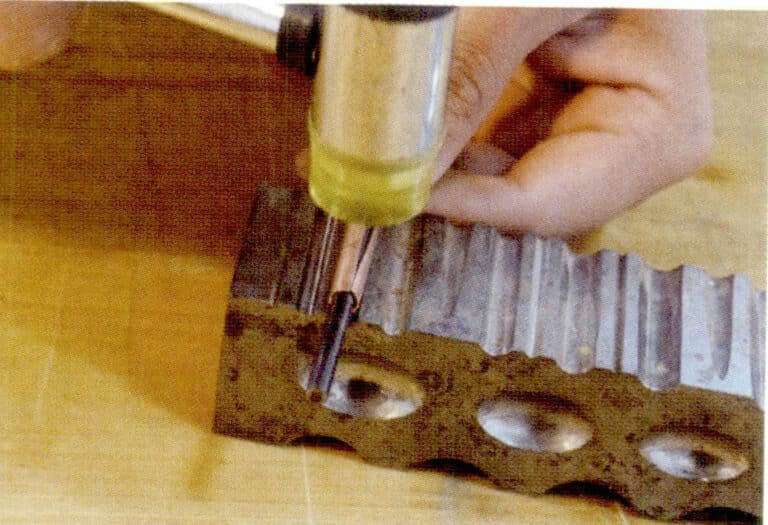
4. Use a rubber mallet to adjust the curvature of the metal pipe

5. Use flat-nose pliers to clamp both ends of the metal tube tightly, and use a file to trim the cross-section of both ends of the tube; the round tube is now completed.
Section X Polishing and Buffing
After the metal object is completed, the final step is to treat the surface. Regardless of whether the final goal is a mirror finish, matte effect brushed texture, or textured wrinkles, polishing and grinding is a necessary process.
1. Cleaning
(1) Pickling:
To clean the surface residues, place the metal object in a pickling solution.
(2) Rinse with clean water:
Rinse the object that has been picked up with clean water, and gently brush off any attachments with a brush. If conditions allow, rinsing with warm water around 38℃ is more effective in removing dirt.
2. Polishing
(1) Hand polishing
Manual polishing is usually done with sandpaper and grinding rods. There are many types of sandpaper and grinding rods, and one must gradually transition from coarse sanding to fine sanding to make the metal surface gradually refined. Sandpaper polishing can also be divided into manual polishing and hanging grinder polishing.
① Sandpaper polishing:
Sandpaper can be held by hand for polishing, generally used for large area polishing at the beginning; for details, sandpaper can be wrapped around a file for polishing, and for very fine parts, sandpaper can be tightly wrapped around a drill bit for polishing.
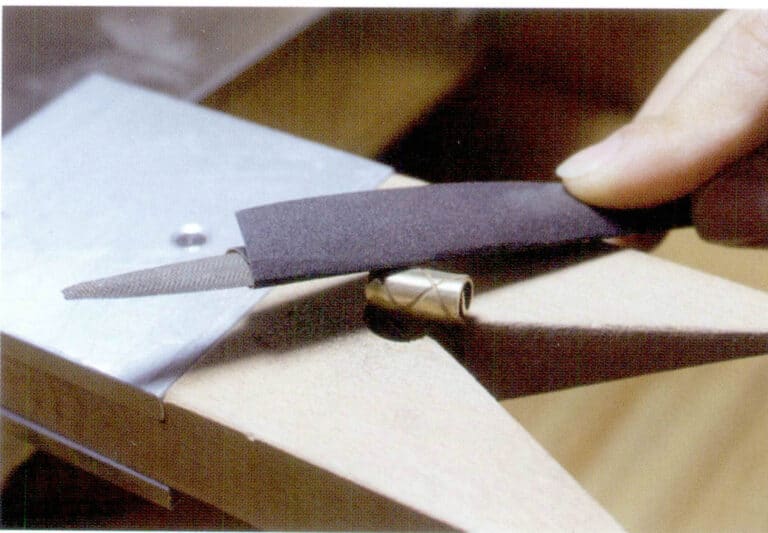
② Grinding rod polishing:
Various grinding rods can be used for manual polishing. Grinding rods are soft and can be cut into various shapes, making polishing small parts and grooves convenient.

(2) Machine Polishing
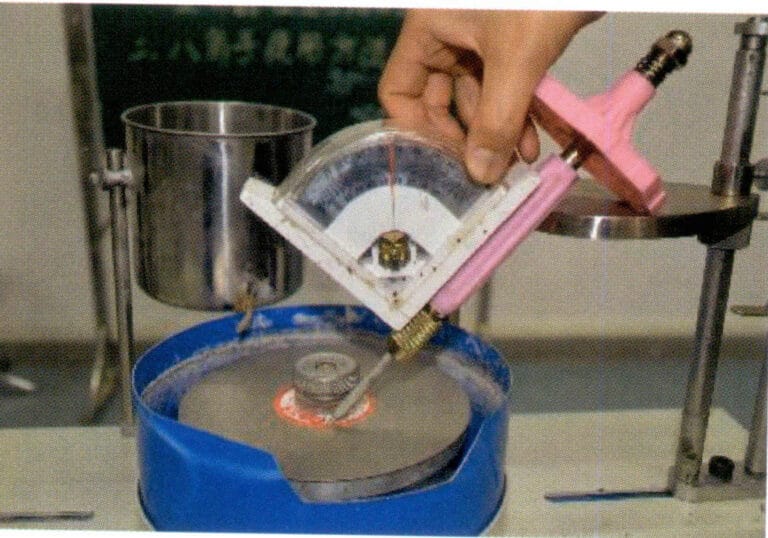
The polishing machines can be divided into hanging grinders, electric disc sander, abrasive belt machine, etc. We often use the hanging grinder, which generally installs sandpaper rolls or other tools for polishing.
① Abrasive Paper Polishing:
Install a tightly wound sandpaper roll onto the hoist and control the hoist’s speed evenly to polish the object. The surface of the sandpaper roll comes in various grits, and polishing should also be done from coarse to fine.
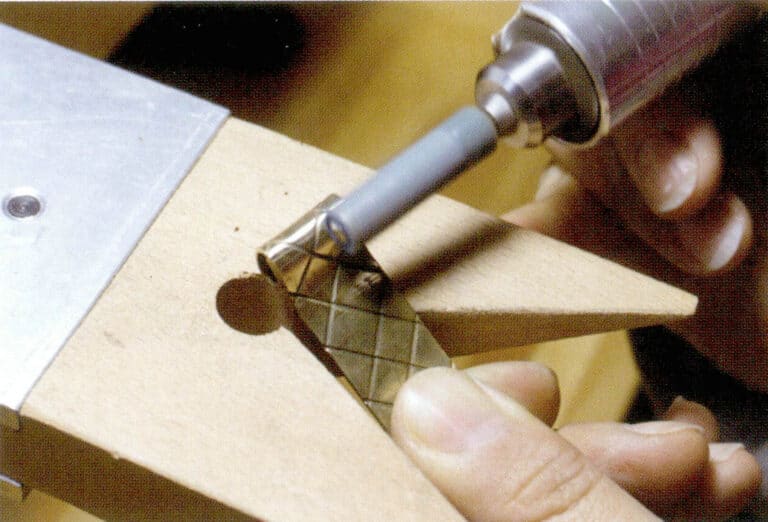
② Rubber Abrasive Wheel Polishing:
Rubber abrasive wheels are generally used with hanging grinder and come in various models, suitable for shaping and polishing metals. Additionally, if a special shape of a rubber wheel is needed, it can also be modified using a file.

3. Polishing
(1) Manual Polishing
It is relatively time-consuming, but it can handle details better using tools such as copper brushes, buffing wheels, and wool felts.
(2) Mechanical Polishing
① Hanging Grinder Polishing:
Can be used with various polishing accessories such as copper wire sweepers, cloth wheels, and wool sweeps.
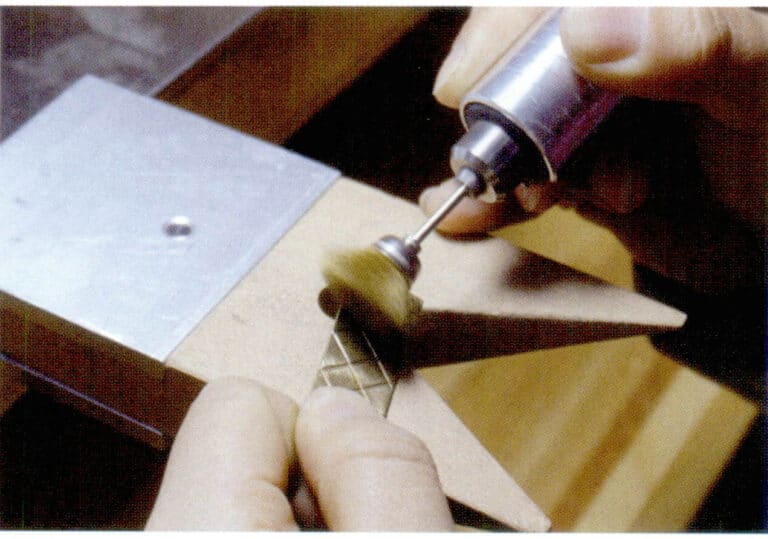
Hanging grinder with copper wire sweeper for polishing
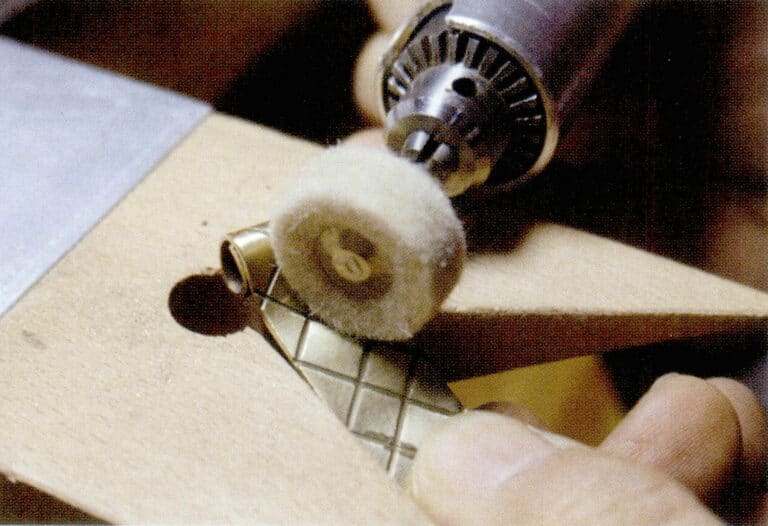
Hanging grinder with felt rolls for polishing
② Cloth wheel polishing machine:
Can be used with different polishing wheels and polishing wax for polishing, such as cotton cloth wheels, canvas wheels, cotton thread wheels, wool wheels, etc.
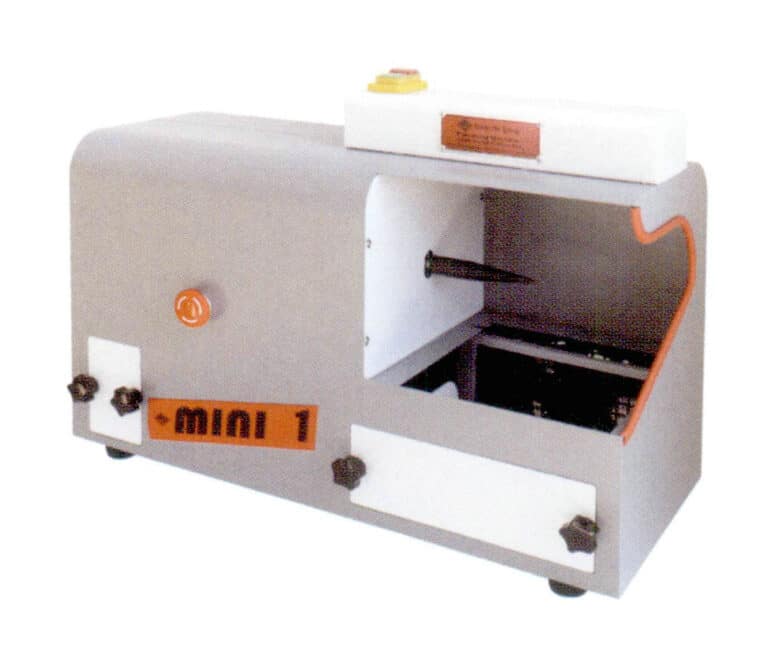
Dust collector polishing machine
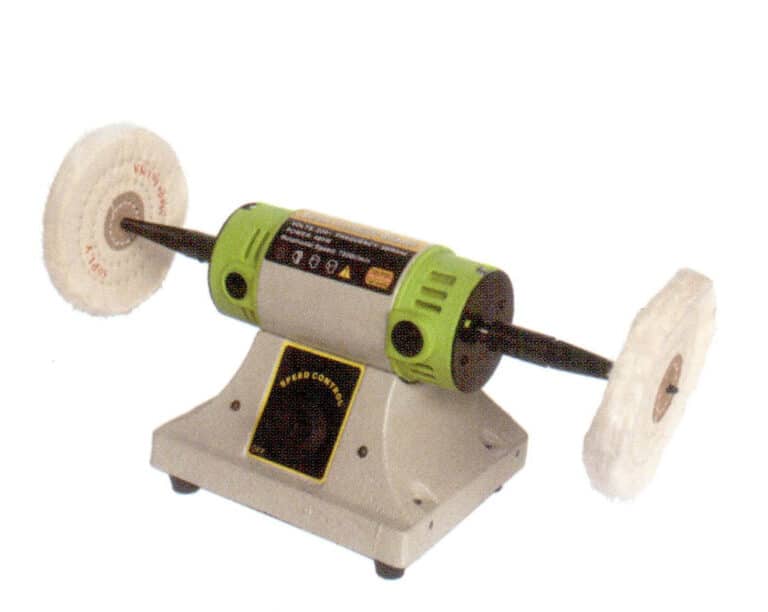
Double head bench polishing machine

Polishing compound
③ Magnetic tumbler:
Uses friction between metals for polishing. When in use, place an appropriate amount of magnetic polishing pins, detergent, and clean water into the polishing machine, then put the metal into the machine and adjust the polishing time and intensity. The machine operates quickly, and the metal can achieve a shiny effect quickly.
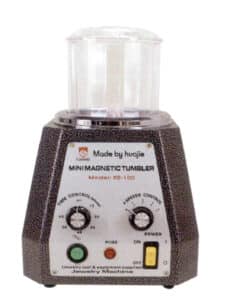
Magnetic tumbler
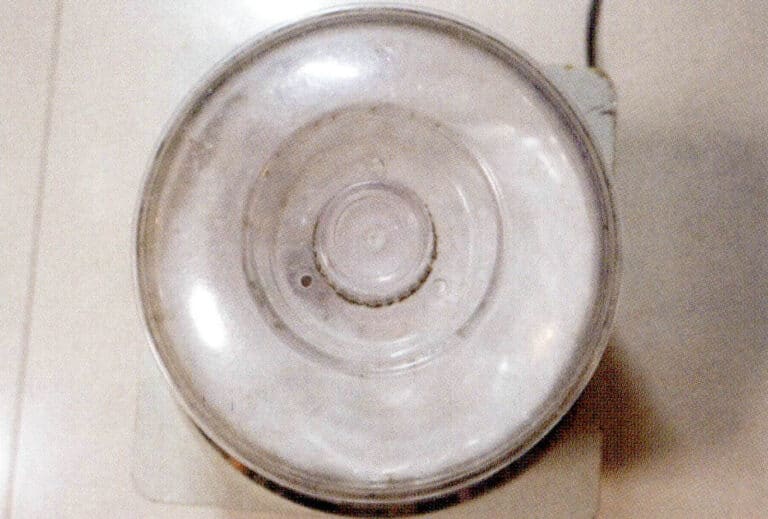
Magnetic tumbler in operation
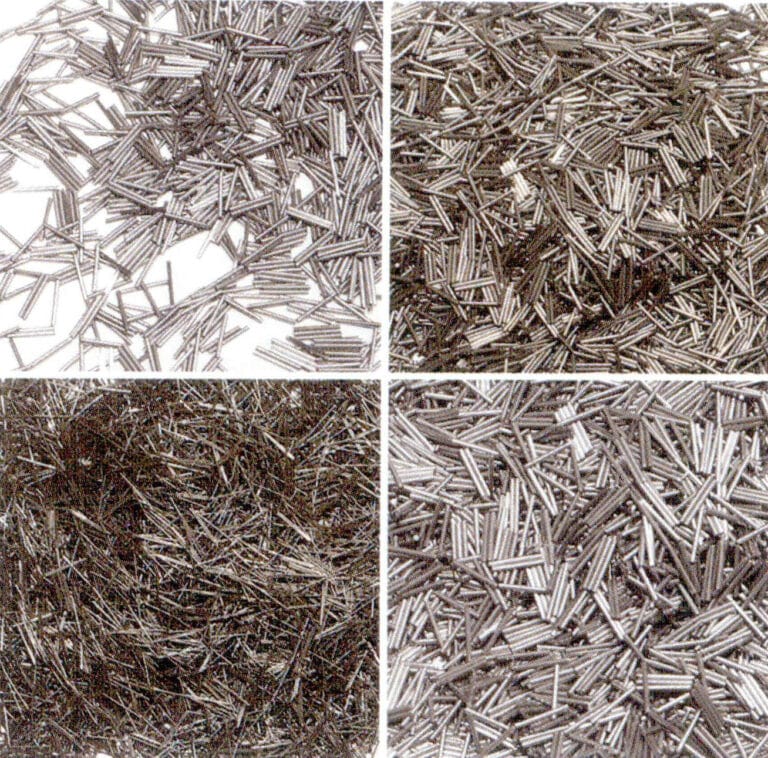
Various types of magnetic tumbling pin

Magnetic tumbler polishing silver jewelry
④ Rotary tumbler:
When in use, place stainless steel polishing beads, polishing powder, clean water, etc., into the machine, then add the metal items to be polished and adjust the polishing time and intensity according to your needs.
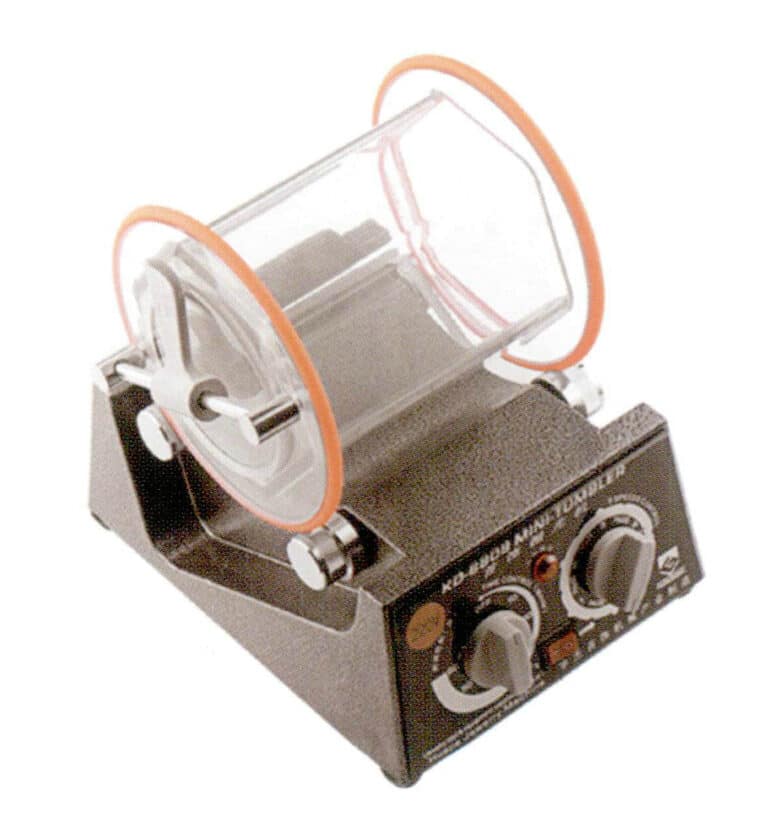
Rotary tumbler
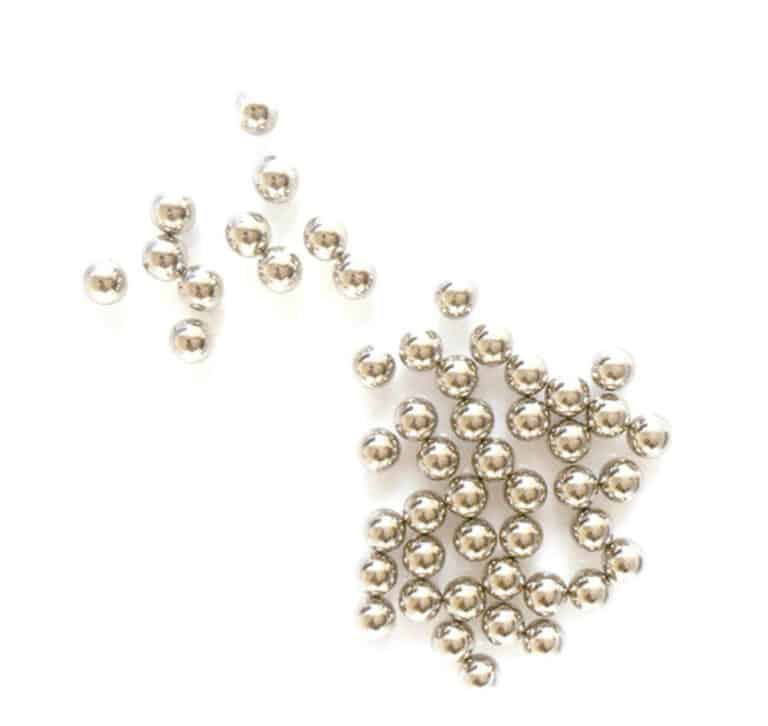
Special stainless steel beads for rotary tumbler (various models)
4. Burnishing
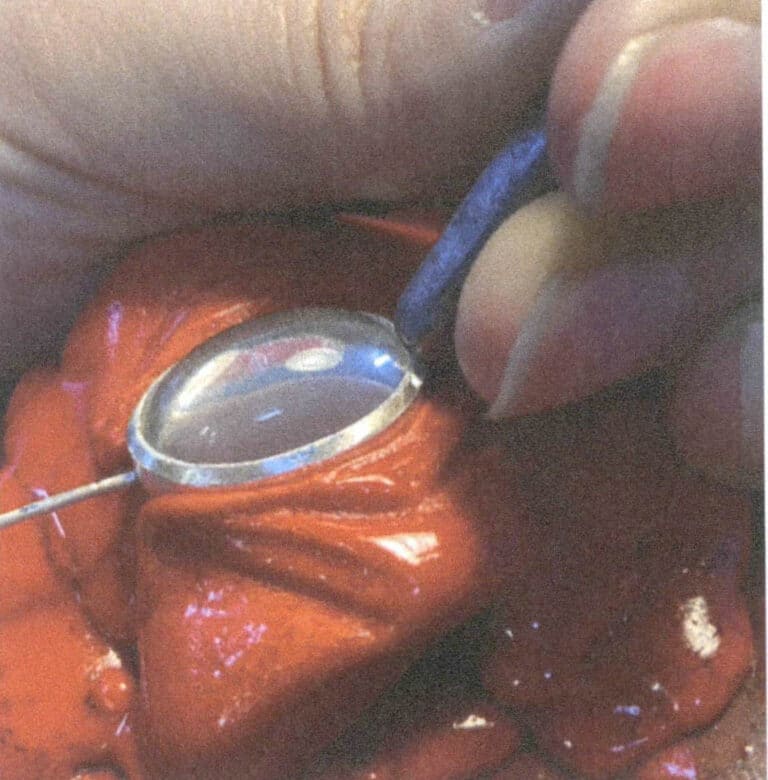
Burnishing, also known as press polish, is a method that uses pressure to achieve a high gloss on metal surfaces. Unlike grinding and polishing, burnishing does not cause any loss to the metal. Burnishing is often done manually, allowing for the treatment of areas machines cannot reach while also creating a sense of rhythm through contrasting brightness on the metal surface.
Use a burnishing pen or agate burnisher knife to apply pressure and friction to the areas needing pressing while dipping into a certain lubricant, such as a cleaner or water. Remember that there should be no dust or grit between the burnishing tool and the metal; otherwise, the metal surface and the burnishing tools will suffer varying degrees of damage.
