How to Perfectly Set Gemstones: A Step-by-Step Guide for Jewelry Makers
8 kinds of Setting Techniques
Exquisite jewelry is inseparable from precious metals (including platinum, metal, and silver) . Yet, it is undeniable that the most dazzling part of jewelry consists of the variously shaped and brilliantly colored gemstones embedded within it. Natural gemstones and jade are Exquisite “gifts” are bestowed upon humanity by nature Products of various geological processes during the formation and evolution of the Earth,Showcasing the miraculous power of nature’s craftsmanship. Gemstones possess a captivating charm that can evoke endless imagination.
The art of setting involves using various methods such as setting, filing, chiseling, pinching, and welding to combine gemstones and jade of different colors, shapes, and textures into various forms and styles, creating craftworks and decorative items with high aesthetic value.
The art of setting is primarily a manual skill with a high technical content, making it one of the more challenging jewelry-making processes. The setting technique emphasizes the skill proficiency of the operator; almost every exquisite piece of jewelry reflects the operator’s skill.
Common setting methods mainly include bead setting, prong setting, bezel setting, channel setting, pave setting, gypsy setting, flush setting, and no-edge setting.

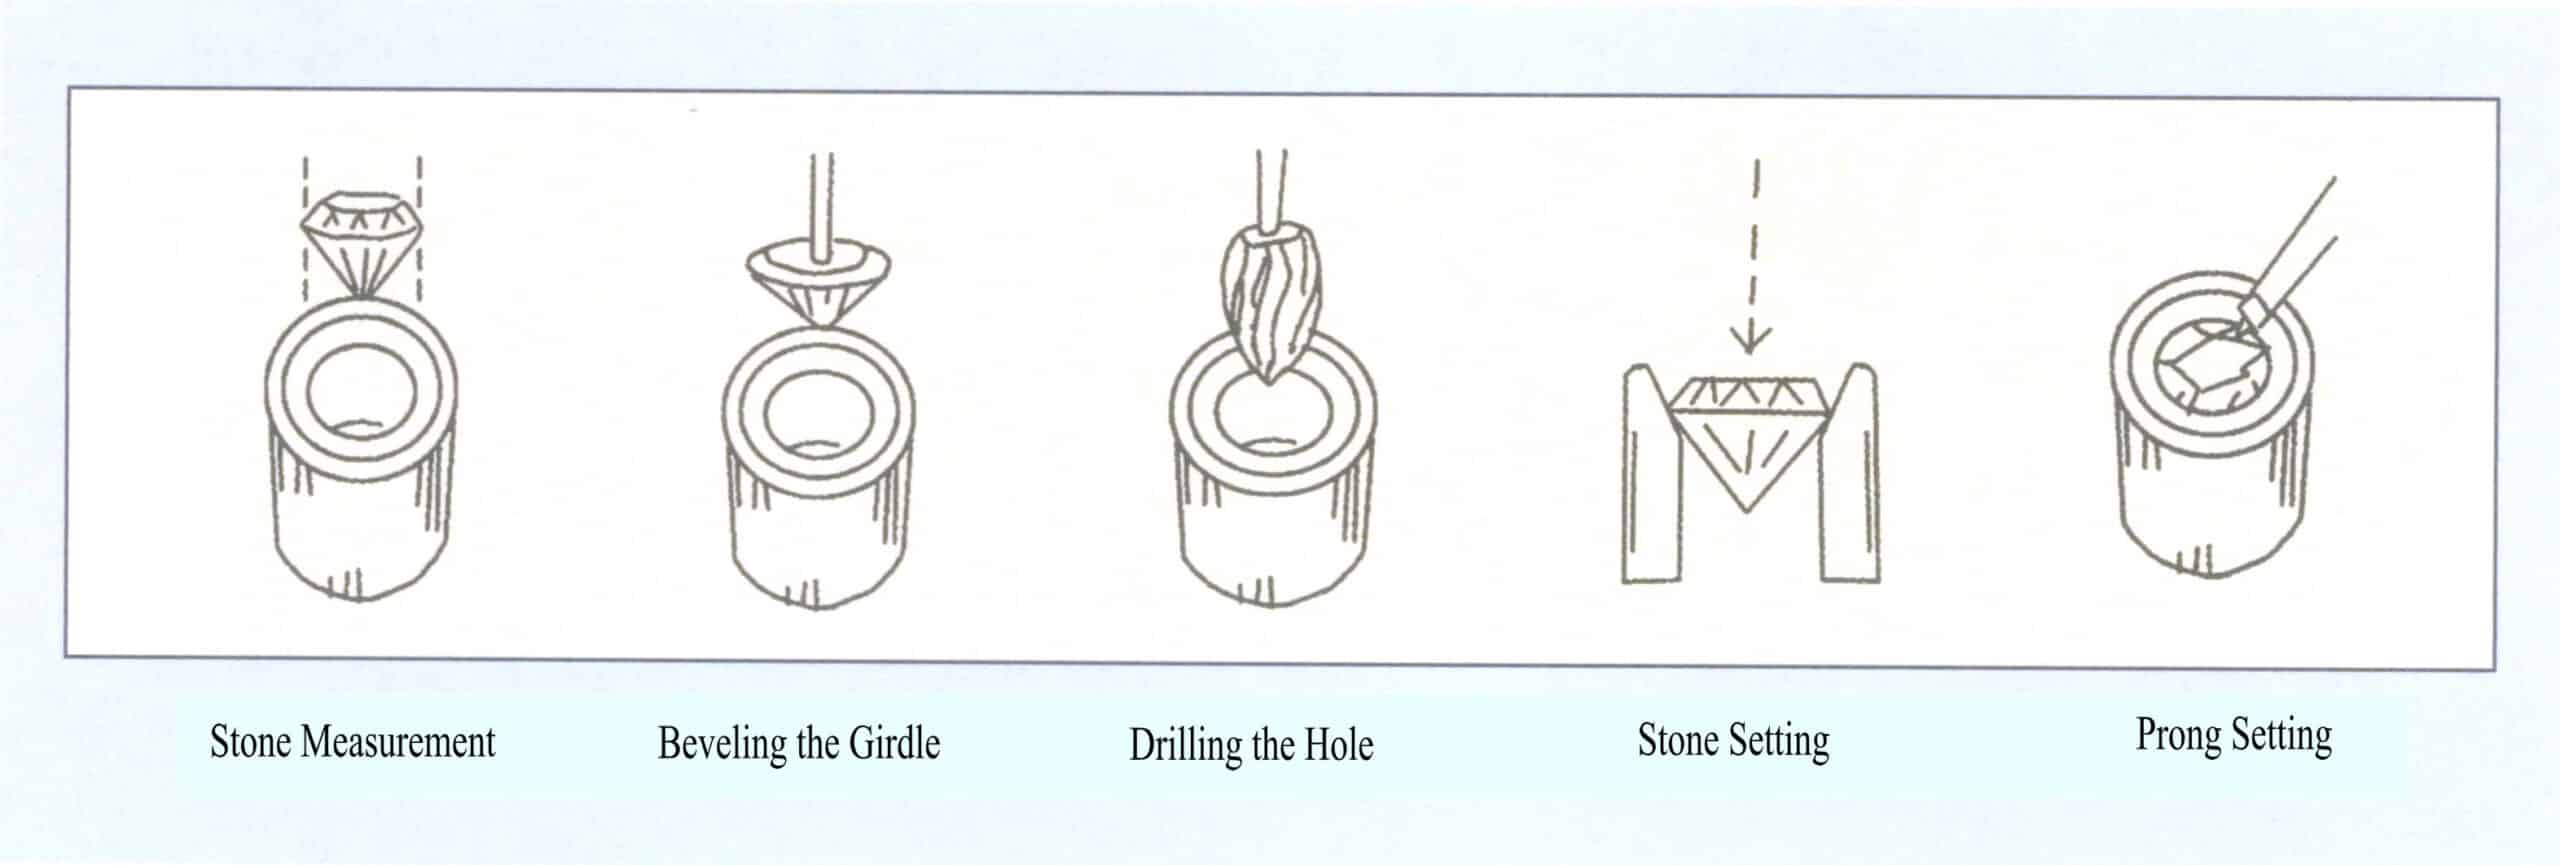
Schematic diagram of the process of setting the Prong
Table of Contents
Section I Preparing Gemstones
Preparing Gemstones Video
1. Main Tools Used
2. Key Points of the Operating Process
(1) Understand and familiarize yourself with customer order requirements.
(2) For the gemstones provided by the customer, weighing and verification are required; see Table 5-1.
Table 5-1 Gemstone Weighting and Verification Table
| Code | Size (mm) | Weight (carat) | Code | Size (mm) | Weight (carat) | Code | Size (mm) | Weight (carat) |
|---|---|---|---|---|---|---|---|---|
| 000 | 0.004 | 6.5 | 1.8 | 0.026 | 13.5 | 3.2 | 0.130 | |
| 00 | 0.004 | 7 | 1.9 | 0.031 | 14 | 3.3 | 0.146 | |
| 0 | 1.0 | 0.006 | 7.5 | 2.0 | 0.035 | 14.5 | 3.4 | 0.153 |
| 1 | 1.1 | 0.007 | 8 | 2.1 | 0.042 | 15 | 3.5 | 0.165 |
| 1.5 | 1.2 | 0.008 | 8.5 | 2.2 | 0.046 | 15.5 | 3.65 | 0.185 |
| 2 | 1.2 | 0.009 | 9 | 2.3 | 0.051 | 16 | 3.7 | 0.200 |
| 2.5 | 1.25 | 0.010 | 9.5 | 2.4 | 0.060 | 16.5 | 3.8 | 0.205 |
| 3 | 1.25 | 0.011 | 10 | 2.5 | 0.065 | 17 | 3.9 | 0.230 |
| 3.5 | 1.3 | 0.013 | 10.5 | 2.6 | 0.073 | 17.5 | 4.0 | 0.250 |
| 4 | 1.4 | 0.014 | 11 | 2.7 | 0.080 | 18 | 4.1 | 0.255 |
| 4.5 | 1.5 | 0.015 | 11.5 | 2.8 | 0.085 | 18.5 | 4.2 | 0.265 |
| 5 | 1.5 | 0.017 | 12 | 2.9 | 0.100 | 19 | 4.3 | 0.300 |
| 5.5 | 1.6 | 0.019 | 12.5 | 3.0 | 0.110 | 19.5 | 4.4 | 0.320 |
| 6 | 1.7 | 0.021 | 13 | 3.1 | 0.120 | 20 | 4.5 | 0.360 |
(3) Check if the gemstones have chips, cracks, or fractures and whether the color and clarity grade of the gemstones match the order requirements. Use a wax or metal mountings to test the gemstones and check if the shape and specifications of the gemstones match the settings. If the customer’s gemstones do not meet the order requirements, they must be reported promptly.
(4) Strictly match the gemstones to the jewelry according to the order requirements and hand over the set gemstones to the next production process.
(5) Input the quantity of gemstones, embedding methods, customer names, and other data into the production management system.
(6) Inspect the jewelry after the gemstones are embedded and address issues such as leftover and broken gemstones during the embedding process.
02 Gemstone Preparing Explanation Video
3. Common Terms Used in Gemstone Setting
(1) Cutting (Faceting): Refers to the shape and style of the gemstone’s cut. The cut gemstone should meet the customer’s order requirements.
(2) Color: Refers to the color of the gemstone, such as blue, yellow, red, green, brown, etc.
(3) Size: Refers to the size and dimensions of the gemstone.
(4) Gemstone Dullness: Refers to the phenomenon where the surface of the gemstone appears dull, leading to a decrease in transparency and affecting the brightness of the gemstone.
(5) Needle inclusions: Refers to the presence of small needle hole phenomena within the gemstone. Such inclusions may be found on the surface or bottom of the gemstone.
(6) Black spots: Refers to the presence of black impurities on the surface or inside the gemstone.
(7) Internal flowers: Refers to the impurities within and on the gemstone’s surface. Based on the visibility of the impurities, they can be classified into three categories: minute impurities, containing impurities, and containing obvious impurities.
(8) Internal cracks: Refers to the degree of cracks within and on the gemstone’s surface.
Internal cracks in gemstones: Based on the degree of cracks present, they can be classified into three categories: minute cracks, containing cracks, and containing obvious cracks.
Surface cracks in gemstones: Based on the degree of cracks present, they can be classified into three categories: those with slight cracks, those with small cracks, and those with obvious cracks.
(9) Gemstone chipping: Refers to defects or notches on the surface of gemstones. Depending on the location of the defect, it can be further divided into five types: edge defects, facet defects, table defects, bottom defects, and corner defects. Based on the obviousness of the defects, they can be classified into three categories: those with minor defects, those with small defects, and those with obvious defects.
Section II Preparation for Setting Gemstones
1. Applying Hot Wax
Applying hot wax secures the jewelry onto the handle, making it easier for the operator to hold and manipulate during the gemstone setting process. It is mainly used for earrings, pendants, or other pieces that require pressing, while other setting methods depend on the specific situation of the jewelry piece.
(1) Main tools used
A set of welding tools, sealing wax, tweezers, an anvil, etc.
(2) Key points of the operating process
Place the sealing wax on the anvil, then step on the air ball evenly with your foot, ignite the blowtorch, and move the flame to heat the sealing wax. Once the sealing wax softens, press one end of the sealing wax stick onto the sealing wax, and then use the tweezers to detach the sealing wax from the anvil. Continue to heat the sealing wax with the blowtorch, place the jewelry into the soft sealing wax, and expose the gemstone setting, pressing the sealing wax around the jewelry with your hand or tweezers to secure the jewelry (Figure 5-2) . Finally, place the sealing wax in water to cool it down, making it harder and increase strength.
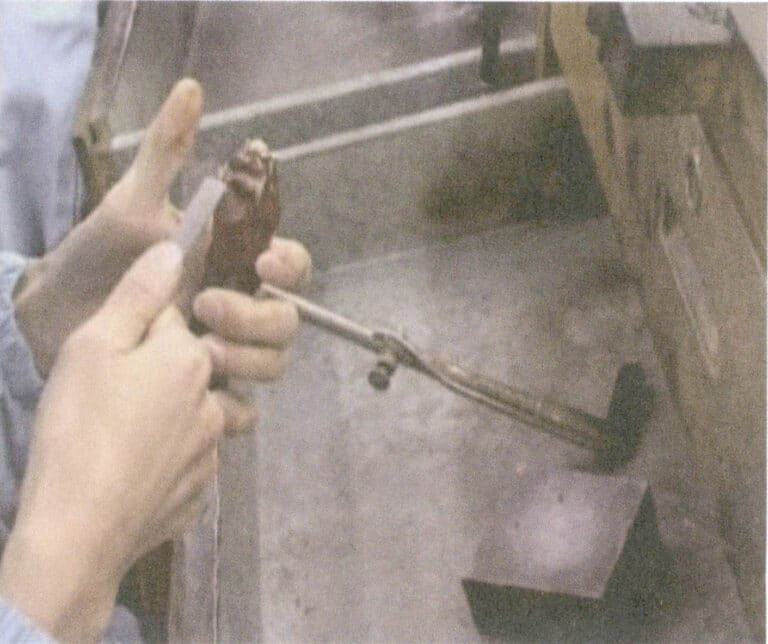
Applying Hot Wax Video
2. Grind Flat Chisel
In the jewelry processing process, the flat chisel is widely used and is one of the most commonly used tools in the gemstone setting process. Almost every setting method requires a flat chisel, such as edge chiseling, Prong lifting, and gemstone removal.
(1) Main tools used
Chuck, sewing needle, oil gemstone, sewing machine oil.
(2) Steps for flattening the chisel
① Place the oil gemstone directly in front of you on the table, keeping your chest up and about 10 cm away from the table.
② Wipe the oil gemstone clean with a paper towel, and add an appropriate amount of sewing machine oil to the oil gemstone to improve the speed and quality of sharpening the chisel and reduce the wear of the oil gemstone.
③ Install the needle. Take a sewing needle, cut the tip, and place it into the needle chuck, There are two types of Needle chuck: single-ended and double-ended, their main function is to hold the steel needle, increasing the area of force for easier work. The length of the needle exposed should be about 1 cm. If the needle is exposed too long, it can easily bend or break under pressure; if exposed too short, the needle holder will frequently collide with the jewelry during use.
④ Hold the oil gemstone with the left hand and grip the chuck tightly with the right hand (the chuck is gripped with the thumb and the front middle part of the index finger at the non-slip area, while the other fingers help to stabilize it) , allowing the needle to rub back and forth on the oil gemstone. During the process of grinding flat chisel, the wrist and forearm should be in a straight line, and the arm should maintain a certain angle and height relative to the table, using the wrist to control the angle between the needle and the oil gemstone, with an inclination angle of 30°-40°. is mainly the use of shoulder strength, so that the needle in the oil gemstone horizontally back and forth friction, during which the force should be uniform (force on the steel needle, Figure 5-3) . Be careful not to swing your hand from side to side to avoid grinding several sides or sloping flat chisel.
⑤ Use the same method to sharpen the other side of the needle, paying attention to applying slightly more force at the longer angle.
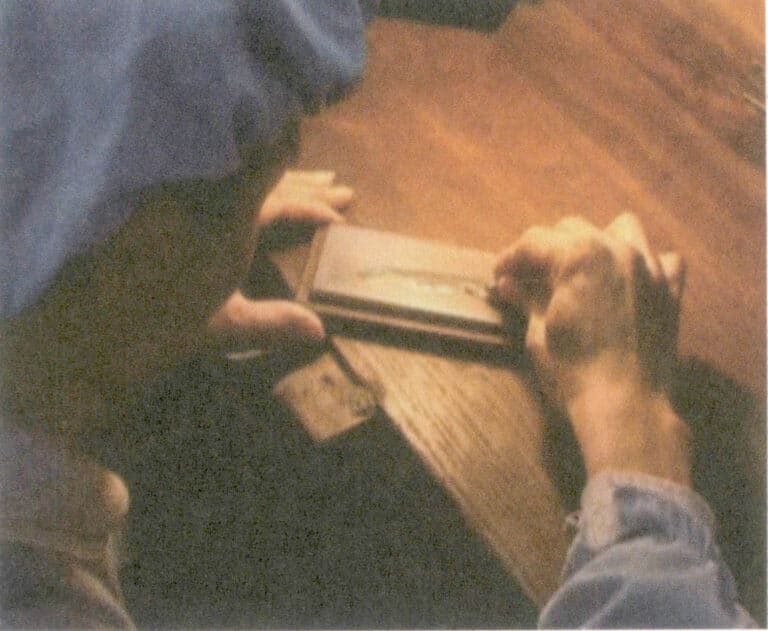
(3) Requirements for flattening the chisel
The two surfaces of the flat chisel should be of equal size, the surface must be smooth and shiny, and it should not form a curve or multiple cutting edges. The cutting edge of the flat chisel should be straight and sharp. During the process of grinding the chisel, special attention needs to be paid to the angle of the flat chisel, as different usage scenarios have different requirements for the flat chisel. Flat chisels used for edging are relatively faster with a 95° angle because the thinner and sharper it is ground, the better it is for removing metal. The flat chisel used for driving prongs, with 85 ° angle is relatively less effort, because the flat chisel mouth tip of the force area is small, using the same force, driving prongs better results.
Grind Flat Chisel Video
3. Make cup bur for round prong
(1) Main tools used
Flex shaft grinder, bur, ball bur, oil gemstone, blowtorch, pliers.
(2) Operating Steps
① Use a discarded tool (such as a wheel bur) to cut off its tip and grind it flat on an oil gemstone or with a sand roller.
② Hold the discarded tool with pliers in your right hand, and use a blowtorch in your left hand to burn the front end until it turns red, then let it cool naturally; the discarded tool can be softened through tempering.
③ Hold the discarded tool with your left hand, securing it against the workbench, and with your right hand, pick up the flex shaft grinder handpiece equipped with a bur, using the bur drilling on the cross-section of the discarded tool. during the drilling process, the flex shaft grinder remains stationary, and the left hand slowly rotates the waste tool. The bur should maintain a certain inclination with the tool’s cross-section and the drilled hole should be semi-circular (Figure 5-4) .
④ Switch to a ball bur (generally a 006 ball bur) to round the drilled hole and polish it smooth.
⑤ Heat the already drilled Prong-set cup bur until it turns red. After that, immediately place it in water to cool and quench it in order to increase the hardness of the bead.
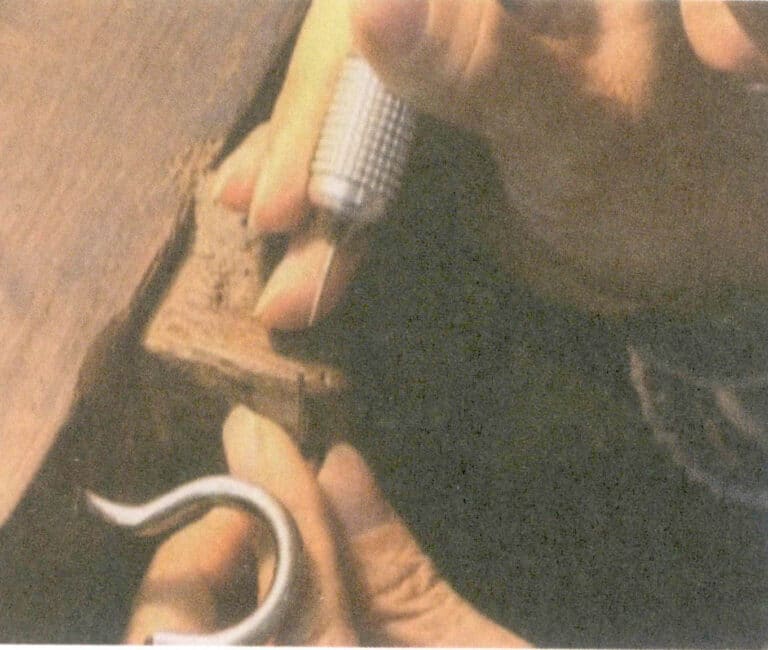
(3) Operation Requirements
① The inner hole of the bead must be centered and not tilted.
② The hole should not be drilled too deep or too shallow; the depth should be determined based on the length of the Prong being set.
③ The hole should be round, and the hole wall should be smooth.
④ The size of the Prong head should determine the size of the cup bur; if it is too large or too deep, it may cause the Prong head not to adhere to the gemstone, and it is easy to damage the gemstone during operation; if it is too small, the pressed Prong head will be flawed.
Setting Preparation Work Video
4. Making a cup bur for flush setting
(1) Main tools used
Same as a ” Make cup bur for round prong.
(2) Operating Steps
See the operation method for ” Make cup bur for round prong.
(3) Operation Requirements
In the process of making cup bur for flush setting, it is important to ensure that the edge is neither too thick nor too thin. If the edge is too thick, the cup bur cannot go down; even if it can, too much metal dust will be collected, affecting the appearance. If the edge is too thin, too easy of lifting the metal dust while the cup bur going down, and there may throw the gemstones off. The edge for cup bur cannot be thick on one side and thin on the other or not round enough; otherwise, the result will be uneven metal dust, affecting the appearance.
Section III Setting Techniques
1. Pave setting
Pave setting is a method of securing a gemstone by pressing the existing prongs of the setting against it. This is the simplest and most fundamental method in a gemstone setting. Generally, learning gemstone setting starts with this method.
(1) Main tools used
Flat chisel, tweezers, peach bur, wave bur, cup bur, flex shaft grinder, oil gemstone, etc.
(2) Operating Process Steps
① Place the gemstone to be set on the anvil and arrange them in order of size.
② Hold the jewelry to be set with the ready working sealing wax (ring clamp) in the left hand and fix it against the platform.
③ Use tweezers to pick up the gemstone, placing it at the test setting position (Figure 5-5) . If the gemstone is larger than the setting position, use a peach bur or umbrella bur to grind the position according to the thickness of the gemstone (Figure 5-6) until the setting position fits the size of the gemstone.
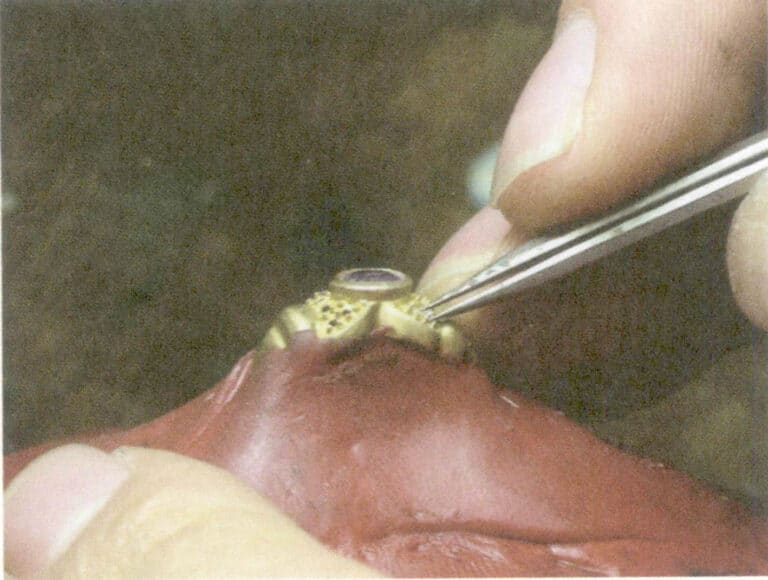
Figure 5-5 testing the gemstone base
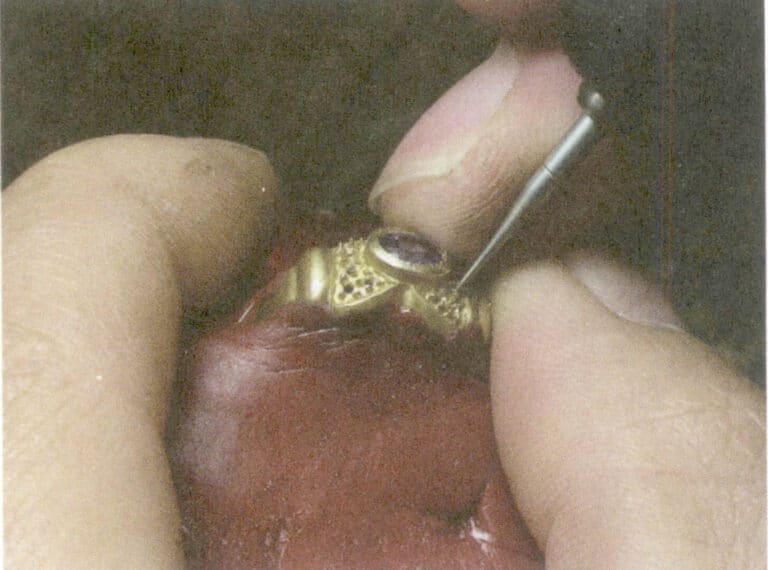
Figure 5-6 grind the position of setting base.
④ Choose a disc bur the same size as the gemstone to be set based on the size of the gemstone, place it against the Prong at an beveled angle of 30 degrees, and then slowly straighten it to align with the position of setting base.
⑤Using tweezers carefully place the gemstone into the setting, ensuring it sits slightly recessed. Align the gemstone correctly with the tweezers, making sure it is securely positioned in the setting base. For gemstones that sitting flat, gently push the prong head upward from the base towards the gemstone edge, ensuring it is close to the gemstone. If the gemstone is not level after placement, use a disc bur to gently reshape it until it lies flat against the setting. If the prong is too far from the gemstone, use a flat chisel to press it closer, then use a cup bur to attach the prong head firmly to the gemstone. Throughout the process, be cautious with the pave setting edges to keep the polished surface intact and undamaged.
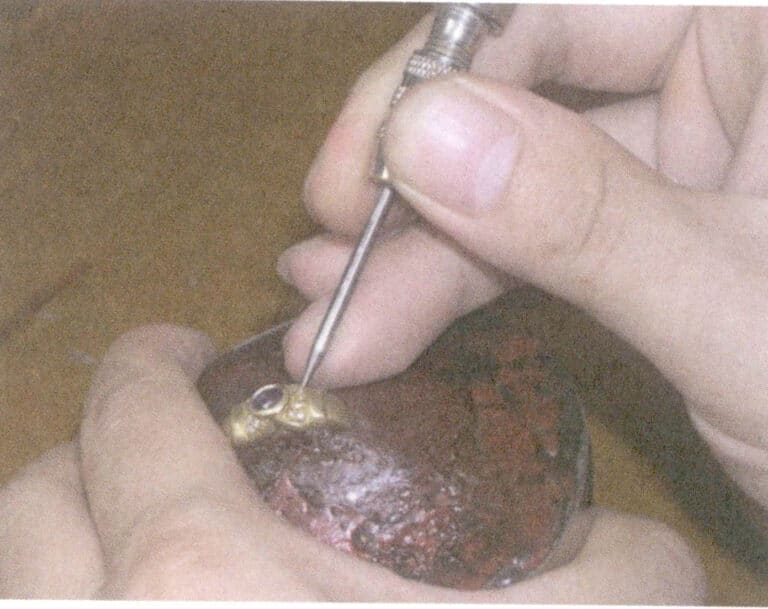
Figure 5-7 Pushing the Prong
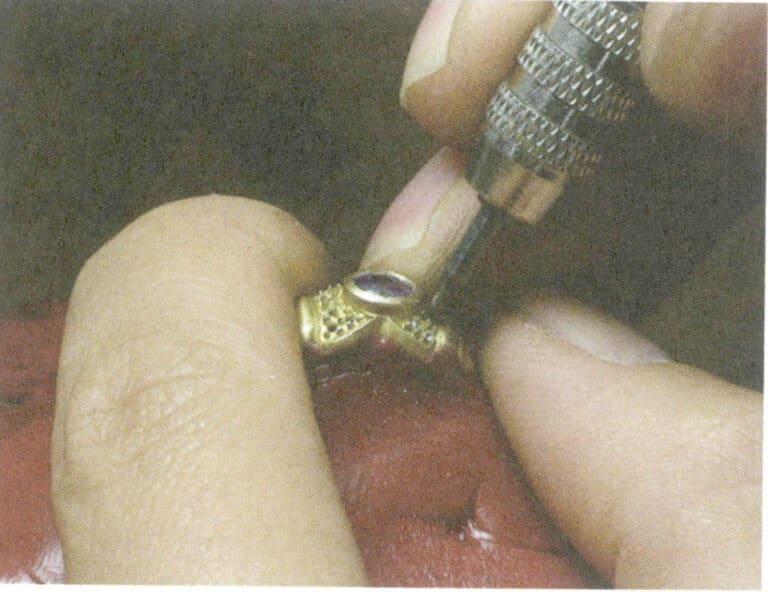
Figure 5-8 Polish the round Prong
(3) Craft requirements for pave setting
① The set gemstone must not exhibit tilting, unevenness, insecure setting, or broken gemstones.
② The height difference between the gemstones should be determined according to the shape of the jewelry; on the same line, there should be no unevenness between the gemstones.
③ The polished metal position and metal edge around the gemstone must not be scratched.
④ The Prong head must be round and not flattened, and there should be no metal chips on the edge of the Prong head.
⑤ The Prong should neither be too long nor too short; if it is too long, it may catch on clothing, and if it is too short, the gemstone will not be securely set, resulting in gemstones dropped off.
⑥ Before setting, the thickness and shape of the gemstone must be carefully observed before grinding the position of setting base.
⑦ Observe whether the gemstone placing upward correctly, compare the gemstone surface with the setting base.. Treat the gemstone surface as a straight line and compare it from four directions with the setting position; if they are parallel, the gemstone sitting upward correctly.
⑧ To observe whether the gemstone sitting upward correctly, one should look at the overall shape of the jewelry.
Pave setting Video
2. Raised beads Setting
Raised beads Setting embeds gemstones by manually raising beads to secure the gemstone to the setting base. The embedding effect of the beads set is the same as that of the pave setting.
(1) Main tools used
Flat chisel, tweezers, peach bur, wave bur, bead sucker, flex shaft grinder, oil gemstone.
(2) Operating Process Steps
For the process of setting the Prong, see Figure 5-9.

① Using tweezers carefully place the gemstone into the setting position. If the gemstone is larger than the setting base, use a peach bur to expand the position until the setting base fits the size of the gemstone.
② Ensuring the gemstone surface is slightly lower than the metal surface.
③ Determine the raised beads position. Usually, three Prongs are arranged in an equilateral triangle, four in a square, and six in a hexagon.
④ Use a flat chisel to push the Prongs up from the corner of the setting position.
⑤ Use a flat chisel to remove the extra edge of the gemstone settings and any excess metal dust.
⑥ Use a cup bur to round the Prong head and tightly attach it to the gemstone.
(3) Craft requirements for starting the setting hook
① The gemstones must sit flat, without slanting, loose settings, or broken gemstones.
② The Prong head must be round without flattened or metal shavings.
③ The flat chisel used for raised beads must be sharp; if dull, it should be sharpened with an oil gemstone before use.
④ Before setting, carefully observe the shape and thickness of the gemstones, then proceed to grind the position.
⑤ When setting gemstones, the gemstone’s surface should be level with or slightly lower than the metal surface.
Raised beads Setting Video
3. Prong Setting
Prong setting is a method of setting gemstones using prongs for fixation. Prongs can be categorized into round prongs, square prongs, triangular prongs, finger nail prongs, six-prong, four-prong, three-prong, two-prong, single prongs, and shared prongs.
Prong setting can be further divided into bottom prong setting, diamond prong setting, and colored gemstone prong setting.
(1) Main tools used
Disc bur, needle-nose pliers, cutting pliers, triangular file, bamboo leaf file, tweezers, bead cup bur, flex shaft grinder, umbrella bur, peach bur.
(2) Operating Process Steps
Diagram of the operation process for prong setting, see Figure 5-10.
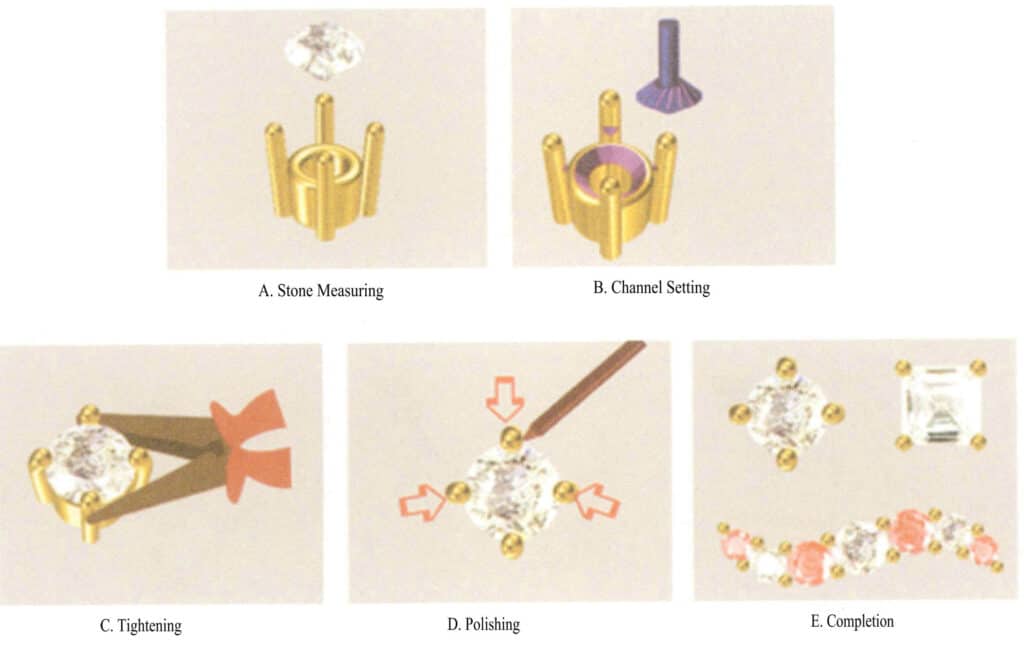
① Test setting base. Place the gemstone in the setting position (Figure 5-11) , paying attention to the size and thickness of the gemstone. If suitable, use an appropriate umbrella bur or disc bur to create the grip position on the prong, whose height determined by the gemstone’s thickness.
② Grinding the setting base. If the gemstone is larger than the setting position, use an umbrella bur or peach bur to carve the bottom metal, making the gemstone level with the setting position (Figure 5-12) . Then, corresponding operations based on the type of gemstone are performed, such as using an umbrella bur to grind the setting base for cabochon-shaped gemstones. The depth and height during the grinding should be consistent with those determined parameters during test setting base, and the junction point between the prong foot and the setting base must not be polishing off.
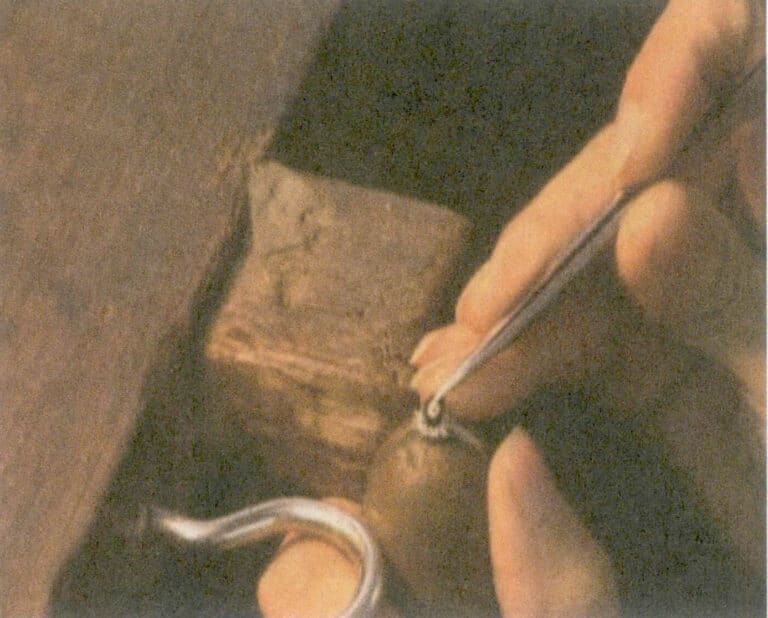
Figure 5-11 Test Prong Setting Position
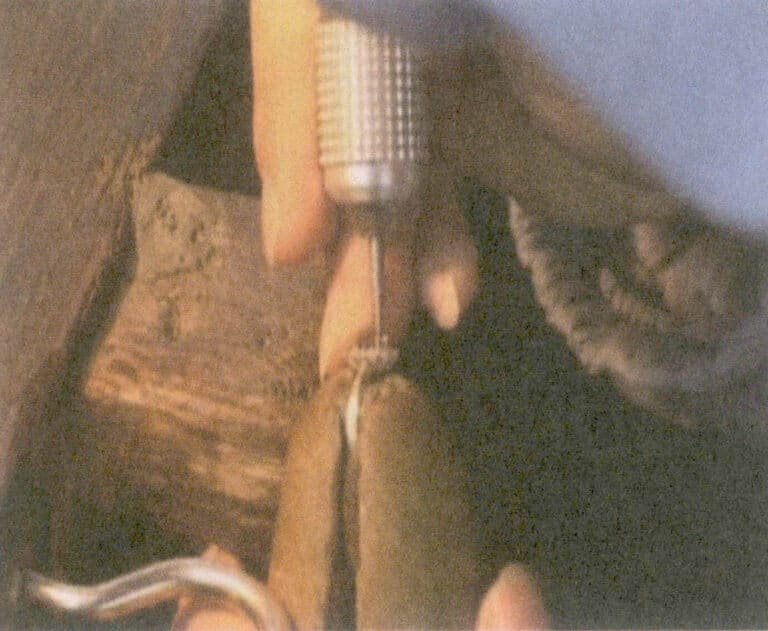
Figure 5-12 Grind Prong Setting Position
③ Prong Pliers. Use tweezers to pick up the gemstone, placing it diagonally into the setting position and then adjusting it with the tweezers. If the gemstone sitting flat, use pointed pliers to slightly tighten the symmetrical prongs, making them fit against the gemstone, and then adjust and tighten the two adjacent prongs (Figure 5-13) . Be careful not to displace or tilt the gemstone while using the pliers, and avoid making the prong marks too deep, as this will affect the subsequent jewelry finishing process.
④ Prong Cutting. When cutting prongs with cutting pliers, press down on the prong head with your hand to prevent it from bouncing away (Figure 5-14) . Pay attention to the length of the prongs; if they are too long, it will increase filing time, and if they are too short, the cup bur may easily touch the gemstone.
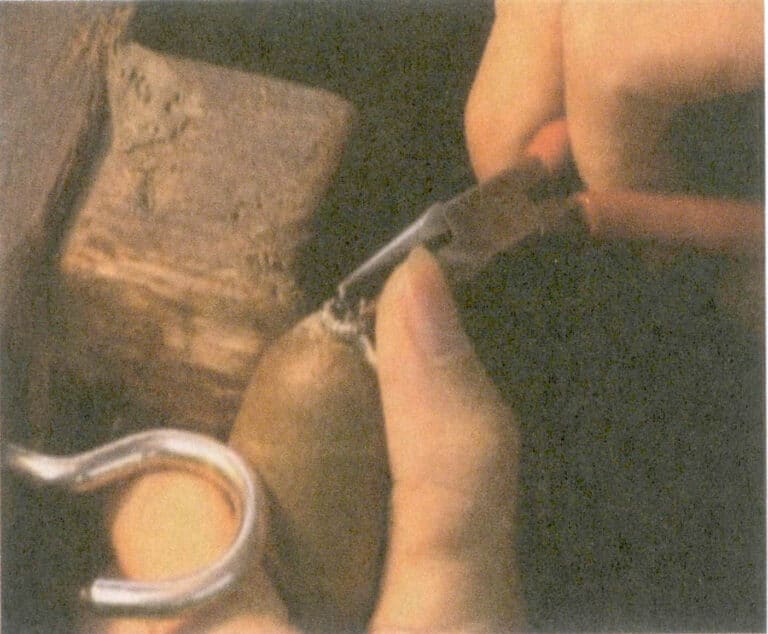
Figure 5- 13 Prong Pliers
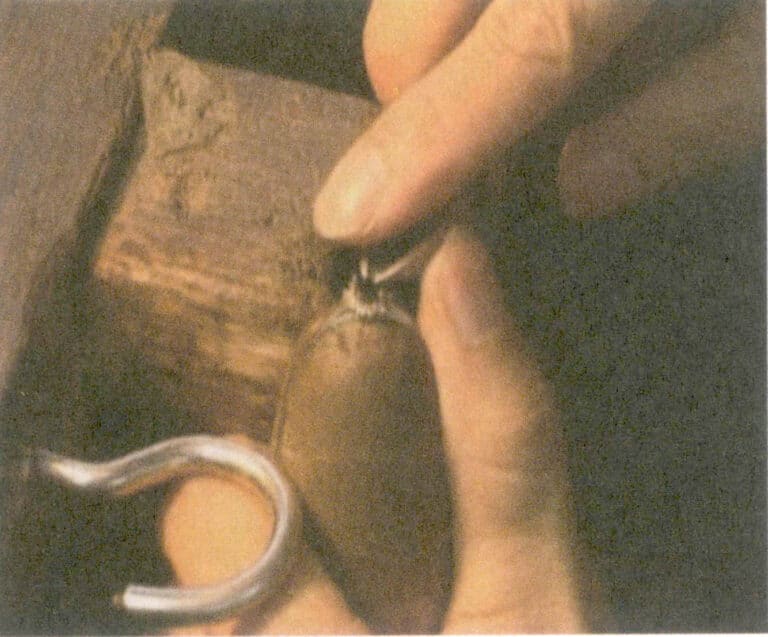
Figure 5- 14 Prong Cutting
⑤ Filing the Prong. After cutting the prong, use a triangular file to file the prong to the height suitable for the cup burs working, ensuring uniform prong height. Then, use a bamboo leaf file to trim the inner side of the prong to fit the gemstone and round the outer side of the prong. When filing the prong, use the thumb or index finger of the left hand for positioning and do not file the gemstone surface (Figure 5-15) .
⑥ Make Round Prong. Use a suitable cup bur to round prongs, swinging evenly from the inside to the outside and on both sides until the prong tip is rounded and tightly adheres to the gemstone, with the outer side of the prong at the same height as the inner side (Figure 5-16) .
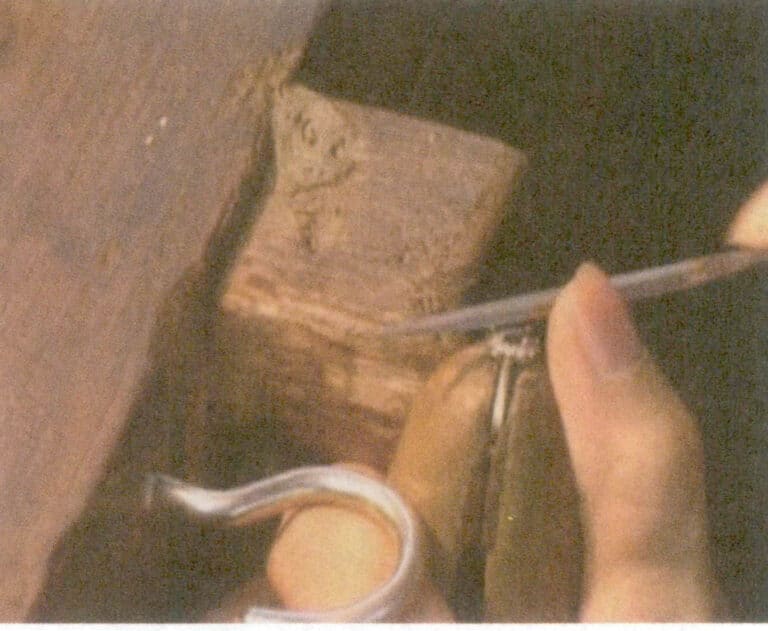
Figure 5- 15 Filing the Prong
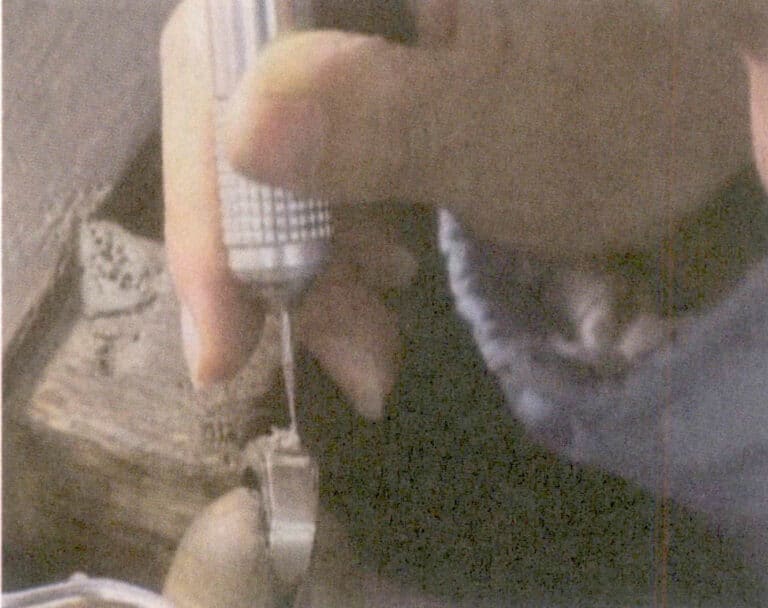
Figure 5-16 Cup bur to round prongs
(3) Requirements for prong setting
① The prongs must be in close attached with the gemstone.
② The gemstone must sit flat without tilting, loose setting, or chipping.
③ The length of the prongs should be consistent and symmetrical, without tilting or scratches at the back of the prong.
④ The gripping position of the prong should be consistent in depth and height. The diamond gripping position is generally for the prong of 1/4-1/3; if it is a colored gemstone, it can be for the prong of 1/3 or slightly more. Regardless of the type of gemstone set, the grip position should be determined by the size and thickness of the gemstone.
⑤ Care should be taken when setting for egg-shaped or octagonal gemstones to avoid twisting and misaligning the gemstone.
Prong Setting Technique Video
(4) Precautions
① Before setting, carefully observe the shape and thickness of the gemstone, and then set the prongs. During the setting process, please pay attention to any issues and resolve them promptly to avoid quality problems with the entire batch of jewelry.
② The cup bur must not damage the gemstone, causing fragments, chips, or scratches on the gemstone.
③ The shared prong should be rounded first. If the gemstone setting will obstruct the cup burs working
④ The prong should be rounded from the outer side towards the inner side.
⑤ The rounded prongs should be tightly against the gemstone, not be too thin or flattened, without varying prong lengths existing.
⑥ The prong should not be too much scratch; otherwise to remove scratch by polishing, it will cause the prongs to become thinner and reduce strength, and the prong tips should not have metal shavings (sharp edges) .
Copywrite @ Sobling.Jewelry — Custom jewelry manufacturer, OEM and ODM jewelry factory
4. Gypsy setting
Gypsy setting embeds gemstones deeply into a circular metal bowl, with the edges tightly wrapped and embedded in metal.
(1) Main tools used
Wave bur, ball bur, disc bur, cup bur, steel setting pusher, tweezers, flex shaft grinder, flat chisel.
(2) Operating Process Steps
For the Gypsy setting operation process, see Figure 5-17.

① Use tweezers to pick up gemstone and place it on the jewelry’s setting position (Figure 5-18).
② If the gemstone is larger than the setting position, use a wave bur to expand the setting base slightly larger than the gemstone, then use a disc bur to create a small recess on the setting position (Figure 5-19) .
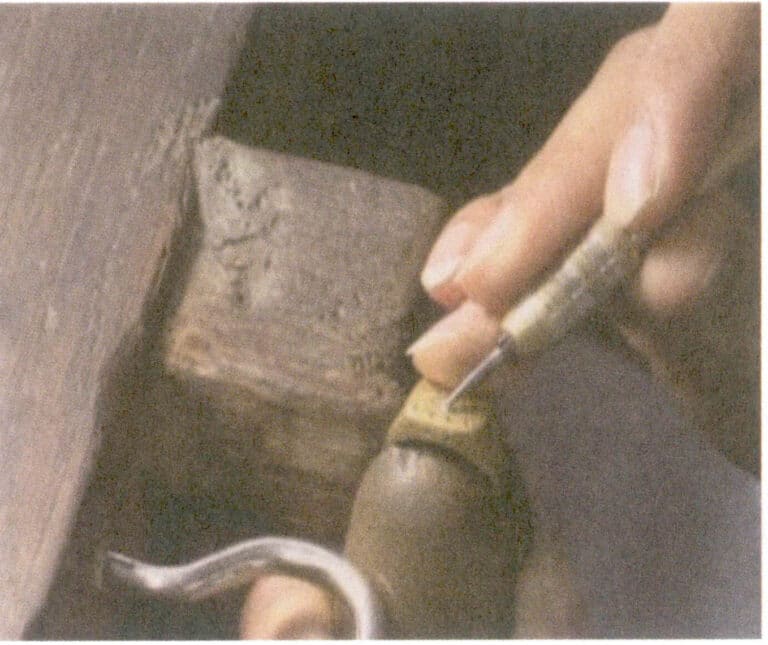
Figure 5-18 Test setting position of Gypsy setting
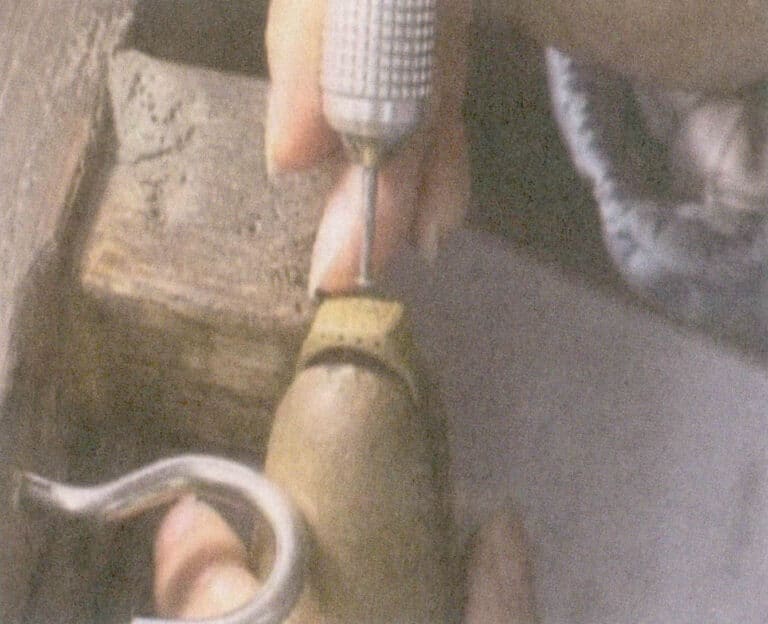
Figure 5-19 grind setting base of Gypsy setting
③ Use tweezers to pick up gemstone and place it along the position of setting base, then observe whether the gemstone is level. If the gemstone is not level, it may because the bottom base metal being too thick, and you need to use a wave bur to expand the position until the gemstone is level; if the gemstone is level, use a recess cup bur to secure the gemstone tightly, the flex shaft grinder should not rotate too quickly. After the gemstone is secured, check again if the gemstone is level. (Figure 5-20).
④ Use a steel setting pusher to compact the metal edges generated when cup bur rotating, ensuring the edges are tightly adhered to the gemstone. If the edges are uneven, remove the excess edges and then use a steel bur to compact the edges (Figure 5-21) .
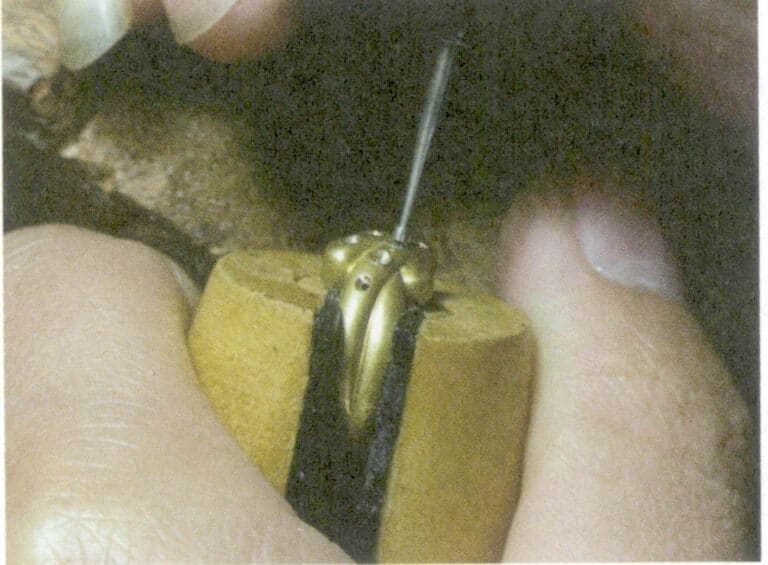
Figure 5-20 Secure gemstone settings by cup bur in Gypsy setting
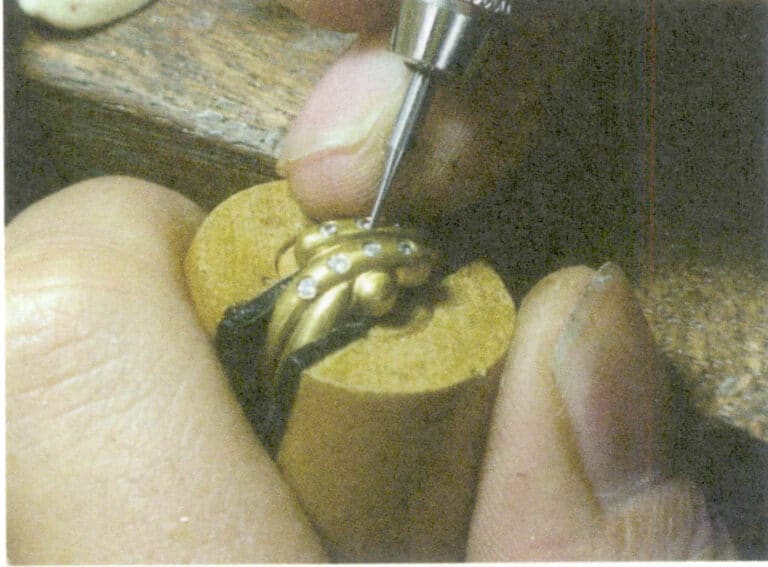
Figure 5-21 Pressing the metal edge
⑤ When using a wave bur, be careful that the wave bur does not deviate.
⑥ The cup bur selected for the Gemstone should be appropriate; if too small, it will not pick up metal at the edge of the gemstone, and if too large, it will not adhere to the gemstone or may easily delaminate.
(3) Requirements for Gypsy setting
① Before setting, carefully observe the shape and size of the gemstone, and then create the setting base.
② There should be no phenomena such as the gemstone being tilted, insecurely setting broken gemstones, or metal edges not attached to the gemstone.
③ The gemstone’s surface should be slightly lower than the metal surface.
④ The metal edges should be even, not too much, too little, or uneven.
⑤ The edges of the setting cannot have gaps, nor one side be larger and the other smaller.
⑥ The gemstone must be positioned in the center and cannot be tilted.
⑦ When pressing the metal edges, the hand must be steady, and the metal edge cannot be scratched.
Gypsy setting Technique Video
5. Tension Setting (channel Setting)
The Tension Setting (channel Setting) is a method of embedding gemstones by creating grooves on both sides of the jewelry setting base to clamp the gemstones in place, which can be further divided into three types: Tension Setting for round gemstones, channel Setting for square gemstones, and Cross shape Tension Setting (channel Setting).
5.1 Tension Setting for round gemstones
(1) Main tools used
Tooth bur, wheel bur, disc bur, setting pusher, hammer, flex shaft grinder, tweezers, flat chisel.
(2) Operating Process Steps
Tension Setting (channel Setting) a round diamond, see Figure 5-22.

① Use tweezers to pick up the gemstone and place it on the setting position; if the gemstone is too large to be put in, then use a tooth bur that perpendicular to the metal surface, and the channel edges on both sides are grinded until the distance between the two edges is less than 0.2 mm of the gemstone diameter.
② According to the thickness of the gemstone, use a tiny wheel bur to carve the setting base, and then use the wheel bur to grind the bottom metal at an angle so that the bottom metal matches the thickness of the gemstone. Use the same method to carve the other side, ensuring that the bottom metal on both sides matches the shape of the gemstone’s base, and the thickness of the surmetal edges should be 0.4-0.5mm.
③ Use tweezers to pick up the gemstone and place its one side into the setting base, then apply appropriate force to press the other side down. Taking the first gemstone as a standard, sequentially press into other gemstones, ensuring they are flat and evenly spaced.
④ Use the Tension Setting (channel Setting) rod to incline outward and press the outer edge of the metal surface, then press the wrapping metal vertically.
⑤ Use a flat chisel to grind off the metal dust left on the gemstone’s surface, and also trim the channel edge to check if it is closely attached to the gemstone.
(3) Requirements for prong setting round gemstones
① Before setting, carefully observe the shape and thickness of the gemstone, and then grind the setting base
② Based on the shape, quantity, and length of the setting channel, reasonably control the spacing between the gemstones.
③ The gemstones must sit flat, with consistent height and separation distance, securely set, and without broken gemstones.
④ The channel edge is closely attached to the gemstone edge.
⑤ The finished piece with gemstones should not show any deformation or unevenness on the metal surface.
⑥ When grinding the setting base, always pay attention to the thickness of the metal surface.
⑦ The base metal should not be grinded too loosely; if it is too loose, it can easily cause the gemstones to fall out, making it more difficult to secure setting, and the metal surface is prone to deformation.
(4) Precautions
① When settings, The bezel should be forced diagonally from the edge of the bezel and then compressed from the front face.
② When setting, check whether the gemstone is tilted, displaced, or not securely set while pressing the channel edge. If the gemstone is tilted, observe its leaning direction and add pressure on the corresponding opposite side until it is level. If the tilt is severe, removing the gemstone and resetting it may be necessary.
③ The size of the channel edges on both sides of the gemstone setting should be consistent; there should be no size disparity.
④ The channel edges should not cover too much of the gemstone or more than 2/3 of the gemstone’s width.
⑤ The channel metal needs to retain a certain thickness of 0.4-0.5 mm.
⑥ The setting bottom base of gemstone must not have any height differences.
⑦ The gemstones must be symmetrical, with consistent depth and width.
⑧ The role of the cross beam is to prevent deformation of the jewelry, must not be cut off.
5.2 Tension Setting (channel Setting) of square gemstones.
(1) Main tools used
Tooth bur, wheel burs, setting pushers, hammers, flex shaft grinders, tweezers, and flat chisels.
(2) Operating Process Steps
The Channel setting process of square gemstones is the same as round gemstones, that as follows.
① Use tweezers to pick up the gemstone and place it at the setting position. if the gemstone is too large to be put in, then use a tooth bur that perpendicular to the metal surface, and the channel edges on both sides are grinded until it can be placed at the position of 1/4 on both sides of the metal edge.
② Choose the appropriate wheel bur to carve setting base based on the thickness of the gemstone. Then grind the bottom metal at an angle, ensuring that the bottom metal on both sides match the gemstone bottom shape.
③ Use tweezers to pick up the gemstone and place its one side into the setting base, then apply appropriate force to press the other side down. Taking the first gemstone as a standard, sequentially press into other gemstones, ensuring they are flat and evenly spaced. There should be no gaps between the gemstones.
④ Make the Tension setting bar perpendicular to the metal surface, tilt inward and press the sides of the channel edge until the gemstone settings securely, then make the Tension setting bar vertically to the metal surface and press it until the gemstone sit tightly.
⑤ Use a flat chisel to grind away the metal dust left on the gemstone’s surface to check if the channel edge is tightly attached to the gemstone.
(3) Requirements for channel setting square gemstones –— Sames as round gemstones
Channel setting Technique Video
(4) Precautions
① The channel edges needs to maintain enough thickness but not too thick, as excessive thickness can cause deformation of the jewelry, nor be too thin, as that may lead to issues with the gemstone being insecurely set.
② When pressing the edges, it is necessary to constantly check for any tilting, loose arrangement, or displacement of the gemstones. If a gemstone is tilted, carefully observe which direction it is leaning, and then apply pressure on the corresponding side to make it symmetrical until the gemstone is level. If the tilt is severe, removing the gemstone and re-carving the base may be necessary before setting it again.
③ When grinding the setting, it should be symmetrical, with consistent depth and width.
④ The setting gemstones should not have height differences based on the gemstone surface.
⑤ The role of the cross beam is to prevent deformation of the jewelry, must not be cut off.
5.3 Square crossbeam channel setting
(1) Main tools used
Tooth bur, wheel burs, setting pushers, hammers, flex shaft grinders, tweezers, and flat chisels.
(2) Operating Process Steps
Square crossbeam channel setting operating process, see Figure 5-23.
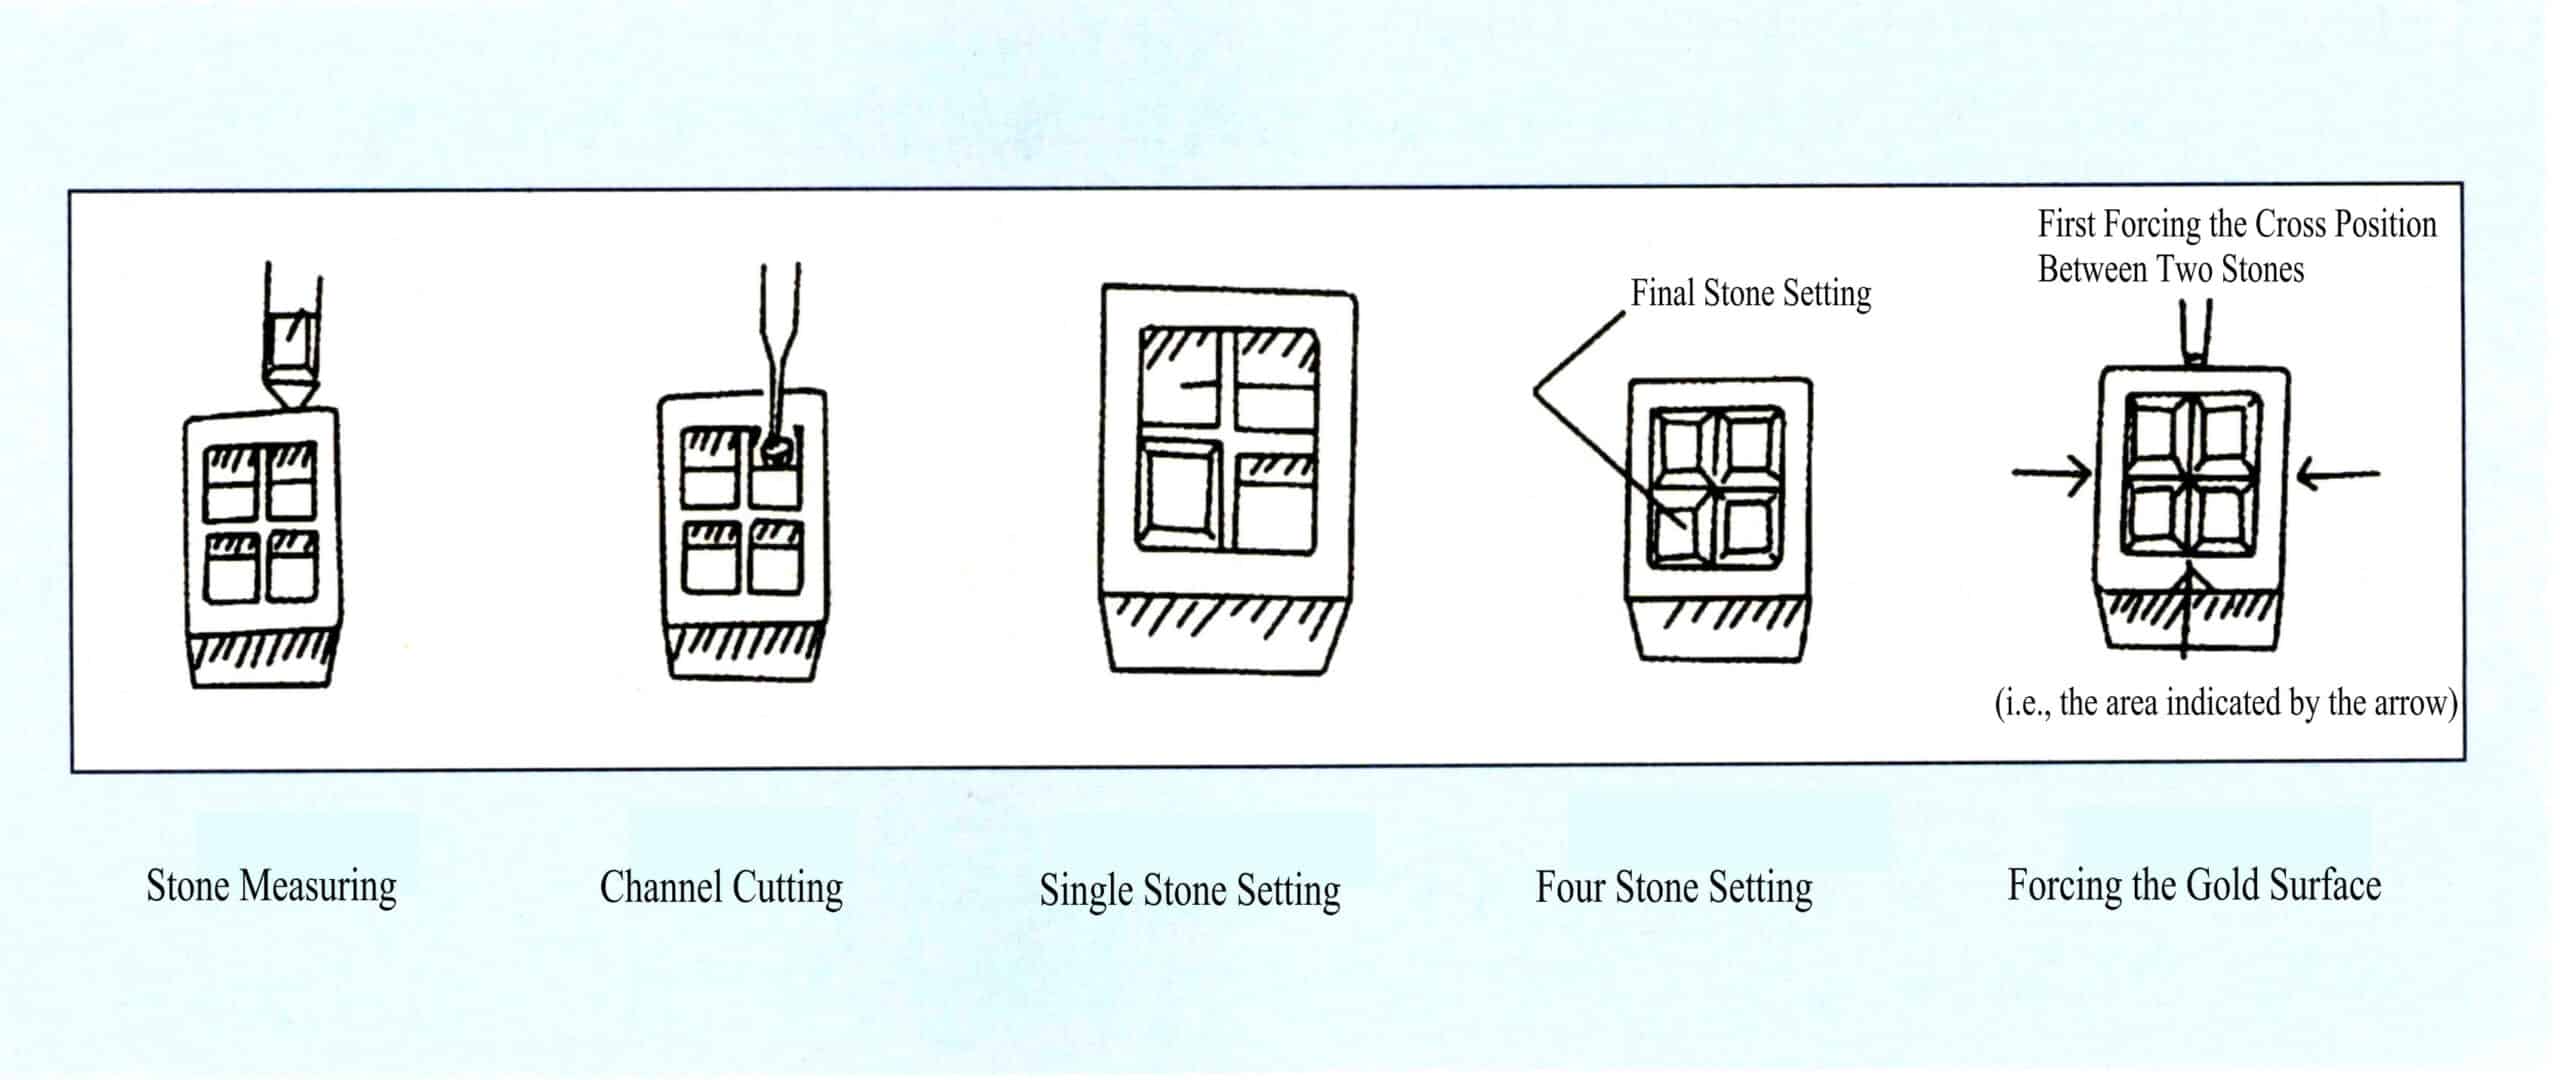
① Use tweezers to pick up the gemstone and place it at the setting position, then place the gemstone at one corner of the square setting.
② If the gemstone is larger than the setting, use a tooth bur to grind the channel edge of the setting, expanding until the gemstone can only be placed diagonally.
③ According to the thickness of the gemstone and the shape of the bottom of the gemstone, use a wheel bur to grind the setting position and the bottom metal until the gemstone can be placed steadily in the setting.
④ Place the second and third gemstones using the same method.
⑤ Before setting the 4th gemstone, first, carve the setting base according to the 1、2 、3 gemstones method, slowly place the gemstone along the corner into the setting, use tweezers to gently adjust the gemstone until it is flat and there are no gaps between the gemstones.
⑥ Use the setting pusher perpendicular to the metal surface, slightly inward, to first press a point between two gemstones so that the gemstones are equally compressed and pressed. Use the same method to press the remaining four points, ensuring that all four gemstones are subjected to the same pressure, then use the setting pusher to press the remaining positions until the gemstones are flat. The metal surface is tightly attached to the gemstones.
(3) Requirements for setting
① Before setting, carefully observe the shape and thickness of the gemstones, and then grind the setting base.
② The gemstones should be flat, closely arranged, and of uniform height, with no overlapping, loose settings, or broken gemstones appearing between them.
③ There should be no gaps between the gemstones.
④ The crosses formed between the gemstones must be symmetrical, with right angles at the four sides and equal lengths.
⑤ The size of the metal edges should be consistent, and the metal edges must closely adhere to the gemstones.
⑥ The metal edge cannot cover too many gemstones; at most, it cannot cover the side of the gemstone 2/3.
⑦ The jewelry with embedded gemstones must not show deformation or uneven metal surfaces.
⑧ It must be tight when put stones into the setting base; if it is too loose, it can easily be pushed up in the middle during pressing.
(4) Precautions
① The metal edges needs to retain a certain thickness; it cannot be too thick or too thin. If it is too thick, it may cause deformation of the jewelry and issues with gemstone fracturing during the pressing process.
② The crossbeam is used to secure the position of setting base and the gemstones so that cannot be broken or cut off.
③ When pressing the edges, incline the edge to tighten the gemstone, then press gemstone straight to compress it firmly.
④ When pressing the edge, it is necessary to constantly check for issues such as gemstones being tilted, not tightly arranged, or displaced. If a gemstone is tilted, use tweezers to straighten it; if the tilt is severe, it may be necessary to remove the gemstone and re-carve the seat before resetting it.
6. Bezel Setting
Bezel setting is a method of setting gemstones surrounded by a metal edge, and it is also a commonly used setting method characterized by a secure setting.
(1) Main tools used
Pressing tools, peach bur, disc bur, hammer, flex shaft grinder, flat chisel, umbrella bur.
(2) Operating Process Steps
For the process of bag setting operation, see Figure 5-24.

① Use tweezers to place the gemstone to be set on the setting position. If the gemstone is larger than the setting position, use a peach needle with the same diameter as the gemstone to grind the position until the gemstone fits snugly against the setting.
② Use a disc or wheel bur to carve the setting base. If a colored gemstone is set, the base metal needs to be carved. You can use an umbrella bur to carve the base metal, then use tweezers to pick up the gemstone and put into the gemstone along the setting base.
③ If the gemstone is flat, Fastening the jewelry to the work bench, then press the middle of the setting pusher with the thumb of the left hand while the index and middle fingers hold the other side, forming a three-point fixation with the thumb, index, and middle fingers on the setting pusher. Hold a hammer in the right hand and strike the setting pusher with the hammer to push the metal edge towards the gemstone edge. During the striking process, the setting pusher should be slightly tilted outward until the gemstone is tightly wrapped and the metal edge is closely attached to the gemstone.
④ During the pressing process, always pay attention to the gemstone being tilted; do not press one side first, but apply force evenly on both sides.
⑤ Use a flat Chisel to remove the metal shavings obstructing the gemstone’s surface.
Bezel setting Technique Video
(3) Requirements for the Setting Process
① Before setting, carefully observe the shape and size of the gemstone, and then carve the setting base.
② The gemstone should be flat without tilting, loose setting, or broken gemstones.
③ The gemstone must be positioned in the center of the setting.
④ After setting’s pressing, the jewelry must not deform.
⑤ During the pressing process, when the hammer strikes the setting pusher, the force must be even; the setting pusher must not leave the metal bezel edges and should be kept slightly tilted outward.
⑥ After pressing the edge, the gemstone should be tight, the edge should be smooth and retain thickness around 0.4-0.5 mm.
⑦ When using a flat chisel to remove metal shavings, care should be taken to avoid bumping into the gemstone.
7. Invisible setting
Invisible setting is a method of securing the bottom of a gemstone using metal grooves or tracks and fixing the gemstone through the pressure between the gemstones and between the gemstones and the metal edge.
(1) Main tools used
Tooth bur, wheel burs, setting pusher, hammers, flex shaft grinders, tweezers, and flat chisels.
(2) Operating Process Steps
For the operational process of Invisible setting, see Figure 5-25.

① Use tweezers to pick up the gemstone and place it on the setting edge for Test setting base.
② According to the size of the gemstone and the depth of the gemstone setting base, adjust the height and thickness of the middle crossbar, which is generally 0.3-0.4 mm, and the height of the crossbar to the metal surface is generally 0.7-0.8 mm .
③ After adjusting the height and thickness of the crossbar, use a 006 or 007 wheel bur to grind a setting base on the crossbar, ensuring the setting base is parallel to the plane of the crossbar, with a thickness of about 0.06 mm to the surface.
④ After the setting base on the crossbar is grinded, use a 009 or 010 wheel bur to grind the setting channel for the metal edge, with the thickness of the metal surface generally being 0.5 mm. After completion, it should not be less than 0.3 mm. If the edge needs add migrain, it is best to have a thickness of 0.4 mm.
⑤ After adjusting the setting, use tweezers to pick up gemstones and put into setting base, then gently place the gemstones into the setting with the crossbar, fitting together like gears.
⑥ For Invisible settings with more than three rows, after adjusting the crossbar, put into the gemstones generally starting from the middle, as the gemstone in the middle does not have a metal to press against. The tightness of the gemstones mainly relies on the gemstones setting base and both sides pressing the crossbar towards the center, so the setting must be precise, and the gemstones cannot be loose.
(3) Precautions
① The gemstones must be tight, and the edge of each gemstone should cover half of the crossbar, meaning that after two gemstones setting, they should cover the crossbar; otherwise, a 007 tooth burs needs to be used for grind. The outermost two rows should be slightly tilted inward, as they will level out after pressing.
② The gemstones should be flat, tight, and of uniform height, with no gaps exposing the crossbar and no diagonal or insecurely set gemstones or broken gemstones. The gemstones must align, and the cross positions must be straight.
8. Flush Setting (also known as batch silk setting or Italian setting)
Flush Setting is a method that combines a bezel setting and prong setting, where the gemstone is surrounded by a metal edge, which is then secured by several small prongs of metal. Its characteristic is that the prongs on the edge are usually quite small. The difference between Flush Setting and bezel setting is that the metal edge in Flush Setting only serves to surround the gemstone without function to secure the gemstone, but instead secures the gemstone through the small prongs raised from the metal edge.
(1) Main tools used
Disc bur, bullet head rubber roller, peach needle, flat chisel, flex shaft grinder, tweezers.
(2) Operating Process Steps
For the Flush Setting operating process, see Figure 5-26.
① Test the setting base
② Use a disc bur of same the size as gemstone, to grind the setting position of the jewelry.
③ Use a bullet head rubber roller to polish and smooth the setting position.
④ Use tweezers to pick up the gemstone and put into the setting position. If the setting is smaller than the gemstone, use a peach bur to grind the position, allowing the gemstone to fit into the setting.
⑤ Use tweezers to pick up the gemstone and put into the setting position, ensuring the gemstone faces up straight
⑥ Use a flat chisel to vertically press down along the edge of the gemstone, then shovel up the Prong towards the gemstone, making the Prong closely attach to the gemstone.
⑦ According to the requirements, shovel the remaining Prongs to press the gemstone tightly.
(3) Requirements for craftsmanship
① Before setting, carefully observe the thickness and shape of the gemstone, and then grind the position.
② The gemstone must be flat and tight; there should be no phenomena such as the gemstone being tilted or broken gemstones.
③ The edges should be even, the thickness should be consistent, and they should be shiny, no scratches
④ The Prong should not be too long or too short, the direction of the Prongs should be consistent, the Prongs should be symmetrical and of the same size, and the Prong heads should attach the gemstones.
Flush Setting Technique Video
Section IV Surface Finishing
1. Cleaning Sealing Wax
After processing jewelry pieces and setting gemstones, a lot of Sealing Wax is adhered to the pieces. Cleaning Sealing Wax means cleaning the Sealing Wax that is adhered to the surface of the jewelry pieces after setting.
(1) Main tools used
A set of welding tools, tweezers, a chuck, a steel needle, a small iron sieve, and a hair dryer.
(2) Key points of the operating process
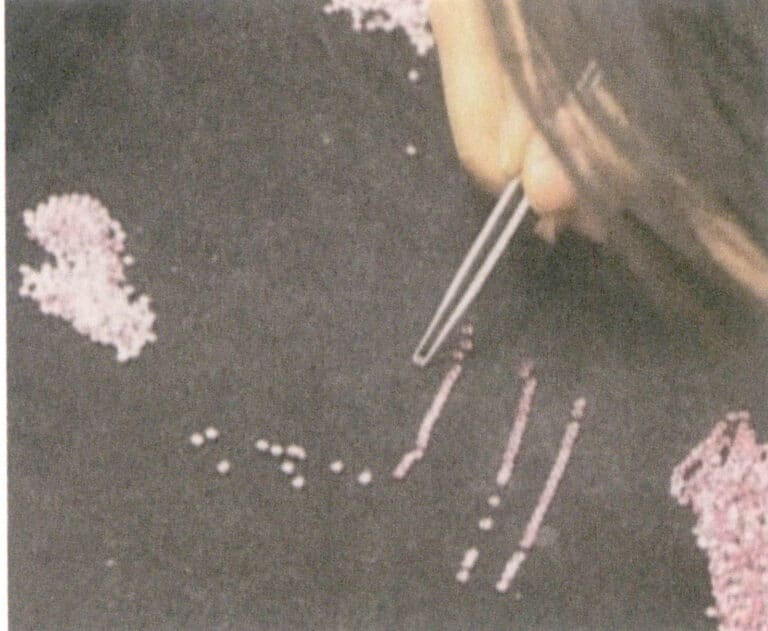
A torch softens the Sealing Wax, and tweezers pick the pieces out of the Sealing Wax one by one (Figure 5-27) . Attach the steel needle to the chuck and use it to strip away excess and thick Sealing Wax from the pieces. Then, place the pieces into the cup filled with acetone and cover it well. Generally, after 4 to 5 mouth cups, the adhered Sealing Wax can gradually dissolve and be removed (Figure 5-28) . Next, place the pieces into a dish filled with gasoline, clean them, and take them out, then rinse thoroughly with tap water. If it is a platinum piece, place it in an ultrasonic cleaner for cleaning, then rinse thoroughly with tap water (the solution in the cleaner is a detergent solution) . Use a hair dryer to dry the pieces.
It is particularly important to note that the pieces must not be scratched when using the steel needle to strip the Sealing Wax. The used acetone solution should not be disposed of casually and must be treated according to regulations.
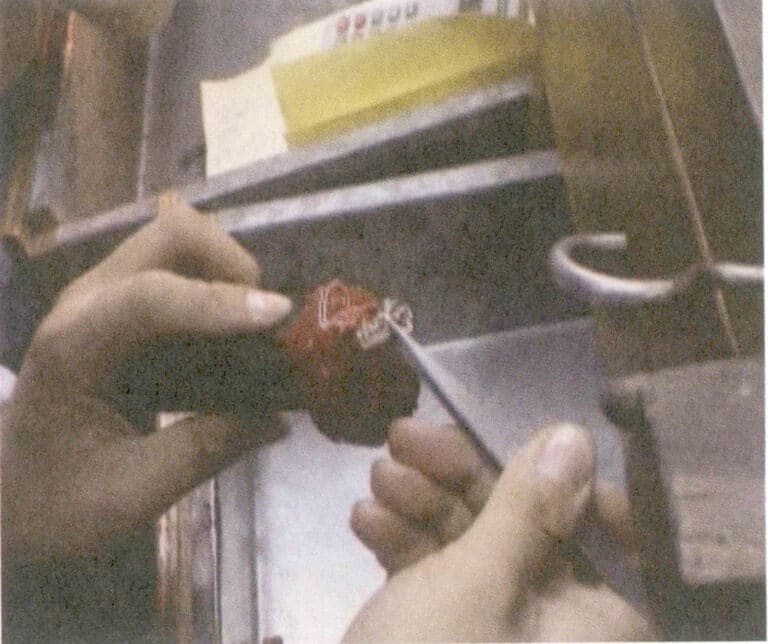
Figure 5-27 Taking the jewelry
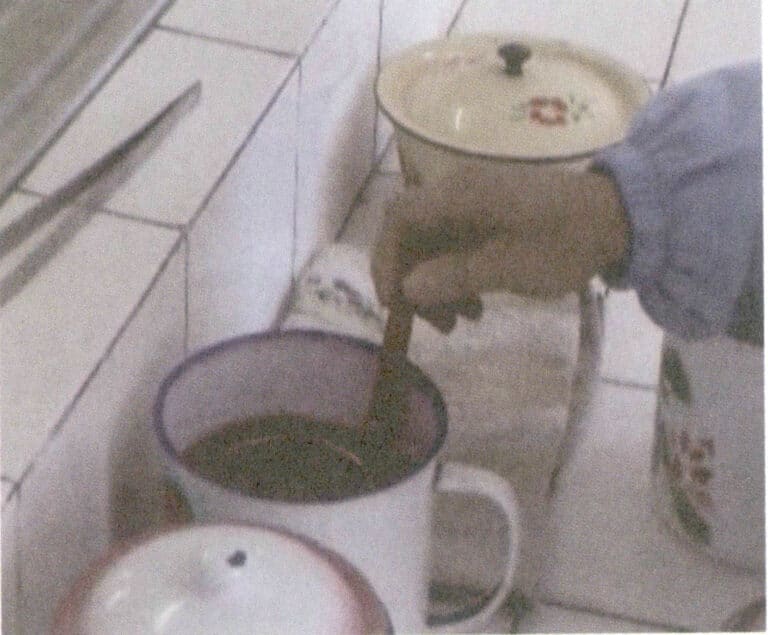
Figure 5-28 Washing the fire paint
2. Edge Finishing
Edge finishing means restoring the surface of the jewelry after setting the gemstones to a smooth and soft state.
(1) Main tools used
Flex shaft grinder, tooth burs, half round file, sliding file, bamboo leaf file, triangular file, sandpaper, sandpaper stick, disc bur, sandpaper polishing wood, red rubber roller, blue rubber roller.
(2) Key points of the operating process
Before edge finishing, observe the jewelry’s surface and the embedding method. Choose files and other tools based on the actual situation, and polish the rough surface of the jewelry. Then, the tooth burs is installed on the flex shaft grinder to work on the corners of the jewelry. Repair the edging position, gap position, and areas that cannot be filed with the file to smooth these areas. For jewelry with high angle requirements, install the rubber wheel roller on the flex shaft grinder and turn the angle once (Figure 5-29) to make the angle smoother (red rubber wheel for K metal jewelry, blue rubber wheel for platinum jewelry) .
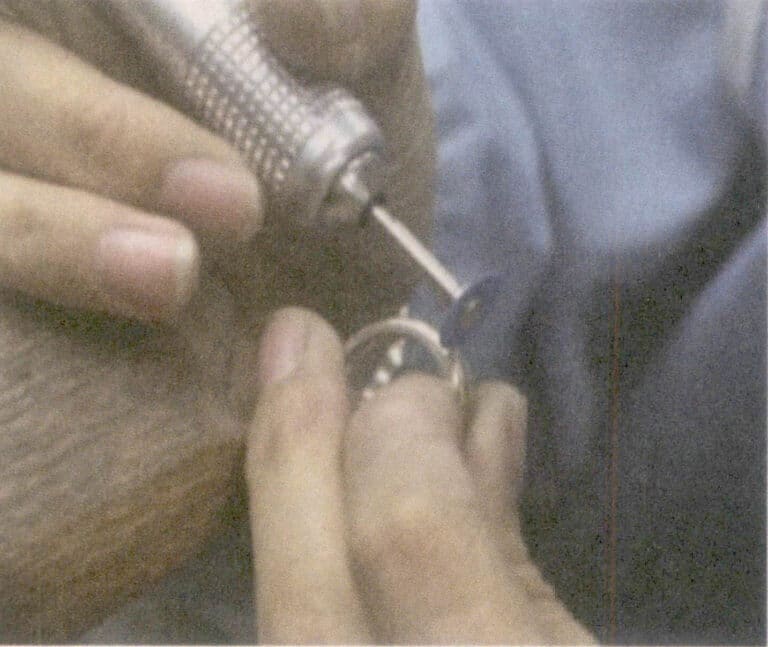
Use tools such as sandpaper sticks, sandpaper discs, and bar to polish various parts of the jewelry (using 400 sandpaper) . If it is a platinum jewelry, further polish it with sandpaper tools made of 1200# sandpaper.
Throughout the edge finishing process, do not damage the overall shape and angle of the jewelry. Do not harm the lines and patterns of the jewelry, nor damage, scratch, or loosen the embedded gemstones on the jewelry.
3. Edge Trimming
Edge trimming is the process of remove the burrs on the inner side of the metal edge of the jewelry after the gemstone setting, making the inner edge lines smooth and the surface polished and bright.
(1) Main tools used
Flat chisel, steel setting pusher, ring clamp, chuck, oilstone, etc.
(2) Key points of the operating process
Before edge trimming, carefully observe the shape of the jewelry, then choose the tools and methods for edge trimming. The flat chisel used for edge trimming should maintain a sharp edge.
Hold the jewelry with a ring clamp, and the earring can also insert the ear pin into the chuck for fixation. Attach the flat chisel to the chuck, and use the flat chisel against the inner side of the metal edge to trim the edge, making the inner edge lines smooth (Figure 5-30) . Use the steel setting pusher to press the inner edge for round jewelry, making the metal edge even brighter.
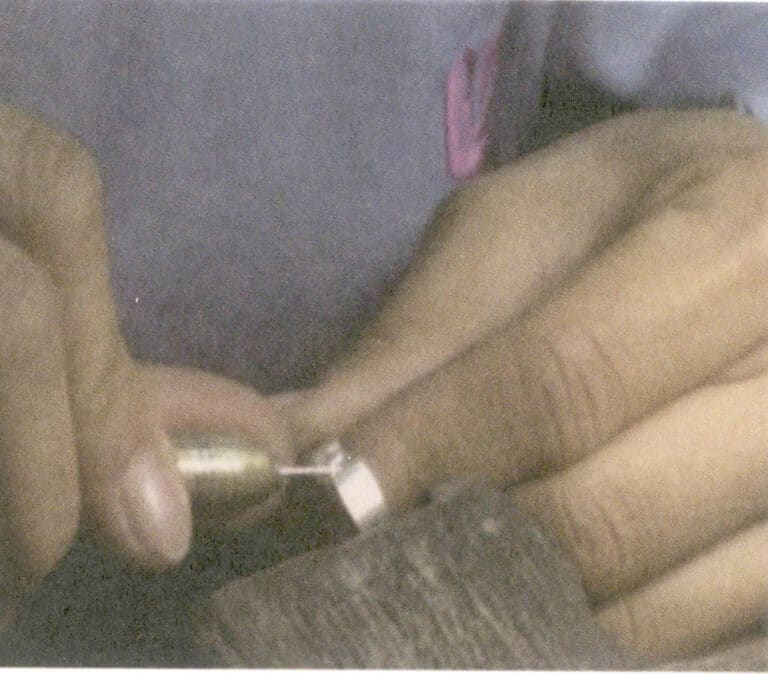
4. Milgrain edge
The Milgrain edge is formed by rolling at the specified position of the jewelry, creating a bead-like metal edge that embellishes the jewelry.
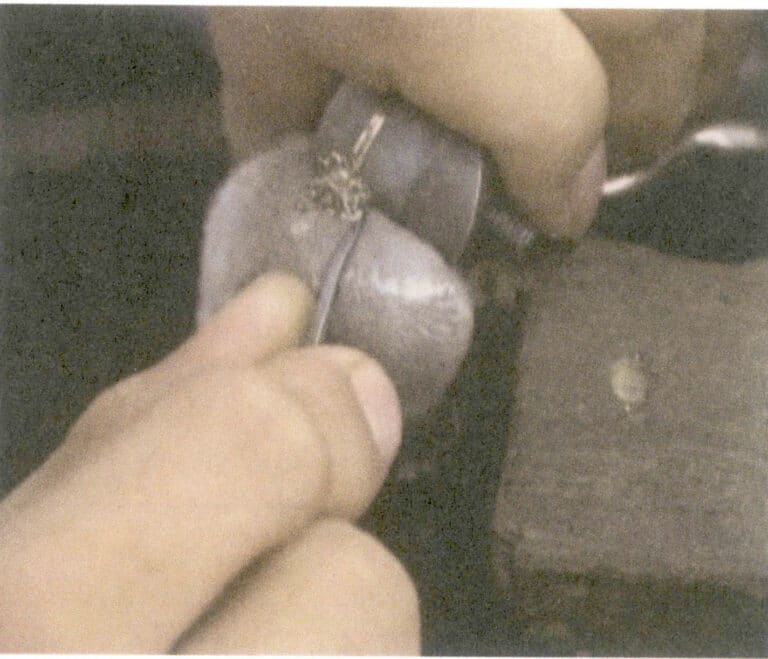
First, apply Sealing Wax to the jewelry to be processed, and fix the Sealing Wax stick on the workbench. Choose a suitable milgrain roller based on the width of the metal edge of the jewelry, roll the metal edge by the milgrain roller. During the operation, hold the hand pusher with the right hand, press the milgrain roller against the metal edge, and use the left thumb to hold the curved part of the chisel. Then, press down with the right hand to roll along the metal edge, leaving metal milgrains on the edge (Figure 5-31) . When creating the milgrain edge, the chisel must not leave the metal edge; it must follow the original trajectory without deviation when rolling back and forth. Otherwise, the rolled bead edge will be scrapped (the jewelry for making milgrain is generally processed after turning and grinding) .
13 Surface Finishing Video


