How to do jewelry Investment Casting?
The Ultimate Guide to Jewelry Investment Casting Techniques and Casting Process
Introduction:
The lost wax casting process has developed from the lost wax casting technique. In the mid-20th century, the lost wax casting method, which had been used for a long time in the dental industry, was successfully applied to jewelry production. Since then, the Investment Casting method has been widely used in jewelry. With the development of rubber and synthetic resins and the electronics industry, the equipment and process levels for jewelry casting have continuously improved, making Investment Casting the main method for jewelry production. The Investment Casting method produces over 60% gold, silver, and copper jewelry.
The typical process flow for jewelry Investment Casting is as follows.

It can be seen that the jewelry Investment Casting process flow is complex, involving many procedures, each of which significantly impacts the quality of the castings. According to statistics, most jewelry defects are metallurgical defects that occur during the Investment Casting production process, and the metallurgical parameters in the post-processing stage are rarely affected, resulting in few metallurgical defects. However, the finishing process can expose casting defects below the surface. Therefore, strictly controlling the process parameters during casting production is necessary to obtain high-quality jewelry products.
Table of Contents
Section I Pressing the rubber mold
1. First Edition
The first step in making a rubber mold is to have a master model (also known as the head model). The usual master model is made of silver (Figure 3-1). With the widespread application of rapid prototyping technology, sometimes resin or wax models are directly used to create rubber molds (Figure 3-2). The completed master model must have a casting line welded on (commonly known as the casting sprue), a reserved channel for the injection and outflow of wax liquid, and the pouring of metal liquid. The length, thickness, and position of the casting sprue on the master model should be determined based on the shape and size of the master model. Whether the casting sprue is set reasonably will directly affect the quality of the casting.
Before the master model is placed in the mold, if the casting sprue is too long, it needs to be trimmed a little based on practical experience to facilitate the pressing of the mold. During this process, all impurities are strictly prohibited from mixing in.
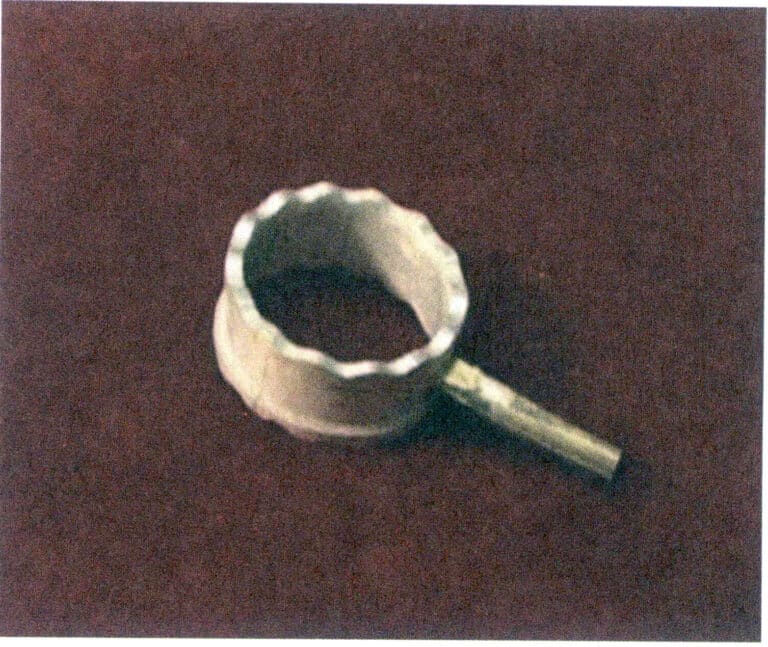
Figure 3-1 Silver Model
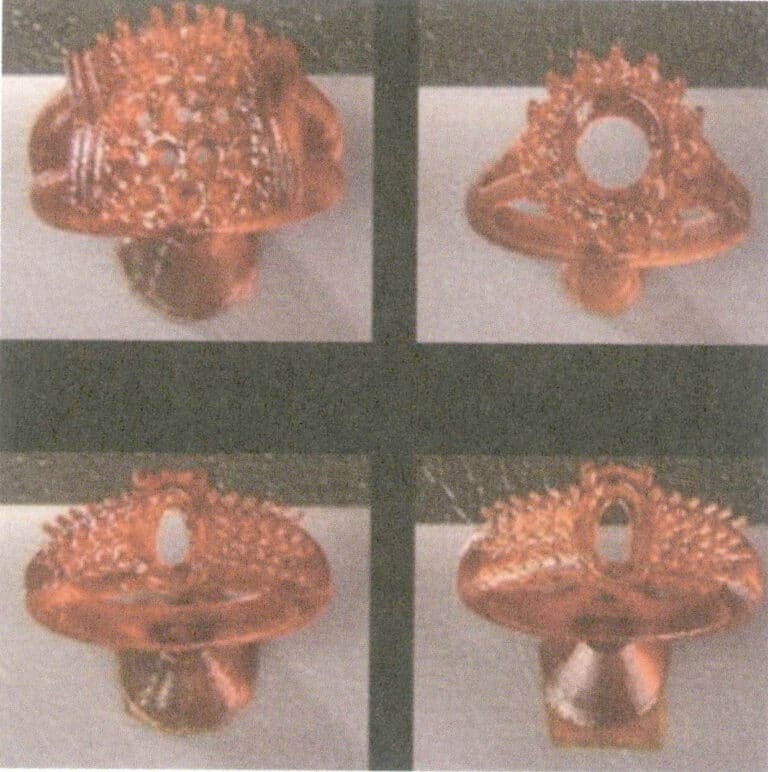
Figure 3-2 Resin Model
2. Types and Characteristics of Jewelry Rubber
High-quality rubber molds are necessary for obtaining high-quality castings. The rubber used to make models must meet the following requirements: corrosion resistance, aging resistance, good recovery performance, elasticity, and softness. Many types of model rubber are available on the market, including natural and synthetic rubber, such as silicone rubber. Each type of rubber has different properties; silicone rubber is easier to make and has good surface replication performance, and wax molds are easy to remove. However, silicone rubber is prone to cracking and can hinder gas escape during wax injection. Natural rubber has good elasticity and high tear strength. Still, due to the large number of double bonds in its main chain structure, it is easily damaged by ozone, leading to degradation or cross-linking, so it cannot be used directly. Synthetic rubbers include diene, acrylate, polyurethane, polysulfide, and siloxane.
Castaldo from the United States is the most commonly used rubber brand in the jewelry casting industry(Figure 3-3). It contains some modified natural rubber, offering good flexibility, high fracture resistance, and a long service life. China’s main domestic rubber variety is a hydrolyzed condensate of dimethyl dichlorosilane, which has a flexible molecular chain and is heat-resistant. Still, its disadvantages include high hardness and poor tear strength, resulting in a relatively short service life.
In addition, cold-curing silicone and liquid rubber have been developed(Figure 3-4). They can cure at room temperature without needing vulcanization at a specific temperature, making them suitable for making temperature-sensitive resin or wax molds.
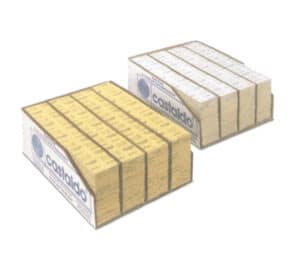
Figure 3-3 Castaldo high temperature vulcanized silicone rubber sheet
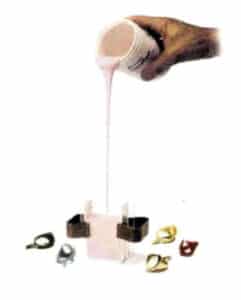
Figure 3-4 Room temperature vulcanized liquid silicone rubber
3. Main Equipment and Tools
The main tools for pressing rubber molds are a rubber molding machine, aluminum frame, rubber sheet, aluminum pad, scalpel, scissors, double-headed nozzle, tweezers, and oil-based pen.
The equipment for pressing rubber molds is the (vulcanization) rubber molding machine, which mainly consists of two heating plates with built-in resistance wires and temperature sensors, a temperature controller, and a timer (some models do not have this device). The rubber molding machine also has a lifting wire rod for pressing and removing molds. Also, molding frames are used in conjunction, which can be categorized into single-plate, double-plate, and four-plate models based on the number of rubber molds pressed simultaneously. The material used to manufacture the molding frames is usually aluminum alloy. The general size of the molding frame is 48 mm x 73 mm, and sometimes thicker molding frames are used for pressing larger master molds, with sizes typically being 64 mm x 95 mm.
4. Rubber Pressing
4.1 Pressing of High-Temperature Vulcanized Rubber
The process of pressing rubber seems simple, but attention must be paid to the following details during the filling and pressing process.
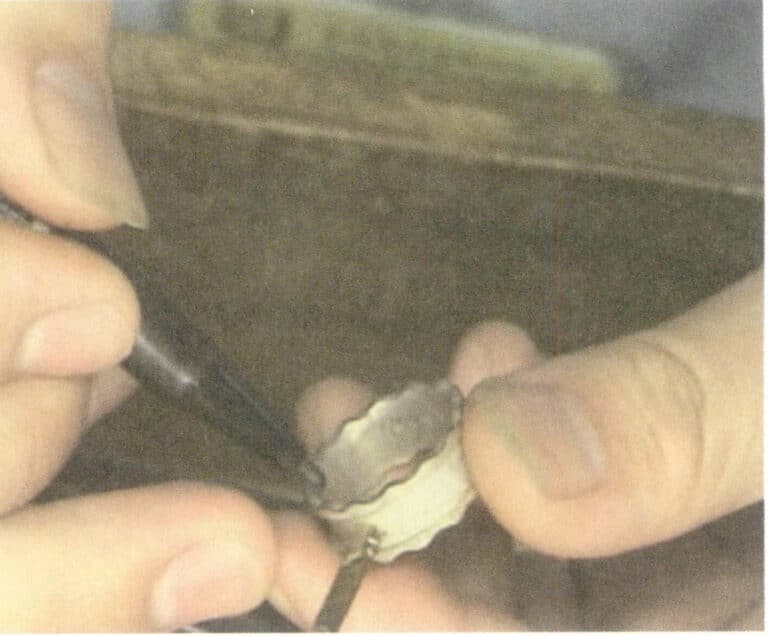
(1) Use an oil-based pen to draw the parting line along the edge of the master mold shape (Figure 3-5), which serves as the parting position for the upper and lower molds. The position of the parting line should be determined based on the ease of mold removal. During the operation, it is essential to ensure the cleanliness of the mold frame and the raw rubber sheet. Before pressing the mold, the mold frame should be cleaned as thoroughly as possible, and the operator should wash their hands and the workbench.
(2) It must be ensured that the master mold does not stick to the rubber. To achieve this, silver mold are usually prioritized during production. If a copper master mold is used to, the copper master mold should be silver-plated before pressing the mold, as copper master molds can easily stick to the rubber.
(3) Attention should be paid to determining the appropriate vulcanization temperature and time based on specific circumstances. The vulcanization temperature and time of the rubber generally conform to a certain functional relationship and are related to the thickness, length, width, and complexity of the master mold. Typically, the vulcanization temperature is set around 150℃, and if the mold thickness is three layers (approximately 10 mm), the vulcanization time is generally 20-25 min; if it is four layers (approximately 13 mm), the vulcanization time can be 30-35 min, and so on.
(4) The vulcanization temperature is closely related to the complexity of the master mold.If the master mold is complex and intricate, the vulcanization temperature should be lowered, and the vulcanization time should be extended (for example, by lowering the temperature 10℃ and doubling the time); conversely, if the temperature is too high, it will affect the molding effect.
In summary, during the gluing process, to ensure that the rubber sheets bond tightly together, it is essential to keep the rubber sheets clean, avoid direct contact with the surface of the rubber sheets with hands, and instead, after sticking the rubber sheets, remove the protective film from the surface. Use plugging, detailing, and filling methods to fill the gaps, depressions, and stone-setting areas on the master mold, ensuring no gaps between the rubber and the master mold. Care must be taken when filling the rubber, especially for certain small floral shapes and the bottom holes of side stone settings, which must be filled with small rubber particles and pressed firmly with sharp objects (such as the tip of tweezers) (Figure 3-6). It should have sufficient thickness to ensure the rubber mold can be reused considerably. Typically, a rubber mold requires at least four layers of rubber sheets to be pressed. The thickness of the rubber mold should be slightly higher than the plane of the frame by about 2 mm after being pressed into the mold frame (Figure 3-7).
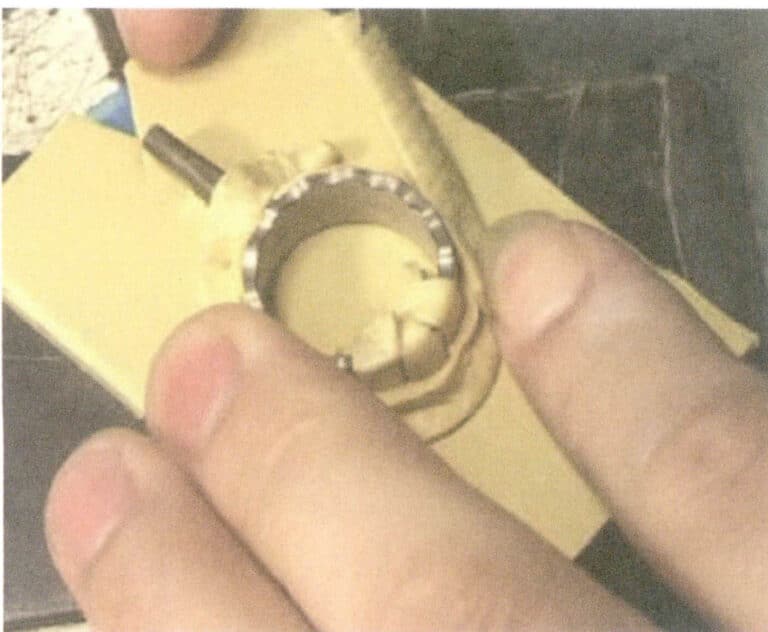
Figure 3-6 High-temperature vulcanization rubber filling
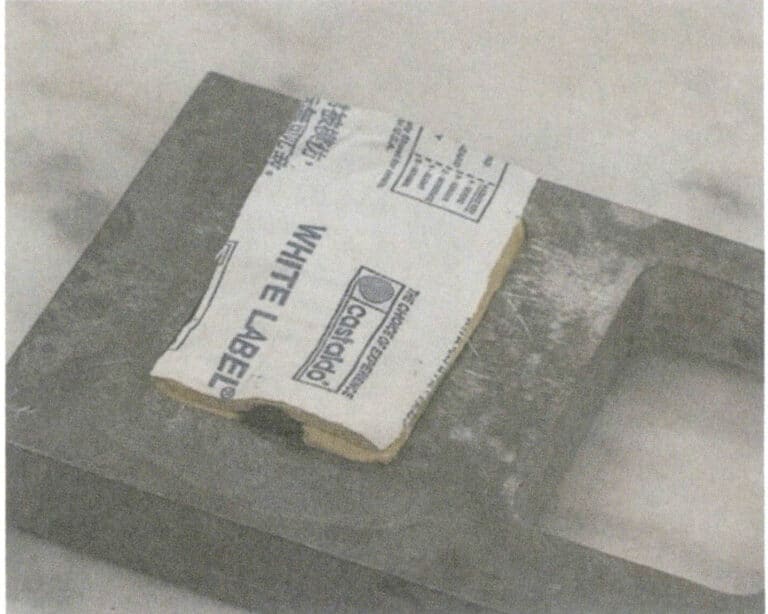
Figure 3-7 Thickness of the rubber layer
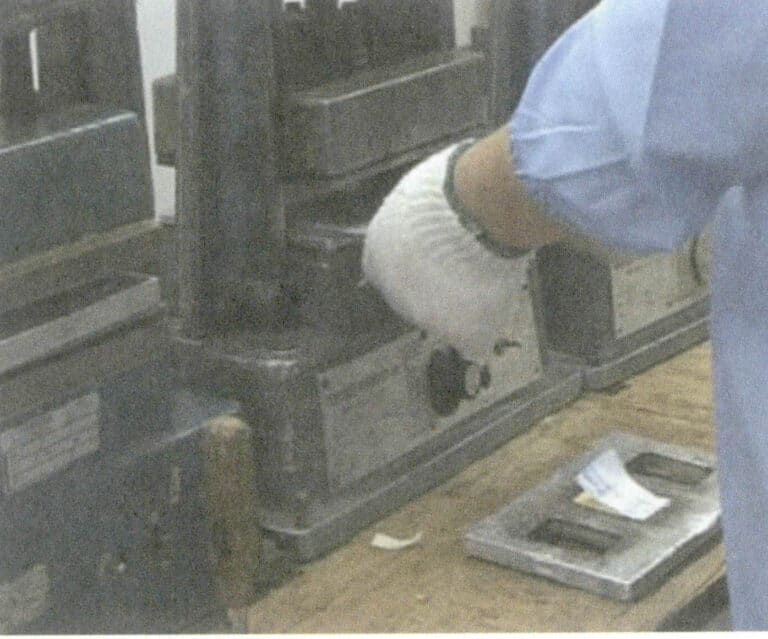
The rubber molding machine should be preheated first, then the mold frame filled with rubber should be placed in, tightening the handle to press the heating plate against the mold frame (Figure 3-8).
At the beginning of vulcanization, check whether the heating plate is pressed tightly; once the vulcanization time is up, quickly remove the rubber mold, preferably allowing it to cool naturally to room temperature, before using a surgical knife to open the mold. The pressed rubber mold should be intact and smooth, and the casting sprue should not be skewed. Common issues during the molding process include, causes and countermeasures, see Table 3-1.
Table 3-1 Analysis of Common Problems and Countermeasures for Compression Molds
| Problems | Causes | Countermeasure |
|---|---|---|
| The finished rubber mold is sticky and soft | Short vulcanization time or too low temperature | Check the molding machine, adjust working temperature and time |
| The rubber mold is too hard, has high elasticity, and cannot be flattened | Excessive pressure, long duration, high temperature | Reduce pressure, adjust working temperature and time |
| Partial rubber mold layer has come off | Contaminated the rubber due to grease on hands, etc. | Remove dirt and keep the rubber mold clean |
| The rubber mold is filled with bubbles, and the surface is sunken. | The rubber mold and the pressing frame are not filled tightly. | Fill the pressing frame tightly. |
| The rubber shrinks excessively. | The temperature is too high during vulcanization | Use standard temperature and time |
Rubber Pressing Video
4.2 Filling of room temperature vulcanized liquid rubber
Room temperature vulcanized liquid silicone rubber has two components: Component A is a viscous liquid, and Component B is a curing agent. Before making the mold, first check the flowability of the silicone. Generally, the viscosity of silicone is around 35000 CPS. If the viscosity is too high, it can cause uneven mixing of the curing agent and silicone, resulting in uneven mold drying. The steps are as follows.
(1) Processing the master mold.
Weld the casting sprue onto the master mold according to the process requirements, connecting the casting sprue to the copper pouring gate. Fix the master mold on an acrylic glass surface. Then, clean the master mold thoroughly and evenly spray a release agent on its surface. Surround the master mold with a circle of film or hard cardboard, maintaining a wall thickness of more than 10 mm for the outer wall and bottom of the mold.
(2) Mix the rubber material in proportion.
Generally, the ratio of silicone to curing agent is 100:2-100:5. The larger the curing agent added, the faster the curing time, resulting in a shorter operating time. The rubber material must be mixed evenly; otherwise, the mold will have uneven drying and curing, affecting its service life and the number of times it can be reused, and may even lead to the scrapping of the master mold.
(3) Vacuum degassing treatment.
After evenly mixing the silicone and curing agent, a vacuum treatment should be performed. Generally, the vacuum time should not exceed 10 minutes; if it is too long, the silicone will undergo cross-linking and cure quickly, making it impossible to brush or pour.
(4) Pouring (brushing) operation process.
Cover the master mold by brushing or pouring. For smaller master molds, the overall pouring method can be used: pouring the vacuumed silicone material into the cylinder. It can be poured in two stages: pour enough material to submerge the master mold, then vacuum and add more material until it is level with the cylinder. For larger products, the brushing method can be used. Use a soft brush to apply the material evenly on the surface of the master mold. After 30 minutes, apply a layer of gauze or fiberglass cloth to increase the strength and tensile force of the silicone. Then, another layer of silicone is applied, followed by another layer of gauze or fiberglass cloth, repeating this two or three times to extend the lifespan and number of uses of the silicone mold. Finally, cover the brushed silicone surface with a layer of plaster, ensuring the thickness meets the strength requirements for handling and use. A fiberglass mold can also be made, which is strong, lightweight, and easy to operate in production.
(5) Curing.
After filling the material, let it sit; it will undergo a cross-linking reaction and cure, with a typical curing time of 1.5-2 hours.
5. Opening the silicone mold
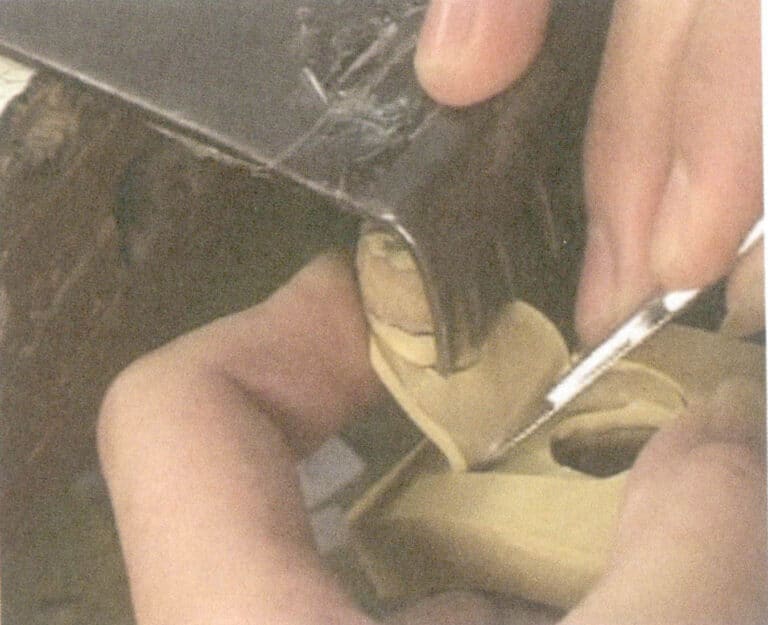
Cut open the pressed silicone mold, remove the master mold, and divide the silicone mold into several parts according to the shape and complexity of the jewelry sample so that the wax mold can be smoothly removed after the wax injection.
Opening a silicone mold in a jewelry factory is a highly technical job. The quality of the silicone mold directly affects the quality of the wax model and the metal casting and directly impacts the mold’s lifespan. A skilled mold maker produces molds that show little to no deformation, breakage, or flash after wax injection, requiring minimal wax repair or welding. This can save significant time in adjustments and improve production efficiency.
The tools for opening molds are relatively simple and mainly include surgical knives and blades, tweezers, scissors, and needle-nose pliers.
Beginners must use a new blade when using a surgical knife to open molds, as this makes it less likely to cut their fingers. During the cutting process, to ensure lubrication between the blade and the rubber mold, water or detergent can be dabbed on the blade (but never oil, as it will harden and make the mold brittle). The four-point positioning method is usually adopted for opening molds, meaning that the opened mold has four feet that fit together and are fixed, with the sections between the feet cut in curves to present a wavy mountain shape, avoiding straight or flat cuts as much as possible (see Figure 3-9).

The general sequence for opening molds is as follows (taking the opening of a ring mold as an example).
(1) The pressed rubber mold cools to room temperature. Use scissors to cut off the flash and needle-nose pliers to remove the sprue block, pulling away the charred shell.
(2) Stand the rubber mold upright with the sprue facing up. Cut from one side of the sprue, along the centerline of the four edges of the rubber mold, to a depth of 3-5 mm (which can be adjusted according to the size of the rubber mold), cutting open the four edges of the rubber mold.
(3) Cut the first foot from the first incision. First, cut open the two straight edges to a depth of 3-5 mm (which can be adjusted according to the size of the rubber mold), then pull apart the cut straight edges with force and cut a diagonal edge along 45 to form a right triangle at the beginning of the foot. At this point, the two halves of the rubber mold at the cut should have corresponding yin and yang triangular feet that fit together.
(4) Cut out the remaining three feet sequentially following the previous operation process.
(5) Pull apart the first cut foot, and use a blade to cut inward along the centerline evenly (if using a curved cutting method, the blade should swing in a certain curve to create a fish scale or wavy cutting surface). While cutting, pull the rubber mold outward. When approaching the sprue line, be careful and gently lift the rubber mold with the tip of the knife to expose the sprue. Then, cut along one end of the face of the outer ring until it reaches the flower head and the setting area of the ring.
(6) Cutting the flower head is a relatively difficult and complex step in opening the rubber mold. Suppose the main stone setting is a claw setting. In that case, the flower head should be cut along the axis of the two claws on one side of the flower head and then cut towards the outer edge of the ring on the other side until reaching the Casting inlet position. The rubber mold has been cut into two halves, but the silver mold cannot be removed yet.
(7) Cut the rubber mold part that retains the setting and flower head. At the intervals between the main stone setting and the side stone settings, cut along the outer sides of the two already cut claw axes of the main stone setting until reaching the symmetrical other two claws; then cut in one remaining direction along the outer side of the main stone setting, intersecting with the previously cut surface, making the main stone setting upright; then make a horizontal cut at the base of the claws of the main stone setting and the side stone setting, dividing the flower head into two parts. Pull apart the cut sections and observe any elongated rubber threads (usually formed by the holes of the side stone settings and the hollow part of the flower head); if there are, they must be cut off.
(8) Remove the silver mold, paying attention to whether any rubber threads are sticking between the silver mold and the rubber mold; if there is any stickiness, they must be cut off.
(9) Open the bottom. Deeply cut along the entire circumference of the ring’s inner circle, close to the bottom surface, but do not cut through. Flip the rubber mold over and bend the sides of the rubber mold towards the cut direction with your fingers; you can observe the circumferential cut of the inner circle as well as the traces of the cuts on the setting and flower head parts (since it has not been cut through, the remaining rubber stretches to form slightly concave shallow marks). Cut along these traces to the corresponding Casting inlet position, then cut a width 8-12 mm strip in the equal direction along the Casting inlet, with a length close to the Casting inlet. At this point, the bottom forms a shape similar to a mushroom, and the inner part of the ring can already be pulled out from the cut bottom (Figure 3-10). Such a rubber mold can only successfully remove the wax model after injecting wax.
Demoulding Video
Silicone Molding + Demoulding Video
Section II Wax Mold Making
Once the rubber mold is ready, the wax injection operation can begin. Factors such as wax temperature, pressure, and the tightness of the rubber mold should be considered during the wax injection process. The wax mold produced by injecting wax from the rubber mold is called wax injection (commonly known as wax squeezing), while the wax mold made using carving techniques is called carved wax.
1. Wax Material for Jewelry Lost-Wax Casting
In the lost-wax casting process, the quality of the jewelry wax mold directly affects the final quality. The wax material should have the following process parameters for a good jewelry wax mold.
(1) The melting point of the wax material should be moderate, with a certain melting temperature range, stable temperature control, and suitable fluidity, and the wax mold should not easily soften or deform, making it easy to weld.
(2) To ensure the dimensional accuracy of the jewelry wax mold, the expansion and contraction rate of the wax mold material should be small, generally less than 1%.
(3) The wax mold should have sufficient surface hardness at room temperature to prevent surface scratches during other processes of lost wax casting.
(4) To ensure that the wax mold can be smoothly removed from the rubber mold, can bend without breaking, and can automatically return to its original shape after removal, the wax used for jewelry should have good strength, flexibility, and elasticity, with a bending strength greater than 8 MPa.
(5) There should be little change in composition during heating and minimal ash residue during combustion.
The basic composition of the wax mold material includes wax, grease, natural and synthetic resins, and other additives. Wax serves as the matrix, with a small amount of grease added as a lubricant. Various resins can toughen the wax mold and make it elastic while improving surface gloss. Adding resin to paraffin hinders the growth of paraffin crystals, refining the grain and increasing strength.
Currently, the more popular types of jewelry wax on the market come in various shapes, such as beads, sheets, tubes, and threads, with colors including blue, green, and red (Figures 3-11, 3-12). The wax used for pressing wax molds is most commonly blue, with a melting temperature around 60℃ and a pouring temperature of 70-75℃.
When handling wax for the central casting runner and wax for the mold, they should be distinguished as much as possible. The melting point of the wax for the central casting runner should be slightly lower than that of the wax for the mold to avoid stress in the casting that could lead to cracks during dewaxing.
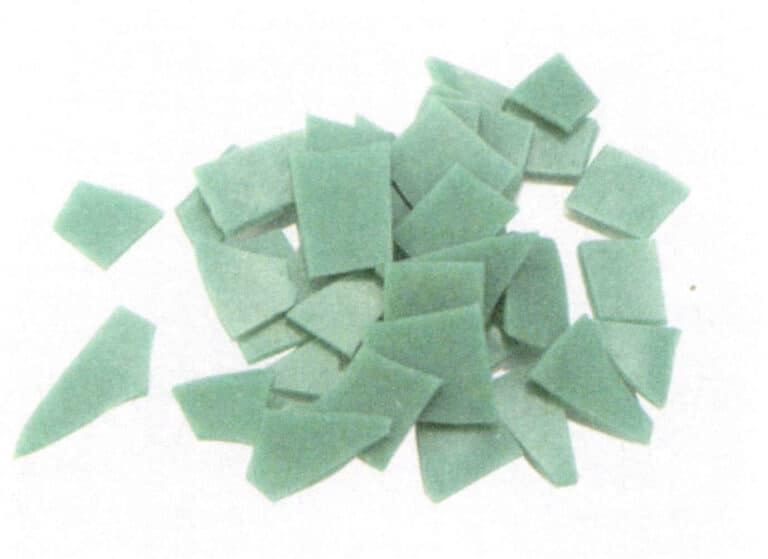
Figure 3-11 Green Wax Sheet
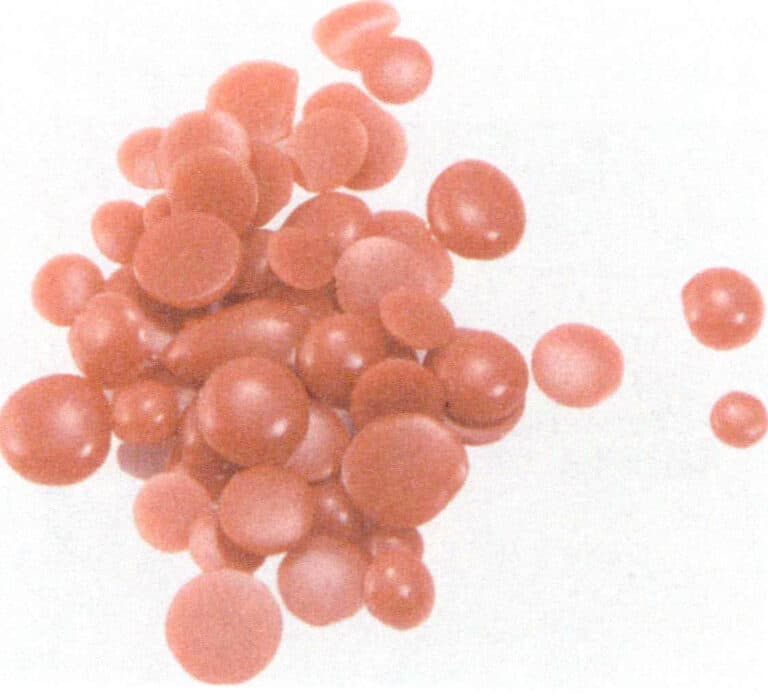
Figure 3-12 Red Wax Bead
2. Main Equipment and Tools
The main equipment and tools for wax mold making are a wax injection machine (commonly known as a wax injector), an air gun, a rubber mold clamp, a pearl powder bag, a wax dripping needle, an alcohol lamp, etc.
Main Tools and Pre-production Preparation Video
3. Wax injection (wax injecting)
Place the wax material into the wax tank; the wax material must remain clean. Continuous wax leakage from the wax nozzle is mostly due to dust in the wax or particles on the surface blocking the valve. Therefore, if there is suspicion that the wax contains foreign impurities or reused wax material, it must first be heated to the appropriate temperature to melt and then filtered through several layers of gauze before use.
Adjust the temperature of the wax tank and wax nozzle to the required temperature. The heater and temperature sensor in the wax injection machine can bring the wax liquid to and maintain a certain temperature, usually between 70-75℃. This temperature ensures the fluidity of the wax liquid. If the temperature is too low, the wax liquid will not fill the wax mold easily, resulting in incomplete molds; conversely, if the wax liquid temperature is too high, it may overflow from the mold seams or the injection port, easily forming flash or injuring fingers.
Before injecting wax, open the mold and check its integrity and cleanliness. If it is an used mold, spray a release agent (or sprinkle a small amount of talcum powder) into the mold, especially in the small and complex areas at the beginning, to facilitate the removal of the wax mold. The release agent and talcum powder should not be used simultaneously, and talcum powder should not be used excessively to avoid roughness on the surface of the wax mold. A single application of talcum powder can produce 3-6 wax mold.
The pressure in the wax cylinder of the injection machine is provided by an external air pump (source). Check the air pressure before injecting wax and adjust the injection time according to the complexity of the wax pieces in the rubber mold (Figure 3-13). Generally, wax mold with more flat surfaces and simple shapes use 0.5-0.8 kg/cm air pressure; wax mold with thinner walls, more embedded stones, and narrow gaps use 1.0-2.0 kg/cm. The injection time for large wax mold is about 4 seconds, while for small wax mold, it is 2 seconds. Then, use both hands to clamp the rubber mold tightly with the clamping plate (which can be made of acrylic, wood, aluminum, etc.), ensuring that the distribution of fingers applies even pressure to the mold; align the Casting inlet of the mold parallel to the wax nozzle and push it in, holding it against the wax nozzle without moving your hands (Figure 3-14). Gently step on the injection switch with your foot and then release it. When the indicator light of the injection machine changes from yellow to red and then to green, it indicates that the injection process has ended, and the rubber mold can be moved away from the wax nozzle.
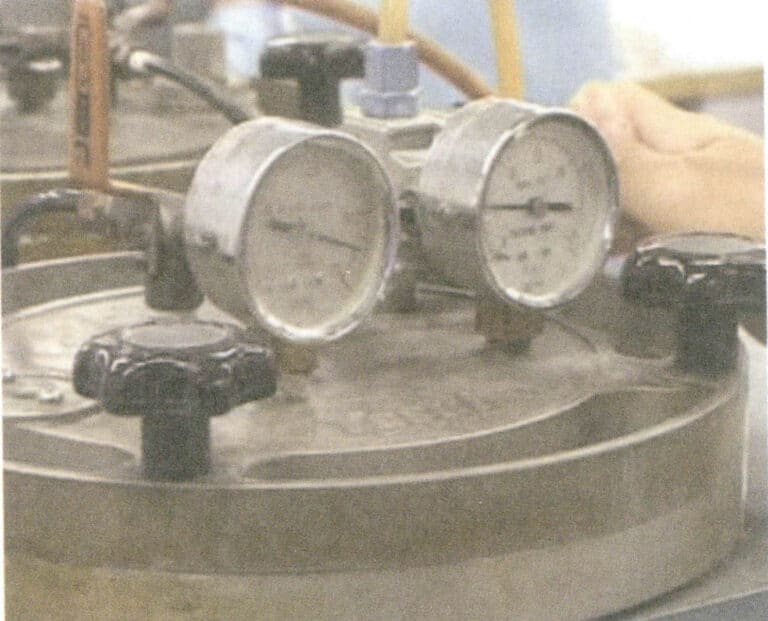
Figure 3-13 Adjusting Air Pressure
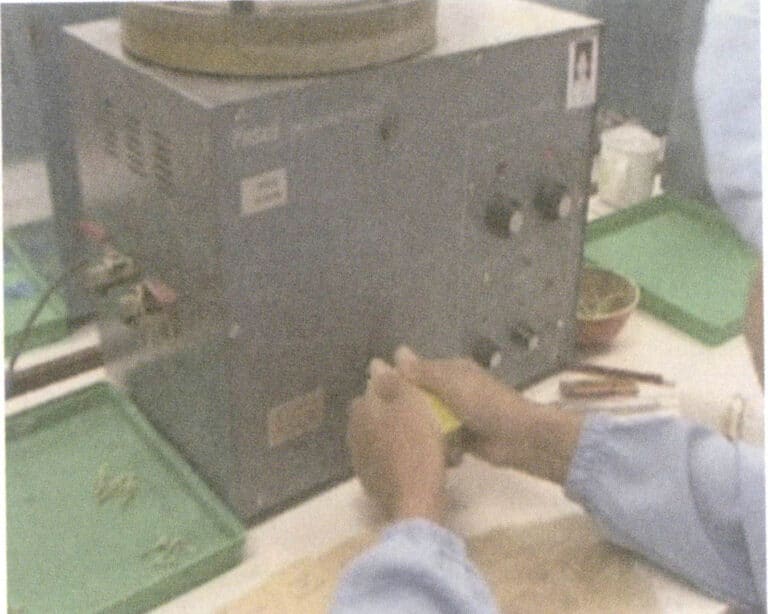
Figure 3-14 Wax Injection
Arrange the silicone molds in the order of wax injection. After continuously making 6-7 silicone molds, you can open the first silicone mold (if the mold has assembled plugins, that should be removed first), remove the wax mold, and so on. Pay attention to the technique (Figure 3-15) when taking the mold to avoid breaking or deforming the wax piece. After removing the wax mold, carefully check it. If there are missing edges, broken claws, deformation, severe flash, or multiple bubbles, such a wax mold is considered defective. The wax mold should be repaired if there are some very small defects.
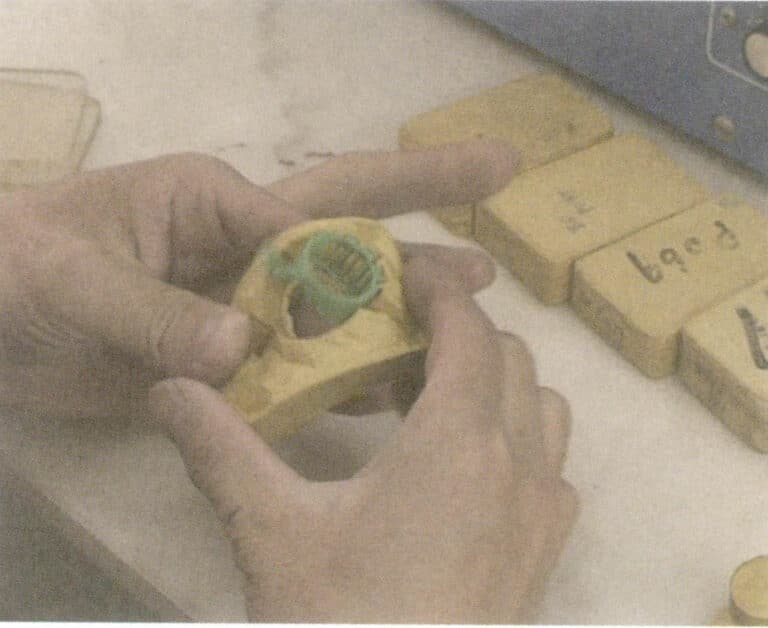
Wax injection Video
4. Repairing the wax mold
Main tools: scalpel, electric soldering iron, wax scraping knife, wax dripping needle, etc.
Generally speaking, the wax molds taken out after wax injection will have some issues, such as flash, clamping marks, broken claws, visible sand holes, partial or overall structural deformation, blocked small holes, unclear floral lines, and overlapping floral edges. A scalpel blade can polish defects like flash, clamping marks, unclear floral patterns, and overlapping edges (Figure 3-16). An electric soldering iron can repair sand holes and broken claws (Figure 3-17). Wax pieces with blocked small holes can be pierced with a welding needle. For deformed wax molds, they can be corrected in 40-50℃ hot water.
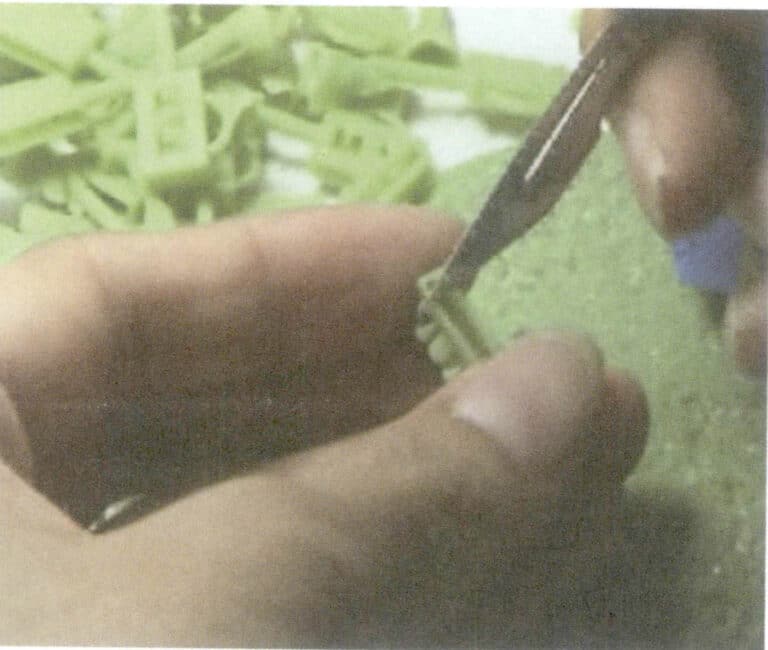
Figure 3-16 Wax Model Repair
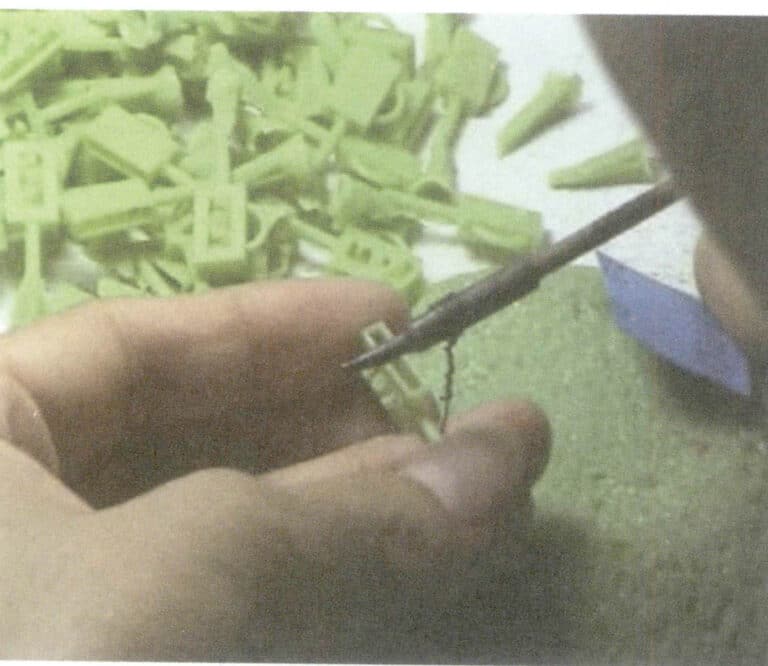
Figure 3-17 Welded Wax Model
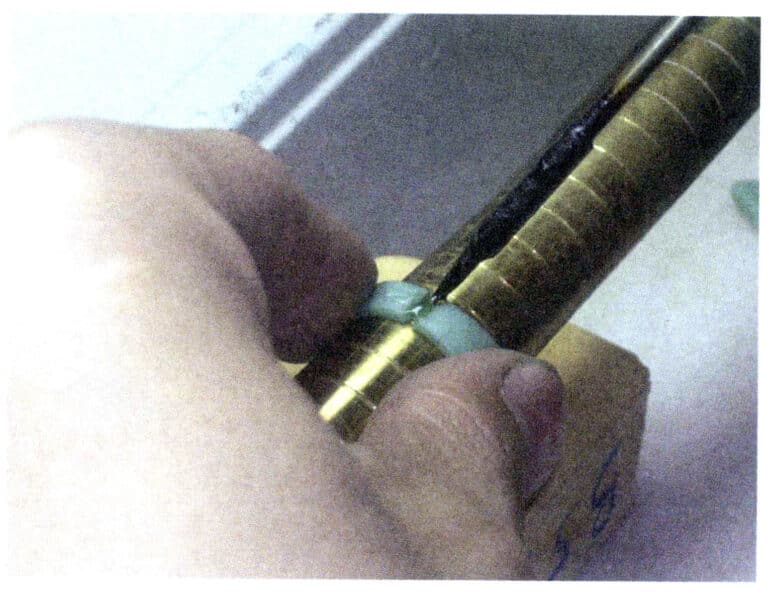
Additionally, for rings with different sizes, if the ring size is changed during the molding process, it is both labor-intensive and material-consuming. Therefore, jewelry manufacturing companies directly modify the ring size while repairing the wax model (Figure 3-18). Using a wax welder (electric soldering iron) to change the ring size is very convenient; trim the weld seam with a blade after welding. Finally, cotton soaked in alcohol removes wax shavings from the wax model.
Wax Model Trimming Video
5. Common Wax Mold Defects
Common wax mold defects are shown in Table 3-2.
Table 3-2 Causes and Solutions of Common Wax Mold Defects
| Question | Image | Possible reasons | Solutions |
|---|---|---|---|
| The wax piece has burrs. |

|
(1) The air pressure of the wax injection machine is too high, or the wax temperature is too high; (2) The clamping force on both sides of the mold is too small; (3) The mold stays at the wax nozzle for too long. | (1) Lower the air pressure or wax temperature of the wax injection machine; (2) Increase the clamping force on both sides of the mold; (3) Shorten the injection time. |
| The wax piece is incomplete. |

|
(1) The wax injection machine's air pressure is too low or the wax temperature is too low; (2) The mold is clamped too tightly; (3) The wax outlet of the injection machine is blocked; (4) There is a problem with the mold, and internal gas cannot escape; (5) The mold temperature is too low, causing the incoming wax to solidify quickly. | (1) Increase the air pressure or wax temperature of the injection machine; (2) Reduce the pressure on both sides of the mold; (3) Clean and unblock the wax outlet of the injection machine; (4) Open "venting lines" in the dead corners inside the mold; (5) Place the mold in 20-22℃ room temperature 1-2 hours before starting the wax injection. |
| There are bubble s inside the wax piece |

|
(1) The air pressure of the wax injection machine is too high; (2) The amount of wax in the injection machine is too low; (3) The wax temperature is too high or too low; (4) The wax inlet of the mold is not aligned with the wax outlet of the machine, causing air to enter with the wax. | (1) Adjust the air pressure of the wax injection machine accurately; (2) Increase the amount of wax in the injection machine (no less than half of the wax machine capacity; (3) Adjust the wax temperature to the correct range (65-75℃) ; (4) Align the wax inlet of the mold tightly with the wax outlet of the machine, leaving no gaps |
| Wax pieces are prone to breakage. |

|
(1) Wax temperature is too high; (2) Too much "old wax" is reused; (3) Wax pieces are left in the mold for too long; (4) Using poor quality wax or wax that is too hard. | (1) Lower the wax temperature; (2) Add new wax to the injection machine (new wax accounts for the total wax amount in the machine over 60%); (3) When injecting wax in large batches, inject fewer molds at a time; (4) Switch to high-quality wax or softer wax |
| Wax pieces are easily bent and deformed. |

|
(1) Wax temperature is too high; (2) Wax pieces are taken out of the mold too early before cooling; (3) Using overly soft wax in summer. | (1) Lower the wax temperature; (2) Wait until the wax pieces cool in the mold before taking them out (more than 1 min); (3) In summer, choose harder wax. |
Section III Casting Investment
Casting Investment involves using a well-mixed casting powder liquid plaster, which is evenly poured into the casting flask (cylinder) containing the wax model and, through the wax removal process, leaves a cavity in the Casting flask (cylinder) that is the same as the wax model.
1. Planting Wax Trees
After trimming the wax mold, the next process is planting wax trees.
Planting wax trees involves sequentially welding the prepared wax molds onto a wax rod in a circular manner using a wax welder, ultimately forming a wax tree that resembles a tree shape. The wax tree is then subjected to processes such as investment. The basic requirements for planting wax trees are: the wax molds must be arranged in an orderly manner, the molds must not touch each other (at least a 2 mm gap must be maintained), and while ensuring sufficient gaps, as many wax molds as possible should be welded onto the wax tree. There must be at least a 5 mm gap between the wax tree and the flask wall, and the wax tree should maintain a distance of about 10 mm from the bottom of the flask, thus determining the size and height of the wax tree.
The wax tree must be “planted” on a circular rubber base. This rubber base’s diameter matches the flask’s inner diameter. Generally, the diameters of rubber bases are 3 inches, 3.5 inches, and 4 inches, (1 inch= 3.33 cm ). The exact center of the base has a raised circular recess, and the diameter of the recess is equivalent to the diameter of the wax rod of the wax tree.
The steps for planting wax trees are as follows.
(1) Dip one end of the wax rod into some melted wax liquid and insert it into the recessed hole of the chassis while it is still hot, so that the wax rod and the recessed hole are firmly combined (Figure 3-19).
(2) Weld the wax molds onto the wax rods one by one, either from the bottom of the rods (from the bottom up) or from the top of the rods (from the top down) until it is completed (Fig. 3-20). If the technique of “planting a wax tree” is skillful, there is not much difference between the two methods. However, the method of starting from the top of the bar (from top to bottom) is generally used more often, because the biggest advantage of this method is that it prevents the melted wax from dripping down onto the welded mold, thus avoiding rework due to wax dripping.
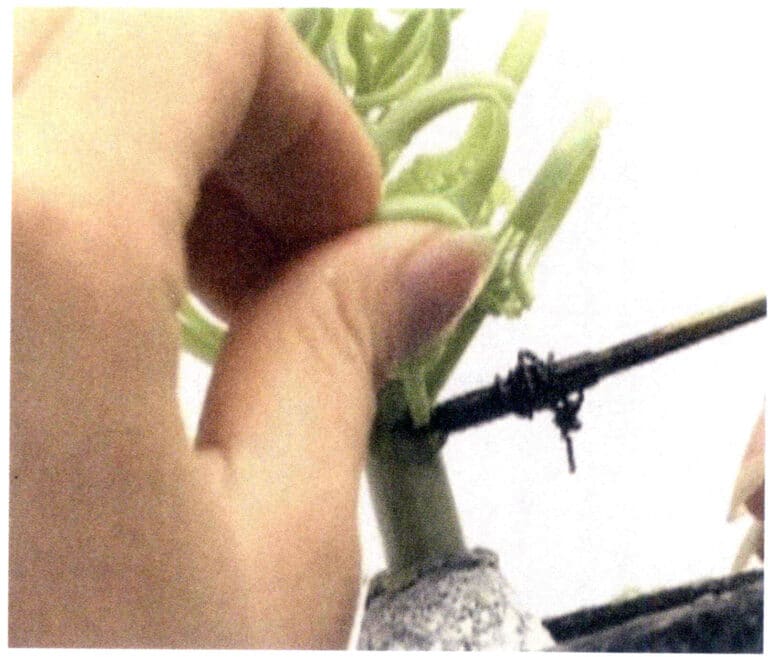
Figure 3-19 Planting wax trees
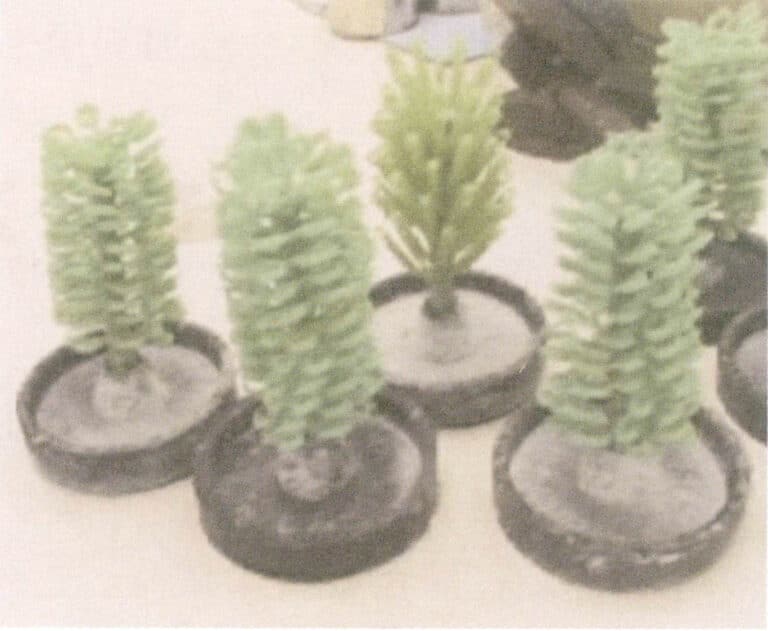
Figure 3-20 The Grown Wax Tree
Planting Wax Trees Video
The following issues should be noted while growing the wax tree.
(1) When planting the wax tree, it is advisable to avoid mixing thick and thin workpieces, as it is difficult to ensure quality during casting.
(2) Based on the shape of the wax piece, select the angle between the wax piece and the wax rod to ensure that the molten metal can flow smoothly and quickly. Generally, the direction of the wax mold is inclined upwards, and this angle can be adjusted appropriately according to the casting method, the wax mold’s size, and the wax piece’s shape. In centrifugal casting, the wax mold and the wax rod form 45°-60°; in vacuum casting, the wax mold and the wax rod form 70°-80°, which helps control the solidification direction.
(3) The rubber base should be weighed Before planting the wax tree. After planting the wax tree, a second weighing should be done. Subtracting the results of these two weighing gives the mass of the wax tree. Converting the mass of the wax tree into the mass of metal based on the density ratio of paraffin to casting metal allows for an estimate of how much metal is needed for casting. Typically, Silver : wax =10 : 1; 14K gold : wax =14 : 1; 18K gold : wax =16 : 1; 22K gold : wax = 18 : 1.
(4) After planting the wax tree, checking whether the wax molds are securely welded is essential. Not securely welded can easily cause the wax molds to fall off during the plaster pouring, affecting the casting process. Check whether the casting sprue of the wax piece is smoothly connected to the wax rod, avoiding angles or gaps. Finally, check whether there is enough space between the wax molds; they should be separated if they are stuck together. If there are wax drips on the wax tree, they should be removed with a blade.
Wax Model Crafting Video
2. Casting investment
The melting points of different jewelry metals vary, and accordingly, the materials used for molds are also different. Conventional decorative gold, silver, and copper alloys generally have melting points below 1100℃, so plaster molds are commonly used; however, for high melting point materials such as platinum, palladium, and stainless steel, ceramic molds made from acid-bonded casting powder must be used.
2.1 Production of plaster molds
(1) Production of plaster molds
- Advantages of plaster molds:
- Good replication; plaster expands while crystallizing, filling the small details of the model, resulting in clear patterns and strong three-dimensionality;
- Good dispersibility; for thin and complex ornaments, residual casting powder can be easily removed without damaging the cast piece; Convenient operation, easy to master.
(2) Composition of plaster casting powder. The casting powder consists of refractory materials, binders, and additives. Refractory materials use quartz and cristobalite to avoid decomposition at high temperatures; the binder uses hemihydrate plaster to fix the refractory materials into a mold; additives are used to control when the binding material sets and to adjust the processing performance of the casting powder liquid plaster.
Currently, there are various types of casting powders on the market. Widely used international brands include Kerr and R&R from the USA and SRS and Golden Star from the UK; each with its characteristics in terms of performance and price.
(3) Investment process. Due to static electricity generated on the wax tree, which easily attracts dust, it can be immersed in a surfactant or diluted detergent before pouring, then rinsed with distilled water and dried. During the Investment process, it is important to control the setting time of the plaster liquid plaster appropriately; if it sets too quickly, gas may not be completely expelled; if too slowly, the powder may settle in the liquid plaster, altering the solid-liquid ratio locally and causing differences in roughness on the top and bottom of the jewelry. The liquid plaster’s setting time depends on the casting powder’s performance and is greatly influenced by the mixing operation and the water-to-powder ratio.
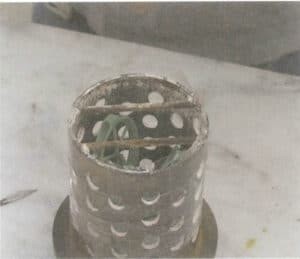
First, take a clean casting flask, tightly wrap a circle of transparent tape around the cylinder wall to prevent the liquid plaster from leaking out of the holes in the wall, and insert the wax tree into the casting flask, ensuring the rubber base is in close contact with the flask to stabilize the wax tree in the center of the cylinder (Figure 3-21 ).
Calculate the required mass of casting powder based on the capacity of the casting flask, weigh the casting powder and water in the specified ratio (Figure 3-22), and mix evenly by hand or in a mixer for 2-3 min (Figure 3-23).
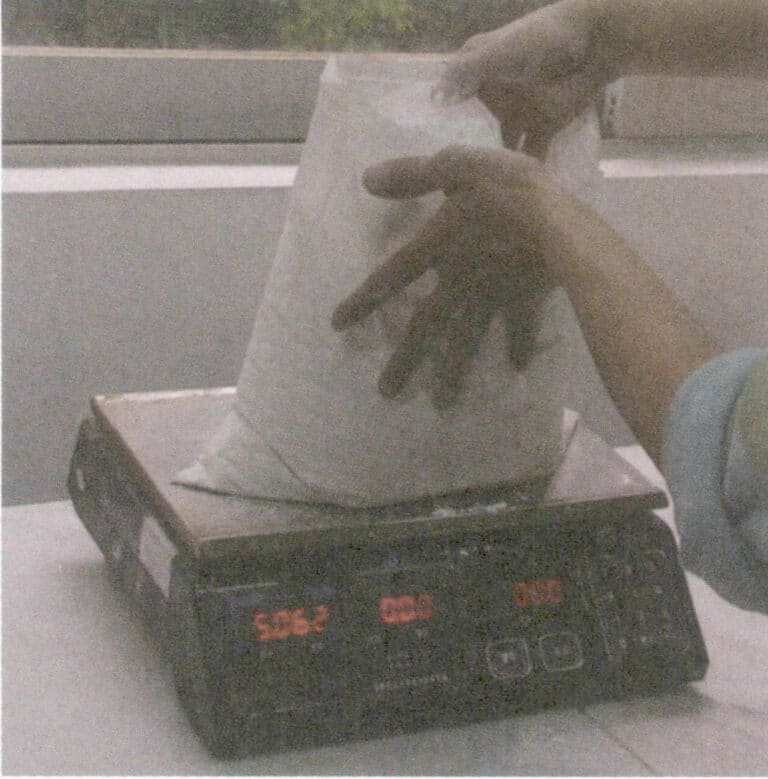
Figure 3-22 Weighing cast powder
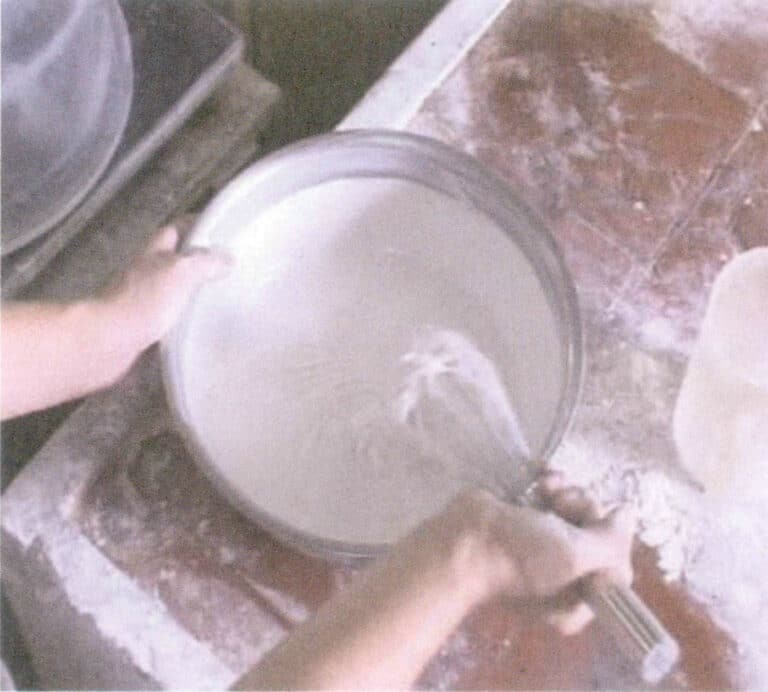
Figure 3-23 Hand mixing of casting powder liquid plaster
After mixing the casting powder liquid plaster, vacuum it in a vacuum machine for 1 to 2 minutes, then evenly inject the vacuumed casting powder liquid plaster into the casting flask (Figure 3-24). and then vacuum 2-3 minutes, and at the same time constantly vibrate the casting flask in order to prevent air bubbles attached to the wax mold (Figure 3-25)
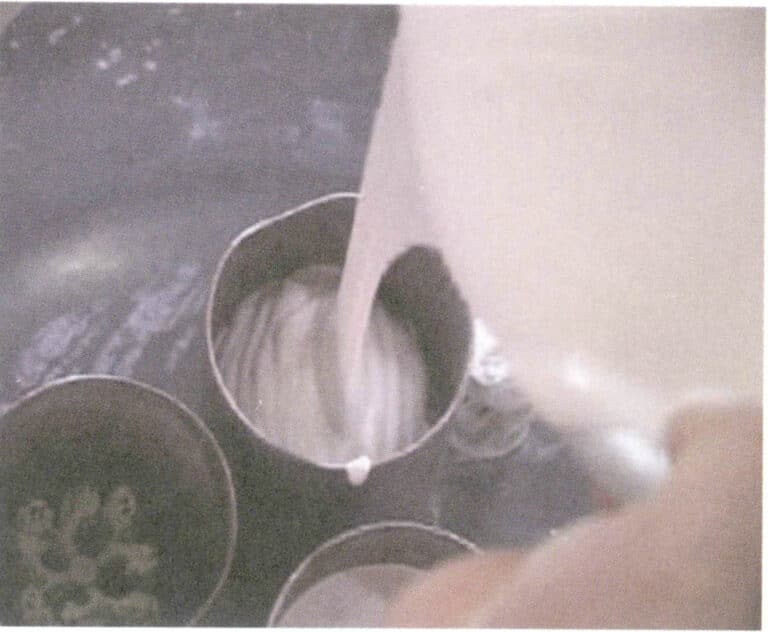
Figure3-24 Grouting
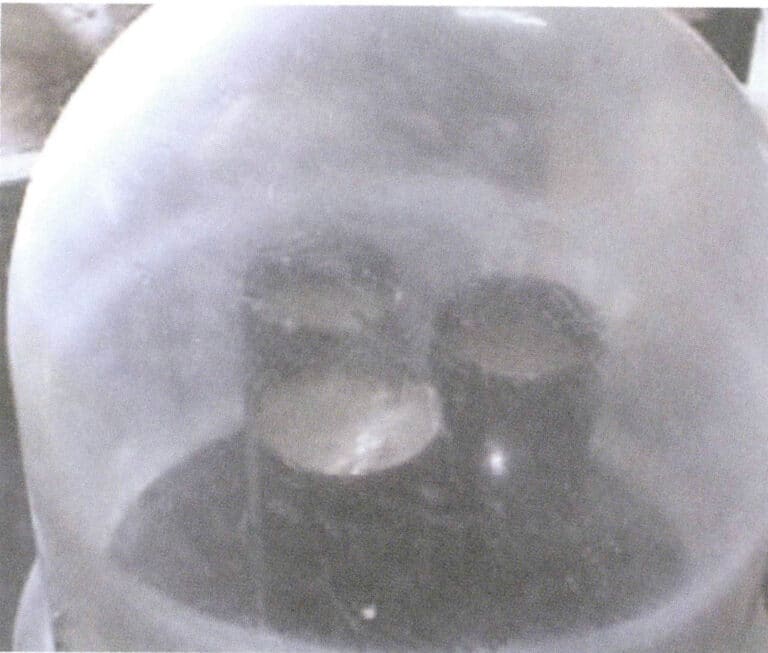
Figure 3-25 Vacuuming
(4) Stand still. After completing the investment, it should stand for 1.5-2 hours to allow the plaster mold to solidify and harden fully (Figure 3-26). Then remove the rubber base, dismantle the wrapping material around the steel flask, clean up the liquid plaster splattered around it, and make marks on the side and surface of the mold.
Plaster Mold Making Video
(5) Issues to pay attention to in the investment.
- Stir according to the required water-to-powder ratio. When stirring the casting liquid plaster, the action should be quick, and the stirring should be thorough until there are no powder lumps so that the liquid plaster achieves better fluidity. It is best to inject the liquid plaster into the casting flask with the wax tree after vacuum degassing for 1-2 min.
- After injecting the liquid plaster into the casting flask, perform a second vacuum degassing, which generally requires 2-3 min, while degassing and vibrating the flask makes it easier for bubbles to rise.
- After the second degassing, place the casting flask in a still place without vibration. The powder and water mixture begins to solidify after about 15-20 min, and it will completely solidify and reach the required strength after 2 hours.
- It is particularly important to note that during the casting process, the viscosity increases about 10 minutes after the powder and water are mixed, making it unfavorable for degassing. Therefore, the first and second steps of the two degassing must be completed within 10 minutes.
Copywrite @ Sobling.Jewelry — Custom jewelry manufacturer, OEM and ODM jewelry factory
2.2 The Investment of platinum jewelry
Taking the Platinum-Plus platinum casting powder produced by the R&R company as an example, the mold-making process is as follows.
(1) Prepare the sprue cup base.
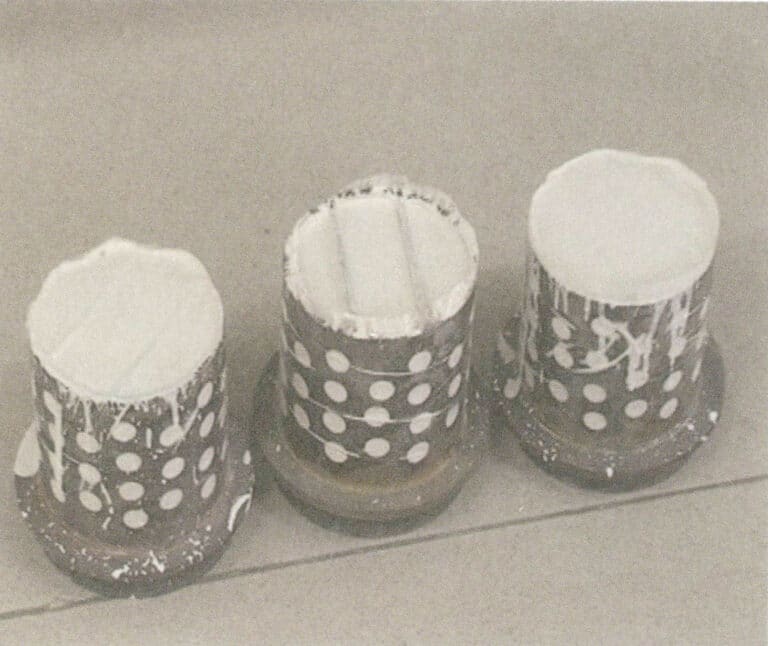
Use non-asbestos paper instead of a rubber base, with the paper being 10 cm x 10 cm or larger. Cut a circular hole with a diameter of 1.27 cm in the center of the base so that during burnout, the wax can be discharged from here into the cavity. Stick a sprue cup with a diameter of 2.5 cm in the center of the paper, and fix the wax tree or wax mold to the sprue cup. The wax mold should be 2.5 cm shorter than the height of the steel cylinder. Use paper, soft paper tape, or other materials to form a 10 cm high cylindrical barrel around the top of the steel cylinder to prevent the liquid plaster from overflowing during vacuum extraction (Figure 3-27).
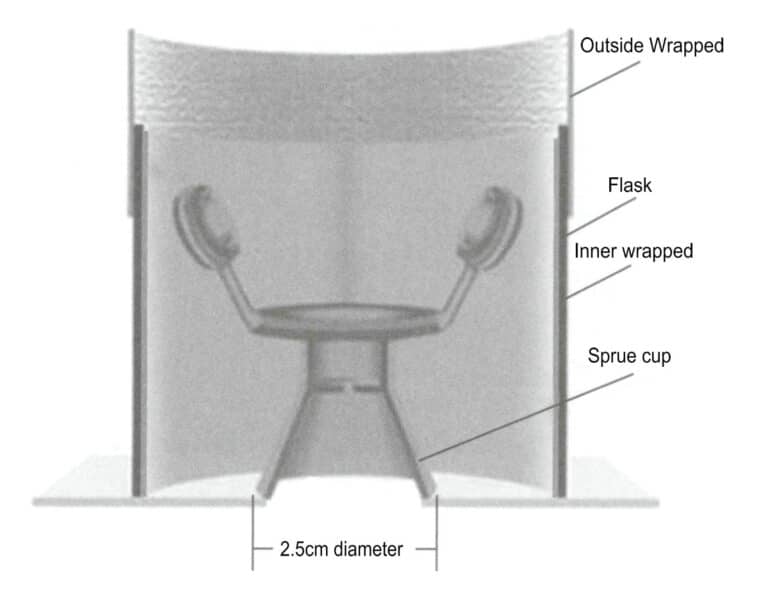
(2) Inner wrap of the steel cylinder.
The Inner wrap helps absorb excess binder liquid and remove casting powder. Prepare a piece of 2-3 mm thick, water-absorbent fiber paper, making its length sufficient to wrap around the inner circumference of the steel cylinder and its height shorter than the steel cylinder by 10-15 mm. Roll the paper and insert it into the steel cylinder, leaving an equal distance at the top and bottom.
(3) Mixing the liquid plaster.
The appropriate water-to-powder ratio and curing time are key to ensuring the quality of the castings, so it is important to weigh the mass of the liquid and casting powder accurately.
Platinum-Plus concentrated binder can be diluted with water at 1 volume of binder to 14 volumes of water. Add the binder to deionized or distilled water using a clean plastic container.
The water-to-powder ratio for Platinum-Plus is 30: 100 (mass ratio). Weigh the required amount of diluted binder solution and the corresponding casting powder. Using a high-power mechanical mixer, slowly add the casting powder to the liquid while stirring slowly. When the casting powder begins to thin, switch to a medium-speed stirring for 10-15 min, then, vacuum the liquid plaster until it rises, bubbles burst, and it begins to boil vigorously, continuing to vacuum for 1 minute.
(4) Casting the mold.
Quickly and smoothly inject the vacuumed casting liquid plaster into the steel cylinder, avoiding directly washing the wax mold. Then, place the casting powder cup into the vacuum machine and vacuum for 3-5 min. During this time, it is necessary to continuously and slightly vibrate the casting flask to prevent bubbles from adhering to the wax mold. □
(5) Keep still.
After vacuuming, place the mold on water-absorbing powder and let it rest for 6-8 hours, marking the sides of the casting flask and the casting powder cloth.
3. Wax removal from the Casting plaster mold
When the liquid plaster solidifies, there are two different methods to remove the wax: steam wax removal or burnout in a burnout furnace.
3.1 Steam wax removal
Experiments show that steam dewaxing can more effectively remove wax, with the wax liquid permeating into the mold thickness reduced to zero, resulting in very little wax residue. During calcination, a reducing atmosphere will not form inside the mold, which is beneficial for the stability of CaSO4, as a reducing atmosphere promotes the thermal decomposition of CaSO4. Additionally, using steam dewaxing is also beneficial for environmental protection.
First, fill the dewaxing furnace with enough water, turn on the heating device, and when the water boils, invert the mold and place it in the dewaxing box (Figure 3-28), using steam to melt the wax model inside the mold, allowing it to flow out of the mold.
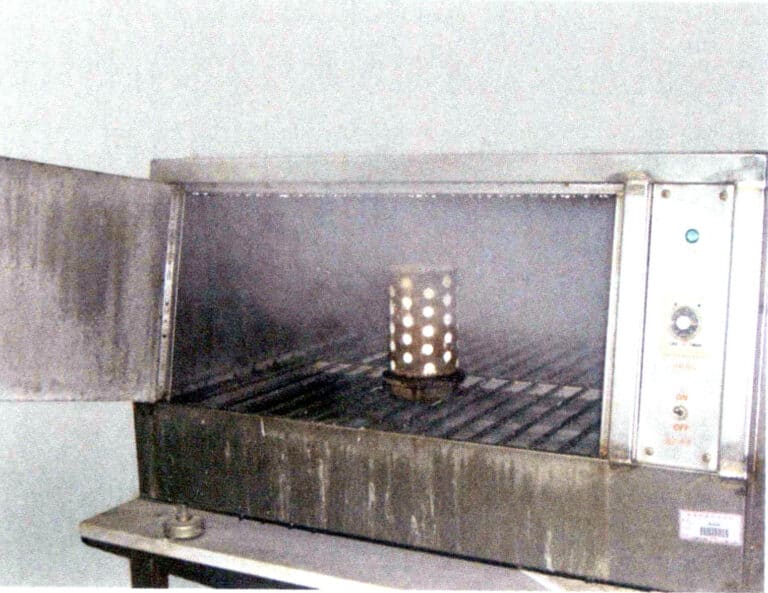
The use of steam dewaxing, pay attention to the boiling of water cannot be too violent, and to control the time of steam dewaxing, otherwise splashing; otherwise, splashes of water will enter the mold, damaging the surface of the mold, and even causing CaSO4 crystals to crack, increasing the reactivity of CaSO4 crystals, lowering the thermal decomposition temperature, and leading to the formation of pores. Additionally, steam dewaxing may weaken the boric acid protectant in the casting powder in wax-settings casting, making the gemstones dull and discolored.
3.2 Wax Removal by Burnout
Wax removal by burnout is a method that uses a burnout furnace to heat the mold, causing the wax material to melt and flow out of the mold. Due to the low boiling point of the wax material, if the wax liquid boils violently during this process, it can damage the surface of the mold, or if the wax liquid does not drain smoothly, it can seep into the surface layer of the mold, both of which will deteriorate the surface quality of the casting. Therefore, it is important to control the heating temperature and speed during the wax removal stage and to set up a corresponding insulation platform. Additionally, the mold should not be completely dried before wax removal; otherwise, the mold is prone to cracking. If it cannot be waxed within 2-3 hours after investment, a damp cloth should be used to cover the mold to prevent drying.
4. Casting Plaster mold Burnout
The purpose of burnout is to remove the moisture and residual wax from the mold completely, achieve the required high-temperature strength and mold permeability, and meet the temperature requirements of the mold during pouring. The burnout system and burnout equipment largely influence the final performance of the mold.
4.1 Burnout of Plaster Molds
Before burnout the mold, a suitable burnout system must be established, which requires underkeep still the temperature changes of the mold during the heating process. The temperature changes inside the plaster mold during heating can be divided into three stages.
(1) Evaporation of free water, vaporization of 2/3 of the water added to the gypsum mixture, absorbing a large amount of heat. The thermal conductivity of water is much lower than that of air, resulting in a significant temperature difference within the mold during the heat transfer process.
(2) Dihydrate plaster transforms into hemihydrate plaster, an endothermic reaction resulting in a reduced temperature gradient.
(3) Hemihydrate plaster transforms into anhydrous, insoluble hard plaster with no significant thermal effect. The filler also does not undergo a phase change, and the mold’s temperature field depends on the materials’ thermal properties and the mold’s bulk density, leading to a reduced temperature difference within the mold.
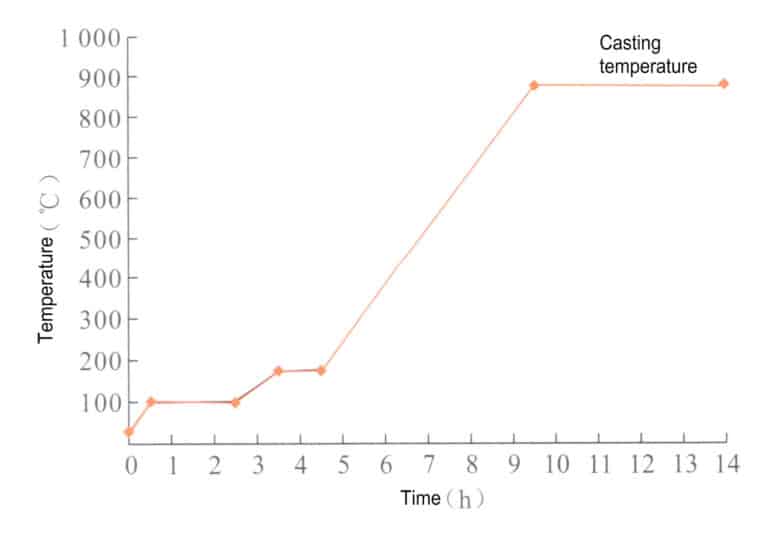
Generally, casting powder manufacturers have established detailed burnout systems, which may vary among manufacturers. Taking R&R plaster casting powder as an example, its recommended burnout system is shown in Figure 3-29.
Directly place the mold into the burnout furnace with the casting cup facing down, leaving a certain gap between molds to prevent uneven heating. When placing more than two layers, the mold on the upper layer should be staggered with the bottom layer (Figure 3-30). According to the burnout system, the self-control heating time and temperature of the high-temperature furnace and the mold are sintered at a high temperature to achieve the required strength, forming various cavity models inside the casting. After burnout the mold, cool down to the required casting temperature.
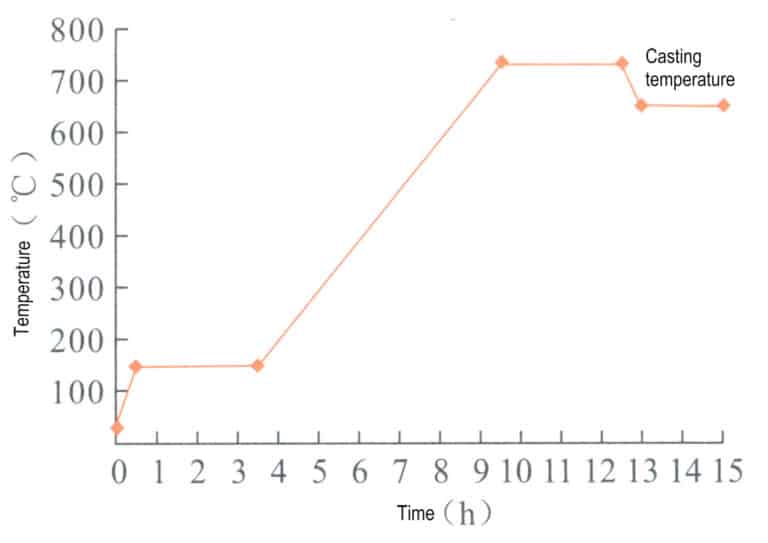
Figure 3-29 R&R Gypsum Cast Roasting Regime
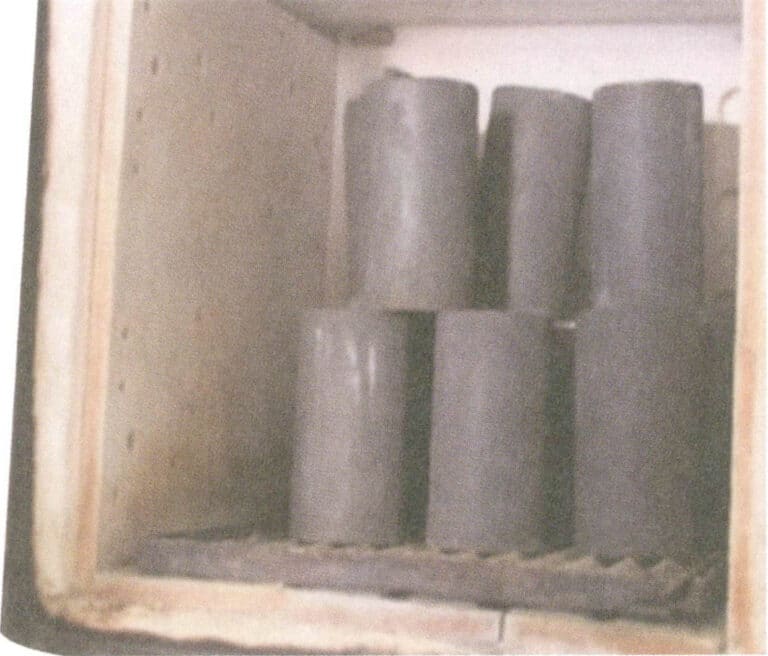
Figure 3-30 Placement method of molds in the burnout furnace
Mold De-waxing and Burnout Video
Investment Molding Video
4.2 Burnout of platinum castings
The burnout system of platinum molds differs greatly from that of plaster molds. It is an acid-bonded mold, and higher sintering temperatures need to be adopted to achieve a good effect. The burnout system recommended by R&R for platinum molds, it is shown in Figure 3-31.
Section IV Melting and pouring
Melting and pouring is one of the most important steps in the jewelry casting process, and many defects are related to this procedure. The work sequence mainly includes several key steps: material preparation, alloy pretreatment, alloy melting, and pouring.
1. Prepare alloy materials
Before melting, it is essential to accurately prepare the type and quality of alloy required for each mold. The weight of the wax tree has already been measured during the wax tree preparation, and based on the specific gravity relationship between wax and metal, the required metal weight can be calculated.
When preparing the ingredients, it is necessary to handle the ratio of new materials to recycled materials correctly. Many suppliers suggest that the recycled material should account for 30% of each batch. However, in actual production, except for a few simple parts with higher casting yields, most products yield only around 50% or even lower. According to the required recycling ratio, a large amount of recycled material generated daily cannot be reused in time, leading to quick accumulation, which poses significant material management and production cost issues for jewelry manufacturing companies. Therefore, many companies adopt at least a 50% ratio during ingredient preparation; in some cases, the recycled material ratio reaches 70%. It is important to note that alloys inevitably become contaminated during the melting and casting process. For instance, excessively increasing the ratio of recycled material to new metal can lead to fluctuations in the alloy’s performance, and elements that are prone to volatilization will decrease, increasing the probability of oxidation inclusions and insufficient pouring defects. The elements prone to volatilization will decrease, increasing the probability of oxidation inclusions and insufficient pouring defects.
2. Alloy Pretreatment
In the casting production of jewelry alloys, the effect of jewelry castings is closely related to the condition of the jewelry alloy. For pure gold, pure silver, and pure platinum jewelry, this issue is relatively minor, and block materials can be directly melted. Materials like gold, silver, and platinum alloys need to be pre-treated. For example, directly mixing pure metals with intermediate alloys for casting can easily lead to problems such as uneven composition, severe loss, and defects like holes.
Therefore, it is generally recommended to melt and cast various pure metals and alloy materials into bead particles, cast them into ingots, and then mix them according to the required quality. It is advisable to prioritize the method of prefabricated bead particles, where the molten metal flows out from the crucible outlet, drops into cooling water, and instantly cools and splits into droplets, solidifying into solid metal particles. Well-shaped and appropriately sized alloy particles are beneficial for uniform composition and temperature control during the melting process, reducing defects such as holes, sand holes, and hard spots, which are also closely related to the control of metal loss. The granulation effect is mainly reflected in particle shape, size, metal quality, and process stability. A good granulation effect depends not only on the type and nature of the alloy material but also on the working performance of the granulation device. The granulation device can be a separate piece of equipment, but some casting equipment is also often equipped with granulation devices. Due to poor equipment conditions, some jewelry companies use manual bead sprinkling, directly pouring molten metal into a quenching water tank to obtain bead particles. Regardless of the method, it is necessary to strictly control several important links, such as the melting, pouring, and cooling methods. If not controlled well, it can lead to irregular bead shapes, easy adhesion into blocks, and phenomena such as gas entrapment and oxidation, thereby affecting the performance of the alloy.
3. Alloy Melting
There are various methods for melting and pouring jewelry alloys, with the commonly used melting methods being oxy-fuel melting and induction melting.
3.1 Oxy-fuel melting
Using a flame gun for smelting and pouring jewelry is a relatively traditional production method with simple tools and equipment. First, the metal is melted using a flame and then manually poured using simple pouring equipment. The combustion gases used in flame gun smelting include gas-oxygen, natural gas-oxygen, etc. Generally, oxygen-acetylene is not used because its temperature is too high, leading to significant metal loss and difficulty in control. The flame guns used are of two types: single-tube and double-tube. The flame gun has a control knob that can adjust the size, strength, and nature of the flame. To effectively protect the molten metal and reduce the oxidation of metal elements, a yellow reducing flame is required (Figure 3-32). The smelting time should be a manageable length, and it should be generally controlled to complete the smelting and pouring within 2-3 min.
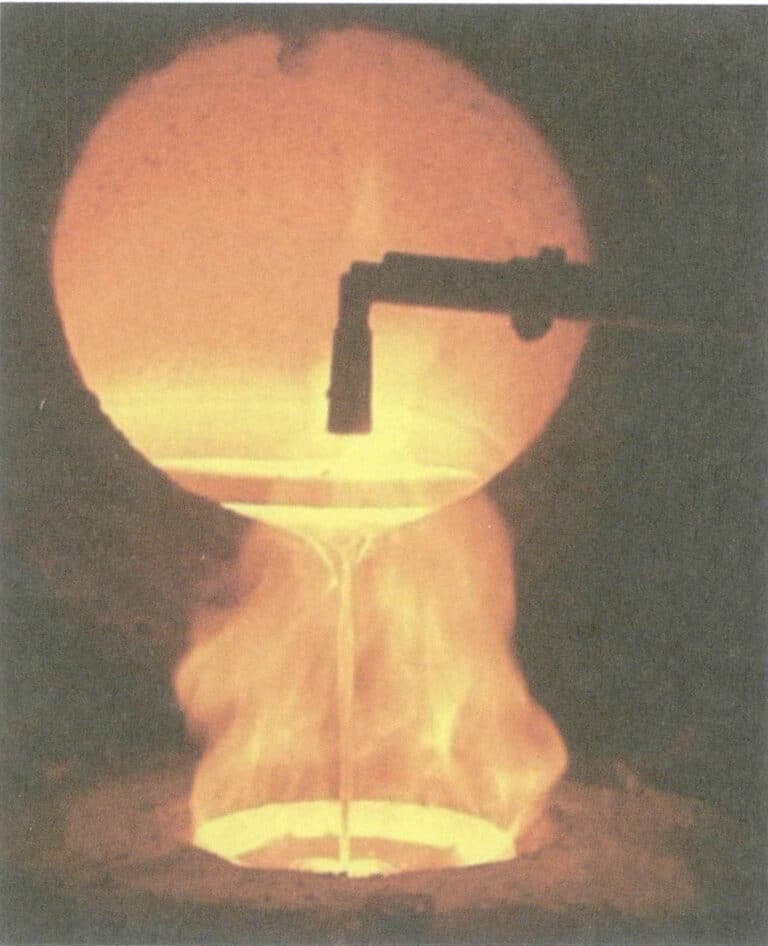
Flame gun smelting generally uses clay crucibles. Before smelting, the quality of the crucible should be carefully checked; the inner wall should have a smooth and dense glazed layer with no residual slag. Prepare the flux for slag formation, usually using anhydrous borax. First, preheat the crucible, then add copper particles, adjusting the flame strength and nature to suitable levels. When the copper material is close to melting, sprinkle a small amount of borax on the surface of the liquid and gently stir the molten metal with a glass rod until it is evenly mixed. When the temperature reaches the required pouring temperature, the mold can be taken out for pouring.
During the melting process, it is important to control the temperature and flame atmosphere; otherwise, serious oxidation will occur, leading to metal loss and the formation of slag that contaminates the molten metal, especially in gold and silver alloys with high zinc content. Due to the high vapor pressure of zinc, it will undoubtedly increase the loss of zinc elements, particularly at higher melting temperatures, where the reactivity of the metal increases with temperature. In a boiling state, its oxidation ability is dramatically enhanced, resulting in a large amount of zinc oxide (ZnO) being generated and released into the air, causing a sharp increase in loss. The oxidation ability of copper also increases sharply, forming a large amount of oxidized slag, and the longer the boiling state is maintained, the greater the amount of metal loss. To reduce metal loss, it is generally necessary to strictly control the melting temperature according to the filler metal (referring to the intermediate alloy used to prepare the required karat gold, silver, and platinum alloys).
When the metal is close to melting, a small amount of borax is generally sprinkled on the surface, which not only aids melting but also forms a protective layer on the surface of the molten metal to prevent oxidation and gather the slag on the surface. Borax is Na2B4O7 • 10H2O, with a low melting point, and when calcined to 320℃, it loses its crystalline water and becomes a porous substance. Borax is a good flux in copper alloy melting, having high fluidity after heating and melting, covering the surface of the molten metal, providing excellent protection against gas absorption and metal oxidation, and separating boric anhydride (B2O3). Boric anhydride is extremely unstable at high temperatures and reacts violently with metal oxides when separated.
The chemical reaction equation is as follows:
Na2B4O7 • 10H2O → Na2B4O7 + 10H2O
Na2B4O7 → Na2O • B2O3 + B2O3
B2O3 + MeO → MeO • B2O3
Na2OB2O3 then react with MeO • B2O3 to form the complex salt Na2O•MeO[B2O3]2. This greatly reduces the slag generated from metal oxides and effectively reduces metal loss by displacing and reducing the metal. Additionally, borax plays a good protective role in the molten state, maximizing the prevention of oxidation of the molten metal.
3.2 Induction Melting
The basic principle of induction melting is that when alternating current passes through the induction coil, an alternating magnetic flux is generated in the internal space of the induction coil, inducing an electromotive force in the metal conductor inside the crucible. The induced current, which has a certain electromotive force, forms eddy currents in the metal material, generating heat due to the metal’s resistance, causing the metal to melt. Compared with other melting methods, induction melting has advantages such as high melting efficiency, low element loss, convenient and accurate control and adjustment of the composition and temperature of the molten metal, and simple operation and maintenance, making it widely used in the jewelry casting industry.
During the induction melting process, the distribution of the induced current in the metal is uneven, with the current density being highest at the surface of the charge and decreasing towards the interior, resulting in the so-called skin effect. The skin effect is closely related to the current frequency; the higher the current frequency, the more pronounced the skin effect. When the crucible capacity is large, the severe skin effect is detrimental to melting. Therefore, there is a certain correspondence between crucible capacity and current frequency. When the melting amount is large, medium-frequency induction is generally used; high-frequency induction is often used when the melting amount is small. Since jewelry is usually quite fine and the amount melted at one time is small, high-frequency induction melting is generally used in jewelry alloy melting(Figure 3-33).
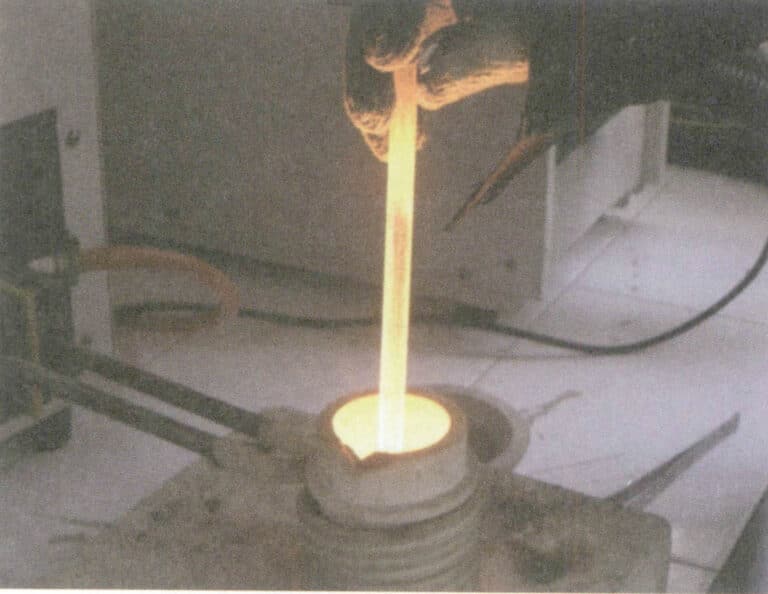
In induction melting, electromagnetic stirring occurs under the action of the electromagnetic force, which is beneficial for the uniformity of the temperature and composition of the molten metal and helps non-metallic inclusions in the molten metal rise. The lower the current frequency, the stronger the electromagnetic stirring effect.
The control of the atmosphere during melting significantly impacts the quality of molten metal. Generally, several methods exist, such as vacuum melting, inert gas protection melting, and reducing flame protection melting. Vacuum melting is beneficial for ensuring metallurgical quality; however, it is not suitable for copper alloys, especially brass alloys with high zinc content. This is because the vacuum exacerbates the volatilization of zinc, leading to severe metal loss and significant composition fluctuations, and the smoke generated during the melting process can damage the vacuum system. Therefore, it is generally necessary to use inert gases such as argon and nitrogen or to use a reducing flame to isolate and protect the molten metal surface to achieve excellent metallurgical quality when induction melting copper alloys.
4. Pouring
Since jewelry pieces are relatively fine, they solidify quickly during the pouring process and lose fluidity. Therefore, conventional gravity pouring is difficult to ensure shaping, and it is necessary to introduce some external force to promote the rapid filling of the mold cavity with molten metal, obtaining castings with complete shapes and clear profiles.
4.1 External Force Methods for Pouring
Pouring can be divided into two main categories based on external force: centrifugal and static pouring.
(1) Centrifugal casting method.
Centrifugal casting involves pouring molten metal into a rotating mold, where the centrifugal force helps fill the mold and solidify the metal. Centrifugal casting has high production efficiency, significant metal pressure, and fast filling speed, which is beneficial for forming castings, especially suitable for casting small ornaments, such as links, earrings, etc. Compared to static casting, traditional centrifugal casting has some weaknesses; due to the fast filling speed, the molten metal experiences severe turbulence during pouring, increasing the likelihood of gas entrapment and the formation of pores; the discharge of gas within the mold cavity is relatively slow, resulting in high back pressure within the mold, which increases the probability of pore formation; when the filling pressure is too high, the molten metal exerts strong scouring on the mold wall, easily leading to mold cracking or peeling; additionally, slag may enter the mold cavity along with the molten metal during pouring. Due to the high filling pressure generated by centrifugal force, the maximum amount of metal that can be cast within a safe range of the centrifuge is less than that of a static casting machine. Furthermore, inert atmospheres are generally less used because the centrifugal casting chamber is relatively large.
(2) Static casting method.
Static casting utilizes methods such as vacuum suction casting and vacuum pressure casting to promote filling the mold cavity with molten metal. Compared to centrifugal casting, the filling process of static casting machines is relatively gentle, resulting in the less scouring effect of the molten metal on the mold wall; due to the vacuum effect, the back pressure of gas within the mold cavity is lower; the maximum amount of metal that can be cast in one go is greater. Therefore, it has been widely used in jewelry casting, especially for casting medium to large ornaments, such as men’s rings, pendants, bracelets, etc.
4.2 Degree of automation in casting
Casting can be divided into two main categories based on the degree of automation: manual casting and automatic casting by machines.
(1) Manual casting.
Manual casting is generally performed in conjunction with fire melting or induction melting. After refining the molten metal and slag, the temperature is adjusted to the casting temperature range. Then, the mold is taken out of the burnout furnace to prepare for casting. Depending on the type of equipment used, manual casting mainly includes centrifugal casting and vacuum casting.
- Manual centrifugal casting: Figure 3-34 shows a simple mechanical drive centrifugal machine used in some small jewelry processing factories. It does not come with an induction heating device and uses oxygen gas to melt metal or an induction furnace to smelt metal, The metal is then poured into a crucible and centrifugally cast.
- Manual vacuum casting: Vacuum casting refers to a method where the air pressure in the mold cavity is lower than the external air pressure, using the pressure difference to draw the molten metal into the mold cavity. Manual vacuum casting is the simplest form of vacuum casting. It uses a vacuum casting machine, and the main component is the vacuum system, without a heating and melting device. Therefore, it needs to be used in conjunction with a torch or melting furnace, and after melting, the molten metal is manually poured into the mold (Figure 3-35). It is relatively simple to operate, has a higher production efficiency, and is widely used in small and medium-sized jewelry factories. Since the pouring is done in the atmosphere, there is a problem of secondary oxidation and gas absorption of the molten metal, and the entire pouring process is controlled by the operator, including pouring temperature, pouring speed, head height, and slag handling on the liquid surface. Thus, many human factors can affect quality.
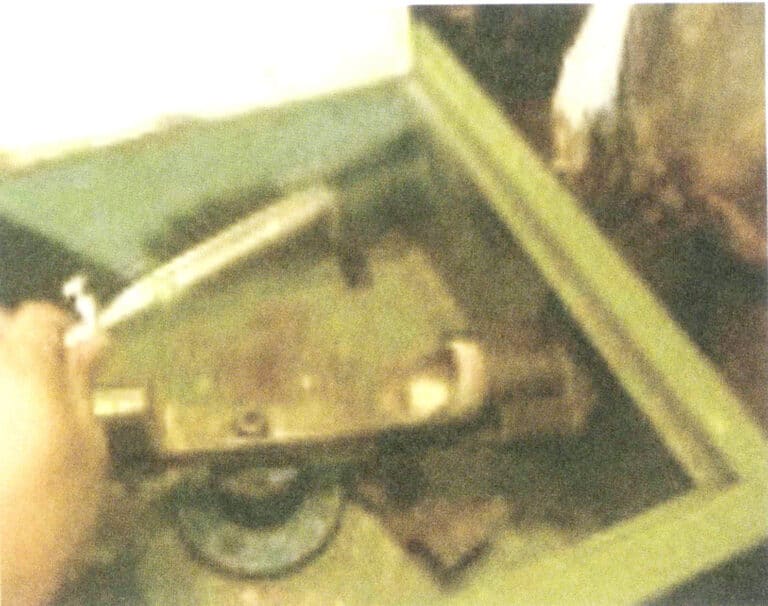
Figure 3-34 Manual centrifugal casting
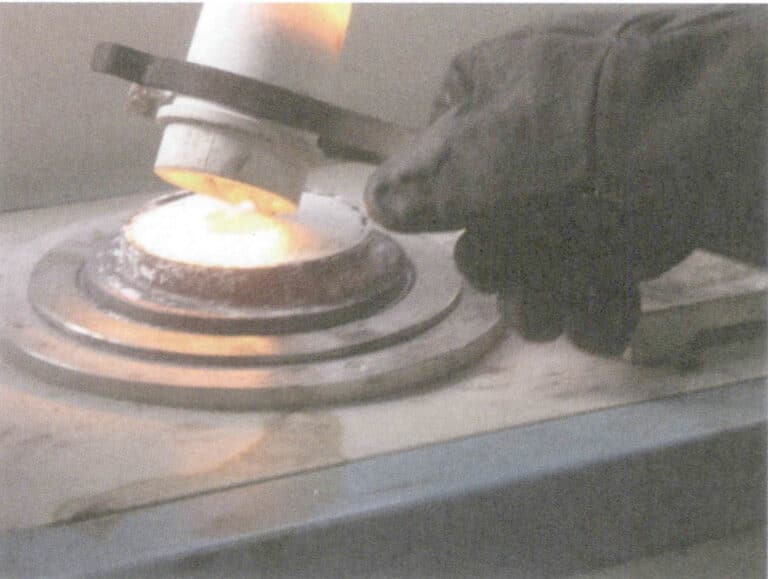
Figure 3-35 Manual vacuum casting
Melting and Casting Video
(2) Automatic pouring by casting machines.
Manual pouring is a traditional and outdated production method, resulting in significant fluctuations in product quality. With the increasing quality requirements for jewelry products and the technological advancements in the jewelry industry, automatic casting machines have become very important equipment in lost-wax casting for jewelry, serving as an important foundation for ensuring product quality.
According to the form of external force used, the commonly used jewelry casting machines mainly fall into two categories: centrifugal and static casting.
- Automatic centrifugal pouring: In response to the shortcomings of traditional simple centrifugal pouring machines, modern centrifugal casting machines integrate induction heating and centrifugal pouring, achieving significant advancements in driving technology and programming, improving programming capabilities and process automation control. For example, the angle of the mold’s central axis and the swing arm is designed to be variable, functioning as a function of rotational speed, allowing it to change from 90℃ to 0℃. This comprehensively considers the effects of centrifugal and tangential inertial forces in driving the molten metal out of the crucible and into the mold. This device helps improve the balance of metal flow and prevents the molten metal from preferentially flowing along the reverse rotation direction of the pouring channel wall. An exhaust device is added at the bottom of the mold to facilitate the smooth discharge of gas from the cavity, improving filling capacity. It also has a temperature measurement device to reduce human judgment errors. Figure 3-36 shows a typical melting and pouring chamber of a jewelry centrifugal casting machine suitable for casting alloys such as gold, silver, and copper.
When pouring with a centrifugal casting machine, open the cooling water, turn on the power switch, evenly place a measured amount of raw material into a clean crucible, raise the heating wire, and press the heating button to heat. Use iron pliers to take out the dewaxed casting flask from the furnace and place it on the casting machine’s cylinder rack, aligning the pouring opening of the casting powder mold with the pouring opening of the crucible. Once the metal is completely melted, use flux to purify it, lower the heating wire, cover the top of the crucible with a semicircular refractory material, and press it tightly. After covering the protective cover, the centrifugal motor drives the crucible and mold to rotate around the motor shaft at high speed. The enormous centrifugal force injects the metal into the mold cavity during the rotation. After 20 seconds, please turn off the motor power switch, and once the machine stops rotating, remove the mold and let it cool.
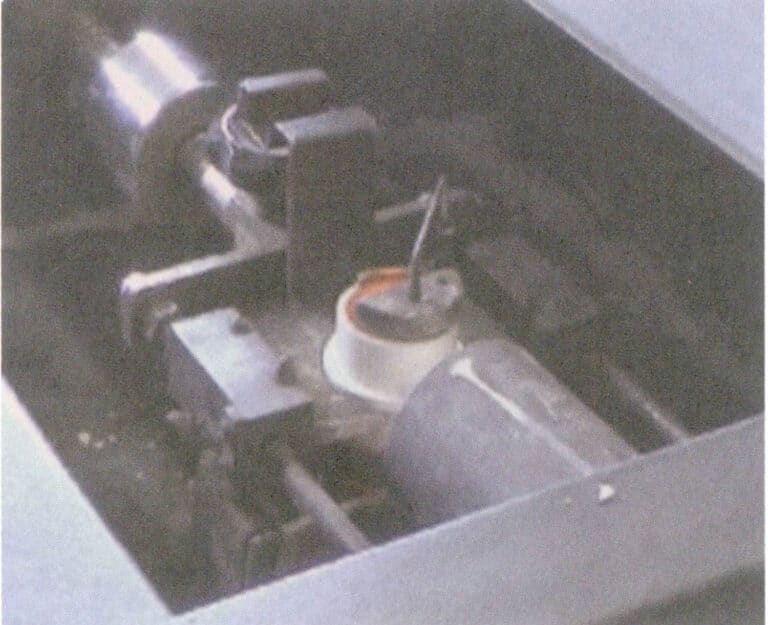
Induction Melting Centrifugal Casting Video
- Automatic vacuum pressure pouring: Among vacuum casting machines, the automatic vacuum pressure casting machine is the most advanced and widely used. This type of machine has many models, and different companies produce casting machines with their characteristics, but generally, they consist of induction heating, vacuum systems, control systems, etc. Structurally, they are generally upright, with the upper part as the induction melting chamber and the lower part as the vacuum casting chamber, using a bottom-pour casting method. The bottom of the crucible has a hole, which is sealed with a refractory plunger rod during melting, and when pouring, the plunger rod is lifted, allowing the molten metal to flow into the mold cavity. Generally, a thermocouple is installed inside the plunger rod, which can accurately reflect the temperature of the molten metal. There are also thermocouples placed on the crucible wall to measure temperature. Still, the measured temperature cannot directly reflect the temperature of the molten metal and can only serve as a reference. Automatic vacuum casting machines generally melt and cast metals under vacuum or inert gas conditions, effectively reducing the possibility of metal oxidation and gas absorption. They widely use computer programming control, have a high degree of automation, and the quality of cast products is relatively stable, with reduced hole defects, making them highly regarded jewelry casting equipment, widely used for vacuum casting of metals such as gold, silver, and copper (Figure 3-37). Some models also come with granulation devices that can prepare granular intermediate alloys.
When using a vacuum pressure casting machine for casting, first turn on the cooling water, open the argon and compressed air switches, and then turn on the power. Check the equipment’s opening and closing condition and the crucible’s quality, test the vacuum effect, and select the appropriate program from the casting program library. Evenly place the charge into the crucible, start the casting program, and after the metal material has completely melted, place the mold into the casting chamber as prompted by the equipment, and the pouring will be completed automatically. After reaching the specified holding time, remove the mold.
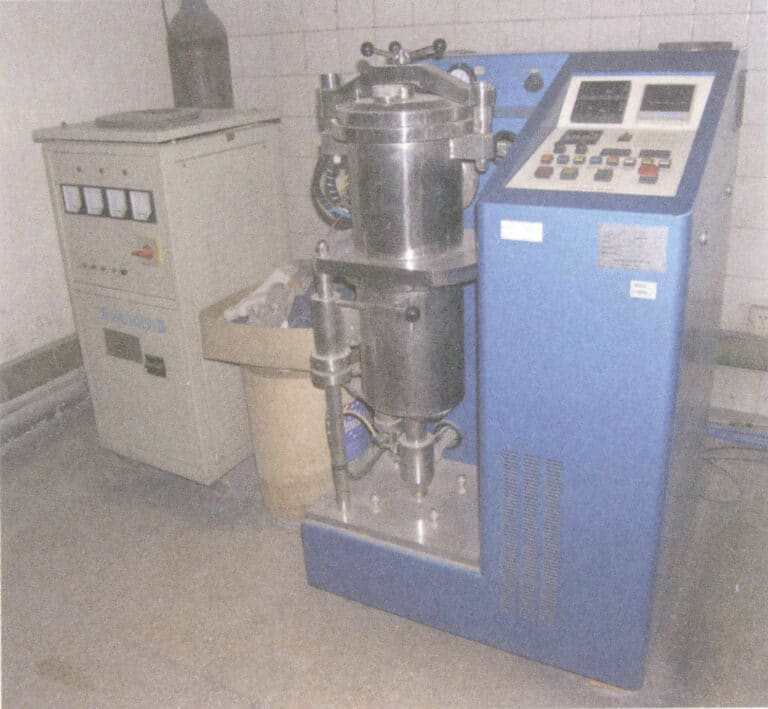
5. Common problems in jewelry casting
Jewelry casting is a complex process involving multiple steps, and many factors affect casting quality. Therefore, various problems are likely to arise during jewelry casting production. Common jewelry casting defects and their possible causes are shown in Table 3-3.
Table 3-3 Analysis table of common problems and countermeasures in jewelry casting
| Common Casting Defects | Defect Illustrations | Possible Causes |
|---|---|---|
| Flash and Burrs |

|
①Incorrect ratio of casting powder to water, too much water used; ②Mold moved after investment during the resting period; ③Rapid temperature increase during the burnout process; ④Mold left out for too long before being placed in the furnace, causing internal cracks in the mold cavity |
| Raised Gold Beads on Surface |

|
①Incorrect ratio of water to powder, too little water used; ②Excessive working time during the investment operation; ③ Abnormal operation of the vacuum machine |
| Rough Surface of Casting |

|
①Rough surface of the wax model; ②Poor quality or expired casting powder; ③Rapid temperature increase during the burnout process |
| Incomplete Casting |

|
①Incorrect wax tree planting; ②Suboptimal metal casting temperature; ③Low mold temperature during pouring; ④Insufficient amount of metal used for casting |
| Porosity in Castings |

|
①Metal casting temperature is too high; ②Mold not fully burned through; ③Excessive recycled material used in casting; ④Severe air intake during the melting process |
| Shrinkage Porosity in Castings |

|
①Metal liquid pouring temperature is too high; ②Mold temperature is too high; ③Improper positioning or size of the water line; ④Insufficient pouring pressure |
Section V Casting Cleaning
1. Removing casting powder
Remove the metal workpiece from the casting powder mold and remove the casting powder adhered to the workpiece.
Main tools: hammer, iron needle, water gun.
Please wait for the casting powder mold to cool to an appropriate temperature, then impact its bottom with tap water. The residual heat of the casting powder mold encounters the cooling water, resulting in a phenomenon known as “exploding plaster,” which causes the cast workpiece to separate from the casting powder mold; this process is commonly referred to as “exploding plaster” (Figure 3-38).
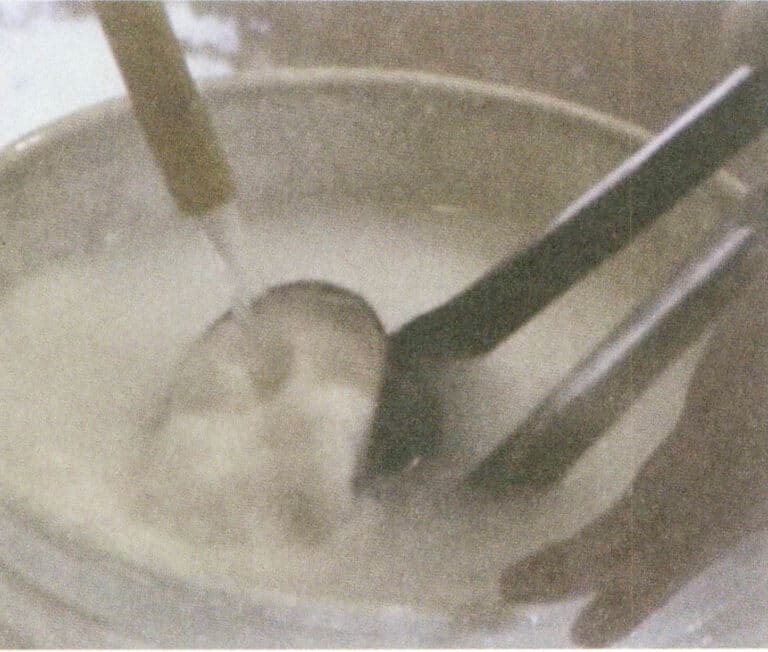
A high-pressure water gun is used to spray the cast workpiece, trying to remove the casting powder from its surface as cleanly as possible (Figure 3-39). Place the rinsed casting into a container with acid solutions such as hydrofluoric acid for soaking (Figure 3-40). After soaking, thoroughly remove the residual casting powder from all parts of the casting. Remove the workpiece from the hydrofluoric acid solution, wash it with water, and dry it.
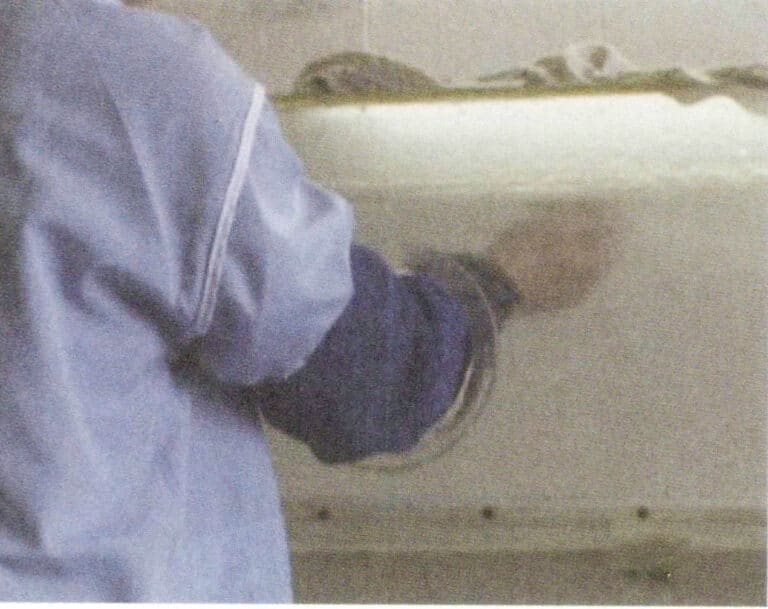
Figure3-39Water Spraying
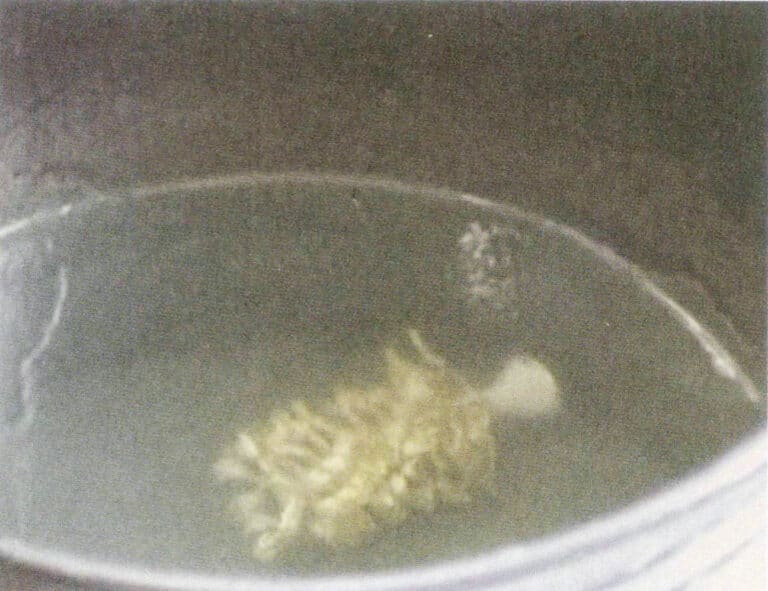
Figure 3-40 Acid Immersion
Removing casting powder Video
The immersion time for K gold, pure gold, and silver workpieces should be 20 min, with a hydrofluoric acid concentration of 20%. The immersion time for copper workpieces is 20 min, with a hydrofluoric acid concentration of 5%. The immersion time for platinum workpieces is 60 min, with a hydrofluoric acid concentration of 55%.
Hydrofluoric acid is highly corrosive and should be stored in specialized containers. Take safety precautions during operation. Due to the high pressure of the water gun, be careful to prevent accidental deformation of the workpiece when rinsing with the water gun.
2. Cutting Defective Parts
After removing the casting powder, the workpiece is still in a tree-like state and needs to be cut at its casting sprue, sorted, and categorized to prepare for the next production process.
After removing the casting powder, the tree-like blanks needs to be weighed to calculate the metal loss during the casting process, and then the casting sprue cutting operation should be performed. First, cut according to the overall division, and then classify the cuts (Figures 3-41, 3-42). When cutting the casting sprue, it is important to master the angle and distance to prevent deforming or damaging the blank. Generally, cutting the casting sprue at a distance of 1.5 mm from the workpiece is optimal.
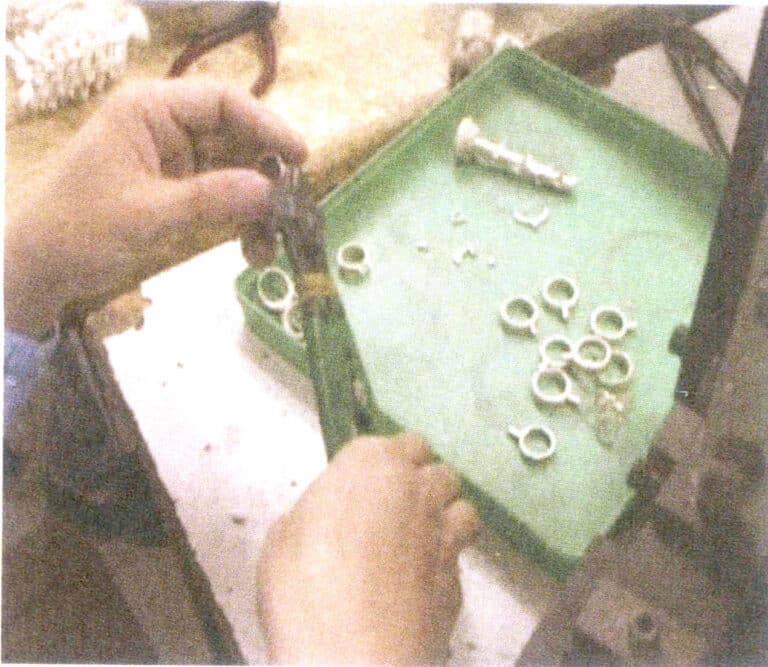
Figure 3-41 Casting sprue Cutting 1
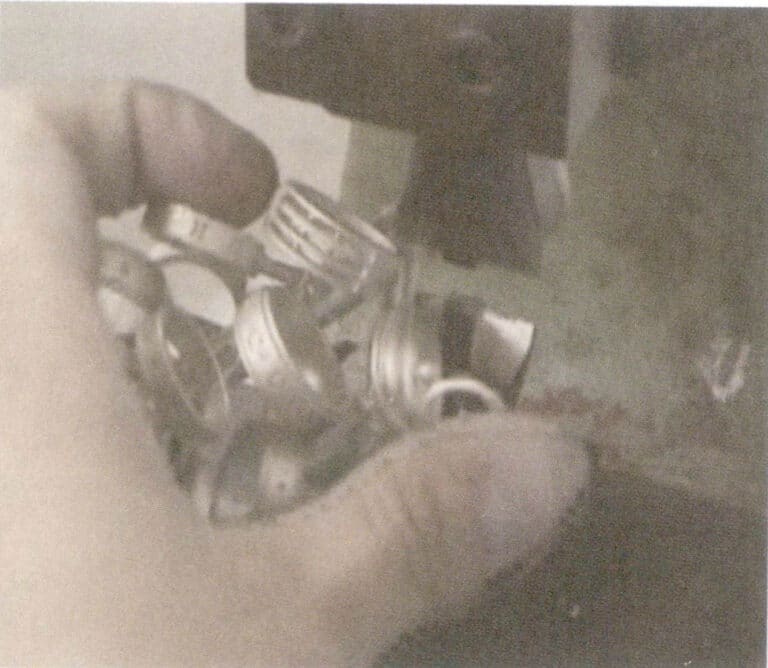
Figure 3-42 Casting sprue Cutting 2
Cutting Defective Parts Video
Cast Cleaning Video






2 Responses
No doubt.
I can suggest to visit to you a site on which there are many articles on this question.