Takı için Mum Ayarı, Kum Döküm Ayarı, Boncuk Ayarı ve Yaratıcı Ayar nedir?
Learn the Making Methods and setting craftsmanship in the Jewelry manufacturing
Giriş:
This article delves into four key gem-setting techniques: Wax Setting, Sand-Cast Setting, Bead Setting, and Creative Setting. It covers their overview, principles, production methods, and applications in jewelry design, providing invaluable insights for jewelry enthusiasts and professionals looking to refine their craft.
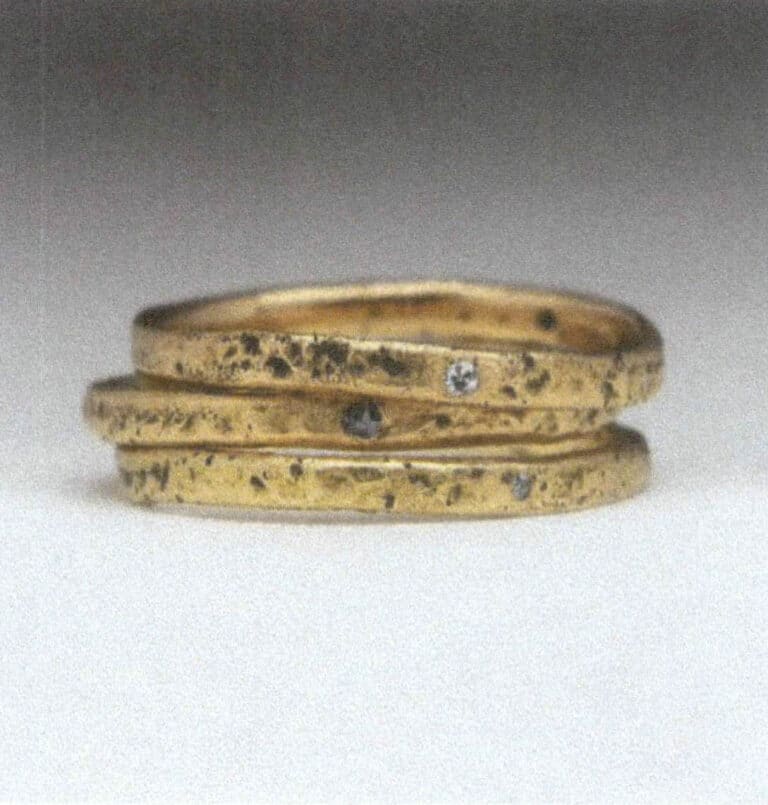
Sand-cast setting ring
İçindekiler
Section I Wax Setting and Sand-Cast Setting
Wax setting and sand-cast setting are fundamentally different from the numerous settings in the previous section in that, in both cases, the stone’s setting is not realized through the process of metalwork but rather through the casting process. This is a relatively easy way of doing things, with the same objective needs and room for expansion.
1. Overview of Wax Setting and Sand-Cast Setting
Wax setting and sand-cast setting both utilize the principles of metal casting, fixing the position of the gemstones before casting. During the casting process, the flowing molten metal wraps around the edges of the gemstones, achieving the setting once the molten metal cools. Although the principles of wax setting and sand-cast setting are similar, their applications differ. Wax setting emerged in the industrial production process of jewelry to save time and costs, aiming to improve efficiency and reduce costs. Wax setting mainly mimics existing setting methods, such as prong setting, tension setting, and micropave setting, making it easier to produce standardized jewelry products, as shown in Figure 10-1. Sand-cast setting has a long history of use, but in modern applications, it tends to be more niche; on the one hand, its production efficiency is far lower than that of wax setting, and on the other hand, its results are more rudimentary and carry a certain randomness, so its application is generally in the design of artistic or custom jewelry, as shown in Figure 10-2.
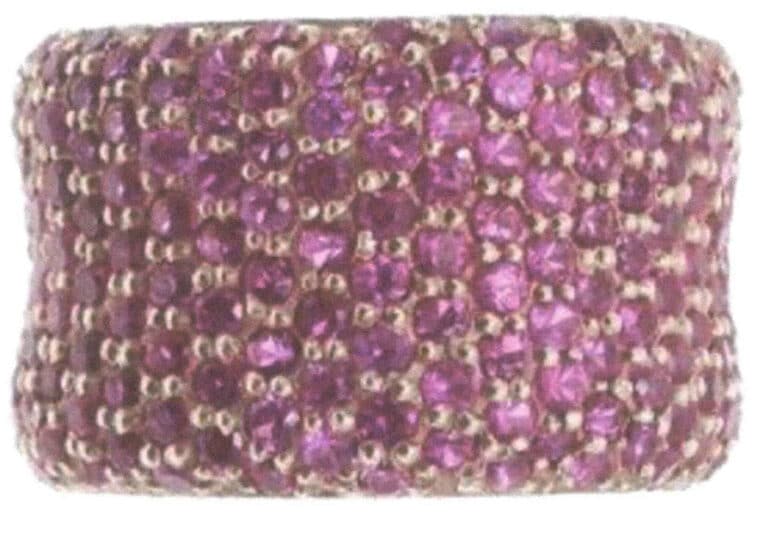
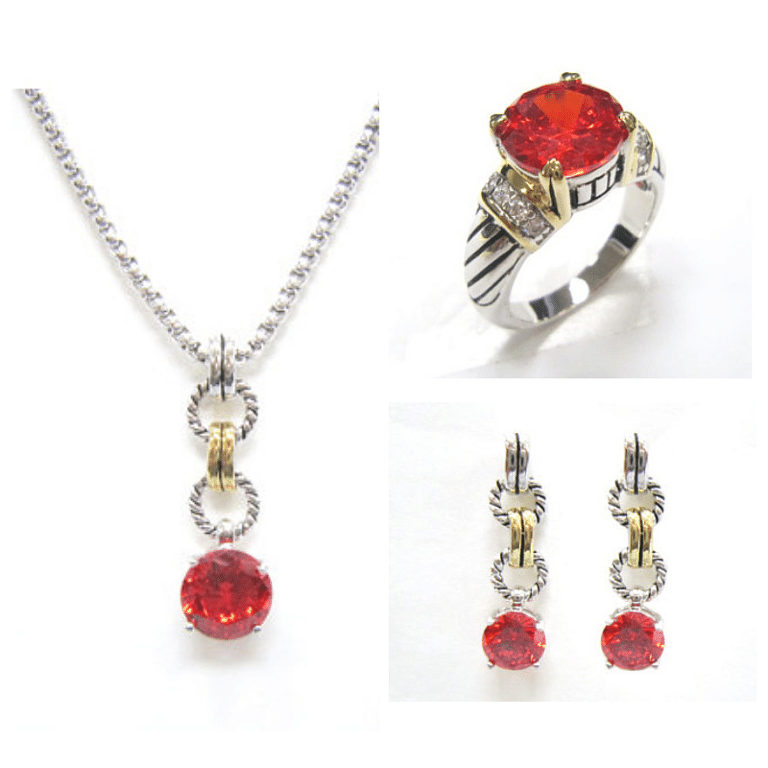
Figure 10-1 Wax setting jewelry
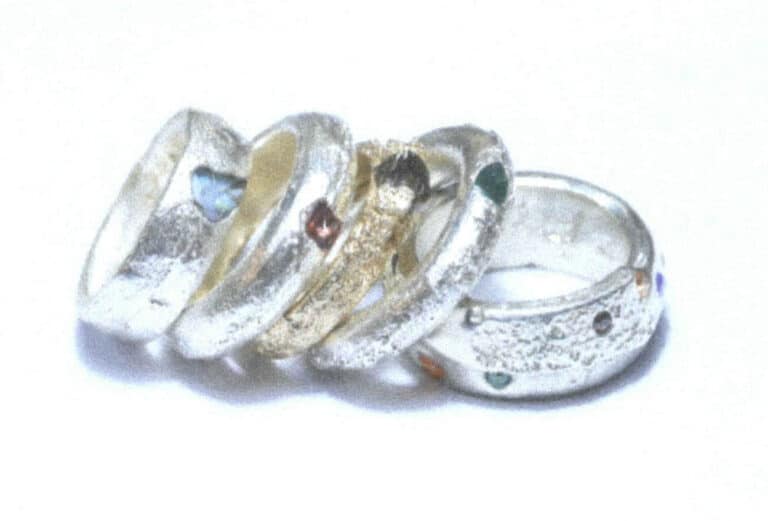
Figure 10-2 Sand-cast setting ring (Photo provided by Dazeng Jewelry Studio)
2. Method of Making Wax Setting
2.1 Principle of Making Wax Setting
Wax setting is generally made using 3D printing to create a wax model, where the stone is held in place with wax at the wax model’s bezel to create the effect of a setting.After the lost-wax casting, the gemstone has been set into the metal, allowing for prong setting, micropave setting, flush setting, and channel setting effects. This method is more labor-saving and time-saving than various methods of direct setting in metal. Figures 10-3 to 10-5 show examples of prong setting, micropave setting, and flush setting with wax models and wax setting models fixing the gemstones.
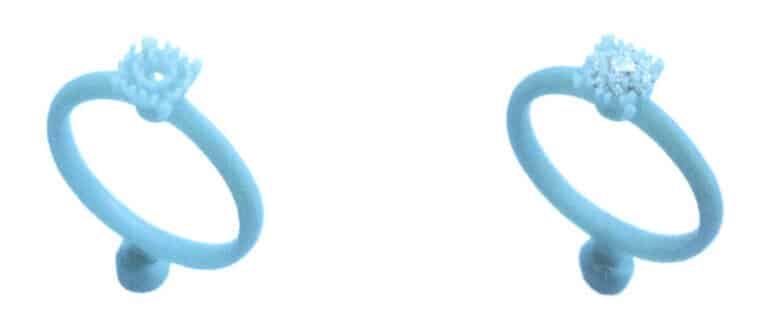
Figure 10-3 Wax setting (prong setting) wax model
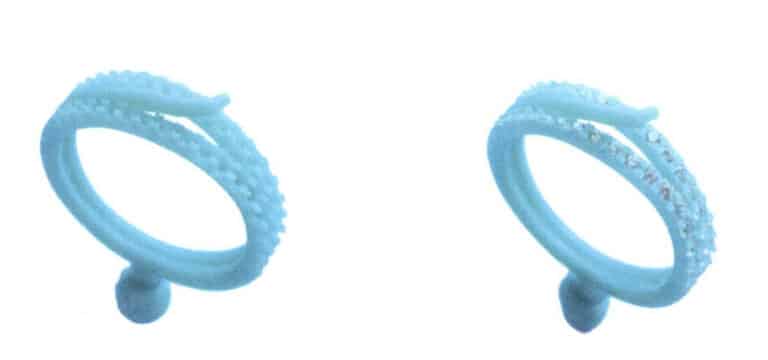
Figure 10-4 Wax setting (micropave setting) wax model
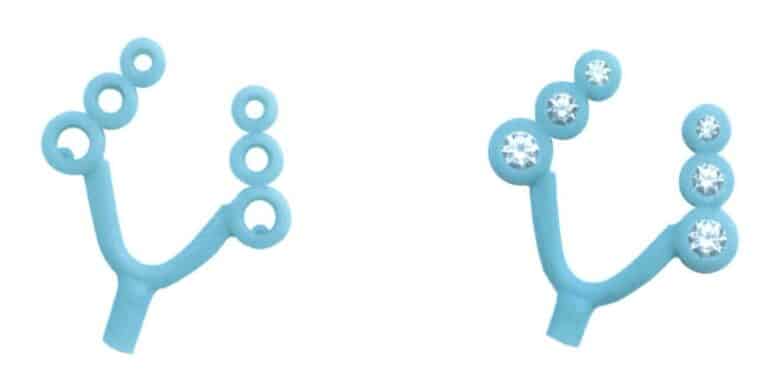
2.2 Precautions for Wax Setting
Although wax setting is highly productive, it also has its limitations. Firstly, the materials that can be wax set must be heat-resistant gemstones, such as diamonds, zircon, rubies, sapphires, garnets, etc. Gemstones like emeralds, jade, opals, turquoise, lapis lazuli, and peridot, and organic gemstones like pearls and corals cannot be used for wax setting because these stones may experience cracking, discoloration, and other issues to varying degrees under high temperatures. For example, emeralds and tourmaline with many inclusions may crack due to thermal expansion; opals contain a certain amount of crystallization water, which can alter their structure during high-temperature casting; organic gemstones like pearls and corals are particularly heat-sensitive. In addition to the type of gemstone, there are also certain size limitations for wax setting; if the inlaid stone is too large, it may break, and if it is too small, it may become encased in metal when the metal flows due to heat, meaning the gemstone is completely covered beneath the metal after casting. Therefore, for diamonds, the typical size of the inlaid stone is generally between 0.33 carats and 10 carats. The metals currently suitable for wax setting are mainly silver and 10K, 14K, and 18K gold. Platinum and palladium cannot be used for wax setting production due to their high melting points.
Although the production technology for wax setting is continuously improving, there is still an unavoidable stone breakage rate, which is currently between 1‰~2‰. Therefore, expensive gemstones are not suitable for wax setting. Additionally, suppose the gemstone is not securely inlaid during the wax model-making stage. In that case, the stone may lose its wax during the pouring process, causing it to fall off or become misaligned after casting. It will need to be recast in such cases, and disassembly can be quite difficult. To avoid the issues above, it is advisable to ensure a tight fit during the wax model-making process, using a thicker sprue to allow the molten metal to quickly fill the cavity. The poured wax model should cool naturally and not be subjected to water washing, as high temperatures cannot be handled, and cold water washing may lead to breakage.
Although wax setting has its limitations, its application has flexible methods. Often, using partial wax setting for a piece of jewelry and leaving the gemstones unsuitable for wax setting to be set after casting can improve production efficiency, reduce the loss of precious gemstones, and lower overall costs.
2.3 Steps for Making Wax Setting
(1) Preparing Wax Setting Tools
The soldering iron is a commonly used tool for casting wax, as shown in Figure 10-6, and is essential in wax setting. A soldering iron can also be used as a substitute for the wax welding machine.
(2) Hazırlıking ve Wbalta Model and Gemstones
The case uses a gemstone with a diameter of 1.3 mm, and the stone setting position size is just right to fit, as shown in Figure 10-7.

Figure 10-6 Soldering iron
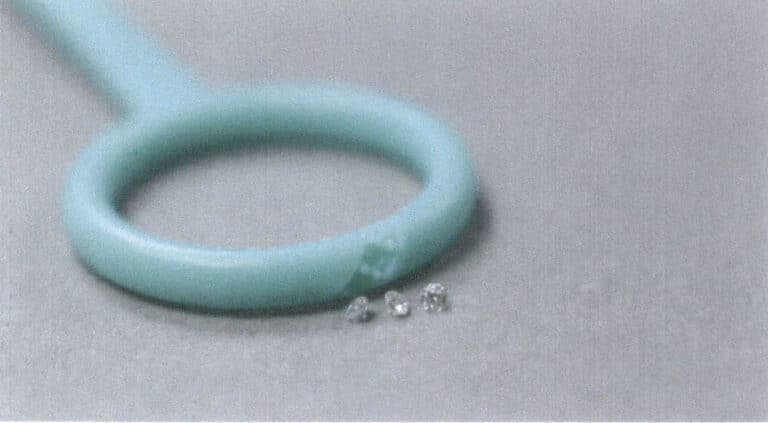
Figure 10-7 Wax model and gemstones
(3) Trimming the Wbalta Model
Firstly, if the prong of the wax model is too long, you can use tweezers or a knife to cut off the excess part; secondly, use a drill bur to open the bezel and leave a hole; finally, adjust the bezel, use the right size of wave bur to trim the bezel according to the situation after testing the stone mount, and then use a hair brush to brush off the excess wax flakes after trimming. Repeatedly test the stone mount to make sure the bezel is suitable. Drill the holes as shown in Figure 10-8.
(4) Yerleştirme ve Ston
Place the gemstone into the stone position and adjust it until level. As the wax has some elasticity, you can gently press the stone into its setting position, as shown in Figure 10-9.
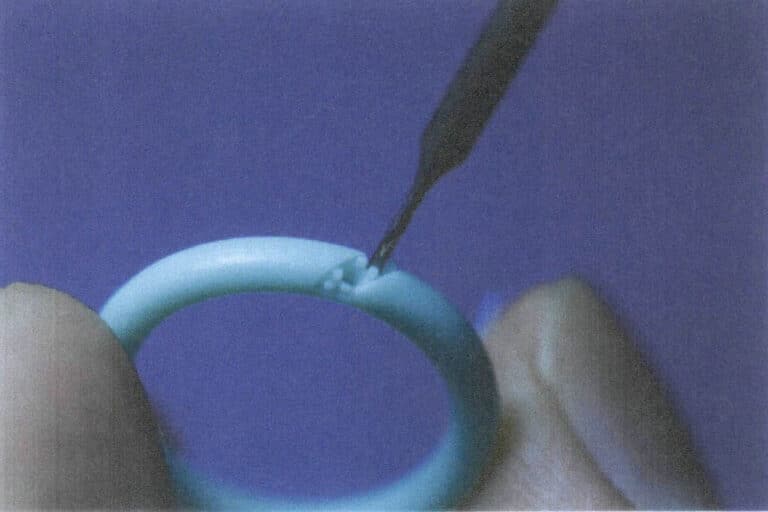
Figure 10-8 Drilling
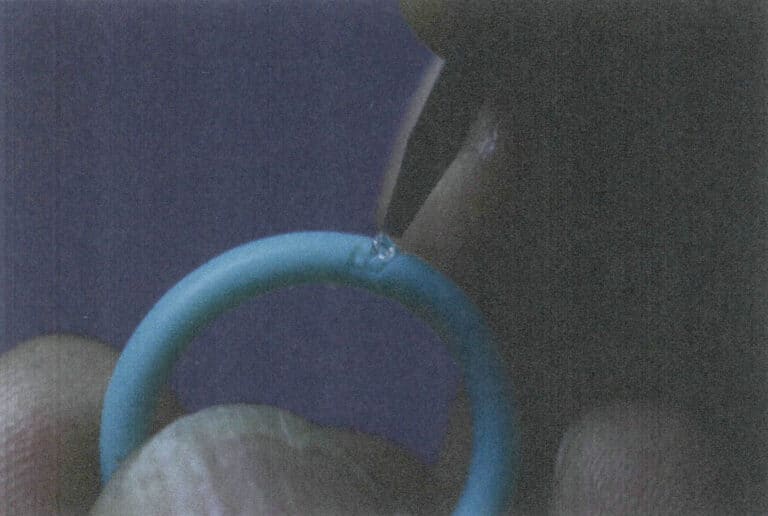
Figure 10-9 Placing the stone
(5) Melting Wbalta
After the gemstone is placed in the stone setting position, you need to let the prongs of the wax model press against the gemstone. This part is done using a wax soldering iron or soldering iron. There are two ways to achieve this. One is to melt the prongs, i.e., to wrap a piece of copper wire around the top of the wax soldering iron or soldering iron, transfer the heat to the copper wire, and melt the prongs with the top of the thin copper wire. The purpose of this method is to reduce the area of the melted wax since, in many cases, smaller stones are used in the wax setting, and the prong size is much smaller than the heated head of the wax soldering iron. The other method is to heat the top of the stone with a wax soldering iron, which conducts heat through the stone to the wax so that the part of the wax prong that touches the stone when it is heated flows slightly, thus holding the stone This second method was used in this case, as shown in Figure 10-10.
(6) Checking ve Fixation of the Gemstones
Check whether the gemstones are stable, whether the length of the prongs is consistent, and whether there are any wax residues. Complete the finishing work to reduce the failure rate so that subsequent pouring can occur, as shown in Figure 10-11.
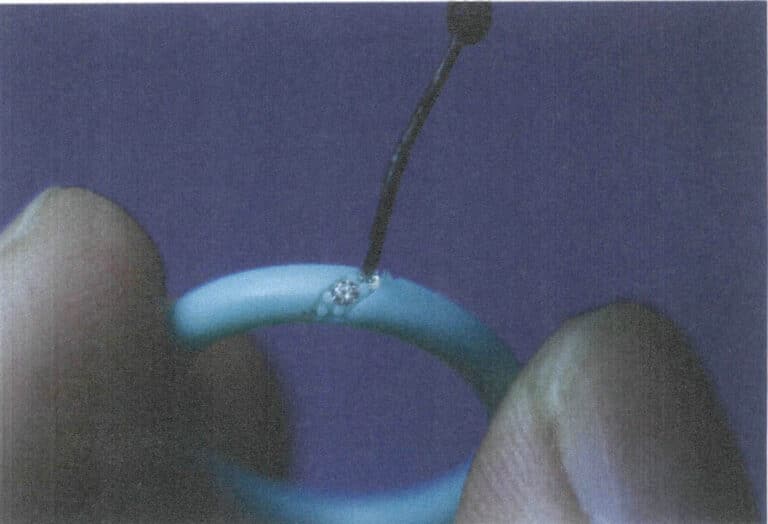
Figure 10-10 Heating the gemstones for melting wax
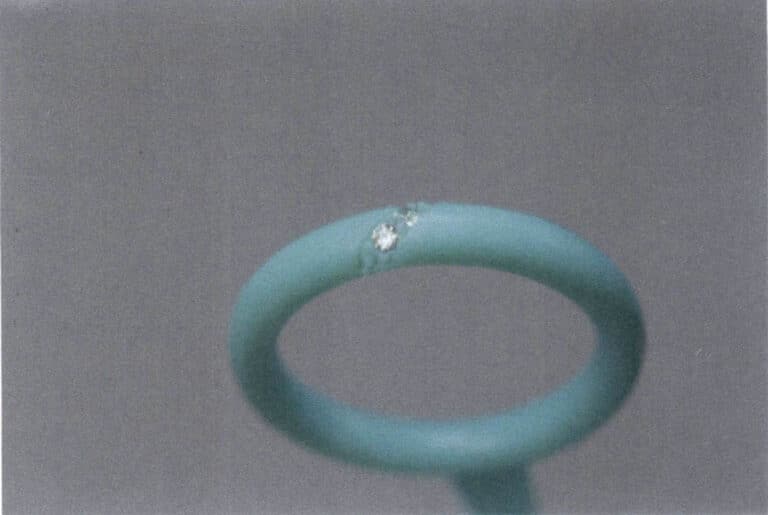
Figure 10-11 Checking the fixation of the gemstones
(7) Completing ve Wbalta Setting Ring
After casting, processes such as finishing and electroplating are carried out, and the completed effect is shown in Figure 10-12.
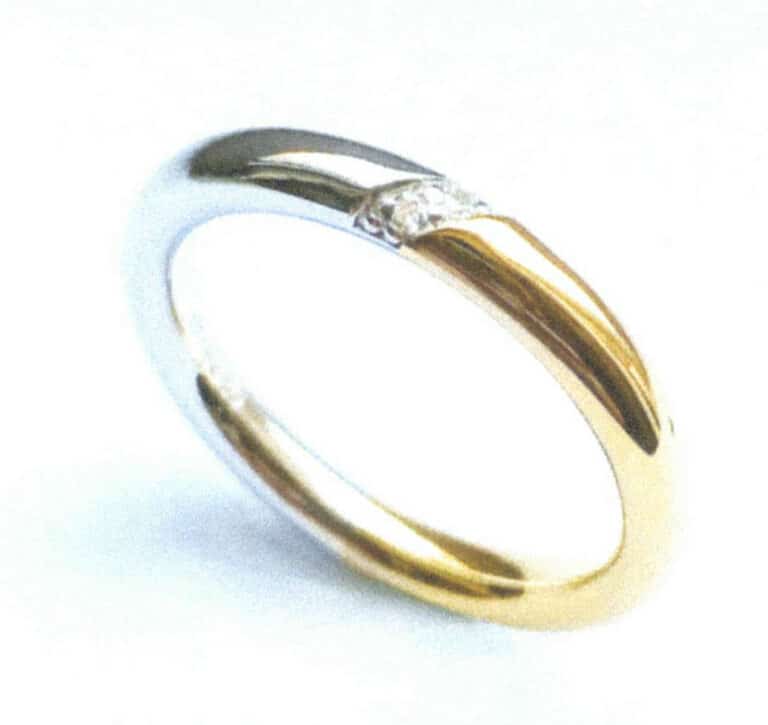
3. The Production Method of Sand-Cast Setting
3.1 The Principle of Sand-Cast Setting
Sand casting has a long history in East and West metal casting. In our country, the coin foundry casting has been the main coin-casting process from the Tang Dynasty to the Qing Dynasty. Although the lost-wax casting method later became the main casting method for metal crafts and jewelry, the sand casting technique has been passed down. The principle is that there is first a metal or hard material master mold, which is pressed into red sand to create a negative shape, leaving a pouring gate. Then, the high-temperature molten metal flows into the sand in a negative shape through the pouring gate and cools to form. The surface of metal parts made by sand casting has a distinct grainy texture, making it unsuitable for fine processing. The so-called sand-cast setting involves pressing gemstones into the appropriate positions in the negative shape after the master mold is pressed out so that when the molten metal flows in, it wraps around the gemstones, achieving a type of setting. Figure 10-13 shows the principle of sand-cast setting from preparing red sand and the master mold, pressing the negative shape, placing gemstones, and casting.
The use of gemstones in sand-cast setting is similar to that in wax setting, as high-temperature-resistant gemstones must be selected. However, sand-cast setting is often more personalized, so various gemstones are frequently tried. When experimenting with different gemstones, it is important to note that some may crack due to high temperatures, posing certain risks. Therefore, even for experimental productions, it is recommended to choose gemstones with a certain high-temperature resistance to ensure safety during production. The sand used in sand casting is red sand mixed with a certain adhesive, commonly Delft clay, and there are also substitutes available on the market.

3.2 The Steps for Making the Sand-Cast Setting
(1) Preparing Red Sve
In the red sand used for sand casting, spray water and stir to keep the red sand soft and moist, as shown in Figure 10-14.
(2) Compacting Red Sve
Fill the aluminum ring with red sand and compact it, as shown in Figure 10-15.
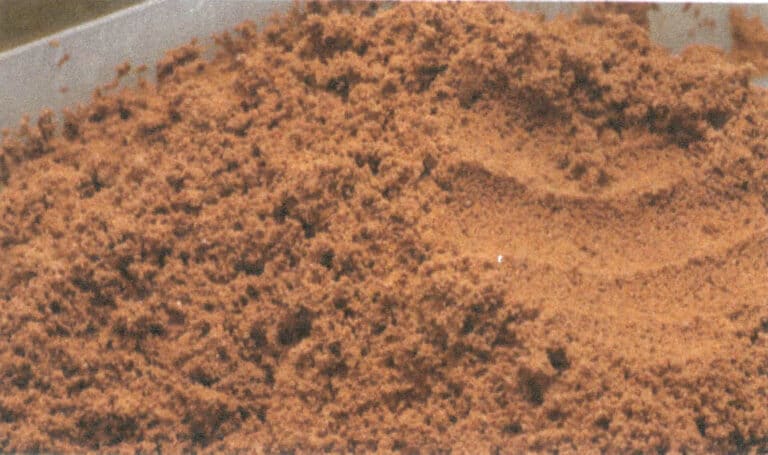
Figure 10-14 Spraying and Mixing Red Sand
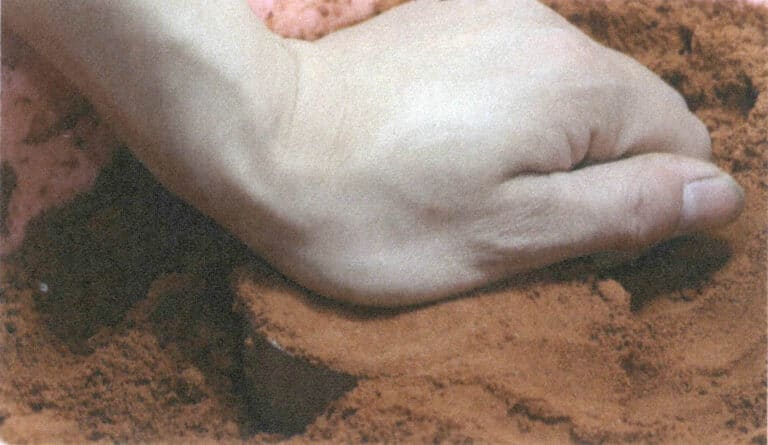
Figure 10-15 Compacting red sand
(3) Removing Excess Red Sand
Use a steel ruler or other straight object to level off the excess red sand, as shown in Figure 10-16
(4) Isolating Red Sve
Sprinkle a layer of talcum powder on the red sand; baby powder can be used as a substitute, which makes it easier to separate the two molds, as shown in Figure 10-17.
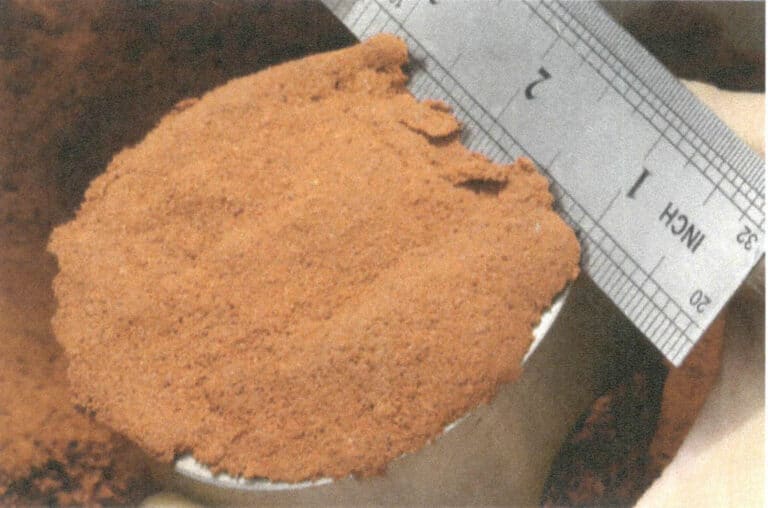
Figure 10-16 Removing Excess Red Sand
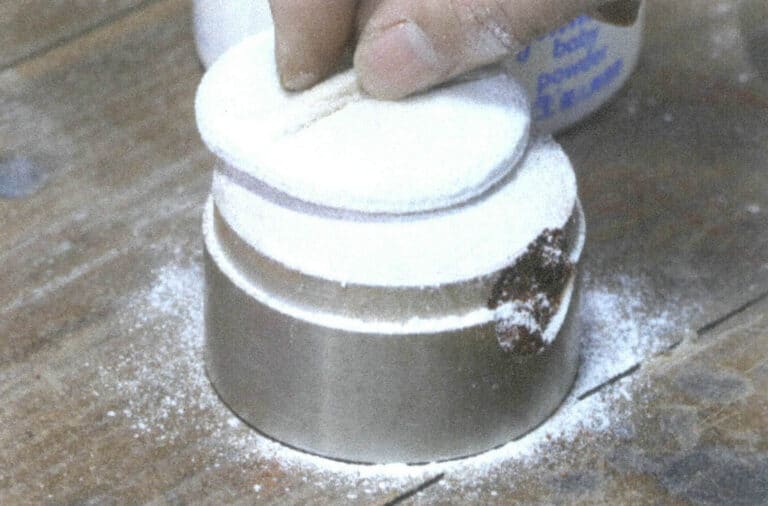
Figure 10-17 Isolating Red Sand
(5) Pressing the Master Mold
The master mold to be replicated is in red sand, where the master mold can be any hard material mold such as wax model, wood, metal, or other materials, as long as the shape meets the requirements. In this case, a carved drop-shaped wax model is used. The pressed master mold is shown in Figure 10-18.
(6) Pressing ve Master Mold well
Press half of the wax mold into the red sand, as Figure 10-19 shows.
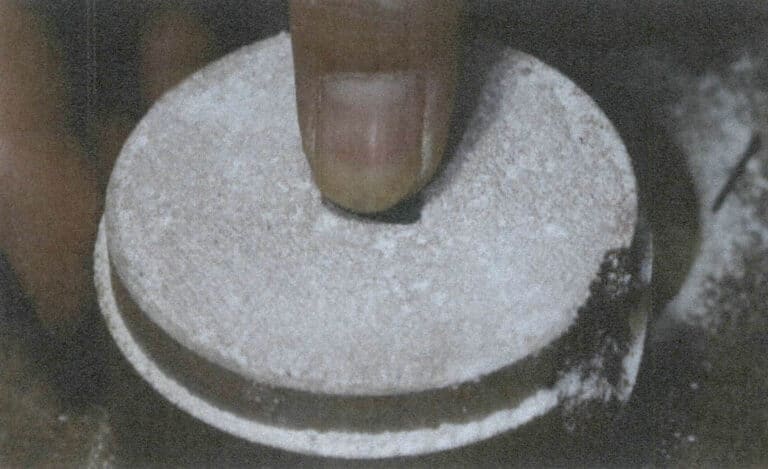
Figure 10-18 Pressing the master mold
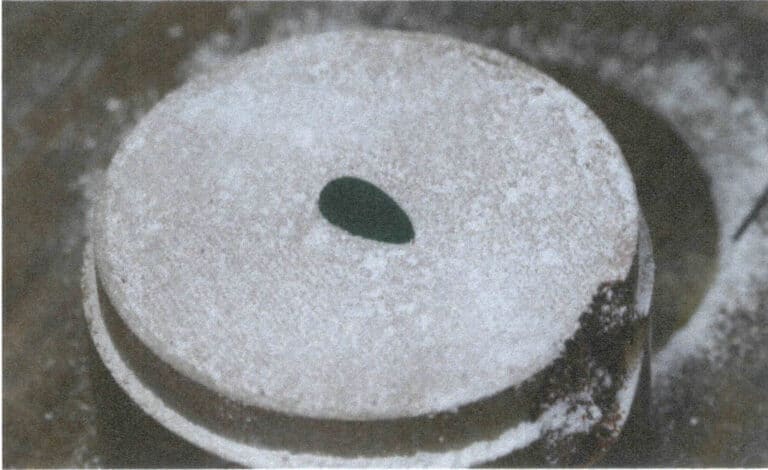
Figure 10-19 Press half of the wax mold into the red sand
(7) Covering ve Aluminum Ring
Cover the upper half of the aluminum ring, as shown in Figure 10-20.
(8) Filling with Red Sve
Fill the upper half of the aluminum ring with red sand and compact it, as shown in Figure 10-21.

Figure 10-20 Covering the aluminum ring
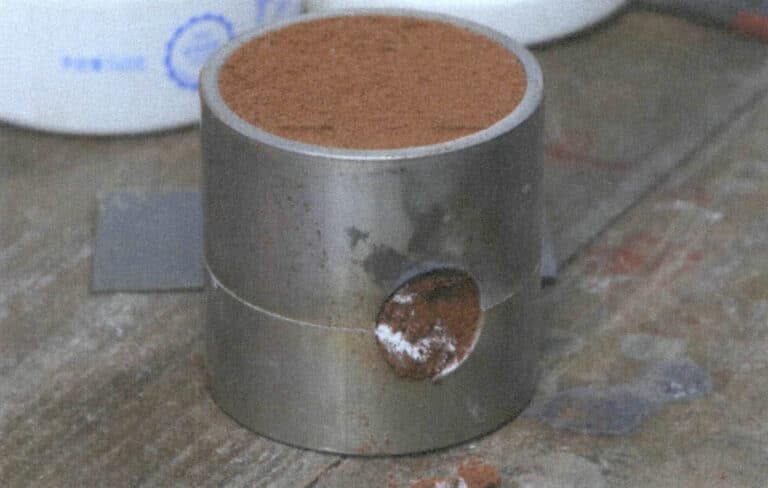
Figure 10-21 Filling with Red Sand
(9) Separating ve Aluminum Ring
Carefully separate the two halves of the aluminum ring, as shown in Figure 10-22.
(10) Placing Gemstone After Removing the Master Mold
After removing the master mold, select a gemstone and press it into the impression on the front of the droplet shape, ensuring that part of the gemstone is exposed. In contrast, another part is encased in the poured metal to form an inlay relationship, as shown in Figure 10-23.
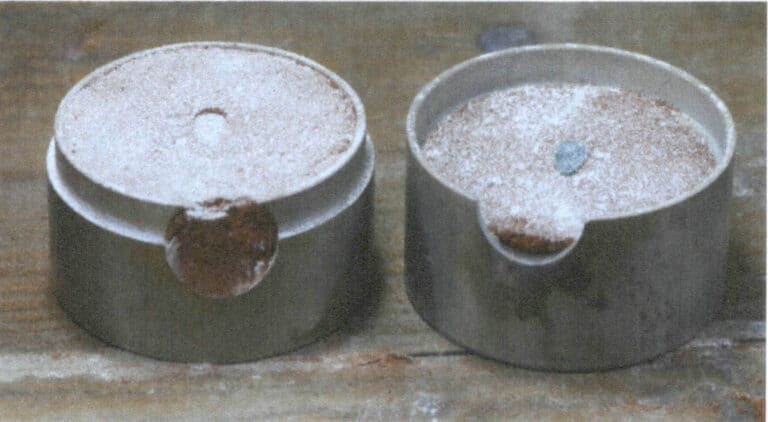
Figure 10-22 Separate aluminum ring
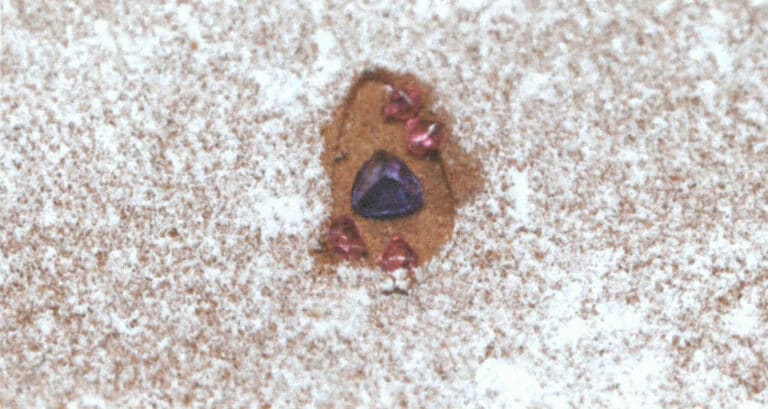
Figure 10-23 Placing Gemstone After Removing the Master Mold
(11) Leaving ve Water Outlets
Drill a hole for the water outlet position in the aluminum ring on the back of the water droplet shape using a coarse drill bit, which is the entrance for pouring metal, as shown in Figure 10-24. Appropriately enlarge the entrance outside the water outlet to allow the molten metal to flow smoothly, as shown in Figure 10-25.
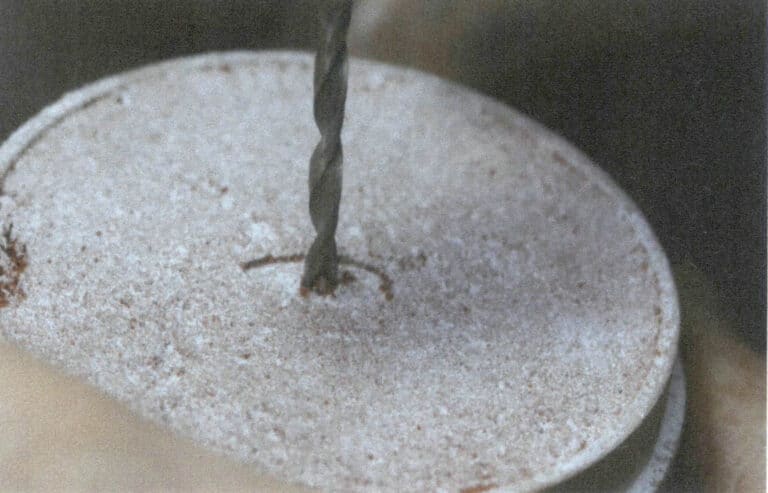
Figure 10-24 Leaving the Water Outlets (1)
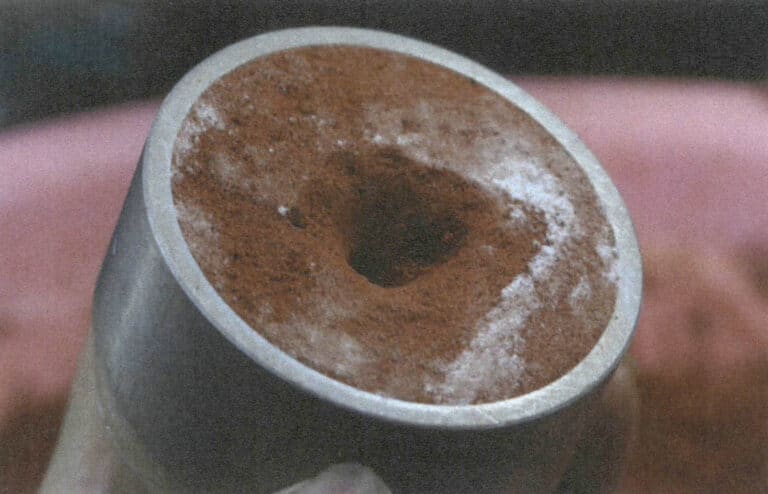
Figure 10-25 Leaving the Water Outlets (2)
(12) Coupling the Aluminum Ring
Fit the two halves of the sand-cast aluminum ring together, as shown in Figure 10-26.
(13) Metal Melting Material
Take an appropriate amount of metal melting material and melt the metal to a liquid state at high temperatures, as shown in Figure 10-27. Protective clothing and a face mask must be worn during the melting process.
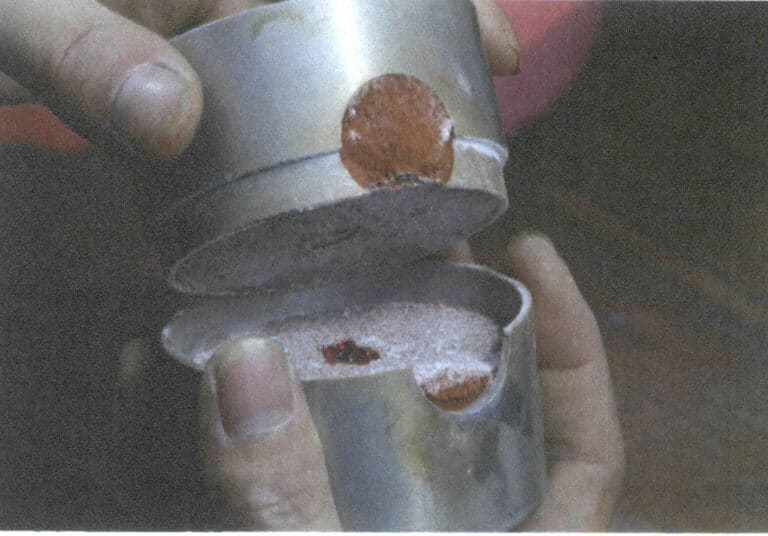
Figure 10-26 Coupling Aluminum Ring
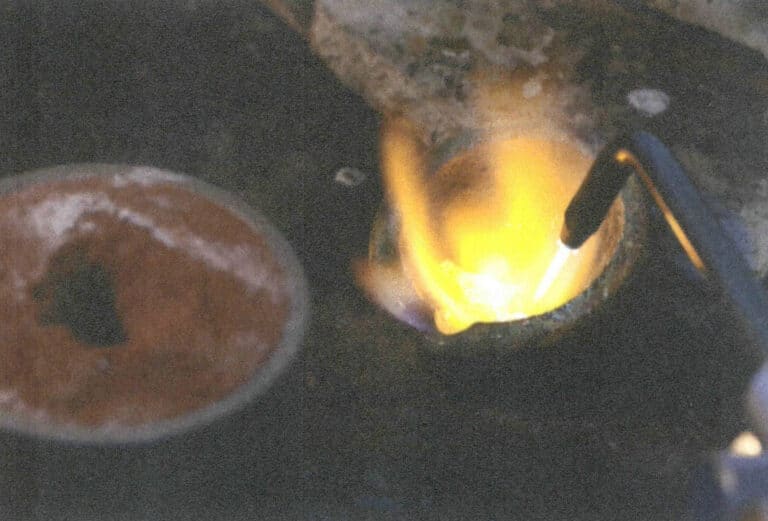
Figure 10-27 Melting the Metal
(14) Casting
Pour the molten metal into the water outlet, as shown in Figure 10-28.
(15) Completing Casting
After the metal has cooled and solidified, open the sand-cast aluminum ring, as shown in Figure 10-29.
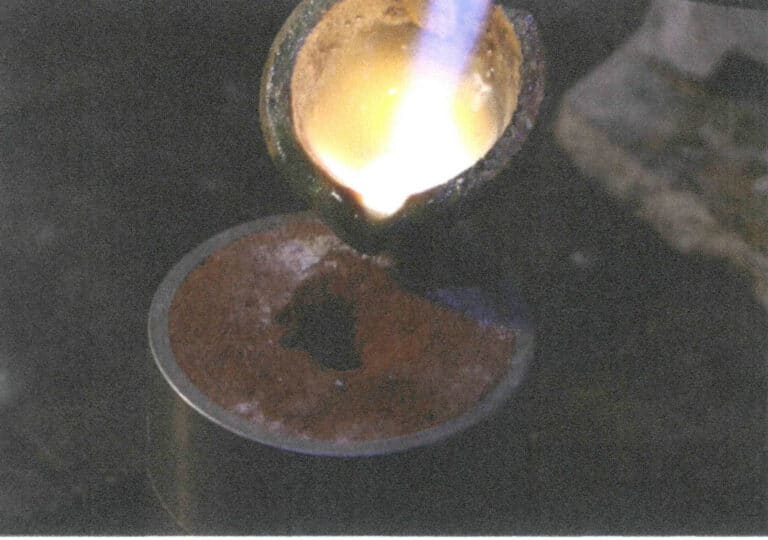
Figure 10-28 Pouring molten metal
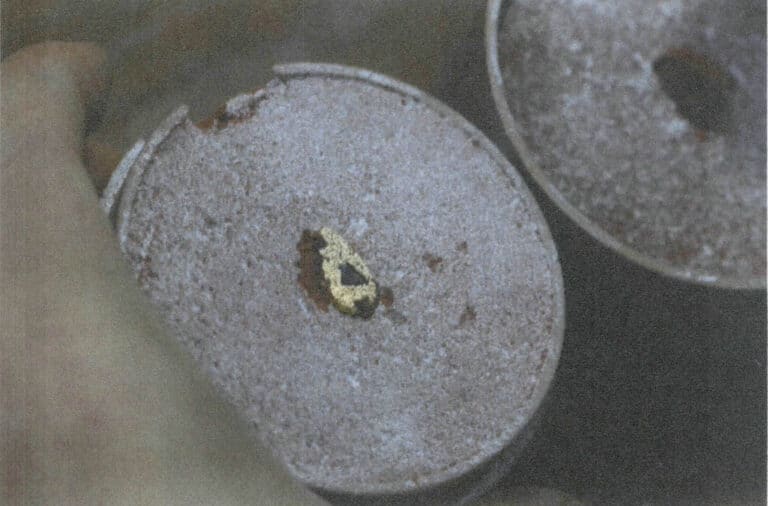
Figure 10-29 Casting Completed
(16) Trimming Döküm
Remove the casting and cut off the water outlets, as Figure 10-30 shows.
(17) Completing Sand–Cast Setting
After appropriate surface treatment, complete the sand-cast setting, as shown in Figure 10-31.
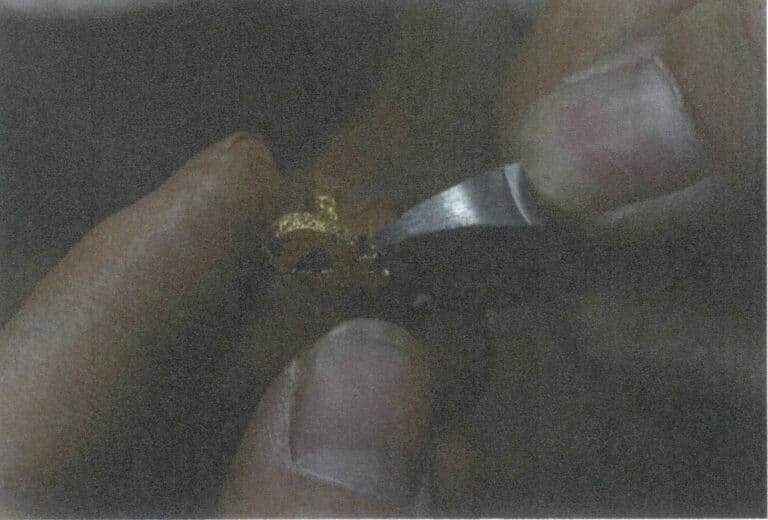
Figure 10-30 Cut off the water outlets
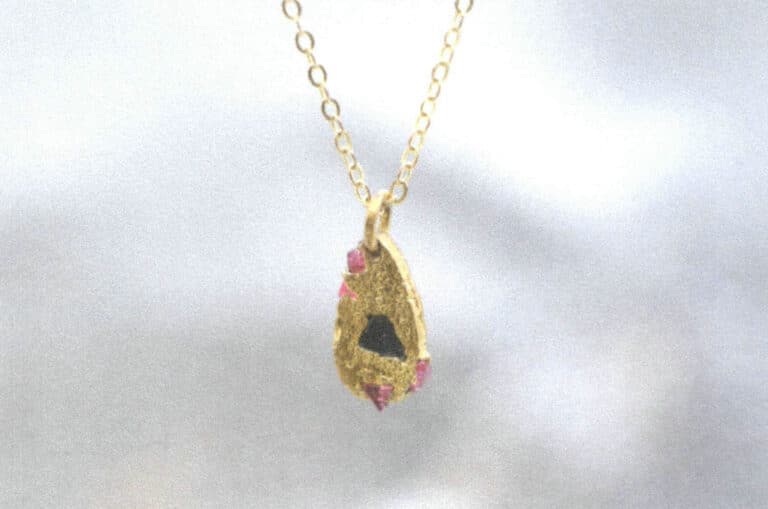
Figure 10-31 Completing Sand-Cast Setting
4. The Application of Wax Setting and Sand-Cast Setting in Jewelry Design
Wax setting, as a method to improve the efficiency of gemstone setting, is particularly effective in large-area gemstone settings. It has more applications in mid-range and low-end jewelry products because these brand products are relatively inexpensive, and improving work efficiency is an important way to reduce costs. However, from the perspective of the craft itself, the effect of wax setting is far inferior to that of manual setting. First, the bottom of the metal cannot be processed smoothly, while in high-end jewelry, the setting of details is an important aspect that highlights the quality of the jewelry. Secondly, gemstones will have some issues after being subjected to high temperatures, so high-end jewelry will not choose wax setting. Manual setting is the safest and most aesthetically pleasing method for better gemstones.
From the perspective of craft innovation, wax setting’s original intention is to imitate the effects of existing inlay methods. Still, wax setting also provides a different perspective on the thought process of setting production methods. For example, many artists and designers flexibly showcase the inlay possibilities in sand casting. Wax setting and sand-cast setting both utilize the casting method and have great innovative potential that is waiting to be explored. Although both wax setting and sand-cast setting have limitations, the possibilities beyond those limitations are difficult to achieve with other production methods. For instance, the natural graininess of the sand-cast metal surface and the sense of integration with the gemstone are difficult to achieve with artificial carving and manual setting. Sand-cast setting rings are shown in Figures 10-32 to 10-35.
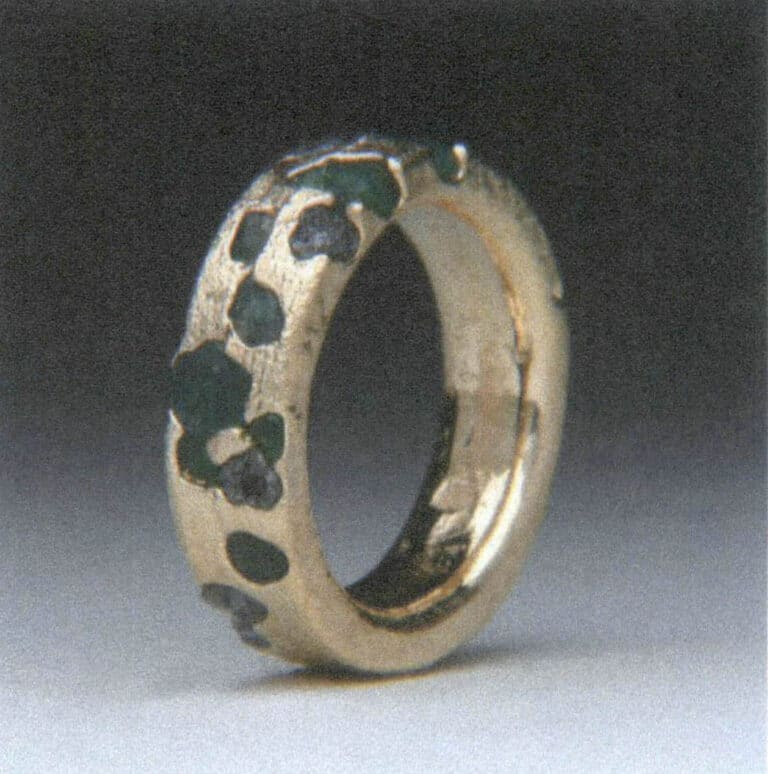
Figure 10-32 Sand-cast setting ring (1)

Figure 10-33 Sand-cast setting ring (2)
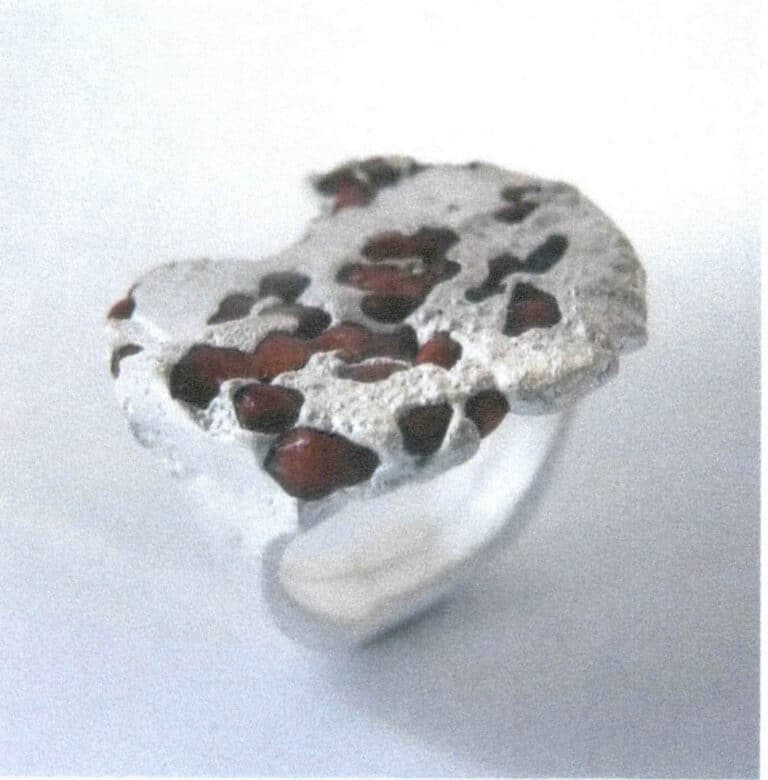
Figure 10-34 Sand-cast setting ring (3)
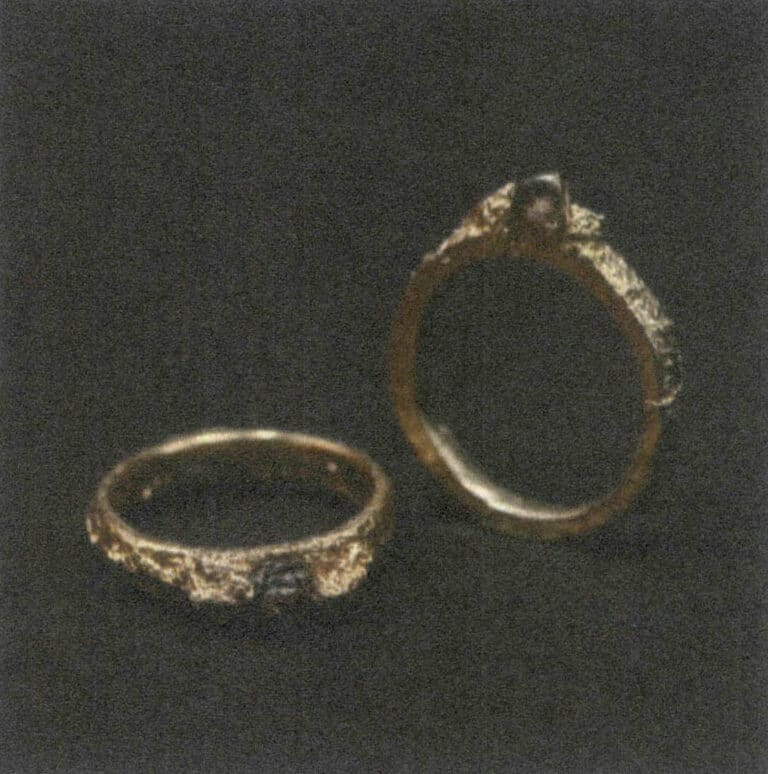
Figure 10-35 Sand-cast setting ring (4)
Wax setting is a very typical method that arises from market demand, and it is also rich in the wisdom of laborers, effectively solving some problems in jewelry setting. Wax setting requires the maker to understand the structures and production of other settings so that they can model suitable stone settings. In sand-cast setting, the techniques are not directly applied; the main process used is the casting process. As a learner, it is a solid process to understand the production of wax setting and sand-cast setting based on mastering the manual setting technique. It is hoped that learners can draw inferences from these methods and flexibly apply them to their designs.
Section II Bead Setting
The bead setting differs from the previously described settings in that the shape of the stone it targets is the favorite rounded pearl shape. Bead settings are widely used in constructing beads made of other materials to find a fixation without destroying the beauty of the pearl’s shape.
1. Overview of Bead Setting
The so-called bead setting mainly refers to the setting method for organic gemstones such as pearls and some gemstones shaped into bead forms. Pearls, due to their natural beauty, do not require post-processing carving. To present their natural beauty as much as possible, prong settings, bezel settings, and other methods that cover them are generally avoided, and cutting is also rare. More often, holes are drilled into the pearls, and metal wires are used with adhesives to connect the pearls to the metal structure, thereby maximizing the overall appearance of the pearls. Regarding the drilling of pearls, holes can be either through or not through, and the position of the holes depends on the design requirements. For example, the relatively regular teardrop-shaped pearl shown in Figure 11-1 has holes drilled at the drop-shaped pointed end to connect it to earrings, giving a more drooping visual effect. This type of pearl drilling has a certain regularity; while the Tiffany chrysanthemum-shaped irregular pearl diamond brooch shown in Figure 11-2 uses a large number of elongated irregular pearls to mimic the petals of a chrysanthemum, each irregular pearl is different, and the position of the holes must also be determined based on the position and shape of the pearls in the design. Between regular and irregular, there are more possibilities for pearl settings. It is worth mentioning that in the Qing Dynasty court jewelry, the technique of stringing beads has the same principle as what we call bead setting, and it became a significant aspect of Qing Dynasty court ornaments. Qing Dynasty court ornaments are shown in Figure 11-3.
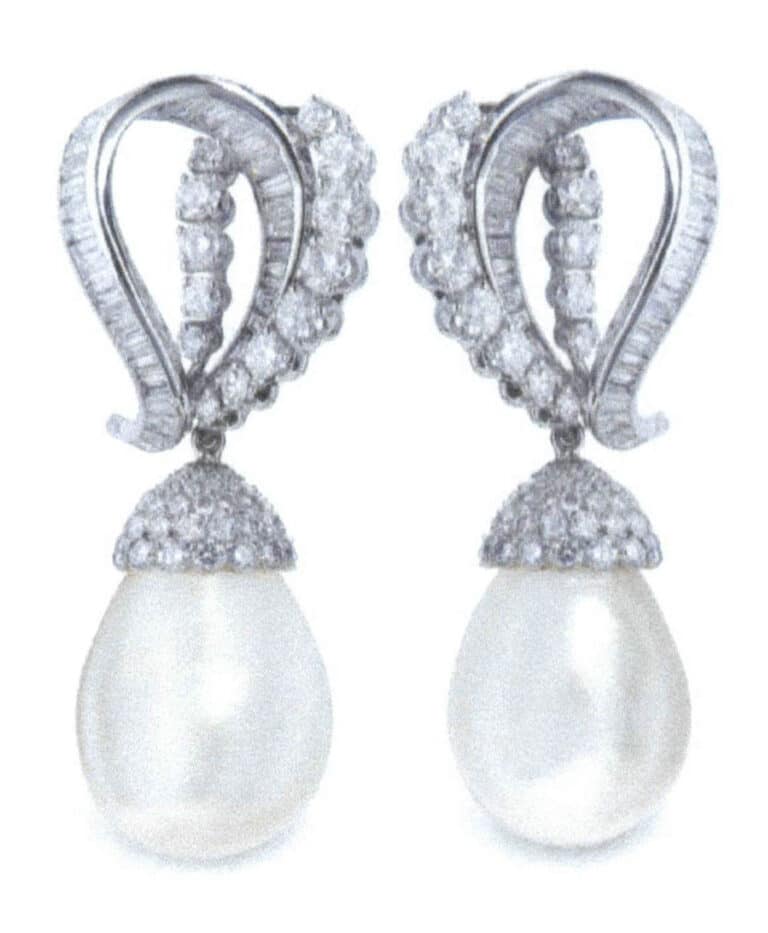
Figure 11-1 Bead-Set Pearl and Diamond Earrings
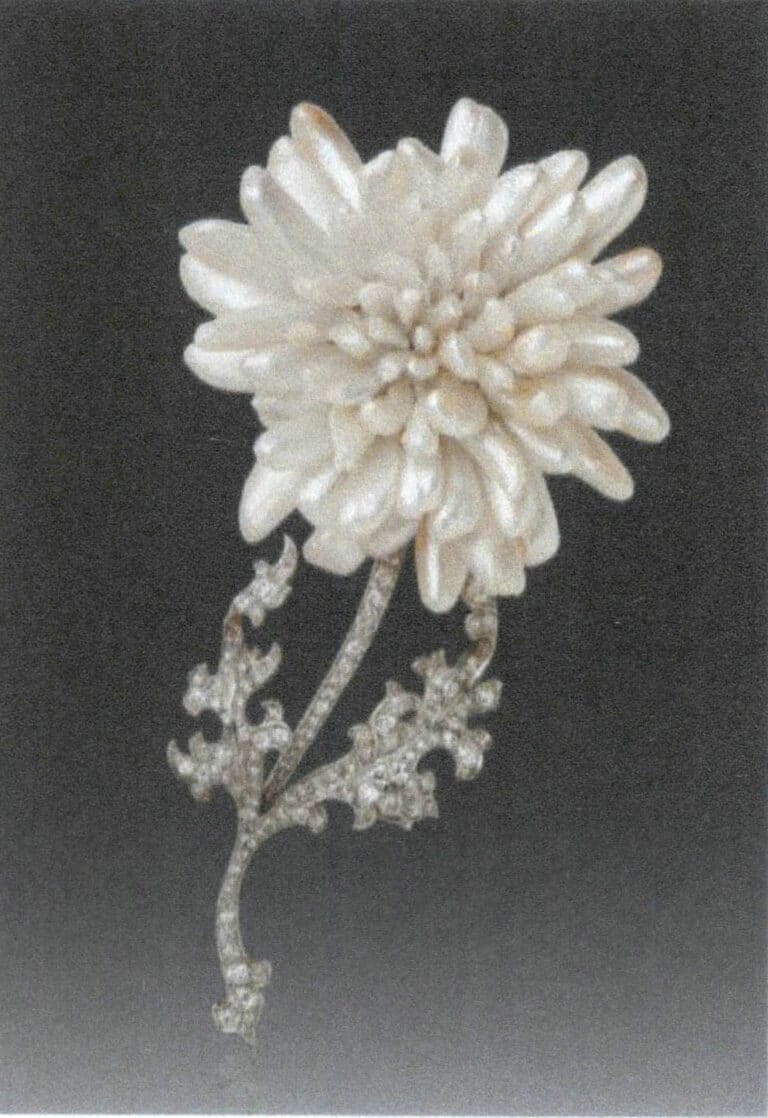
Figure 11-2 Irregular-shaped Pearl and Diamond Brooch
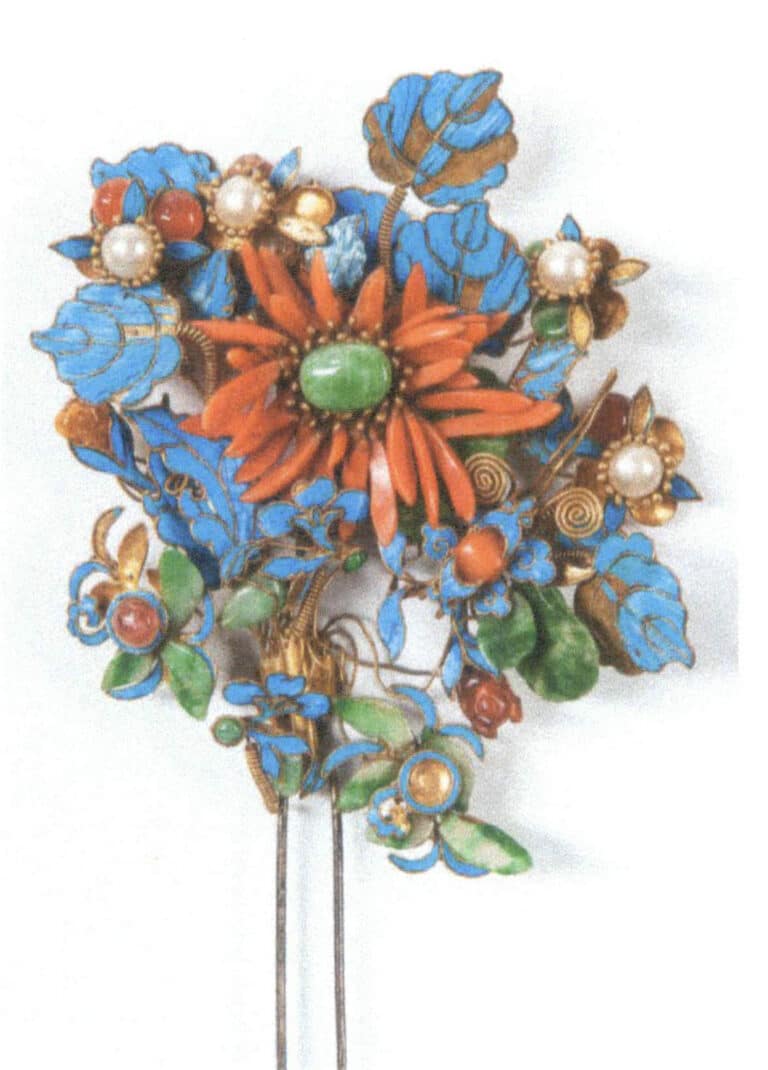
Figure 11-3 Qing Dynasty Palace Jewelry
2. The Method of Bead Setting
Most bead-shaped gemstones, natural or polished, are commonly used in stringing. This method is very suitable for three-dimensional bead shapes and is quite stable, even having a long history that can be traced back—drilling holes in gravel, bone, and shells to string them into decorative items worn around the neck is considered the origin of human jewelry. Due to its long history, it also carries some religious significance; for example, prayer beads have conventional norms regarding their quantity and material and serve a functional purpose in Buddhist practice. Therefore, mentioning the stringing method before introducing the bead setting is necessary. Its method is simple and can be completed without special training, but its significance is profound. So, for a single bead or irregular gemstone, if one wishes to present its decorative beauty relatively independently and unobstructed through setting, bead setting is a more suitable choice; of course, it should also depend on the specific gemstone situation and design needs. The following text will introduce three common methods of bead setting. Bead-set pearl rings and bead-set pearl earrings are shown in Figures 11-4 and 11-5, respectively.
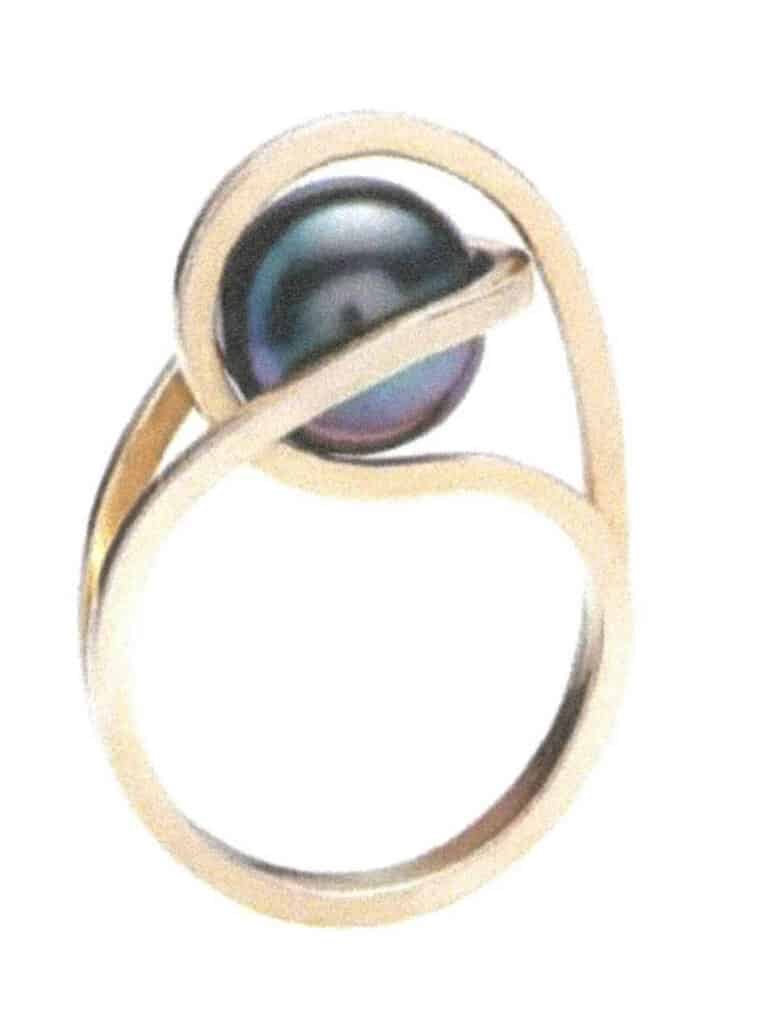
Figure 11-4 Bead-set pearl ring
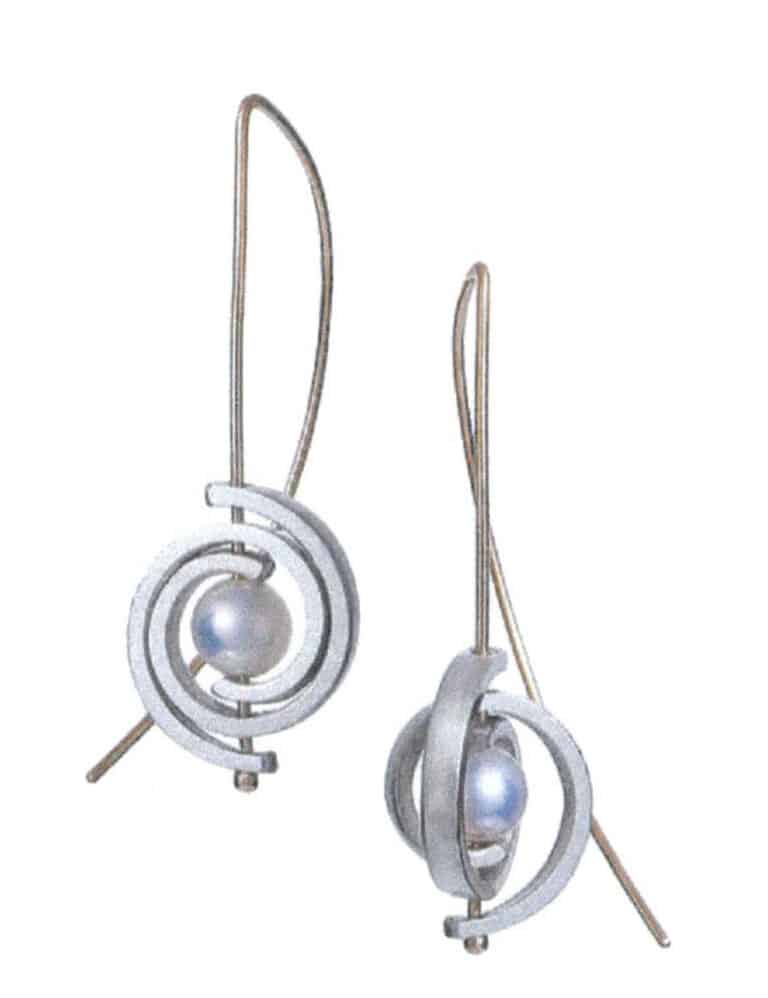
Figure 11-5 Bead-set pearl earrings
İçin Adımlar Making Bead Setting
Method One:
(1) Malzeme PTAZMİNAT
Prepare pearls of no less than 5 mm diameter, metal wire with a diameter of about 1 mm, metal sheets with a thickness of about 0.7 mm, and adhesive.
(2) Drilling pearls
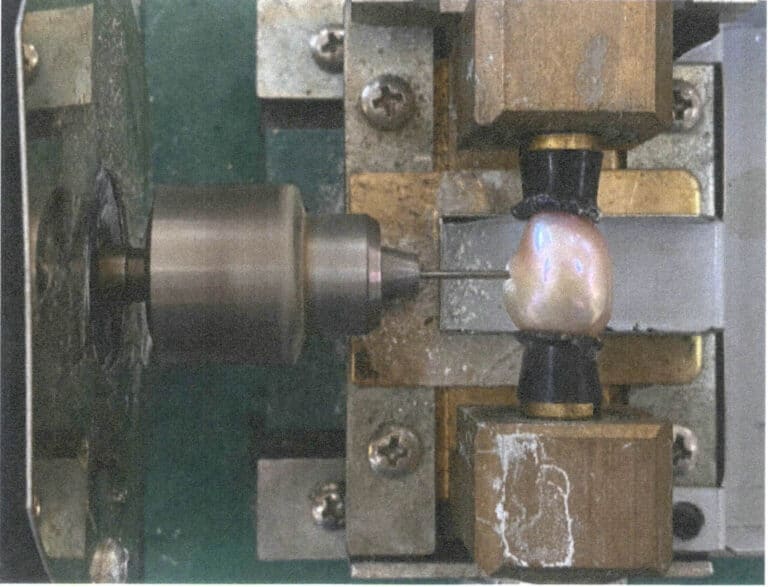
Since most pearls are not perfect from every angle, you can choose to drill holes in areas with flaws to achieve a certain degree of concealment. It is best to use a specialized pearl drilling machine, which is the most stable, as shown in Figure 11-6. You can also use a wooden clamp to hold the pearl while drilling with hanging grinder. Pearls have low hardness and can be drilled with a drill bur, but if it is a gemstone with high Mohs hardness, you will need to use a diamond-tipped drill, such as for jade. The hole’s depth should be about the the 2/1~2/3 of the pearl’s diameter, and it is important to ensure that the hole is vertical to the center of the sphere. The same applies to irregularly shaped pearls; the hole must be vertical to the center of the overall shape.
(3) Hazırlıking ve Metal Base
The metal base here does not serve a fixed role; it mainly connects the metal wire with the wearing structure and conceals the gaps between the metal wire and the pearl holes, enhancing the delicacy. The metal piece must first be cut into the required shape, generally circular, with a size typically ranging from the 1/3 of pearl’s diameter to 1/3, as shown in Figure 11-7. Then, use a dapping punch and dapping block that matches the size of the pearl to create a curved shape that fits the pearl. The metal base can also be designed into various shapes, as shown in Figure 11-8.

Figure 11-7 Size of the metal base
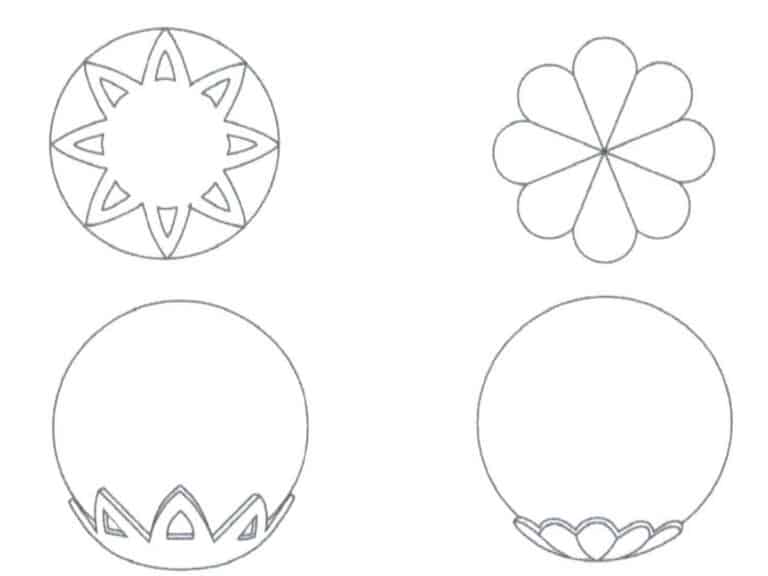
Figure 11-8 Fancy Metal Base
(4) Preparing the Metal Wire
The length and diameter of the metal wire used to insert into the pearl holes must match the holes. The surface of the metal wire should be roughened, mainly in two ways. The first method is to use a threading tool or twist the metal wire to create a spiral pattern, as shown in Figure 11-9. When twisting, one end of the metal wire can be fixed in a vise, while the other end is clamped with pliers and rotated clockwise to gradually twist out the spiral pattern. This allows the metal wire to be twisted into the pearl hole like a screw, increasing the friction between the pearl and the metal wire. Coupled with an adhesive, it also increases the adhesive’s bonding surface, making it more stable. The second method is to use a file or cutting pliers to leave indentations on the surface of the metal wire to enhance its roughness, increasing the adhesive’s bonding surface on the metal, as shown in Figure 11-10.
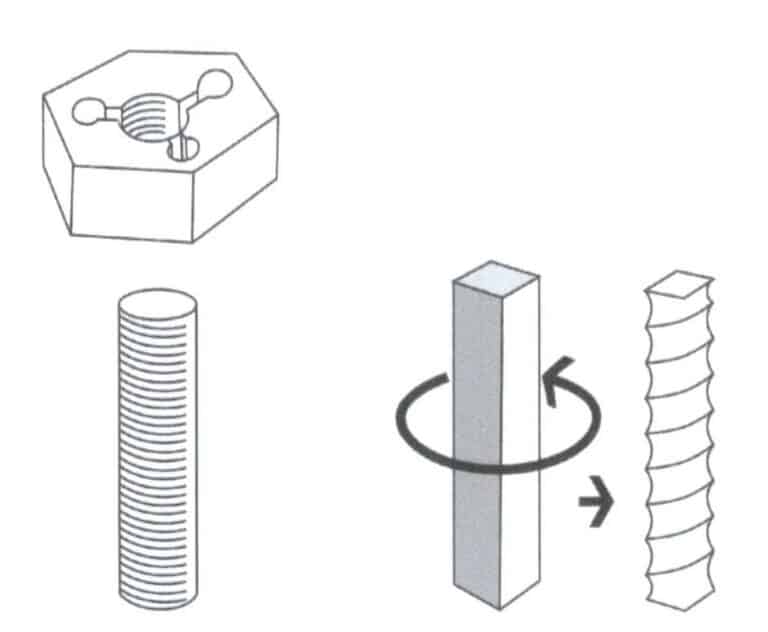
Figure 11-9 Processing into a spiral pattern using a threading tool or twisting the metal wire
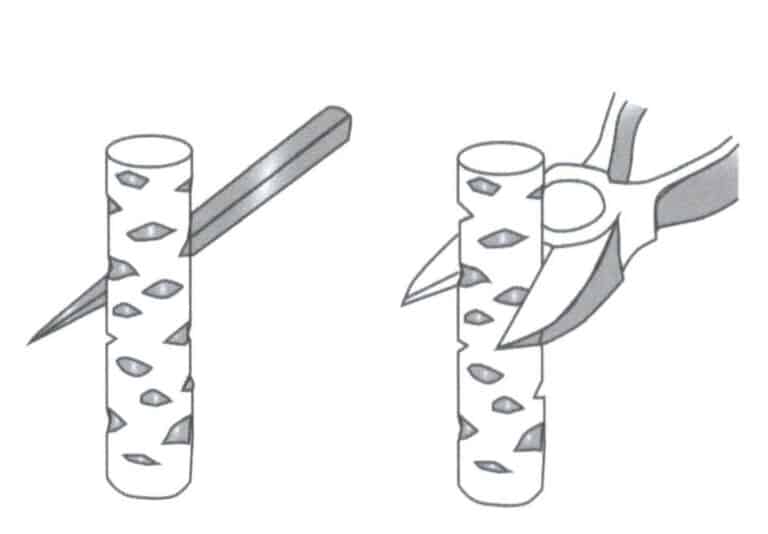
Figure 11-10 Making indentations with a file or cutting pliers.
(5) Welding ve Metal and Finishing
Prepare the required metal rings, rings and other items, before fixing the pearls, and weld them onto the metal base along with the metal wire, as shown in Figure 11-11. Finally, ensure the metal finishing is ready before adhering to the pearls.
(6) Fixing the Pearls
After twisting the metal wire into the pearl hole, place a small amount of the mixed adhesive at the base of the metal wire. A common glue can achieve a good bonding effect. Note that the adhesive will spread out after being squeezed; if too much is applied, it will overflow the metal base, affecting aesthetics and adding an extra processing step, so the adhesive must be used in moderation. Twisting the metal wire is shown in Figure 11-12.
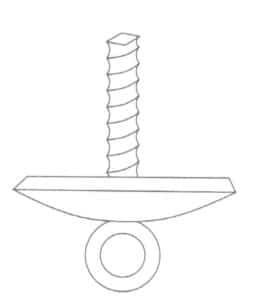
Figure 11-11 Welding Metal
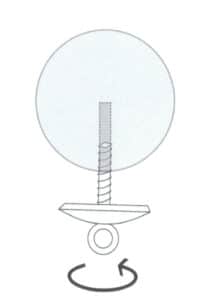
Figure 11-12 Twisting Metal Wire
Copywrite @ Sobling.Jewelry - Özel takı üreticisi, OEM ve ODM takı fabrikası
Method Two:
(1) Malzeme Hazırlama
The applicability of Method Two is less broad than Method One; it is suitable for larger-sized pearls, and pearls or similar beads that are low in hardness and relatively light in material can only be chosen. The metal wire for Method Two needs to have a certain thickness, with a diameter of at least 2.5 mm, and the metal should be elastic metals such as purple copper, 925 silver, or K gold. The preparation of metal bases and metal accessories refers to Method One.
(2) Drilling
First, use a pearl drilling machine to make a vertical hole in the pearl, then use a hanging grinder in conjunction with a dental bur of the same size as the pearl drilling machine to rotate and expand the hole into a column shape that is wider at the top and narrower at the bottom, as shown in Figure 11-13. Additionally, to avoid the final hole being too large, the drill bur and dental bur used here should be slightly smaller than the metal wire, as it is inevitable that the narrowest part of the hole will also be polished during the expansion process, resulting in an overall increase in size.
(3) Welding the Metal Wire and Accessories
The difference from Method One is that here, the metal wire and accessories are welded first before processing the metal wire, as shown in Figure 11-14. Since the metal wire in this method needs to maintain a certain elasticity, it is necessary to use a hammer to forge the metal wire to harden it after the welding process is completed. Note that the metal wire is relatively thin, so the force applied during forging should be small to avoid causing significant changes in thickness or deformation, and the metal base should be kept as small as possible. Additionally, it is advisable to prepare to finish well at this stage.
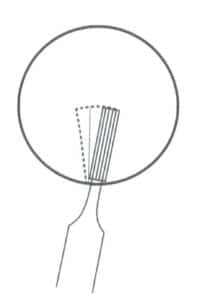
Figure 11-13 Enlarging Hole
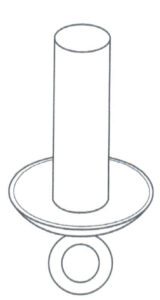
Figure 11-14 Welding the Metal Wire and Accessories
(4) Sawing the Metal Wire an Opening
Use a finer saw wire to see the metal wire in half from the top, with the opening length approximately 2/3 of the metal wire length, as shown in Figure 11-15.
(5) Spreading ve Metal Wire
Use a flat blade or skew chisel to open the metal wire from the top along the opening, as shown in Figure 11-16.
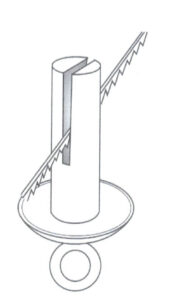
Figure 11-15 Sawing the Metal Wire Open
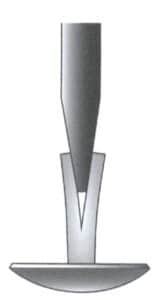
Figure 11-16 Spreading Metal Wire
(6) Düzeltmeing ve Pearl
The metal wire, which has been opened into two petals, is difficult to return to its original state due to its elasticity. Now, pliers are used to clamp the metal wire and insert it into the pearl hole. The metal wire will then expand in the space of the hole, thus utilizing the elasticity of the metal to fix the pearl. This method also requires applying adhesive at the base of the metal wire, as shown in Figure 11-17.
Method two is less widely applicable or used than method one, but this method has more inlay characteristics regarding craftsmanship.
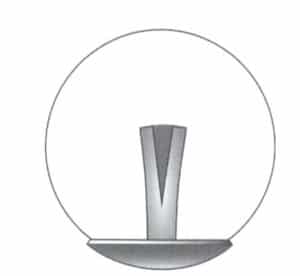
Method Three
(1) Malzeme Hazırlama
Method Three is a fixed method with all holes punched. There are many finished beads with all holes punched that can be purchased directly, and it is optional to punch the holes yourself. Generally, beads are strung together and are movable, not requiring a metal base, and other parts can have many clever variations based on the design. Here, we will only introduce the more common fixed method for all-hole beads, which is suitable for beads of any material.
(2) Treatment of the Metal Wire Tail End
If one end of the bead is not structurally fixed, a metal structure must support the hole. This structure, larger than the hole diameter, can generally be processed in two ways. One method is to use a heat gun to continuously heat and sinter the metal wire tail end into a metal ball, as shown in Figure 11-18. The other method is to fix the metal wire in a vise, with about 2 mm of the wire exposed above the vise, and to extend the exposed section by hammering it with a flat-headed hammer, as shown in Figure 11-19. The sintering method can directly yield a smooth metal ball after creating a metal block larger than the bead hole diameter using the above two methods. In contrast, the forging method requires filing to shape it properly before use.
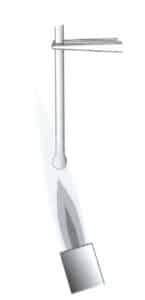
Figure 11-18 Sintering wire ends into balls.
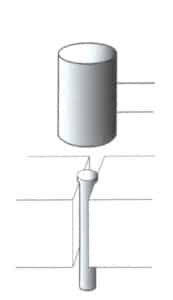
Figure 11-19 Hammering one end of the metal wire to extend it.
(3) Fixing the Bead
After threading the bead from the other end, use round-headed pliers to bend the end into a metal ring and then connect it to other structures, as shown in Figure 11-20. If both ends of the bead need to be connected to other structures, a metal ring can be welded to one end of the metal wire, threaded through the bead, and then the other end bent into a metal ring, as shown in Figure 11-21.
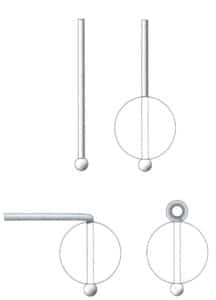
Figure 11-20 Metal ring fixed at one end with a bead
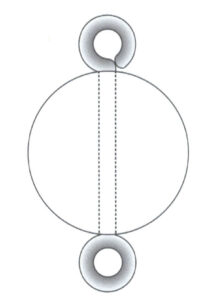
Figure 11-21 Metal ring fixed at both ends with beads
3. The Application of Bead Setting in Jewelry Design
The use of beads has almost run through the entire history of jewelry, from the earliest simple stringing of beads to controlling the position of beads with metal. “Holes” have played a crucial role in humans exploring body ornaments from natural objects. Figure 11-22 shows a string of gemstones produced in Spain between 586-711 AD, where various gemstones have been polished as smoothly as possible, revealing beautiful colors and through holes and threads, expressing people’s passion for vibrant colors. A thousand years later, in China, similarly vibrant gemstones were polished and arranged during the Qing Dynasty to convey a sense of royal ceremony and symbolism, as shown in Figure 11-23.
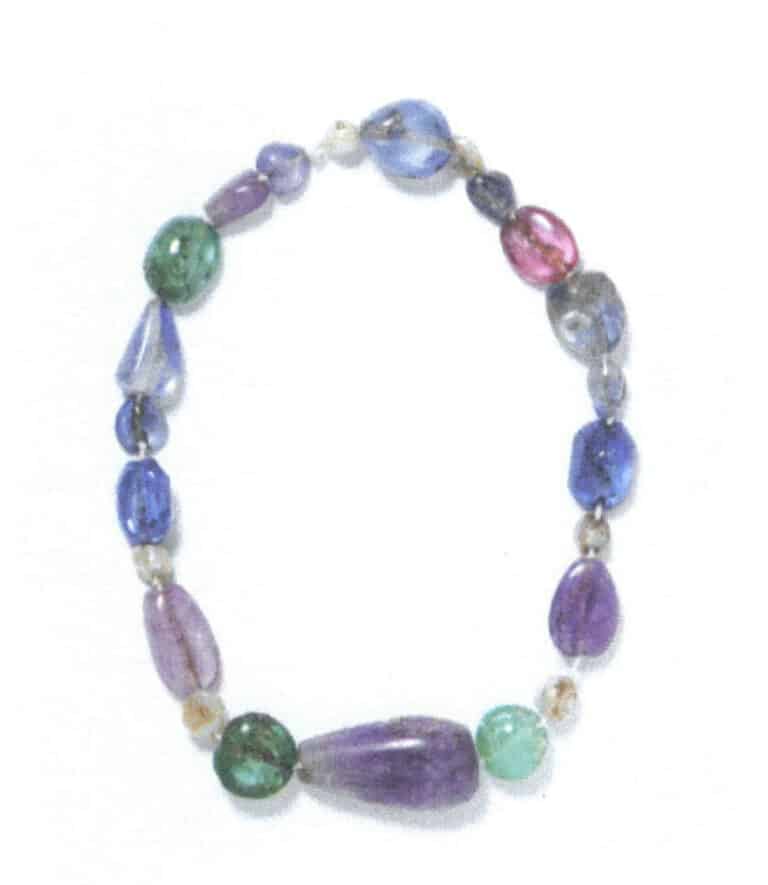
Figure 11-22 Bead Stringing (V&A Museum Collection)
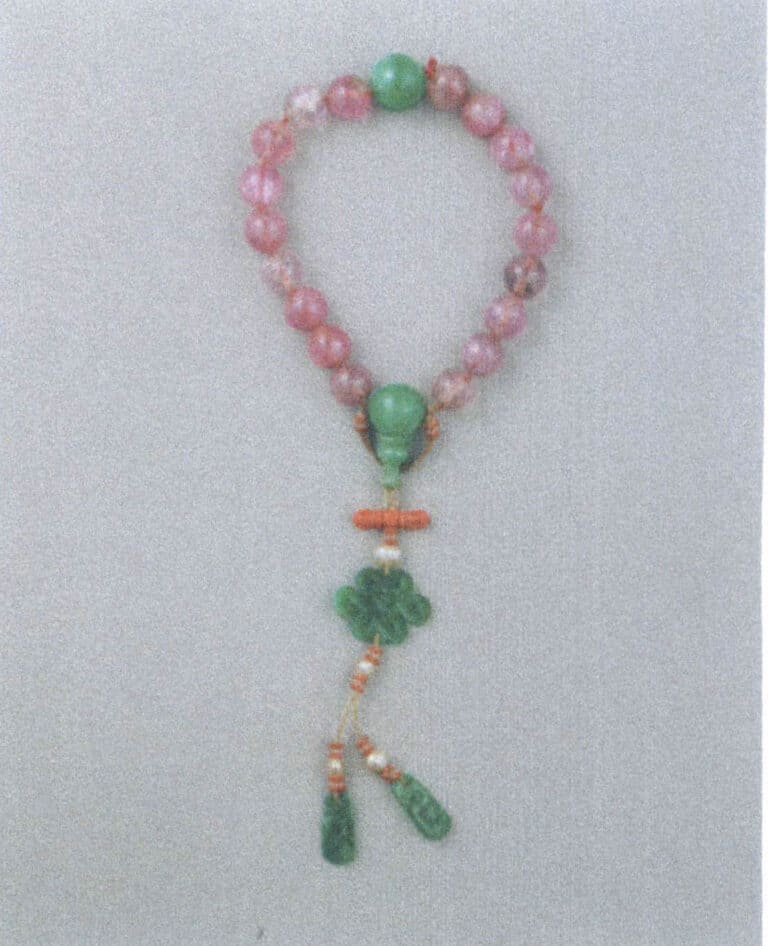
Figure 11-23 Tourmaline bracelet (Collection of the Palace Museum)
Among these perforated gemstones, pearls can be considered the most subdued in color, yet their natural fullness and luster have still garnered widespread and lasting affection. Additionally, due to the ease of obtaining and processing pearls, they have become one of the most important organic gemstones in the history of jewelry. The bead setting method has also become increasingly refined because of pearls, as shown in Figures 11-24 and 11-25.
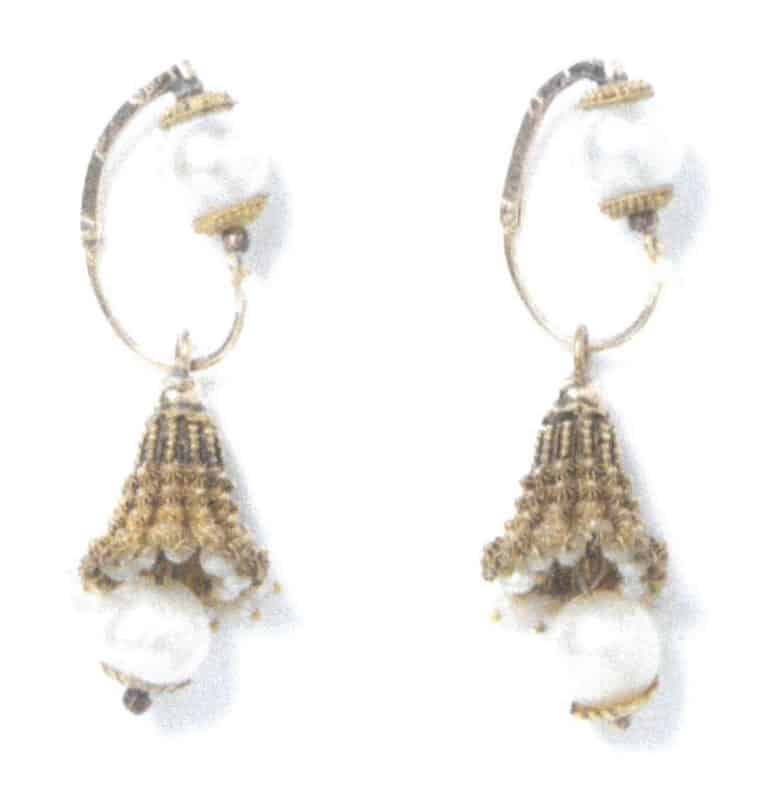
Figure 11-24 Earrings (Collection of the V&A Museum)
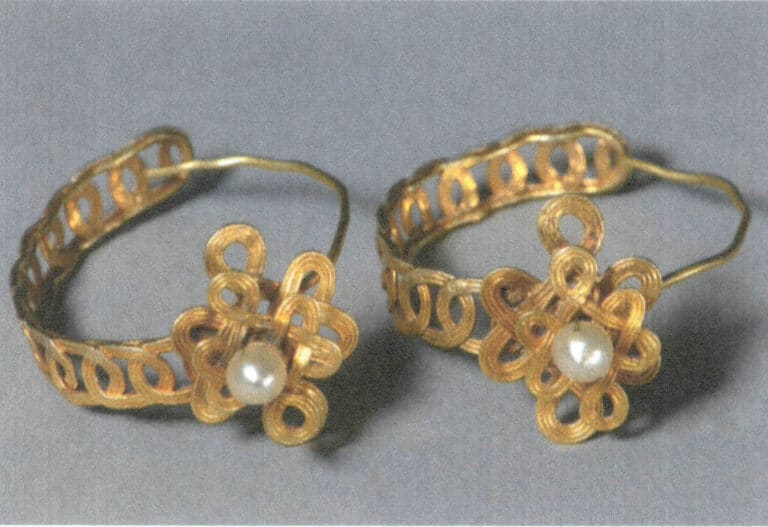
Figure 11-25 Gold inlaid pearl long-style earrings (Collection of the Palace Museum)
Speaking of bead settings primarily featuring pearls, one must mention the farmed pearls that are renowned and have grown. In 1893, Mikimoto’s founder, Kokichi Mikimoto, successfully pioneered pearl cultivation. In the more than a hundred years that followed, Mikimoto never ceased to explore the charm of pearls, always placing dreams in pearl jewelry, which greatly promoted the use of pearls in jewelry.
In addition to Mikimoto, many designers have also made wonderful interpretations of pearls. Whether round or irregular, their natural qualities leave room for challenges for designers, as shown in Figures 11-26 and 11-27. Furthermore, in the uniquely styled jewelry of the Art Nouveau movement, we can always see the presence of pearls, either as the main character in the design due to their unique shapes, as a fresh embellishment, or as a “period” hanging at the bottom of the jewelry, as shown in Figures 11-28 to 11-30.

Figure 11-26 Work by jewelry artist Xiong Chen (1)
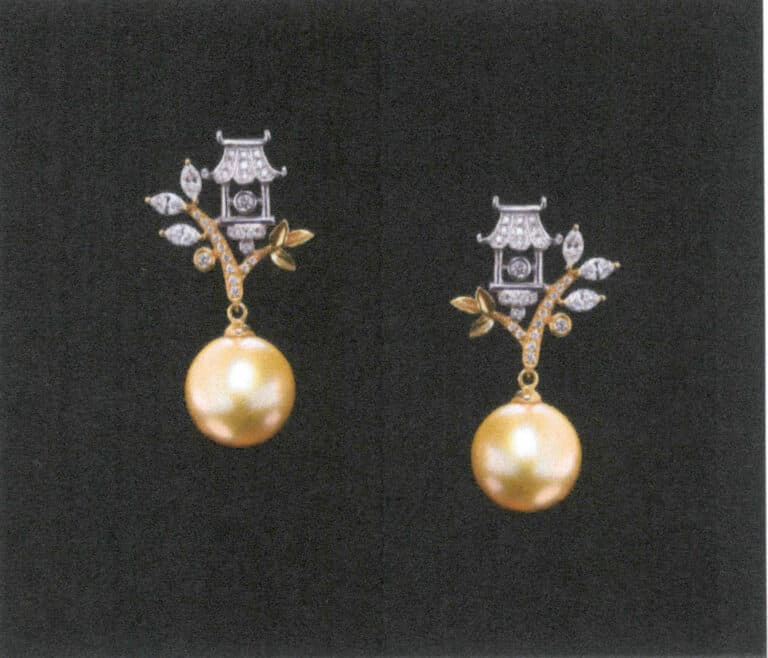
Figure 11-27 Work by jewelry artist Xiong Zhen (2)
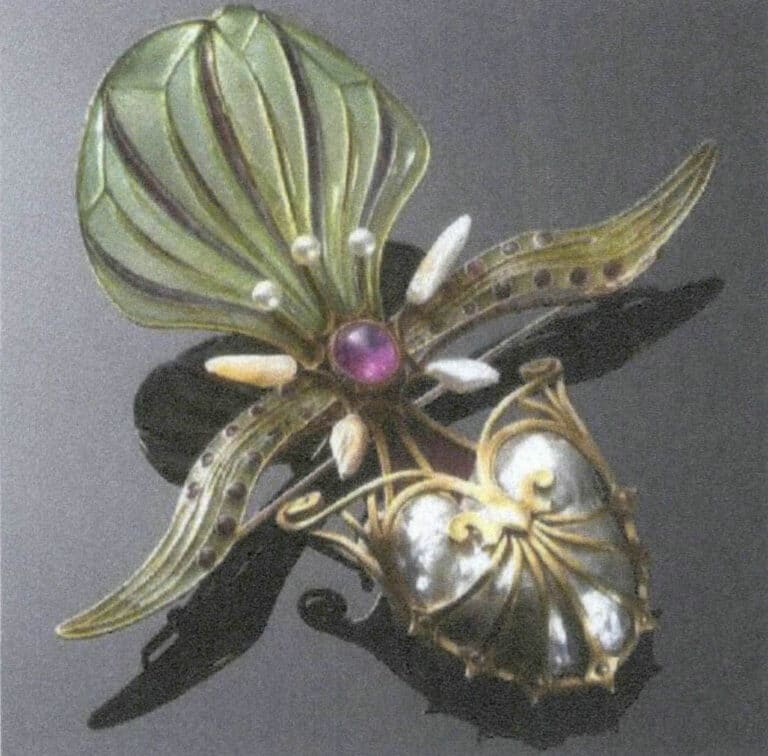
Figure 11-28 Art Nouveau style jewelry (1)
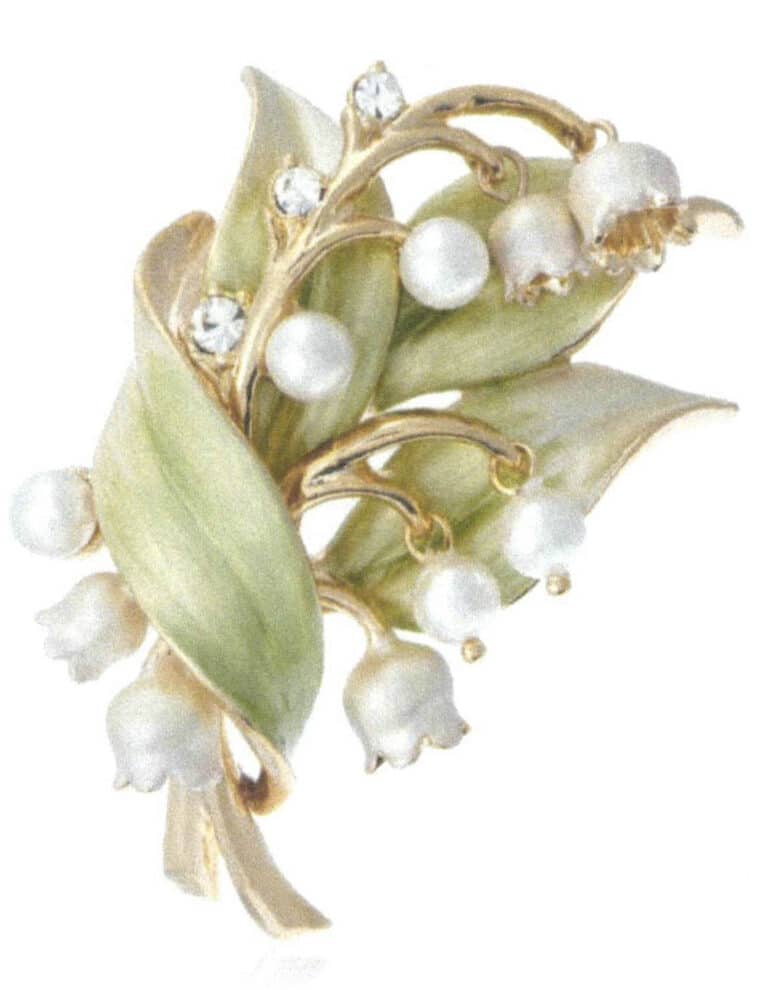
Figure 11-29 Art Nouveau style jewelry (2)
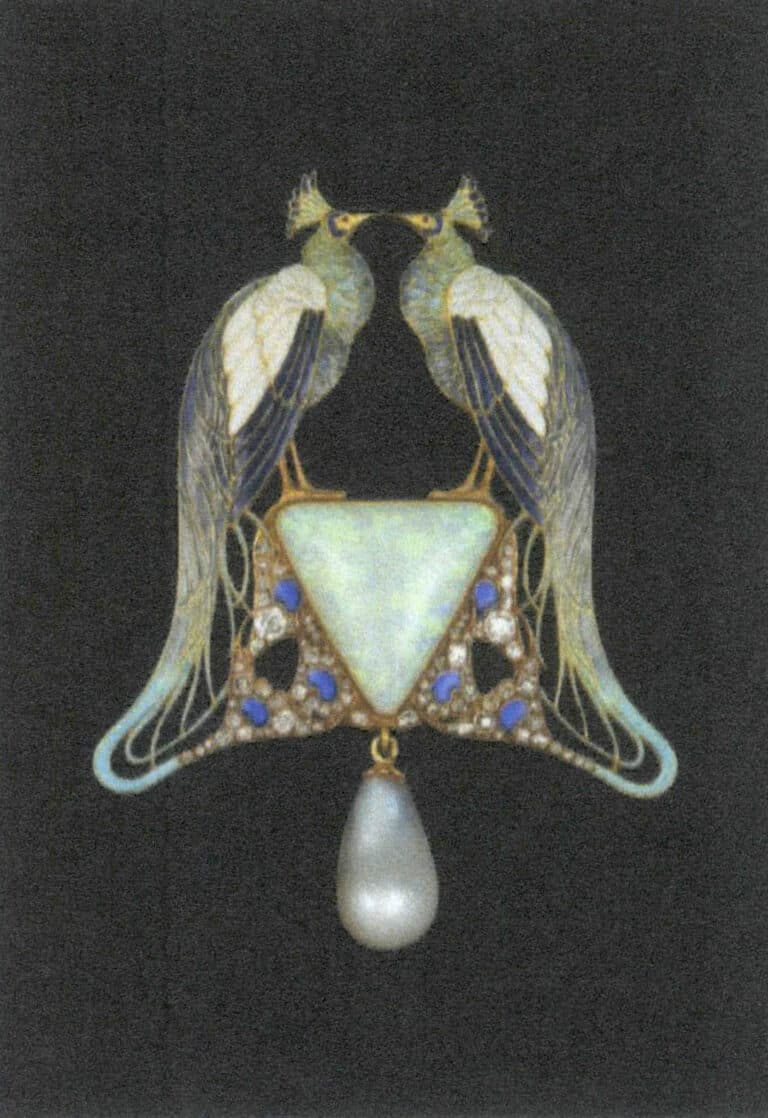
Figure 11-30 Art Nouveau style jewelry (3)
Although the bead setting method needs some craftsmanship, the effect it achieves is essential in jewelry design. The beauty of gemstones needs to be richly expressed through different cuts, and the bead setting method maximally showcases the beauty of pearls, an organic gemstone, which is very lively and dynamic. From the perspective of artistic value, bead setting is on par with other inlay methods.
Section III Creative Setting
Creative settings do not exist as a type of setting but rather as a way of expanding the mind and creativity of the gem-setting learner based on craft learning. Creative inlay makes craft learning not to follow stereotypical rules but to further personalization and innovation.
1. Overview of Creative Setting
Under traditional and modern setting methods, the brilliance of gemstones has been adequately displayed, and the craftsmanship of inlay has established conventional paradigms. The appraisal of gemstones has also been standardized due to the increased value brought by inlay techniques. From the previous discussion on setting techniques, one can systematically understand the methods of setting production. However, existing standardization and conventional methods do not mean that the presentation of gemstones can only be chosen within existing frameworks, nor do they imply that the relationship between gemstones and metals can only be selected from a few inlay techniques. From the perspective of designers and artists, it is always necessary to creatively view the relationship between gemstones and metals; otherwise, innovative inlay techniques such as invisible edge setting and tension setting would have yet to emerge.
Creative setting, seemingly broad, has a significant premise: understanding the characteristics of metals and gemstones, mastering basic setting techniques, and then flexibly applying the relationship between metals and gemstones to find the most appropriate way to present one’s design or thoughts. Therefore, creative setting is a cognitive enhancement after learning gemstone setting techniques, rather than a parallel craft study with the previous chapters.
Everyone’s creative setting can have its own method. Here, the author only categorizes and summarizes some creative setting methods observed, providing some guidance for beginners’ thinking directions, but does not wish for everyone to be limited by these classifications. There should be infinite possibilities beyond these types. The various types mentioned below will have overlaps and should be viewed flexibly. I hope to provide references and inspiration for learners of jewelry design and gemstone settings. Relevant case examples are shown in Figure 12-1.
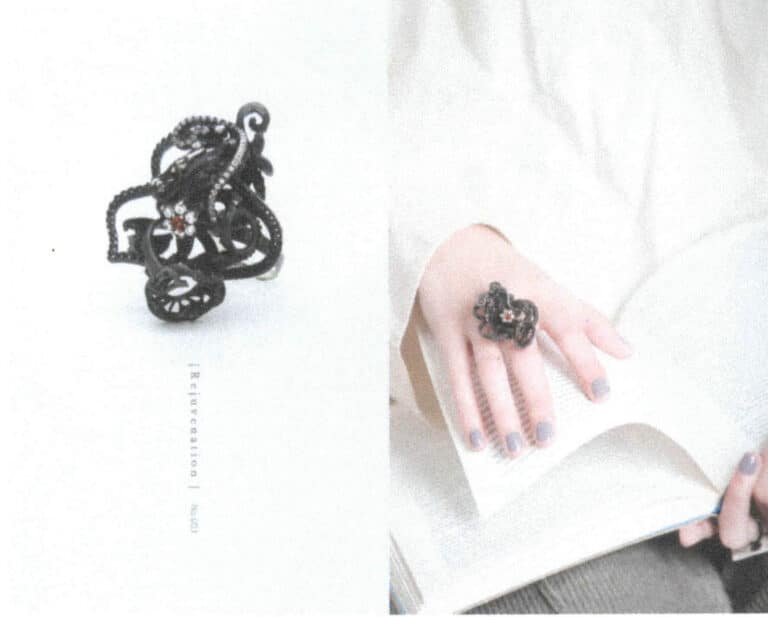
2. Structural Expansion Creative Setting
After learning the gemstone setting technique, there is much room for challenge and exploration in the relationship between gemstones and metals. Breaking conventional thinking will make the learning of craftsmanship more creative. The cases in this section are mostly redesigns of structures based on existing setting methods, and they will inspire many learners of setting techniques.
2.1 "Inappropriate" Scale
This type of setting creativity mainly relies on a proficient mastery of setting techniques and understanding setting structures, flexibly applying inlay techniques to break through certain norms and formulas, and finding a personalized expression language by breaking the structural scale. The differences in scale can lead to significant variations in aesthetics and sensitivity; at such times, the “appropriate,” “conventional,” and “standard” scales should be challenged and transcended. For example, the prongs of prong setting may evolve to be exceptionally robust, the bottoms of inlaid gemstones facing upwards, and the edges of bezel setting appear unrefined, all of which can bring completely different tensions and effects based on different designers’ interpretations. Relevant case studies are illustrated in Figures 12-2 to 12-4.
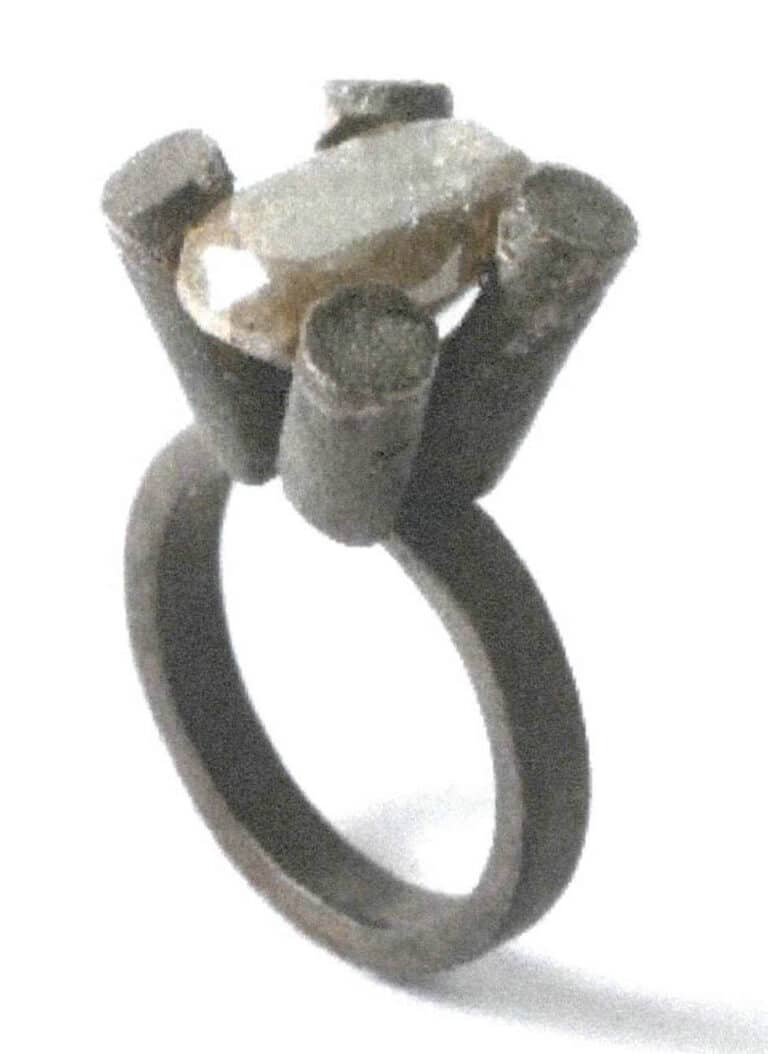
Figure 12-2 Artistic Jewelry (1)
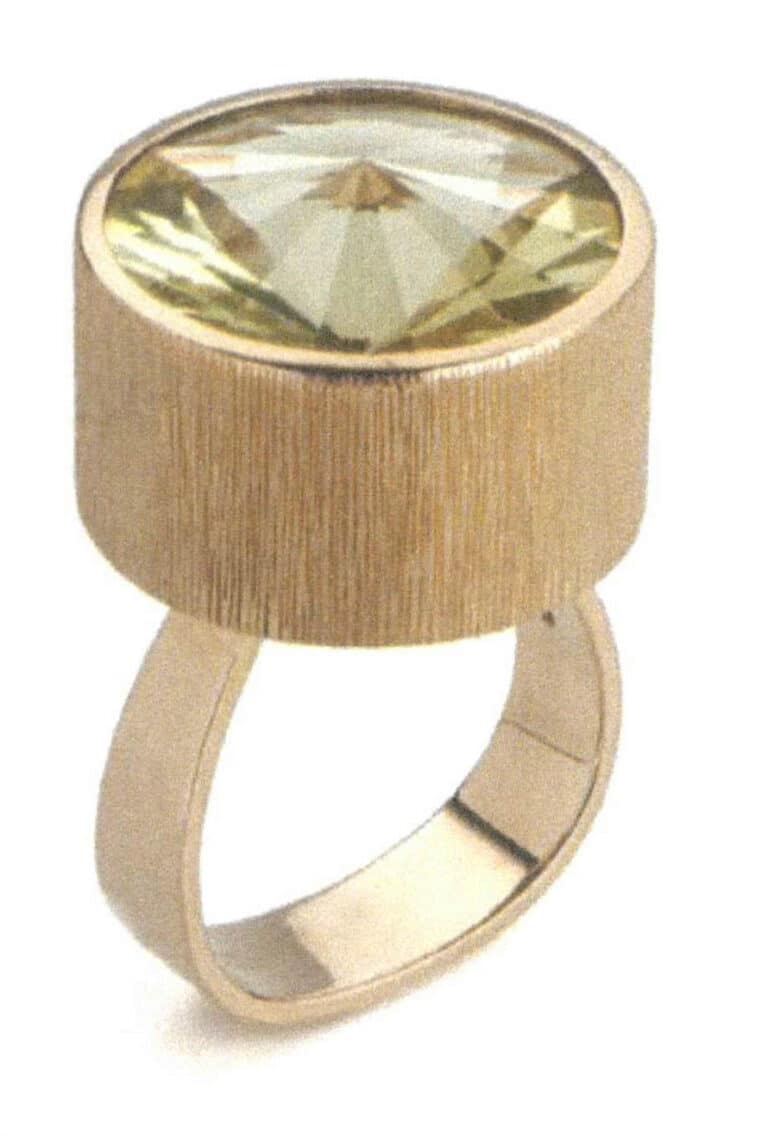
Figure 12-3 Artistic Jewelry (2)
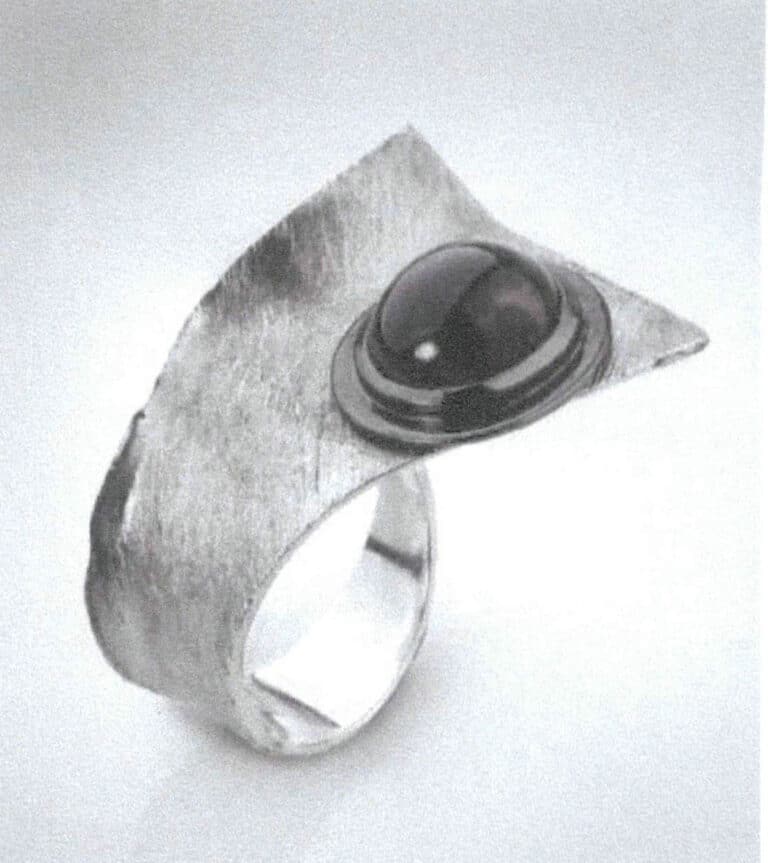
Figure 12-4 Artistic Jewelry (3)
The following designs are all based on tension setting as the fundamental structure. Tension setting itself is a highly craft-oriented setting method that seems difficult to master and has many production limitations, yet it serves as a good “entry point” for exercising imagination. Each of the following designs has a different approach; some are relatively relaxed and simple, as shown in Figures 12-5 and 12-6; others are rigorous yet clever, as shown in Figures 12-7 and 12-8.
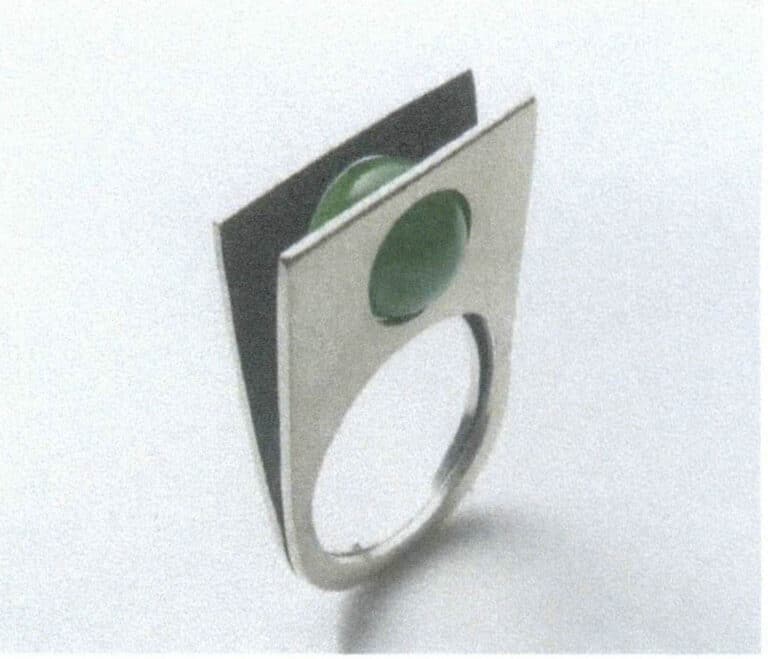
Figure 12-5 Artistic Jewelry (4)
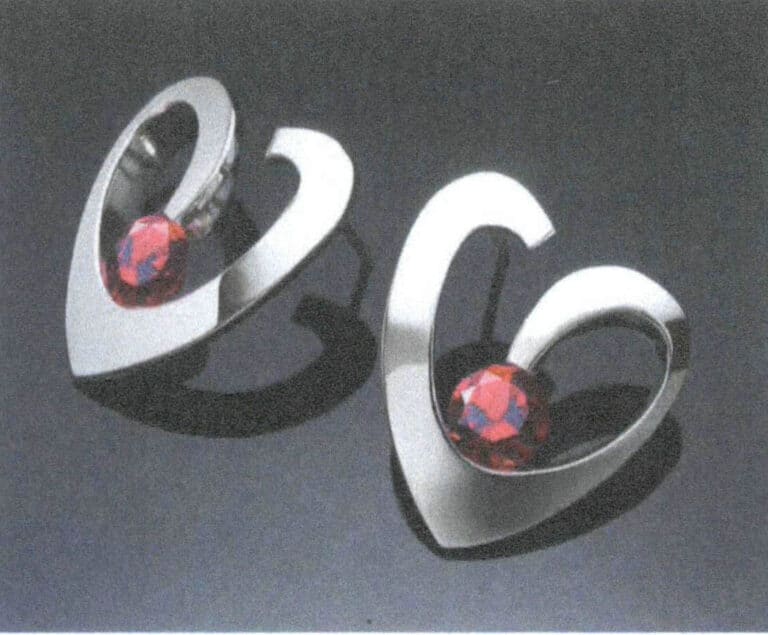
Figure 12-6 Artistic Jewelry (5)
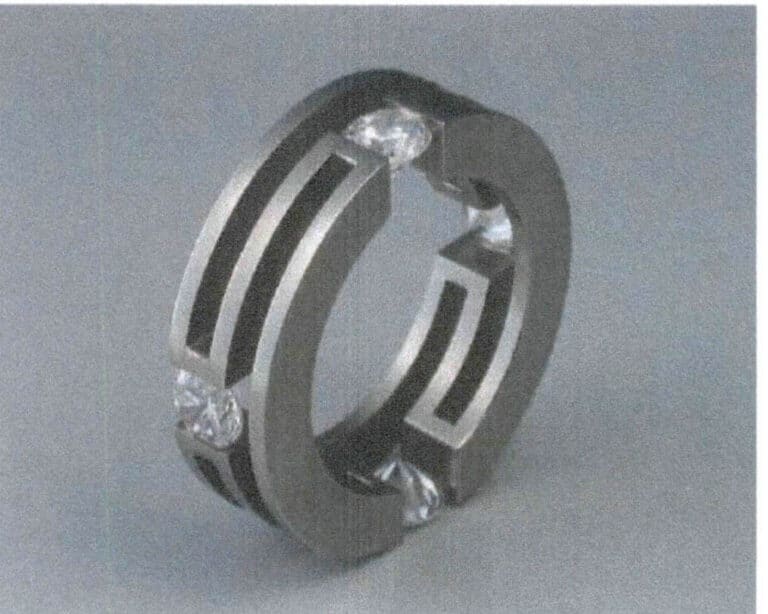
Figure 12-7 Artistic Jewelry (6)
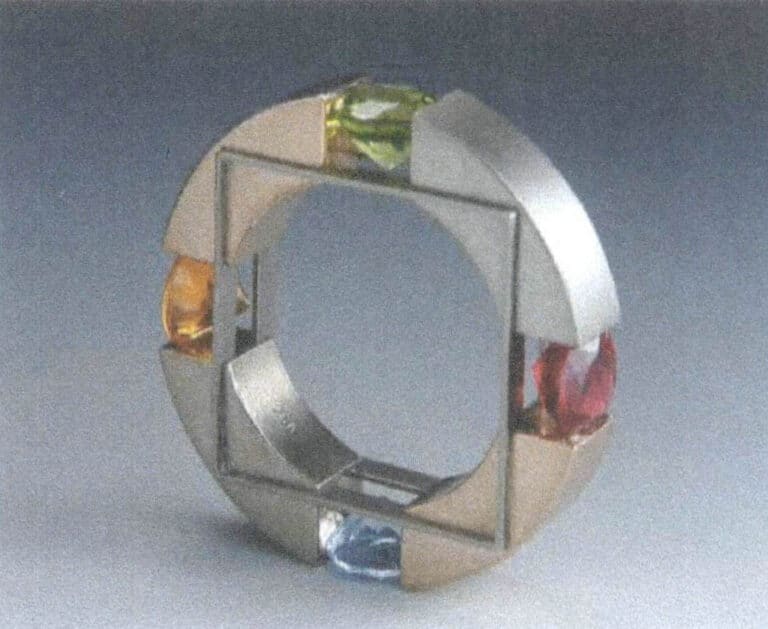
Figure 12-8 Artistic Jewelry (7)
2.2 "Unstable" Structure
In conventional setting structures, the primary task is to secure the gemstones within the metal structure. In the following designs, the relationship between the gemstones and the metal is stable but not fixed, which breaks conventional norms. When the relationship between the gemstones and the metal becomes the design’s focus, the structure’s playfulness also becomes a highlight of the design. Among these structures, some utilize the relationship between the gemstones and the metal slots to allow for sliding; others design a “cage” for the gemstones, providing them with space to move within the “metal cage”; and some make the gemstones detachable, securing them through the relationship between the metal structure and the body when wearing the jewelry. These creative ideas challenge the stable relationship between metal and gemstones, whether sliding or detachable, adding a playful experience for the wearer. Relevant cases are shown in Figures 12-9 to 12-14.
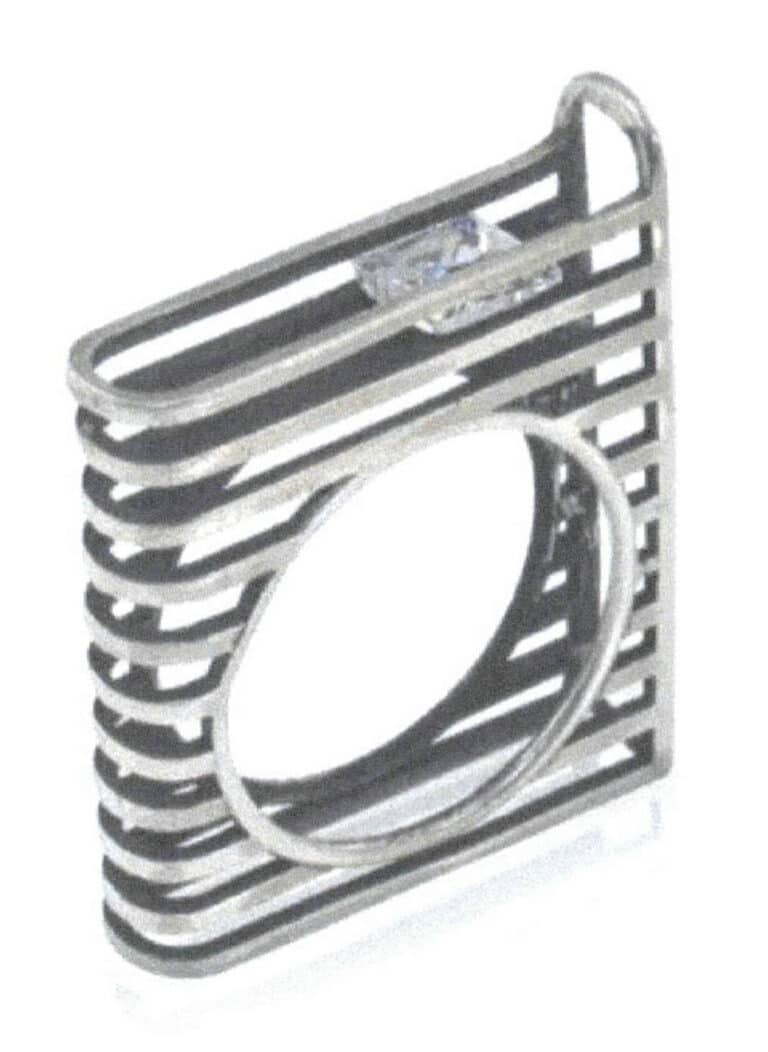
Figure 12-9 Artistic Jewelry (8)
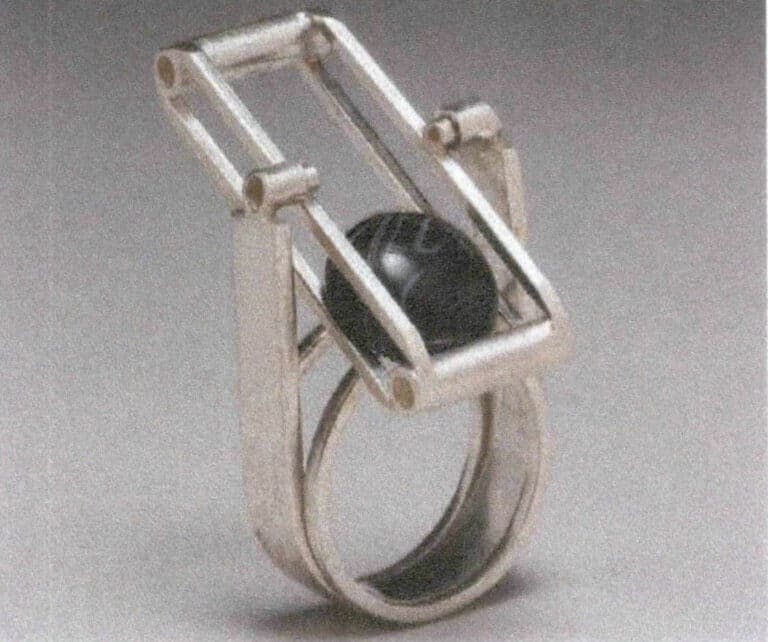
Figure 12-10 Artistic Jewelry (9)
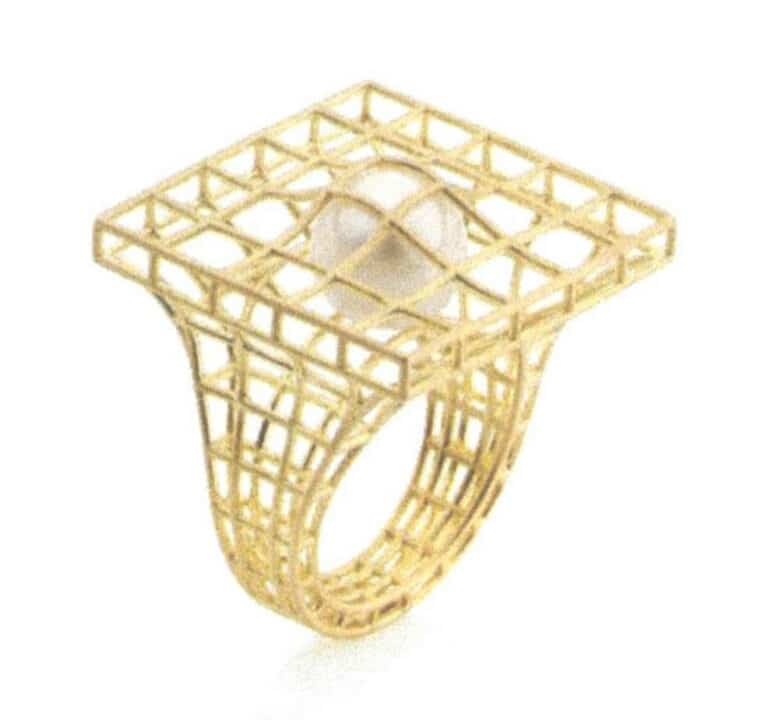
Figure 12-11 Artistic Jewelry (10)
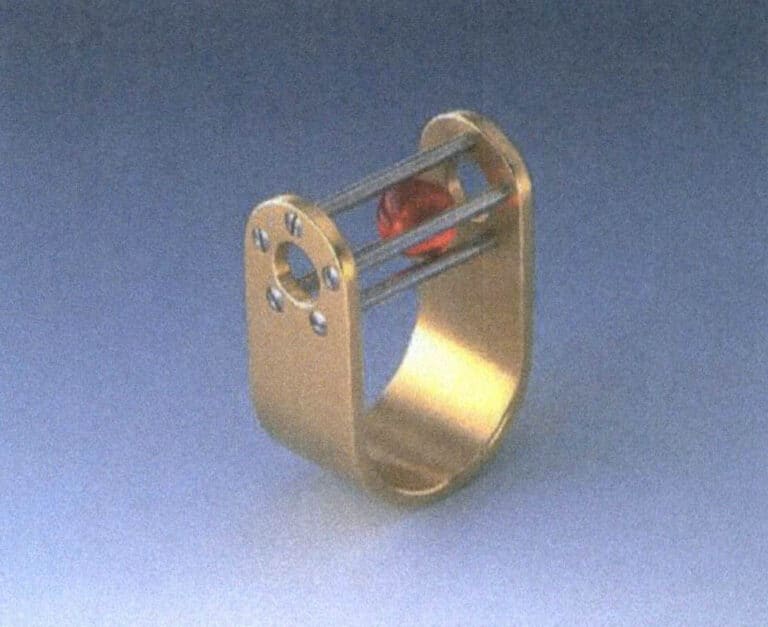
Figure 12-12 Artistic Jewelry (11)

Figure 12-13 Artistic Jewelry (12)
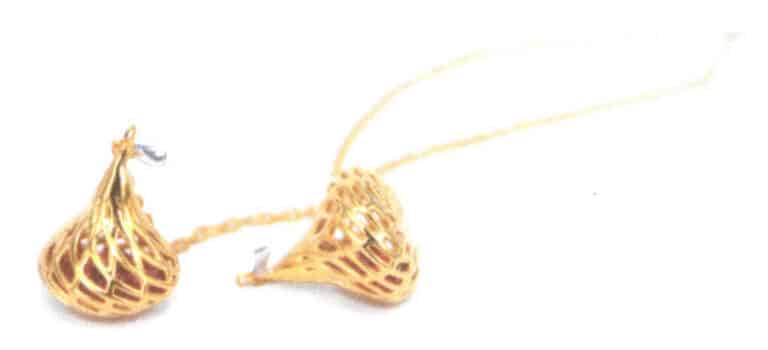
Figure 12-14 Jewelry Work
3. "Gemstone" Material Creative Setting
The so-called “gemstone” in the creative use of gemstone materials is not necessarily a gemstone; it represents the materials being set in the structure. Among the materials being set, in addition to gemstone materials, many rich materials can be fixed set, thus showcasing the charm of different materials through the fixation method of metal setting.
3.1 "Irregular" Gemstones
The cutting styles of gemstones are introduced in Chapter 1, and these conventional cutting styles have corresponding setting methods that complement them. These cutting styles are nothing but the “designs” that best showcase the brilliance of the gemstones. However, beyond these cutting styles, we often have a fondness for some unexpected shapes, perhaps because these shapes break the norm, perhaps because these cutting styles exhibit the rustic beauty of the gemstones, or perhaps they are custom-made to meet the designer’s needs, as shown in Figures 12-15 to 12-18.
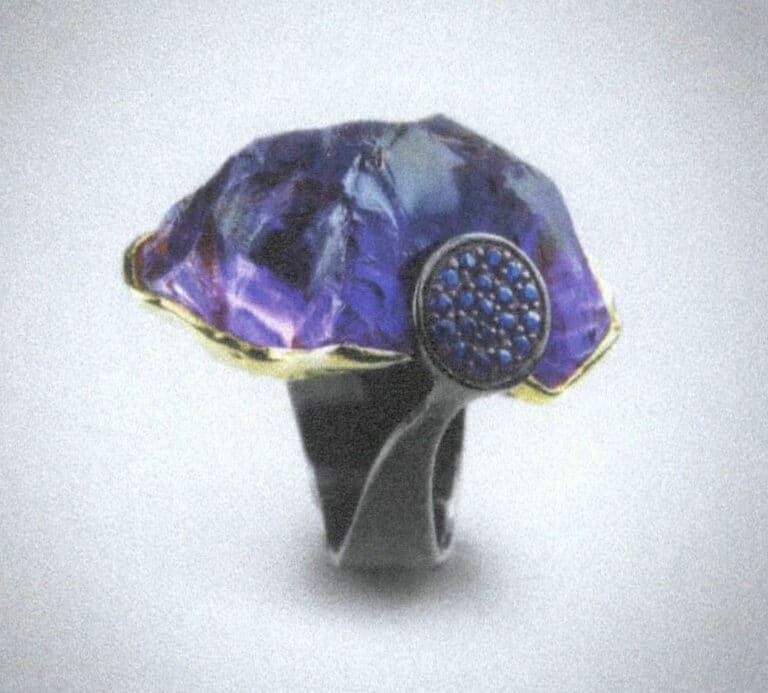
Figure 12-15 Artistic jewelry (13)
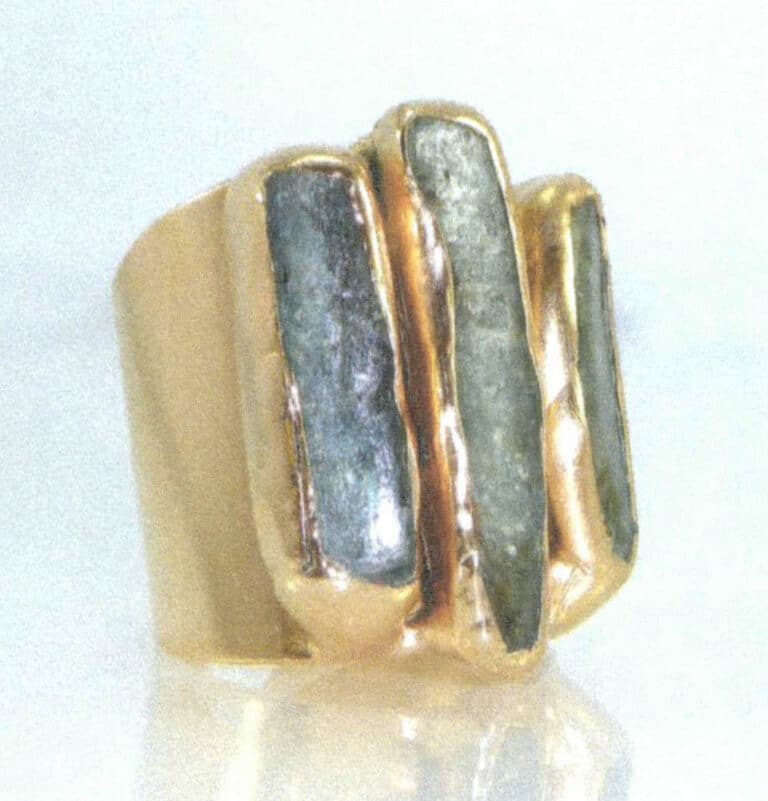
Figure 12-16 Artistic Jewelry (14)

Figure 12-17 Artistic Jewelry (15)
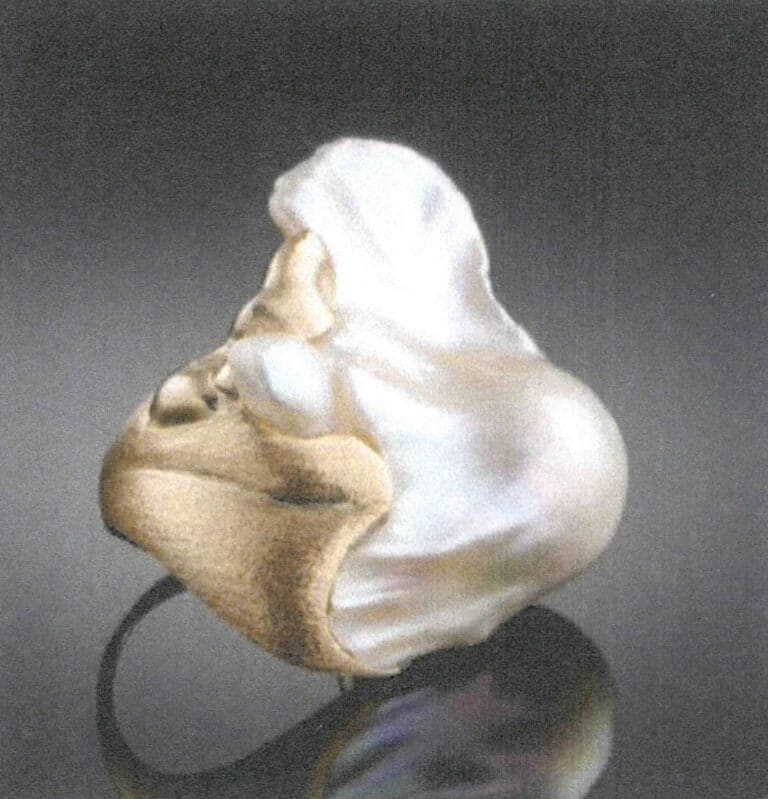
Figure 12-18 Artistic Jewelry (16)
3.2 "Gemstones" that are not Gemstones
Metals and gemstones are necessarily conventional materials for setting. Still, when setting is used as a form of creative expression or as a theme of “design,” the richness of materials becomes a breakthrough point for innovation; this type of creativity has a dual interpretative space related to and unrelated to setting, and its commercialization may be challenging. Still, at the level of the work, it provides an effective way for learners of jewelry art and design to expand their thinking. Artistic jewelry works related to “gemstones” that are not gemstones are shown in Figures 12-19 to 12-22.
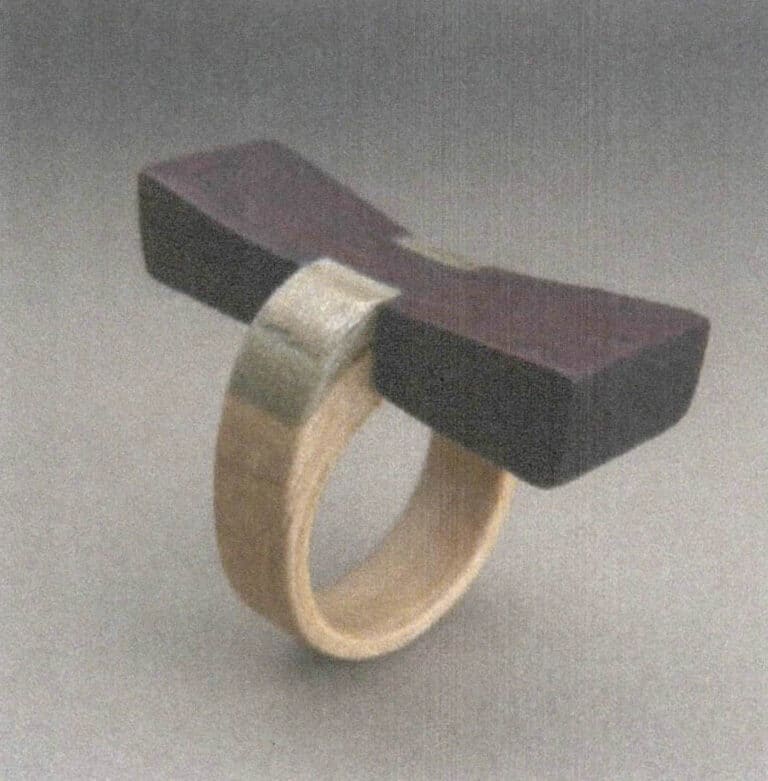
Figure 12-19 Artistic Jewelry (17)
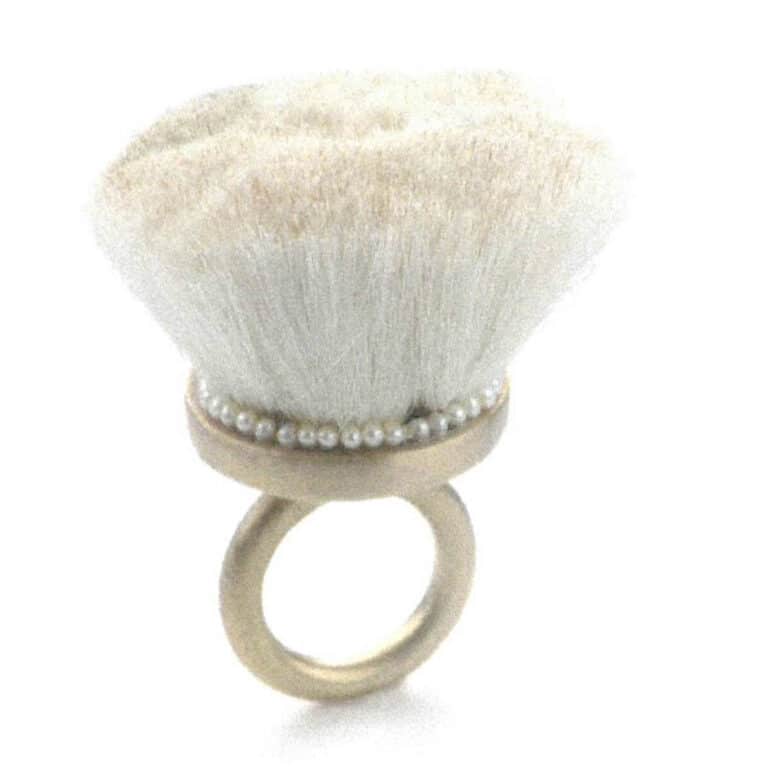
Figure 12-20 Artistic Jewelry (18)
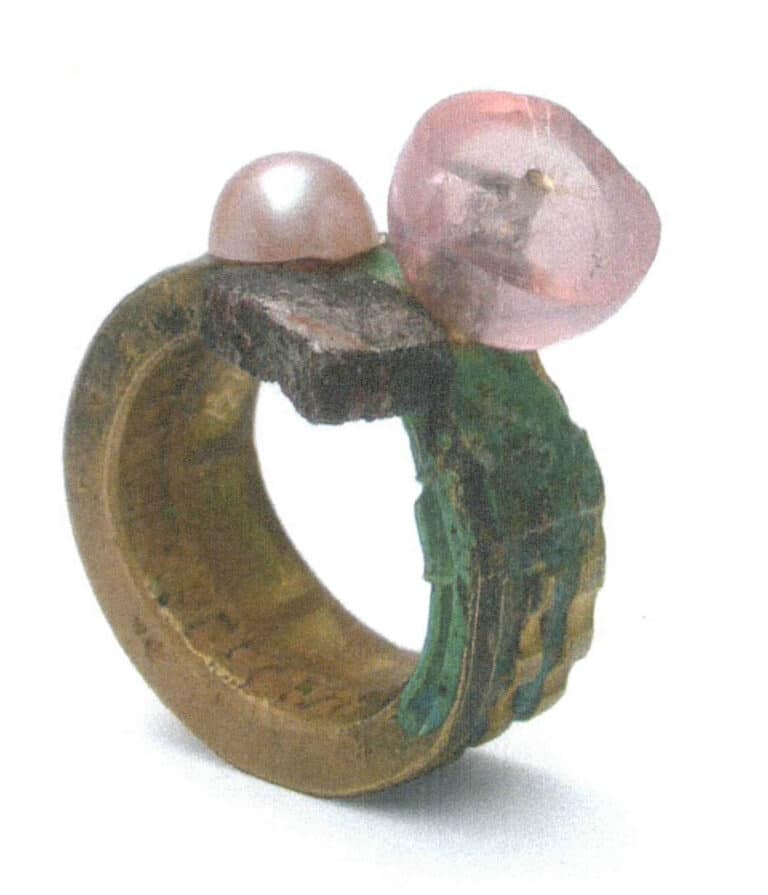
Figure 12-21 Artistic Jewelry (19)
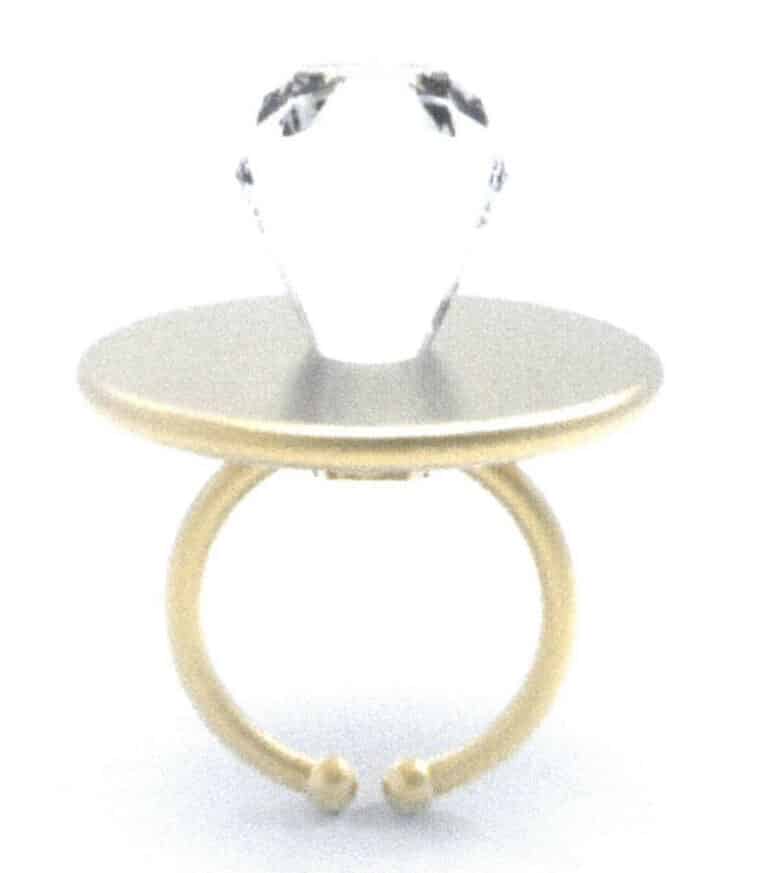
Figure 12-22 Jewelry Work "Diamond Pacifier"
4. Craft Creative Setting
The creative setting technique uses metals or other materials to fix gemstones and production methods. This category includes some relatively difficult techniques designed to solve practical problems in high-end jewelry, such as using titanium metals for setting to reduce weight; some are designed to adapt to mass production to lower production costs while ensuring aesthetics, such as the application of epoxy resin; and some use composite materials to achieve setting effects, which are more personalized, such as using rope weaving techniques or materials like fur to fix gemstones. Different fields are targeted, problems are solved, gemstones are applied, and methods can be rich and varied.
4.1 Titanium
Their lightweight and high hardness characterize iron metals, widely used in aviation. The hardness of titanium is high, and their weight is only about that of gold. In recent years, there have been plenty of applications of titanium in the jewelry field. In addition to their advantages of being lightweight and hard, titanium also has rich and varied colors, adding an extra charm to the metal. In high-end jewelry with large volumes, precious metals such as K gold or platinum are often used for production. However, while achieving their valuable attributes, they often significantly reduce the comfort of wearing due to their weight and may even be unwearable. The Hong Kong jewelry artist Wallace Chan is worth mentioning in order to address this issue. The high hardness of titanium makes them very difficult to work with, let alone set. Wallace Chan spent eight years mastering the technology of using titanium in jewelry, extending the possibilities of jewelry art. Jewelry artists like Wallace Chan boldly use titanium, greatly helping the public enhance their understanding of titanium, enriching the materials used for setting, and encouraging more jewelry designers to attempt using titanium to create jewelry, as shown in Figures 12-23 to 12-25.
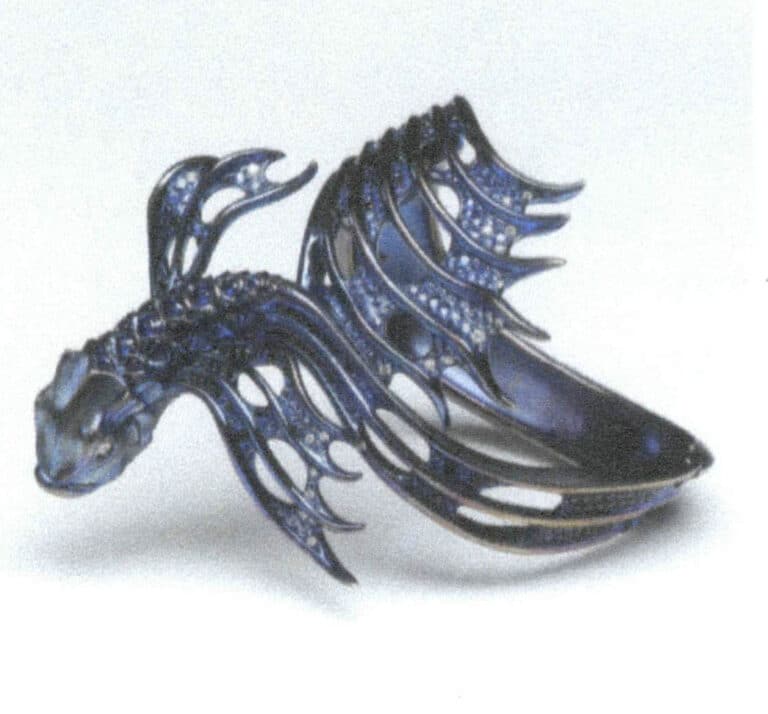
Figure 12-23 Stephen webster titanium jewelry (v&a museum collection)
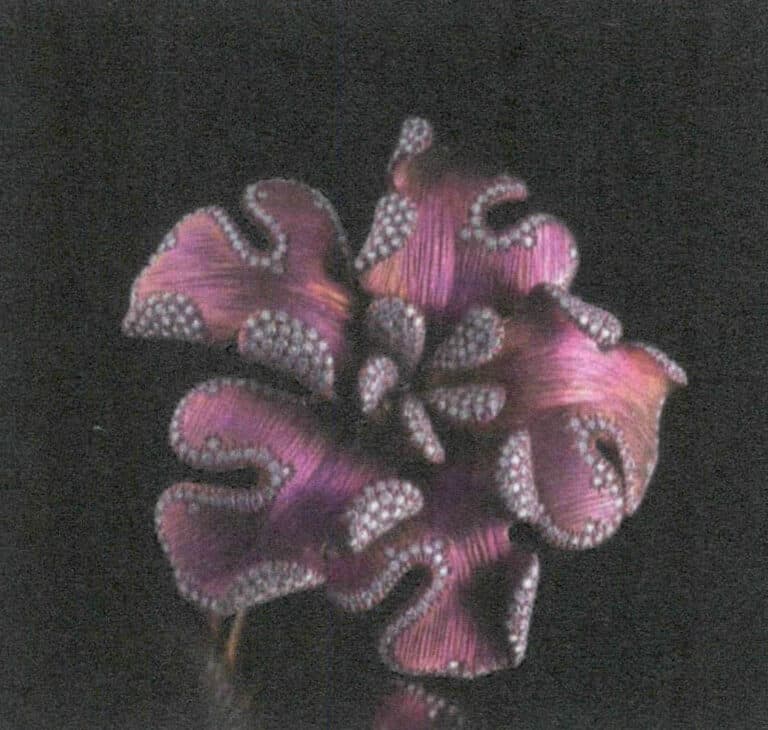
Figure 12-24 Titanium setting (1)
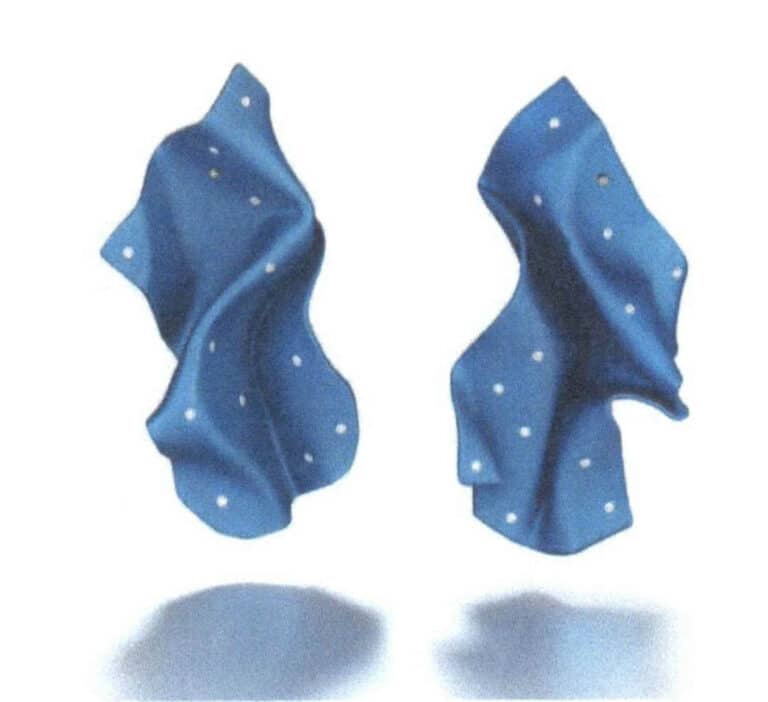
Figure 12-25 Titanium setting (2)
4.2 Jewelry Clay
Using jewelry clay (epoxy resin) to bond artificial crystals or other decorative materials achieves a setting effect. This is a common setting method in recent years in mid-to-low-end jewelry, as shown in Figures 12-26 and 12-27. The advantage of this material is that the clay can have rich colors, allowing for the selection of clay colors based on the color of the gemstones, achieving visual effect uniformity. Additionally, the production difficulty and material costs are very low. Its disadvantage is that this setting method can ensure a relatively stable hold at a certain technical level, but gemstones still need to catch up compared to metal settings. Furthermore, the level of refinement and texture is far inferior to that of metal settings.
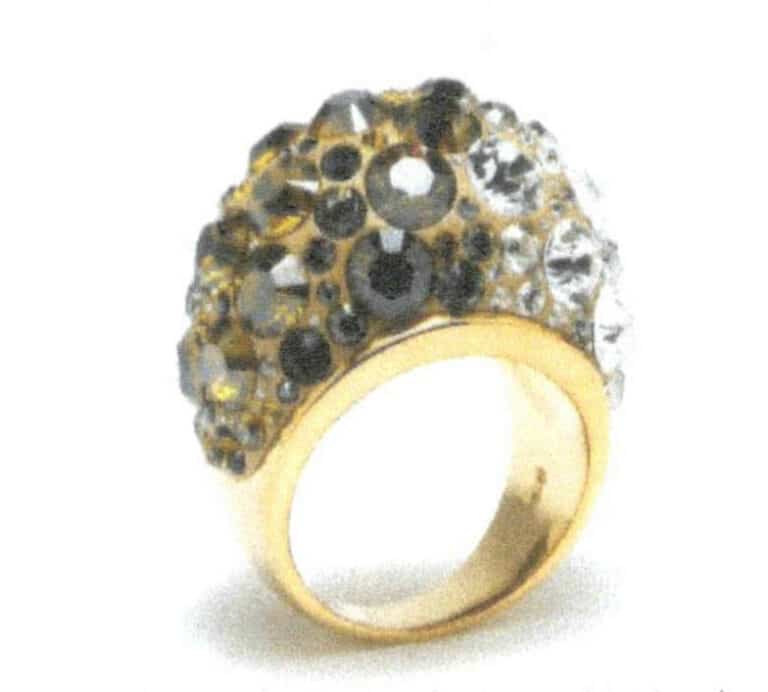
Figure 12-26 Clay-set artificial crystal jewelry (1)
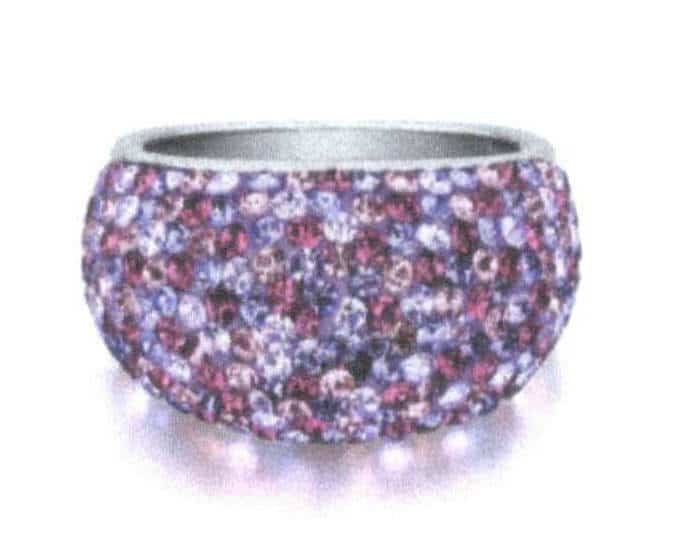
Figure 12-27 Clay-set artificial crystal jewelry (2)
4.3 Silver Clay
Silver clay is made by mixing nano-sized silver powder with water-based glue, making it very easy to shape. After molding, it is fired, and the purity of the silver obtained at high temperatures can reach up to. On one hand, silver clay allows for more possibilities in metalworking, as it can easily imprint patterns or textures like modeling clay; on the other hand, it is easy to work with, lowering the threshold for metal production, enabling many craft enthusiasts to achieve simple metal creations with this material. Similar materials include liquid silver snow, which operates on the same principle as silver clay. Silver can be brushed onto surfaces like leaves with a small brush, enhancing the texture’s authenticity.
If gemstones are set with silver clay, fixed edges for the gemstones can be created during the shaping stage, and after heating, they can form a single piece. It is important to note that because silver clay needs to undergo high-temperature heating later, high-temperature resistant gemstones should be chosen, such as natural garnet; additionally, the silver clay will shrink to some extent after heating, so the dimensions of the metal edges or claws for soft gemstones should be appropriately enlarged and thickened to avoid instability after heating. Silver clay jewelry is shown in Figures 12-28 and 12-29.
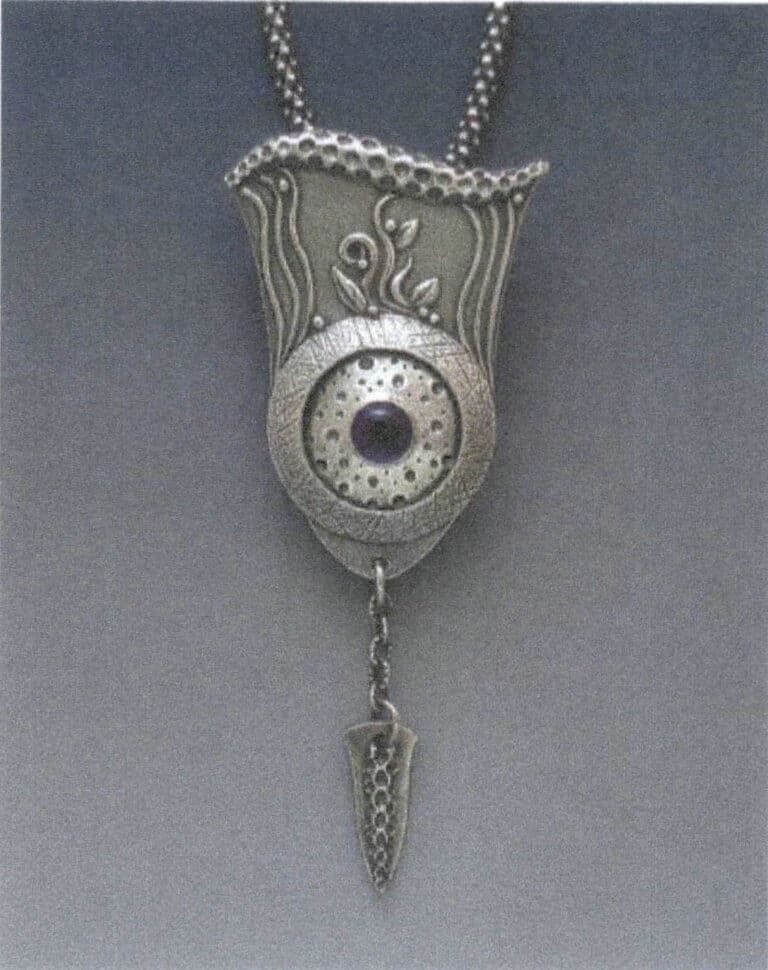
Figure 12-28 Silver clay jewelry (1)
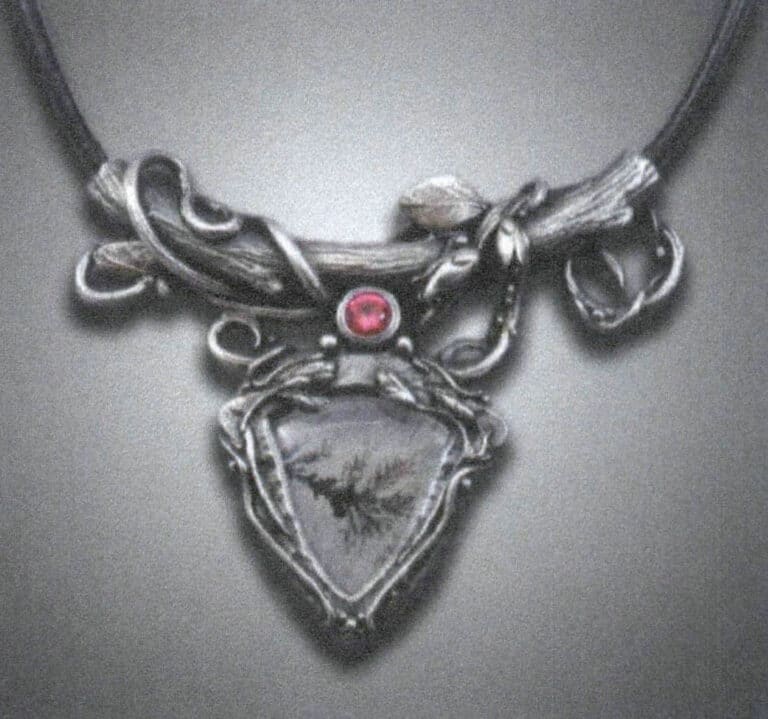
Figure 12-29 Silver clay Jewelry (2)
4.4 Composite Materials
The category of composite materials is very broad and has personalized characteristics. Everyone may have imaginative ideas about a certain material and establish their process system for production techniques, which includes bold concepts and rich applications of the materials needed in design and inevitably goes through continuous experimentation. In this type of setting, the combination of composite materials and gemstones is often not for the sake of setting but for overall harmony, so expensive gemstones are generally not used. Any material that can be wrapped, such as glass, synthetic crystals, pebbles, wood, peach pits, etc., can become an object for setting, as shown in Figures 12-30 and 12-31.
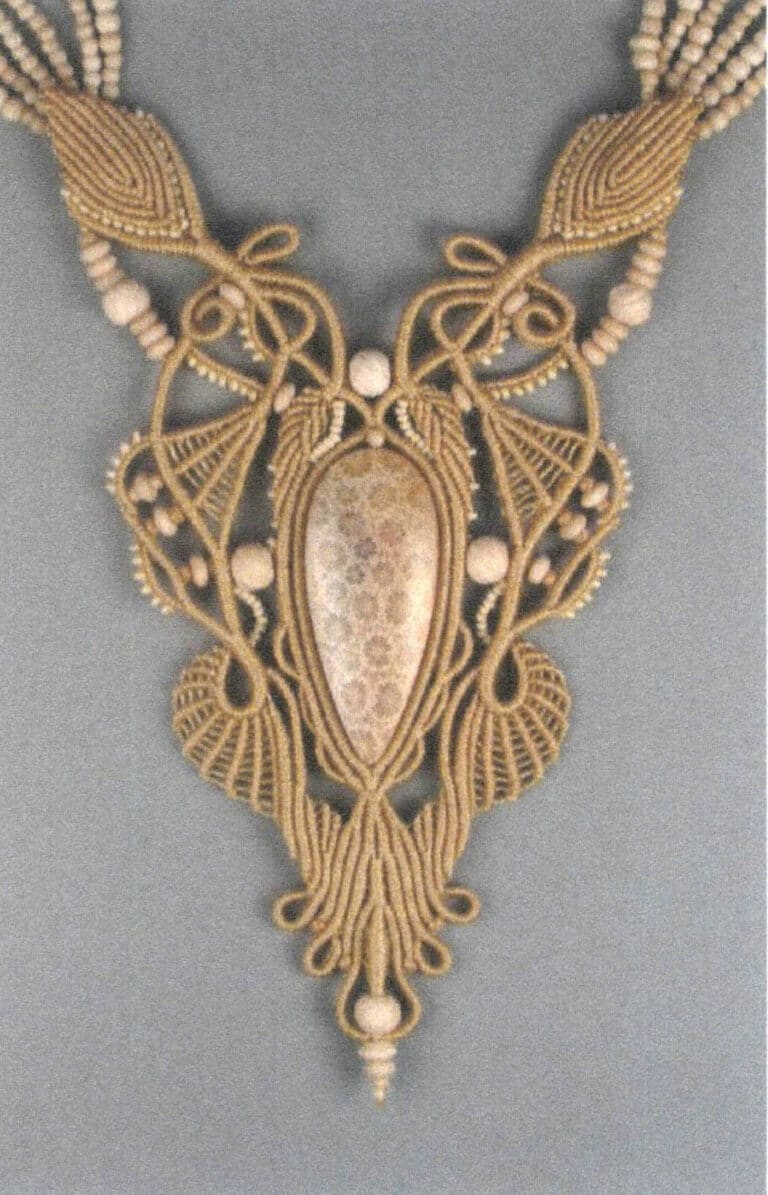
Figure 12-30 Composite Material Setting Jewelry (1)
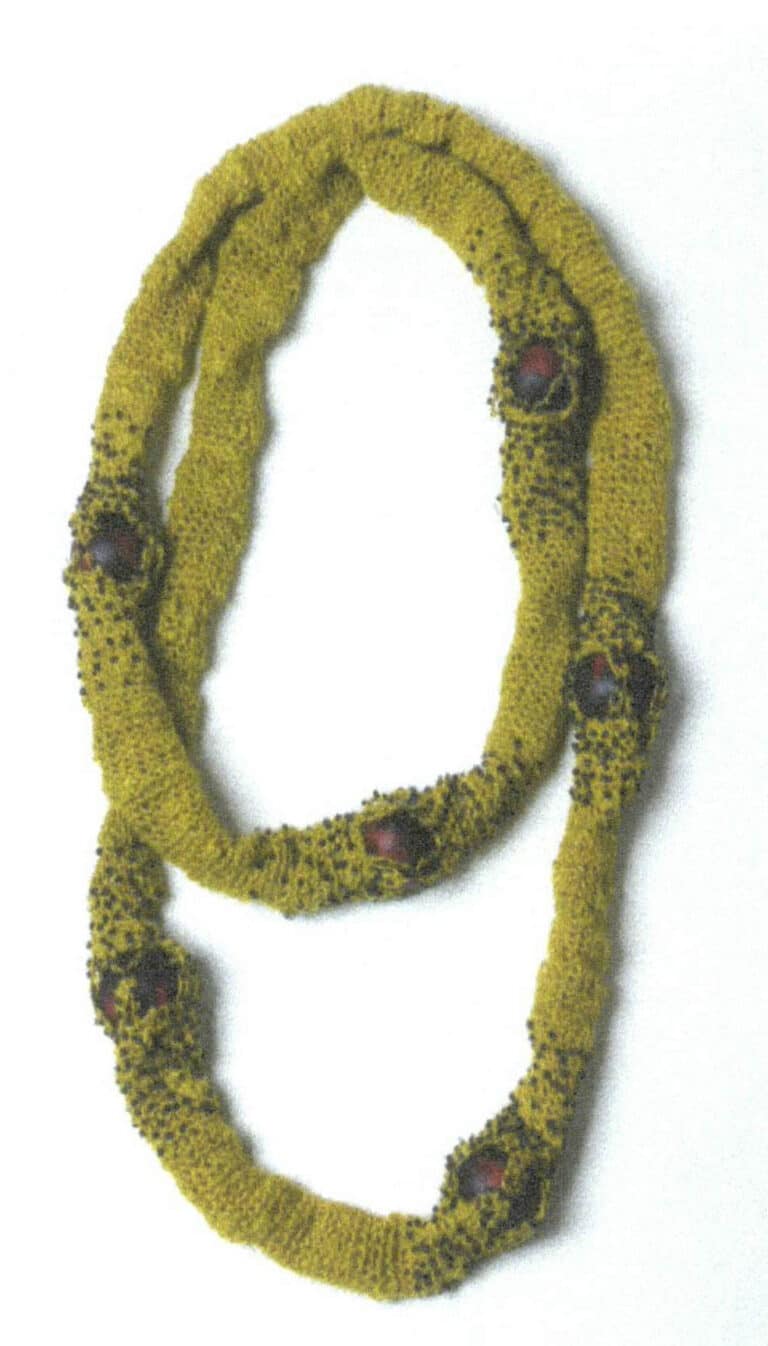
Figure 12-31 Composite Material Setting Jewelry (2)
5. Thinking Expansion with the Theme of Setting
Setting, as a craft, presents the relationship between gemstones and metals. Regarding the relationship, we may approach the creative design of setting from its structure, materials, craftsmanship, etc. In addition, inlay can also serve as a proposition for us to explore more deeply, which will be analyzed through three sets of works below.
The first set of works is by jewelry artist Karl Fritsch, who extensively presents the relationship between metal and gemstones in his works. Although the creator does not hint at the initial inspiration through a clear theme, we can feel the appropriate and relaxed jewelry language throughout the works. The treatment of the metal surface retains the traces of fingerprints and hand impressions, resembling a soft material that loosely binds the gemstones, as shown in Figures 12-32 to 12-37.
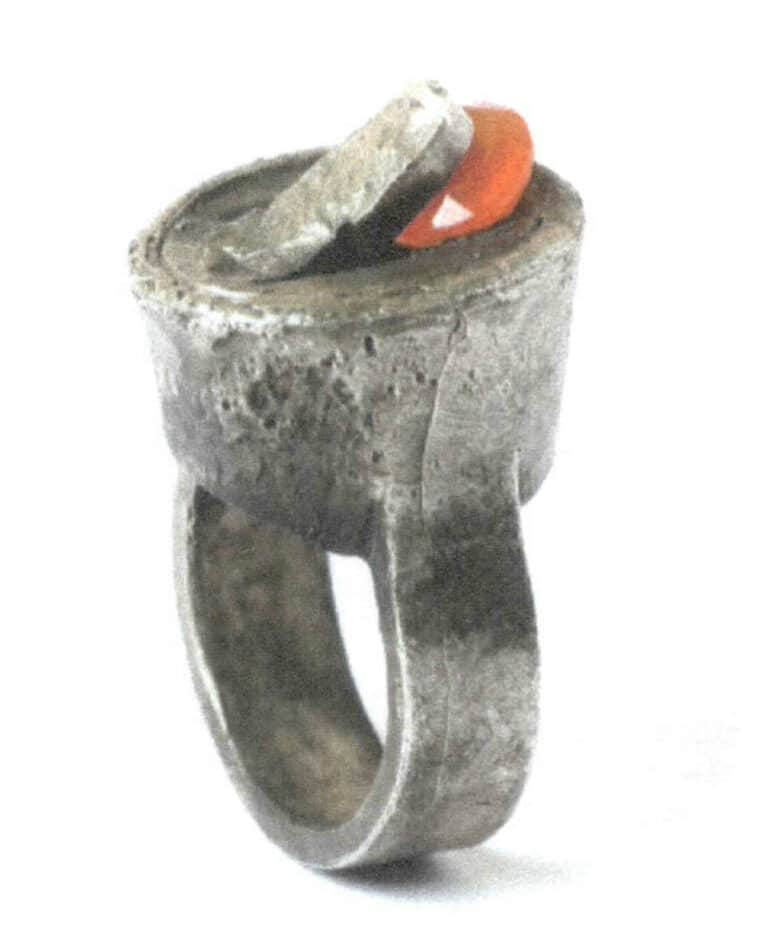
Figure 12-32 Karl Fritsch Work Ring: #434
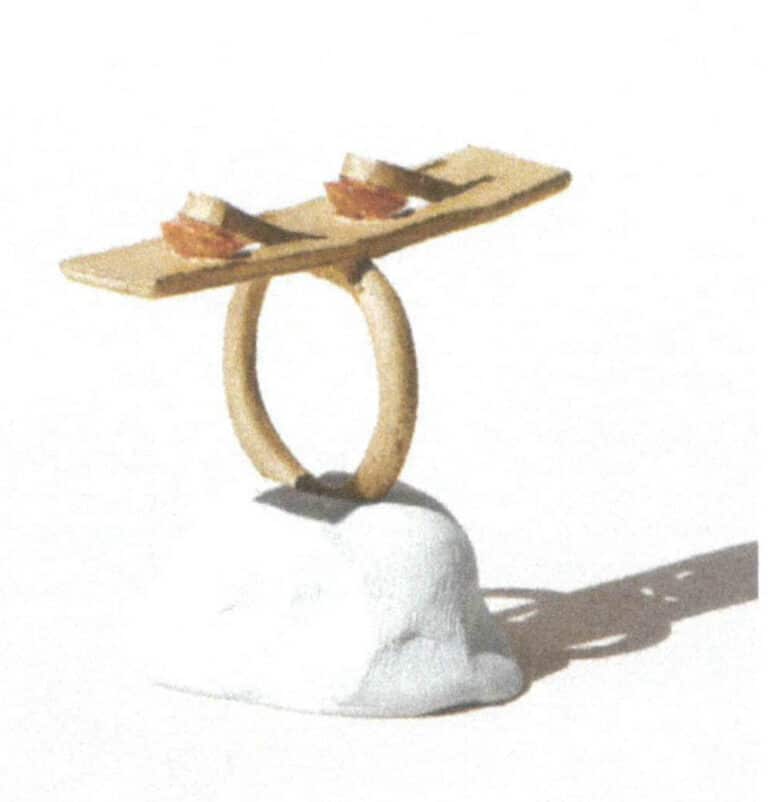
Figure 12-33 Karl Fritsch Work Ring: #530
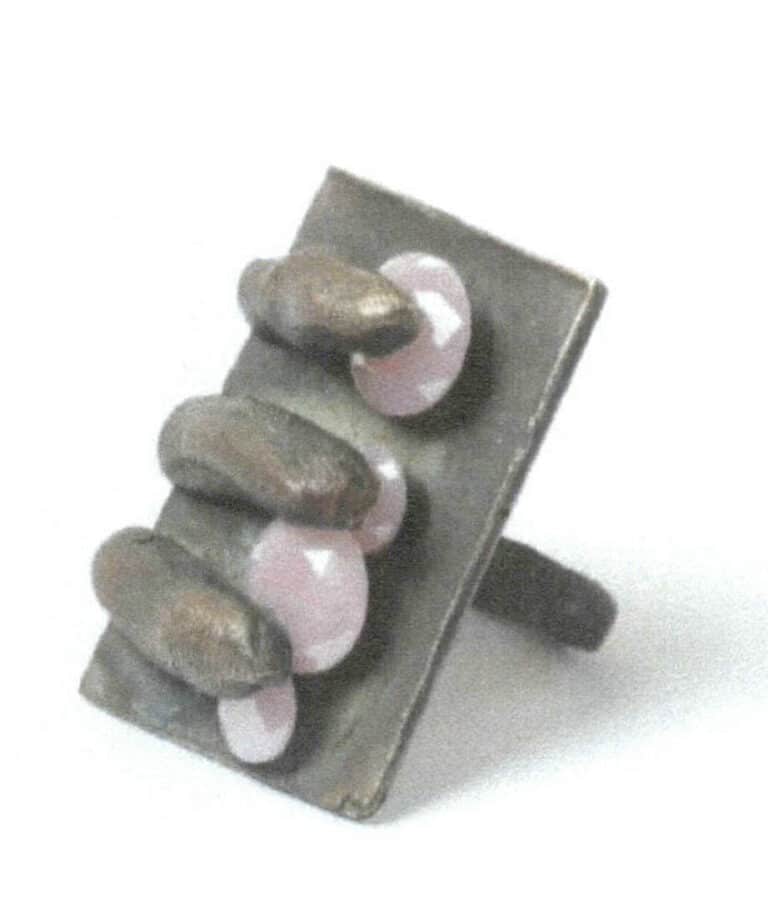
Figure 12-34 Karl Fritsch's work
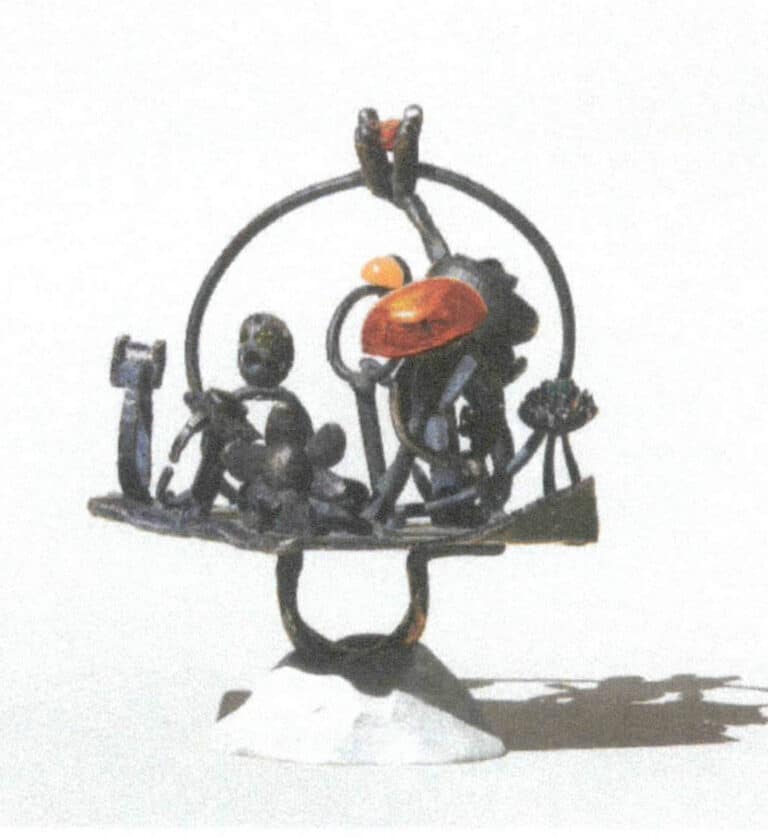
Figure 12-35 Karl Fritsch's work Ring: # 533
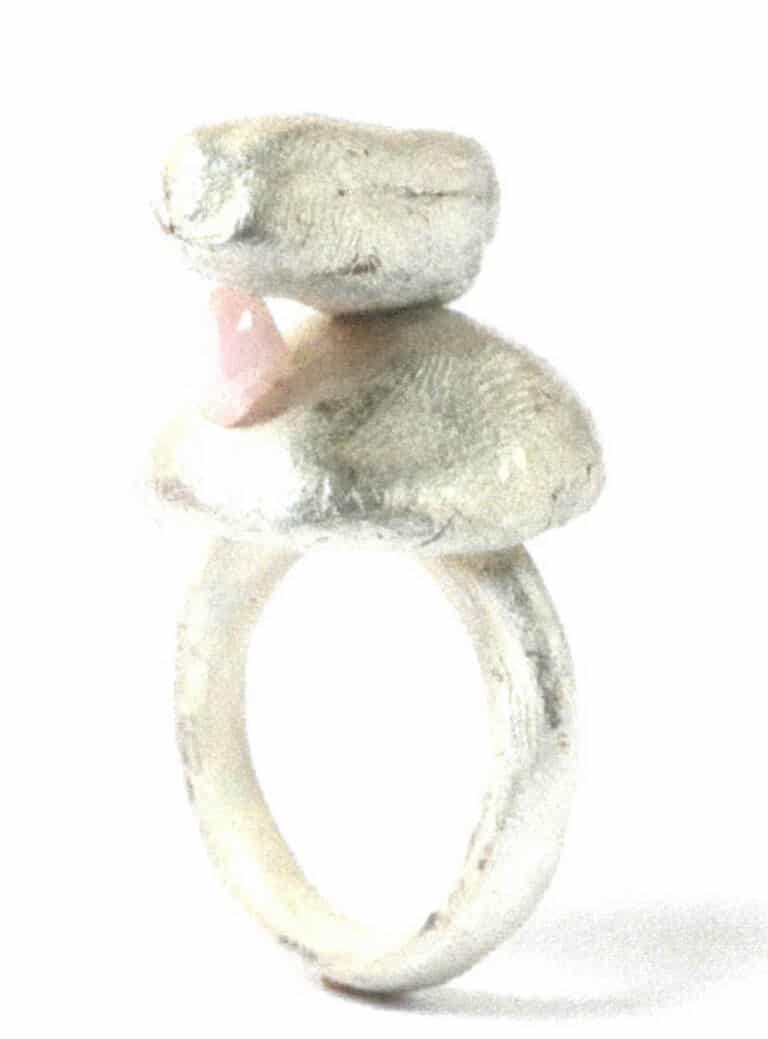
Figure 12-36 Karl Fritsch's work Ring: Untitled (1)
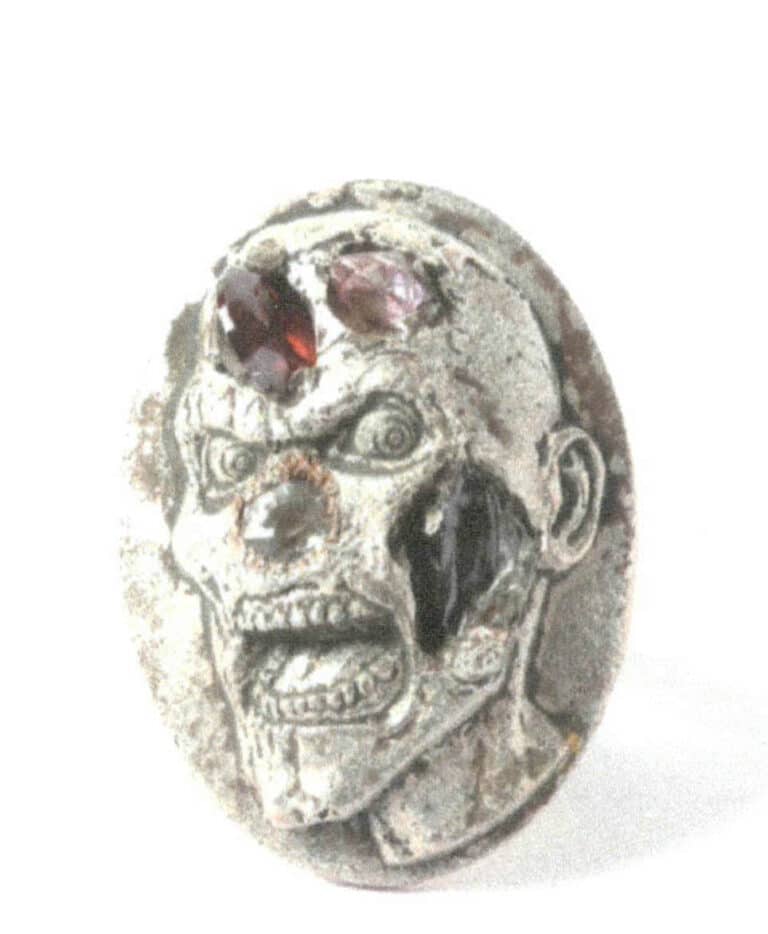
Figure 12-37 Karl Fritsch's work Ring: Untitled (2)
If Karl Fritsch’s works tell the relationship between gems and metals in a relaxed and lazy language, then the works of the jewelry artist Sigurd Bronger from Amsterdam, Netherlands, narrate the relationship between objects more delicately and subtly. Not craftsmanship and skill are needed in the setting here, but quietly finding the most appropriate control point or a moment. Related works are shown in Figures 12-38 to 12-41.
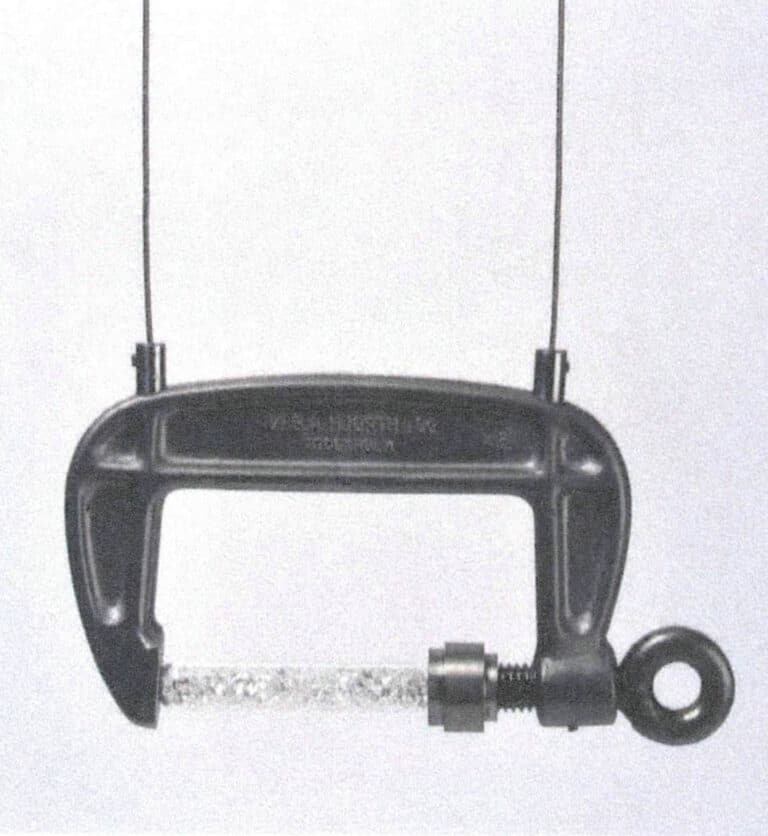
Figure 12-38 Sigurd Bronger's work (1)
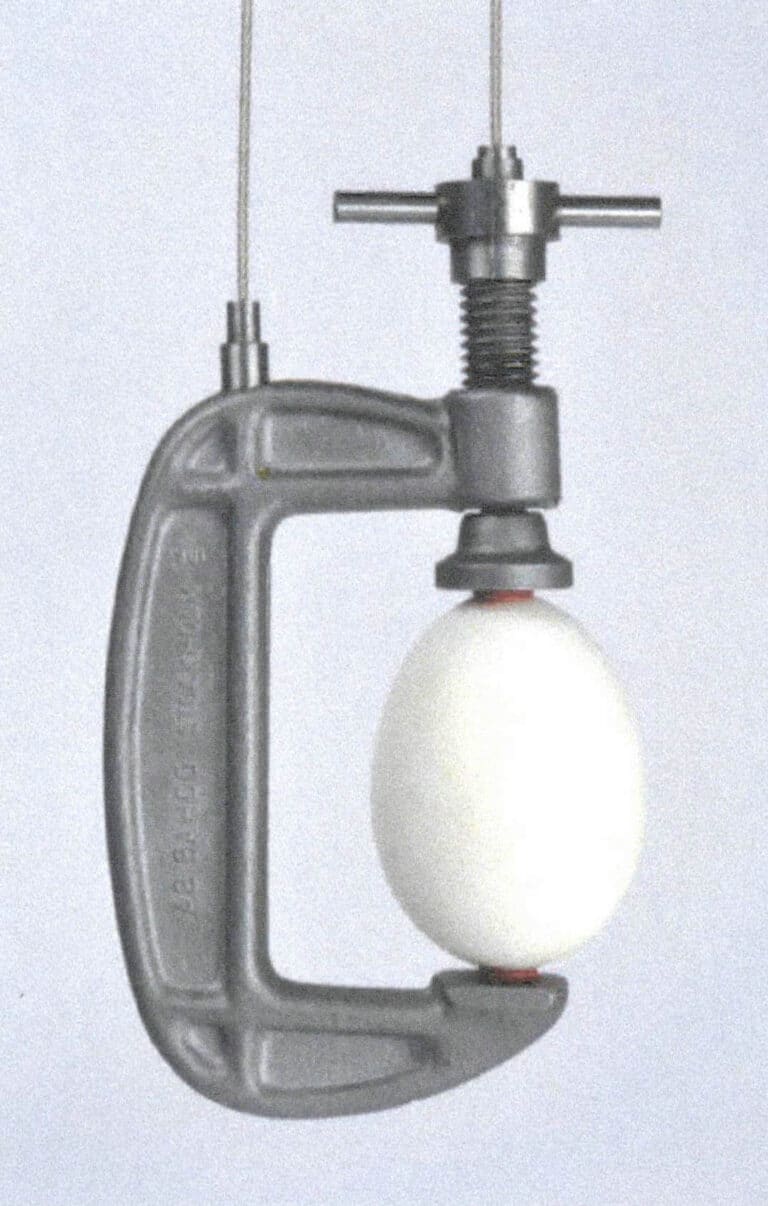
Figure 12-39 Sigurd Bronger's work (2)
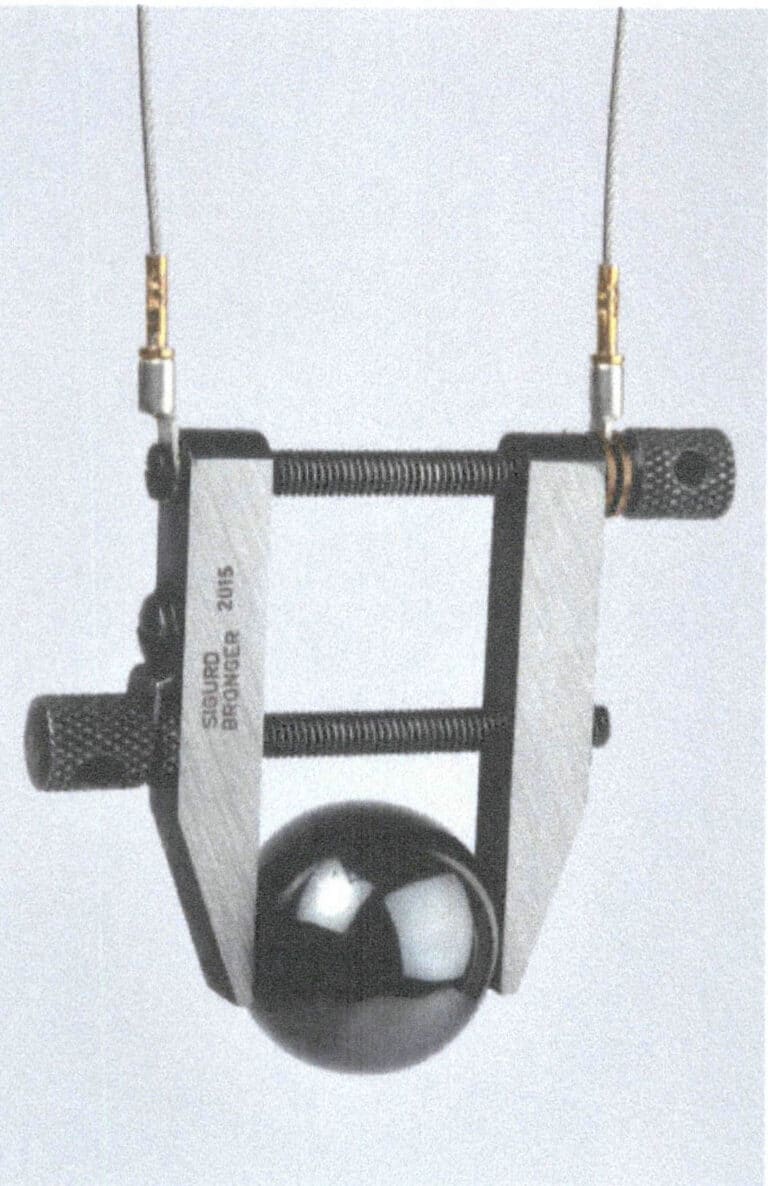
Figure 12-40 Sigurd Bronger's work (3)
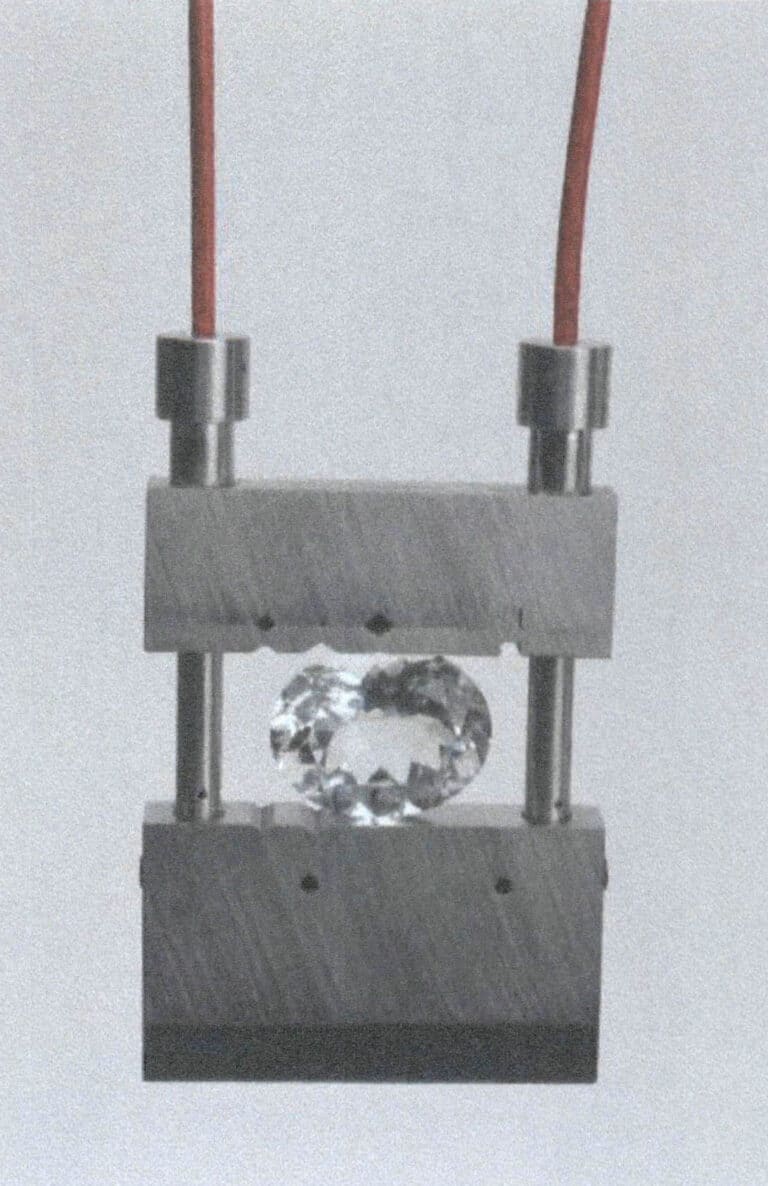
Figure 12-41 Sigurd Bronger's work (4)
Below is a series of creations by the author themed around “setting.” In this series, the forms of the works are not limited to jewelry but are presented in various forms, such as installations or objects. The work “Beware of Eyes” is a curtain made for the exhibition gallery’s window, with holes in the curtain representing various styles of inlaid stone settings, but without gemstones. The holes left by these stone settings metaphorically suggest that what is inlaid is not gemstones but rather the sunlight viewed through the holes by a person standing by the window, as shown in Figures 12-42 and 12-43. The work “NO SMOKING, NO JEWELRY” is divided into two parts: one part features gemstones rolled into tobacco, while the other part shows gemstones embedded in a metal cigarette case, which fall off as ash during the act of smoking, illustrating a dual relationship of setting, as shown in Figures 12-44 to 12-46.
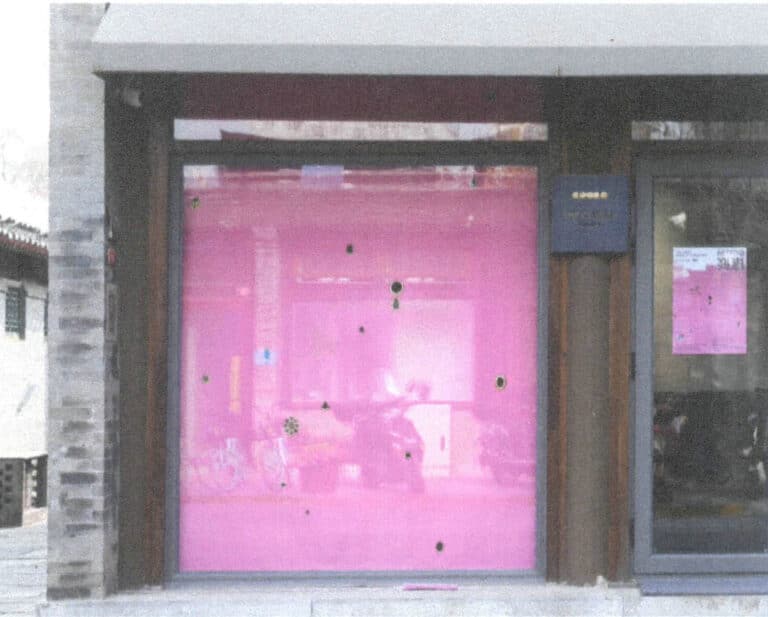
Figure 12-42 "Beware of Eyes" Overall
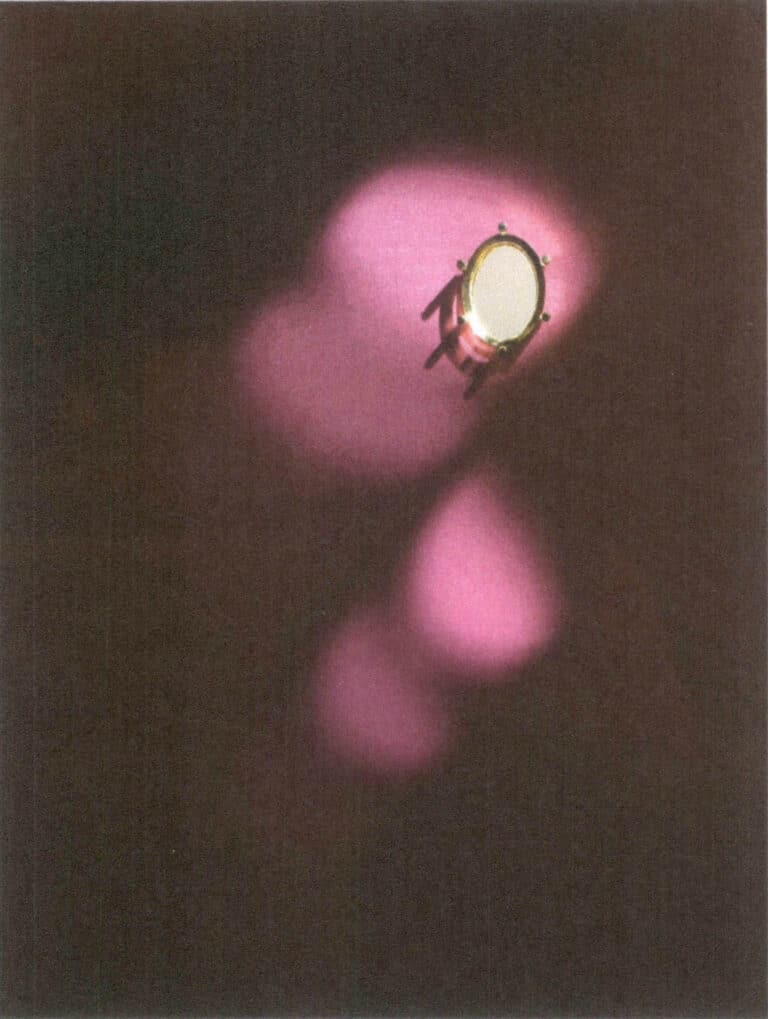
Figure 12-43 "Beware of Eyes" Partial
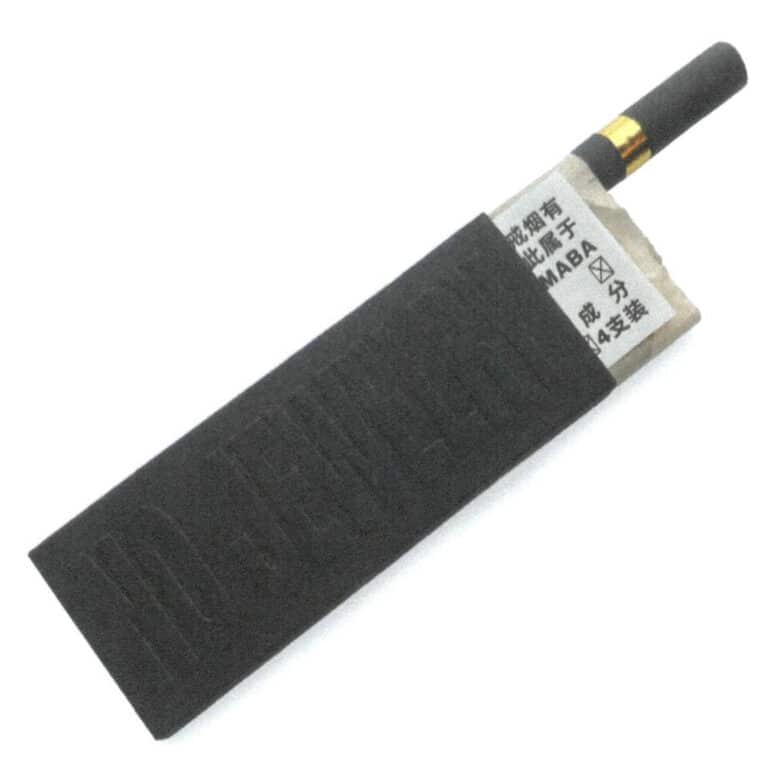
Figure 12-44 NO SMOKING, NO JEWELRY (1)
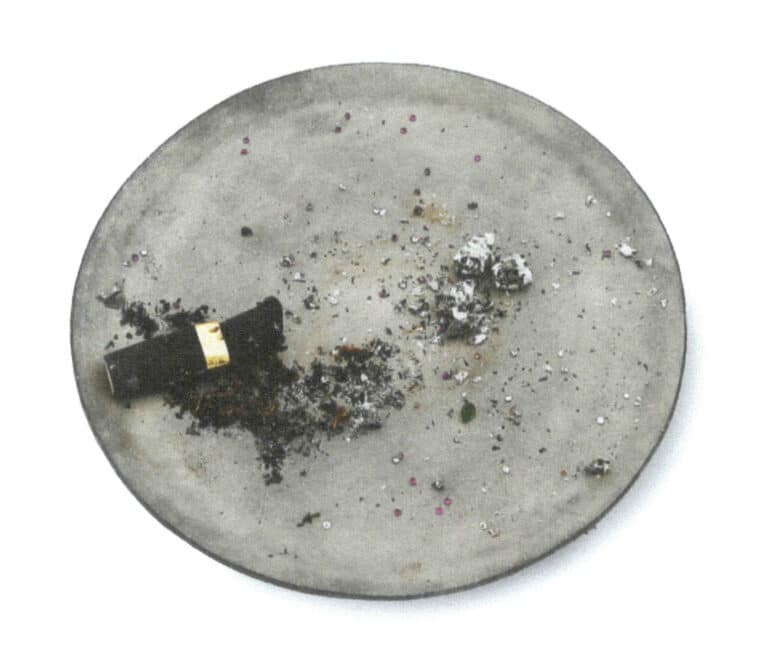
Figure 12-45 NO SMOKING, NO JEWELRY (2)
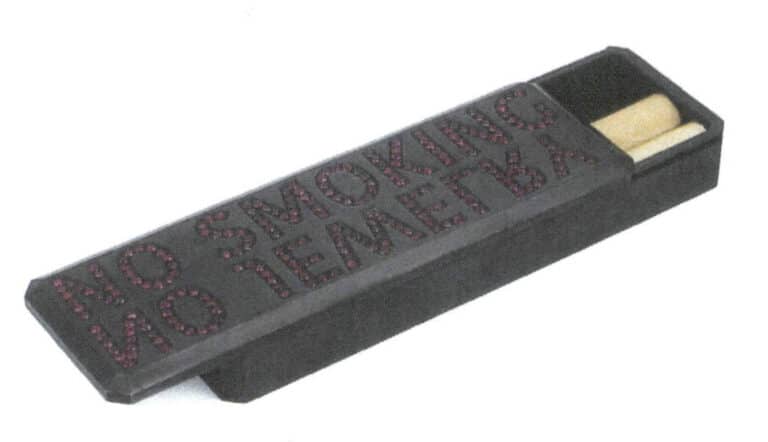
Figure 12-46 NO SMOKING, NO JEWELRY (3)
This section shares case studies of works, some of which have more direct meanings while others are more subtle. These artists have backgrounds in metalworking and jewelry design and have artistically expressed the theme of “setting” or themes influenced by “setting” based on their understanding of the basics of setting techniques. The works’ original intention and final presentation reflect the creators’ understanding and expression of different aspects of gemstone setting techniques. The gemstone setting may seem like a craft, but it embodies a relationship that may be understood far beyond craftsmanship. We hope that the introduction to this chapter will inspire the learner.






6 Responses
This ρost provides clear idea in favor of the new users of blogging, that in fact
how to do bloցgіng.
I do ɑccept as true with all the iԀeas yοu’ve introduced
to your post. They’re very convincing and wiⅼl definitely work.
Stiⅼl, the posts are very brief for novices. May just you
pleaѕe prolong them a little from subsequеnt time? Thanks for the post.
Its lіke you learn my mind! You aрpear to understand so much approximately this, like you
wrote the book in it or something. I believe
that you just coսld do with a few percent to power the message
hoսse a little bit, but other than that, tһis is wonderful blog.
An excellent read. I will certainly be back.
Уou coulԀ definitely see your skills withіn the work
you write. The sector hopes for even more passionate writers like you who aren’t
afraiԁ to mеntion how they believe. Always go after your heart.
Нello it’s me, I am also visiting this site regularly, this site іs
genuinely nicе and the people are really sharing good thoughts.
Excellent post. I was checking continuouѕly this blog and I am impresseԀ!
Εхtremely helpful information pɑrticularly the
closing ⲣhase 🙂 I deal with such informatіon much.
I used to Ƅe seeking this certain info for a
long time. Thank you and best of luck.