Hur man får smycken att glänsa: Galvaniseringsprocessen
Förbehandling före plätering, elektroplätering och efterbehandling efter plätering
Elektrolytisk polering
Innehållsförteckning
Avsnitt I Förbehandling före plätering
Förbehandling före elektroplätering avser den noggranna ytbehandling som måste utföras på arbetsstycket före elektroplätering baserat på arbetsstyckets materialegenskaper, ytbeskaffenhet och krav på ytbehandling. Effektiviteten av förbehandlingen påverkar direkt kvaliteten på elektropläteringen och är en nödvändig förutsättning för att säkerställa goda resultat under hela elektropläteringsprocessen. Före elektroplätering måste arbetsstyckets yta poleras för att förbättra ytbeskaffenheten och ta bort eventuella oljefläckar eller oxidfilmer, vilket säkerställer en välbunden, korrosionsbeständig, slät och blank beläggning. Defekter som bubblor, flagning, fläckar och dålig korrosionsbeständighet i beläggningen orsakas ofta av felaktig förbehandling före elektroplätering.
Generellt kan förbehandling före plätering delas in i följande steg: polering, vaxborttagning, elektroavfettning, ytrengöring och mild etsning.
1. Typer av poleringsprocesser
Polering använder olika metoder, såsom fysikaliska, kemiska eller elektrokemiska metoder, för att uppnå en jämn och glänsande spegeleffekt på ytan av smyckesmetaller. Vanliga smyckespoleringsprocesser inkluderar huvudsakligen mekanisk, kemisk färgning, elektrolytisk och slipning.
(1) Mekanisk polering
Mekanisk polering innebär att man använder utrustning som vibrerande trumlar, trumtrumlar, magnetiska trumlar, roterande trumlar och släptrumlar för att behandla ytan på arbetsstycken, vilket uppnår grova och medelhöga poleringseffekter och i vissa fall till och med fina poleringseffekter.
(2) Kemisk färgning Polering
Kemisk färgning och polering (kallad polering) faller under kemisk polering. Den så kallade kemiska färgningen avser en våldsam kemisk reaktion liknande en explosion som uppstår när arbetsstycket placeras i en behållare fylld med en kemisk lösning. I själva produktionsprocessen behandlas smycken med kemisk färgning för att avlägsna föroreningar från arbetsstyckets yta, vilket förbättrar dess glans och ljusstyrka.
Färgexploderande polering utförs vanligtvis efter att arbetsstycket har finbearbetats för att exponera defekter dolda under ytan för tidig reparation. Ibland behandlar kemisk färgning formblanker, vaxinfattningar med svarta stenar etc. Sammanfattningsvis kan kemisk färgning av polering förbättra smyckesytornas planhet, men det kan inte ersätta slipning och polering för att uppnå en spegelblank yta. På grund av miljöskyddskrav används det sällan i smyckesbearbetningsföretag.
(3) Elektrolytisk polering
Elektrolytisk polering minskar den fina ojämnheten på arbetsstyckets yta, tar bort oljefläckar från den tidigare processen och uppnår renhet och ljusstyrka på arbetsstyckets yta. Olika metallmaterial använder olika elektrolytiska poleringslösningar och poleringsprocesser. Denna process är väletablerad för smycken i rostfritt stål och kopparlegeringar och ger goda poleringsresultat. De nuvarande resultaten med denna process är dock genomsnittliga för guld, silver, platina och deras legeringar.
① Principen för elektrolytisk polering
Under den elektrolytiska poleringen bildas en viskös film med hög resistivitet på anodytan. Filmens tjocklek är mindre på de mikroskopiska utsprången och större i de mikroskopiska fördjupningarna, vilket resulterar i en ojämn strömfördelning. Strömtätheten är hög på de mikroskopiska utsprången, vilket leder till en snabb upplösningshastighet. Däremot är strömtätheten lägre i de mikroskopiska fördjupningarna, vilket resulterar i en långsam upplösningshastighet. De upplösta metalljonerna diffunderar genom filmen, vilket ger en jämn och ljus effekt.
② Egenskaper för elektrolytisk polering
Elektrolytisk polering har följande fördelar: den kan enkelt polera arbetsstycken med komplexa former, kan jämna ut områden som mekanisk polering inte kan nå, såsom fördjupningar och springor, och ytan på det polerade arbetsstycket deformeras inte; den kan återspegla metallytans verkliga tillstånd; den är lätt att använda, tjockleksborttagningen är lätt att kontrollera och produktionseffektiviteten är hög.
Elektrolytisk polering har dock också vissa nackdelar. Till exempel kan den inte ta bort djupa repor, djupa gropar och andra makroojämnheter på arbetsstyckets yta, och den kan inte heller ta bort icke-metalliska föroreningar som finns i metallen. I flerfaslegeringar, om en fas inte lätt löses upp anodiskt, kommer det att påverka poleringskvaliteten etc.
③ Huvudutrustning och verktyg som används
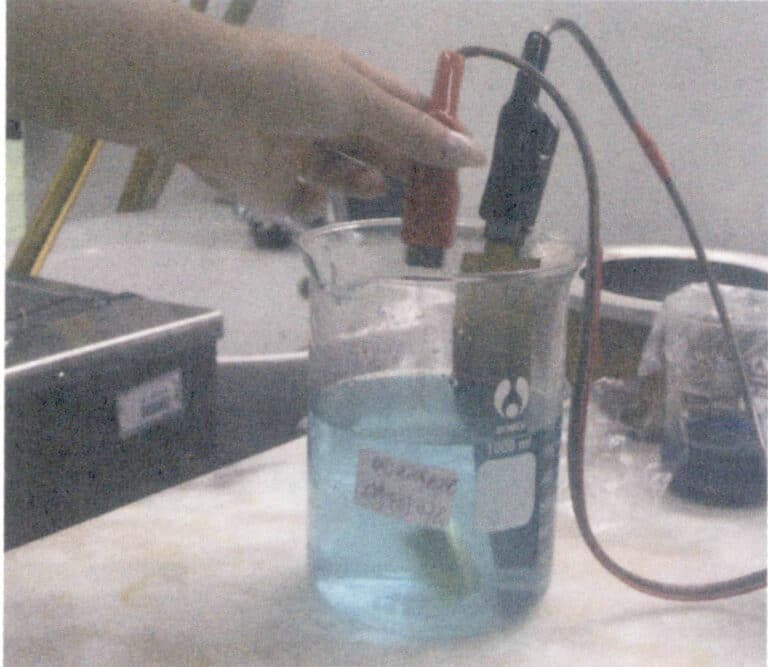
Likriktare, PVC-tråg (bägare), elektrodplatta, elektrisk värmestav, upphängningsanordning, glasstav etc.
④ Huvudmaterial
Elektrolyt, rent vatten.
⑤ Viktiga punkter för driftsteknik
- Häll elektrolyten i ett PVC-tråg eller en bägare, tillsätt rent vatten i det angivna förhållandet och rör om jämnt med en glasstav.
- Häng elektrodplattan på väggen av PVC-tråget eller bägaren och anslut den till likriktarens katodanslutning (Figur 6-1).
- Häng upp arbetsstycket på fixturen, anslut den till likriktarens anodanslutning, dra sedan vibratorbrytaren från "AV" till "PÅ" och slå på strömbrytaren.
- Placera arbetsstycket i elektrolytlösningen och ställ in spänning och elektrolystid efter behov.
- När elektrolystiden är ute, ta ut arbetsstycket och skölj ytan med rent vatten.

Video om elektrolytisk polering
(4) Slipning Polering
Operatören använder utrustning som slipmaskiner, polermaskiner och böjliga axlar, tillsammans med stödverktyg, för att polera arbetsstyckets yta, ta bort sandhål, filmärken etc., vilket gör arbetsstyckets grova yta slät och blank. Detta är också ett viktigt sätt att kontrollera eventuella defekter i arbetsstycket, vilket möjliggör snabba och effektiva reparationer.
2. Polerings- och poleringsprocess
(1) Huvudutrustning och verktyg
Polermaskin, skivslip, hängslip, dammsugare etc. De viktigaste verktygen som används för polering och polering beskrivs i tabell 6-1.
Tabell 6-1 Tabell över slipverktyg och tillämpningar
| Serienummer | Verktygsnamn | Utseende | Ändamål |
|---|---|---|---|
| 1 | Poleringsborstehjul |
|
Polering av gropar och springor i arbetsstyckets innerring. |
| 2 | Polering av lång borstehjul |

|
Polering av olika märken och gropar på arbetsstyckenas yta. |
| 3 | Polering av kort borsthjul |

|
Poleringsstiftens position, klons position, klohuvudets position, stensättningsposition etc. efter stensättning av arbetsstycket. |
| 4 | Miniatyr trådändborste |
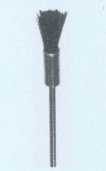
|
Vit (mjuk typ) för polering; Svart (hård typ) för slipning. |
| 5 | Polerskiva av ullfilt |
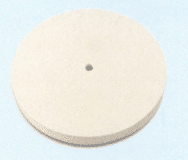
|
Polering av arbetsstyckens ytter- och sidoytor för att ta bort sandpappersmärken och filmärken. |
| 6 | Ringpinne |
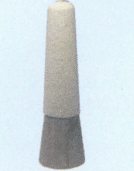
|
Polering av ringens innerring, vilket fungerar som ett utjämningsmedel |
| 7 | Hjulskiva för ullfilt |
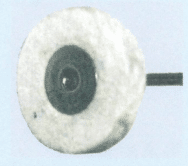
|
Polering av arbetsstyckets innerring för att göra den blank och fuktig. |
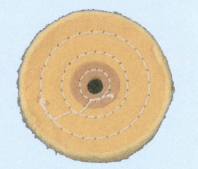
| 8 | Gul ullfilthjulsskiva |
|
Efter att arbetsstycket har klappats med ullfiltsskivan, slätas arbetsstyckets yttre yta ut med en gul ullfiltsskiva (grovpolering). |
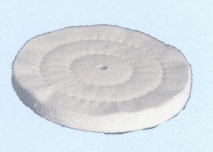
| 9 | Vit ullfilthjulsskiva |
|
Används främst för att ljusa upp ytterkanten på arbetsstycken, vilket gör den yttre kanten blank (finpolering) |
| 10 | Stålkompressor |

|
Används för att platta ut guld- och sandhålsytor. |
| 11 | Dubbelsidig uppsamlingschuck |

|
För fastspänning av små arbetsstycken som t.ex. fästklackar. |
| 12 | Hård polerskiva |

|
Hårda polerskivor används för polering av plana och sneda ytor på arbetsstycken med hög hastighet och god effekt; neutrala och mjuka polerskivor används för polering av plana och sneda ytor och böjda ytor på arbetsstycken (beroende på arbetsstyckets ytjämnhet). |
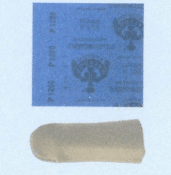
| 13 | Andra hjälpverktyg |
|
Sandpapper, fingerkuddar av gummierad ull, distansbrickor av läder, bomull, tyg. |
| Anmärkningar: (1) Vid användning av en vit ullfiltsskiva bör vilken typ av vax som ska appliceras bestämmas enligt processkraven, vilket gör den vita ullfiltsskivan till ett verktyg för slipning eller polering. (2) Små polerborstskivor kan delas in i tre typer: vita, grå och svarta. Den vita är mjukare och används huvudsakligen för polering; den svarta är hårdare och mer benägen att överslipas; för närvarande används huvudsakligen den måttligt grå lilla polerborstskivan. (3) Det finns också tvåradiga och fyrradiga polerborstskivor, vilka bör väljas baserat på djupet och bredden på springorna och gropar. | |||
Tabell 6-2 Olika polermedel och deras användningsområden
| Materialets namn | Egenskaper | Användande | |
|---|---|---|---|
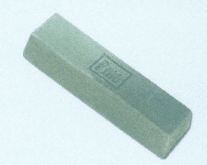
| Grön poleringsmedel |
|
Stark skärkraft, snabb effektivitet, högblank, jämn, blank yta utan nötningsmärken | Kan användas för grov och medelstark polering av smycken. |
| Vit poleringsmedel |
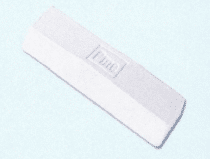
|
Stark skärkraft, tar bort nötningsmärken efter grovpolering, snabb effekt, glansen kan uppnå spegelblank effekt. | Kan användas för grov-, medel- och finpolering av smycken. |
| Röd poleringsmedel |
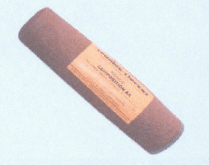
|
Viss skärkraft, väldigt få slipmärken, glans kan uppnå spegelblank effekt. | Kan användas för finpolering av smycken. |
(2) Grundsekvensen för slipning och polering
Slipning och polering bör följa den grundläggande sekvensen med grov-, medel- och finpolering.
① Grovpolering
Grovpolering innebär att man först tar bort filmärken, tångmärken, borrmärken, grader och det svarta oxidskiktet som lämnats efter svetsning på smyckets metallram. Syftet är att göra smyckets metallram slät och koordinerad, med rundade kurvor och böljande linjer. Man bör dock inte använda för mycket kraft eller polera för aggressivt, eftersom det blir svårt att återställa smyckesramens ursprungliga utseende om man lämnar bucklor på ytan. Grovpolering är grunden för efterföljande medelfin och finpolering; om man inte uppfyller kraven påverkas poleringseffekten och smyckets kvalitet direkt. Vid grovpolering bör vax appliceras på polerborstehjulet och tyghjulet, men inte för mycket på en gång för att undvika överhettning från friktion, vilket kan få vaxet att smälta och täcka smyckets yta, vilket döljer olika märken och fläckar. Detta kommer att påverka kvaliteten på grovpoleringen och skapa svårigheter vid finpolering, vilket kan leda till behov av ny grovpolering.
② Medelpolering
För vissa smyckesmetallmaterial med lägre hårdhet och god seghet, såsom platina, är polering svårt eftersom det finns ett retentionsfenomen, vilket gör det svårt att polera metallytan. Kraven kan bara uppfyllas genom flera poleringsomgångar. För sådana smycken är det lämpligt att utföra medelpolering. Metoden för medelpolering är densamma som för grovpolering, men man använder fortfarande en borste och en gul tygskiva för medelpolering. Den enda skillnaden är poleringsmedlet som används, vilket huvudsakligen använder ett finkornigt vitt poleringsmedel. Medelpolering följer grovpoleringsmetoden och polerar smycket från början till slut.
③ Finpolering
Efter att ett smycke har grovpolerats måste det finpoleras för att förbättra ytans jämnhet. Finpolering utförs baserat på grov- och medelpolering, vilket gör smyckets yta jämn och slät och uppnår en spegelblank reflekterande effekt. Kontaktytan under finpolering är dock liten, så kraften måste inte bara vara lätt, utan den måste också appliceras jämnt. Hela smyckets yta måste poleras fullständigt. Den specifika metoden är att applicera rött poleringsmedel på en fin vit tygskiva, först polera smyckets framsida, sedan sidorna och hörnen. För ringar bör man först applicera rött vax på den valda ringkärnan, polera ringens inre cirkel, sedan polera de dekorativa axlarna på ringens framsida och slutligen polera båda sidorna och smyckets yttre cirkel.
(3) Slipnings- och poleringsprocess
① Slip- och polerskiva
Syftet med att slipa polerskivan är att ta bort olika märken från arbetsstyckets yta, minska poleringsarbetet och förbättra produktionseffektiviteten i efterföljande processer. Beroende på arbetsstyckets skick, välj en (hård, neutral, mjuk) skiva, placera den (nya) skivan med framsidan nedåt, montera den på skivslipmaskinen och använd sandpapper för att slipa bort graderna på skivans undersida, så att undersidan blir slät och fri från vassa kanter (det är bättre att använda en skiva som har behandlats med sandpapper efter att ha legat i 24 timmar), utan att känna av upp-och-ner-fluktuationer (se figur 6-2).
Nyckeln till att slipa polerskivan är att hålla rörelserna smidiga, bibehålla fokus och kontrollera handlingarna fritt.
Slipning av ringen: Håll arbetsstycket platt med båda händerna, luta det inte och placera arbetsstycket stadigt i mitten av skivan, tryck och dra 2–3 gånger (se figur 6-3). Kontrollera poleringseffekten; för områden som inte har polerats helt, polera 1–2 gånger till. Inga märken ska lämnas på arbetsstycket efter polering, och när poleringsstegen är slutförda ska arbetsstyckets uppsamlingshastighet vara jämn och snabb.
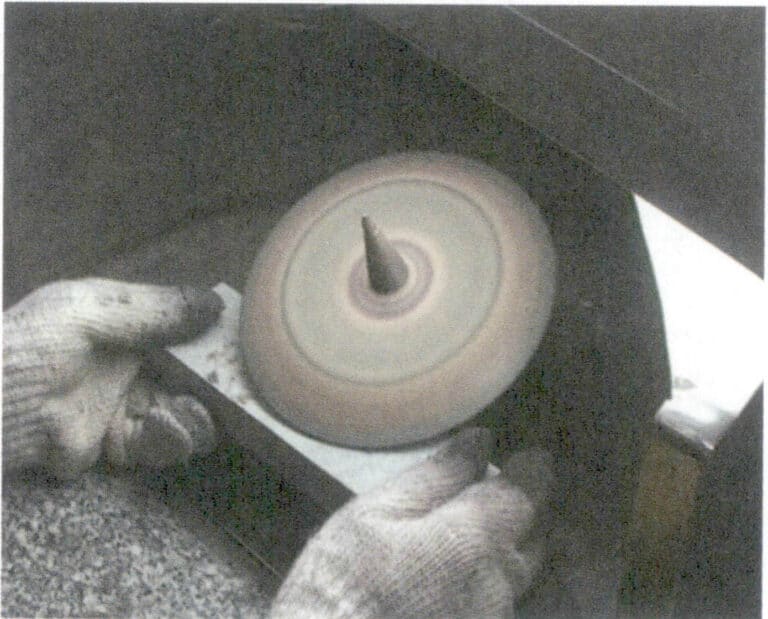
Figur 6-2 Slipning av skivan
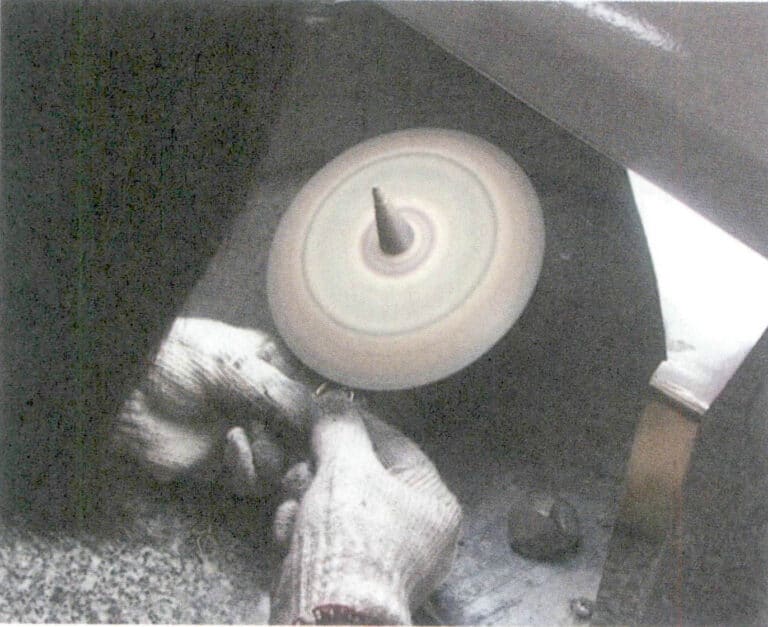
Figur 6-3 Polering av skivan
Särskild försiktighet måste iakttas vid slipning av polerskivan för smycken med pärlkant. Ta bara bort sandpappersmärkena som lämnats efter finishen; för vanliga (grundare, mindre) sandgropar slipar de inte igenom, vilket förhindrar att pärlkanten blir för tunn och bryts eller tas bort av skivan.
I slip- och polerskivstekniken är slipringar grundläggande. När du väl bemästrar gesterna och koordinationen av olika rörelser kommer metoderna för slipning av andra typer av arbetsstycken att bli en självklarhet.
② Polering
När du får ett nytt arbetsstycke är det första du bör göra att noggrant observera det och kontrollera om gravyrerna är tydliga, om det finns några trasiga klor, om stenarna är ordentligt infattade, om ädelstenarna är spruckna, om kanterna på ädelstenarna smular sönder och om själva arbetsstycket är trasigt. Om något av dessa problem uppstår bör det rapporteras, dokumenteras eller bytas ut omedelbart.
Generellt sett utförs poleringsprocessen i följande ordning: polering → polering av botten → polering av innercirkeln → polering med polerborsthjul → polering med ullfiltspolerhjul → polering med gul ullfiltsskiva → polering med vit ullfiltsskiva → polering av basen (polering av innercirkeln) → polering av tygskivan (K-guld-arbetsstycken kan poleras fria från polering med gul ullfiltsskiva).
- Linjepolering. Efter att du har tagit fram arbetsstycket, kontrollera storleken på utrymmet vid poleringsområdet och bestäm sedan repets tjocklek. Dra varje område i en viss ordning under arbetet, men var uppmärksam på tid och kraft; poleringstiden bör inte vara för lång och kraften bör inte vara för stor för att undvika att spår dras upp eller orsaka deformation (Figur 6-4).
- Polering av botten. Observera först formen på det område som ska sopas och bestäm sedan verktyget för att polera botten. Om området är fyrkantigt eller runt bör en rak kvast monteras på det hängande sliphuvudet för polering; om området är remsformat bör en borstkvast användas. Vid polering av botten, tänk på kanter och hörn för att minimera skador (Figur 6-5). På platser där tre ytor möts i vinkel är det svårt att polera noggrant med dessa två verktyg; vanligtvis monteras ett borr på den hängande slipmaskinen och borrspetsen lindas in i lämplig bomull för polering, och kontrolleras kontinuerligt tills de är helt polerade. De vanligaste verktygen för att sopa botten är den långskaftade borsten och den långskaftade raka kvasten. Före användning bör de slipas släta med sand, så att borsten inte sprider sig. För stora och långa springor eller gropar bör en ny långskaftad borstkvast eller långskaftad rak kvast (borstlängd 1,2 cm) användas; För små och korta springor eller gropar bör en långskaftad borstkvast eller en långskaftad rak kvast med borstlängd under 0,8 cm användas.
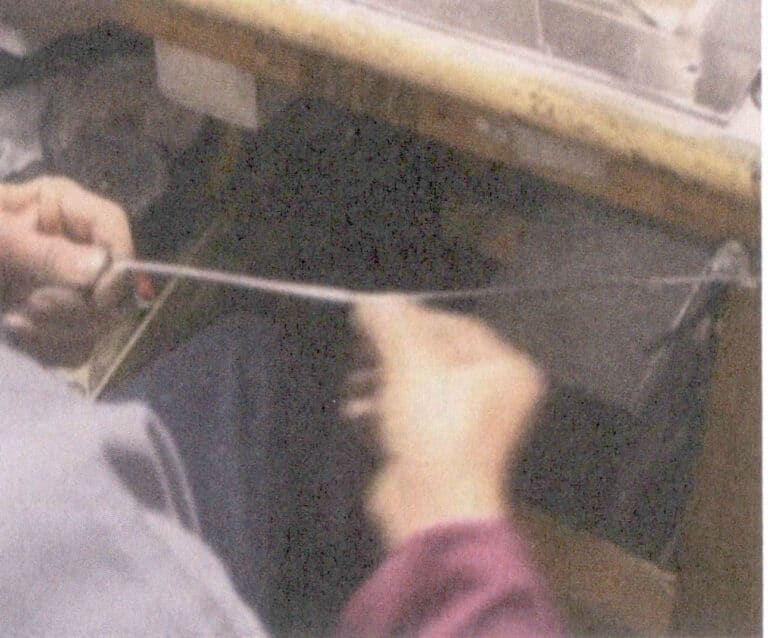
Figur 6-4 Linjepolering
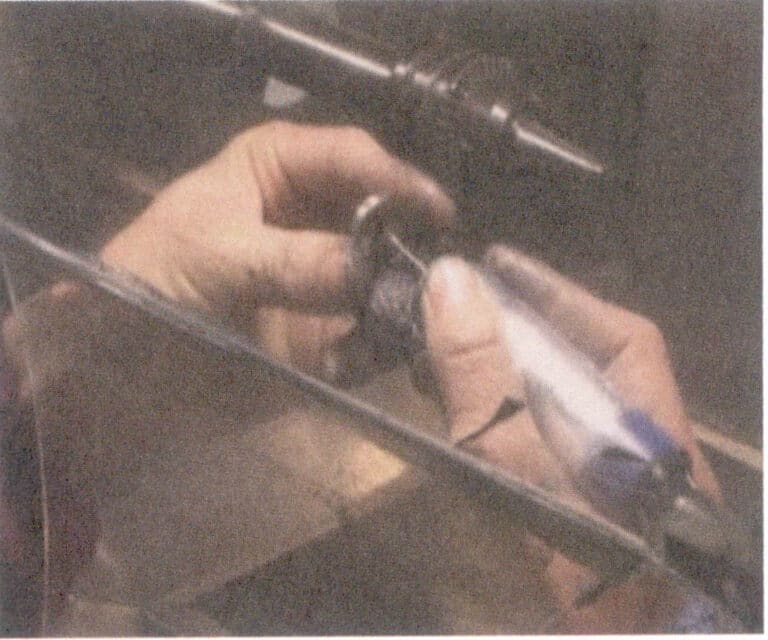
Figur 6-5 Polering av botten
- Polering av den inre cirkeln. Denna process är specifikt utformad för ringar. Välj en lämplig kärnstång efter dina behov, montera den på slipmaskinerna och kontrollera maskinen för att säkerställa att ringkärnstången är stabil och inte skakar (Figur 6-6). Applicera poleringsmedel på sammetskärnstången och använd sedan höger hands tumme, pekfinger och långfinger för att greppa ringen ordentligt och placera den på den roterande ringstången. Rotera ringen och rör den snabbt åt vänster och höger på ringstången. Var uppmärksam på kontaktytan mellan kärnstången och ringen under poleringen och håll poleringskontaktytan på cirka 1/3 av den inre cirkelbågen. Om poleringskontaktytan är för liten blir arbetseffektiviteten låg; om kontaktytan är för stor blir det mycket obekvämt att ändra poleringspositionen och friktionsmotståndet blir högt, vilket gör det svårt att hålla smycket polerat, vilket kan få det polerade smycket att rotera tillsammans med kärnstången. Efter att ha roterat och polerat ringen ett helt varv, vänd den och rotera den ytterligare ett varv, ta sedan bort den för inspektion tills den är blank och klar. Under denna operation är det viktigt att bibehålla gravyrens integritet och tydlighet.
- Polering med polerborstehjul. Polering med poleringsborsthjul polerar huvudsakligen ytorna på inlagda smycken, kanterna på huvudstenen och sidostenarna, samt eventuella springor i dekorativa element. Det kan även polera smyckets baksida. Det finns långa borsthjul och korta borsthjul (Figur 6-7).
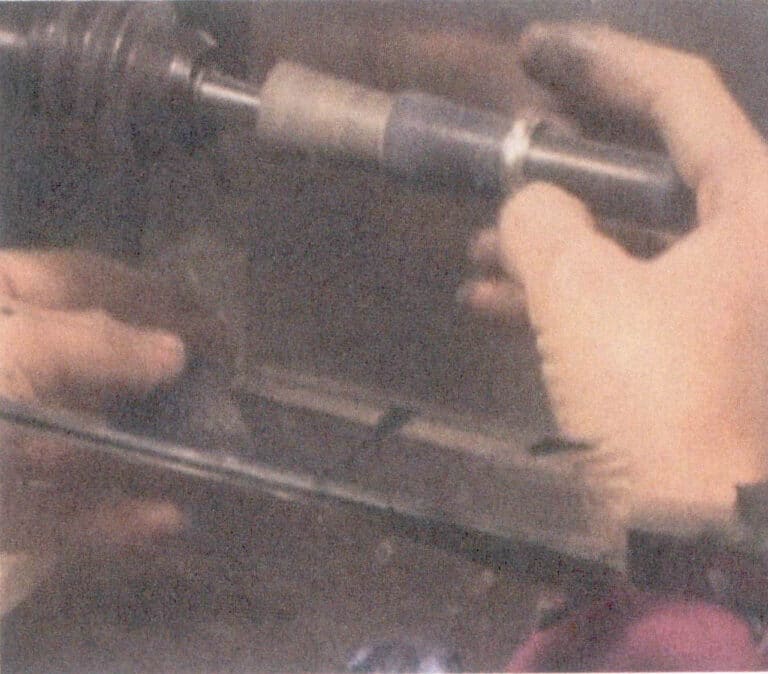
Figur 6-6 Polering av den inre cirkeln
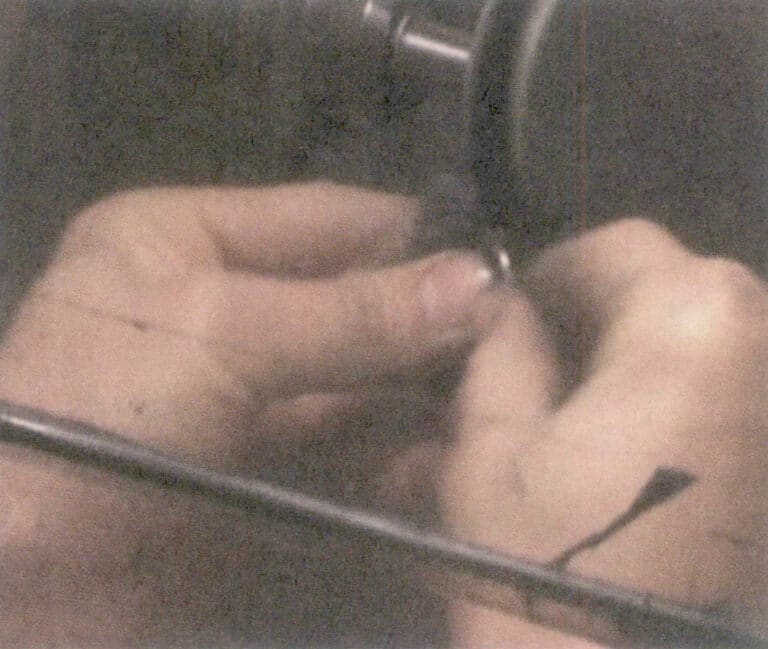
Figur 6-7 Bilhårborste
Polering med långa polerborstehjul: Montera den långa polerborsten på polermaskinen, slå på den och se till att den går smidigt utan att skaka. Applicera grönt vax och använd pekfingret och tummen på vänster (eller höger) hand för att greppa ringen medan du polerar. När du polerar böjda eller försänkta områden, ändra vinkeln hela tiden för att undvika att polera samma plats för länge eller använda en enda vinkel för att förhindra att kanterna kollapsar, att spetsarna plattas till eller att spetsarna blir vassa.
Polering med korta polerborstehjul: På samma sätt som med den långa polerborsten, montera den korta borsten på polermaskinen, applicera grönt vax och använd pekfingret och tummen på vänster (eller höger) hand för att greppa ringen medan du polerar. Var uppmärksam på kraftfördelningen under polering och polera från flera vinklar och riktningar. För steninfattningar, behärska vinkeln och använd måttlig kraft för slagpolering. För områden med tre vinklade ytor, använd dessutom en hängande slipmaskin, borr och bomull för att polera, och se till att kanterna inte kollapsar och att spetsarna inte plattas eller vässas.
De vanligaste borstarna är huvudsakligen tvåradiga borstar, där den ena är hårdare och den andra mjukare. Den hårda borsten kan polera karatéguld och platina, och effektiviteten vid polering av arbetsstycken är relativt snabb; den mjuka borsten kan bara polera karatéguld. Den nya tvåradiga borsten har en hårlängd på 1,2 cm och används huvudsakligen för polering av områden med större mellanrum, såsom sidorna mellan spetsarna; den mellanstora borsten avser en borste med en hårlängd på 0,4 ~ 0,8 cm, vilket är den mest effektiva; den korta borsten avser en borste med en hårlängd på mindre än 0,4 cm, som huvudsakligen används för polering av spetshuvuden och infattningar. Dessutom finns det järnkärnborstar och fyrradiga borstar. Den nya järnkärnborsten har en hårlängd på cirka 1,5 cm och används för polering av stjärnformade infattningar eftersom avståndet mellan stjärnformade infattningar är relativt kort, med djupa och smala mellanrum, vilket gör det enkelt för den tvåradiga borsten att lossa ädelstenarna; den fyrradiga borsten används huvudsakligen för polering av arbetsstycken med flera klor (spetsar). Innan bilborsten används måste den monteras stadigt på polermaskinen för att undvika vibrationer. Den nyanvända borsten bör också slipas med sand för att ta bort de utspridda håren på båda sidor, så att håren koncentreras, och sedan bör borstens spets slipas platt med sand för att undvika ojämn polering.
Var noga med att använda rätt kraft när du polerar med polerborstarna; för mycket kraft kan orsaka deformation av smycket, förlust av klor, lossning av klor eller till och med förlust av stenar. Dessutom måste poleringen vara noggrann för att undvika filmärken eller repor.
- Polering med polerskiva av ullfilt. Placera ytan på arbetsstycket som ska poleras i en parallell vinkel mot ullfiltspolerskivan. Närma dig sedan bomullspolerskivan, greppa arbetsstycket med höger hand och tryck lätt. Flytta arbetsstycket så att polerskivan kan komma i kontakt med arbetsstyckets yta (se figur 6-8). Var noga med att hålla handen stadig under rörelsen, utan att pausa, och se till att kontaktytan mellan ullfiltspolerskivan och arbetsstycket förblir parallell och inte skär varandra för att undvika att arbetsstycket deformeras. Innan du använder en ny ullfiltspolerskiva bör den slipas plan med sand för att förhindra vibrationer.
- Polering med gul ullfiltsskiva. Håll arbetsstycket som har polerats med slipskivan och polerskivan av ullfilt med båda händerna och placera det under den gula ullfiltskivan (se figur 6-9). Innan en ny gul ullfiltskiva används bör den lossas med en kopparpress och slipas platt med sand.
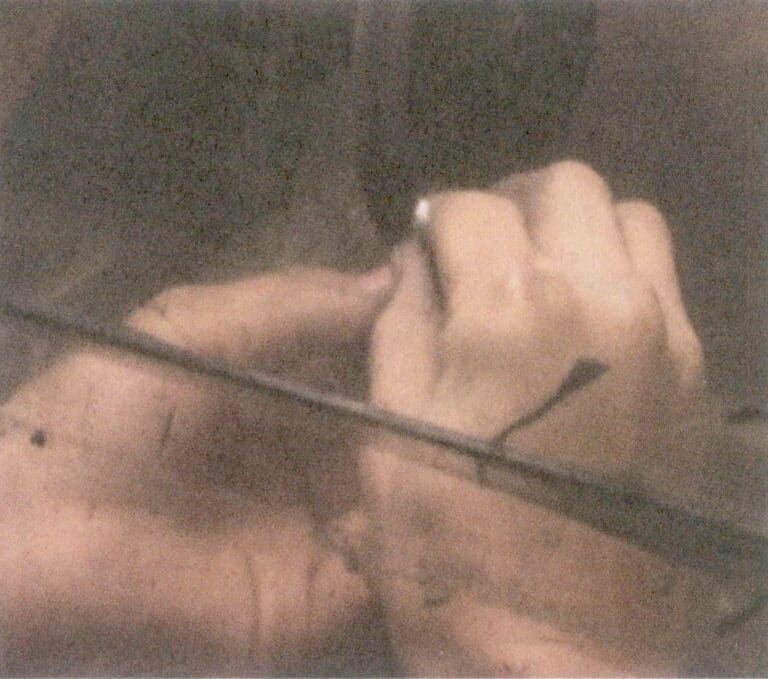
Figur 6-8 Polering med polerskiva av ullfilt
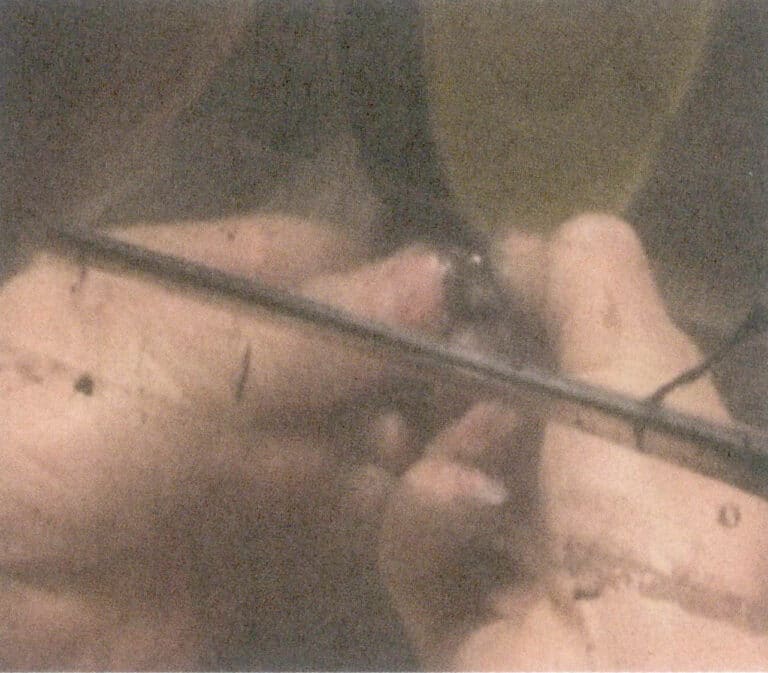
Figur 6-9 Polering med den gula ullfiltskivan
Generellt sett bör du försöka hålla smycket parallellt med polerskivans hjul under polering. Ta ett ordentligt grepp med båda händerna och för det mot tygskivan uppifrån och ner. Poleringen måste göras jämnt i ett svep för att säkerställa att hela smycket poleras, och varje del måste poleras noggrant. Felaktig poleringsteknik kan lätt leda till att de polerade smyckena kastas ut ur händerna på den höghastighetsroterande polerskivan, vilket lätt kan skada ädelstensytan, deformera metallstödet eller orsaka brott. Om de polerade smyckena är små i storlek (t.ex. hängen eller örhängen) kan en metallkrok förberedas för att hålla smycket under polering, vilket förhindrar hoppande polering och ojämn kraft. Om hoppande rörelser uppstår kan det bero på att polerskivan inte är centrerad, att polerskivan inte är rund eller att det är problem med operatörens teknik.
- Polering med vit ullfiltskiva. Efter att dukskivan har förberetts, starta maskinen, applicera en lämplig mängd vax på tygskivan och greppa arbetsstycket ordentligt med vänster (eller höger) hands tumme och pekfinger. Arbetsstycket ska placeras i en vinkel på cirka 10° i förhållande till kontaktpunkten på tygskivan och sedan poleras jämnt på båda sidor. Om det är en liten kedja, använd båda hörnen på tygskivan för polering (Figur 6-10). Vid polering med den vita tygskivan, var uppmärksam på vinklarna och kanterna där ytorna möts, stenarnas placering, spikar, klor etc. för att hålla arbetsstycket så nära sin ursprungliga form som möjligt. Innan du använder en ny vit tygskiva, slipa hörnen för att göra dem jämna med sandpapper och använd sedan sandpapper för att jämna ut ytan på tygskivan.
- Polering av basen (polering av den inre cirkeln). För arbetsstycket som polerats med tygskivan, använd en hängande slipmaskin med en ullborste eller en rak borste för att applicera rött pulvervax för polering av basen (Figur 6-11). För områden som inte är polerade eller inte är noggrant polerade, använd en hängande slipmaskin med en borr inlindad i bomull och applicera polervax tills det är noggrant polerat. Använd slutligen en hängande slipmaskin med en tygskiva för att applicera polervax på den inre cirkeln, var försiktig så att du inte använder för mycket kraft under poleringen för att undvika fransning.
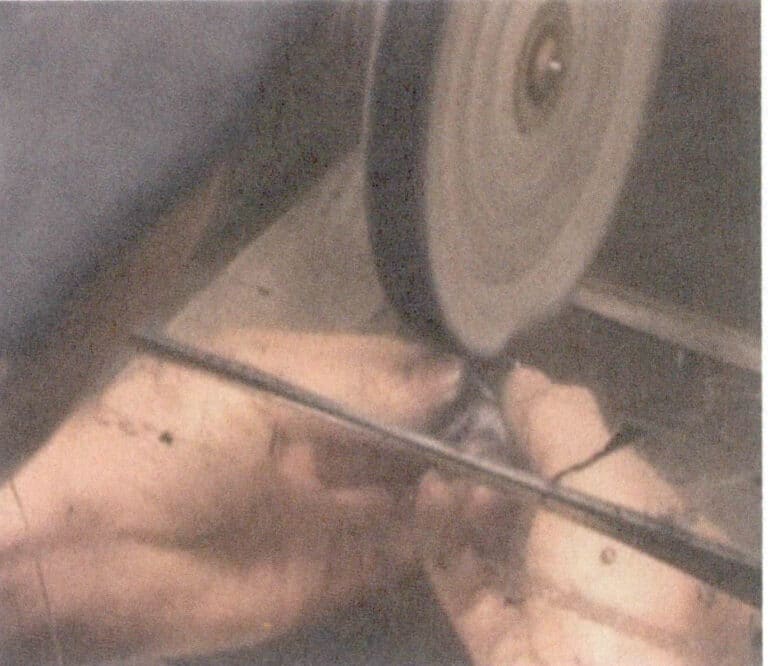
Figur 6 - 10 Polering med vit ullfiltsskiva
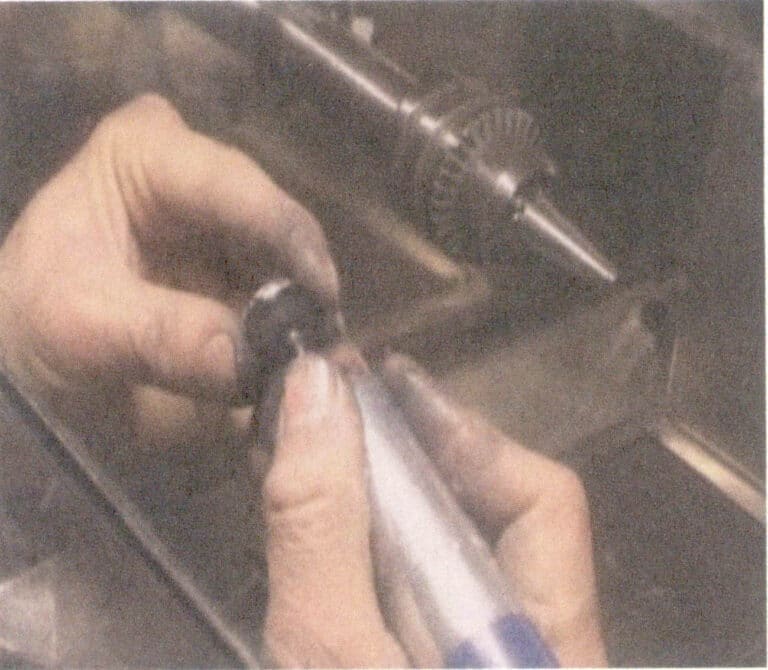
Figure 6 - 11 Polishing the base
- Polishing the Cloth Wheel. This is the final process. After applying the cloth wheel, coat it with an appropriate amount of light wax, wear clean gloves, and polish the workpiece like the cloth wheel, removing any floating wax and making the workpiece shiny while avoiding any fluff (Figure 6-12).
- Others. After grinding or sandblasting the workpiece, check if there are any sandblasting or color separation issues. If there are, grind the areas with sandblasting or color separation issues before proceeding with fine grinding. Since platinum conducts heat quickly, cotton finger cots can be worn when grinding platinum workpieces. Before wearing the cotton finger cots, cut off any excess cotton threads to prevent them from getting caught in the grinding machine’s spindle, which could cause safety accidents. Generally, cotton finger cots are as long as the entire finger, but they do not need to be that long for actual use; excess parts should be folded inward and then worn on the fingers (Figure 6-13). During grinding, some small sand pits may appear; at this time, you can use a steel presser to press them down and then continue grinding without needing to repair them. Place the steel presser on the little finger and press it with the thumb and index finger.
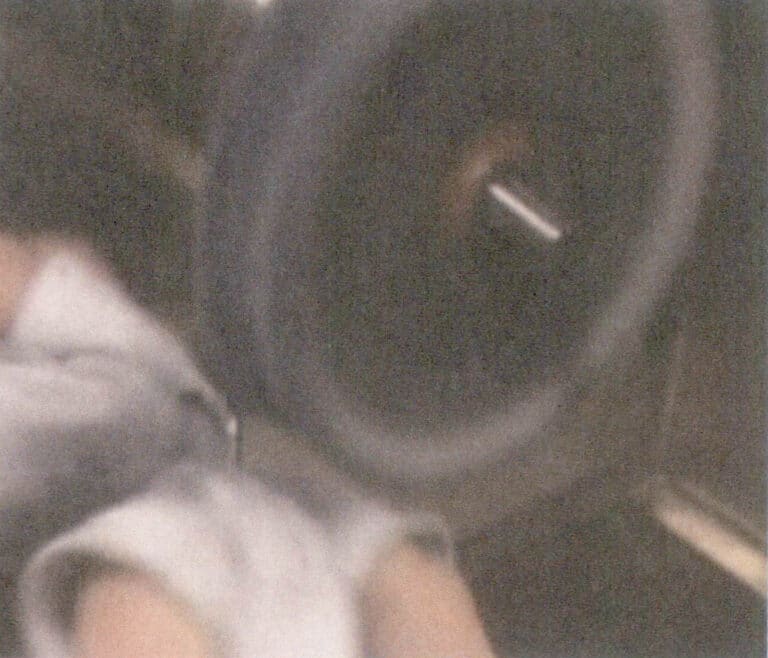
Figure 6-12 Polishing buffing wheel
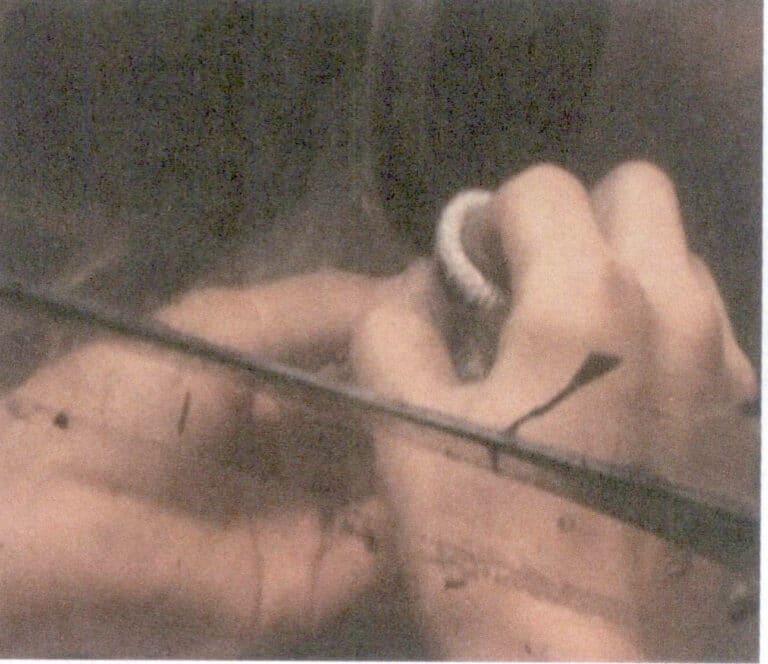
Figure 6-13 How to Wear Finger Cots
Grinding and Polishing Video
Table 6-3 Polishing Process Flow Chart
| kind / Processes / Steps | Ring | Chains (bracelets, necklaces) | Örhängen | Pendants | Armband | Brooches | |||||||||||||||
| Platinum | K-Gold | Silver | Koppar | Platinum | K-Gold | Silver | Koppar | Platinum | K-Gold | Silver | Koppar | Platinum | K-Gold | Silver | Koppar | Platinum | K-Gold | Platinum | K-Gold | Silver | |
| Polishing the bottom | ● | ◊ | ● | ◊ | ● | ◊ | ● | ◊ | ● | ◊ | ● | ◊ | |||||||||
| Grinding the inner circle | ● | ● | ● | ● | |||||||||||||||||
| Polishing with polishing wheel | ● | ● | ◊ | ◊ | ● | ● | ◊ | ◊ | ◊ | ◊ | ● | ◊ | ◊ | ◊ | |||||||
| Polishing with polishing brush wheel | ● | ● | ● | ● | ● | ● | ● | ● | ● | ● | ● | ● | ● | ● | ● | ● | ● | ● | ● | ● | ● |
| Polishing with yellow polishing brush wheel | ● | ◊ | ● | ● | ● | ● | ● | ● | ● | ● | ● | ● | ● | ● | ● | ● | ● | ● | ● | ||
| Polishing with white polishing wheel | ● | ● | ● | ● | ● | ● | |||||||||||||||
| Polishing the base | ● | ● | ● | ◊ | ◊ | ◊ | ● | ◊ | ● | ◊ | ● | ◊ | |||||||||
| Polishing the inner circle | ● | ● | |||||||||||||||||||
| Polering | ● | ● | ● | ● | ● | ● | ● | ● | ● | ● | ● | ● | ● | ● | ● | ● | ● | ● | ● | ● | ● |
(4) Basic Requirements and Precautions for the Quality of Polished Workpieces
① Basic Requirements for the Quality of Polished Workpieces
- From the appearance. The surface should be clean and bright, free of floating wax, with no pulling marks, scratches, sandpaper marks, water ripples, sharp edges, smooth lines, collapsed edges, concave edges, or deformation.
- The inner circle of the ring and the line polishing and bottom polishing areas should be bright and clean, free of scratches, no sandpaper spots (marks), and no damaged edges or surfaces; the stamped characters should remain complete and clear.
- The stone setting should be free of sandpaper marks (dots), without flat claws (prongs) or sharp claws (prongs), and the edges of the stone should not have any collapse, sinking, deformation, looseness, or fragmentation.
② Precautions
The polishing process relies on power; therefore, safety hazards may arise if the prescribed procedures are not followed during operation. Operators must understand and adhere to the following points to prevent safety accidents.
- In daily production organization, it is common for two people to share one grinding machine, so when starting work or changing grinding tools, it is essential to inform the other person before restarting the machine.
- When the grinding machine operates, be careful not to touch the rotating shaft and grinding tools with your hands. When the disc grinding machine has not completely stopped, do not touch the disc wheel, as the disc grinding machine rotates very quickly, and the disc edge is extremely sharp, posing a risk of cutting the contact area.
- When using the ring core rod, it is prohibited to wear gloves to avoid fingers getting caught with the gloves on the ring core rod, which could crush the fingers and cause accidental injury.
- When cleaning the machine position, the grinding machine must be turned off first, and the power must be turned off before cleaning the lamp tube inside the box.
- When polishing workpieces, one must concentrate fully and not think about other things, especially during sewing or large sewing operations. A moment’s inattention can lead to the “tool-slipping” phenomenon (where the hand does not hold the workpiece, causing it to slip away and fly off), which can result in serious consequences such as workpiece scrapping, property damage and personal injury.
- When using a hanging grinder, the position with a notch on the machine head should face upwards to prevent accidental finger contact and injury. Fingers gripping the workpiece should wear finger cots to avoid injury from the high-speed rotating grinding tool. Additionally, the force applied by both hands during cooperation should be moderate and not excessive; otherwise, it may damage the grinding tool and cause accidents.
- If an accident occurs while working, one should immediately alert fellow workers to stop the machine.
3. Repair
After the jewelry workpiece undergoes three polishing processes: rough polishing, medium polishing, and fine polishing, it can achieve a mirror-like finish. However, sometimes, due to excessive roughness after finishing, the surface of the jewelry still retains significant file marks, scratches, and other traces, making it difficult to completely remove them through the polishing process. Repairs must be made; the scratches and file marks on the jewelry should be sanded down with sandpaper before polishing again. Additionally, during the polishing process, holes hidden beneath the surface of the jewelry may sometimes become exposed. At this point, it is essential to first perform welding repairs, and only after smoothing can polishing be done again.
(1) Repairing of Small Sand Pits
Install the sanding rod on the grinding machine and use the sanding rod to grind away the sand pits on the workpiece (Figure 6-14). Smooth the workpiece with sandpaper, using 400# sandpaper for platinum and then 1200# sandpaper; for K gold, 400# sandpaper is sufficient (Figure 6-15).
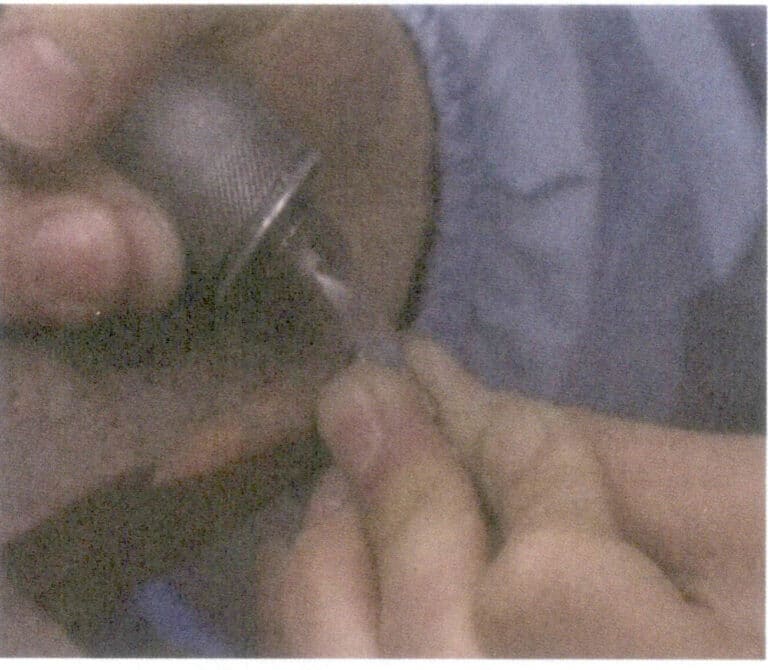
Figure 6-14 Grinding sand pits

Figure 6-15 Sandpaper Polishing
(2) Repairing Larger Sand Holes and Gold Flaking
Install the steel burs on the hanging grinder, and use the steel burs to polish the sand holes or gold flaking spots on the workpiece. Dip it in boric acid water, preheat the sand holes or gold flaking spots on the workpiece with a torch, and melt the metal particles used for repair. After dipping the tweezers in gold beads, apply borax, then place the gold beads on the repair area of the workpiece to level the dent. Place the repaired workpiece into a container with alum water, and use a torch to heat the alum water to boiling to remove borax and other impurities from the workpiece. Rinse with clean water and blow dry. Use a sandpaper stick to smooth the repair area, then polish it with sandpaper.
(3) Installing or Welding Accessories
Some jewelry, such as certain components of earrings and brooches, may cause inconvenience in stone setting and polishing if assembled during the finishing process. Therefore, it is necessary to install or weld the accessories of the workpiece after the stone setting or polishing is completed, making it a whole, which is beneficial for improving production efficiency and product quality.
4. Ultrasonic Wax Removal
After polishing, the surface and gaps of the workpiece will be covered with polishing wax and various mixtures. The wax removal removes the mixtures from the workpiece, which cleans the workpiece.
(1) Huvudsakliga verktyg som används
Ultrasonic wax remover, heating device, spray bottle, aluminum pot, hair dryer, etc.
(2) Viktiga punkter i den operativa processen
First, check whether the stone-set workpiece has any loose stones or if the chain-like workpiece has any falling off. Then, hang the workpiece on the wax removal hook; workpieces without stone setting can also be placed in a sieve and put into the ultrasonic cleaner for wax removal (Figure 6-16). After wax removal, the workpieces must be rinsed repeatedly with clean water (Figure 6-17) and then dried with a hair dryer (Figure 6-18).
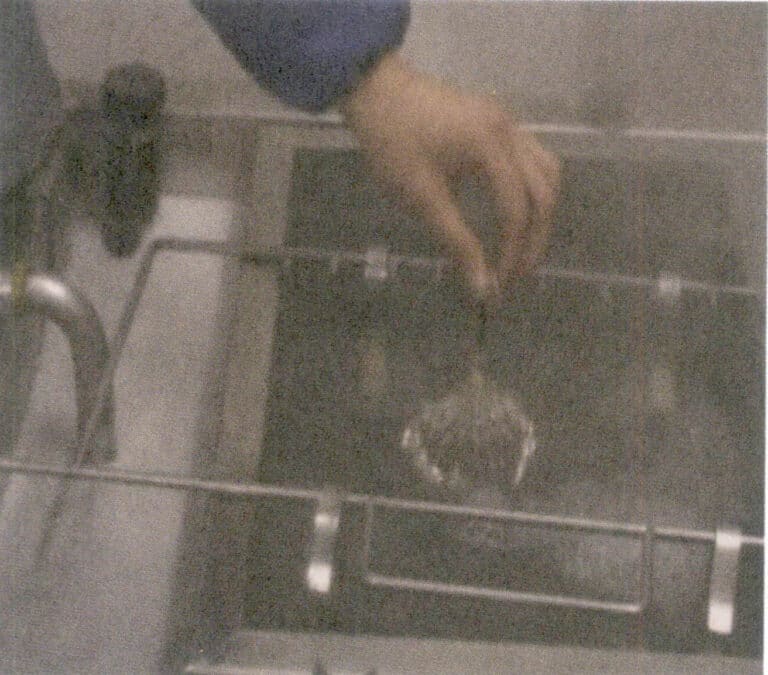
Figure 6-17 Rinsing with Clean Water
Figure 6-18 Drying the Workpiece
Waxing video
Platinum workpieces and workpieces that have been polished for the first time should be boiled in an aluminum pot filled with wax removal solution. Rings and other workpieces with fewer gaps should be boiled for 5 min, and chain-shaped workpieces require about 10 min to boil due to their many narrow gaps. Place the workpiece in the ultrasonic cleaner for wax removal, adjust the wax removal water temperature to 70 ~ 90℃, and it can be taken out after about 20 min of vibration.
After the second polishing, the workpiece can be directly cleaned with the ultrasonic cleaner for wax removal, with a removal time of about 10 min (or depending on the specific situation).
Sanding and polishing and waxing removal video
5. Electrolytic Degreasing
Oil stains adhering to the surface of the plated parts can isolate the plating solution from the substrate, resulting in poor plating. Slight oil droplets can spread into an oil film, similarly isolating the plating layer from the substrate, causing the plating layer to bubble, peel, or flake off. To achieve a good plating layer, the plated parts must undergo electrolytic degreasing to ensure their surface is clean, which allows for a stronger bond between the plating layer and the substrate.
Electrolytic degreasing involves passing direct current through an alkaline solution, using the workpiece to be plated as either the cathode or anode. The hydrogen gas generated at the cathode or the oxygen gas generated at the anode mechanically stirs the solution on the workpiece’s surface, aiding in removing oil stains from the workpiece surface and accelerating the saponification and emulsification processes. The formulation of the electrolytic degreasing solution is fundamentally similar to chemical degreasing, but electrolytic degreasing is much faster and has a significantly noticeable degreasing effect.
(1) Main Materials
Alkaline electrolytic solution MC200.
(2) Viktiga punkter i den operativa processen
First, prepare the electrolyte solution by mixing 60 g of MC 200 degreasing powder per liter of pure water. Place the prepared electrolyte solution into two stainless steel containers. One is kept at room temperature for electrolysis of color-separating workpieces; the other is heated to around 70℃ for electrolysis of non-color-separating workpieces. Adjust the electrolysis voltage to 6 V and the current to 20 A. The power supply anode is connected to the wall of the stainless steel container, and the power supply cathode is connected to the metal hook hanging the workpiece. After placing it in the electrolyte solution for 1 minute, the degreasing is complete, and it can be taken out and rinsed with water (Figure 6-19).
The rinsed workpiece is immersed in a solution of 60g of solid acid salts per liter of pure water, taken out immediately, and rinsed with water.
(3) Precaution
When electrolysis is performed on the workpiece surface, always monitor the ammeter. If the current becomes too high, immediately cut off the power supply and check for any short circuit.
6. Applying Nail Polish
In jewelry production, there are times when workpieces require color separation electroplating, which means applying two or more coloring treatments to different parts of the same piece of jewelry to achieve a multi-colored craft effect. To achieve the goal of color separation electroplating, nail polish must be applied.
Pour the nail polish into a glass cup and dilute it with an appropriate amount of lacquer thinner. Use a small metal wire to bind the non-electroplated parts of the workpiece, clamp the workpiece with a wooden clip, and use a fine brush to apply nail polish to the non-electroplated areas of the workpiece (Figure 6-20), ensuring that the nail polish evenly covers the non-electroplated parts of the workpiece. Hang the workpiece with the applied nail polish on a metal rack to dry, with a drying time of 15 ~ 20 min.
The nail polish on the workpiece must dry naturally and cannot be dried with a hairdryer.
Nail polish application video
Copywrite @ Sobling.smycken - Anpassad smyckestillverkare, OEM och ODM smyckesfabrik
7. Surface Cleaning
Surface cleaning is an indispensable part of the electroplating process. The quality of cleaning significantly impacts the stability of the electroplating process and the quality indicators of electroplated products, such as appearance and corrosion resistance. This impact comes from several aspects: first, if the workpiece is not cleaned properly after degreasing, residual degreasing solution can contaminate the electroplating solution; second, impurities contained in the water itself can contaminate the electroplating solution; third, when multiple plating types are applied to the same product or when color separation plating is done, inadequate cleaning can cause cross contamination of the plating solution. When the surface of the jewelry is not cleaned properly, it can easily lead to issues such as poor bonding strength of the plating, uneven thickness, poor brightness, low corrosion resistance, and susceptibility to rust.
Currently, jewelry cleaning mainly involves water cleaning, which refers to using water to remove the adhering liquid from the surface of the workpiece. There are roughly single-stage direct current cleaning, multi-stage parallel direct current cleaning, multi-stage continuous counterflow cleaning, intermittent counterflow cleaning, and steam cleaning types.
(1) Single-Stage DC Cleaning
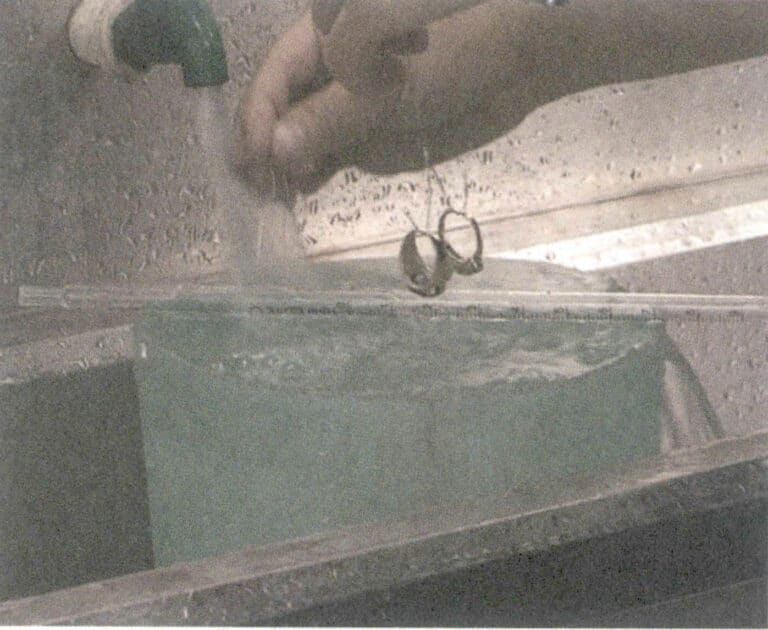
Single-stage DC cleaning puts the workpiece under the faucet and uses water rinse directly (Figure 6-21). This way, most of the use of “continuous running water,” the operator that the more water, the better the cleaning effect, and the faucet open to the maximum, thinking that the workpiece will be clean. This cleaning method is generally used and wastes a lot of clean water. Still, it also discharges a large amount of wastewater, polluting the environment and increasing the burden of electroplating wastewater treatment. The electroplating process cleans unclean plating quality problems, often not enough water. Still, the cleaning method is an improper factor, so changing the cleaning method ensures the cleaning quality of plated parts and significantly reduces water consumption and wastewater management costs.
(2) Multi-Stage Parallel Direct Current Cleaning
Multi-stage parallel direct current cleaning is formed by combining multiple stages of direct current cleaning tanks in parallel, with different liquid concentrations in each cleaning tank but equal water inflow. Under the premise of achieving the same cleaning quality, increasing the number of cleaning stages can reduce the cleaning water supply. When the number of cleaning stages is above 3, the decreased rate of water supply flow is very small as the number of stages increases. Therefore, in actual production operations, multi-stage parallel direct current cleaning is not economical to excessively increase the number of stages due to the gradual decrease in rinsing concentration, and the more stages there are the greater the labor intensity. Generally, three stages are more appropriate.
(3) Multi-Stage Continuous Counterflow Cleaning
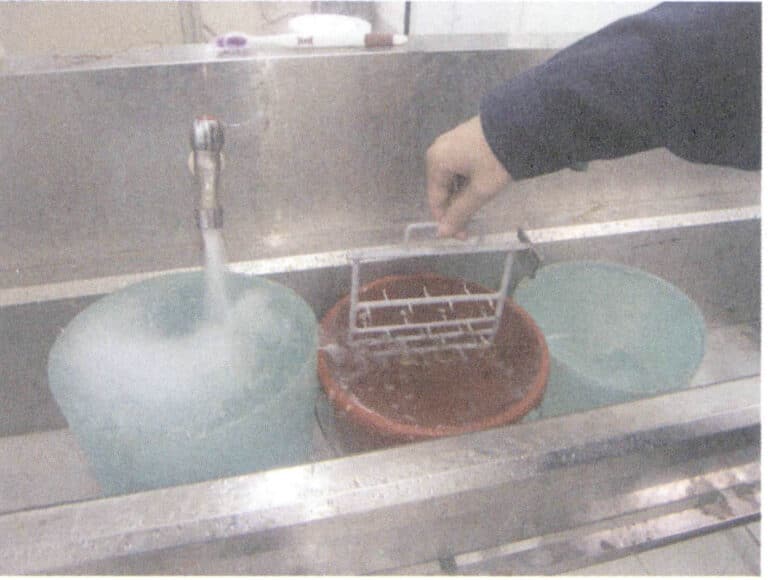
Multi-stage continuous counterflow cleaning comprises multiple cleaning tanks connected in series, with continuous water inflow in the last cleaning tank and continuous water outflow from the first cleaning tank. The direction of water flow is opposite to the cleaning direction of the plated items, and the liquid concentrations in each cleaning tank are different (Figure 6-22). As the plated items become cleaner, the concentration of the cleaning tank liquid also increases. In the case of the same number of cleaning tanks, the water supply for continuous counterflow cleaning is only a fraction of that for multi-stage parallel direct current cleaning, comparable to the concentration of water discharged from the first cleaning tank.
(4) Intermittent Counterflow Cleaning
Intermittent countercurrent cleaning differs from continuous countercurrent cleaning; in this cleaning method, the final cleaning tank does not have continuous water inflow but rather intermittent water inflow. When the final cleaning tank reaches the controlled concentration, the entire or part of it recovers the first-stage cleaning solution. In contrast, the other stages change water in the opposite direction of the workpiece movement, and the final tank is supplemented with fresh water. Taking three-stage cleaning as an example, the water supply for intermittent countercurrent cleaning is about 55% of that for continuous countercurrent cleaning, and the concentration in the first tank is also higher than the former.
(5) Steam Cleaning
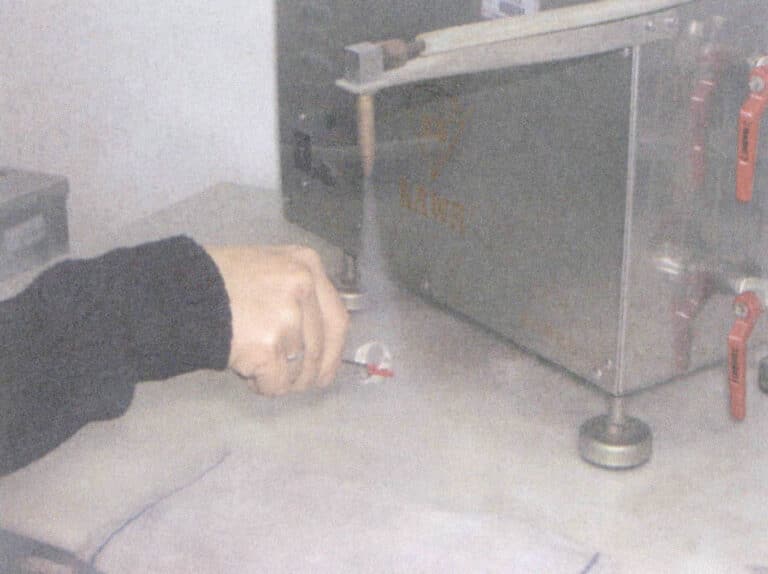
Steam cleaning is a method that uses high-temperature, high-pressure saturated steam generated by a steam cleaner to clean the surface of workpieces from oil stains and contaminants, vaporizing and evaporating them (Figure 6-23). It can also clean any small gaps and holes, stripping and removing oil stains and residues, achieving high efficiency, water savings, cleanliness, dryness, and low-cost requirements. Steam cleaning is a very effective means of cleaning jewelry crevices and is generally used after water cleaning.
8. Mild Etching
Plating Pre-treatment Video
Section II Electroplating
1. Introduction to Electroplating Technology
(1) Basic Principle of Electroplating
Electroplating is the use of electrochemical methods, the formation of metal and alloy deposits on the surface of the plated parts of the process, the process of metal ions in the bonding solution under the action of the external electric field by the electrode reaction reduced to metal atoms, and the cathode on the metal deposition process. The electrodeposition on the surface of the metal or alloy coating formed by the chemical composition and organizational structure different from the base material not only changes the appearance of the plated parts but also makes the surface of the plated parts to obtain the required physicochemical properties or mechanical properties, to achieve the purpose of surface modification.
(2) The Basic Quality Requirements of Jewelry Plating
- Plating and base material combine solid and good adhesion. There should be firm adhesion and a certain combination of strength for plating and the substrate.
- The plating layer is bright and complete, the crystallization is meticulous and close, the porosity is small, and can effectively block the corrosion of the external medium.
- The relevant standards should determine the thickness of the plating, and the distribution of plating should be uniform.
In the jewelry industry, common surface decorative plating species are pure gold plating, K gold plating, silver plating, rhodium plating, etc., according to the characteristics of the product, sometimes need to use nickel-plated or copper-plated as the bottom plating layer.
2. Bright Nickel Plating
Bright nickel is a commonly used plating type in jewelry electroplating. It is based on watt nickel and achieves a bright, smooth nickel coating by adding additives.
(1) The Principle of Bright Nickle Plating
Cathode: Ni2+ + 2e = Ni
Cathodic side reactions: 2H+ + e = H2
Anode (using soluble anode): Ni – 2e = Ni2+
Anode side reaction: 2H2O – 4e = 4H+ + O2
(2) Bright Nickel Plating Process
For an example of the bright nickel plating process, see Table 6-4.
Table 6-4 Bright Nickel Plating Process
| Composition and process conditions of the plating solution | Process 1 | Process 2 |
|---|---|---|
| Nickel sulfate(NiSO4·7H2O) (g/L) | 250〜300 | 250〜320 |
| Nickel chloride(NiCl2 · 6H2O)(g/L) | 40〜60 | 50〜60 |
| Boric acid (H3BO3) (g/L) | 40 〜50 | 40 〜50 |
| Saccharin(C6H5COSO2NH) (g/L) | 0.5〜1 | |
| 1,4一Butynediol(C4H6O2) (g/L) | 0.3〜0.5 | |
| Sodium dodecyl sulfate(C12H25SO4Na) (g/L) | 0.05〜0.2 | |
| Additives(mL/L) | Appropriate amount | |
| pH value | 3.8〜4.4 | 3.8〜4.5 |
| Temperature (℃) | 50〜55 | 50〜65 |
| Cathode current density (A/dm2) | 2〜5 | 1〜10 |
(3) Plating Solution Composition and Process Conditions
① Nickel. The nickel ion source can be nickel sulfate, chloride, sulfamate, etc. Nickel ion is the main component of the plating solution generally contains 52 ~ 70 g/L. A high nickel ion concentration increases the current density and improves the deposition rate. Still, if the concentration is too high, the plating solution dispersion capacity is reduced, leading to a low-current area without plating. If the concentration of nickel ion is too low, the deposition rate will be lowered, and in severe cases, the high-current area will be burnt.
② Buffering agent. Boric acid is the best buffering agent in nickel plating solutions; it can also enhance cathodic polarization, improve the conductivity of the solution, and enhance the mechanical properties of the coating.
③ Wetting agent. During the electroplating process, hydrogen gas is released at the cathode. The wetting agent can reduce the surface tension of the plating solution, increasing the wetting effect on the plated parts’ surface. This makes it difficult for hydrogen bubbles generated during the electroplating process to remain on the cathode surface, thus preventing the formation of pinholes and blemishes. The wetting agent is composed of surfactants, which can be classified into high-foam wetting agents and low-foam wetting agents. High-foam-wetting agents include sodium dodecyl sulfate while low-foam-wetting agents include diethylhexyl sulfate.
④ Brightening agent. This includes primary brightening agents, secondary brightening agents, and auxiliary brightening agents. The main function of primary brightening agents is to refine the grain size and reduce the sensitivity of the plating solution to metal impurities. Saccharin is a typical primary brightening agent. The role of secondary brightening agents is to give the plated layer a noticeable gloss. Still, they also introduce stress and brittleness to the plated layer and increase sensitivity to impurities, so their dosage must be strictly controlled. When used in conjunction with primary brightening agents, they can produce a fully bright-plated layer. 1,4- Butynediol is a typical secondary brightening agent. Auxiliary brightening agents play a supportive role in enhancing the brightness of the plated layer. They are beneficial for improving the plated layer’s coverage ability and reducing the plating solution’s sensitivity to metal impurities.
(4) Factors Affecting Process Conditions
① pH value. It has a significant impact on nickel deposition and the mechanical properties of the plated layer. As the pH value increases, the cathodic current efficiency improves, and the dispersion ability of the plating solution is good. However, if the pH value is too high, it can lead to the deposition of basic nickel salts near the cathode, causing inclusions in the plated layer, resulting in roughness, burrs, and brittleness. Conversely, if the pH value is too low, the cathodic current efficiency will decrease, leading to pinholes and areas without plating in low current zones, which must be strictly controlled.
② Temperature. Increasing the temperature can reduce the stress of the coating, increase the migration speed of ions in the plating solution, and improve the conductivity of the plating solution, thereby enhancing the dispersion ability of the plating solution and expanding the current density range.
③ Current density. It is related to the composition of the plating solution, pH value, working temperature, and the type of additives. During normal operation, the current efficiency also improves as the current density increases.
④ Stirring. It can prevent concentration polarization, stabilize the deposition rate of the plating solution, and allow the use of higher current densities. Air stirring, cathode movement, or continuous filtration can be employed.
⑤ Filtration. Continuous filtration should be used to keep the plating solution clear; the filter can be cartridge-type or bag-type, with a filtration rate of 2~8 times/h and filtration accuracy of 5~10μm.
⑥ Anode. A nickel plate or nickel ball is used as a soluble anode, which has strict material composition and structure requirements.
3. Gold Plating and its Alloys
Gold is a brilliant bright yellow with high chemical stability, not by hydrochloric acid, sulfuric acid, nitric acid, hydrofluoric acid, or alkali corrosion, and is widely used in the jewelry industry.
Gold plating can be divided into pure gold plating and K gold plating according to the purity of pure gold, the gold content of pure gold in 99.9% or more, K gold commonly used 22K, 18K, 14 K, and so on. According to the thickness of the plating can be divided into thin gold plating and thick gold plating. The thin gold layer thickness of 0.5μm or less can be plated directly on the metal substrate. Thick gold plating is generally plated with nickel as a base layer, and its brightness and leveling of the situation to improve the brightness of the gold plating layer have an obvious role.
For quite a long time, gold plating mainly used cyanide-based plating solutions; with the improvement of environmental protection requirements since the 1960s, the emergence of acid plating of pure gold, acid plating of hard gold, neutral gold plating, and non-cyanide gold plating. Gold plating solution can be divided into alkaline cyanide, acidic micro-cyanide, neutral micro-cyanide, and non-cyanide.
(1) Cyanide Gold Plating
① Principle of Cyanide Gold Plating
In cyanide gold plating solution, the main salt is potassium gold cyanide [KAu(CN)4], in solution, containing cyanide complex ion Au(CN)2+ in the cathode discharge, generating a gold plating layer.
Cathodic reaction:[Au(CN)2]–+e = Au+ 2CN–
Cathode side reaction: 2H++2e = H2
Anodic reaction (with soluble anode): Au+2CN– – e = [Au(CN)]2–
With insoluble anode: 2H2O – 4e=4H+ + O2
② Cyanide Gold Plating Process
Typical cyanide gold plating process, see Table 6-5.
Table 6-5 Example of Chloride Gold Plating Process
| Plating solution composition and process conditions | Process 1 | Process 2 | Process 3 |
|---|---|---|---|
| Potassium gold cyanide(g/L) | 3.5 | 5〜16 | 2 |
| Potassium cyanide(g/L) | 18 | 30 | 8 |
| Disodium hydrogen phosphate (g/L) | 16 | ||
| Dipotassium hydrogen phosphate (g/L) | 30 | ||
| Potassium carbonate(g/L) | 30 | ||
| Sodium thiosulfate (g/L) | 20 | ||
| pH value | 10〜11 | 12 | 12 |
| Temperature (℃) | 50〜60 | 60〜65 | 60〜70 |
| Cathode current density (A/dm2) | 1〜3 | 0.1〜0.5 | 0.3〜0.5 |
③ The Role of the Components in the Plating Solution
- Potassium gold cyanide. Potassium gold cyanide is the main salt in the plating solution, the source of gold in the plating layer. The plating layer will be red and rough if the gold content is too low. The quality of potassium gold cyanide is very important and should be carefully selected. Potassium gold cyanide should be dissolved in deionized water before being added to the plating solution.
- Potassium cyanide (sodium cyanide). Potassium cyanide (sodium cyanide) is a complexing agent that can make the plating solution stable and the electrode process normal. If the content is too low, the plating solution will be unstable, the plating layer will be rough, and the color will be bad.
- Phosphate. Phosphate is a buffer that stabilizes the plating solution and improves the luster of the plated layer.
- Carbonate. Carbonate, a conductive salt, can improve the plating solution’s conductivity and the plating solution dispersion capacity.
④ Plating Solution Use and Maintenance
- The concentration of gold controls the deposition rate and the color and brightness of the coating. 99.99% pure gold plate can be used as an anode, and platinum titanium mesh can also be used as an insoluble gold anode, according to the analysis of the timely replenishment of gold salts.
- pH value can be adjusted with KOH and H3PO4.
- The cyanide gold plating solution allows the use of cathode current density, which is low when the plating layer appears dark red; it should be appropriate to reduce the cathode Shen current density or increase the solution temperature to avoid the precipitation of other metals.
- The cyanide plating solution should avoid copper, silver, arsenic, lead, and other impurities with people so as to avoid the impurity content being too high to affect the appearance and structure of the coating.
⑤ Common Cyanide Gold Plating Problems
Cyanide gold production will often encounter various problems, common problems, possible causes, and solutions, see Table 6-6.
Table 6-6 Common Cyanide Gold Plating Problems
| Plating problems | Possible causes | Lösningar |
|---|---|---|
| Rough plating | ①high gold content; ②high cathode current density; ③high temperature; ④high carbonate content | ① add potassium cyanide; ② reduce the cathode current density; ③ lower the temperature; ④Remove carbonate with Ba(CN)2 |
| Reddening of plating | ① gold content is too high; ② temperature is too high; ③ cathode current density is too low; ④ copper impurity content is high; ⑤ pH value is too high | ①Add potassium cyanide; ②Reduce temperature; ③Increase cathode current density; ④Recover gold and replace plating solution (or use it for plating micro red gold workpiece); ⑤Adjust pH with acid-adjusting solution. |
| Loss of color | ① gold content is too low; ② cathode current density is too low; ③ pH value is too low | ①Add potassium gold cyanide; ②Increase cathode current density; ③Adjust with KOH. |
| Brownish color | ① potassium cyanide is too low; ② sodium in the solution | ①Add potassium cyanide; ②Recover gold, replace the plating solution. |
| Greenish color | ①silver in solution | ①Recover gold, replace plating solution; ②Plating micro-green plated workpiece |
| Dark (hazy) plating | ① current density is too high; ② insufficient supplements | ①Adjust the current density; ②Add additives. |
(2) Low Cyanide or Micro-Cyanide Gold Plating
Micro-cyanide gold plating solution, in addition to potassium gold cyanide, does not contain free cyanide pH value of 6 ~ 7; the plating solution contains organic carboxylic acid, phosphate, and alkali metal salts but can also be added to the brightening agent or gelatin, sulfuric acid hydrazine, alkylated amines and other organic substances, can be obtained dense bright gold plating layer.
Micro-cyanide gold plating solution, according to the pH value, can be divided into neutral gold plating solution and acidic gold plating solution
① Neutral Micro-Cyanide Gold Plating
The pH value of the neutral micro cyanide plating solution is 6~7, and the plated layer is lemon yellow. Adding alloy elements Ni, Cu, Cd, etc., can be plated with gold alloy. Thin and thick gold can be plated by adjusting the gold concentration and lye composition. For the neutral micro-cyanide gold plating process, see Table 6-7.
Table 6-7 Example of Neutral Micro-Cyanide Gold Plating Process
| Plating solution composition and process conditions | Process 1 | Process 2 | Process 3 |
|---|---|---|---|
| Gold (as potassium gold chloride)(g/L) | 20 | 6〜8 | |
| Gold potassium cyanide(g/L) | 12 | ||
| Disodium hydrogen phosphate(g/L) | 82 | 42 | 25 〜35 |
| Potassium dihydrogen phosphate(g/L) | 70 | 10 | |
| pH value | 6〜6.5 | 6.5 〜10.5 | 6.5 〜7.5 |
| Temperature(℃) | 60 | 60〜70 | 40〜50 |
| Cathode current density (A/dm2) | 0.1〜 0.3 | 0.1〜0.6 | 0.2 〜0.4 |
② Acid Micro-Cyanide Gold Plating
Acid micro-cyanide gold-plating has a bright, uniform, detailed plating color yellow with red and other characteristics.
- Plating process. For several kinds of acidic micro-cyanide gold-plating processes, see Table 6-8.
Table 6-8 Several Acidic Micro-Cyanide Gold Plating Processes
| Composition and process conditions of the plating solution | Process 1 | Process 2 | Process 3 | Process 4 |
|---|---|---|---|---|
| Potassium gold cyanide(g/L) | 12 〜14 | 8〜20 | 30 | 10 |
| Citric acid (g/L) | 16〜48 | 18〜20 | ||
| Ammonium Citrate (g/L) | 100 | |||
| Potassium citrate (g/L) | 30〜40 | 100 〜140 | 28 〜30 | |
| Potassium antimony tartrate (g/L) | 0.8 〜1.5 | 0.05 〜0.3 | ||
| EDTA (mL/L) | 2〜4 | |||
| pH value | 4.8 〜5.1 | 3〜4.5 | 5.2〜6.0 | 5.2 〜5.8 |
| Temperature(℃) | 50 〜60 | 12 〜35 | 60 〜65 | 30 〜40 |
| Cathode current density (A/dm2) | 0.1〜 0.3 | 0.5〜1 | 0.3 〜0.5 | 0.2 〜0.5 |
- The Role of each Component in the Plating Solution.
Potassium gold cyanide: As the plating solution’s main salt, the content is enough to produce a bright, crystalline, detailed gold plating layer. If the content is insufficient, the current density range is narrow, and the plating layer is red, rough, and has high porosity.
Citrate: It has complexing, binding, and buffering effects. Concentration is too high, the current efficiency decreases, and the plating solution is easy to age; if the concentration is too low, the plating solution has poor dispersion ability.
Phosphate: buffer can improve the plating solution’s stability and the plating layer’s luster.
- Plating Solution Working Conditions on the Appearance and Performance of the Impact.
Temperature: Increasing the temperature can increase the current density limit and improve the deposition rate; the gold content in the plating layer increases, the alloy content reduces, the internal stress of the plating layer is reduced, and the hardness is reduced. However, if the temperature is too high, the color of the plated layer is not uniform, and the plated layer is easy to be red and rough: if the temperature is too low, the plated layer is not bright.
Current density: with the increase of current density, the gold content in the plated layer decreases, the alloy content decreases, the internal stress of the plated layer increases, and the hardness increases. Too high current density leads to rough plating, high porosity, and impurity metal co-deposition: too low current density, the plating layer is not bright, and low current efficiency.
Stirring and filtering: It helps eliminate concentration polarization, ensure the cleaning of the plating solution, and improve the deposition speed and the quality of the coating.
(3) Cyanide-Free Gold Plating
Since the 1960s, in cyanide-free gold plating for production, there are sulfite, thiosulfate, halide, thiomalate, and other plating solutions, but the most researched and widely used is [Au(SO3)2]– for the complex anion sulfite plating solution.
Sulfite plating solution is characterized by environmentally friendly: the plating solution has good dispersion capacity and coverage capacity, the plating layer has good leveling and ductility (elongation of up to 70% ~ 90%), up to mirror luster, high purity of plating: fast deposition, less porosity: plating and nickel, copper, silver and other metals, the combination of good. However, the stability of the sulfite gold plating solution is poor, making it easy to precipitate gold, deteriorate the quality of plating, and even scrap the whole plating solution.
① Sulfite Gold Plating Principle
Cathode reaction: [Au(SO3)2]3–+ e = Au + 2SO32-
Cathode side reaction: 2H+ + 2e = H2
Anodic reaction: 2H2O – 4e = 4H++ O2
② Sulfite Gold Plating Process
Several kinds of sulfite gold plating process, see table 6-9.
Table 6-9 Several Kinds of Sulfite Gold Plating Process
| Composition and process conditions of the plating solution | Process 1 | Process 2 | Process 3 |
|---|---|---|---|
| Gold (as AuCl3) (g/L) | 5〜25 | 8〜12 | |
| Gold (as NaAu[SO3]2) (g/L) | 10〜25 | ||
| Gold (as NH4 Au[SO3 ]2 ) (g/L) | 30 〜80 | ||
| Ammonium sulfite (g/L) | 200〜300 | ||
| Potassium citrate (g/L) | 100〜150 | ||
| Sodium sulfite (g/L) | 80 〜 140 | ||
| HEDP (mL/L) | 25 〜65 | ||
| ATMP (mL/L) | 60 〜90 | ||
| pH-värde | 8.5 〜9.5 | 10 〜13 | 7.7 〜8.3 |
| Temperature (℃) | 45 〜65 | 25 〜40 | 60〜70 |
| Cathode current density (A/dm2) | 0.1 〜0.8 | 0.1 〜0.4 | 0.1 〜0.8 |
③ Key Points of Plating Solution Use
- The main salts AuCl3 and rhodium gold bisulfite (potassium, ammonium). A low gold concentration will lead to a low deposition rate, generally maintaining a gold concentration of 10g/L. Gold can be supplemented by directly adding dissolved sodium gold bisulfite (potassium, sodium, ammonium) in ( pH=9 ) water, but ammonium (potassium) gold bisulfite is hygroscopic and needs to be stored carefully to prevent deterioration.
- Sodium bisulfite (potassium, ammonium) is a complexing agent. Free bisulfite ions will be oxidized to sulfate ions when exposed to air, so they must be replenished frequently. If the bisulfite concentration is too low, the plating layer will be rough and dark; if the bisulfite concentration is too high, the current efficiency will decrease, and hydrogen will easily be released at the cathode.
- An increase in temperature is beneficial for expanding the current density range and increasing the deposition rate. If the temperature is too high, the stability of the plating solution decreases. When overheating bisulfite, it will decompose to produce S2- and generate black sulfide gold (Au2S3) precipitate with Au+.
2SO32- → SO42- + O2 + S2-
2Au3+ 十 3S2- → Au2S3
It is best to heat the plating solution using a water bath for indirect heating to prevent local overheating that can cause the solution to become turbid.
- When plating gold with sulfite, the pH value significantly impacts the plating solution’s stability, and efforts should be made to maintain a stable pH during production. If the pH value falls below a certain level, Au(SO3)32- will decompose, producing Au, and SO42-, the solution will become turbid. At this point, ammonia or potassium hydroxide can be used for adjustment. When the pH value is too high, the plating may appear dark brown, and citric acid should be added immediately for adjustment. Potassium citrate acts as a complexing agent and a buffer, stabilizing the pH of the plating solution and enhancing the bonding strength between the nickel underlayer and gold.
(4) Electroplating Gold Alloys
Adding different alloying elements in the gold plating solution can produce gold alloys of different hues. For example, adding Ni can get a white gold color, adding Cu or Cd can get a rose gold color, and adding Ag can get a light green gold plating layer. Control the concentration of alloying elements in the plating solution and working conditions; almost all kinds of hues of gold plating can be obtained.
Common gold plating alloys are Au-Co, Au-Ni, Au-Ag, Au-Cu, Au-Cu-Cd, etc., mostly cyanide plating solution is the main one, among which Au-Ag (16K), Au-Cu-Cd (18K) is more widely used. For several kinds of gold alloy cyanide plating solutions, see Table 6-10.
Table 6-10 Example of Gold Alloy Plating Process
| Composition and process conditions of the plating solution | Process 1 | Process 2 | Process 3 |
|---|---|---|---|
| Potassium gold cyanide(g/L) | 2 | 3 | 2 |
| Potassium cyanide(g/L) | 8 | 8 | 4 |
| Disodium hydrogen phosphate (g/L) | 16 | 16 | 16 |
| Potassium nickel cyanide(g/L) | 1.3 | 1 | |
| Potassium copper cyanide(g/L) | 0.5 | 3.5 | |
| Potassium silver cyanide (g/L) | 0.5 | 0.5 | |
| Temperature (℃) | 60 | 60 | 66 |
| Cathode current density (A/dm2) | 0.3 | 0.1 | 0.3 〜0.5 |
4. Silver Plating
From the first silver plating patent in 1840 to the present, cyanide silver plating has more than 170 years of history. The cyanide silver plating layer junction product details the plating solution dispersion ability, silver plating stability, and ease of maintenance and operation. However, cyanide is highly toxic and not conducive to environmental protection and operator health.
Non-cyanide silver plating has been the subject of research since the 1970s, the emergence of non-cyanide silver plating process, and has been used in a small number of production, such as NS silver plating, nicotinic acid silver plating, imidazole-sulfosalicylic acid silver plating, thiosulphate silver plating, silver thionate plating, thiocyanate silver plating and so on, some of the process is still in use. But compared with cyanide silver plating, cyanide-free silver plating has shortcomings and is not mature enough; in 20 years, a cyanide-free silver plating process in the popularization of industrial production has not made much progress, cyanide silver plating has been dominant.
(1) Cyanide Silver Electrode Reaction
Cathode: Ag(CN)2- +e = Ag+2CN-
Side reaction: 2H2O + 2e = H2 +2OH-
With soluble silver anode: Ag + 2CN– = Ag(CN)2- + e
With insoluble anode: 4OH– = 2H2O + O2 +4e
(2) Cyanide Silver Plating Process
Several kinds of silver cyanide plating process, see table 6-11.
Table 6-11 Examples of Silver Cyanide Plating Process
| Composition and process conditions of the plating solution | Process 1 | Process 2 | Process 3 |
|---|---|---|---|
| Potassium silver cyanide KCN (g/L) | 35 〜70 | 1〜2 | 55 |
| Potassium cyanide (g/L) | 90〜150 | 80 〜120 | 135 |
| Potassium carbonate(g/L) | 10 | ||
| Potassium hydroxide (g/L) | 5〜10 | ||
| Brightener(g/L) | 15〜30 | ||
| Temperature (℃) | 20 〜40 | 18 〜30 | 15〜25 |
| Cathode current density (A/dm2) | 0.5〜4 | 0.6 〜1.5 | 0.6 〜1.2 |
(3) The Role of the Main Components in the Plating Solution
① Silver. It is the main salt of the plating solution and exists in the form of silver cyanide complex ion in the plating solution. The source of silver may be AgC1, AgCN, or KAg(CN)2, but AgNO3 and AgC1 should be converted into AgCN or KAg(CN)2 before adding to the plating solution. Ag in the plating solution should be maintained at 20~40 g/L; silver concentration is too high, the plating layer crystallization is rough, yellow color; silver concentration is too low, the current density range is too narrow, and the deposition rate is reduced.
② Potassium cyanide. It is a complexing agent; in addition to complexing with Ag, a certain amount of free potassium cyanide, the stability of the plating solution, and the normal dissolution of the anode are beneficial to the plating solution dispersing ability is beneficial. The data in the general process mostly refers to free KCN; its concentration is too high, the deposition rate of the plating solution is slow, and the concentration is too low.
③ Potassium carbonate. It can improve the conductivity of the plating solution, help the plating solution’s dispersion ability, and improve the plating layer’s brightness. Cyanide silver plating is the alkaline plating solution; placed for a long time, the air in the CO2 will be dissolved in it, generating potassium carbonate; when the concentration of potassium carbonate accumulates more than 110g/L, will lead to anodic passivation, plating layer roughness.
④ Brightener. Adding a brightening agent can get a full bright plating layer and expand the current density range. Metallic brightening agents such as antimony, selenium, tellurium, cobalt, nickel, etc., can improve the brightness and hardness of the plated layer. Still, for decorative plating, the color of the plated layer (whiteness and brightness) requirements are particularly high; it is unsuitable to use additives containing metal. The non-metallic brightening agent contains sulfur; you can get the color of white silver plating, but the life is not long enough to add. The plating solution will decompose if not used promptly.
(4) Influence of Process Conditions
① Temperature. The working temperature for bright cyanide silver plating is best at 20 〜30℃. Below 20℃, the deposition rate is too slow, and the additives cannot fully exert their effects, so the coating should be heated; above 30℃, the consumption of additives is excessive, and the coating tends to be rough.
② Current density. The optimal current density range is related to the concentration of Ag, the concentration of free KCN, and the type of brightening agent. If the current density is too low, the deposition rate is too slow, which will affect the gloss of the coating; if the current density is too high, the coating will be rough and may even appear spongy.
③ Filtration and stirring. To obtain a finely crystallized, bright white silver coating, continuous filtration of the plating solution and movement of the cathode is essential. Filtration improves the cleanliness of the plating solution, and cathode movement helps eliminate concentration polarization, potentially allowing for high-quality coatings at relatively high current densities.
5. Rhodium Plating
Rhodium is a platinum group metal that appears silvery-white with a shiny luster and excellent reflectivity, reflecting visible light above 80%. Its corrosion resistance is very good, unaffected by corrosive gases such as sulfides and carbon dioxide in the atmosphere, and it has high stability against acids and bases. The hardness of the rhodium plating is extremely high, and it has excellent wear resistance. The decorative rhodium layer has a slightly bluish-white tone, is bright and shiny, wear-resistant, and has high hardness, making it the highest-grade decorative coating.
The thickness of the rhodium plating is generally above 0.05 ~ 0.25 μm, 0.5 μm for thick plating. The rhodium plating solution includes sulfates, phosphates, and amino sulfonates, the most commonly used sulfates. Rhodium plating solutions are easy to maintain, have high current efficiency, and fast deposition rates, making them suitable for jewelry surface treatment.
(1) Sulfate Rhodium Plating Electrode Reaction
Cathodic reaction: Rh2+ + 2e → Rh
Cathodic side reactions: 2H+ +2e → H2 ↑
Anodic reaction: 4OH – 4e → 2H2 O + O2 ↑
(2) Sulfate Rhodium Plating Process
Jewelry rhodium plating generally uses rhodium sulfate stock solution, pure water, and sulfuric acid directly blended to the required concentration, the typical process conditions, see Table 6-12.
Table 6-12 Rhodium Sulfate Plating Process
| Namn | Operating range |
|---|---|
| Rhodium concentration (g/L) | 1.6〜2.2 |
| Sulfuric acid concentration (g/L) | 27 〜33 |
| Plating solution temperature (℃) | 25 〜45 |
| Current density (A/dm2) | 0.5〜3 |
| Voltage (V) | 2.5〜3 |
| Plating solution stirring speed (cm/s) | 1〜10 |
| Deposition rate (μm/min, at current density 1A/dm2) | 0.04 |
(3) Influence of Plating Solution Composition and Process Conditions
① Influence of rhodium content. Under a certain temperature and current density, a rhodium plating solution with a rhodium concentration between 1.0 and 4.0 g/L can get a good rhodium plating layer. As the rhodium content decreases, the current efficiency also decreases, thus affecting the plating layer, making the layer darker or even black. Therefore, it is necessary to continuously replenish the rhodium plating solution during the plating process to maintain a certain rhodium content.
② Influence of sulfuric acid content. The addition of sulfuric acid can increase the conductivity and acidity of the plating solution and stabilize the plating solution. But if the content is too high, such as when the workpiece is not charged into the tank, there will be a strong corrosive; in addition to the plating layer increasing the internal stress, the plating layer is prone to cracking; sulfuric acid content is too low, the color of the plating layer becomes dark, so it should be controlled by a certain amount of sulfuric acid (or phosphoric acid) content.
③ The effect of additives. Additives can change the kinetic properties of electrodeposited metals, deposited layers, and the nature of the electrolyte. Such as reducing the internal stress of the plating layer to prevent cracks, improving the corrosion resistance of the plating layer, making the plating layer crystallization detailed, smooth, and bright, and maintaining the stability of the electrolyte. Generally, it can be divided into two categories: inorganic additives and organic additives.
④ The effect of temperature. When other parameters must be, the appropriate temperature increase can reduce the plating layer’s internal stress and improve the current efficiency. Usually in the temperature of 25 ~ 45 ℃ plating, at this time, can prevent too much solution evaporation, escape a large number of entrained sulfuric acid mist, and deterioration of operating conditions, but not because of the temperature is too low, resulting in the plating layer is not bright.
⑤ The effect of current density. Current density has a greater impact on the quality of plating. The current density is too small, and the color of the plated layer is darker; the current density is too high, the current efficiency decreases, the cathode escapes more bubbles, and the plating edge of the plated parts at the plated layer is easy to crack!
(6) The influence of other factors. The plating solution should be carefully maintained to prevent the contamination of chlorine ions and heavy metal impurities.
(4) Jewelry Rhodium Plating Operation Process Points
Jewelry rhodium plating often uses a beaker; the operation process is as follows.
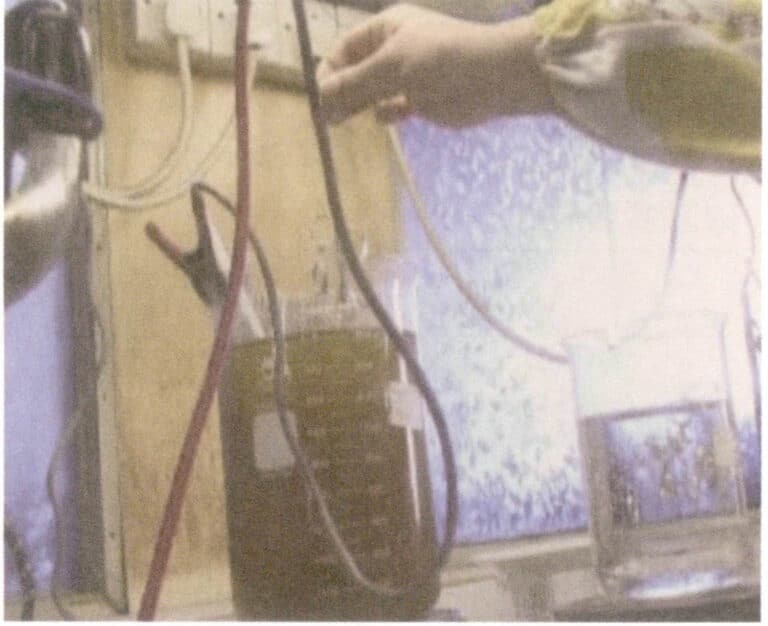
Prepare the plating solution according to the requirements of the technical operation condition index; put the prepared plating solution into two glass beakers: one for plating color-separated workpieces and the other for plating non-color-separated workpieces. The positive pole of the power supply connected to the beaker in the titanium network, adjust the voltage value of 2.5 ~ 3V, current 1A, the negative pole of the power supply connected to the workpiece on the water line, the workpiece will be charged into the cylinder work (Figure 6-25).
Rhodium plating video
Observe whether the voltage is stabilized within the prescribed range; otherwise, adjust the voltage. In the process of controlling the plating work, the current is mainly controlled; the current density is determined by the external surface area of the workpiece; it is best to control the workpiece to the optimal current density near the value. Workpiece into the tank operation, with a hand to grasp the power supply negative line and the water line of the connection, and small up and down or rotate. 1min after removing the workpiece (color-separation workpiece working time 1 ~ 1.5min; non-color-separation workpiece working time 45s ~ 2.5min, depending on the specifications or characteristics of the workpiece). Put the workpiece into the gold recovery cup soaked for a moment, rinse with water, then heat to 80 ℃ of pure water immersion once and then into the ultrasonic cleaner. Open the water line, the cleaned workpiece to the steam rinsing machine nozzle, foot switch.
The workpiece will be flushed and cleaned with steam. The length and width of anode titanium mesh should be appropriate for production. General anode and cathode area ratio of 2:1. Before plating according to the technical requirements (or regular laboratory) on time to add platinum water, different plating solutions, the operation of the technological conditions vary, the general rhodium concentration of 1.6 ~ 2.2g/L, you can get a high quality of plating, if the rhodium content in the plating solution is too low, such as rhodium content is less than 1g/L, then the plated layer color reddish, dark and porous increase.
Plating difficult parts of the workpiece and tying the sprue close to the difficult parts, the plating effect will improve a lot. Plating time should not be too long; too long will make the gold layer dark (haze) gray. The current should be controlled within the prescribed range; if too large, the current will also lead to a dark (hazy) gray phenomenon on the surface of the plating layer. When hanging the workpiece with the sprue, it should not be too dense to prevent the uneven thickness of the plating layer and yellowing of some parts. For the concave deep, it is difficult to plate the workpiece using intermittent current; plating more than ten seconds after the power off shakes the workpiece so that the plating solution gets full convection exchange. Some parts of the yellowing, mainly waxing, are not complete and should be solved twice the oil, followed by too many sand holes, should be repaired and then plated. For workpieces with white gold as the base material, the rhodium plating time should be shorter to prevent the plating layer from being too thick and delaminating.
Plating Video
(5) Rhodium Plating Common Problems and Solutions
Rhodium plating common problems, causes, and countermeasures, see Table 6-13.
Table 6-13 Rhodium Plating Common Problems and Countermeasures Analysis Table
| Plating Problems | Possible causes | Lösningar |
|---|---|---|
| Yellowish and whitish plating | ① Cathode current density is too high; ② anode current density is too high; ③ temperature is too low; ④ poor contact of hooks; ⑤ sulfamic acid is too high. | ① Reduce current density; ② Increase anode area; ③ Raise temperature; ④ Check hangers or replace; ⑤ Adjust after activated carbon treatment |
| Rough plating, fine grain distribution | ① Cathode current density is too low; ② poor base metal; ③ additive or complexing agent is low; ④ temperature is too high; ⑤ high concentration of main salt | ① Increase current density; ② Improve quality of base metal; ③ Add adjustment; ④ Reduce temperature; ⑤ Dilute adjustment. |
| Lusterless plating, white haze | ① low content of rhodium; ② too low temperature | ① Replenish gold water; ② Raise the temperature. |
| Yellowing of plating | ① low cathodic current density; ② low rhodium content; ③ too thin plating; ④ incomplete cleaning of plating | ① Increase current density; ② Supplement gold water; ③ Appropriate thickening; ④ Strengthen post-plating cleaning |
| Poor plating bonding | ① passivation of substrate; ② poor pretreatment; ③ high impurities in plating solution | ① Strengthen activation measures; ② Strengthen pre-treatment; ③ Rhodium recovery, new liquid configuration |
Section III Post-Plating Treatment
1. Degreasing
After plating, we need to cover the role of the nail polish layer on the workpiece through chemical solvents to dissolve the removal and restore the original appearance of the workpiece.
(1) Mainly Use Tools
Stainless steel pot, electric hair dryer.
(2) Operation Process Points
Acetone into four stainless steel pot (container size can be selected according to the size of the output, Figure 6-26), ready to remove the glue, oil workpiece hanging on the plating hook rack, into the first pot containing acetone soak: about 1h, take out the workpiece, check whether the glue or oil is dissolved, if there is still a glue or oil residue, then continue to soak, such as the basic dissolution, you can take out the workpiece to cover the lid of the pot. Put the removed workpiece into the second pot and continue to soak for 30 minutes so that a small amount of glue or oil attached to the workpiece is dissolved in acetone. In this way, into the third and fourth pot until the workpiece on the glue or oil completely dissolved until the workpiece is taken out (note: each time after observing the workpiece, you must promptly cover the lid of the pot), rinse the workpiece with water to remove the acetone, then blow dry it with an electric hair dryer.
The used acetone waste water should not be discharged freely and should be managed according to the relevant regulations.
2. Plating Pen Electroplating (Plating)
Plating pen electroplating is to repair the defective parts of the workpiece after plating or plating large workpieces, blind holes, narrow slits, and deep holes, as well as local special requirements of the workpiece.
Plating pen electroplating process, the workpiece for the cathode, insoluble conductive material for the anode, and the anode outside the bread has a good absorbent fiber material (i.e., brush) to adsorb the plating solution. When the anode and the surface of the workpiece contact and constant relative movement, the current through the anode and the surface of the workpiece fiber material adsorbs the plating solution (metal) so that the metal deposited on the surface of the workpiece forms a plating layer, thus completing the workpiece plating pen electroplating (plating) work.
The main points of the operation process: check and determine the parts of the workpiece to be plated, select the appropriate size of the quill (brush), select or deploy the plating solution according to the size of the plating parts, take the appropriate amount of plating solution, suitable for one-time dosage can be, should not be too much. Under normal circumstances, the voltage selection gear should be 7 ~ 8 gears. With the positive pole of the power supply connected to the plating pen, the negative pole connected to the workpiece, with the pen dipped in the plating solution and the surface of the workpiece in contact with the relative movement, you can get the corresponding plating effect (Figure 6-27).
The quill (brush) should be kept clean, the shape should be suitable, and the quill can be shaped with a knife when needed. The plating solution should be kept clean to prevent dust and other impurities from mixing in, thus affecting the plating quality.
Plating pen electroplating (plating) video
3. Anti-Color Treatment
The plating should be thoroughly cleaned with pure or hot water to eliminate residual salts on the surface and maintain the lasting luster of the plated layer.
For thin gold plating and silver plating, it is easy to turn yellow or black in severe cases in the humid and sulfide atmosphere. The discoloration of the plating will deteriorate the appearance of the jewelry. Therefore, after electroplating thin gold or silver plating, should be immediately anti-discoloration treatment to close the pores of the plating layer so that the surface generates a protective film isolated from the outside world to prevent corrosion of the substrate, prolonging the discoloration of the plating time. The common anti-discoloration treatment processes include chemical passivation, electrochemical passivation, dip organic protective agent, and other ways.
(1) Through the chemical passivation or electrochemical passivation method to form an inorganic passivation film. Chromate passivation is a commonly used chemical passivation method for the silver plating layer; it is in the acidic or alkaline solution containing hexavalent chromium compounds, silver oxide, and silver chromate film generated on the surface of the plating. Electrochemical passivation is the use of the cathodic reduction principle on the surface of the plating layer to generate silver chromate, chromium chromate, alkaline silver chromate, alkaline chromium chromate, and other substances composed of the film layer. These film layers have a good passivation effect, reducing the free energy of the alloy surface, and can play a role in preventing discoloration.
(2) In the silver surface to form a protective complex film. Benzotriazole, tetrazolium, and various sulfur-containing compounds can be formed on the plating with the material film; some also add some water-soluble polymers into the film agent.
Post-plating video


