Jak wykonać odlewanie inwestycyjne biżuterii?
Kompletny przewodnik po technikach odlewania inwestycyjnego biżuterii i procesie odlewania
Wprowadzenie:
Proces odlewania metodą traconego wosku rozwinął się z techniki odlewania metodą traconego wosku. W połowie XX wieku metoda odlewania wosku traconego, która przez długi czas była stosowana w przemyśle dentystycznym, została z powodzeniem zastosowana w produkcji biżuterii. Od tego czasu metoda odlewania inwestycyjnego jest szeroko stosowana w jubilerstwie. Wraz z rozwojem gumy i żywic syntetycznych oraz przemysłu elektronicznego, sprzęt i poziomy procesu odlewania biżuterii stale się poprawiały, dzięki czemu odlewanie inwestycyjne stało się główną metodą produkcji biżuterii. Metoda odlewania inwestycyjnego produkuje ponad 60% złotej, srebrnej i miedzianej biżuterii.
Typowy przebieg procesu odlewania inwestycyjnego biżuterii jest następujący.

Można zauważyć, że przebieg procesu odlewania inwestycyjnego biżuterii jest złożony i obejmuje wiele procedur, z których każda ma znaczący wpływ na jakość odlewów. Według statystyk, większość wad biżuterii to wady metalurgiczne, które występują podczas procesu produkcji odlewów inwestycyjnych, a parametry metalurgiczne na etapie obróbki końcowej rzadko ulegają zmianie, co skutkuje niewielką liczbą wad metalurgicznych. Jednak proces wykańczania może ujawnić wady odlewnicze pod powierzchnią. Dlatego ścisła kontrola parametrów procesu podczas produkcji odlewów jest niezbędna do uzyskania wysokiej jakości produktów jubilerskich.
Spis treści
Sekcja I Tłoczenie formy gumowej
1. Wydanie pierwsze
Pierwszym krokiem w tworzeniu gumowej formy jest posiadanie modelu wzorcowego (znanego również jako model głowy). Zazwyczaj model wzorcowy wykonany jest ze srebra (rysunek 3-1). Dzięki powszechnemu zastosowaniu technologii szybkiego prototypowania, czasami modele żywiczne lub woskowe są bezpośrednio wykorzystywane do tworzenia form gumowych (rysunek 3-2). Ukończony model wzorcowy musi mieć przyspawaną linię odlewniczą (powszechnie znaną jako wlew odlewniczy), zarezerwowany kanał do wtrysku i wypływu cieczy woskowej oraz wylewanie cieczy metalowej. Długość, grubość i położenie wlewu odlewniczego na modelu wzorcowym należy określić na podstawie kształtu i rozmiaru modelu wzorcowego. Odpowiednie ustawienie wlewu odlewniczego będzie miało bezpośredni wpływ na jakość odlewu.
Przed umieszczeniem modelu wzorcowego w formie, jeśli wlew jest zbyt długi, należy go nieco przyciąć w oparciu o praktyczne doświadczenie, aby ułatwić prasowanie formy. Podczas tego procesu wszelkie zanieczyszczenia są surowo zabronione.
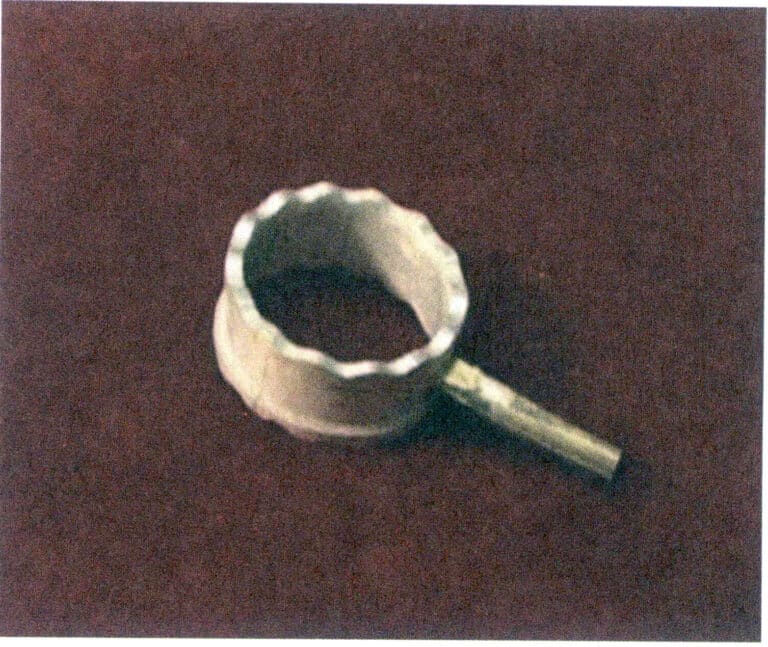
Rysunek 3-1 Model Silver
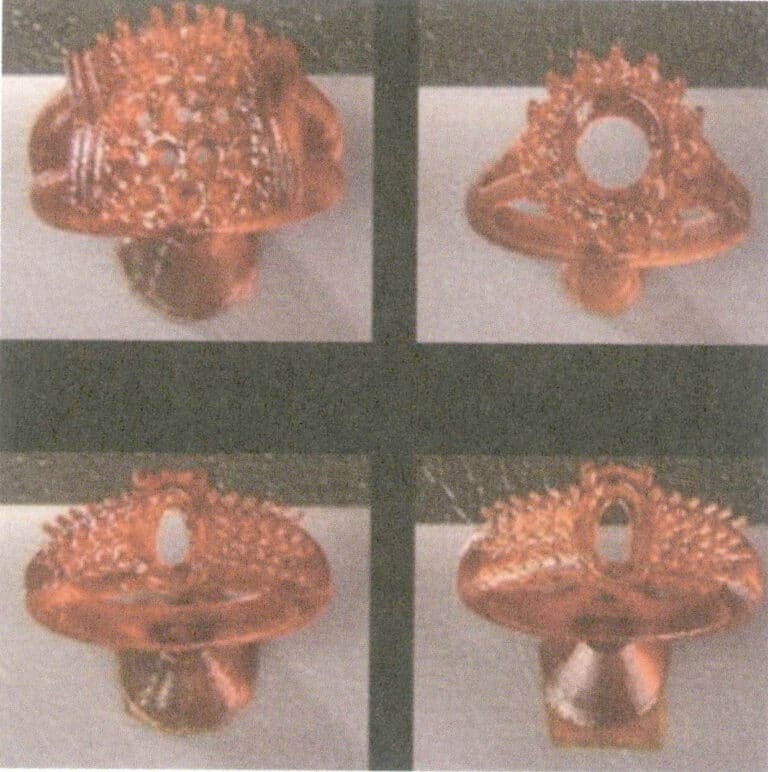
Rysunek 3-2 Model żywiczny
2. Rodzaje i charakterystyka gumy jubilerskiej
Wysokiej jakości formy gumowe są niezbędne do uzyskania wysokiej jakości odlewów. Guma używana do produkcji modeli musi spełniać następujące wymagania: odporność na korozję, odporność na starzenie, dobre właściwości regeneracyjne, elastyczność i miękkość. Na rynku dostępnych jest wiele rodzajów gumy modelarskiej, w tym guma naturalna i syntetyczna, taka jak guma silikonowa. Każdy rodzaj gumy ma inne właściwości; guma silikonowa jest łatwiejsza do wykonania i ma dobrą wydajność replikacji powierzchni, a formy woskowe są łatwe do usunięcia. Kauczuk silikonowy jest jednak podatny na pękanie i może utrudniać ulatnianie się gazu podczas wtryskiwania wosku. Kauczuk naturalny charakteryzuje się dobrą elastycznością i wysoką wytrzymałością na rozdarcie. Jednak ze względu na dużą liczbę podwójnych wiązań w głównej strukturze łańcucha, jest łatwo uszkadzany przez ozon, co prowadzi do degradacji lub sieciowania, więc nie może być stosowany bezpośrednio. Kauczuki syntetyczne obejmują dieny, akrylany, poliuretany, polisiarczki i siloksany.
Castaldo ze Stanów Zjednoczonych jest najczęściej stosowaną marką gumy w przemyśle odlewniczym biżuterii (rysunek 3-3). Zawiera zmodyfikowany kauczuk naturalny, oferując dobrą elastyczność, wysoką odporność na pękanie i długą żywotność. Główną krajową odmianą gumy w Chinach jest hydrolizowany kondensat dimetylodichlorosilanu, który ma elastyczny łańcuch molekularny i jest odporny na ciepło. Jednak jego wady obejmują wysoką twardość i słabą wytrzymałość na rozdarcie, co skutkuje stosunkowo krótką żywotnością.
Ponadto opracowano silikon utwardzany na zimno i płynną gumę (rysunek 3-4). Mogą one utwardzać się w temperaturze pokojowej bez konieczności wulkanizacji w określonej temperaturze, dzięki czemu nadają się do wykonywania wrażliwych na temperaturę form żywicznych lub woskowych.
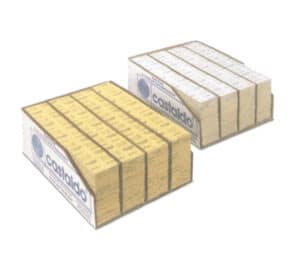
Rysunek 3-3 Wysokotemperaturowy arkusz wulkanizowanej gumy silikonowej Castaldo
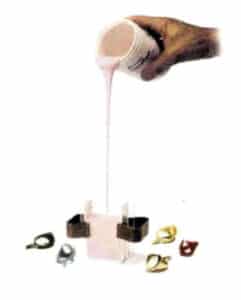
Rysunek 3-4 Płynna guma silikonowa wulkanizowana w temperaturze pokojowej
3. Główny sprzęt i narzędzia
Główne narzędzia do tłoczenia gumowych form to maszyna do formowania gumy, aluminiowa rama, gumowy arkusz, aluminiowa podkładka, skalpel, nożyczki, dwugłowicowa dysza, pęseta i długopis na bazie oleju.
Urządzeniem do prasowania gumowych form jest (wulkanizacyjna) maszyna do formowania gumy, która składa się głównie z dwóch płyt grzewczych z wbudowanymi przewodami oporowymi i czujnikami temperatury, regulatora temperatury i timera (niektóre modele nie mają tego urządzenia). Maszyna do formowania gumy posiada również podnośnik do prasowania i wyjmowania form. Stosowane są również ramy formierskie, które można podzielić na modele jednopłytowe, dwupłytowe i czteropłytowe w oparciu o liczbę jednocześnie prasowanych form gumowych. Materiałem używanym do produkcji ram formierskich jest zwykle stop aluminium. Ogólny rozmiar ramy formierskiej wynosi 48 mm x 73 mm, a czasami grubsze ramy formierskie są używane do tłoczenia większych form wzorcowych, których rozmiary zazwyczaj wynoszą 64 mm x 95 mm.
4. Tłoczenie gumy
4.1 Prasowanie gumy wulkanizowanej w wysokiej temperaturze
Proces tłoczenia gumy wydaje się prosty, ale należy zwrócić uwagę na następujące szczegóły podczas procesu napełniania i tłoczenia.
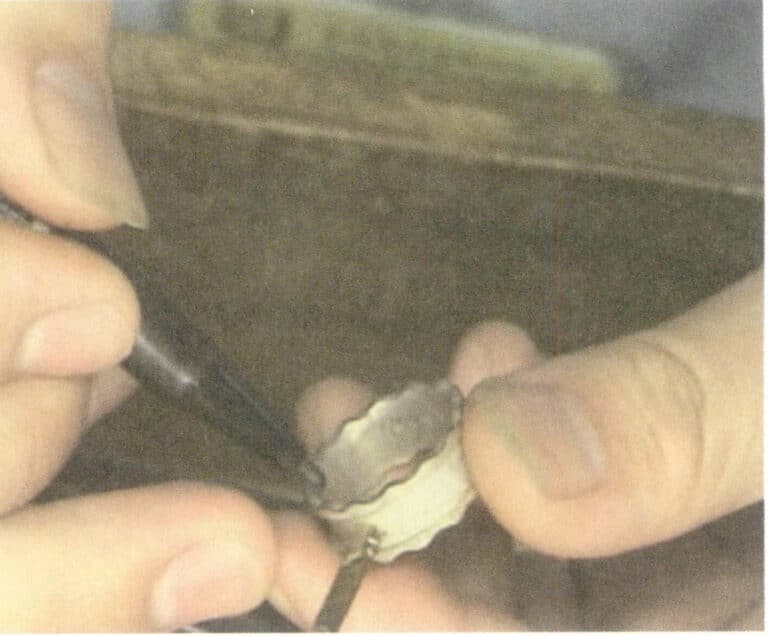
(1) Za pomocą pisaka na bazie oleju narysuj linię podziału wzdłuż krawędzi kształtu formy wzorcowej (Rysunek 3-5), która służy jako pozycja podziału dla górnej i dolnej formy. Położenie linii podziału należy określić na podstawie łatwości wyjmowania formy. Podczas operacji należy zapewnić czystość ramy formy i surowego arkusza gumy. Przed naciśnięciem formy rama formy powinna zostać wyczyszczona tak dokładnie, jak to możliwe, a operator powinien umyć ręce i stół warsztatowy.
(2) Należy upewnić się, że forma wzorcowa nie przywiera do gumy. Aby to osiągnąć, srebrne formy są zwykle traktowane priorytetowo podczas produkcji. Jeśli używana jest miedziana forma wzorcowa, powinna ona zostać posrebrzona przed naciśnięciem formy, ponieważ miedziane formy wzorcowe mogą łatwo przywierać do gumy.
(3) Należy zwrócić uwagę na określenie odpowiedniej temperatury i czasu wulkanizacji w oparciu o konkretne okoliczności. Temperatura i czas wulkanizacji gumy są generalnie zgodne z pewną zależnością funkcjonalną i są związane z grubością, długością, szerokością i złożonością formy głównej. Zazwyczaj temperatura wulkanizacji wynosi około 150 ℃, a jeśli grubość formy wynosi trzy warstwy (około 10 mm), czas wulkanizacji wynosi zwykle 20-25 minut; jeśli są to cztery warstwy (około 13 mm), czas wulkanizacji może wynosić 30-35 minut i tak dalej.
(4) Temperatura wulkanizacji jest ściśle związana ze złożonością formy głównej.Jeśli forma główna jest złożona i skomplikowana, należy obniżyć temperaturę wulkanizacji i wydłużyć czas wulkanizacji (na przykład obniżając temperaturę o 10 ℃ i podwajając czas); i odwrotnie, jeśli temperatura jest zbyt wysoka, wpłynie to na efekt formowania.
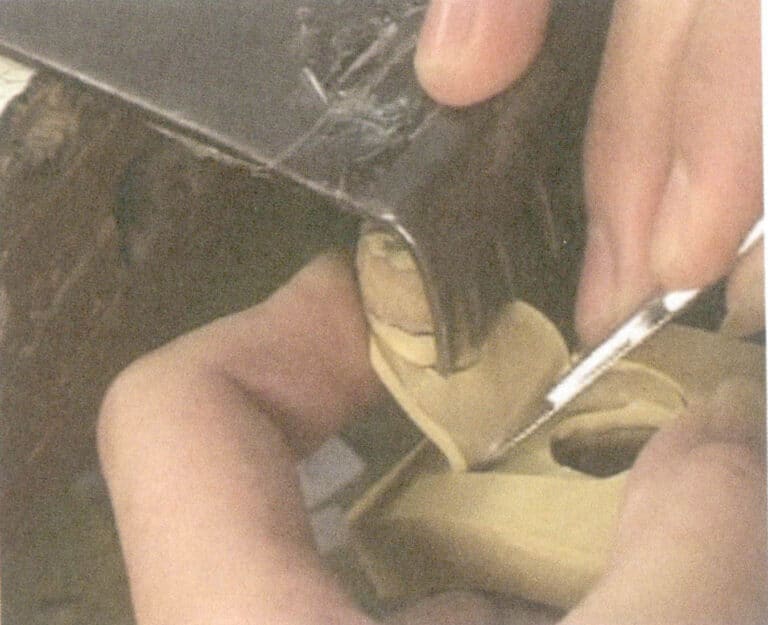
Podsumowując, podczas procesu klejenia, aby zapewnić ścisłe połączenie arkuszy gumy, należy utrzymywać arkusze gumy w czystości, unikać bezpośredniego kontaktu z powierzchnią arkuszy gumy rękami, a zamiast tego, po przyklejeniu arkuszy gumy, usunąć folię ochronną z powierzchni. Do wypełnienia szczelin, wgłębień i obszarów osadzania się kamienia na formie wzorcowej należy użyć metod zatykania, detalowania i wypełniania, zapewniając brak szczelin między gumą a formą wzorcową. Należy zachować ostrożność podczas wypełniania gumy, szczególnie w przypadku niektórych małych kształtów kwiatowych i dolnych otworów bocznych opraw kamieni, które muszą być wypełnione małymi cząstkami gumy i mocno dociśnięte ostrymi przedmiotami (takimi jak końcówka pincety) (Rysunek 3-6). Powinna mieć wystarczającą grubość, aby zapewnić możliwość ponownego użycia gumowej formy. Zazwyczaj gumowa forma wymaga co najmniej czterech warstw gumowych arkuszy do sprasowania. Grubość gumowej formy powinna być nieco wyższa niż płaszczyzna ramy o około 2 mm po wciśnięciu w ramę formy (rysunek 3-7).
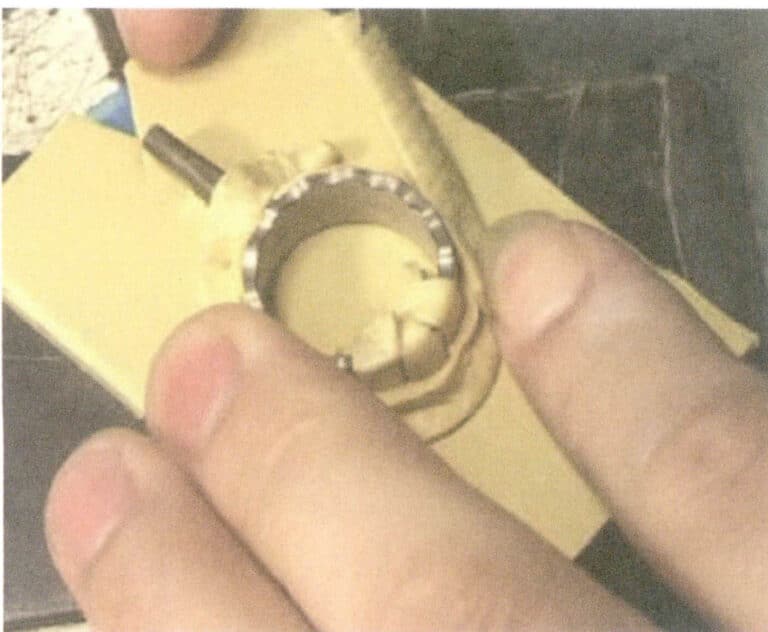
Rysunek 3-6 Wypełnienie gumowe do wulkanizacji wysokotemperaturowej
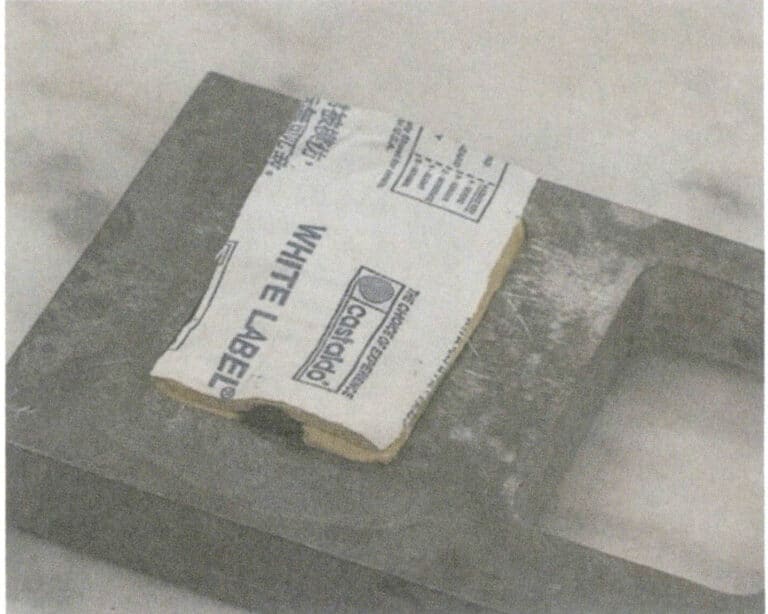
Rysunek 3-7 Grubość warstwy gumy
Maszynę do formowania gumy należy najpierw podgrzać, a następnie umieścić w niej ramę formy wypełnioną gumą, dokręcając uchwyt, aby docisnąć płytę grzejną do ramy formy (Rysunek 3-8).
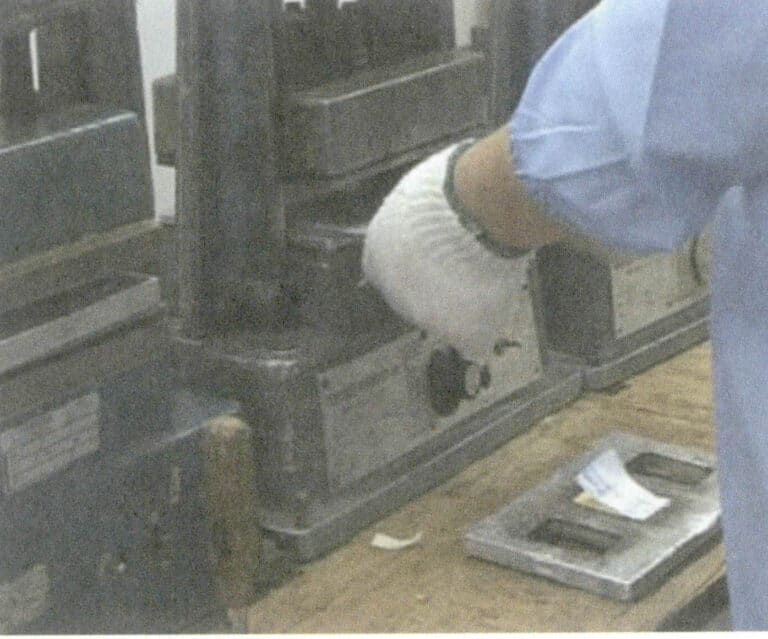
Na początku wulkanizacji należy sprawdzić, czy płyta grzewcza jest mocno dociśnięta; po upływie czasu wulkanizacji należy szybko wyjąć gumową formę, najlepiej pozwalając jej naturalnie ostygnąć do temperatury pokojowej, przed użyciem noża chirurgicznego do otwarcia formy. Wyciśnięta gumowa forma powinna być nienaruszona i gładka, a wlew nie powinien być przekrzywiony. Typowe problemy podczas procesu formowania obejmują przyczyny i środki zaradcze, patrz Tabela 3-1.
Tabela 3-1 Analiza typowych problemów i środków zaradczych dla form do prasowania
| Problemy | Przyczyny | Przeciwdziałanie |
|---|---|---|
| Gotowa gumowa forma jest lepka i miękka | Krótki czas wulkanizacji lub zbyt niska temperatura | Sprawdź maszynę do formowania, dostosuj temperaturę i czas pracy |
| Forma gumowa jest zbyt twarda, ma wysoką elastyczność i nie można jej spłaszczyć | Nadmierne ciśnienie, długi czas trwania, wysoka temperatura | Zmniejsz ciśnienie, dostosuj temperaturę i czas pracy |
| Częściowa warstwa gumowej formy odpadła | Zanieczyszczenie gumy tłuszczem z rąk itp. | Usuwanie brudu i utrzymywanie gumowej formy w czystości |
| Gumowa forma jest wypełniona pęcherzykami powietrza, a jej powierzchnia jest zapadnięta. | Forma gumowa i rama dociskowa nie są szczelnie wypełnione. | Szczelnie wypełnij ramę dociskową. |
| Guma nadmiernie się kurczy. | Zbyt wysoka temperatura podczas wulkanizacji | Użyj standardowej temperatury i czasu |
Wideo z prasowania gumy
4.2 Napełnianie wulkanizowanej ciekłej gumy w temperaturze pokojowej
Wulkanizowana w temperaturze pokojowej płynna guma silikonowa składa się z dwóch składników: Składnik A jest lepką cieczą, a składnik B jest środkiem utwardzającym. Przed wykonaniem formy należy najpierw sprawdzić płynność silikonu. Ogólnie lepkość silikonu wynosi około 35000 CPS. Jeśli lepkość jest zbyt wysoka, może to powodować nierównomierne mieszanie utwardzacza i silikonu, co skutkuje nierównomiernym suszeniem formy. Kroki są następujące.
(1) Przetwarzanie formy wzorcowej.
Przyspawać wlew odlewniczy do formy głównej zgodnie z wymaganiami procesu, łącząc wlew odlewniczy z miedzianą zasuwą wlewową. Zamocuj formę na powierzchni ze szkła akrylowego. Następnie dokładnie wyczyść formę i równomiernie spryskaj jej powierzchnię środkiem antyadhezyjnym. Otocz formę wzorcową okręgiem z folii lub twardego kartonu, zachowując grubość ścianki ponad 10 mm dla zewnętrznej ściany i dna formy.
(2) Wymieszać materiał gumowy w odpowiednich proporcjach.
Ogólnie stosunek silikonu do utwardzacza wynosi 100:2-100:5. Im większa ilość dodanego utwardzacza, tym szybszy czas utwardzania, co skutkuje krótszym czasem pracy. Materiał gumowy musi być równomiernie wymieszany; w przeciwnym razie forma będzie miała nierównomierne suszenie i utwardzanie, co wpłynie na jej żywotność i liczbę razy, kiedy może być ponownie użyta, a nawet może doprowadzić do złomowania formy głównej.
(3) Odgazowanie próżniowe.
Po równomiernym wymieszaniu silikonu i utwardzacza należy przeprowadzić obróbkę próżniową. Zasadniczo czas próżni nie powinien przekraczać 10 minut; jeśli jest zbyt długi, silikon ulegnie sieciowaniu i szybko się utwardzi, uniemożliwiając szczotkowanie lub wylewanie.
(4) Proces zalewania (szczotkowania).
Przykryj formę główną szczotkując lub wylewając. W przypadku mniejszych form głównych można zastosować ogólną metodę zalewania: wlewanie odkurzonego materiału silikonowego do cylindra. Można to zrobić w dwóch etapach: wlać wystarczającą ilość materiału, aby zanurzyć formę, a następnie odkurzyć i dodać więcej materiału, aż będzie równy z cylindrem. W przypadku większych produktów można zastosować metodę szczotkowania. Użyj miękkiego pędzla, aby równomiernie rozprowadzić materiał na powierzchni formy. Po 30 minutach nałóż warstwę gazy lub tkaniny z włókna szklanego, aby zwiększyć wytrzymałość i siłę rozciągającą silikonu. Następnie nakłada się kolejną warstwę silikonu, a następnie kolejną warstwę gazy lub tkaniny z włókna szklanego, powtarzając tę czynność dwa lub trzy razy, aby przedłużyć żywotność i liczbę zastosowań formy silikonowej. Na koniec należy pokryć szczotkowaną silikonową powierzchnię warstwą gipsu, upewniając się, że grubość spełnia wymagania wytrzymałościowe dotyczące obsługi i użytkowania. Można również wykonać formę z włókna szklanego, która jest mocna, lekka i łatwa w obsłudze podczas produkcji.
(5) Utwardzanie.
Po wypełnieniu materiał należy odstawić; ulegnie on reakcji sieciowania i utwardzenia, a typowy czas utwardzania wynosi 1,5-2 godziny.
5. Otwieranie formy silikonowej
Rozetnij sprasowaną formę silikonową, usuń formę wzorcową i podziel formę silikonową na kilka części zgodnie z kształtem i złożonością próbki biżuterii, aby forma woskowa mogła zostać płynnie usunięta po wstrzyknięciu wosku.
Otwieranie formy silikonowej w fabryce biżuterii jest wysoce technicznym zadaniem. Jakość formy silikonowej bezpośrednio wpływa na jakość modelu woskowego i odlewu metalowego oraz bezpośrednio wpływa na żywotność formy. Wykwalifikowany producent form wytwarza formy, które wykazują niewielkie lub żadne odkształcenia, pęknięcia lub wypływki po wstrzyknięciu wosku, wymagające minimalnej naprawy wosku lub spawania. Może to zaoszczędzić znaczną ilość czasu na regulacje i poprawić wydajność produkcji.
Narzędzia do otwierania form są stosunkowo proste i obejmują głównie noże i ostrza chirurgiczne, pęsety, nożyczki i szczypce z igłami.
Początkujący muszą używać nowego ostrza podczas używania noża chirurgicznego do otwierania form, ponieważ zmniejsza to prawdopodobieństwo skaleczenia palców. Podczas procesu cięcia, aby zapewnić smarowanie między ostrzem a gumową formą, na ostrze można nanieść wodę lub detergent (ale nigdy olej, ponieważ stwardnieje i sprawi, że forma będzie krucha). Metoda czteropunktowego pozycjonowania jest zwykle stosowana do otwierania form, co oznacza, że otwarta forma ma cztery stopy, które pasują do siebie i są zamocowane, a sekcje między stopami są cięte po krzywych, aby uzyskać falisty kształt góry, unikając prostych lub płaskich cięć w miarę możliwości (patrz rysunek 3-9).

Ogólna kolejność otwierania form jest następująca (na przykładzie otwierania formy pierścieniowej).
(1) Wyciśnięta gumowa forma ostygnie do temperatury pokojowej. Użyj nożyczek, aby odciąć błysk i szczypiec półokrągłych, aby usunąć blok wlewu, odciągając zwęgloną skorupę.
(2) Ustawić gumową formę pionowo, wlewem do góry. Wytnij z jednej strony wlewu, wzdłuż linii środkowej czterech krawędzi gumowej formy, na głębokość 3-5 mm (którą można dostosować do rozmiaru gumowej formy), przecinając cztery krawędzie gumowej formy.
(3) Wyciąć pierwszą stopę z pierwszego nacięcia. Najpierw rozetnij dwie proste krawędzie na głębokość 3-5 mm (którą można dostosować do rozmiaru gumowej formy), a następnie odciągnij siłą rozcięte proste krawędzie i przetnij ukośną krawędź wzdłuż 45, aby utworzyć trójkąt prostokątny na początku stopy. W tym momencie dwie połówki gumowej formy w miejscu cięcia powinny mieć odpowiadające sobie trójkątne stopy yin i yang, które pasują do siebie.
(4) Wyciąć kolejno pozostałe trzy stopy, postępując zgodnie z poprzednim procesem.
(5) Rozciągnij pierwszą wyciętą stopę i użyj ostrza, aby ciąć równomiernie do wewnątrz wzdłuż linii środkowej (jeśli używasz metody cięcia po łuku, ostrze powinno obracać się po pewnym łuku, aby utworzyć rybią łuskę lub falistą powierzchnię cięcia). Podczas cięcia pociągnij gumową formę na zewnątrz. Zbliżając się do linii wlewu, zachowaj ostrożność i delikatnie unieś gumową formę czubkiem noża, aby odsłonić wlew. Następnie tnij wzdłuż jednego końca powierzchni zewnętrznej pierścienia, aż dotrzesz do główki kwiatu i obszaru osadzania pierścienia.
(6) Wycinanie główki kwiatu jest stosunkowo trudnym i złożonym etapem otwierania gumowej formy. Załóżmy, że głównym kamieniem jest oprawa pazurowa. W takim przypadku główka kwiatu powinna być cięta wzdłuż osi dwóch pazurów po jednej stronie główki kwiatu, a następnie cięta w kierunku zewnętrznej krawędzi pierścienia po drugiej stronie, aż do osiągnięcia pozycji wlotu odlewu. Gumowa forma została przecięta na dwie połowy, ale srebrnej formy nie można jeszcze usunąć.
(7) Wytnij gumową część formy, która utrzymuje oprawę i główkę kwiatu. W odstępach między oprawą głównego kamienia a oprawami bocznych kamieni, należy ciąć wzdłuż zewnętrznych boków dwóch już wyciętych osi pazurów oprawy głównego kamienia, aż do osiągnięcia symetrycznych pozostałych dwóch pazurów; następnie ciąć w jednym pozostałym kierunku wzdłuż zewnętrznej strony oprawy głównego kamienia, przecinając się z wcześniej wyciętą powierzchnią, ustawiając oprawę głównego kamienia pionowo; następnie wykonać poziome cięcie u podstawy pazurów oprawy głównego kamienia i oprawy bocznego kamienia, dzieląc główkę kwiatu na dwie części. Rozciągnij wycięte części i obserwuj wszelkie podłużne gumowe nici (zwykle utworzone przez otwory bocznych opraw kamieni i pustą część główki kwiatu); jeśli są, należy je odciąć.
(8) Usunąć srebrną formę, zwracając uwagę na to, czy pomiędzy srebrną formą a gumową formą nie wystają gumowe nitki; jeśli są one lepkie, należy je odciąć.
(9) Otwórz spód. Wykonaj głębokie cięcie wzdłuż całego obwodu wewnętrznego okręgu pierścienia, blisko dolnej powierzchni, ale nie przecinaj go. Odwróć gumową formę i zegnij palcami boki gumowej formy w kierunku cięcia; możesz zaobserwować obwodowe nacięcie wewnętrznego koła, a także ślady nacięć na części oprawki i główki kwiatu (ponieważ nie została przecięta, pozostała guma rozciąga się, tworząc lekko wklęsłe płytkie ślady). Wytnij wzdłuż tych śladów do odpowiedniej pozycji wlotu odlewu, a następnie wytnij pasek o szerokości 8-12 mm w równym kierunku wzdłuż wlotu odlewu, o długości zbliżonej do wlotu odlewu. W tym momencie dno tworzy kształt podobny do grzyba, a wewnętrzną część pierścienia można już wyciągnąć z wyciętego dna (rysunek 3-10). Taka gumowa forma może z powodzeniem usunąć model woskowy dopiero po wstrzyknięciu wosku.
Wideo z rozformowywania
Formowanie silikonu + demontaż wideo
Sekcja II Wytwarzanie form woskowych
Gdy gumowa forma jest gotowa, można rozpocząć operację wtrysku wosku. Podczas procesu wtryskiwania wosku należy wziąć pod uwagę takie czynniki, jak temperatura wosku, ciśnienie i szczelność gumowej formy. Forma woskowa wytwarzana przez wtryskiwanie wosku z gumowej formy nazywana jest wtryskiem wosku (powszechnie znanym jako wyciskanie wosku), podczas gdy forma woskowa wykonana przy użyciu technik rzeźbienia nazywana jest rzeźbionym woskiem.
1. Materiał woskowy do odlewania biżuterii metodą traconego wosku
W procesie odlewania metodą traconego wosku jakość formy woskowej do biżuterii ma bezpośredni wpływ na jakość końcową. Materiał woskowy powinien mieć następujące parametry procesu dla dobrej formy woskowej do biżuterii.
(1) Temperatura topnienia materiału woskowego powinna być umiarkowana, z pewnym zakresem temperatury topnienia, stabilną kontrolą temperatury i odpowiednią płynnością, a forma woskowa nie powinna łatwo mięknąć ani odkształcać się, co ułatwia spawanie.
(2) Aby zapewnić dokładność wymiarową formy woskowej do biżuterii, szybkość rozszerzania i kurczenia się materiału formy woskowej powinna być niewielka, zwykle mniejsza niż 1%.
(3) Forma woskowa powinna mieć wystarczającą twardość powierzchni w temperaturze pokojowej, aby zapobiec zarysowaniom powierzchni podczas innych procesów odlewania metodą traconego wosku.
(4) Aby zapewnić, że forma woskowa może być płynnie usunięta z gumowej formy, może zginać się bez pękania i może automatycznie powrócić do pierwotnego kształtu po usunięciu, wosk używany do biżuterii powinien mieć dobrą wytrzymałość, elastyczność i sprężystość, z wytrzymałością na zginanie większą niż 8 MPa.
(5) Zmiana składu podczas ogrzewania powinna być niewielka, a pozostałości popiołu podczas spalania minimalne.
Podstawowy skład materiału formy woskowej obejmuje wosk, smar, żywice naturalne i syntetyczne oraz inne dodatki. Wosk służy jako matryca, z niewielką ilością smaru dodanego jako środek smarny. Różne żywice mogą utwardzić formę woskową i uczynić ją elastyczną, jednocześnie poprawiając połysk powierzchni. Dodanie żywicy do parafiny utrudnia wzrost kryształów parafiny, uszlachetniając ziarno i zwiększając wytrzymałość.
Obecnie bardziej popularne rodzaje wosku jubilerskiego na rynku są dostępne w różnych kształtach, takich jak koraliki, arkusze, rurki i nici, w kolorach, w tym niebieskim, zielonym i czerwonym (rysunki 3-11, 3-12). Wosk używany do tłoczenia form woskowych jest najczęściej niebieski, o temperaturze topnienia około 60 ℃ i temperaturze zalewania 70-75 ℃.
Podczas pracy z woskiem do centralnego kanału odlewniczego i woskiem do formy należy je w miarę możliwości rozróżniać. Temperatura topnienia wosku do centralnego kanału odlewniczego powinna być nieco niższa niż wosku do formy, aby uniknąć naprężeń w odlewie, które mogłyby prowadzić do pęknięć podczas odparafinowania.
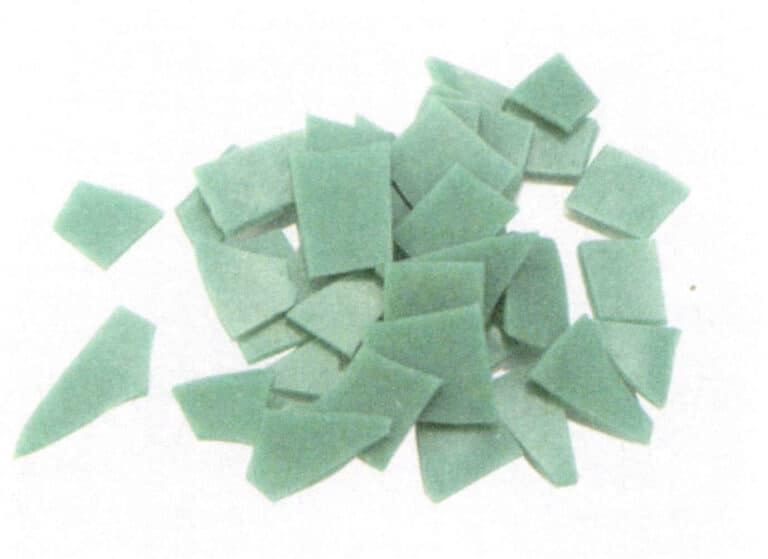
Rysunek 3-11 Arkusz zielonego wosku
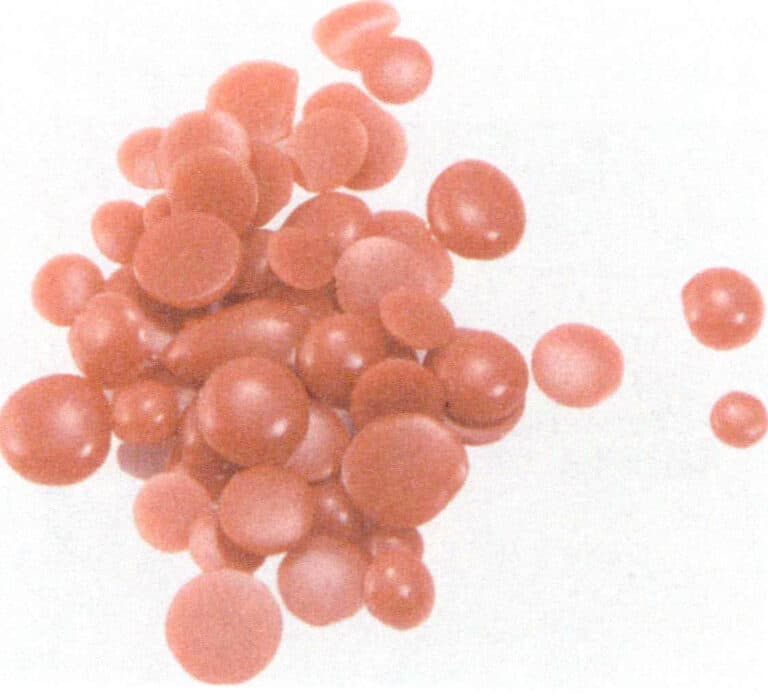
Rysunek 3-12 Czerwona kulka woskowa
2. Główny sprzęt i narzędzia
Głównym sprzętem i narzędziami do produkcji form woskowych są wtryskarka wosku (powszechnie znana jako wtryskarka wosku), pistolet pneumatyczny, gumowy zacisk formy, worek z proszkiem perłowym, igła do kapania wosku, lampa alkoholowa itp.
Główne narzędzia i wideo przygotowujące do produkcji
3. Wstrzykiwanie wosku (wstrzykiwanie wosku)
Umieść materiał woskowy w zbiorniku wosku; materiał woskowy musi pozostać czysty. Ciągły wyciek wosku z dyszy woskowej jest najczęściej spowodowany pyłem w wosku lub cząsteczkami na powierzchni blokującymi zawór. Dlatego jeśli istnieje podejrzenie, że wosk zawiera obce zanieczyszczenia lub ponownie użyty materiał woskowy, należy go najpierw podgrzać do odpowiedniej temperatury w celu stopienia, a następnie przefiltrować przez kilka warstw gazy przed użyciem.
Dostosuj temperaturę zbiornika wosku i dyszy woskowej do wymaganej temperatury. Grzałka i czujnik temperatury w maszynie do wtrysku wosku mogą doprowadzić płyn woskowy do określonej temperatury i utrzymać ją, zwykle w zakresie 70-75 ℃. Temperatura ta zapewnia płynność cieczy woskowej. Jeśli temperatura jest zbyt niska, ciecz woskowa nie wypełni łatwo formy woskowej, powodując niekompletne formy; i odwrotnie, jeśli temperatura cieczy woskowej jest zbyt wysoka, może przelać się ze szwów formy lub portu wtryskowego, łatwo tworząc błysk lub raniąc palce.
Przed wstrzyknięciem wosku należy otworzyć formę i sprawdzić jej integralność i czystość. Jeśli jest to używana forma, należy rozpylić środek antyadhezyjny (lub posypać niewielką ilością talku) do formy, szczególnie w małych i złożonych obszarach na początku, aby ułatwić usunięcie formy woskowej. Środek antyadhezyjny i talk w proszku nie powinny być stosowane jednocześnie, a talk w proszku nie powinien być stosowany nadmiernie, aby uniknąć chropowatości na powierzchni formy woskowej. Pojedyncza aplikacja talku w proszku może wytworzyć 3-6 form woskowych.
Ciśnienie w cylindrze woskowym wtryskarki jest zapewniane przez zewnętrzną pompę powietrza (źródło). Przed wtryskiem wosku należy sprawdzić ciśnienie powietrza i dostosować czas wtrysku do złożoności kawałków wosku w gumowej formie (rysunek 3-13). Ogólnie rzecz biorąc, formy woskowe o bardziej płaskich powierzchniach i prostych kształtach wykorzystują ciśnienie powietrza 0,5-0,8 kg/cm; formy woskowe o cieńszych ściankach, większej liczbie osadzonych kamieni i wąskich szczelinach wykorzystują 1,0-2,0 kg/cm. Czas wtrysku dla dużej formy woskowej wynosi około 4 sekund, podczas gdy dla małej formy woskowej wynosi 2 sekundy. Następnie obiema rękami mocno zaciśnij gumową formę za pomocą płytki mocującej (która może być wykonana z akrylu, drewna, aluminium itp.), upewniając się, że rozkład palców wywiera równomierny nacisk na formę; ustaw wlot odlewniczy formy równolegle do dyszy woskowej i wepchnij go, przytrzymując go przy dyszy woskowej bez poruszania rękami (rysunek 3-14). Delikatnie naciśnij przełącznik wtrysku stopą, a następnie zwolnij go. Gdy lampka kontrolna wtryskarki zmieni kolor z żółtego na czerwony, a następnie na zielony, oznacza to, że proces wtrysku został zakończony i można odsunąć gumową formę od dyszy woskowej.
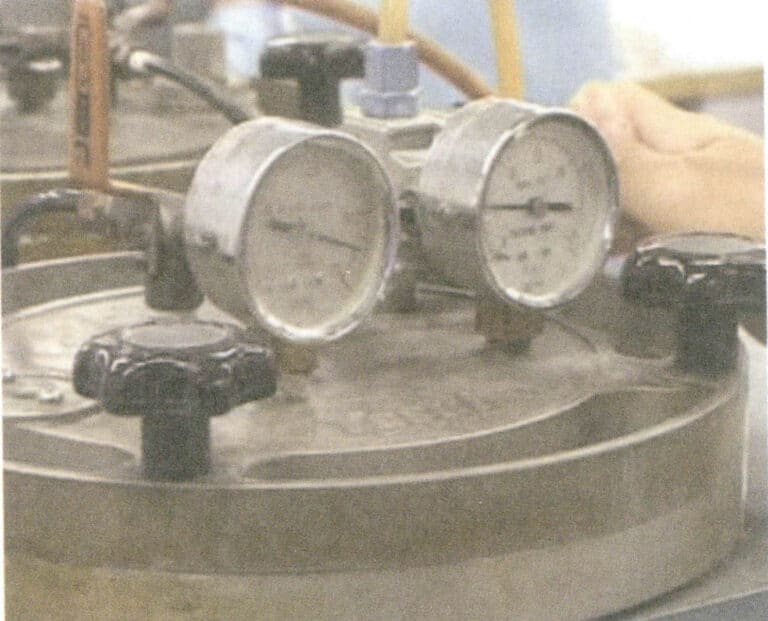
Rysunek 3-13 Regulacja ciśnienia powietrza
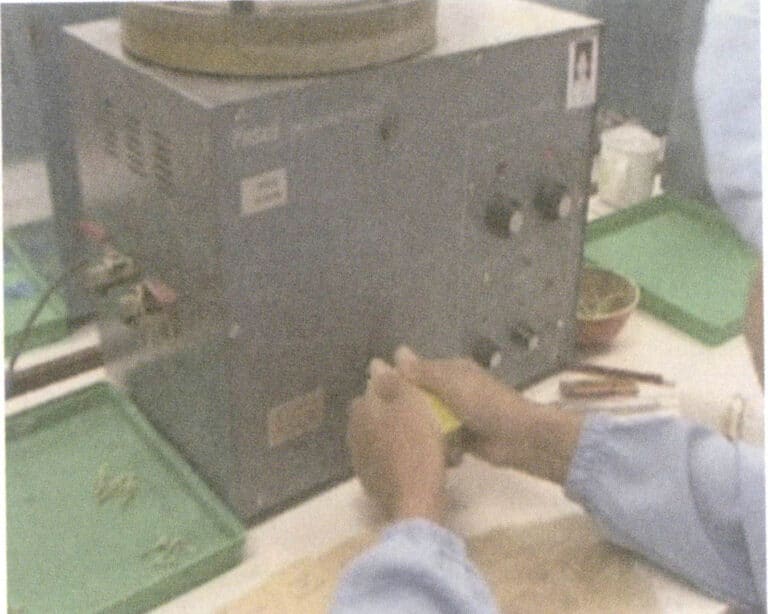
Rysunek 3-14 Wstrzykiwanie wosku
Ułóż formy silikonowe w kolejności wtrysku wosku. Po ciągłym wykonaniu 6-7 form silikonowych można otworzyć pierwszą formę silikonową (jeśli forma ma zamontowane zatyczki, należy je najpierw usunąć), wyjąć formę woskową i tak dalej. Zwróć uwagę na technikę (Rysunek 3-15) podczas wyjmowania formy, aby uniknąć złamania lub zdeformowania kawałka wosku. Po wyjęciu woskowej formy należy ją dokładnie sprawdzić. W przypadku brakujących krawędzi, złamanych pazurów, deformacji, silnego błysku lub wielu pęcherzyków, taka forma woskowa jest uważana za wadliwą. Forma woskowa powinna zostać naprawiona, jeśli występują bardzo małe wady.
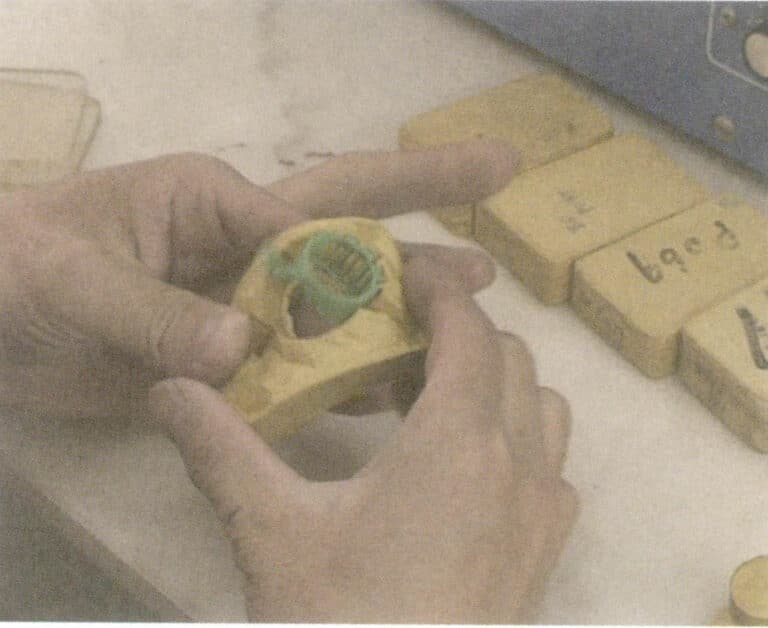
Wstrzykiwanie wosku Wideo
4. Naprawa formy woskowej
Główne narzędzia: skalpel, lutownica elektryczna, nóż do skrobania wosku, igła do kapania wosku itp.
Ogólnie rzecz biorąc, formy woskowe wyjęte po wstrzyknięciu wosku będą miały pewne problemy, takie jak błysk, ślady zaciskania, złamane pazury, widoczne otwory piaskowe, częściowe lub całkowite odkształcenie strukturalne, zablokowane małe otwory, niejasne linie kwiatowe i nakładające się krawędzie kwiatowe. Ostrze skalpela może wypolerować defekty, takie jak błysk, ślady zacisku, niejasne wzory kwiatowe i zachodzące na siebie krawędzie (rysunek 3-16). Lutownica elektryczna może naprawić dziury po piasku i złamane pazury (rysunek 3-17). Kawałki wosku z zablokowanymi małymi otworami można przebić igłą spawalniczą. W przypadku zdeformowanych form woskowych można je poprawić w gorącej wodzie o temperaturze 40-50 ℃.
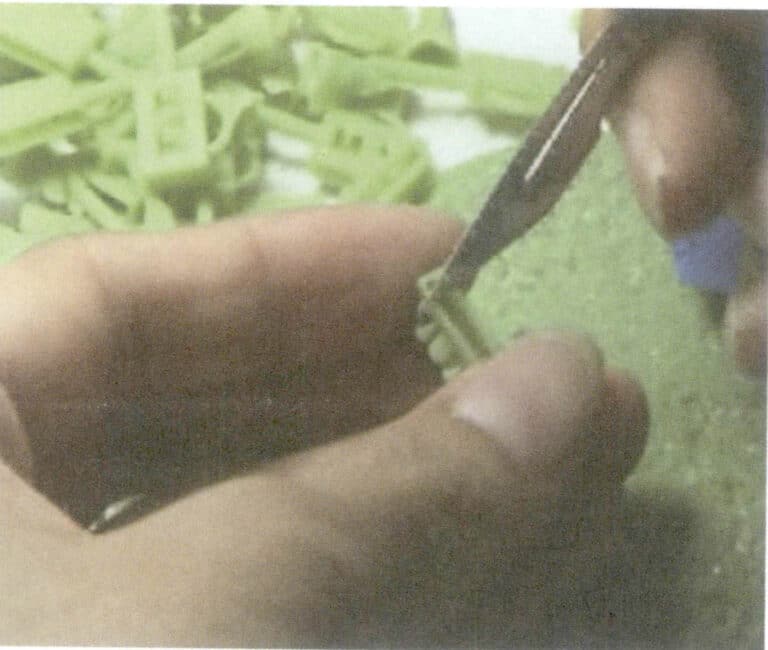
Rysunek 3-16 Naprawa modelu woskowego
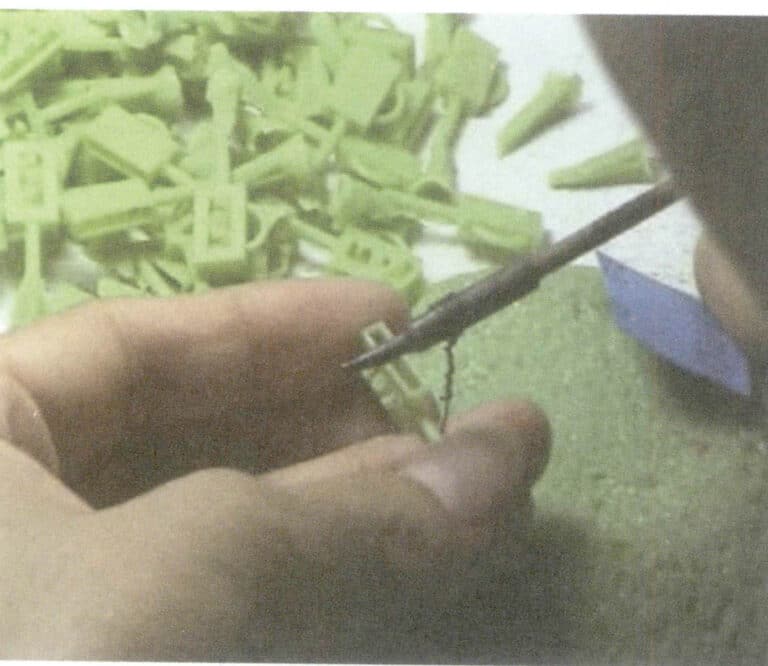
Rysunek 3-17 Spawany model woskowy
Dodatkowo, w przypadku pierścionków o różnych rozmiarach, jeśli rozmiar pierścionka zostanie zmieniony podczas procesu formowania, jest to zarówno pracochłonne, jak i materiałochłonne. Dlatego firmy produkujące biżuterię bezpośrednio modyfikują rozmiar pierścionka podczas naprawy modelu woskowego (rysunek 3-18). Używanie spawarki do wosku (lutownicy elektrycznej) do zmiany rozmiaru pierścionka jest bardzo wygodne; po spawaniu należy przyciąć szew spawalniczy ostrzem. Na koniec bawełna nasączona alkoholem usuwa wiórki wosku z modelu woskowego.
Wax Model Trimming Video
5. Typowe wady form woskowych
Typowe wady form woskowych przedstawiono w tabeli 3-2.
Tabela 3-2 Przyczyny i rozwiązania typowych wad form woskowych
| Pytanie | Obraz | Możliwe przyczyny | Rozwiązania |
|---|---|---|---|
| Wosk Kawałek wosku ma zadziory. |

|
(1) Ciśnienie powietrza wtryskarki wosku jest zbyt wysokie lub temperatura wosku jest zbyt wysoka; (2) Siła zacisku po obu stronach formy jest zbyt mała; (3) Forma pozostaje zbyt długo przy dyszy woskowej. | (1) Obniżenie ciśnienia powietrza lub temperatury wosku we wtryskarce; (2) Zwiększenie siły zacisku po obu stronach formy; (3) Skrócenie czasu wtrysku. |
| Kawałek wosku jest niekompletny. |

|
(1) Ciśnienie powietrza wtryskarki wosku jest zbyt niskie lub temperatura wosku jest zbyt niska; (2) Forma jest zbyt mocno zaciśnięta; (3) Wylot wosku wtryskarki jest zablokowany; (4) Występuje problem z formą i wewnętrzny gaz nie może się wydostać; (5) Temperatura formy jest zbyt niska, co powoduje szybkie krzepnięcie wosku. | (1) Zwiększyć ciśnienie powietrza lub temperaturę wosku we wtryskarce; (2) Zmniejszyć ciśnienie po obu stronach formy; (3) Oczyścić i odblokować wylot wosku wtryskarki; (4) Otworzyć "przewody odpowietrzające" w martwych narożnikach wewnątrz formy; (5) Umieścić formę w temperaturze pokojowej 20-22 ℃ na 1-2 godziny przed rozpoczęciem wtrysku wosku. |
| Wewnątrz kawałka wosku znajdują się pęcherzyki powietrza |

|
(1) Ciśnienie powietrza we wtryskarce wosku jest zbyt wysokie; (2) Ilość wosku we wtryskarce jest zbyt niska; (3) Temperatura wosku jest zbyt wysoka lub zbyt niska; (4) Wlot wosku formy nie jest wyrównany z wylotem wosku maszyny, co powoduje przedostawanie się powietrza wraz z woskiem. | (1) Dokładnie wyregulować ciśnienie powietrza we wtryskarce wosku; (2) Zwiększyć ilość wosku we wtryskarce (nie mniej niż połowa pojemności wtryskarki wosku); (3) Dostosować temperaturę wosku do prawidłowego zakresu (65-75 ℃); (4) Wyrównaj wlot wosku formy szczelnie z wylotem wosku maszyny, nie pozostawiając żadnych szczelin. |
| Kawałki wosku są podatne na pękanie. |

|
(1) Temperatura wosku jest zbyt wysoka; (2) Zbyt duża ilość "starego wosku" jest ponownie używana; (3) Zbyt długie pozostawienie kawałków wosku w formie; (4) Używanie wosku niskiej jakości lub zbyt twardego. | (1) Obniżyć temperaturę wosku; (2) Dodać nowy wosk do wtryskarki (nowy wosk stanowi całkowitą ilość wosku w maszynie powyżej 60%); (3) Podczas wtryskiwania wosku w dużych partiach, wtryskiwać mniej form na raz; (4) Zmiana wosku na wysokiej jakości lub bardziej miękki. |
| Kawałki wosku łatwo się wyginają i deformują. |

|
(1) Temperatura wosku jest zbyt wysoka; (2) Kawałki wosku są wyjmowane z formy zbyt wcześnie przed schłodzeniem; (3) Używanie zbyt miękkiego wosku w lecie. | (1) Obniżyć temperaturę wosku; (2) Odczekać, aż kawałki wosku ostygną w formie przed ich wyjęciem (ponad 1 minutę); (3) Latem wybierz twardszy wosk. |
Sekcja III Inwestycja odlewnicza
Odlewanie inwestycyjne polega na użyciu dobrze wymieszanego płynnego gipsu w proszku odlewniczym, który jest równomiernie wlewany do kolby odlewniczej (cylindra) zawierającej model woskowy i poprzez proces usuwania wosku pozostawia w kolbie odlewniczej (cylindrze) wgłębienie, które jest takie samo jak model woskowy.
1. Sadzenie drzew woskowych
Po przycięciu formy woskowej następnym procesem jest sadzenie drzew woskowych.
Sadzenie drzew woskowych polega na sekwencyjnym zgrzewaniu przygotowanych form woskowych na pręcie woskowym w sposób okrężny za pomocą zgrzewarki do wosku, ostatecznie tworząc drzewo woskowe przypominające kształtem drzewo. Drzewo woskowe jest następnie poddawane procesom takim jak inwestowanie. Podstawowe wymagania dotyczące sadzenia drzew woskowych są następujące: formy woskowe muszą być ułożone w uporządkowany sposób, formy nie mogą się stykać (należy zachować co najmniej 2 mm odstępu), a przy zapewnieniu wystarczających odstępów, jak najwięcej form woskowych powinno być przyspawanych do drzewa woskowego. Między drzewem woskowym a ścianą kolby musi być co najmniej 5 mm odstępu, a drzewo woskowe powinno znajdować się w odległości około 10 mm od dna kolby, określając w ten sposób rozmiar i wysokość drzewa woskowego.
Drzewo woskowe należy "posadzić" na okrągłej gumowej podstawie. Średnica tej gumowej podstawy odpowiada wewnętrznej średnicy kolby. Generalnie, średnice gumowych podstaw wynoszą 3 cale, 3,5 cala i 4 cale (1 cal = 3,33 cm). Dokładnie w środku podstawy znajduje się podniesione okrągłe wgłębienie, a średnica wgłębienia odpowiada średnicy pręta woskowego drzewa woskowego.
Kroki sadzenia drzew woskowych są następujące.
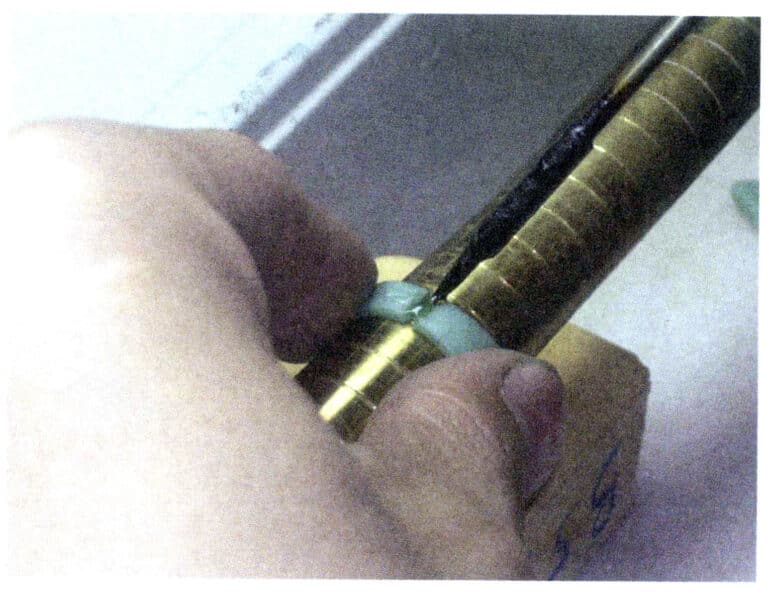
(1) Zanurz jeden koniec pręta woskowego w roztopionym płynie woskowym i włóż go do zagłębionego otworu w obudowie, gdy jest jeszcze gorący, tak aby pręt woskowy i zagłębiony otwór były mocno połączone (Rysunek 3-19).
(2) Weld the wax molds onto the wax rods one by one, either from the bottom of the rods (from the bottom up) or from the top of the rods (from the top down) until it is completed (Fig. 3-20). If the technique of “planting a wax tree” is skillful, there is not much difference between the two methods. However, the method of starting from the top of the bar (from top to bottom) is generally used more often, because the biggest advantage of this method is that it prevents the melted wax from dripping down onto the welded mold, thus avoiding rework due to wax dripping.
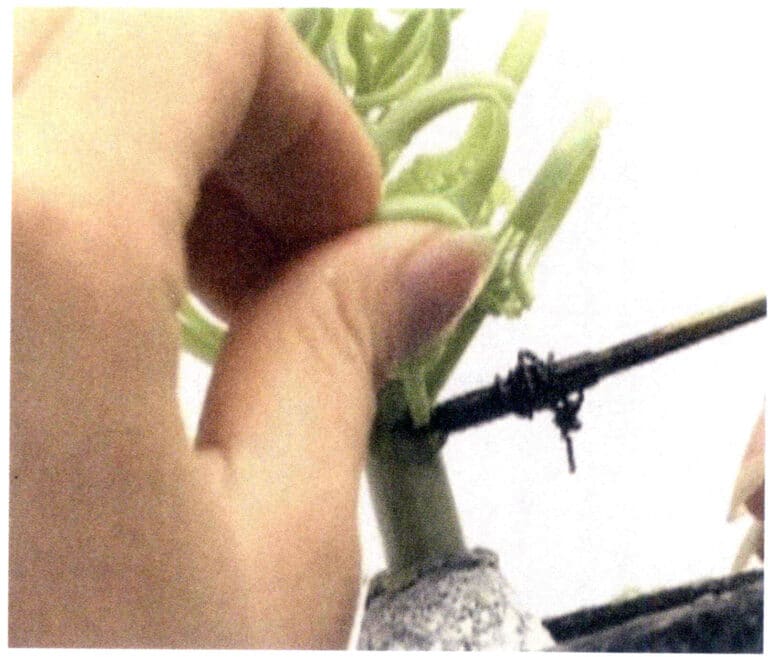
Figure 3-19 Planting wax trees
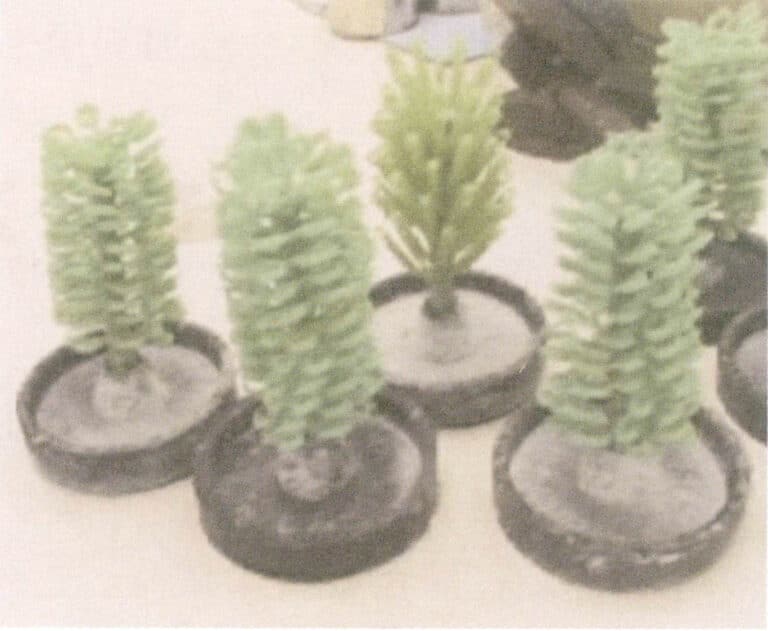
Figure 3-20 The Grown Wax Tree
Planting Wax Trees Video
The following issues should be noted while growing the wax tree.
(1) When planting the wax tree, it is advisable to avoid mixing thick and thin workpieces, as it is difficult to ensure quality during casting.
(2) Based on the shape of the wax piece, select the angle between the wax piece and the wax rod to ensure that the molten metal can flow smoothly and quickly. Generally, the direction of the wax mold is inclined upwards, and this angle can be adjusted appropriately according to the casting method, the wax mold’s size, and the wax piece’s shape. In centrifugal casting, the wax mold and the wax rod form 45°-60°; in vacuum casting, the wax mold and the wax rod form 70°-80°, which helps control the solidification direction.
(3) The rubber base should be weighed Before planting the wax tree. After planting the wax tree, a second weighing should be done. Subtracting the results of these two weighing gives the mass of the wax tree. Converting the mass of the wax tree into the mass of metal based on the density ratio of paraffin to casting metal allows for an estimate of how much metal is needed for casting. Typically, Silver : wax =10 : 1; 14K gold : wax =14 : 1; 18K gold : wax =16 : 1; 22K gold : wax = 18 : 1.
(4) After planting the wax tree, checking whether the wax molds are securely welded is essential. Not securely welded can easily cause the wax molds to fall off during the plaster pouring, affecting the casting process. Check whether the casting sprue of the wax piece is smoothly connected to the wax rod, avoiding angles or gaps. Finally, check whether there is enough space between the wax molds; they should be separated if they are stuck together. If there are wax drips on the wax tree, they should be removed with a blade.
Wax Model Crafting Video
2. Casting investment
The melting points of different jewelry metals vary, and accordingly, the materials used for molds are also different. Conventional decorative gold, silver, and copper alloys generally have melting points below 1100℃, so plaster molds are commonly used; however, for high melting point materials such as platinum, palladium, and stainless steel, ceramic molds made from acid-bonded casting powder must be used.
2.1 Production of plaster molds
(1) Production of plaster molds
- Advantages of plaster molds:
- Good replication; plaster expands while crystallizing, filling the small details of the model, resulting in clear patterns and strong three-dimensionality;
- Good dispersibility; for thin and complex ornaments, residual casting powder can be easily removed without damaging the cast piece; Convenient operation, easy to master.
(2) Composition of plaster casting powder. The casting powder consists of refractory materials, binders, and additives. Refractory materials use quartz and cristobalite to avoid decomposition at high temperatures; the binder uses hemihydrate plaster to fix the refractory materials into a mold; additives are used to control when the binding material sets and to adjust the processing performance of the casting powder liquid plaster.
Currently, there are various types of casting powders on the market. Widely used international brands include Kerr and R&R from the USA and SRS and Golden Star from the UK; each with its characteristics in terms of performance and price.
(3) Investment process. Due to static electricity generated on the wax tree, which easily attracts dust, it can be immersed in a surfactant or diluted detergent before pouring, then rinsed with distilled water and dried. During the Investment process, it is important to control the setting time of the plaster liquid plaster appropriately; if it sets too quickly, gas may not be completely expelled; if too slowly, the powder may settle in the liquid plaster, altering the solid-liquid ratio locally and causing differences in roughness on the top and bottom of the jewelry. The liquid plaster’s setting time depends on the casting powder’s performance and is greatly influenced by the mixing operation and the water-to-powder ratio.
First, take a clean casting flask, tightly wrap a circle of transparent tape around the cylinder wall to prevent the liquid plaster from leaking out of the holes in the wall, and insert the wax tree into the casting flask, ensuring the rubber base is in close contact with the flask to stabilize the wax tree in the center of the cylinder (Figure 3-21 ).
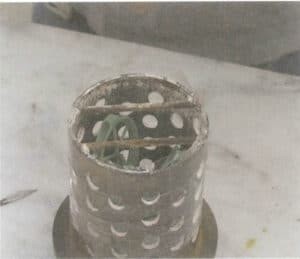
Calculate the required mass of casting powder based on the capacity of the casting flask, weigh the casting powder and water in the specified ratio (Figure 3-22), and mix evenly by hand or in a mixer for 2-3 min (Figure 3-23).
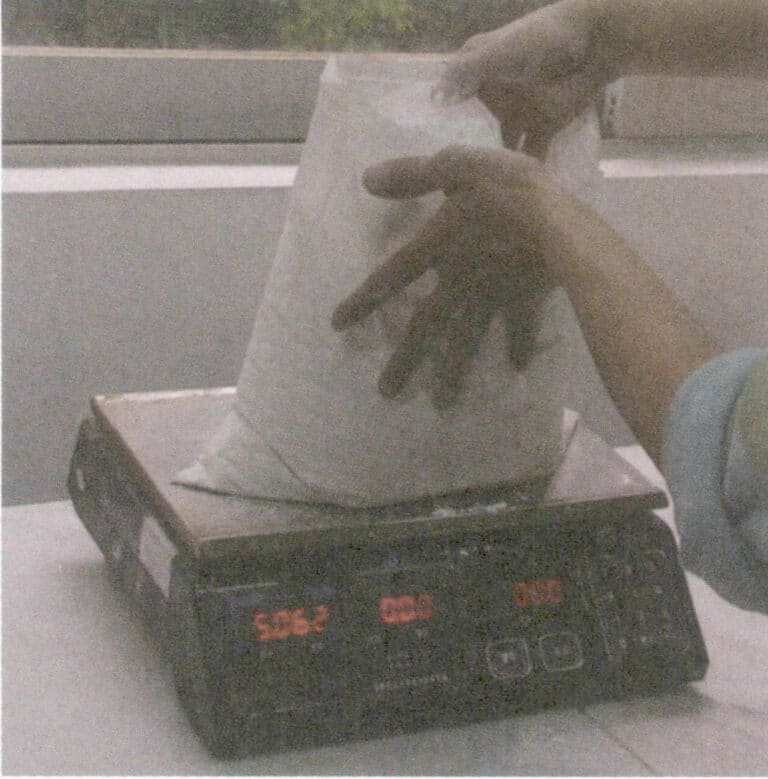
Figure 3-22 Weighing cast powder
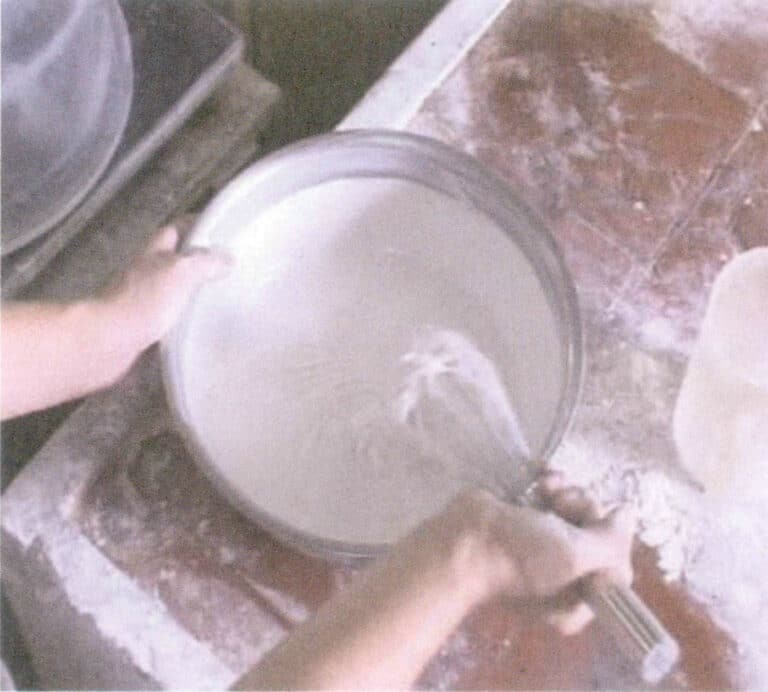
Figure 3-23 Hand mixing of casting powder liquid plaster
After mixing the casting powder liquid plaster, vacuum it in a vacuum machine for 1 to 2 minutes, then evenly inject the vacuumed casting powder liquid plaster into the casting flask (Figure 3-24). and then vacuum 2-3 minutes, and at the same time constantly vibrate the casting flask in order to prevent air bubbles attached to the wax mold (Figure 3-25)
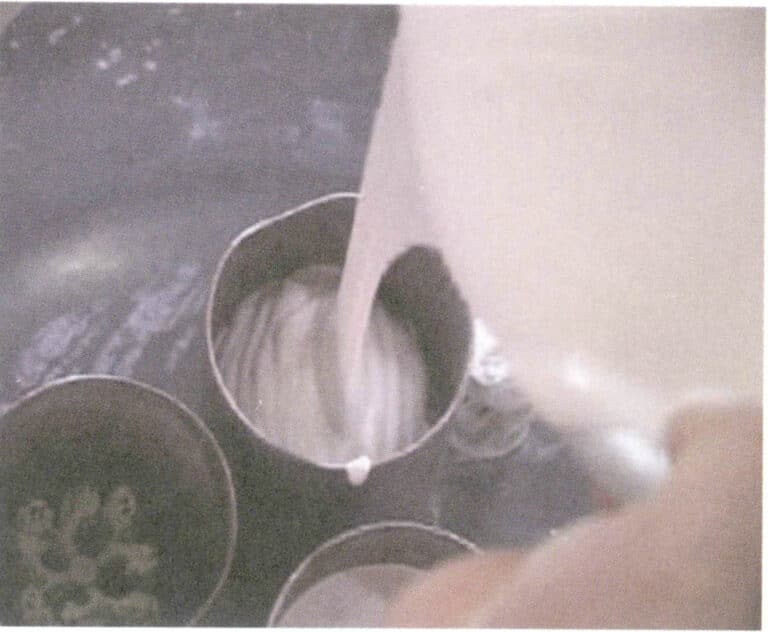
Figure3-24 Grouting
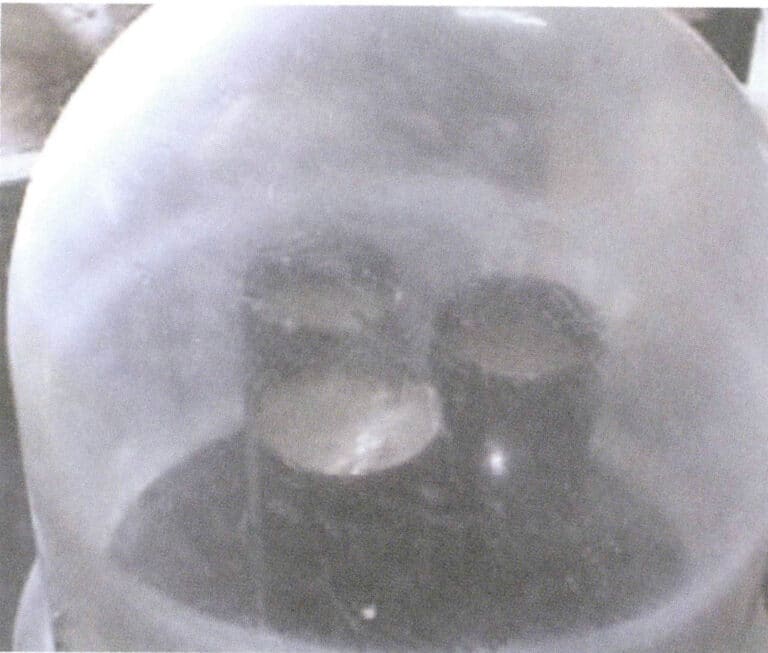
Figure 3-25 Vacuuming
(4) Stand still. After completing the investment, it should stand for 1.5-2 hours to allow the plaster mold to solidify and harden fully (Figure 3-26). Then remove the rubber base, dismantle the wrapping material around the steel flask, clean up the liquid plaster splattered around it, and make marks on the side and surface of the mold.
Plaster Mold Making Video
(5) Issues to pay attention to in the investment.
- Stir according to the required water-to-powder ratio. When stirring the casting liquid plaster, the action should be quick, and the stirring should be thorough until there are no powder lumps so that the liquid plaster achieves better fluidity. It is best to inject the liquid plaster into the casting flask with the wax tree after vacuum degassing for 1-2 min.
- After injecting the liquid plaster into the casting flask, perform a second vacuum degassing, which generally requires 2-3 min, while degassing and vibrating the flask makes it easier for bubbles to rise.
- After the second degassing, place the casting flask in a still place without vibration. The powder and water mixture begins to solidify after about 15-20 min, and it will completely solidify and reach the required strength after 2 hours.
- It is particularly important to note that during the casting process, the viscosity increases about 10 minutes after the powder and water are mixed, making it unfavorable for degassing. Therefore, the first and second steps of the two degassing must be completed within 10 minutes.
Copywrite @ Sobling.Jewelry - Producent biżuterii na zamówienie, fabryka biżuterii OEM i ODM
2.2 The Investment of platinum jewelry
Taking the Platinum-Plus platinum casting powder produced by the R&R company as an example, the mold-making process is as follows.
(1) Prepare the sprue cup base.
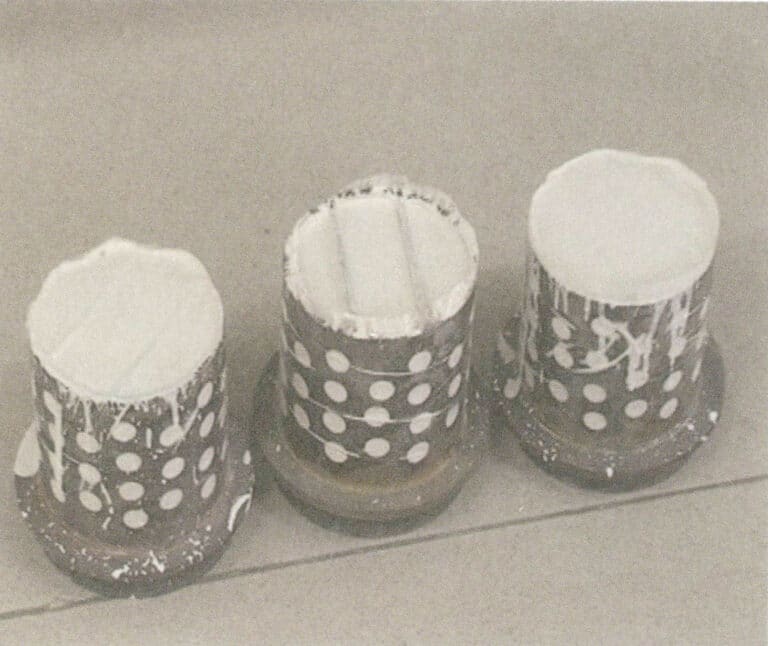
Use non-asbestos paper instead of a rubber base, with the paper being 10 cm x 10 cm or larger. Cut a circular hole with a diameter of 1.27 cm in the center of the base so that during burnout, the wax can be discharged from here into the cavity. Stick a sprue cup with a diameter of 2.5 cm in the center of the paper, and fix the wax tree or wax mold to the sprue cup. The wax mold should be 2.5 cm shorter than the height of the steel cylinder. Use paper, soft paper tape, or other materials to form a 10 cm high cylindrical barrel around the top of the steel cylinder to prevent the liquid plaster from overflowing during vacuum extraction (Figure 3-27).
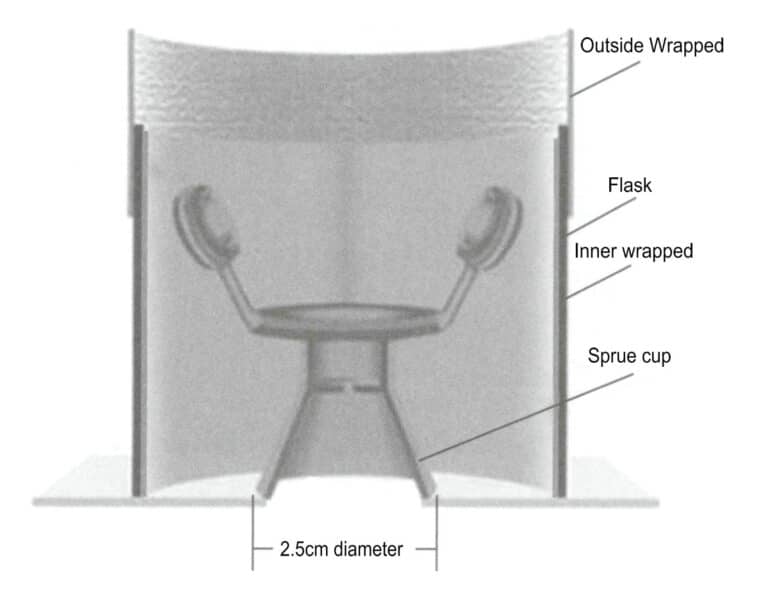
(2) Inner wrap of the steel cylinder.
The Inner wrap helps absorb excess binder liquid and remove casting powder. Prepare a piece of 2-3 mm thick, water-absorbent fiber paper, making its length sufficient to wrap around the inner circumference of the steel cylinder and its height shorter than the steel cylinder by 10-15 mm. Roll the paper and insert it into the steel cylinder, leaving an equal distance at the top and bottom.
(3) Mixing the liquid plaster.
The appropriate water-to-powder ratio and curing time are key to ensuring the quality of the castings, so it is important to weigh the mass of the liquid and casting powder accurately.
Platinum-Plus concentrated binder can be diluted with water at 1 volume of binder to 14 volumes of water. Add the binder to deionized or distilled water using a clean plastic container.
The water-to-powder ratio for Platinum-Plus is 30: 100 (mass ratio). Weigh the required amount of diluted binder solution and the corresponding casting powder. Using a high-power mechanical mixer, slowly add the casting powder to the liquid while stirring slowly. When the casting powder begins to thin, switch to a medium-speed stirring for 10-15 min, then, vacuum the liquid plaster until it rises, bubbles burst, and it begins to boil vigorously, continuing to vacuum for 1 minute.
(4) Casting the mold.
Quickly and smoothly inject the vacuumed casting liquid plaster into the steel cylinder, avoiding directly washing the wax mold. Then, place the casting powder cup into the vacuum machine and vacuum for 3-5 min. During this time, it is necessary to continuously and slightly vibrate the casting flask to prevent bubbles from adhering to the wax mold. □
(5) Keep still.
After vacuuming, place the mold on water-absorbing powder and let it rest for 6-8 hours, marking the sides of the casting flask and the casting powder cloth.
3. Wax removal from the Casting plaster mold
When the liquid plaster solidifies, there are two different methods to remove the wax: steam wax removal or burnout in a burnout furnace.
3.1 Steam wax removal
Experiments show that steam dewaxing can more effectively remove wax, with the wax liquid permeating into the mold thickness reduced to zero, resulting in very little wax residue. During calcination, a reducing atmosphere will not form inside the mold, which is beneficial for the stability of CaSO4, as a reducing atmosphere promotes the thermal decomposition of CaSO4. Additionally, using steam dewaxing is also beneficial for environmental protection.
First, fill the dewaxing furnace with enough water, turn on the heating device, and when the water boils, invert the mold and place it in the dewaxing box (Figure 3-28), using steam to melt the wax model inside the mold, allowing it to flow out of the mold.
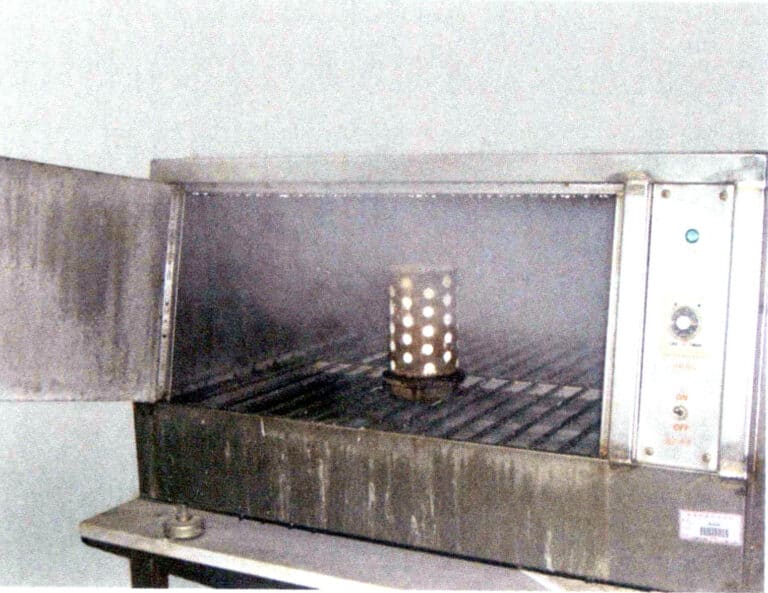
The use of steam dewaxing, pay attention to the boiling of water cannot be too violent, and to control the time of steam dewaxing, otherwise splashing; otherwise, splashes of water will enter the mold, damaging the surface of the mold, and even causing CaSO4 crystals to crack, increasing the reactivity of CaSO4 crystals, lowering the thermal decomposition temperature, and leading to the formation of pores. Additionally, steam dewaxing may weaken the boric acid protectant in the casting powder in wax-settings casting, making the gemstones dull and discolored.
3.2 Wax Removal by Burnout
Wax removal by burnout is a method that uses a burnout furnace to heat the mold, causing the wax material to melt and flow out of the mold. Due to the low boiling point of the wax material, if the wax liquid boils violently during this process, it can damage the surface of the mold, or if the wax liquid does not drain smoothly, it can seep into the surface layer of the mold, both of which will deteriorate the surface quality of the casting. Therefore, it is important to control the heating temperature and speed during the wax removal stage and to set up a corresponding insulation platform. Additionally, the mold should not be completely dried before wax removal; otherwise, the mold is prone to cracking. If it cannot be waxed within 2-3 hours after investment, a damp cloth should be used to cover the mold to prevent drying.
4. Casting Plaster mold Burnout
The purpose of burnout is to remove the moisture and residual wax from the mold completely, achieve the required high-temperature strength and mold permeability, and meet the temperature requirements of the mold during pouring. The burnout system and burnout equipment largely influence the final performance of the mold.
4.1 Burnout of Plaster Molds
Before burnout the mold, a suitable burnout system must be established, which requires underkeep still the temperature changes of the mold during the heating process. The temperature changes inside the plaster mold during heating can be divided into three stages.
(1) Evaporation of free water, vaporization of 2/3 of the water added to the gypsum mixture, absorbing a large amount of heat. The thermal conductivity of water is much lower than that of air, resulting in a significant temperature difference within the mold during the heat transfer process.
(2) Dihydrate plaster transforms into hemihydrate plaster, an endothermic reaction resulting in a reduced temperature gradient.
(3) Hemihydrate plaster transforms into anhydrous, insoluble hard plaster with no significant thermal effect. The filler also does not undergo a phase change, and the mold’s temperature field depends on the materials’ thermal properties and the mold’s bulk density, leading to a reduced temperature difference within the mold.
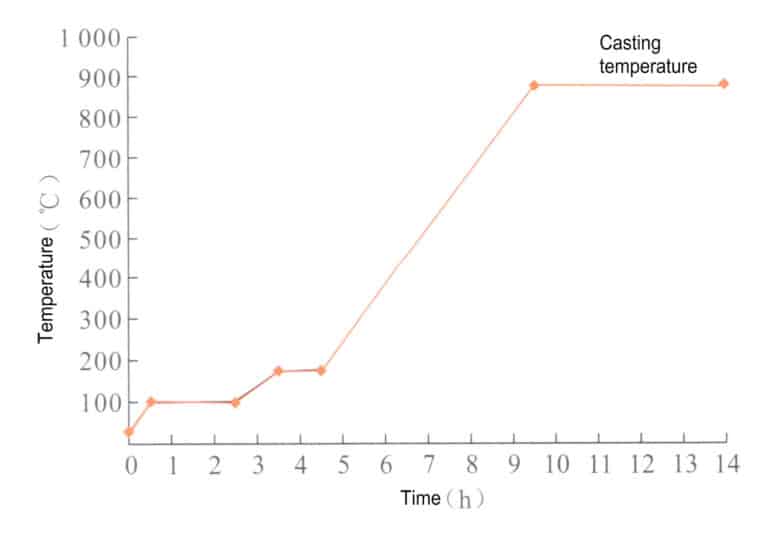
Generally, casting powder manufacturers have established detailed burnout systems, which may vary among manufacturers. Taking R&R plaster casting powder as an example, its recommended burnout system is shown in Figure 3-29.
Directly place the mold into the burnout furnace with the casting cup facing down, leaving a certain gap between molds to prevent uneven heating. When placing more than two layers, the mold on the upper layer should be staggered with the bottom layer (Figure 3-30). According to the burnout system, the self-control heating time and temperature of the high-temperature furnace and the mold are sintered at a high temperature to achieve the required strength, forming various cavity models inside the casting. After burnout the mold, cool down to the required casting temperature.
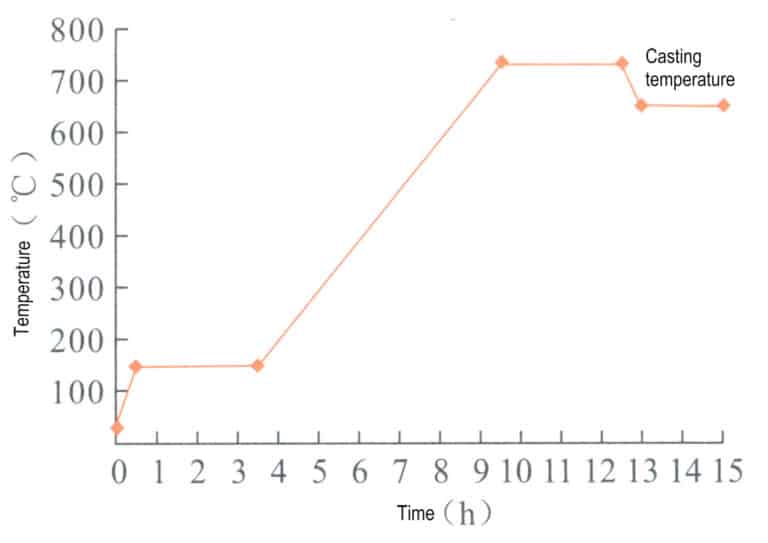
Figure 3-29 R&R Gypsum Cast Roasting Regime
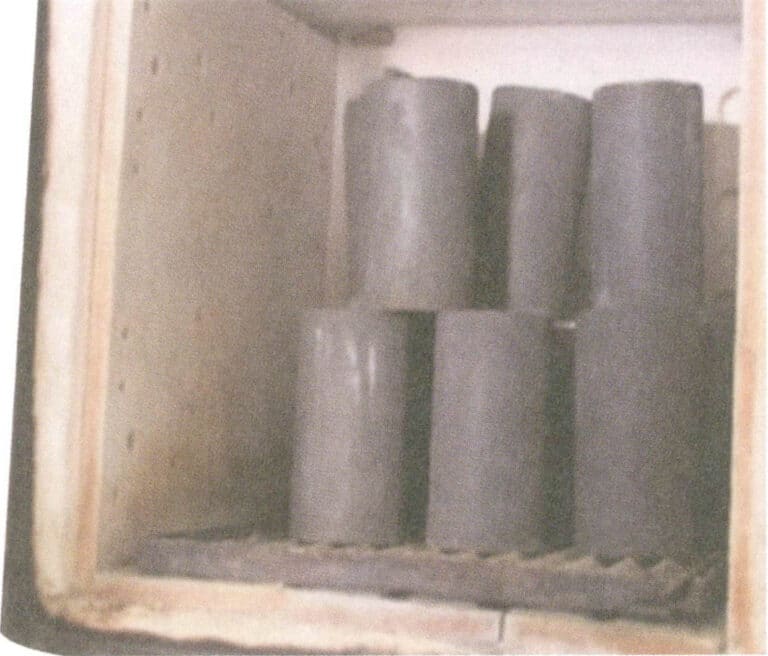
Figure 3-30 Placement method of molds in the burnout furnace
Mold De-waxing and Burnout Video
Investment Molding Video
4.2 Burnout of platinum castings
The burnout system of platinum molds differs greatly from that of plaster molds. It is an acid-bonded mold, and higher sintering temperatures need to be adopted to achieve a good effect. The burnout system recommended by R&R for platinum molds, it is shown in Figure 3-31.
Section IV Melting and pouring
Melting and pouring is one of the most important steps in the jewelry casting process, and many defects are related to this procedure. The work sequence mainly includes several key steps: material preparation, alloy pretreatment, alloy melting, and pouring.
1. Prepare alloy materials
Before melting, it is essential to accurately prepare the type and quality of alloy required for each mold. The weight of the wax tree has already been measured during the wax tree preparation, and based on the specific gravity relationship between wax and metal, the required metal weight can be calculated.
When preparing the ingredients, it is necessary to handle the ratio of new materials to recycled materials correctly. Many suppliers suggest that the recycled material should account for 30% of each batch. However, in actual production, except for a few simple parts with higher casting yields, most products yield only around 50% or even lower. According to the required recycling ratio, a large amount of recycled material generated daily cannot be reused in time, leading to quick accumulation, which poses significant material management and production cost issues for jewelry manufacturing companies. Therefore, many companies adopt at least a 50% ratio during ingredient preparation; in some cases, the recycled material ratio reaches 70%. It is important to note that alloys inevitably become contaminated during the melting and casting process. For instance, excessively increasing the ratio of recycled material to new metal can lead to fluctuations in the alloy’s performance, and elements that are prone to volatilization will decrease, increasing the probability of oxidation inclusions and insufficient pouring defects. The elements prone to volatilization will decrease, increasing the probability of oxidation inclusions and insufficient pouring defects.
2. Alloy Pretreatment
In the casting production of jewelry alloys, the effect of jewelry castings is closely related to the condition of the jewelry alloy. For pure gold, pure silver, and pure platinum jewelry, this issue is relatively minor, and block materials can be directly melted. Materials like gold, silver, and platinum alloys need to be pre-treated. For example, directly mixing pure metals with intermediate alloys for casting can easily lead to problems such as uneven composition, severe loss, and defects like holes.
Therefore, it is generally recommended to melt and cast various pure metals and alloy materials into bead particles, cast them into ingots, and then mix them according to the required quality. It is advisable to prioritize the method of prefabricated bead particles, where the molten metal flows out from the crucible outlet, drops into cooling water, and instantly cools and splits into droplets, solidifying into solid metal particles. Well-shaped and appropriately sized alloy particles are beneficial for uniform composition and temperature control during the melting process, reducing defects such as holes, sand holes, and hard spots, which are also closely related to the control of metal loss. The granulation effect is mainly reflected in particle shape, size, metal quality, and process stability. A good granulation effect depends not only on the type and nature of the alloy material but also on the working performance of the granulation device. The granulation device can be a separate piece of equipment, but some casting equipment is also often equipped with granulation devices. Due to poor equipment conditions, some jewelry companies use manual bead sprinkling, directly pouring molten metal into a quenching water tank to obtain bead particles. Regardless of the method, it is necessary to strictly control several important links, such as the melting, pouring, and cooling methods. If not controlled well, it can lead to irregular bead shapes, easy adhesion into blocks, and phenomena such as gas entrapment and oxidation, thereby affecting the performance of the alloy.
3. Alloy Melting
There are various methods for melting and pouring jewelry alloys, with the commonly used melting methods being oxy-fuel melting and induction melting.
3.1 Oxy-fuel melting
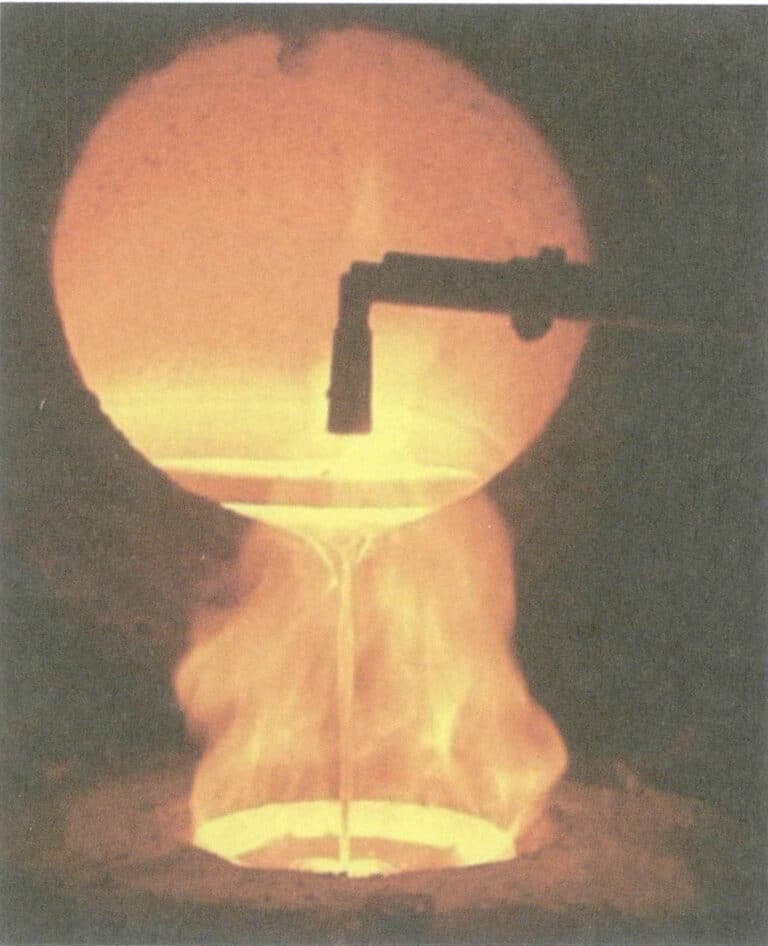
Using a flame gun for smelting and pouring jewelry is a relatively traditional production method with simple tools and equipment. First, the metal is melted using a flame and then manually poured using simple pouring equipment. The combustion gases used in flame gun smelting include gas-oxygen, natural gas-oxygen, etc. Generally, oxygen-acetylene is not used because its temperature is too high, leading to significant metal loss and difficulty in control. The flame guns used are of two types: single-tube and double-tube. The flame gun has a control knob that can adjust the size, strength, and nature of the flame. To effectively protect the molten metal and reduce the oxidation of metal elements, a yellow reducing flame is required (Figure 3-32). The smelting time should be a manageable length, and it should be generally controlled to complete the smelting and pouring within 2-3 min.
Flame gun smelting generally uses clay crucibles. Before smelting, the quality of the crucible should be carefully checked; the inner wall should have a smooth and dense glazed layer with no residual slag. Prepare the flux for slag formation, usually using anhydrous borax. First, preheat the crucible, then add copper particles, adjusting the flame strength and nature to suitable levels. When the copper material is close to melting, sprinkle a small amount of borax on the surface of the liquid and gently stir the molten metal with a glass rod until it is evenly mixed. When the temperature reaches the required pouring temperature, the mold can be taken out for pouring.
During the melting process, it is important to control the temperature and flame atmosphere; otherwise, serious oxidation will occur, leading to metal loss and the formation of slag that contaminates the molten metal, especially in gold and silver alloys with high zinc content. Due to the high vapor pressure of zinc, it will undoubtedly increase the loss of zinc elements, particularly at higher melting temperatures, where the reactivity of the metal increases with temperature. In a boiling state, its oxidation ability is dramatically enhanced, resulting in a large amount of zinc oxide (ZnO) being generated and released into the air, causing a sharp increase in loss. The oxidation ability of copper also increases sharply, forming a large amount of oxidized slag, and the longer the boiling state is maintained, the greater the amount of metal loss. To reduce metal loss, it is generally necessary to strictly control the melting temperature according to the filler metal (referring to the intermediate alloy used to prepare the required karat gold, silver, and platinum alloys).
When the metal is close to melting, a small amount of borax is generally sprinkled on the surface, which not only aids melting but also forms a protective layer on the surface of the molten metal to prevent oxidation and gather the slag on the surface. Borax is Na2B4O7 • 10H2O, with a low melting point, and when calcined to 320℃, it loses its crystalline water and becomes a porous substance. Borax is a good flux in copper alloy melting, having high fluidity after heating and melting, covering the surface of the molten metal, providing excellent protection against gas absorption and metal oxidation, and separating boric anhydride (B2O3). Boric anhydride is extremely unstable at high temperatures and reacts violently with metal oxides when separated.
The chemical reaction equation is as follows:
Na2B4O7 • 10H2O → Na2B4O7 + 10H2O
Na2B4O7 → Na2O • B2O3 + B2O3
B2O3 + MeO → MeO • B2O3
Na2OB2O3 then react with MeO • B2O3 to form the complex salt Na2O•MeO[B2O3]2. This greatly reduces the slag generated from metal oxides and effectively reduces metal loss by displacing and reducing the metal. Additionally, borax plays a good protective role in the molten state, maximizing the prevention of oxidation of the molten metal.
3.2 Induction Melting
The basic principle of induction melting is that when alternating current passes through the induction coil, an alternating magnetic flux is generated in the internal space of the induction coil, inducing an electromotive force in the metal conductor inside the crucible. The induced current, which has a certain electromotive force, forms eddy currents in the metal material, generating heat due to the metal’s resistance, causing the metal to melt. Compared with other melting methods, induction melting has advantages such as high melting efficiency, low element loss, convenient and accurate control and adjustment of the composition and temperature of the molten metal, and simple operation and maintenance, making it widely used in the jewelry casting industry.
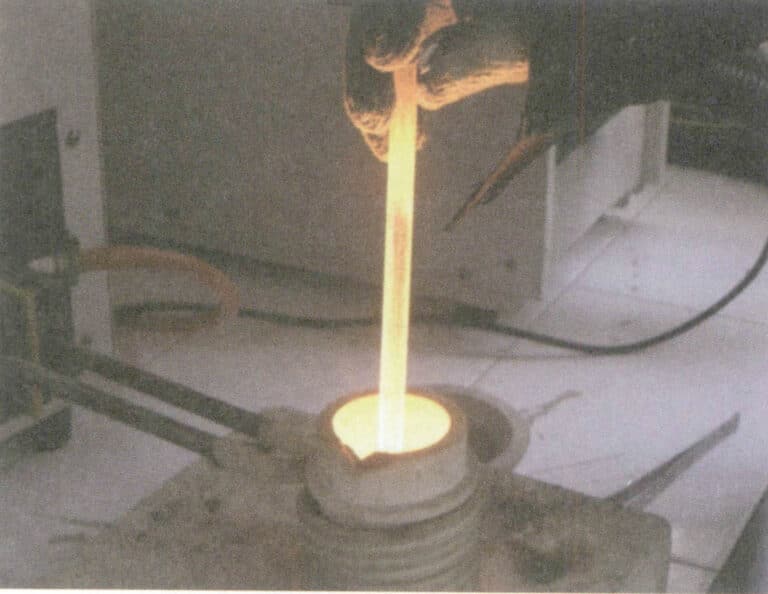
During the induction melting process, the distribution of the induced current in the metal is uneven, with the current density being highest at the surface of the charge and decreasing towards the interior, resulting in the so-called skin effect. The skin effect is closely related to the current frequency; the higher the current frequency, the more pronounced the skin effect. When the crucible capacity is large, the severe skin effect is detrimental to melting. Therefore, there is a certain correspondence between crucible capacity and current frequency. When the melting amount is large, medium-frequency induction is generally used; high-frequency induction is often used when the melting amount is small. Since jewelry is usually quite fine and the amount melted at one time is small, high-frequency induction melting is generally used in jewelry alloy melting(Figure 3-33).
In induction melting, electromagnetic stirring occurs under the action of the electromagnetic force, which is beneficial for the uniformity of the temperature and composition of the molten metal and helps non-metallic inclusions in the molten metal rise. The lower the current frequency, the stronger the electromagnetic stirring effect.
The control of the atmosphere during melting significantly impacts the quality of molten metal. Generally, several methods exist, such as vacuum melting, inert gas protection melting, and reducing flame protection melting. Vacuum melting is beneficial for ensuring metallurgical quality; however, it is not suitable for copper alloys, especially brass alloys with high zinc content. This is because the vacuum exacerbates the volatilization of zinc, leading to severe metal loss and significant composition fluctuations, and the smoke generated during the melting process can damage the vacuum system. Therefore, it is generally necessary to use inert gases such as argon and nitrogen or to use a reducing flame to isolate and protect the molten metal surface to achieve excellent metallurgical quality when induction melting copper alloys.
4. Pouring
Since jewelry pieces are relatively fine, they solidify quickly during the pouring process and lose fluidity. Therefore, conventional gravity pouring is difficult to ensure shaping, and it is necessary to introduce some external force to promote the rapid filling of the mold cavity with molten metal, obtaining castings with complete shapes and clear profiles.
4.1 External Force Methods for Pouring
Pouring can be divided into two main categories based on external force: centrifugal and static pouring.
(1) Centrifugal casting method.
Centrifugal casting involves pouring molten metal into a rotating mold, where the centrifugal force helps fill the mold and solidify the metal. Centrifugal casting has high production efficiency, significant metal pressure, and fast filling speed, which is beneficial for forming castings, especially suitable for casting small ornaments, such as links, earrings, etc. Compared to static casting, traditional centrifugal casting has some weaknesses; due to the fast filling speed, the molten metal experiences severe turbulence during pouring, increasing the likelihood of gas entrapment and the formation of pores; the discharge of gas within the mold cavity is relatively slow, resulting in high back pressure within the mold, which increases the probability of pore formation; when the filling pressure is too high, the molten metal exerts strong scouring on the mold wall, easily leading to mold cracking or peeling; additionally, slag may enter the mold cavity along with the molten metal during pouring. Due to the high filling pressure generated by centrifugal force, the maximum amount of metal that can be cast within a safe range of the centrifuge is less than that of a static casting machine. Furthermore, inert atmospheres are generally less used because the centrifugal casting chamber is relatively large.
(2) Static casting method.
Static casting utilizes methods such as vacuum suction casting and vacuum pressure casting to promote filling the mold cavity with molten metal. Compared to centrifugal casting, the filling process of static casting machines is relatively gentle, resulting in the less scouring effect of the molten metal on the mold wall; due to the vacuum effect, the back pressure of gas within the mold cavity is lower; the maximum amount of metal that can be cast in one go is greater. Therefore, it has been widely used in jewelry casting, especially for casting medium to large ornaments, such as men’s rings, pendants, bracelets, etc.
4.2 Degree of automation in casting
Casting can be divided into two main categories based on the degree of automation: manual casting and automatic casting by machines.
(1) Manual casting.
Manual casting is generally performed in conjunction with fire melting or induction melting. After refining the molten metal and slag, the temperature is adjusted to the casting temperature range. Then, the mold is taken out of the burnout furnace to prepare for casting. Depending on the type of equipment used, manual casting mainly includes centrifugal casting and vacuum casting.
- Manual centrifugal casting: Figure 3-34 shows a simple mechanical drive centrifugal machine used in some small jewelry processing factories. It does not come with an induction heating device and uses oxygen gas to melt metal or an induction furnace to smelt metal, The metal is then poured into a crucible and centrifugally cast.
- Manual vacuum casting: Vacuum casting refers to a method where the air pressure in the mold cavity is lower than the external air pressure, using the pressure difference to draw the molten metal into the mold cavity. Manual vacuum casting is the simplest form of vacuum casting. It uses a vacuum casting machine, and the main component is the vacuum system, without a heating and melting device. Therefore, it needs to be used in conjunction with a torch or melting furnace, and after melting, the molten metal is manually poured into the mold (Figure 3-35). It is relatively simple to operate, has a higher production efficiency, and is widely used in small and medium-sized jewelry factories. Since the pouring is done in the atmosphere, there is a problem of secondary oxidation and gas absorption of the molten metal, and the entire pouring process is controlled by the operator, including pouring temperature, pouring speed, head height, and slag handling on the liquid surface. Thus, many human factors can affect quality.
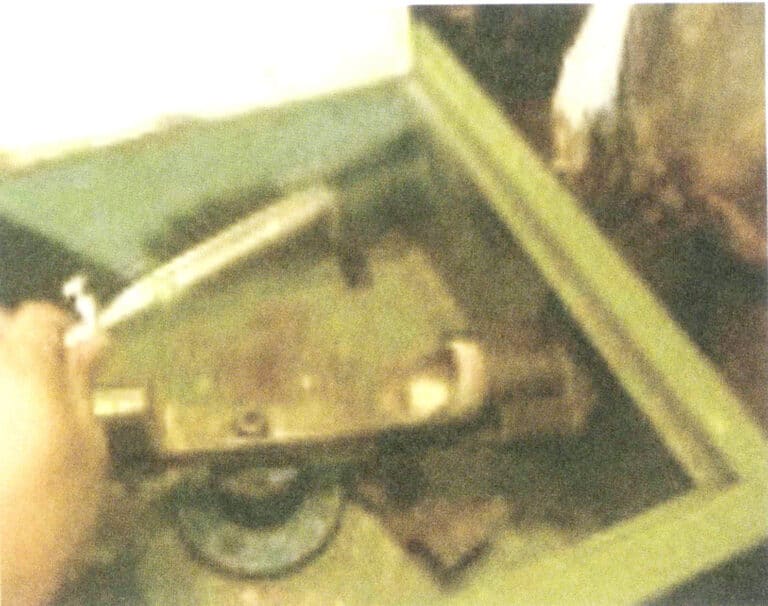
Figure 3-34 Manual centrifugal casting
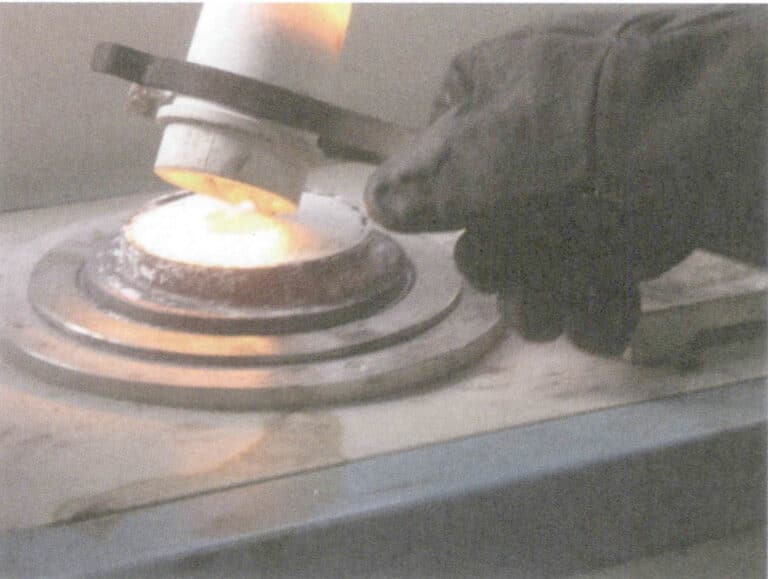
Figure 3-35 Manual vacuum casting
Melting and Casting Video
(2) Automatic pouring by casting machines.
Manual pouring is a traditional and outdated production method, resulting in significant fluctuations in product quality. With the increasing quality requirements for jewelry products and the technological advancements in the jewelry industry, automatic casting machines have become very important equipment in lost-wax casting for jewelry, serving as an important foundation for ensuring product quality.
According to the form of external force used, the commonly used jewelry casting machines mainly fall into two categories: centrifugal and static casting.
- Automatic centrifugal pouring: In response to the shortcomings of traditional simple centrifugal pouring machines, modern centrifugal casting machines integrate induction heating and centrifugal pouring, achieving significant advancements in driving technology and programming, improving programming capabilities and process automation control. For example, the angle of the mold’s central axis and the swing arm is designed to be variable, functioning as a function of rotational speed, allowing it to change from 90℃ to 0℃. This comprehensively considers the effects of centrifugal and tangential inertial forces in driving the molten metal out of the crucible and into the mold. This device helps improve the balance of metal flow and prevents the molten metal from preferentially flowing along the reverse rotation direction of the pouring channel wall. An exhaust device is added at the bottom of the mold to facilitate the smooth discharge of gas from the cavity, improving filling capacity. It also has a temperature measurement device to reduce human judgment errors. Figure 3-36 shows a typical melting and pouring chamber of a jewelry centrifugal casting machine suitable for casting alloys such as gold, silver, and copper.
When pouring with a centrifugal casting machine, open the cooling water, turn on the power switch, evenly place a measured amount of raw material into a clean crucible, raise the heating wire, and press the heating button to heat. Use iron pliers to take out the dewaxed casting flask from the furnace and place it on the casting machine’s cylinder rack, aligning the pouring opening of the casting powder mold with the pouring opening of the crucible. Once the metal is completely melted, use flux to purify it, lower the heating wire, cover the top of the crucible with a semicircular refractory material, and press it tightly. After covering the protective cover, the centrifugal motor drives the crucible and mold to rotate around the motor shaft at high speed. The enormous centrifugal force injects the metal into the mold cavity during the rotation. After 20 seconds, please turn off the motor power switch, and once the machine stops rotating, remove the mold and let it cool.
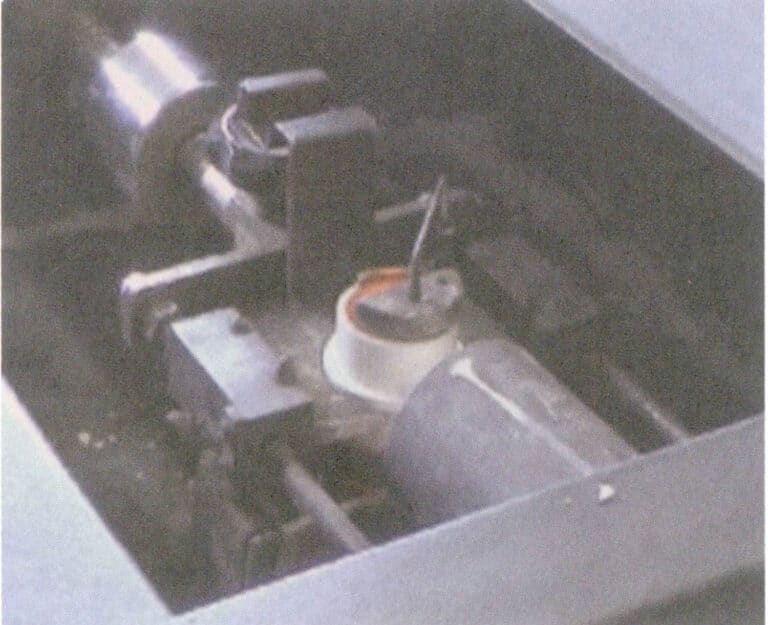
Induction Melting Centrifugal Casting Video
- Automatic vacuum pressure pouring: Among vacuum casting machines, the automatic vacuum pressure casting machine is the most advanced and widely used. This type of machine has many models, and different companies produce casting machines with their characteristics, but generally, they consist of induction heating, vacuum systems, control systems, etc. Structurally, they are generally upright, with the upper part as the induction melting chamber and the lower part as the vacuum casting chamber, using a bottom-pour casting method. The bottom of the crucible has a hole, which is sealed with a refractory plunger rod during melting, and when pouring, the plunger rod is lifted, allowing the molten metal to flow into the mold cavity. Generally, a thermocouple is installed inside the plunger rod, which can accurately reflect the temperature of the molten metal. There are also thermocouples placed on the crucible wall to measure temperature. Still, the measured temperature cannot directly reflect the temperature of the molten metal and can only serve as a reference. Automatic vacuum casting machines generally melt and cast metals under vacuum or inert gas conditions, effectively reducing the possibility of metal oxidation and gas absorption. They widely use computer programming control, have a high degree of automation, and the quality of cast products is relatively stable, with reduced hole defects, making them highly regarded jewelry casting equipment, widely used for vacuum casting of metals such as gold, silver, and copper (Figure 3-37). Some models also come with granulation devices that can prepare granular intermediate alloys.
When using a vacuum pressure casting machine for casting, first turn on the cooling water, open the argon and compressed air switches, and then turn on the power. Check the equipment’s opening and closing condition and the crucible’s quality, test the vacuum effect, and select the appropriate program from the casting program library. Evenly place the charge into the crucible, start the casting program, and after the metal material has completely melted, place the mold into the casting chamber as prompted by the equipment, and the pouring will be completed automatically. After reaching the specified holding time, remove the mold.
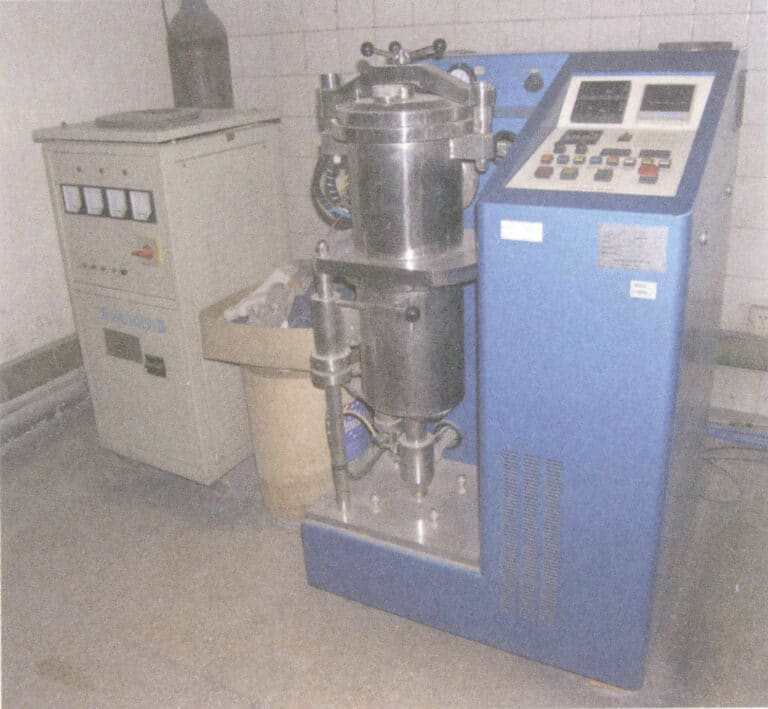
5. Common problems in jewelry casting
Jewelry casting is a complex process involving multiple steps, and many factors affect casting quality. Therefore, various problems are likely to arise during jewelry casting production. Common jewelry casting defects and their possible causes are shown in Table 3-3.
Table 3-3 Analysis table of common problems and countermeasures in jewelry casting
| Common Casting Defects | Defect Illustrations | Possible Causes |
|---|---|---|
| Flash and Burrs |

|
①Incorrect ratio of casting powder to water, too much water used; ②Mold moved after investment during the resting period; ③Rapid temperature increase during the burnout process; ④Mold left out for too long before being placed in the furnace, causing internal cracks in the mold cavity |
| Raised Gold Beads on Surface |

|
①Incorrect ratio of water to powder, too little water used; ②Excessive working time during the investment operation; ③ Abnormal operation of the vacuum machine |
| Rough Surface of Casting |

|
①Rough surface of the wax model; ②Poor quality or expired casting powder; ③Rapid temperature increase during the burnout process |
| Incomplete Casting |

|
①Incorrect wax tree planting; ②Suboptimal metal casting temperature; ③Low mold temperature during pouring; ④Insufficient amount of metal used for casting |
| Porosity in Castings |

|
①Metal casting temperature is too high; ②Mold not fully burned through; ③Excessive recycled material used in casting; ④Severe air intake during the melting process |
| Shrinkage Porosity in Castings |

|
①Metal liquid pouring temperature is too high; ②Mold temperature is too high; ③Improper positioning or size of the water line; ④Insufficient pouring pressure |
Section V Casting Cleaning
1. Removing casting powder
Remove the metal workpiece from the casting powder mold and remove the casting powder adhered to the workpiece.
Main tools: hammer, iron needle, water gun.
Please wait for the casting powder mold to cool to an appropriate temperature, then impact its bottom with tap water. The residual heat of the casting powder mold encounters the cooling water, resulting in a phenomenon known as “exploding plaster,” which causes the cast workpiece to separate from the casting powder mold; this process is commonly referred to as “exploding plaster” (Figure 3-38).
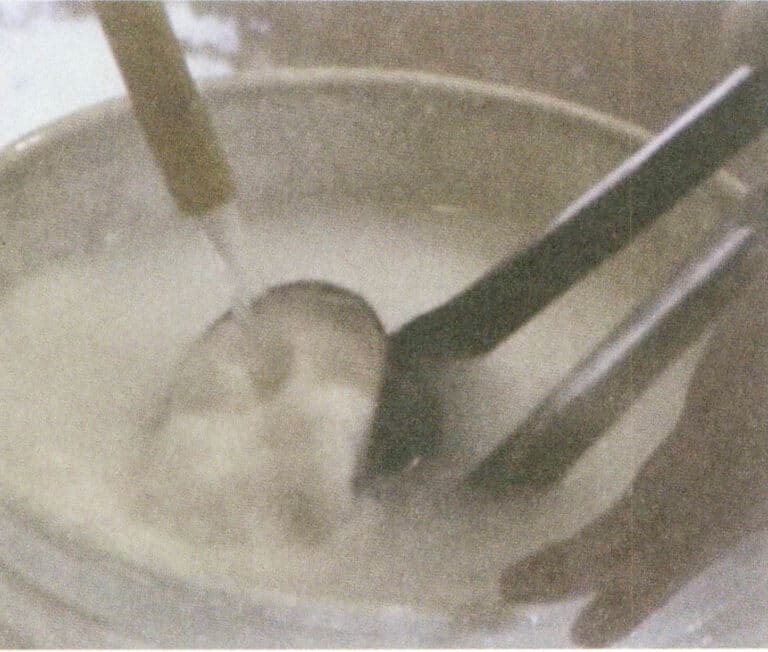
A high-pressure water gun is used to spray the cast workpiece, trying to remove the casting powder from its surface as cleanly as possible (Figure 3-39). Place the rinsed casting into a container with acid solutions such as hydrofluoric acid for soaking (Figure 3-40). After soaking, thoroughly remove the residual casting powder from all parts of the casting. Remove the workpiece from the hydrofluoric acid solution, wash it with water, and dry it.
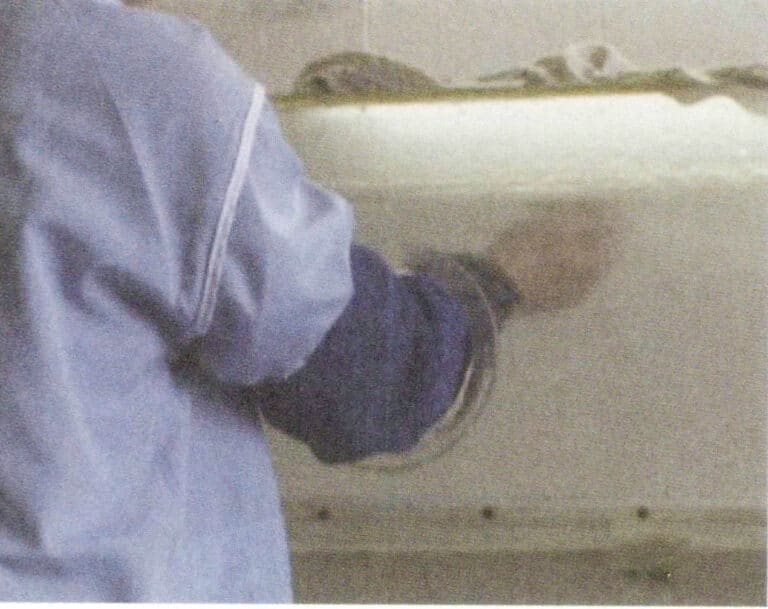
Figure3-39Water Spraying
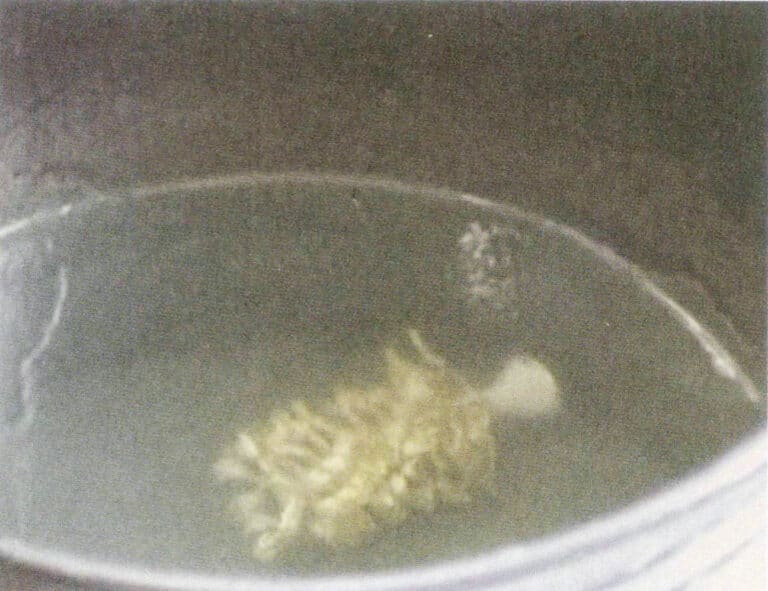
Figure 3-40 Acid Immersion
Removing casting powder Video
The immersion time for K gold, pure gold, and silver workpieces should be 20 min, with a hydrofluoric acid concentration of 20%. The immersion time for copper workpieces is 20 min, with a hydrofluoric acid concentration of 5%. The immersion time for platinum workpieces is 60 min, with a hydrofluoric acid concentration of 55%.
Hydrofluoric acid is highly corrosive and should be stored in specialized containers. Take safety precautions during operation. Due to the high pressure of the water gun, be careful to prevent accidental deformation of the workpiece when rinsing with the water gun.
2. Cutting Defective Parts
After removing the casting powder, the workpiece is still in a tree-like state and needs to be cut at its casting sprue, sorted, and categorized to prepare for the next production process.
After removing the casting powder, the tree-like blanks needs to be weighed to calculate the metal loss during the casting process, and then the casting sprue cutting operation should be performed. First, cut according to the overall division, and then classify the cuts (Figures 3-41, 3-42). When cutting the casting sprue, it is important to master the angle and distance to prevent deforming or damaging the blank. Generally, cutting the casting sprue at a distance of 1.5 mm from the workpiece is optimal.
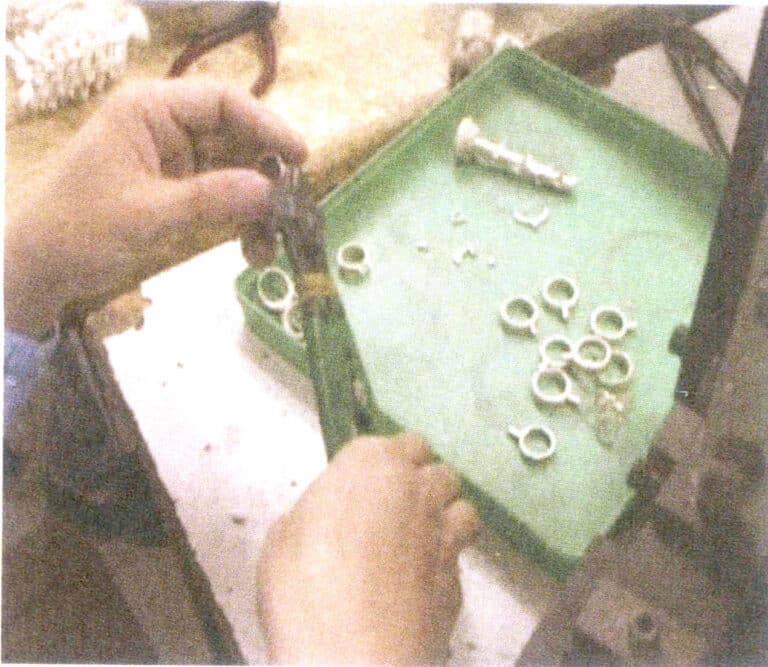
Figure 3-41 Casting sprue Cutting 1
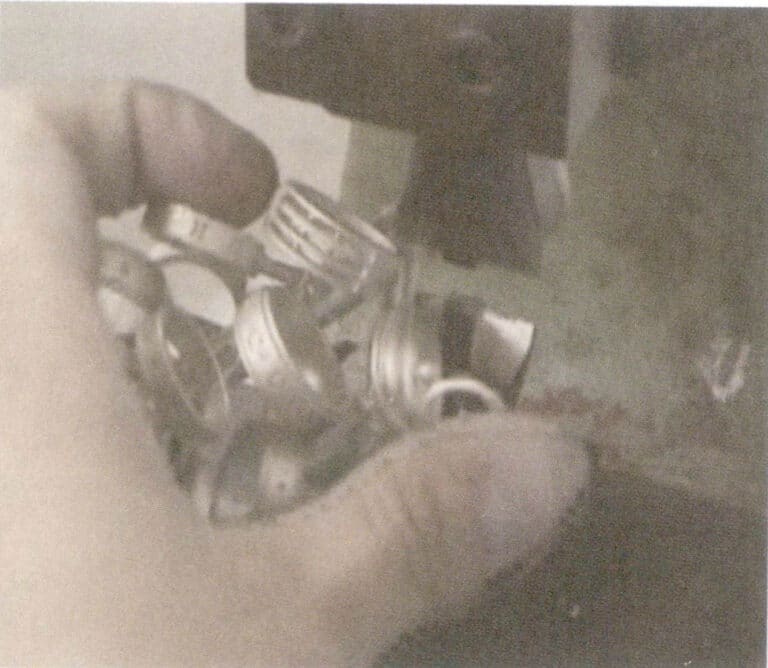
Figure 3-42 Casting sprue Cutting 2
Cutting Defective Parts Video
Cast Cleaning Video






2 odpowiedzi
No doubt.
I can suggest to visit to you a site on which there are many articles on this question.