Comment concevoir des boucles d'oreilles, des bagues, des broches et des bracelets : Un guide étape par étape

Apprenez à concevoir des boucles d'oreilles, des bagues, des broches et des bracelets. Obtenez des conseils sur la coupe et l'assortiment de matériaux tels que l'améthyste, les diamants, l'or, le grenat, le rubis et le quartz rose. Suivez les étapes du dessin pour différentes pièces de bijouterie. Parfait pour les bijouteries, les studios, les marques, les créateurs et les vendeurs en ligne.

Comment concevoir des boucles d'oreilles, des bagues, des broches et des bracelets : Un guide étape par étape

Practical Jewelry Design: Earrings, Rings, Brooches & Bracelets Creation Guide

Introduction :

Want to learn jewelry design? This guide covers designing earrings, rings, brooches, and bracelets. It includes material cutting and matching, size specifications, drawing key points, step-by-step drawing instructions, and technique summaries. Perfect for jewelry makers and designers looking to create beautiful pieces.
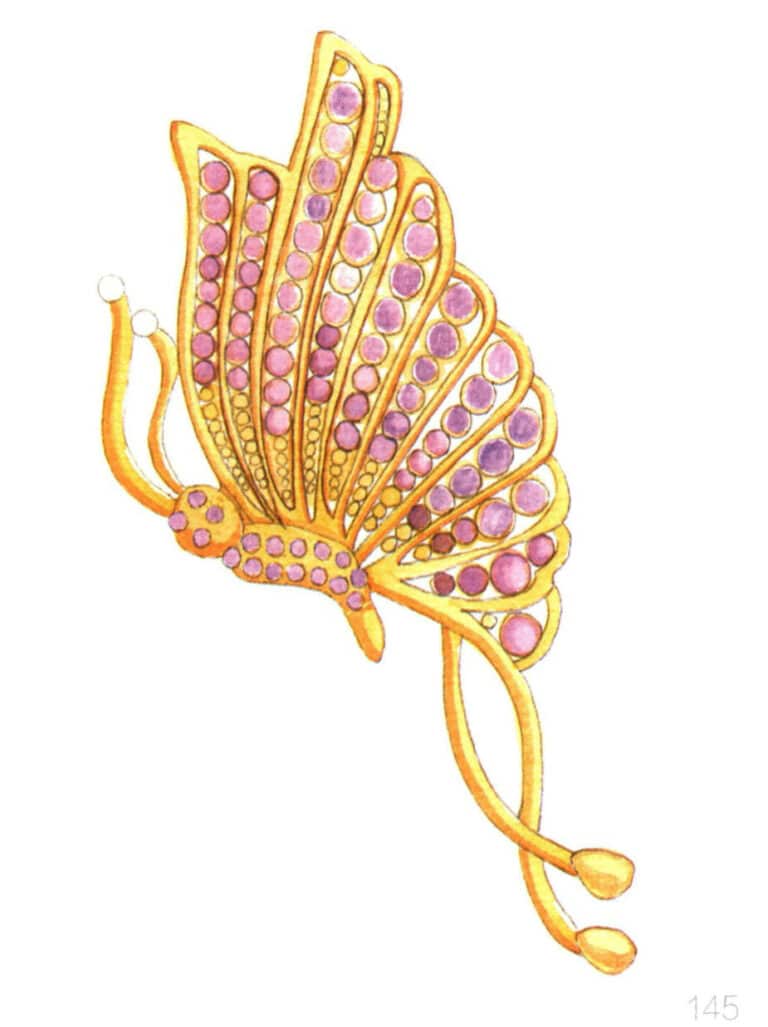
Étape 08 Mélanger la garance rose et le violet pour la première couche des diamants de couleur, en conservant des couleurs claires.

Table des matières

Section I Earring Design Practicing

We have previously learned the basics of hand drawing, using colors, and representing materials. Next, we will explain the training in earring design. This chapter mainly introduces the material cutting and matching for earring design, key points for drawing, drawing steps, and a summary of techniques.

1. Découpe et adaptation des matériaux

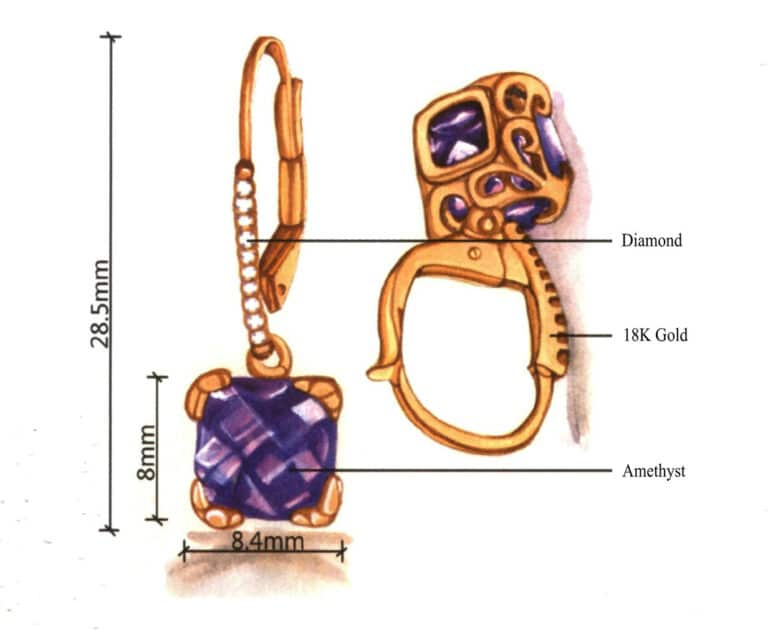
This earring design mainly uses amethyst, diamonds, and 18K gold. Each earring stud features a square amethyst paired with 10 diamonds set in metal, completed with an inlay technique for the design. The overall color tone is filled with a romantic atmosphere. Wearing them on the ears gives a beautiful and noble feeling. Due to the beneficial properties of amethyst for the wearer’s health and its charming hue, its price is also moderate, making it easily accepted by buyers, which makes it very suitable for students and office workers to wear.
Amethyst + Diamond + 18Kgold

2. Size Specifications

Spécifications de la taille

3. Drawing Key Points

(1) The overlay of gem colors should blend, rich but not abrupt.

(2) The metallic texture is expressed through color gradients, reflections, and highlights.

(3) When composing, it is necessary to consider the display characteristics of an earring design, and different angles can be chosen for representation.
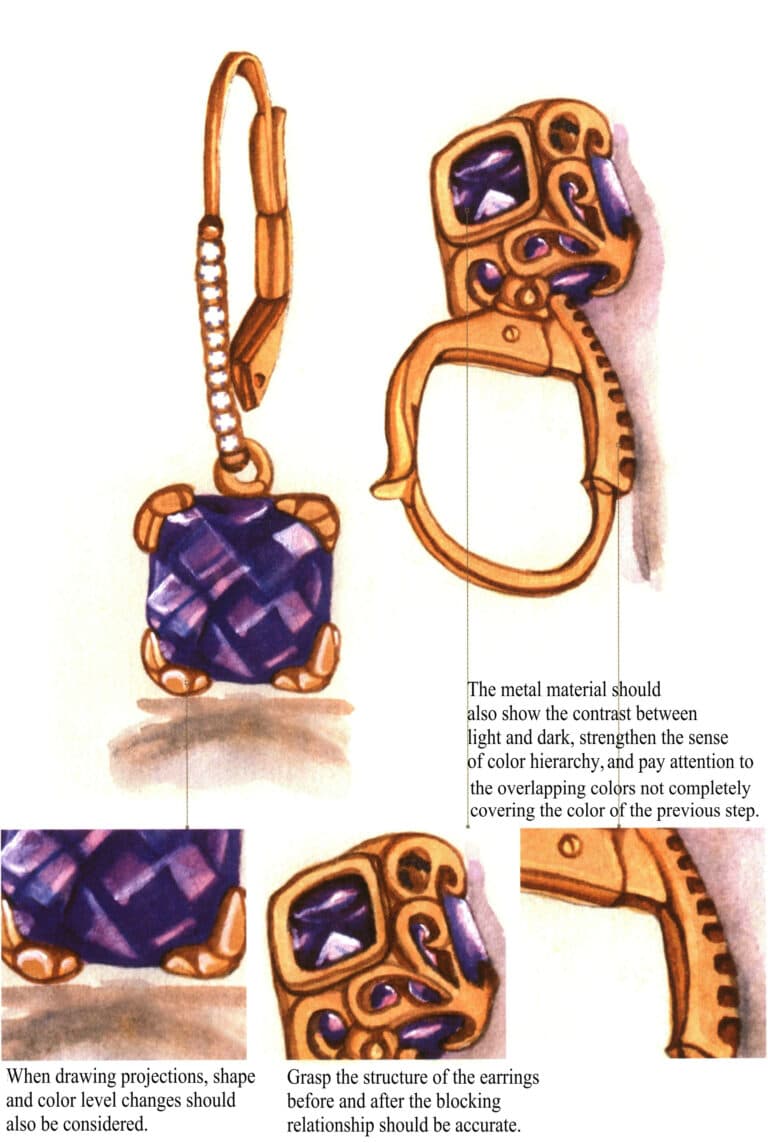
(1) The overlay of gem colors should blend, rich but not abrupt. (2) The metallic texture is expressed through color gradients, reflections, and highlights. (3) When composing, it is necessary to consider the display characteristics of an earring design, and different angles can be chosen for representation.

4. Étapes du dessin
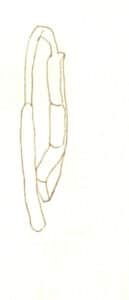
Step 01 Begin with partial sections. Use a pencil to outline the earring’s metal parts based on perspective principles, ensuring clear structural definition and characteristic form.
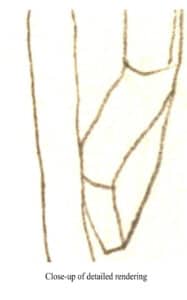
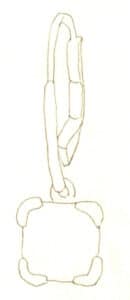
Step 01 Begin with partial sections. Use a pencil to outline the earring’s metal parts based on perspective principles, ensuring clear structural definition and characteristic form.

Step 01 Begin with partial sections. Use a pencil to outline the earring’s metal parts based on perspective principles, ensuring clear structural definition and characteristic form.
Step 02 Sketch the contour of the earring pendant with loose, natural-flowing lines.
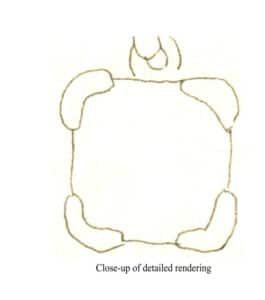
Step 02 Sketch the contour of the earring pendant with loose, natural-flowing lines.
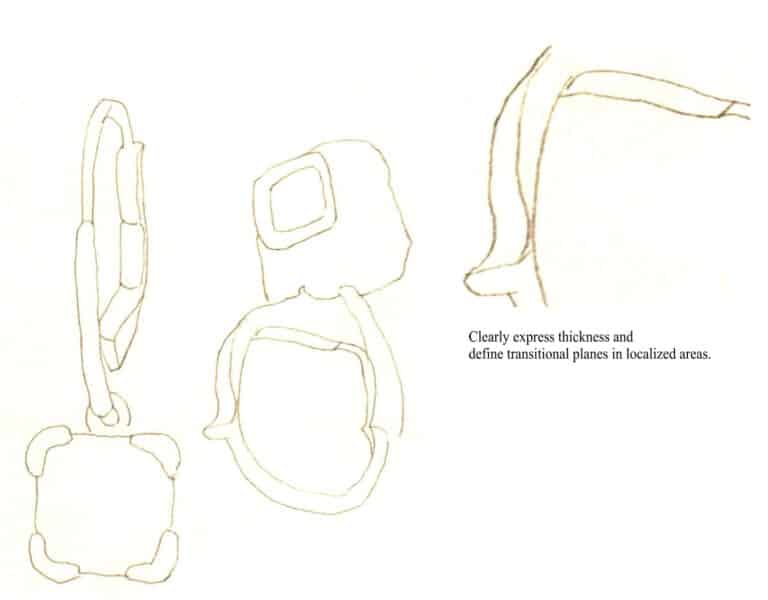
Step 02 Sketch the contour of the earring pendant with loose, natural-flowing lines.
Step 03 Add another earring at a different angle beside the first one to showcase design features from multiple perspectives, enhancing the composition.
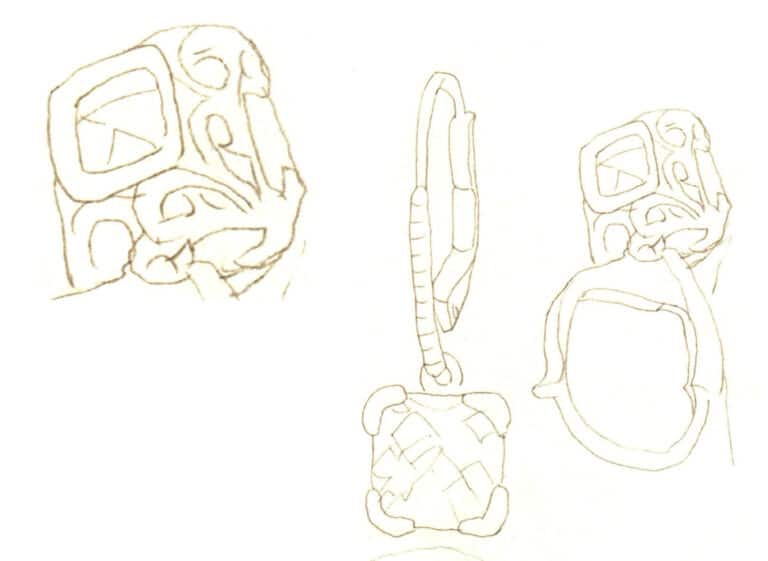
Step 03 Add another earring at a different angle beside the first one to showcase design features from multiple perspectives, enhancing the composition.

Step 04 Add details, refine line art, polish local shapes, and erase redundant lines to maintain cleanliness.
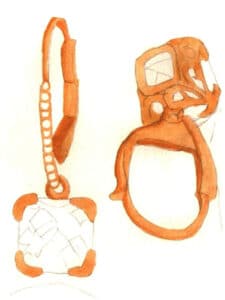
Step 04 Add details, refine line art, polish local shapes, and erase redundant lines to maintain cleanliness.

Step 05 Lighten the pencil sketch with a soft eraser to prevent smudging during coloring. Mix yellow ochre and flesh tone to apply a base layer to the metal parts, suggesting basic light-dark relationships.
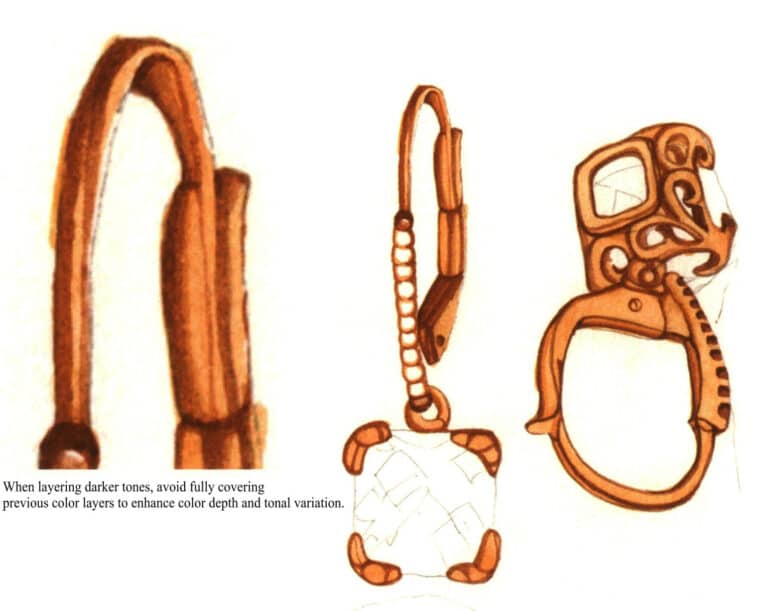
Step 05 Lighten the pencil sketch with a soft eraser to prevent smudging during coloring. Mix yellow ochre and flesh tone to apply a base layer to the metal parts, suggesting basic light-dark relationships.

Step 06 Blend burnt umber and burnt sienna. Use a small watercolor brush to paint metallic shadows, intensifying contrast and three-dimensionality.

Step 06 Blend burnt umber and burnt sienna. Use a small watercolor brush to paint metallic shadows, intensifying contrast and three-dimensionality.


Conseils

When applying the base color, you can first brush a layer of water on the areas that need coloring to ensure a natural color transition.
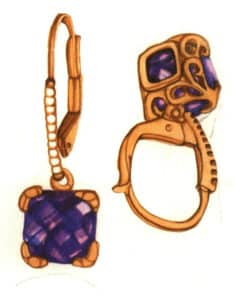
Step 07 Wet the gemstone area. Mix rose madder and violet to apply the amethyst’s base layer. Once slightly dry, add sapphire blue to define shadows and enhance chromatic complexity, emphasizing faceted effects.
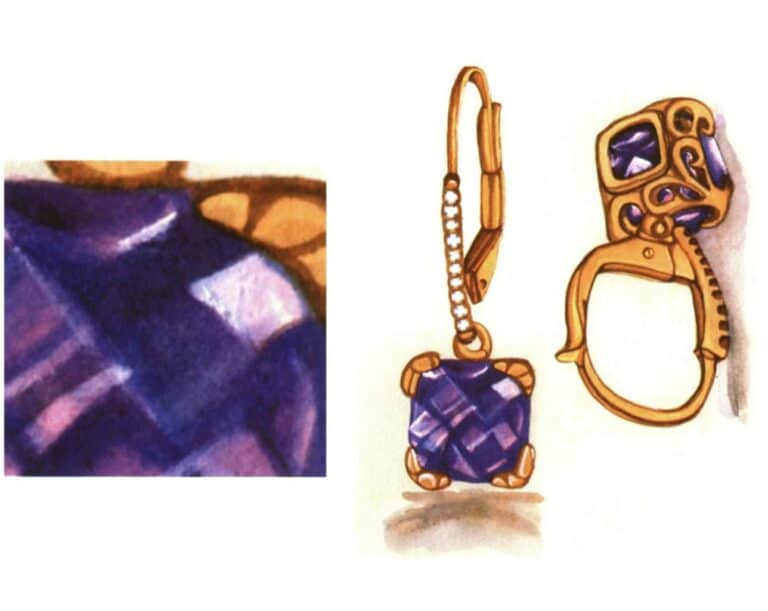
Step 07 Wet the gemstone area. Mix rose madder and violet to apply the amethyst’s base layer. Once slightly dry, add sapphire blue to define shadows and enhance chromatic complexity, emphasizing faceted effects.

Step 08 Paint the earring’s cast shadow. Highlight reflections and sparkle with white pigment. Adjust and finalize the artwork to complete.

Step 08 Paint the earring’s cast shadow. Highlight reflections and sparkle with white pigment. Adjust and finalize the artwork to complete.

5. Résumé des techniques

(1) Comment exprime-t-on le volume des pierres précieuses ?

The volume of gemstones can be expressed through variations in color depth and highlights, and it is important to depict the facets of the gemstones.


(2) How do you blend and diffuse colors in the painting?

The colors in watercolor are often not painted on but can mix or blend freely on the paper, thus creating a natural color effect. Learning this skill requires a lot of practice and familiarity with the characteristics of your painting tools, such as watercolor brushes, paper, and paints, as well as practicing and mastering moisture control.


(3) How to keep the painting clean?

During the drawing process, you can place a tissue under your hand to prevent sweat from dirtying the painting. Drawing paper is often very easy to get dirty; once it is dirty, it isn’t easy to apply color. Therefore, when painting for a long time, you can place a tissue or wash your hands after painting to solve this problem effectively.

Section II Ring Design Practicing

There are many types of rings, with common shapes, including square rings and line rings, and common materials, including diamonds and jade. This chapter mainly introduces jade ring design, material cutting and matching, drawing key points, drawing steps, and technique summaries.

1. Découpe et adaptation des matériaux

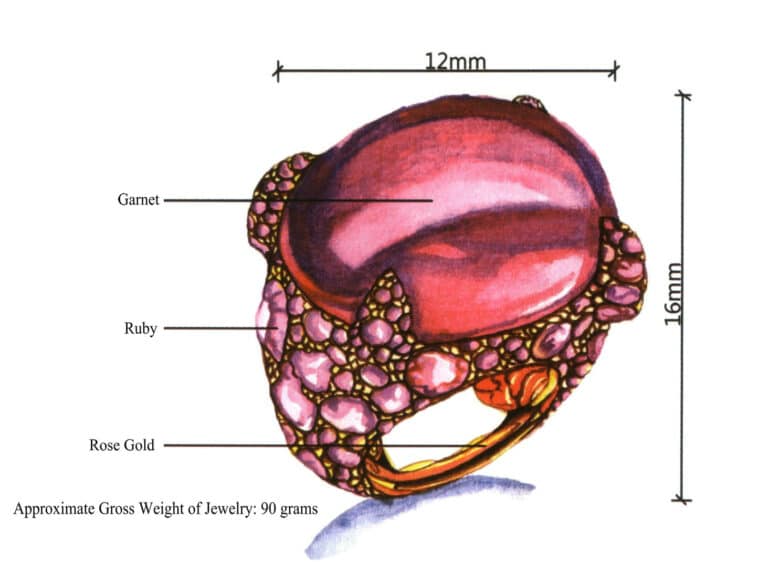
This ring design mainly uses garnet, ruby, and rose gold. The main part features a red semi-circular garnet with a glass-like luster, while the band is made of metal paired with irregular rubies crafted using inlay techniques. The overall color scheme is passionate, vibrant, and lively.

Since it combines garnet, which symbolizes loyalty, authenticity, friendship, and blessings, with ruby, which symbolizes nobility and love, this ring can be worn as a talisman or given as a gift to elders or loved ones.
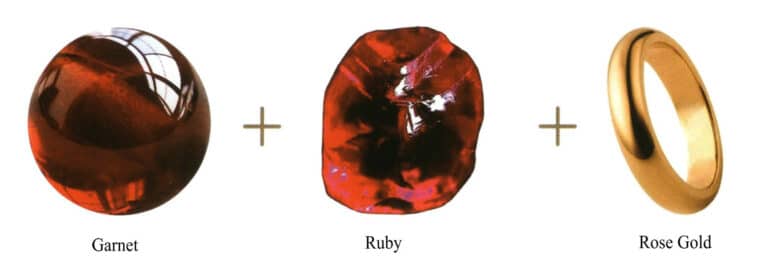
Garnet + Ruby + Rose Gold

2. Size Specifications

Spécifications de la taille

3. Points clés pour le dessin

(1) Pay attention to the representation of the gem’s transparency.

(2) Small gems on the ring should be distinguished.
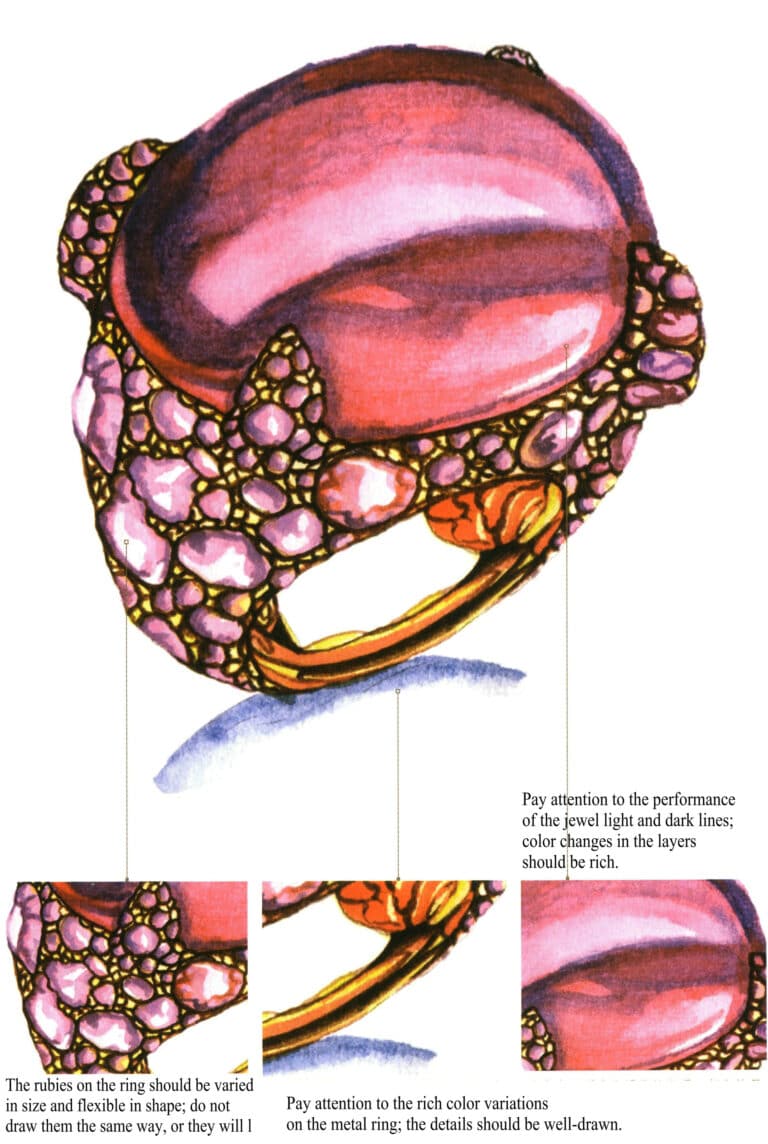
(1) Pay attention to the representation of the gem's transparency. (2) Small gems on the ring should be distinguished.

4. Étapes du dessin
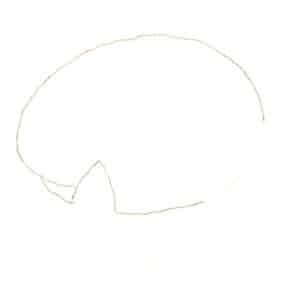
Step 01 Begin with partial sections. Lightly outline the main gemstone’s general contour of the ring with loose, casual lines.
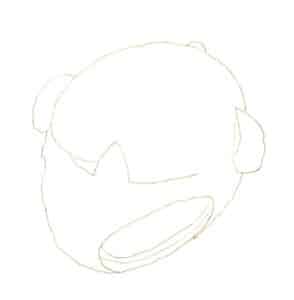
Step 01 Begin with partial sections. Lightly outline the main gemstone’s general contour of the ring with loose, casual lines.

Step 02 Sketch the ring band’s contour with a pencil based on perspective principles, maintaining natural line flow.
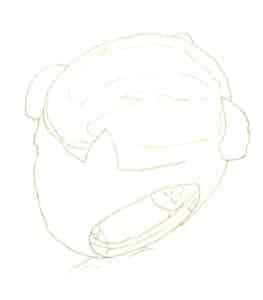
Step 02 Sketch the ring band’s contour with a pencil based on perspective principles, maintaining natural line flow.

Step 03 Lightly outline internal structures like the gemstone’s light-dark boundary line with a pencil.
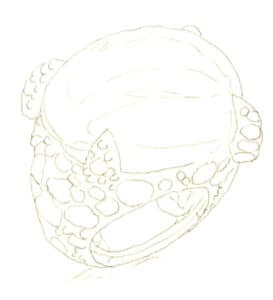
Step 03 Lightly outline internal structures like the gemstone’s light-dark boundary line with a pencil.

Step 04 Add details, refine line art, polish local shapes. Erase redundant lines and soften pencil guidelines with a soft eraser to prevent coloring smudges.
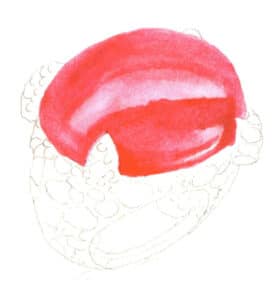
Step 04 Add details, refine line art, polish local shapes. Erase redundant lines and soften pencil guidelines with a soft eraser to prevent coloring smudges.

Step 05 Wet the garnet area on the ring’s main section. Mix vermilion with violet to paint the gemstone’s base color, reserving highlight areas.
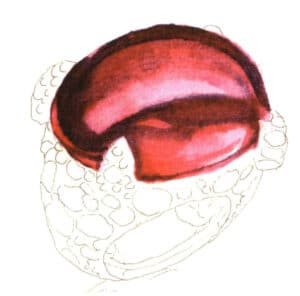
Step 05 Wet the garnet area on the ring’s main section. Mix vermilion with violet to paint the gemstone’s base color, reserving highlight areas.

Step 06 Blend rose madder, cerulean blue, and violet to deepen the gemstone’s shadows, ensuring natural color transitions.
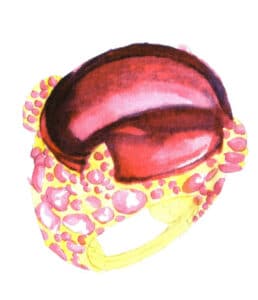
Step 06 Blend rose madder, cerulean blue, and violet to deepen the gemstone’s shadows, ensuring natural color transitions.

Step 07 Dilute rose madder with water to apply the ruby’s base layer on the ring band. Use lemon yellow for a faint base layer on metal parts, leaving intentional gaps for breathability.
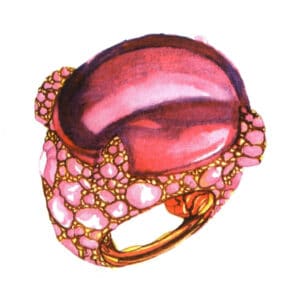
Step 07 Dilute rose madder with water to apply the ruby’s base layer on the ring band. Use lemon yellow for a faint base layer on metal parts, leaving intentional gaps for breathability.

Step 08 Mix burnt umber and vermilion. Use a small watercolor brush to define the ring band’s shadows and refine metal details.
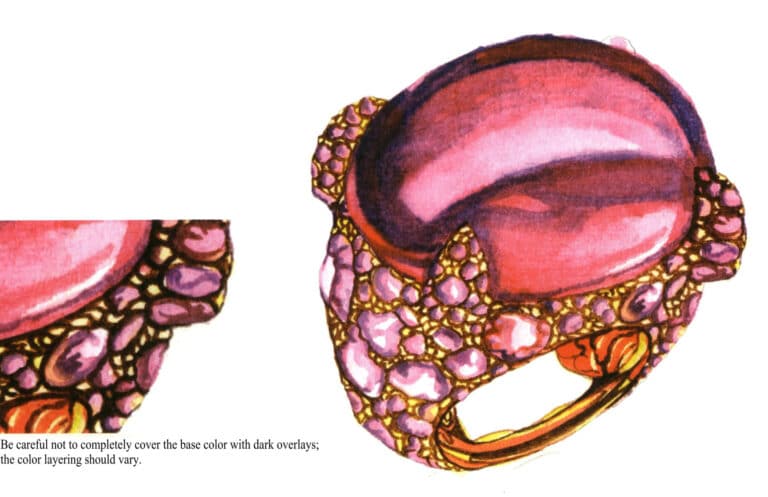
Step 08 Mix burnt umber and vermilion. Use a small watercolor brush to define the ring band’s shadows and refine metal details.

Step 09 Blend rose madder and violet to refine the ruby’s shadows.
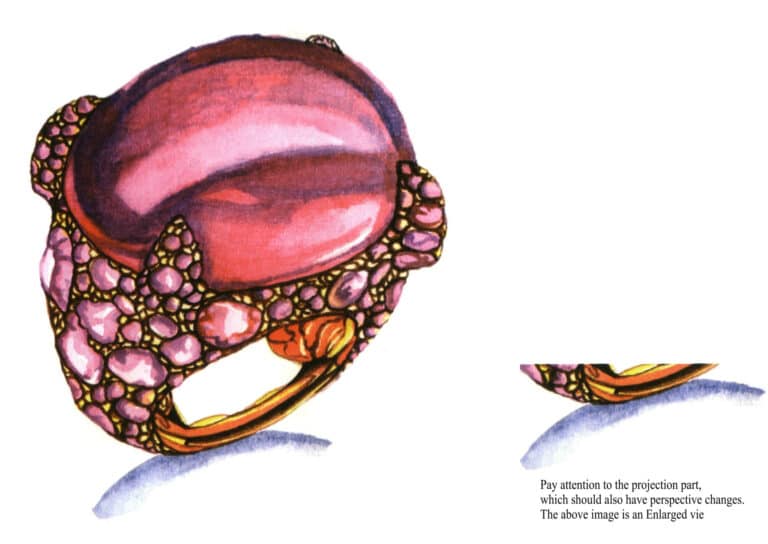
Step 09 Blend rose madder and violet to refine the ruby’s shadows.

Step 10 Deepen metal shadows with raw umber. Paint the ring’s cast shadow with Payne’s grey. Adjust and complete the artwork.

Step 10 Deepen metal shadows with raw umber. Paint the ring’s cast shadow with Payne’s grey. Adjust and complete the artwork.

5. Résumé des techniques

(1) Comment exprime-t-on le volume des pierres précieuses ?

When drawing gemstones, the sense of volume is generally expressed through variations in color depth and the depiction of highlights and reflections.


(2) How do we unify the color tone of the picture?

Every picture has its main tonal feeling. This chapter’s design renderings of jade rings are primarily in red and yellow, leaning towards warm tones. Therefore, the colors in the picture should not be too many to avoid chaos or inconsistent tones.


(3) How to accurately grasp the external characteristics of jewelry?

First, observe and analyze the perspective relationships of the jewelry, then determine the local shapes’ design style and characteristics, and finally start from the outer contour and gradually refine the internal structure.

Section III Brooch Design Practicing

The selection of brooches varies due to differences in season, age, personal preference, and economic conditions. Wearing different brooches also represents different meanings; for example, a swan brooch symbolizes purity, loyalty, and nobility.

This chapter mainly introduces the design materials, cutting and matching of butterfly brooches, key drawing points, drawing steps, and a summary of techniques.

1. Découpe et adaptation des matériaux

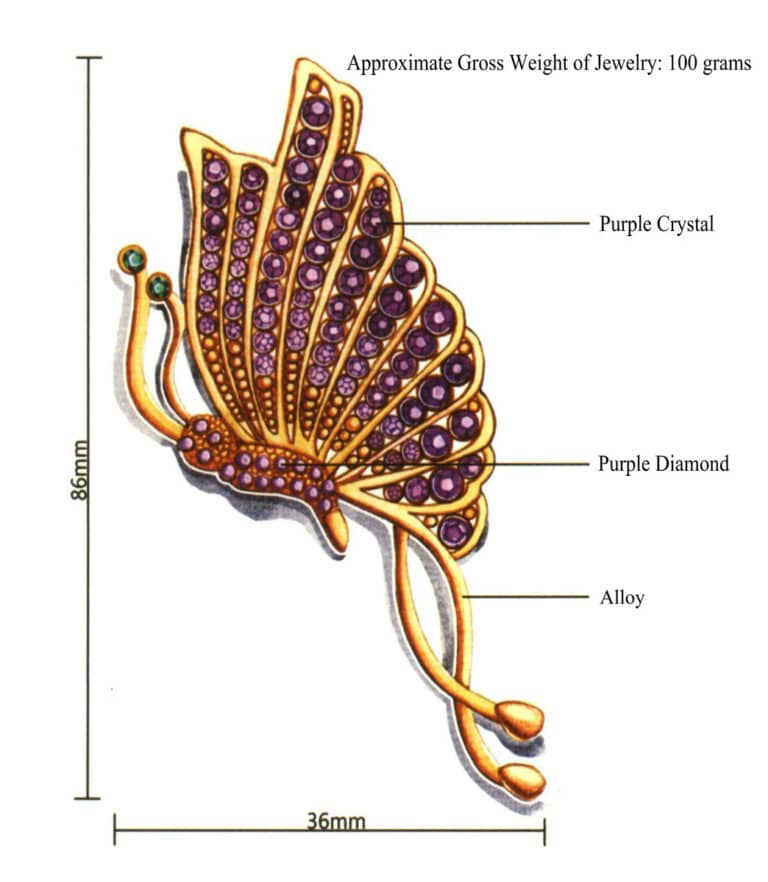
This butterfly brooch design mainly uses purple crystals, diamonds, and alloys. The overall shape features a lightweight butterfly element, with gemstones of varying sizes and independent facets adorning the wings, eyes, and abdomen, paired with a delicate, smooth, and fade-resistant alloy. It employs a handmade inlay technique, ensuring solid quality, and the overall design is dazzling and radiant, giving a feeling of luxury, elegance, and romance.

Wearing it can become the most beautiful embellishment, highlighting the subtle beauty of women and reflecting the wearer’s composure and elegance.
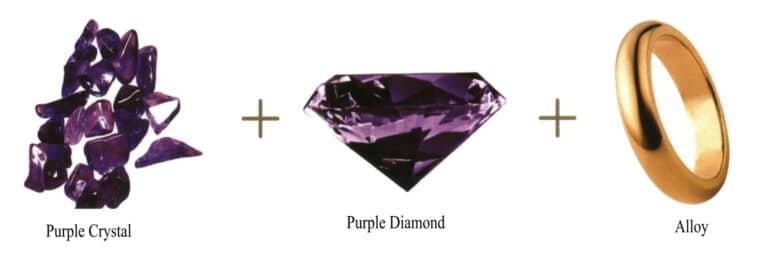
Purple Crystal + Purple Diamond + Alloy

2. Size Specifications

page 144 docsmall.com 副本1

3. Key Points of Drawing

(1) Dark areas are generally depicted using deeper shades of the same color system.

(2) The dark side, bright side, and highlight parts of the gemstone should be distinguished to emphasize the sense of volume.

(3) Due to the light source factors, the butterfly brooch will have variations in color brightness.
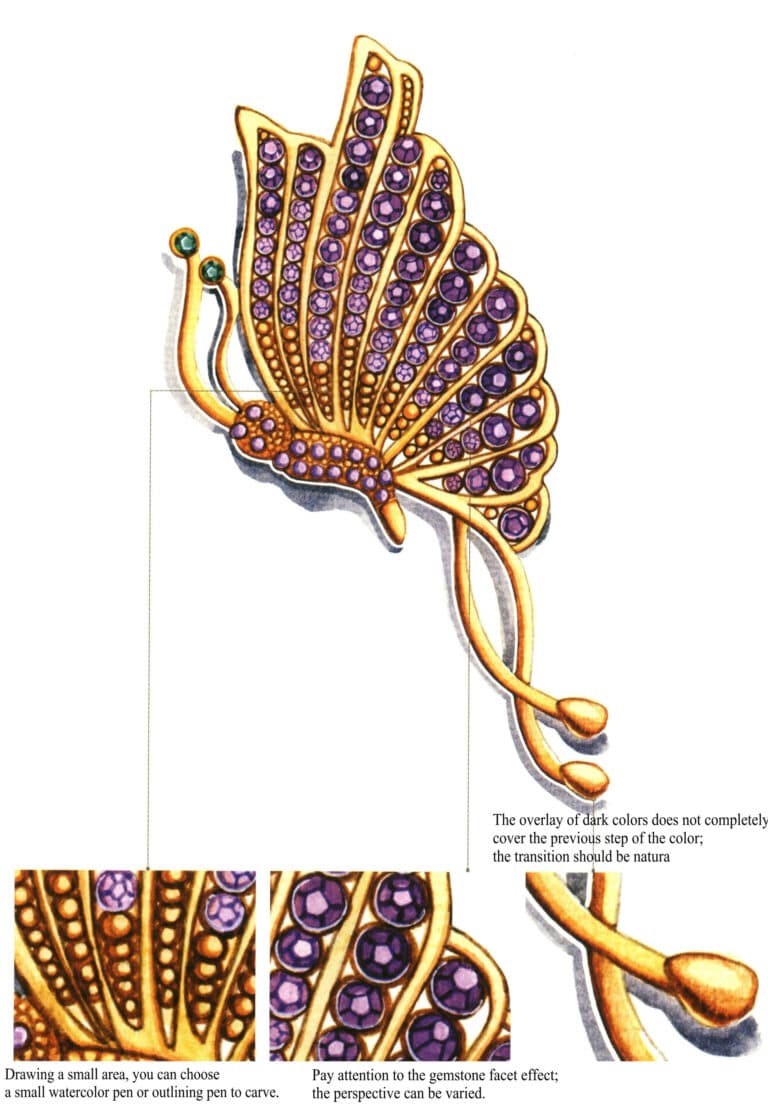
(1) Dark areas are generally depicted using deeper shades of the same color system. (2) The dark side, bright side, and highlight parts of the gemstone should be distinguished to emphasize the sense of volume. (3) Due to the light source factors, the butterfly brooch will have variations in color brightness.

4. Étapes du dessin
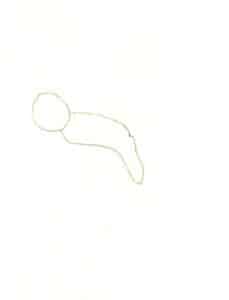
Step 01 Begin with partial sections. Lightly sketch the butterfly brooch’s head and abdomen contours with loose, casual lines as reference.
Step 01 Begin with partial sections. Lightly sketch the butterfly brooch’s head and abdomen contours with loose, casual lines as reference.

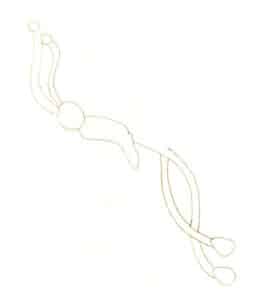
Step 02 Based on overall proportions, outline the brooch’s antennae and tail with natural, flowing pencil lines.
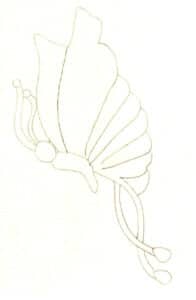
Step 02 Based on overall proportions, outline the brooch’s antennae and tail with natural, flowing pencil lines.

Step 03 Draw the wings’ outer contour with relaxed curved lines.
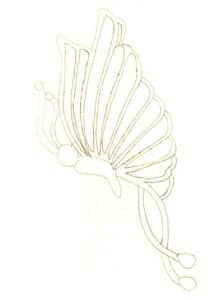
Step 03 Draw the wings’ outer contour with relaxed curved lines.

Step 04 Define the wings’ internal structures with a pencil.
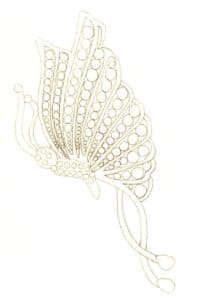
Step 04 Define the wings’ internal structures with a pencil.

Step 05 Mark gemstone positions and shapes using simplified circles. Adjust local shapes and erase redundant lines for cleanliness.
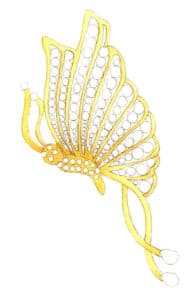
Step 05 Mark gemstone positions and shapes using simplified circles. Adjust local shapes and erase redundant lines for cleanliness.

Step 06 Coat the metal parts with water. Use a medium watercolor brush to apply the first wash with yellow ochre diluted in ample water.
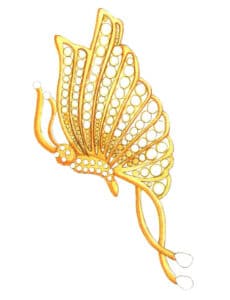
Step 06 Coat the metal parts with water. Use a medium watercolor brush to apply the first wash with yellow ochre diluted in ample water.

Step 07 Paint metallic shadows with burnt umber, keeping coverage minimal.
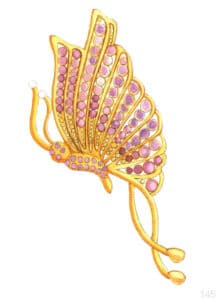
Step 07 Paint metallic shadows with burnt umber, keeping coverage minimal.

Étape 08 Mélanger la garance rose et le violet pour la première couche des diamants de couleur, en conservant des couleurs claires.
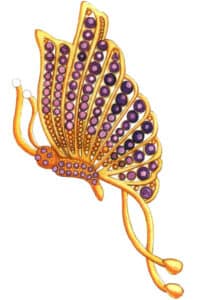
Étape 08 Mélanger la garance rose et le violet pour la première couche des diamants de couleur, en conservant des couleurs claires.

Step 09 Reinforce colored diamonds with saturated rose madder and violet mixtures for deeper tones.
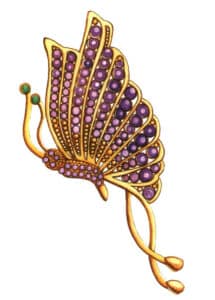
Step 09 Reinforce colored diamonds with saturated rose madder and violet mixtures for deeper tones.

Step 10 Apply emerald green to antennae gemstones. Deepen metal shadows with burnt umber, enhancing color depth.
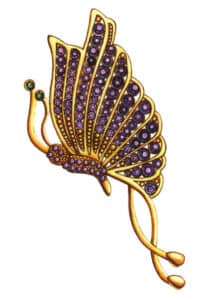
Step 10 Apply emerald green to antennae gemstones. Deepen metal shadows with burnt umber, enhancing color depth.

Step 11 Refine antennae gemstones with emerald green and Payne’s grey. Detail wing gemstones with violet and sapphire blue. Highlight with white.
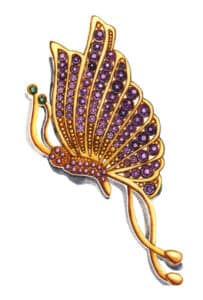
Step 11 Refine antennae gemstones with emerald green and Payne’s grey. Detail wing gemstones with violet and sapphire blue. Highlight with white.

Step 12 Paint the brooch’s cast shadow with Payne’s grey. Adjust and finalize the artwork to complete.

Step 12 Paint the brooch’s cast shadow with Payne’s grey. Adjust and finalize the artwork to complete.

5. Résumé des techniques

(1) How can the sense of volume in metal parts be expressed?

Due to the smooth surface of the metal material, which has good reflective properties, the sense of volume is mainly expressed through the layering of dark colors and the embellishment of reflective areas.


(2) How do you handle the details of the picture well?

The gemstones on the butterfly brooch should be arranged in an orderly manner, and the contrast of light and dark can express the details of the material, highlighting the luster and texture of the crystal and diamond.

Section IV Bracelet Design Practicing

The styles of bracelet design are rich and diverse, with common styles including fashionable multi-strand beaded bracelets, colorful diamond woven thin bracelets, multi-layer crystal stone bracelets, and vintage leather double-ring bracelets. This chapter mainly introduces the material cutting and matching for bracelet design, size specifications, drawing key points, drawing steps, and a summary of techniques.

1. Découpe et adaptation des matériaux

The processing of handmade beads mainly includes four processes: material selection, shaping, grinding, and polishing. Due to the complexity and difficulty of the processing steps, the yield of perfect bead products is generally very low.

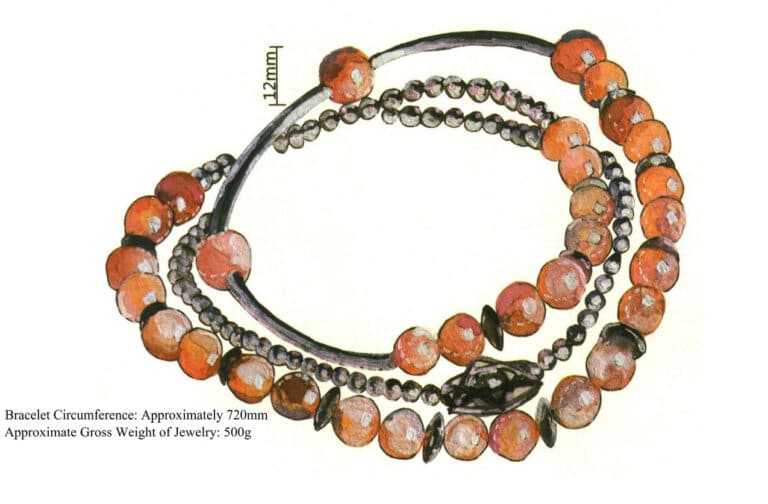
This bracelet design mainly uses crystal-clear, fresh and refined, warm and delicate pink quartz, paired with metal materials to highlight the bracelet’s elegance and restraint, giving a warm and sweet feeling like jade, with a soft pink and watery appearance. Wearing it on the wrist looks very elegant and radiant; not only can it highlight the wearer’s temperament well, but it can also ease tension. In addition, it can promote harmony in interpersonal relationships and enhance attraction to the opposite sex. However, the pink quartz bracelet should be worn on the left hand to exert its best spiritual effect.
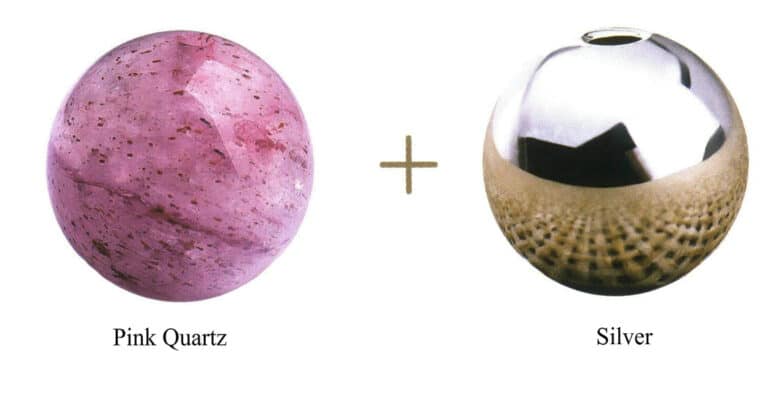
Pink Quartz + Silver

2. Spécification de la taille

The diameter of a single pink crystal bead is 12 mm. This bracelet uses 32 pink crystals, 75 round silver beads, and 13 oval silver beads, with a circumference of approximately 720 mm.

3. key Points of Drawing

(1) The bracelet is in a circular stacked state, and when drawing, it is important to grasp the sense of layering between the upper and lower parts.

(2) When drawing metal beads, it is necessary to express the ambient color and the texture of strong reflections, enhancing the sense of space in the picture through the reflective parts of the chain.

(3) The direction of the light source in the overall picture needs to be unified, and attention should be paid to the distribution of highlight positions.
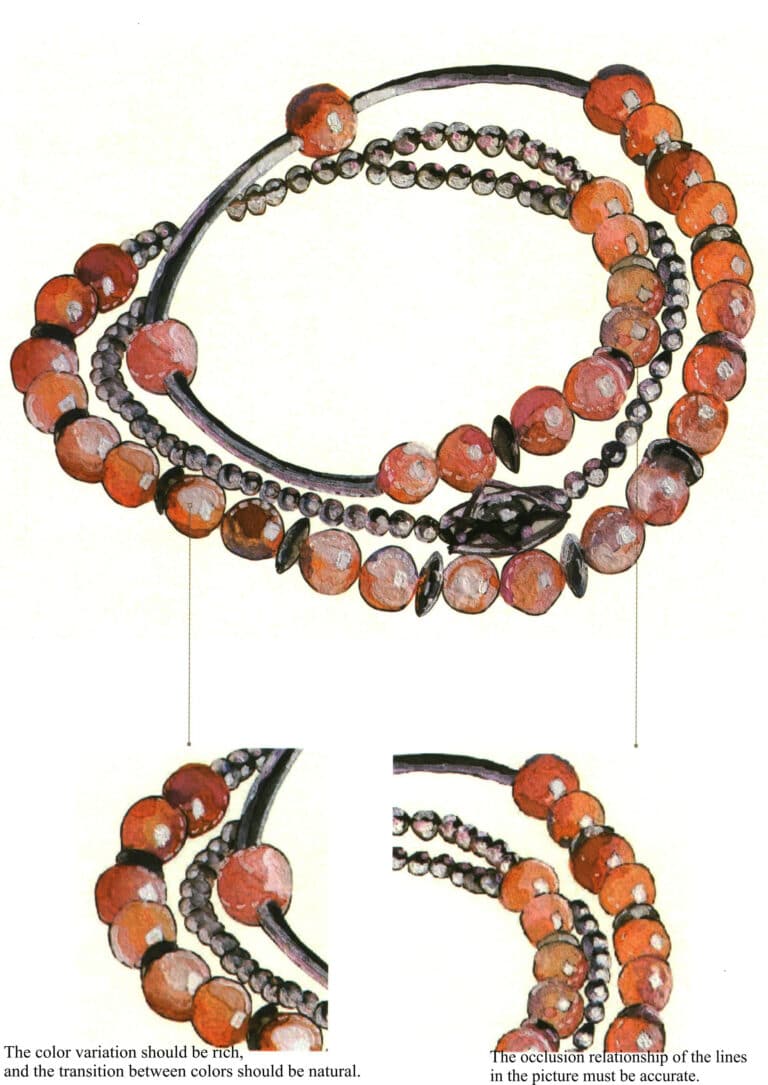
(1) The bracelet is in a circular stacked state, and when drawing, it is important to grasp the sense of layering between the upper and lower parts. (2) When drawing metal beads, it is necessary to express the ambient color and the texture of strong reflections, enhancing the sense of space in the picture through the reflective parts of the chain. (3) The direction of the light source in the overall picture needs to be unified, and attention should be paid to the distribution of highlight positions.

4. Étapes du dessin
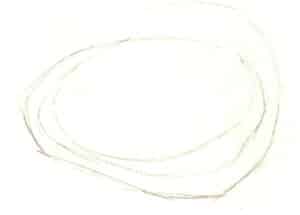
Step 01 Sketch the bracelet’s general contour with light, casual pencil lines, avoiding heavy pressure.

Step 01 Sketch the bracelet’s general contour with light, casual pencil lines, avoiding heavy pressure.

Step 02 Outline the large beads to define the bracelet’s basic shape.
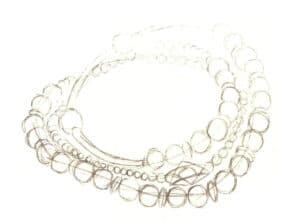
Step 02 Outline the large beads to define the bracelet’s basic shape.

Step 03 Draw remaining structures (small beads, gemstones) with smooth lines.
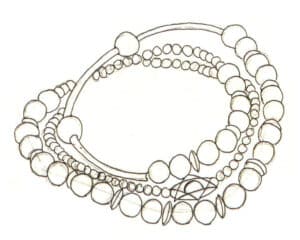
Step 03 Draw remaining structures (small beads, gemstones) with smooth lines.

Step 04 Precisely outline the bracelet’s contours with a 0.2mm technical pen over the pencil draft.
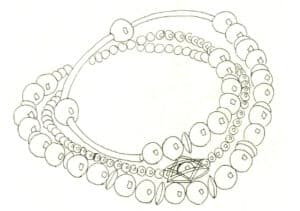
Step 04 Precisely outline the bracelet’s contours with a 0.2mm technical pen over the pencil draft.

Step 05 Add pendant textures and details. Erase pencil marks thoroughly with a soft eraser.
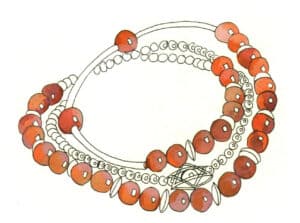
Step 05 Add pendant textures and details. Erase pencil marks thoroughly with a soft eraser.

Step 06 Apply a base layer to large round gemstones using vermilion, lemon yellow, and magenta, reserving whites for highlights.
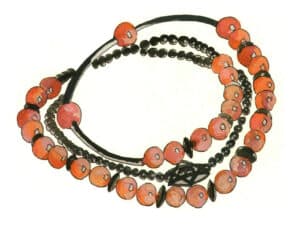
Step 06 Apply a base layer to large round gemstones using vermilion, lemon yellow, and magenta, reserving whites for highlights.

Step 07 Paint the metal parts with Payne’s grey and ivory black, leaving gaps for breathability.
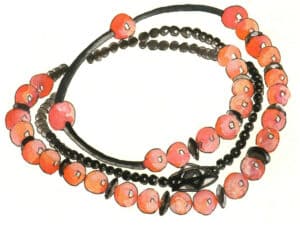
Step 07 Paint the metal parts with Payne’s grey and ivory black, leaving gaps for breathability.

Step 08 Deepen metallic shadows with Payne’s grey mixtures.
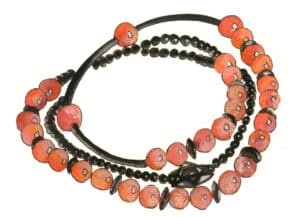
Step 08 Deepen metallic shadows with Payne’s grey mixtures.

page 157 docsmall.com 副本1

Step 09 Blend lemon yellow and rose madder to intensify shadows on pink gemstones, enhancing contrast and volume.
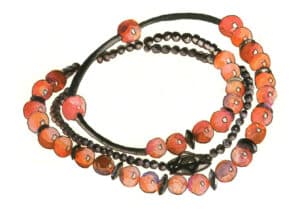
Step 10 Darken shadows on metal beads with Payne’s grey and ivory black.
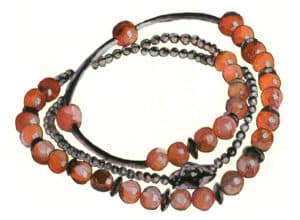
Step 10 Darken shadows on metal beads with Payne’s grey and ivory black.

Step 11 Deepen colors using burnt umber, burnt sienna, lemon yellow, and rose madder. Accent highlights on pink gemstones and metal beads with white.
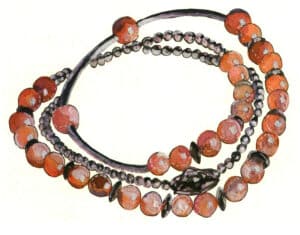
Step 11 Deepen colors using burnt umber, burnt sienna, lemon yellow, and rose madder. Accent highlights on pink gemstones and metal beads with white.

page 158 docsmall.com 副本1

Step 12 Refine gemstones with yellow ochre, rose madder, and orange to amplify three-dimensionality. Adjust and finalize the artwork to complete.

5. Technique Summary

(1) How do we express the sense of volume of crystal beads?

The sense of volume of pink crystal beads can be expressed through variations in color depth, as well as highlights and reflections.


(2) Comment harmoniser les couleurs des matériaux métalliques ?

Le dessin des matériaux métalliques nécessite l'ajout approprié de couleurs réfléchissantes pour exprimer les caractéristiques réfléchissantes du métal.


(3) How to unify the color tone of the picture?

Every picture has its main tonal feeling, such as warm tones, cool tones, etc. The size of the color blocks can determine the main tone, and care should be taken not to use too many colors in the picture to avoid making it chaotic or inconsistent.

Photo de Heman
Heman

Expert en produits de bijouterie --- 12 ans d'expérience abondante

Bonjour ma chère,

Je suis Heman, père et héros de deux enfants géniaux. Je suis heureux de partager mes expériences dans le domaine de la bijouterie en tant qu'expert en produits de bijouterie. Depuis 2010, j'ai servi 29 clients du monde entier, tels que Hiphopbling et Silverplanet, en les aidant et en les soutenant dans la conception de bijoux créatifs, le développement de produits de bijoux et la fabrication.

Si vous avez des questions sur les produits de bijouterie, n'hésitez pas à m'appeler ou à m'envoyer un e-mail et nous discuterons d'une solution appropriée pour vous, et vous recevrez des échantillons de bijoux gratuits pour vérifier l'artisanat et les détails de la qualité de la bijouterie.

Grandissons ensemble !

Laisser un commentaire

Votre adresse e-mail ne sera pas publiée. Les champs obligatoires sont indiqués avec *

Catégories de POSTES

Besoin de soutien pour la production de bijoux ?

Soumettez votre demande à Sobling
202407 heman - Expert en produits de bijouterie
Heman

Expert en produits de bijouterie

Bonjour ma chère,

Je suis Heman, père et héros de deux enfants géniaux. Je suis heureux de partager mes expériences dans le domaine de la bijouterie en tant qu'expert en produits de bijouterie. Depuis 2010, j'ai servi 29 clients du monde entier, tels que Hiphopbling et Silverplanet, en les aidant et en les soutenant dans la conception de bijoux créatifs, le développement de produits de bijoux et la fabrication.

Si vous avez des questions sur les produits de bijouterie, n'hésitez pas à m'appeler ou à m'envoyer un e-mail et nous discuterons d'une solution appropriée pour vous, et vous recevrez des échantillons de bijoux gratuits pour vérifier l'artisanat et les détails de la qualité de la bijouterie.

Grandissons ensemble !

Suivez-moi

Pourquoi choisir Sobling ?

Membres de l'équipe Sobling fabricant et usine de bijoux en argent
CERTIFICATIONS

Sobling respecte les normes de qualité

Sobling est conforme aux certificats de qualité tels que TUV CNAS CTC.

Postes les plus récents

Étape 08 Mélanger la garance rose et le violet pour la première couche des diamants de couleur, en conservant des couleurs claires.

Comment concevoir des boucles d'oreilles, des bagues, des broches et des bracelets : Un guide étape par étape

Apprenez à concevoir des boucles d'oreilles, des bagues, des broches et des bracelets. Obtenez des conseils sur la coupe et l'assortiment de matériaux tels que l'améthyste, les diamants, l'or, le grenat, le rubis et le quartz rose. Suivez les étapes du dessin pour différentes pièces de bijouterie. Parfait pour les bijouteries, les studios, les marques, les créateurs et les vendeurs en ligne.

Lire la suite "
Étape 13 Créer un calque "Couleur du pendentif de la boucle d'oreille droite". Continuer à colorier le pendentif droit en forme d'hippocampe. Étape 14 Créer un calque "Couleur des perles". Appliquer le magenta comme couleur de base des perles. Définir les ombres et les lumières. Finaliser en ajustant le contraste clair-obscur et l'équilibre des couleurs.

Quelles sont les compétences clés pour la création de bijoux : Matériaux, techniques et présentation visuelle ?

Ce guide est parfait pour les bijouteries, les studios, les marques, les créateurs et les vendeurs. Il explique comment dessiner et concevoir des bijoux en utilisant différents matériaux tels que les diamants, les perles, le jade et les métaux. Apprenez des techniques pas à pas pour dessiner, colorier et créer des vues en 3D avec des crayons, des aquarelles, des marqueurs et des tablettes. Idéal pour les pièces personnalisées et les créations de célébrités.

Lire la suite "
Pierre précieuse

14 types de secrets sur les pierres précieuses : votre guide sur le disthène, la cordiérite et bien d'autres choses encore

Explorez une variété de pierres précieuses moins connues mais captivantes. Apprenez ce qui rend chacune d'entre elles unique, des teintes de saphir de la kyanite à la mystique sugilite en passant par les motifs vibrants de la malachite. Parfait pour les créateurs de bijoux et les collectionneurs à la recherche de pierres distinctives pour leurs créations.

Lire la suite "
Qu’est-ce que l’électroformage de l’or et comment est-il appliqué à des matériaux spéciaux ?

Qu'est-ce que l'électroformage de l'or et comment est-il appliqué aux matériaux spéciaux ?

Apprenez les méthodes professionnelles d'électroformage de l'or pour les bijoux. Créer des pendentifs et des décorations creuses et complexes en alliage d'or 18K à l'aide de solutions de placage. Contrôlez la densité du courant et le traitement thermique pour obtenir des pièces personnalisées solides, résistantes à la corrosion et de grande qualité. Indispensable pour les créateurs et les marques.

Lire la suite "
Entretien et soins des bijoux en métaux précieux

Comment entretenir et soigner les bijoux en métal précieux ? Guides des raisons, méthodes et processus

Gardez vos bijoux en métal précieux au meilleur de leur forme grâce à notre guide d'entretien simple. Apprenez à réparer les déformations, à prévenir la casse et à éliminer les décolorations. Indispensable pour les bijoutiers, les studios et les designers qui fabriquent des pièces personnalisées haut de gamme. Conservez la valeur et la beauté de vos bijoux grâce à des conseils simples...

Lire la suite "
Figure 5-21 Pressage du bord métallique

Comment sertir parfaitement les pierres précieuses : Un guide étape par étape pour les fabricants de bijoux

Cet article est un trésor pour les amateurs de joaillerie, car il fournit des techniques détaillées pour le sertissage des pierres précieuses. De la préparation des pierres précieuses à la fixation des bijoux avec de la cire chaude, il couvre des méthodes de sertissage spécifiques telles que le sertissage à l'aide d'une pince ou d'un chaton. Le guide comprend également l'utilisation d'outils courants et des opérations étape par étape, aidant les bijouteries, les studios, les marques, les détaillants, les concepteurs et les vendeurs du commerce électronique et de la livraison directe à améliorer leurs compétences en matière de bijouterie afin de créer des bijoux personnalisés exquis.

Lire la suite "
Quelles sont les principales méthodes et applications du plaquage platine dans l'industrie moderne ? 3

Quelles sont les principales méthodes et applications du plaquage platine dans l'industrie moderne ?

Découvrez le plaquage platine pour la joaillerie ! Ce guide aborde différentes solutions de plaquage, comme le chlorure et le sulfate, ainsi que des alliages tels que le Pt-Au et le Pt-Co. Idéal pour les bijouteries, les créateurs et les marques. Apprenez à rendre vos pièces plus résistantes et plus esthétiques grâce à des informations détaillées sur les techniques et les applications. Parfait pour la création de bijoux sur mesure.

Lire la suite "

10% Off !

Pour toute première commande

Rejoignez notre lettre d'information

Inscrivez-vous pour recevoir les dernières mises à jour et offres !

Fabricant de bijoux Sobling obtenir un devis pour vos bijoux
Guide ultime du sourcing - 10 conseils pour économiser des millions pour votre sourcing auprès de nouveaux fournisseurs
Téléchargement gratuit

Guide ultime de la prospection commerciale

10 conseils précieux peuvent vous permettre d'économiser des millions pour vos achats de bijoux auprès de nouveaux fournisseurs
Fabricant de bijoux Sobling personnalisation gratuite pour vos créations de bijoux

Usine de bijoux, personnalisation de bijoux,Usine de bijoux Moissanite,Bijoux en cuivre laiton,Bijoux semi-précieux,Bijoux en pierres synthétiques,Bijoux en perles d'eau douce,Bijoux en argent sterling CZ,Personnalisation de pierres semi-précieuses,Bijoux en pierres synthétiques