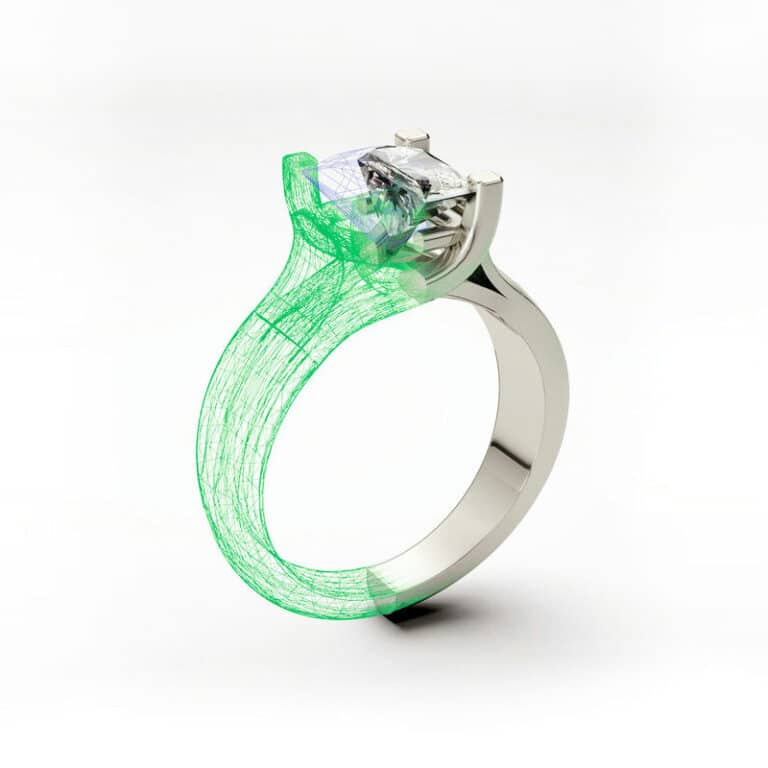
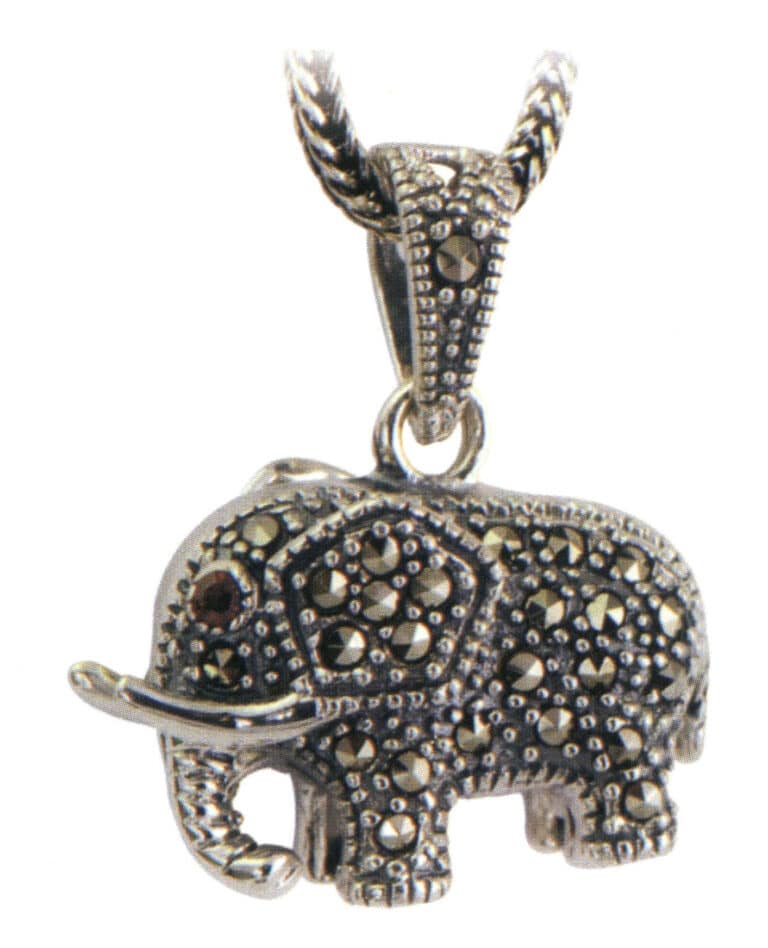
Mücevher için Prong Ayarı, Pave Ayarı ve Mikro-pave Ayarı nedir?
Learn the Making Methods and settings technology in the Jewelry making
Introducing the essentials of prong, pave, and micro settings in jewelry design, this guide delves into the overview and crafting methods of prong setting, including three-prong, four-prong, six-prong, and shared prong settings. It also covers the basics and techniques of pave setting, with a focus on the octagonal star and bright square four-prong pave settings, as well as the intricacies of micro-pave setting, exploring star micro pave, horizontal parallel, and staggered arrangements. Learn how these three setting styles enhance the beauty and brilliance of gemstones in various jewelry applications, perfect for jewelry stores, studios, brands, retailers, designers, e-commerce sellers, drop shippers, and custom celebrity creations.
İçindekiler
Section I Prong Setting
The prong setting is one of the most commonly used settings for gemstones and is a technique that allows the stone to be held securely in place with a metal structure that is as simple as possible. In contrast to the bezel setting, the prong setting is characterized by using a small amount of metal to conceal the stone, thus revealing its brilliance to a greater extent, especially in the case of large-weight faceted stones.
1. Overview of Prong Setting
Prong setting utilizes a “column” shaped metal structure to achieve the centripetal claw fixation of gemstones while maximizing the refractive space for light to fully showcase the gemstone’s brilliance. The common number of prongs includes two, three, four, five, and six, depending on the shape and size of the gemstone, as shown in Figure 3-1. For example, marquise-shaped gemstones have two pointed corners, so they are fixed with two angled prongs. Other shapes may not be stable with two prongs, but if the marquise-shaped gemstone has a larger weight, to ensure stability in setting, two additional columnar prongs need to be added on each side, resulting in six prongs. However, this six-prong setting differs from the classic six-prong setting in wedding rings, so the number of prongs does not necessarily represent a fixed pattern. Round diamonds are the most popular engagement rings because the round shape has the strongest adaptability, and three-prong, four-prong, and six-prong settings can all create beautiful prong settings. Therefore, many people often associate the concept of prong setting with round diamond wedding rings. The limitation of prong setting lies in the relatively thin metal column structure, which has certain hardness requirements for the metal; thus, pure gold and pure silver are not suitable for prong setting structures.

2. Methods of Making Prong Settings
The number of prongs in prong settings can range from two to eight or even more, depending on the condition of the gemstone. Round and oval gemstones commonly use four-prong and six-prong symmetrical prong settings; three-prong settings are generally used for drop-shaped or heart-shaped gemstones; shared prong settings are used when multiple gemstones are arranged. The classification of prong settings mainly introduces the representative three-prong, four-prong, and six-prong settings and the specific production steps for shared prong settings. Based on these setting steps, one can practice other prong-setting styles through analogy.
2.1 Three-prong Setting
Three-prong settings are often used for the setting of drop-shaped, heart-shaped, and triangular-shaped gemstones, typically creating corner prongs at the sharp corners of the gemstone to protect the sharp corners and secure the gemstone. However, if the gemstone is relatively small, the prongs are usually processed into three cylindrical prongs, as shown in Figure 3-2. Below, we will demonstrate the three-prong setting using a drop-shaped faceted gemstone as an example.
Steps for Making a Three-prong Setting
(1) Malzeme PTAZMİNAT
In this case, three-dimensional software modeling creates a stone setting. First, measure the size of the gemstone, then perform 3D modeling based on the size and shape of the gemstone, and finally, use 3D wax casting to create a 925 silver setting. The metal plate must be preliminarily finishing before use, as shown in Figure 3-3.
(2) Fixing the Metal
Fix the prepared three-prong stone setting onto the sealing wax. When applying the sealing wax, be careful to soften it with a low flame; a high flame or hard flame can easily ignite and burn the sealing wax. Then, tools like tweezers are used to push the sealing wax aside and fix the stone setting on the sealing wax. If the stone setting is pressed directly onto the sealing wax, the sealing wax will rise from the bottom hole, so it is important to promptly push and press the sealing wax to hold the stone setting in place before it hardens (see Figure 3-4) and wait for the sealing wax to cool. Once it hardens, you can begin the next steps.
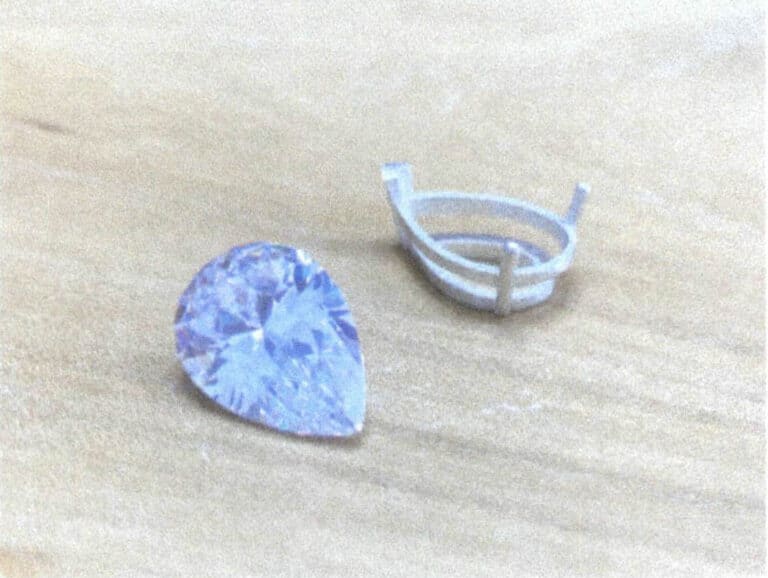
Figure 3-3 Preparing the stone setting and gemstone
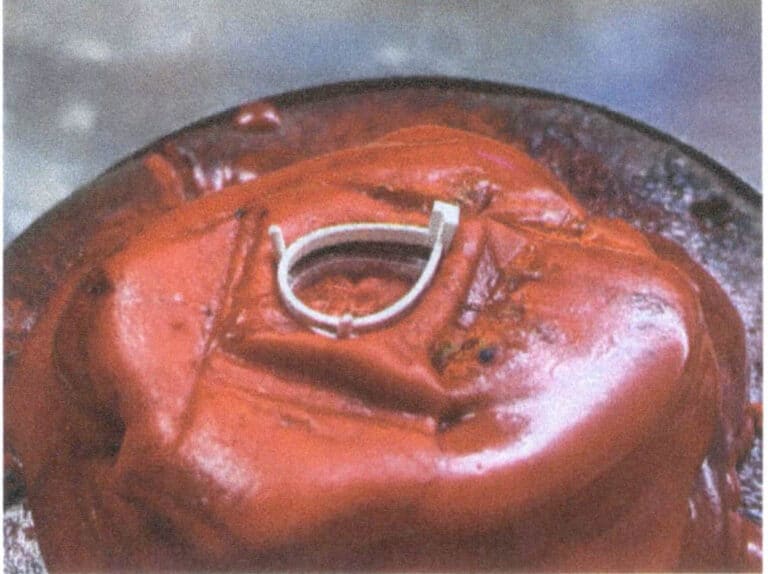
Figure 3-4 Applying sealing wax
(3) Adjusting the Stone Setting
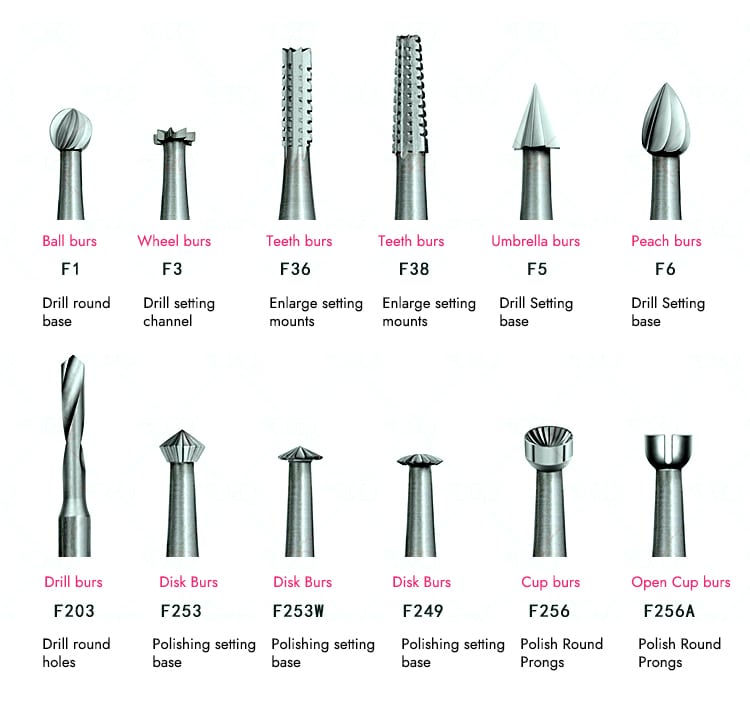
Use a peach bur to polish the stone setting with an inward slope to accommodate the shape of the bottom of the faceted stone, as shown in Figure 3-5. The reason for using peach burs is that the sharp corners of the peach burs can be better sanded to the drop-shaped sharp corners , as shown in Figure 3-6. Note that the slope sanded should be even to avoid unevenness in the height of the stone after it is placed underneath.
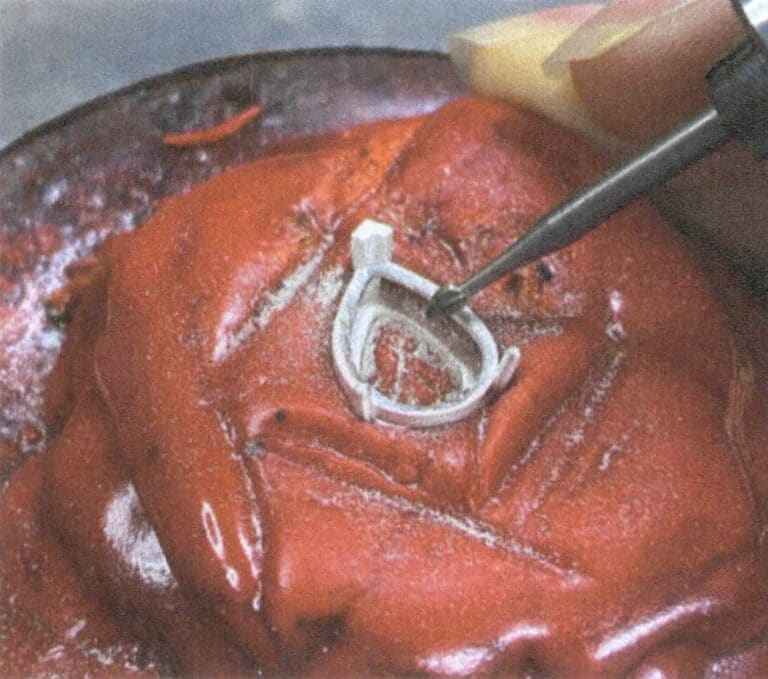
Figure 3-5 Polishing the slope of the stone setting with a peach bur
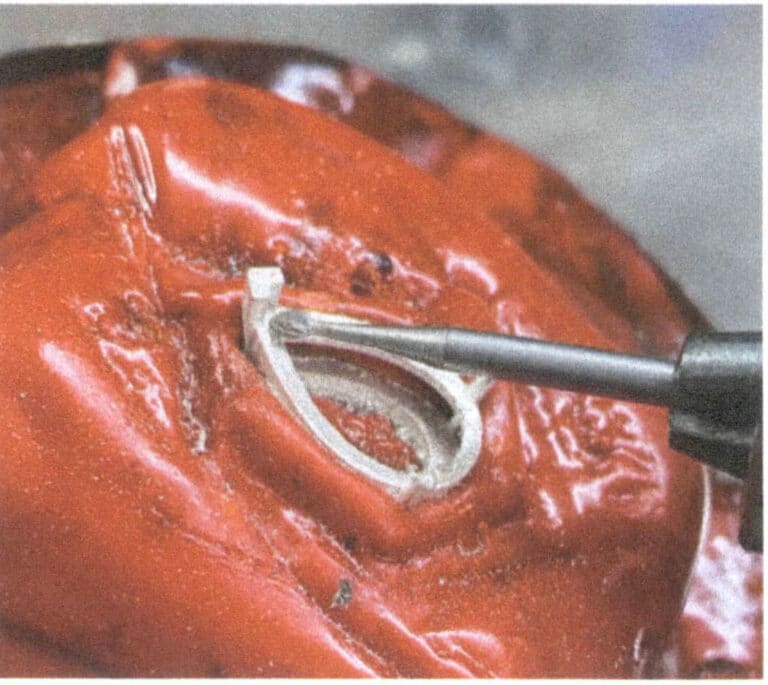
Figure 3-6 Polishing the sharp corner of the drop-shaped stone setting with a peach bur
(4) Marking the Position of Stone Setting Position
Place the gemstone into the stone setting , feel the height of the gemstone’s girdle, and determine the height for opening the stone setting position accordingly. Use disk burs to mark the position for creating grooves on each metal prong, as shown in Figure 3-7.
(5) Polish the Stone Setting Position in V Prongs
The main tool used for opening the stone setting position is the disc bur. First, a groove is opened on the inner side of the corner prong, with a depth of about 1/3 to 1/2 of the prong thickness. It is important to note that the groove on the inner side of the corner prong cannot be polished to the corner position due to the disc bur’s limitations, so a small ball bur should be used to deepen the groove at the corner position, ensuring that the corner position reaches the same depth as other positions, allowing the sharp corner of the gemstone to fit in, as shown in Figures 3-8 to 3-10.
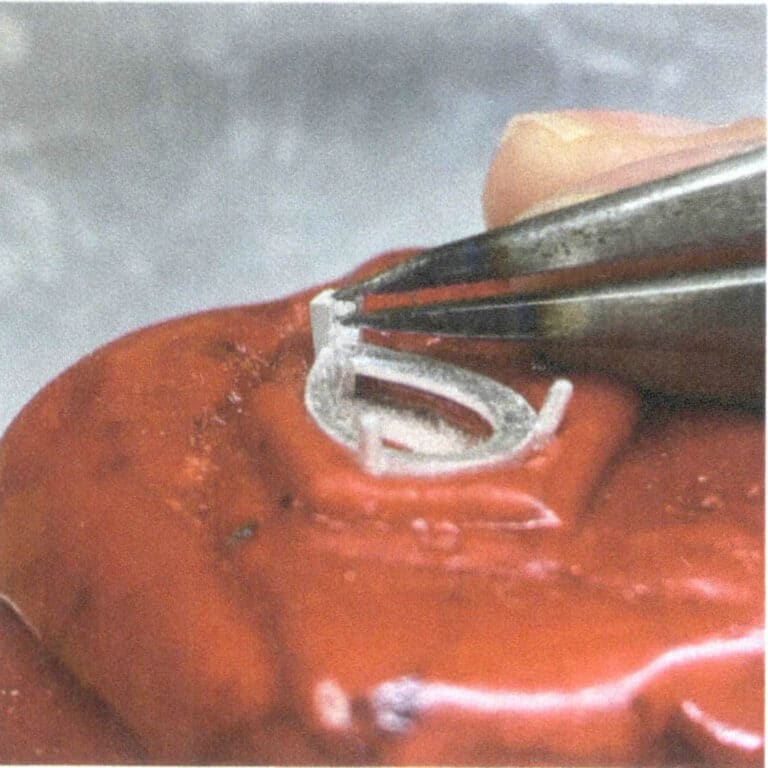
Figure 3-7 Marking the position of the groove
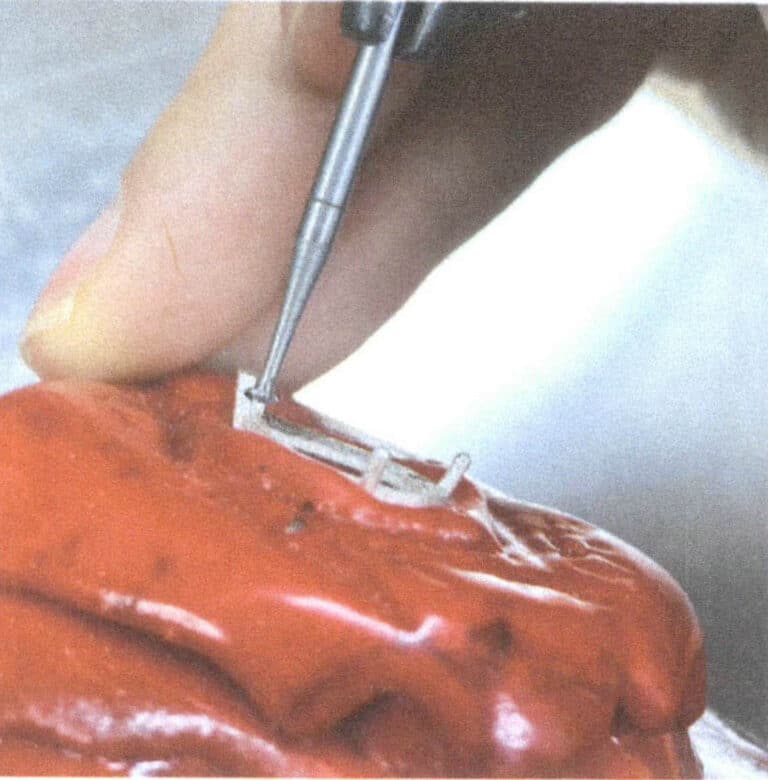
Figure 3-8 Opening the stone setting position of the corner prong with a disc bur
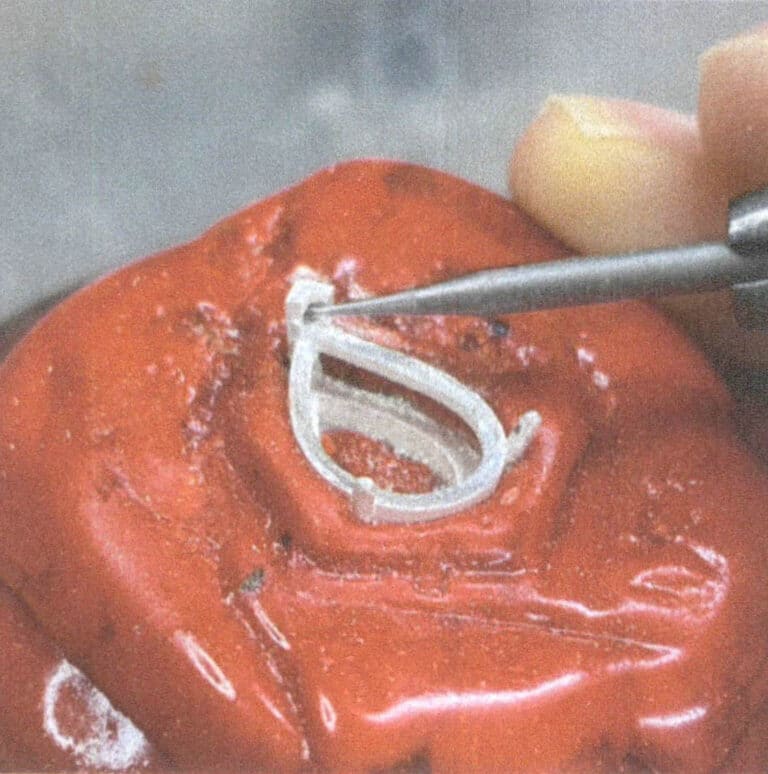
Figure 3-9 Opening the stone setting position of the corner prong at the corner with a ball bur
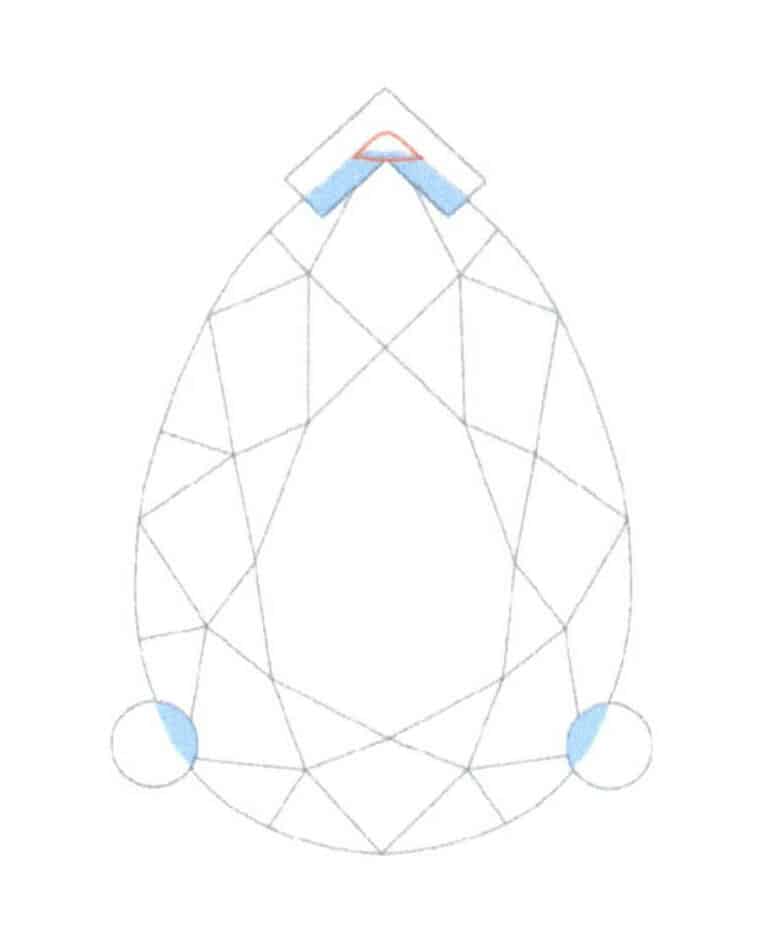
Figure 3-10 Opening stone setting position (the blue marked path is for the disc bur, the red boxed path is for the ball bur)
(6) Polish the Stone Setting Position in Round Prongs
Use the disc bur to open the stone setting position at the center of the columnar prongs, with a depth of about 1/3 to 1/2 of the prong thickness, as shown in Figure 3-11.
(7) Cleaning the Stone Setting Position
If the stone setting position is not regular after being polished with a disc bur, you can use a graver to smooth the metal in the groove and then use a brush to clean up the excess metal shavings, as shown in Figure 3-12.
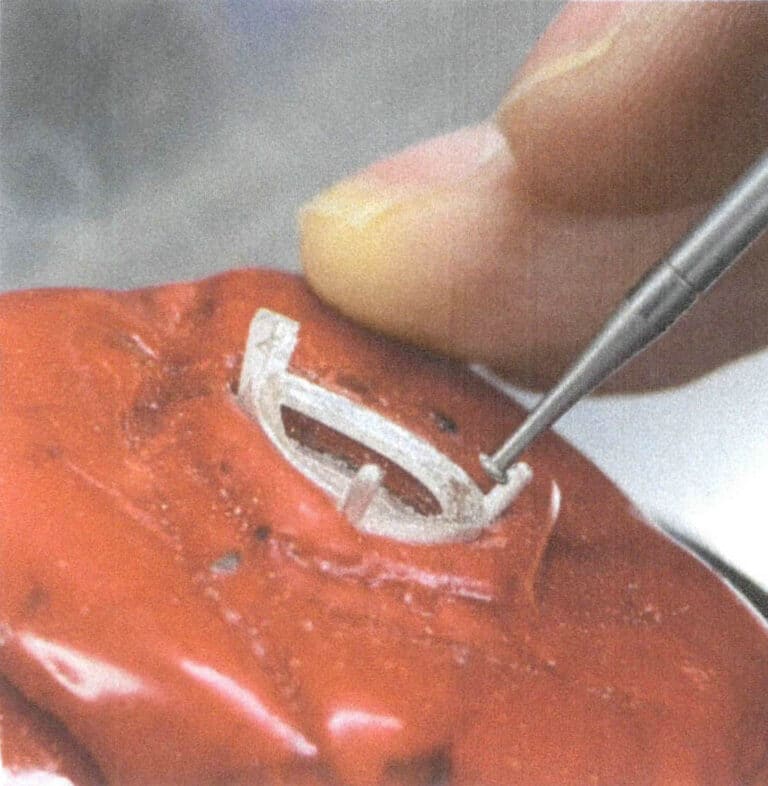
Figure 3-11 Disc bur for an opening stone setting position in tab prongs
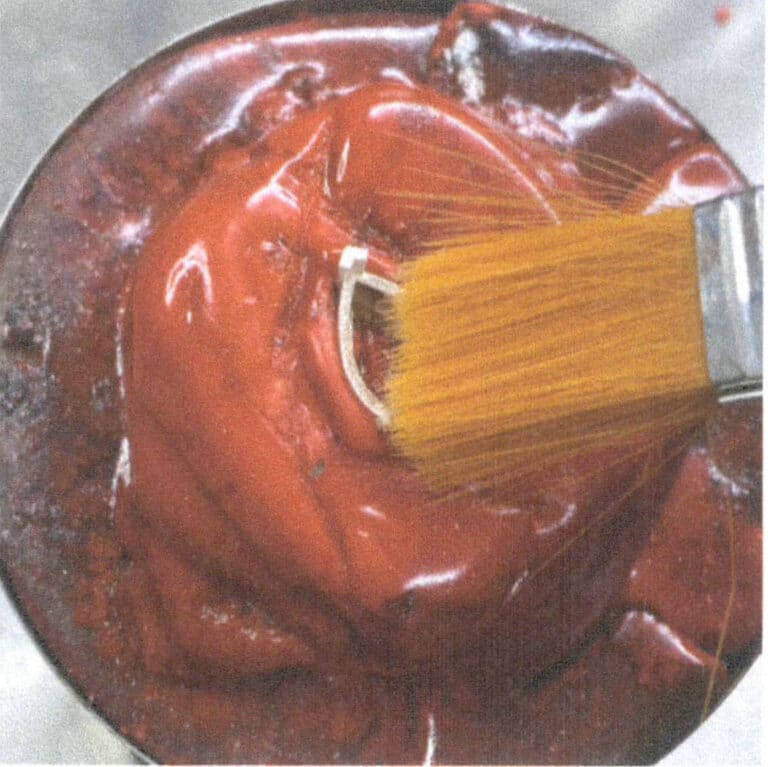
Figure 3-12 Cleaning the stone setting position
(8) Bend three metal prongs outward
Use needle-nosed pliers to bend the three metal prongs outward, allowing the gemstone to fit in, as shown in Figure 3-13.
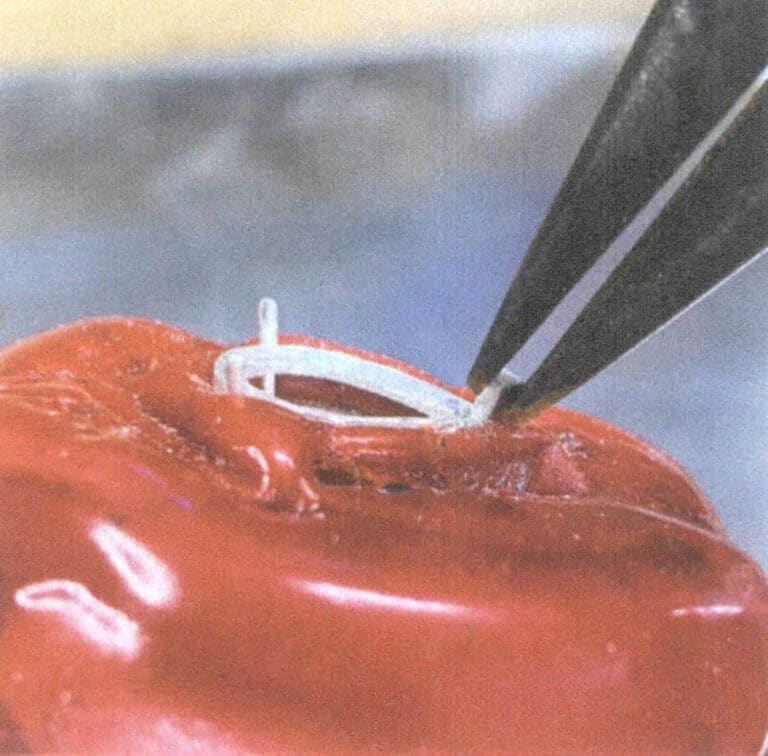
(9) Placing the Stone
Place the gemstone correctly in the setting, and you can gently press the gemstone with tools like tweezers. Observe from the side to see if it is level, as shown in Figures 3-14 and 3-15. Generally, if the prongs are too long at this stage, you must trim the excess with pliers. In this case, the length of the prongs is appropriate, and there is no need to trim them.
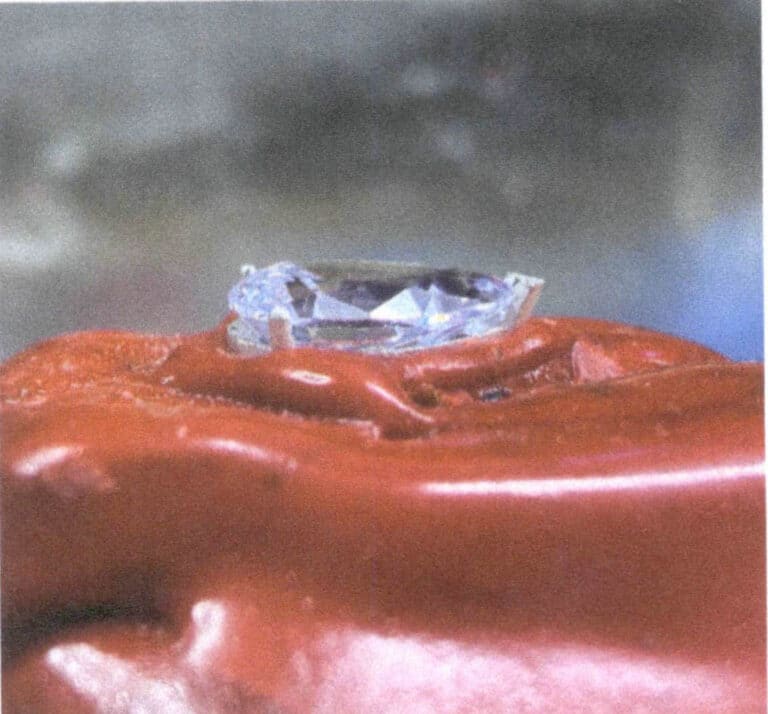
Figure 3-14 Side View of the Stone Placing
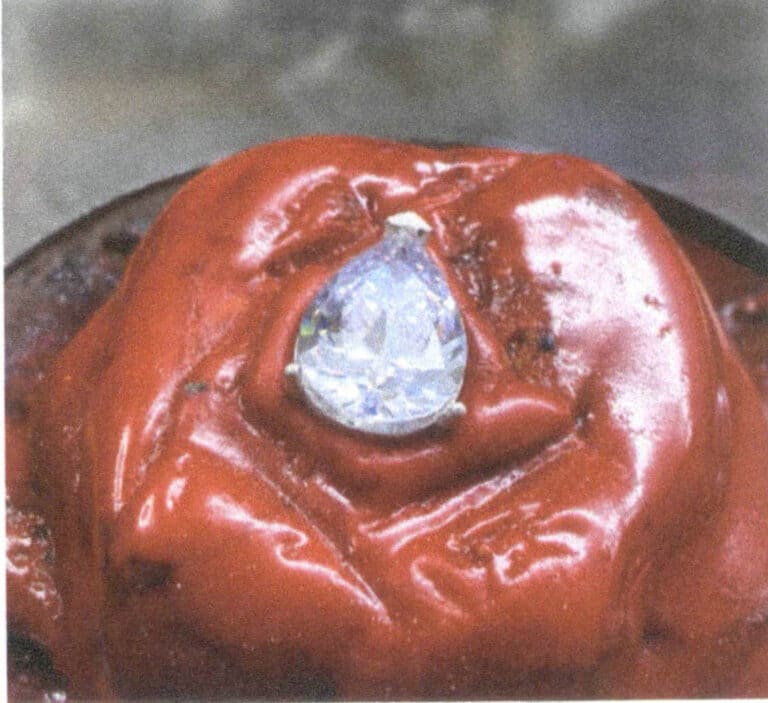
Figure 3-15 Top View of the Stone Placing
(10) Setting the Stone
The two common methods for setting a three-prongs gemstone are: the first method is to use pliers to clamp one end at the sharp corner and the other end from two cylindrical prongs; the second method is to push the three prongs towards the center with a flat-headed chisel. This case demonstrates the second method, as shown in Figures 3-16 and 3-17. Both methods have a common step afterward: using needle-nosed pliers to clamp the corner prongs, reducing the corner’s angle, and securing the gemstone, as shown in Figure 3-18.
(11) Finishing – Shovel Repair
Use a graver to trim the edges of the gemstone on the inner side of the corner prong to be neat and smooth, as shown in Figure 3-19.
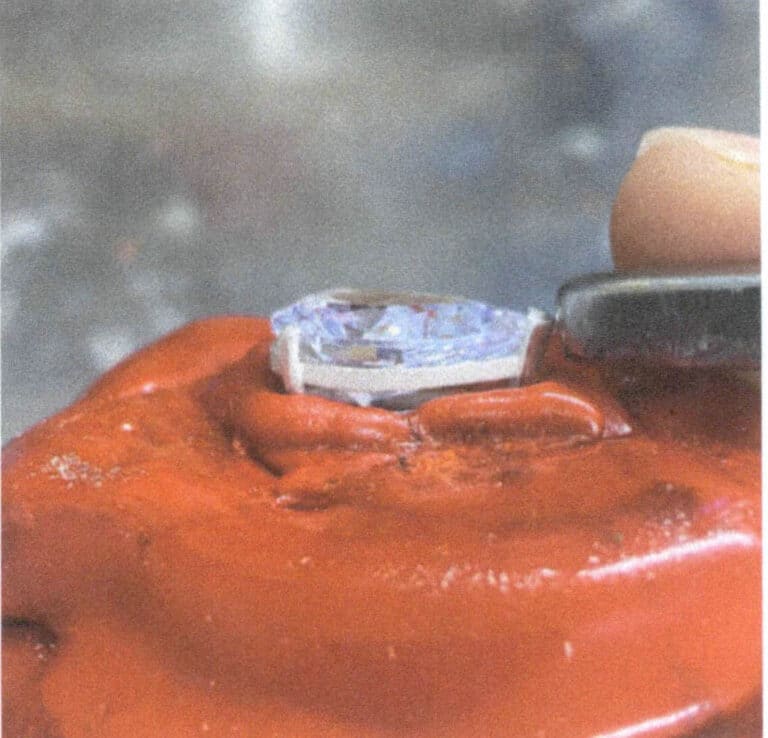
Figure 3-16 Pushing the corner prongs
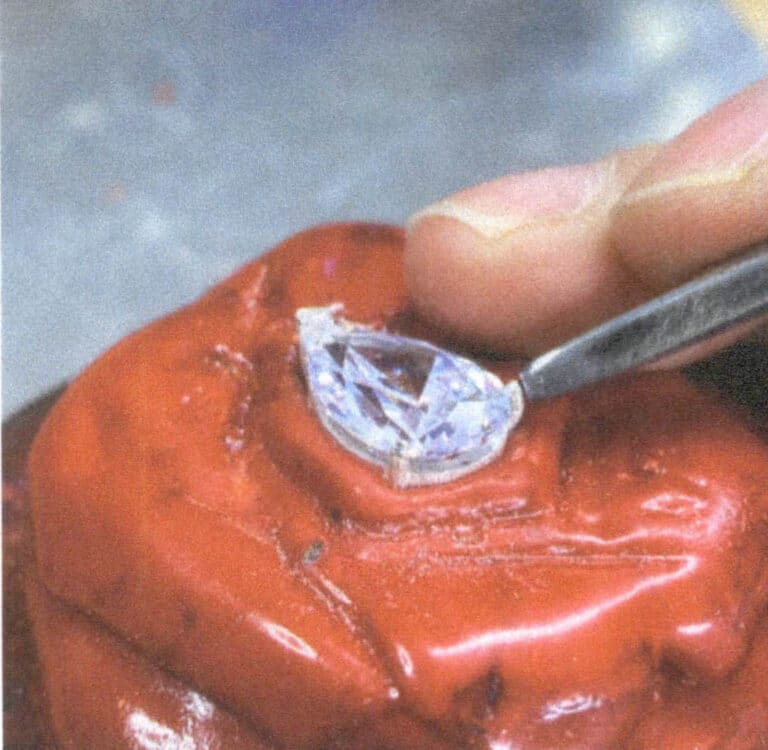
Şekil 3-17 Silindirik çatalların itilmesi
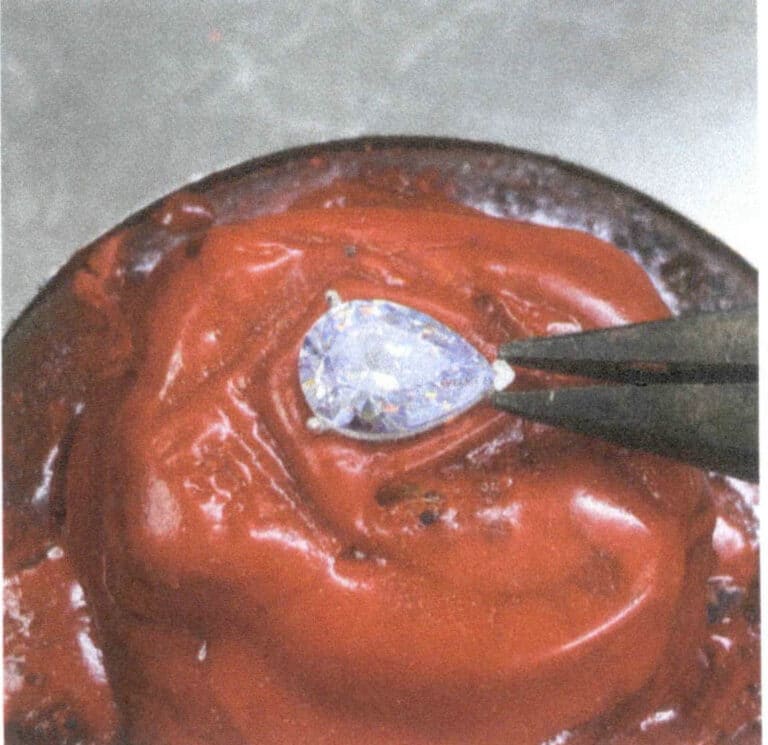
Figure 3-18 Clamping the corner prongs with needle-nosed pliers
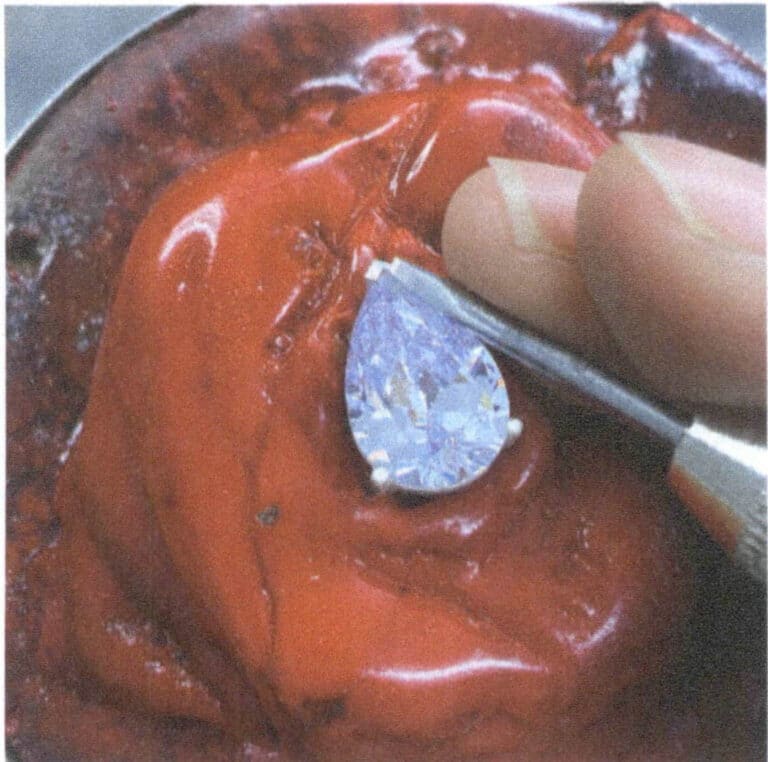
Figure 3-19 Chisel Trimming
(12) Finishing – Filing
Use a file to shape the corner prong, making the angles clear, distinct, and aesthetically pleasing, as shown in Figure 3-20. For claw shapes like drops and marquises that do not have sharp corners, if the metal size is small, it is generally processed into a rounded state; if it is large, filing to create clear corners will be more beautiful. This will make the relationship between the metal and the faceted gemstone more harmonious.
(13) Finishing - Parlatma
Complete polishing with sandpaper rolls, rubber polishing wheels, polishing wheels, etc., as shown in Figure 3-21.
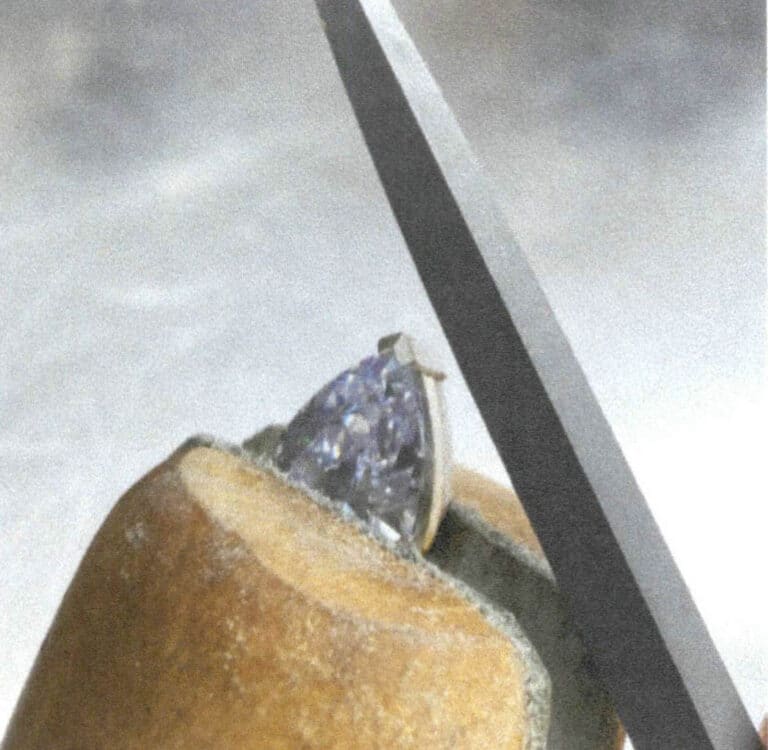
Figure 3-20 Filing the Corner Claw
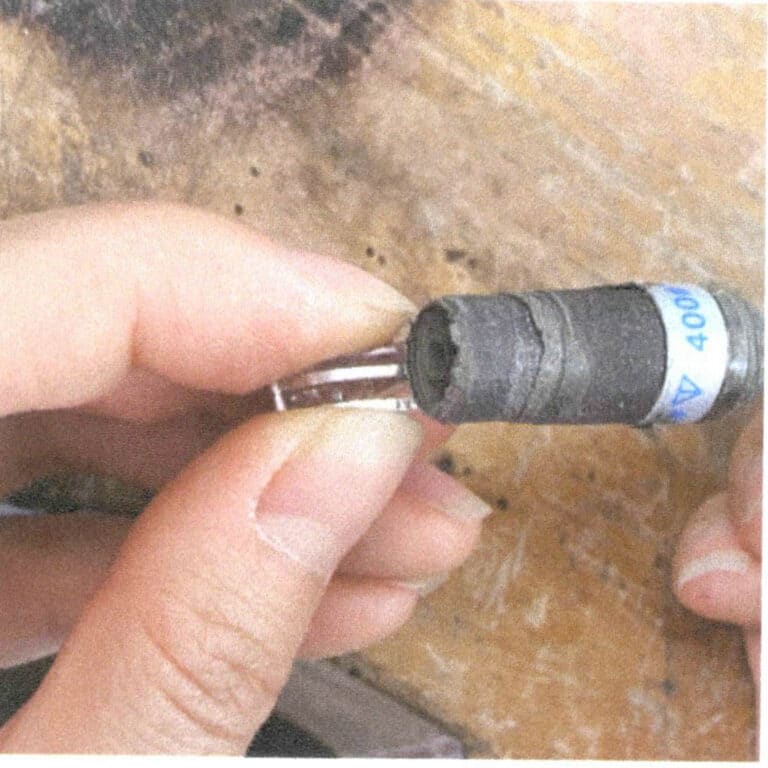
Figure 3-21 Polishing
(14) Completing the Three-Prong Setting Drop-Shaped Faceted Gemstones
The completed three-prong setting the drop-shaped faceted gemstone is shown in Figure 3-22.
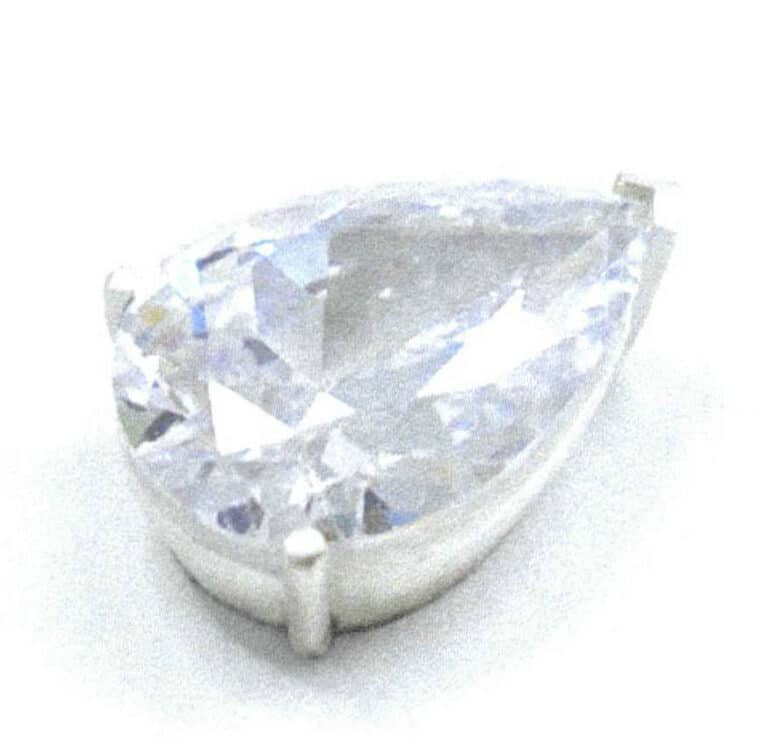
2.2 Four-Prong Setting
The four-prong setting is widely used in shapes with at least two lines of symmetry, such as round, oval, and square shapes. The four-prong setting often gives a more solemn impression, and the two sets of symmetrical fixed prongs are also very stable. In engagement rings, besides the six-prong setting, the four-prong setting is the most common, and in multi-gem settings, the four-prong setting is also the most frequently used, as shown in Figure 3-23.
The rapid development of 3D printing technology has made it easy to complete many processes in jewelry that were originally made using metalworking techniques through 3D modeling and wax casting. Due to high production efficiency, most mass-produced metal jewelry is made using modeling and casting methods. The three-prong, six-prong, and shared-prong settings discussed in this chapter are also prepared using this method. Although 3D printing technology has improved efficiency, traditional metalworking techniques still possess a strong artisanal charm. Therefore, this section uses the four-prong setting as an example to introduce the operational steps for making a crown four-prong stone setting using metalworking techniques.
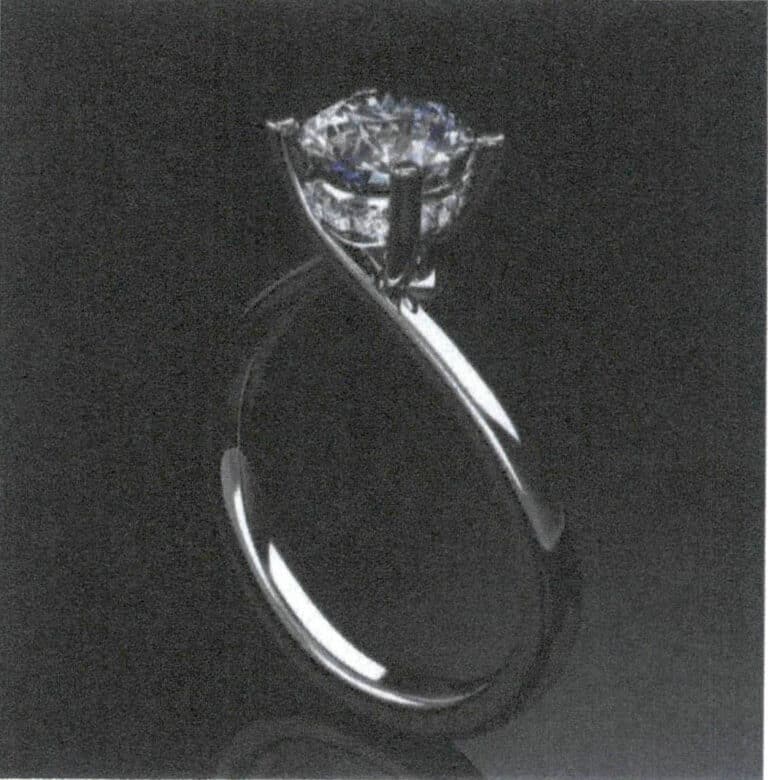
İçin Adımlar Making a Four-Prong Crown Setting
(1) Measuring ve Size of the Gemstone
Since the production of the metal stone setting is entirely based on the gemstone’s size, the first step is to accurately measure the size using a caliper, as shown in Figure 3-24. For example, the size of the round brilliant cut diamond used in this case is 7 mm in diameter and 4.25 mm in height.
(2) Drawing ve Side View of the Stone Setting
According to the size of the gemstone, draw the side view of the stone setting on the drawing to determine the required height and tilt angle of the stone setting, as shown in Figure 3-25.
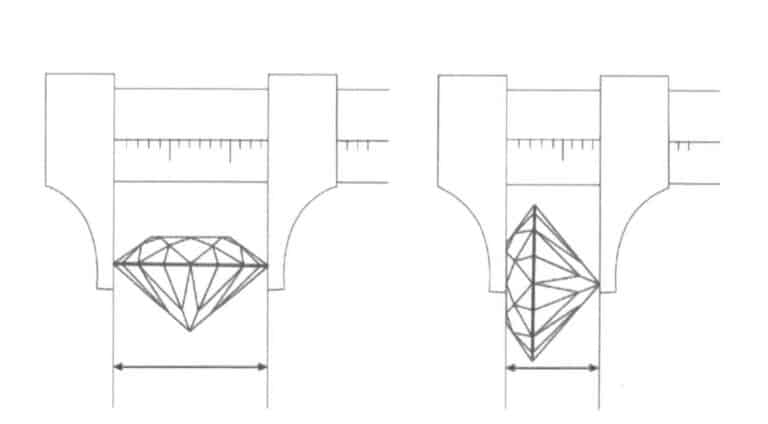
Figure 3-24 Measuring the size of the gemstone
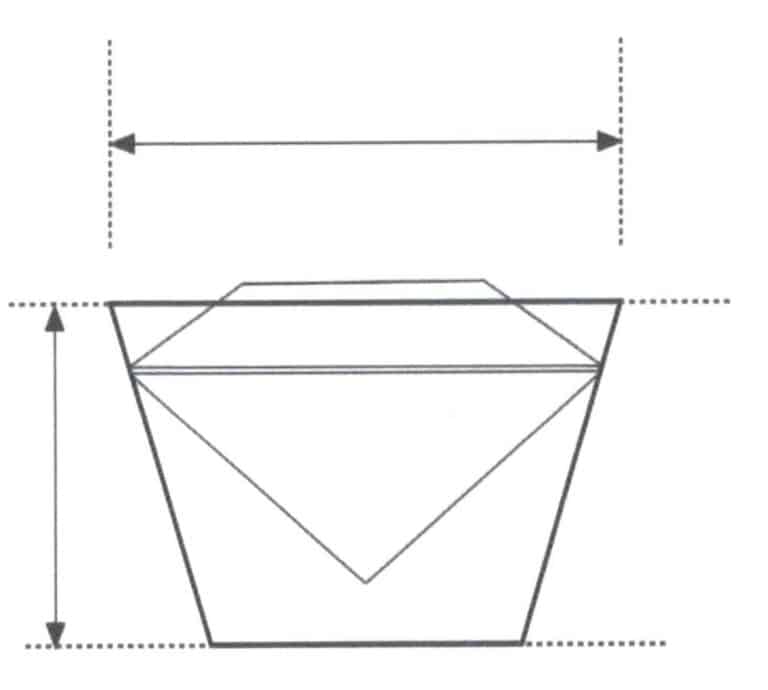
Figure 3-25 Drawing the Side View of the Stone Setting
(3) Drawing ve Sector-Shaped Metal Piece
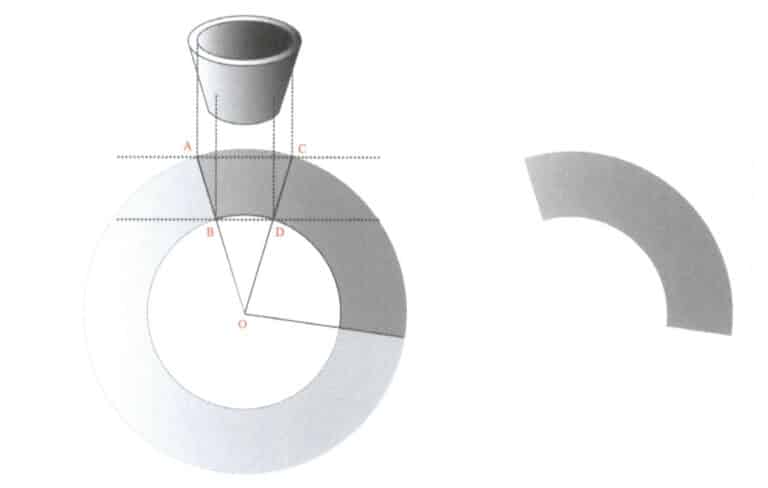
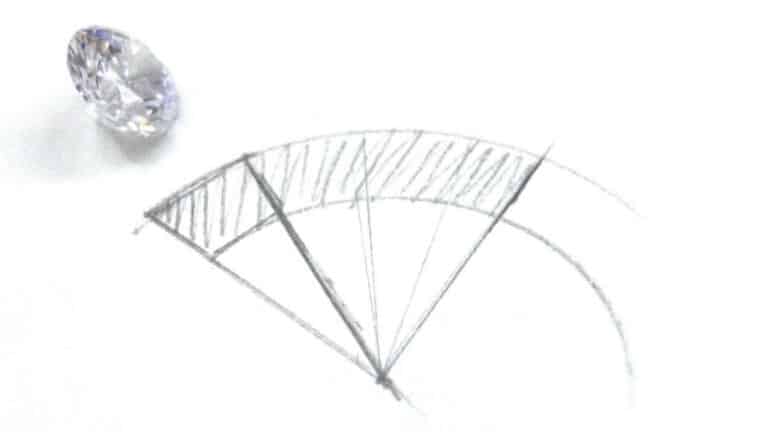
First, make a tapered cylindrical metal piece wide at the top and narrow at the bottom to create a crown four-prong setting. On this basis, file and shape it into a crown-shaped stone setting. This tapered cylindrical piece is formed by bending a flat sector, and calculating the dimensions of this flat sector is the key and difficulty here. The method for drawing the sector-shaped metal piece and the resulting sector area are shown in Figure 3-26.
① First, based on the sketch from the previous step, obtain a side view of the inner wall of the stone setting, which means that both the top and bottom diameters are taken as the inner diameter of the stone setting, drawing the trapezoid ABCD shown in Figure 3-29.
② Extend the straight lines AB and CD and intersect at a point O.
③ Use a point O as the center and draw circles with straight lines OA and OB as the radii.
④ The area of the required sector is the degree of ∠AOC multiplied by 3.14. The loss from the metal saw can be calculated by multiplying by 3.5. The area of the sector formed by extending the two sides of the obtained angle to intersect with the arc is the metal area of the bent stone setting. If calculating the angle is troublesome, a simpler way is to take the area of three-half ABCD sectors.
(4) Drawing the Shape of the Metal Sheet
According to the method in the previous step, draw the shape of the sector-shaped metal piece on paper, as shown in Figure 3-27.
(5) Cutting the Metal Sheet
Cut out the drawn fan shape and paste it onto the metal sheet, then use a saw to cut down the metal sheet along the edge of the shape, as shown in Figures 3-28 and 3-29.
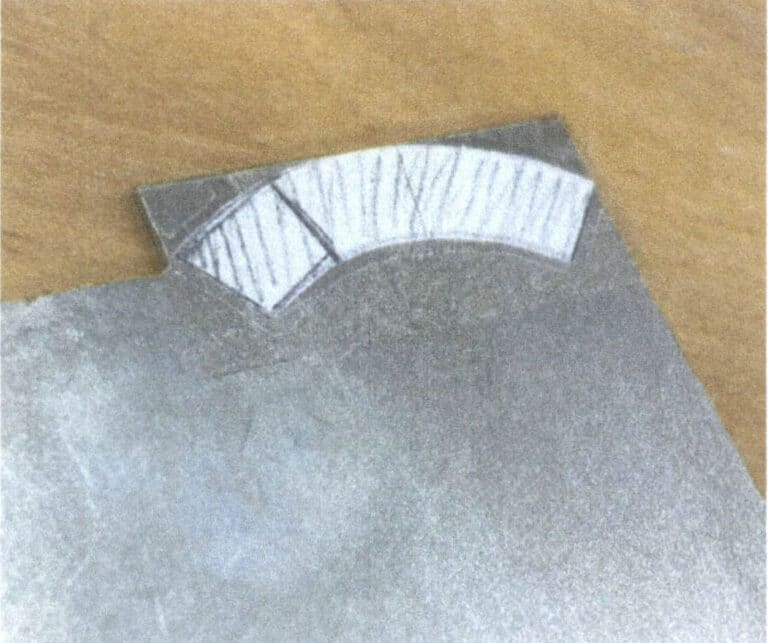
Figure 3-28 Attach the drawn sector paper to the metal piece.
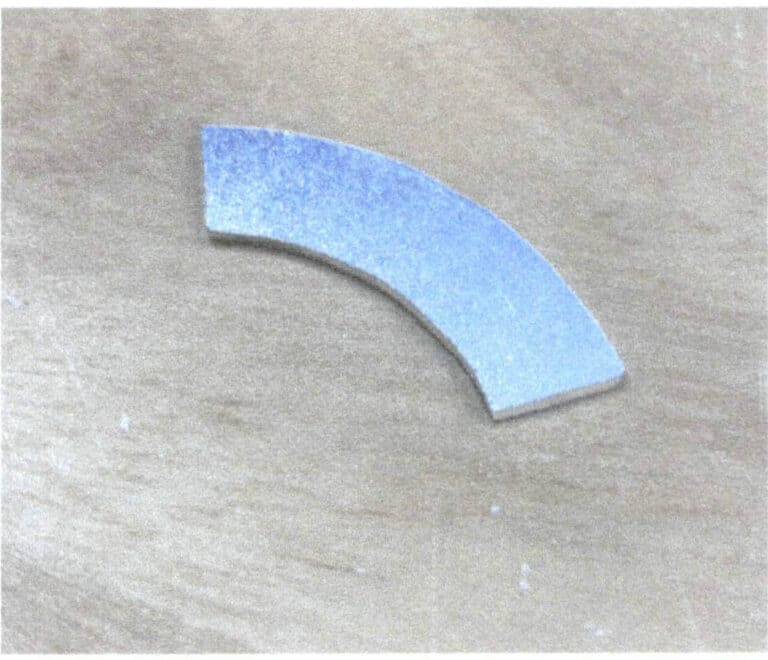
Figure 3-29 Cutting the metal sheet
(6) Bending ve Fan-Shaped Metal Sheet
Bend the resulting fan-shaped metal sheet into a cylinder shape with arc forming pliers and paste the two straight edges closely together, as shown in Figure 3-30.
(7) Welding the Joints
Weld the joints of the bent cylindrical sheet metal (see Figure 3-31), and clean and polish off the excess flux after welding.
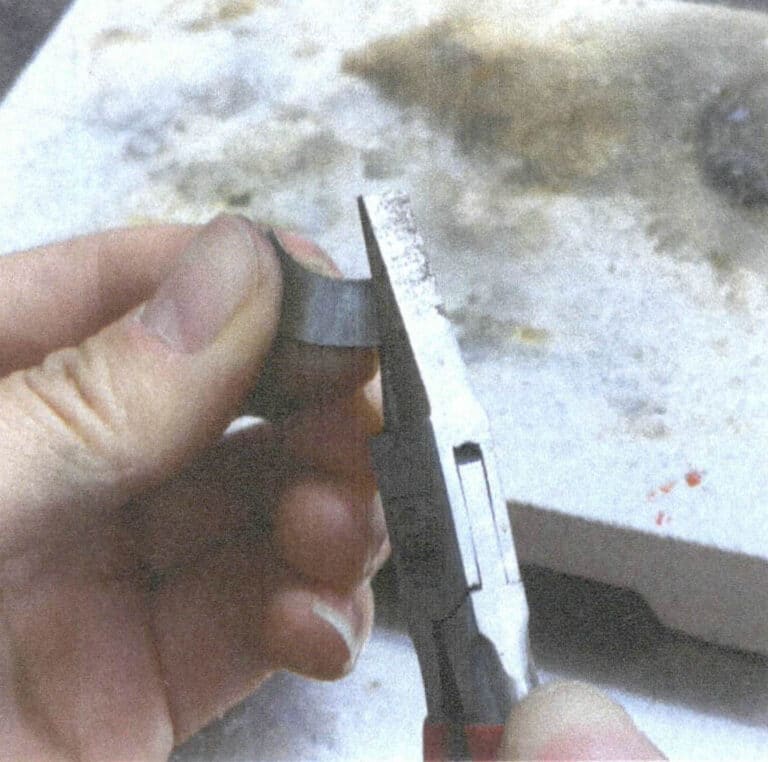
Figure 3-30 Bending the fan-shaped metal piece
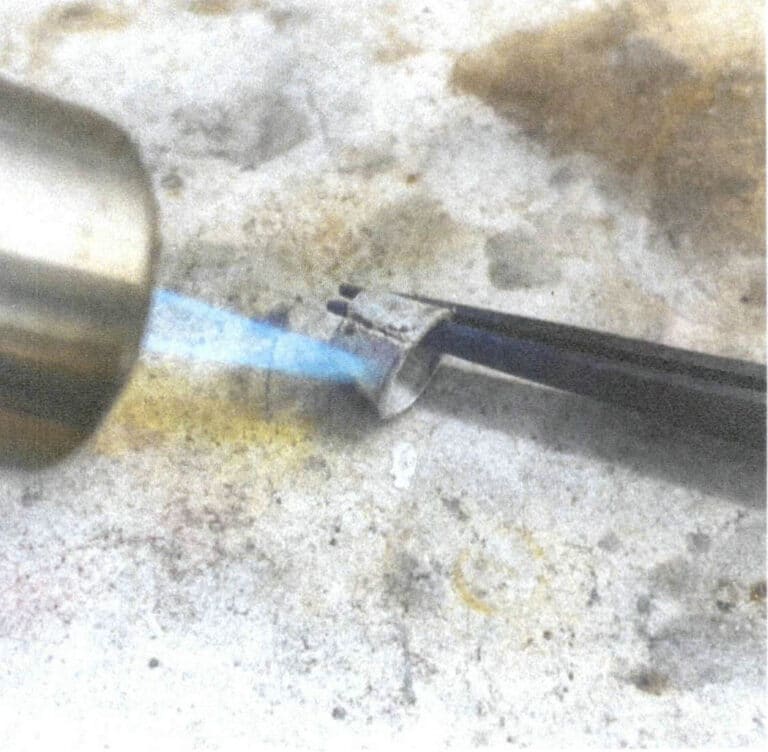
Figure 3-31 Welding the joints
(8) Adjusting the Shape
After welding, the shape is rounded with the help of pliers and a con bur, as shown in Figures 3- 32 and 3-33.
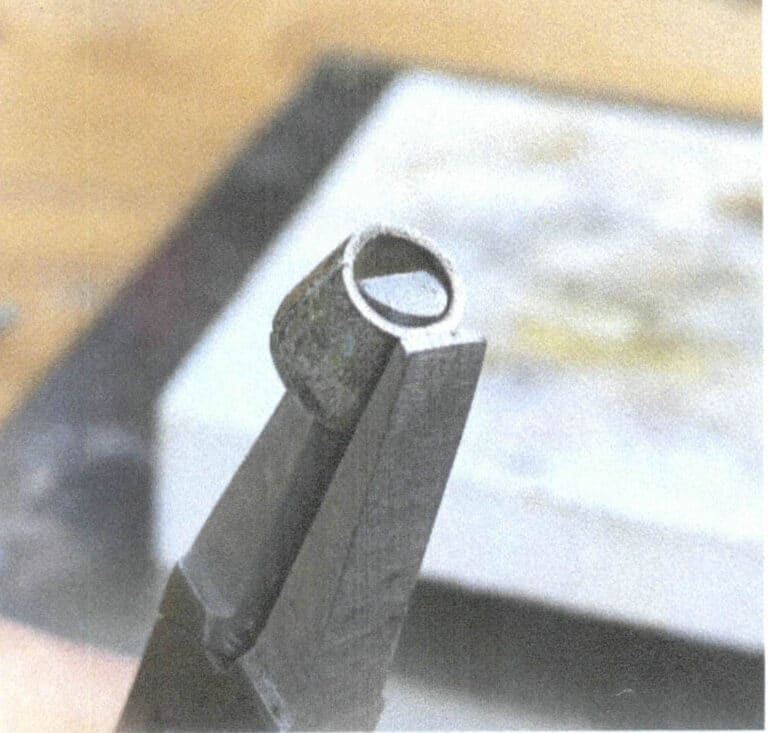
Figure 3-32 Adjusting the shape (1)
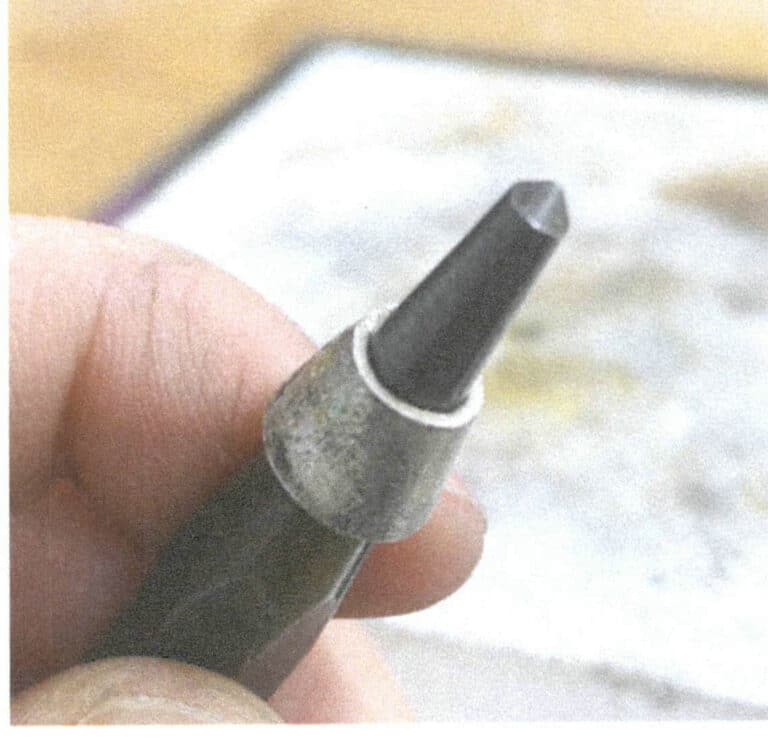
Figure 3-33 Adjusting the shape (2)
(9) Marking Auxiliary Lines
Use a wing divider to mark the auxiliary lines of the upper and lower sets of concave arcs on the outer surface of the metal. The outer surface of the metal should be painted black with an oil-based pen for clearer marking with the compass. Additionally, mark the four points of central symmetry, as shown in Figure 3-34.
(10) Grinding Concave Arc
Use a round shaping file to grind out the required upper and lower sets of staggered arcs, as shown in Figures 3-35 to 3-37.
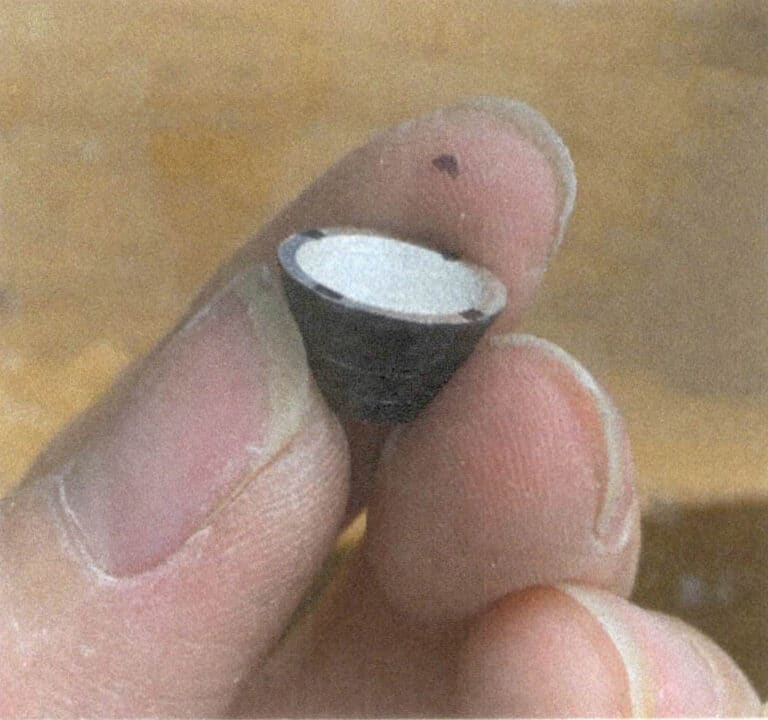
Figure 3-34 Marking Auxiliary Lines
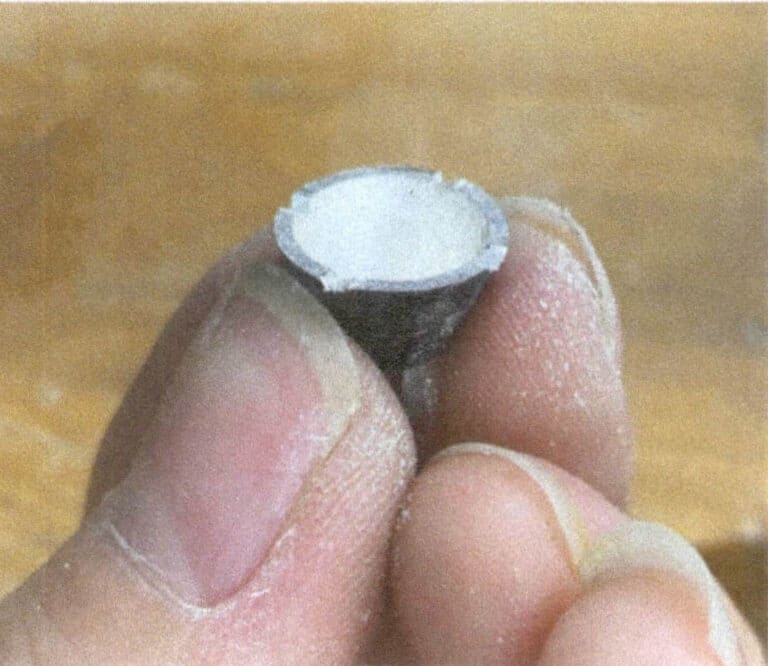
Figure 3-35 Grinding Concave Arc (1)
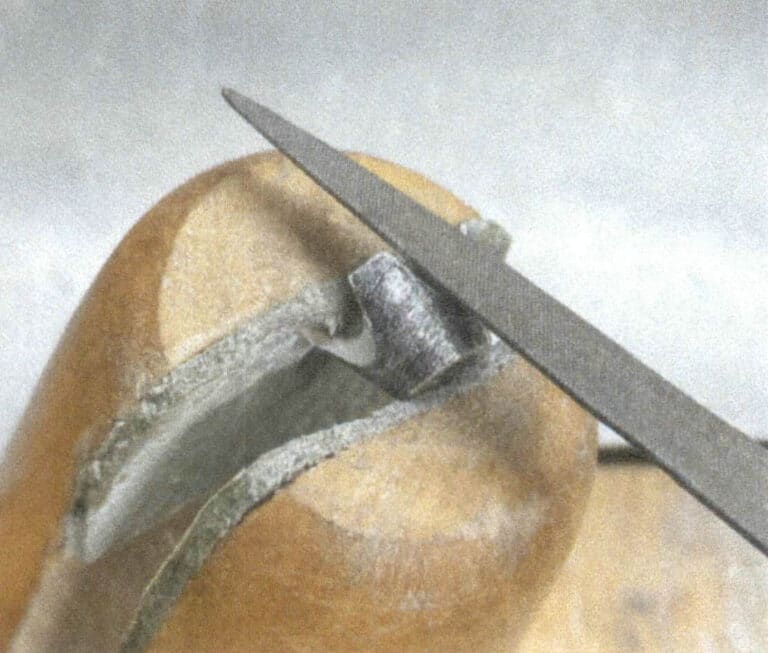
Figure 3-36 Grinding Concave Arc (2)
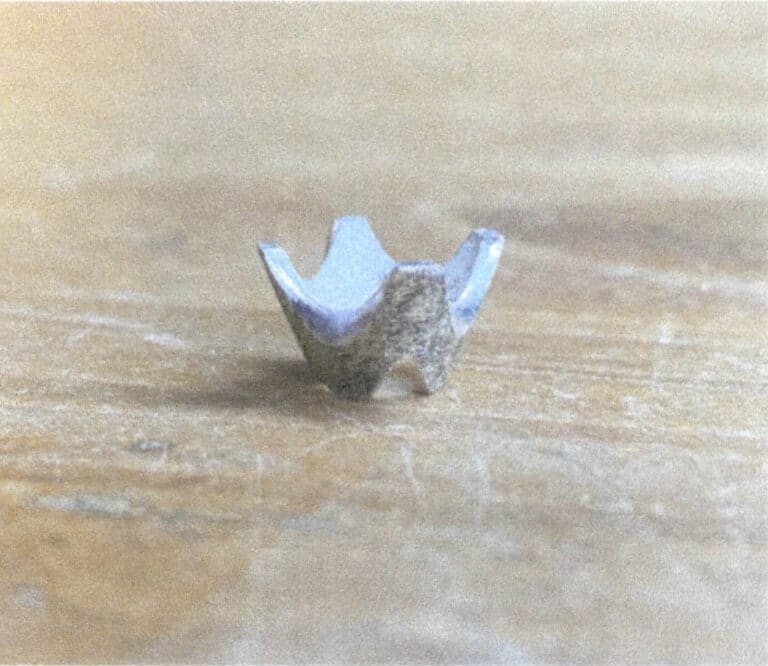
Figure 3-37 Polishing the Concave Arc (3)
(11) Welding the Base
Weld the crown four-claw stone setting that has been polished onto the circular base, creating an elegant shape and making it more like a crown. With the base, combining the stone setting and structures like rings will be more natural. After welding, boil with alum to clean the impurities, as shown in Figure 3-38.
(12) Preliminary Finishing
The grooves of crown four-prongs setting are not easy to polish after setting the stone, so a preliminary finishing should be made before setting the stone to avoid difficulties in polishing afterward, as shown in Figure 3-39.
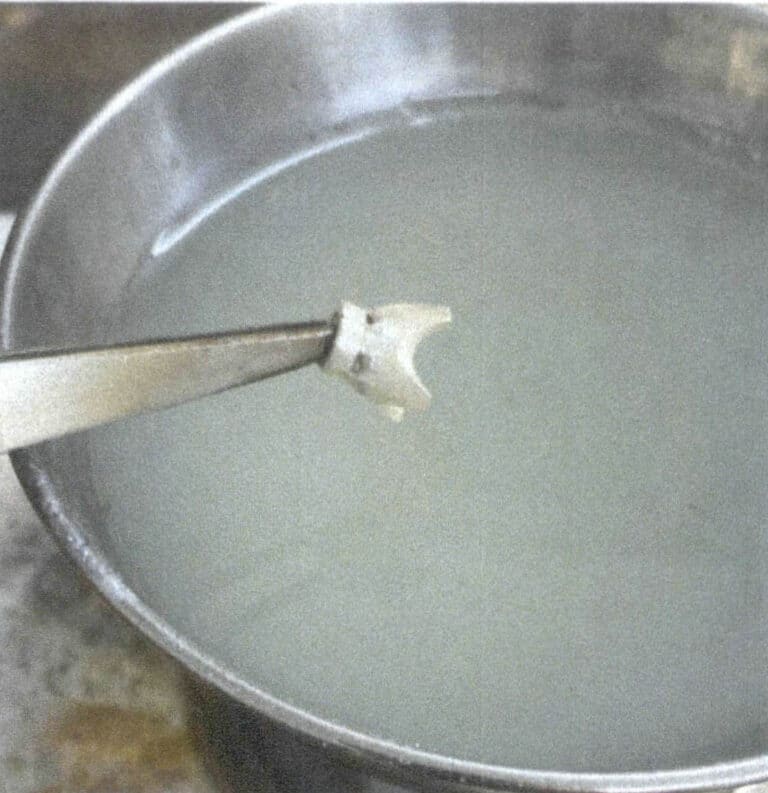
Figure 3-38 Cleaning the Metal After Welding
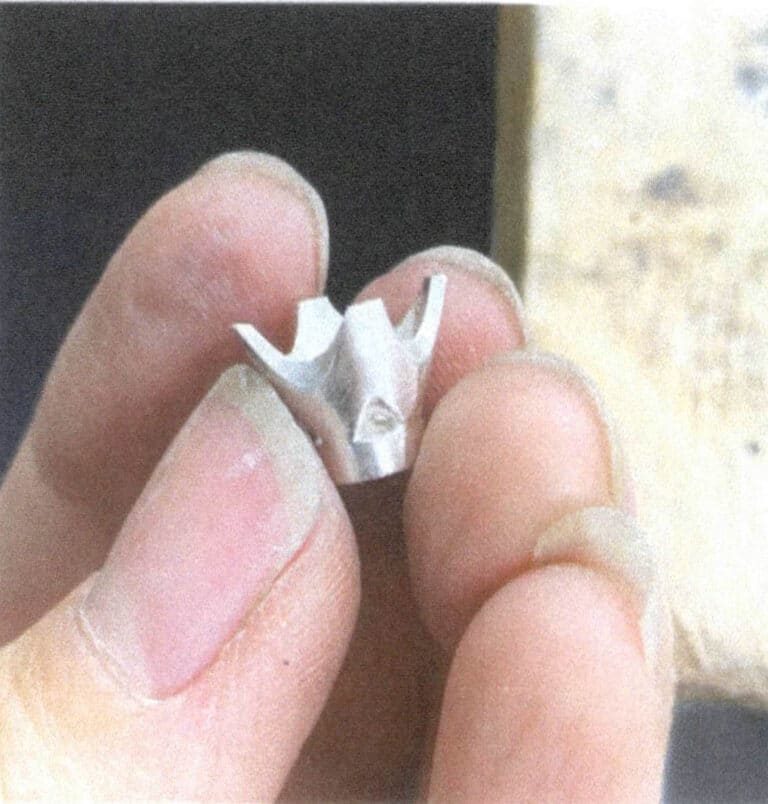
Figure 3-39 Preliminary Finishing
(13) Applying Sealing Wax
Fix the stone setting based on the sealing wax, as Figure 3-40 shows.
(14) Observing the Position of the Prongs
Before opening the stone setting position, place the gem in the stone setting and observe the position of the gem’s girdle in the metal prongs, as shown in Figure 3-41.
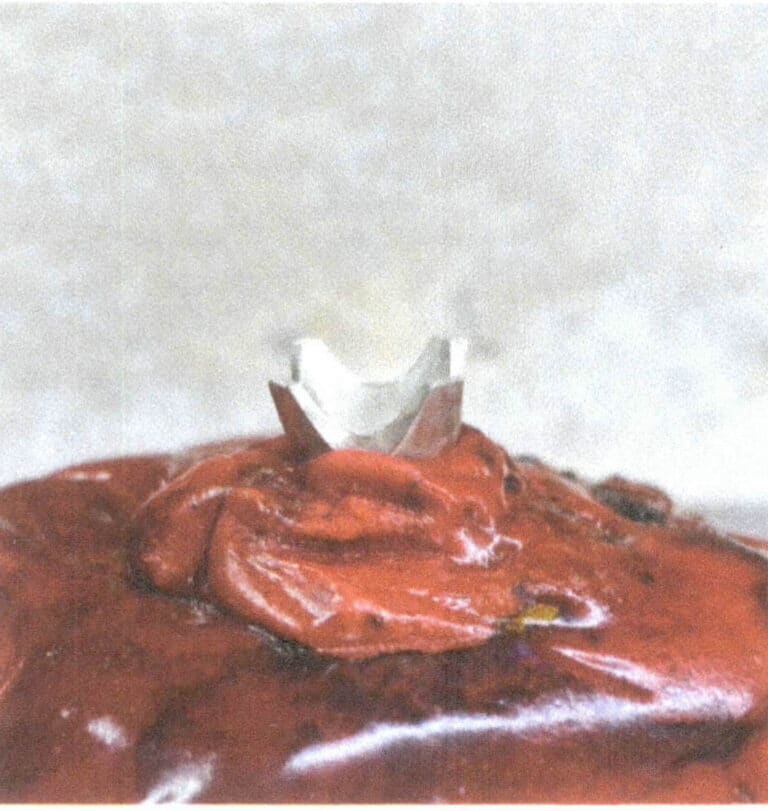
Figure 3-40 Applying sealing wax.
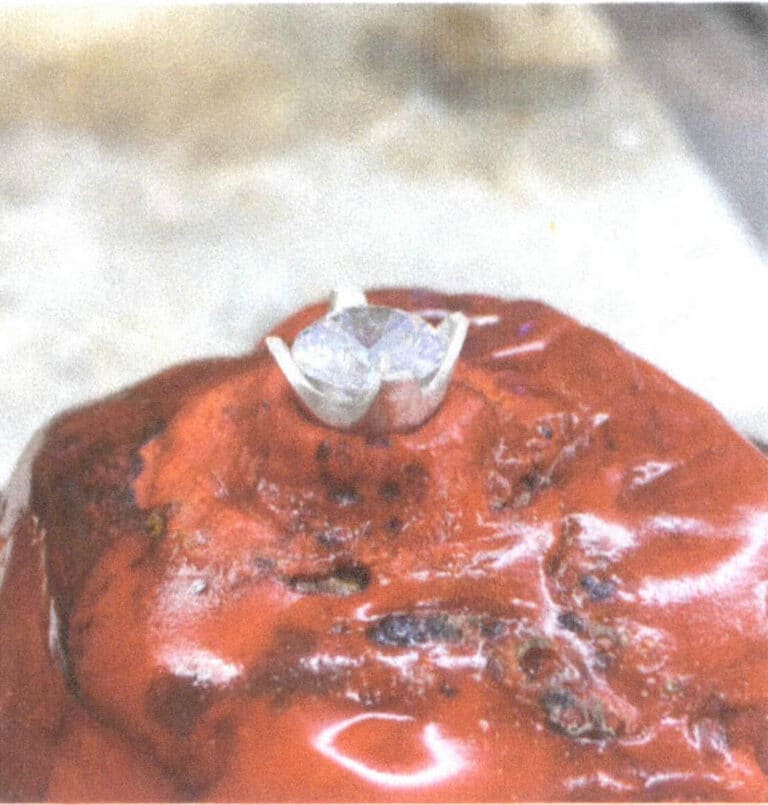
Figure 3-41 Observe the position of the prongs.
(15) Marking the Location for Opening the Stone Setting Position
On the four metal prongs, mark the position where the girdle of the stone touches the metal prongs with a wing divider, making sure that the markings’ height of prongs is the same, as shown in Figure 3-42.
(16) Opening the Stone Setting Position
Slot the stone in the marked position with a disc bur; the depth of the slot is about half of the thickness of the metal prong, as shown in Figure 3-43.
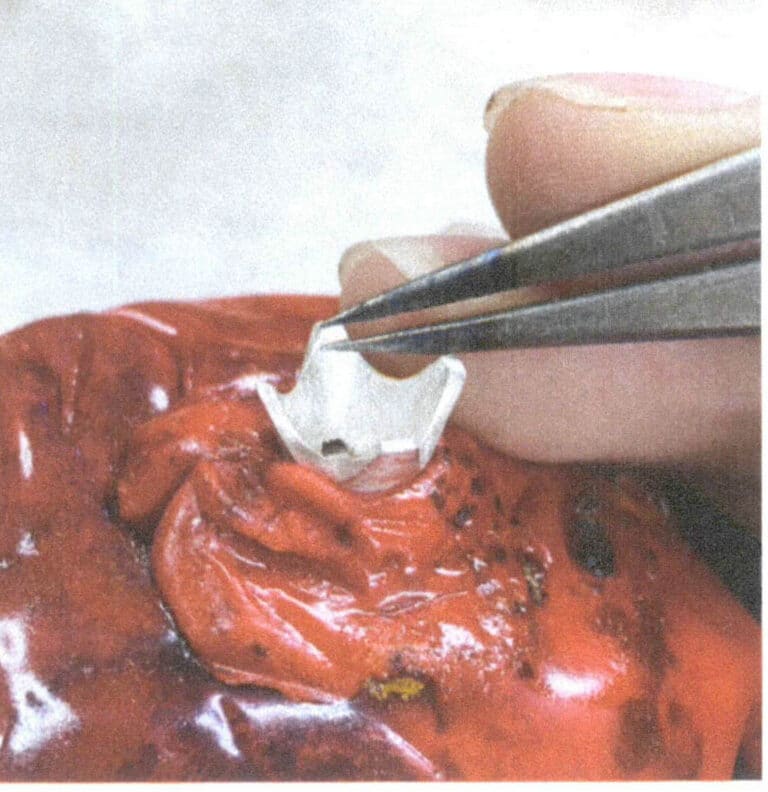
Figure 3-42 Marking the Location for Opening the Stone Setting Position
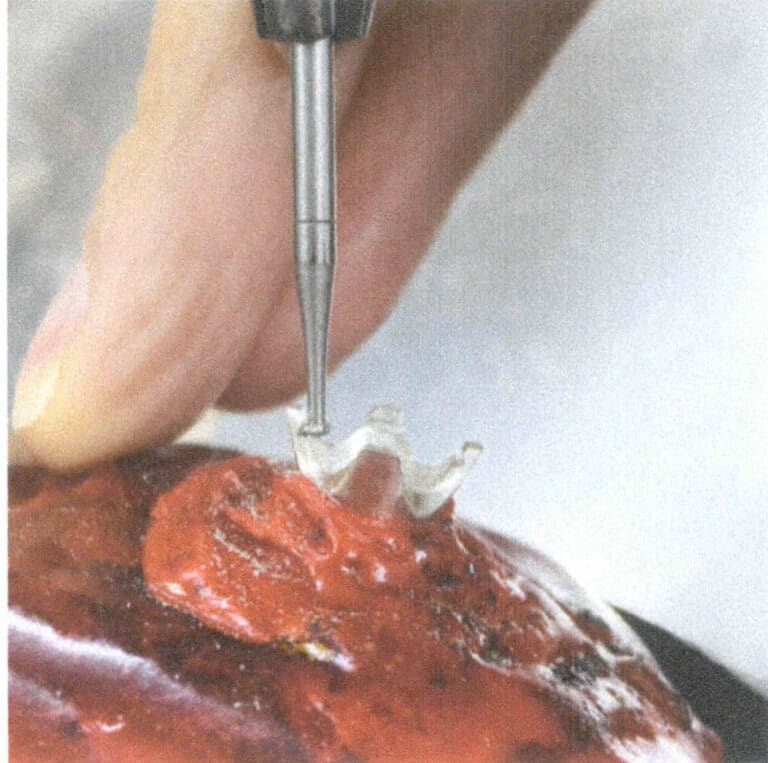
Figure 3-43 Opening the Stone Setting Position
(17) Placing the Stone
After grooving, clean the metal powder in the stone setting position and then put the stone into the stone setting position, as shown in Figure 3-44.
(18) Setting the Stone
Use sharp-nosed pliers to clamp the stone from a diagonal direction, two by two, as shown in Figure 3-45.
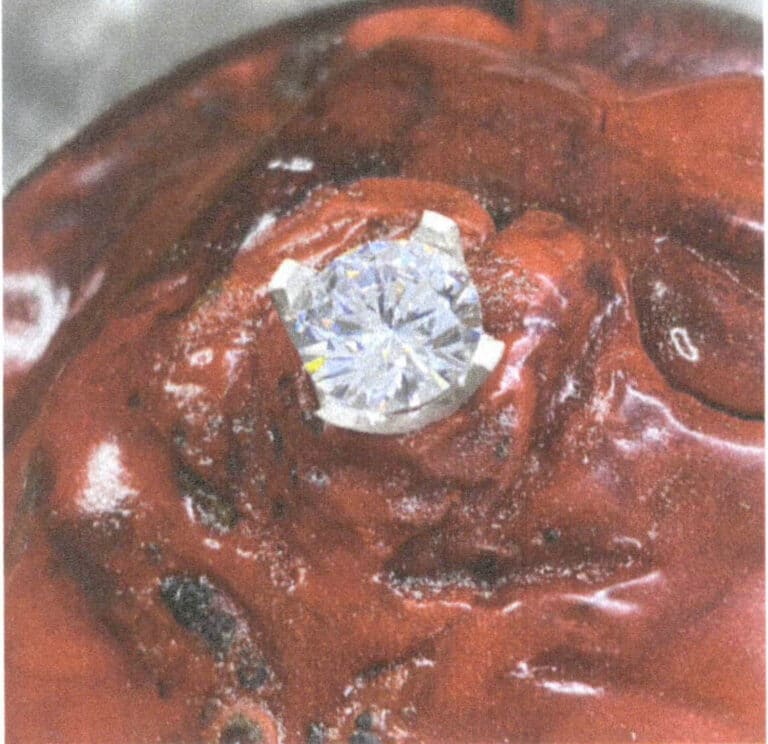
Figure 3-44 Placing the Stone
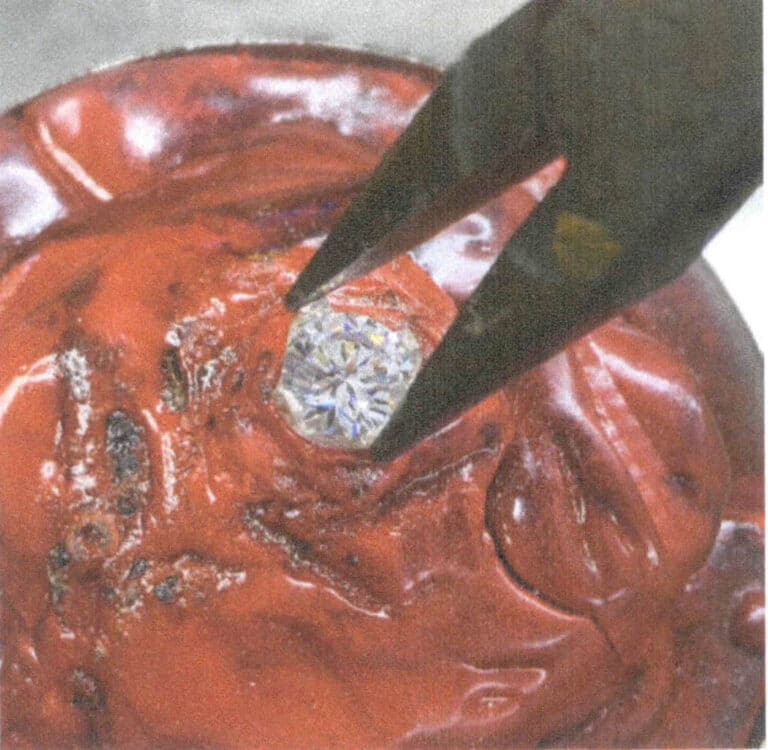
Figure 3-45 Setting the Stone
(19) Finishing – Filing Metal Prongs
File the top of the metal prongs to create a nice rectangular plane, as shown in Figure 3-46.
(20) Finishing – Overall Polishing
Based on the previous finishing, a final overall polishing is carried out, as shown in Figure 3-47.
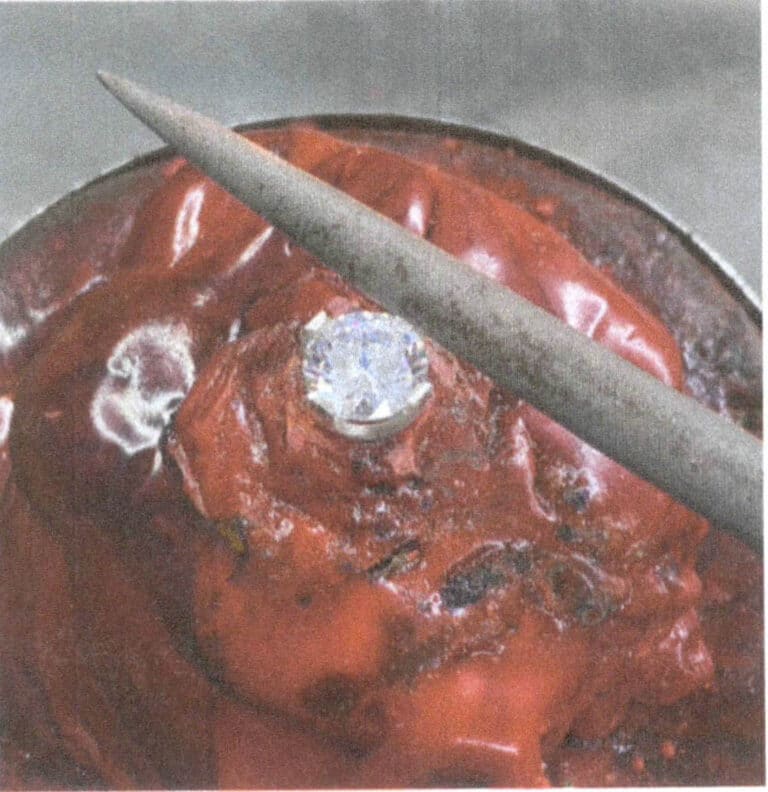
Figure 3-46 Filing Metal Prongs
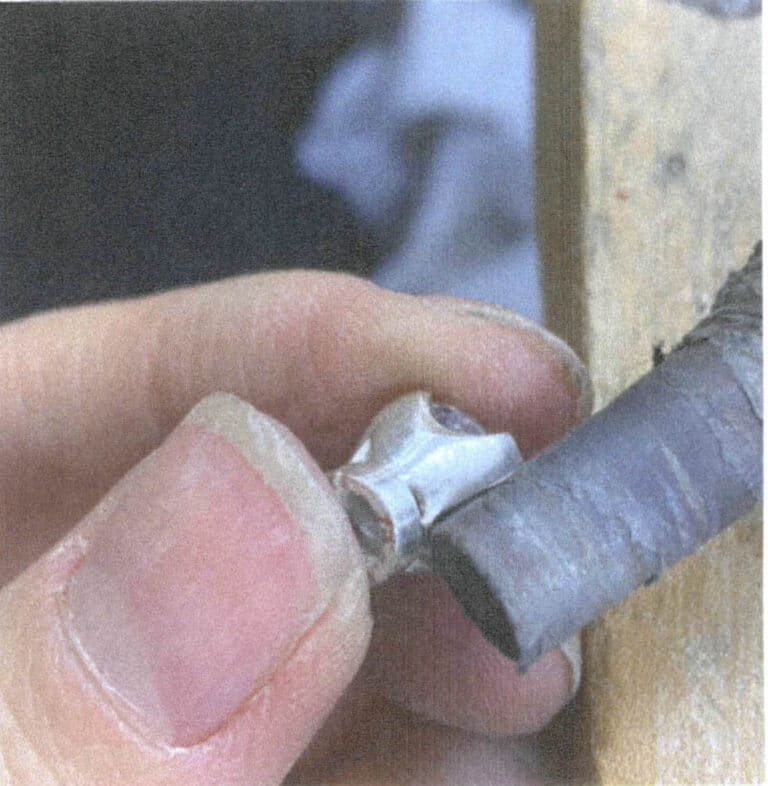
Figure 3-47 Overall polishing
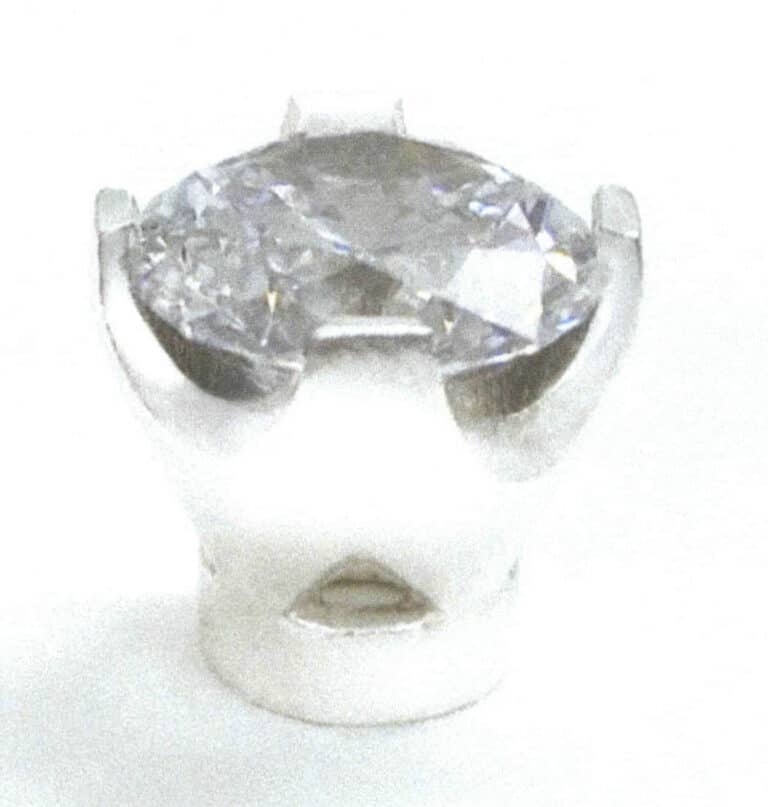
(21) Completing ve Crown Four-Prong Setting
The completed crown four-prong setting is shown in the picture. As shown in 3-48.
2.3 Six-Prong Setting
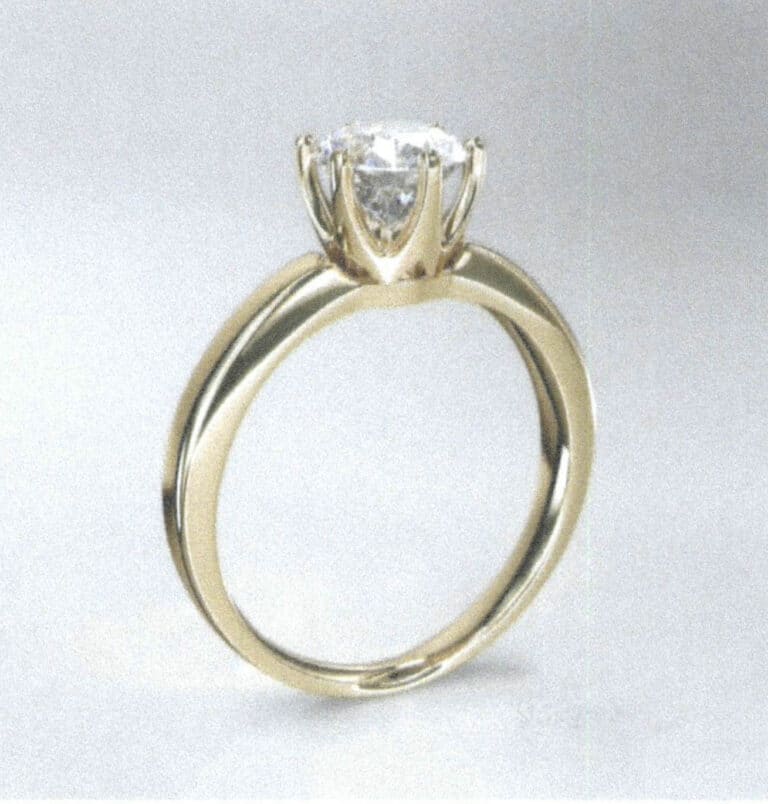
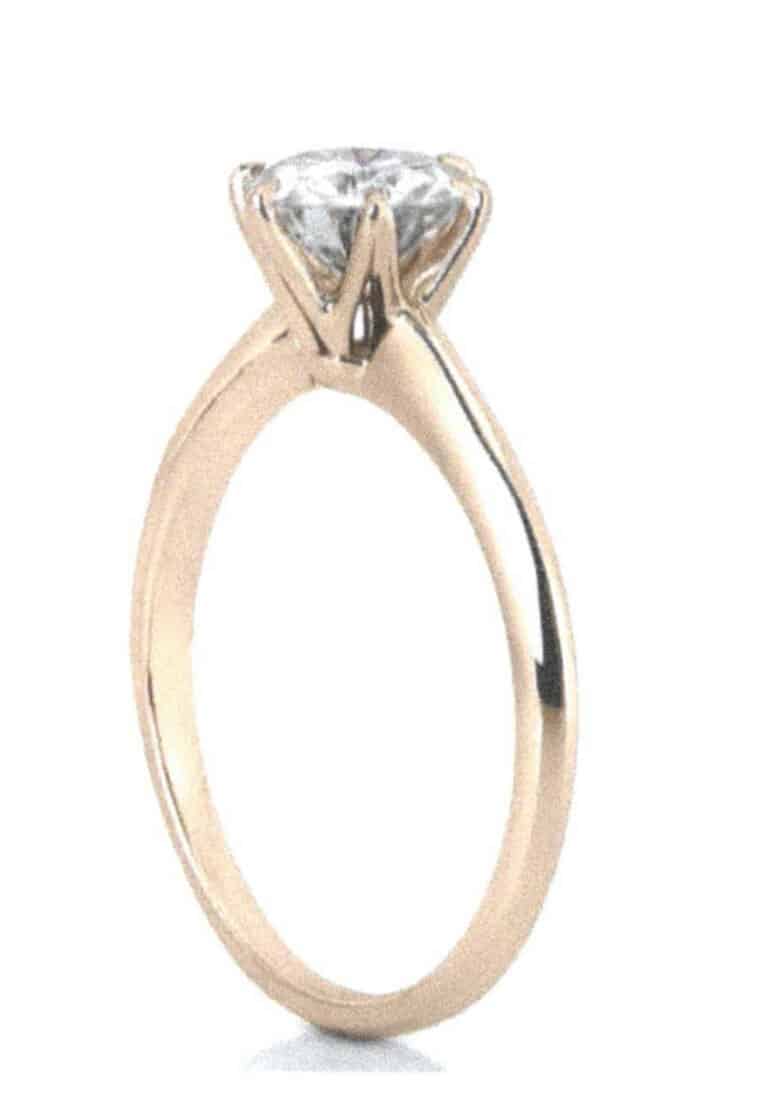
The six-prong setting is common in a single round or oval gemstone and has always been well-loved. The distribution of the six prongs corresponds with how the gemstone facets extend from the center outward. Tiffany’s crown six-prong setting diamond ring design is a classic work among six-prong settings, showcasing the brilliance of the diamond to the fullest in a refined and elegant shape. It remains one of Tiffany’s best-selling styles, as shown in pictures 3-49.
İçin Adımlar Making a Six-Prong Setting
(1) Malzeme Hazırlama
Prepare a round brilliance cut gemstone with a diameter of 5 mm, model and cast a six-prong setting based on the gemstone size, and initially hold the mold, as shown in Figure 3-50.
(2) Fixing the Metal
Fix the inlaid stone setting with sealing wax, as Figure 3-51 shows.
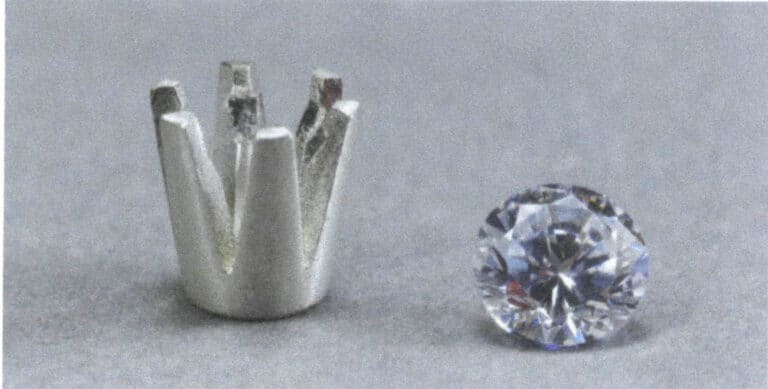
Figure 3-50 Preparing the Gemstone and Stone Setting
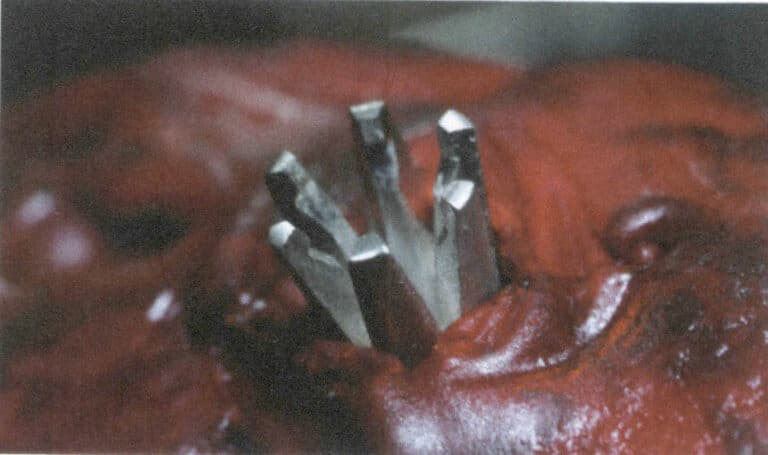
Figure 3-51 Applying sealing wax
(3) Adjusting ve Ayar
Slightly open the setting with tools such as a pile or tweezers, as shown in Figure 3-52, and mark the position of the slot.
(4) Opening the Stone Setting Position
Use a disc bur to carve a groove on the inner side of the claw, with a depth of about half of the metal’s desired thickness, as shown in Figures 3-53 and 3-54.
(5) Placing ve Ston
Place the gem into the stone setting position, ensuring the gem surface is level and the girdle of the gem is secured at the stone setting, as shown in Figure 3-55.
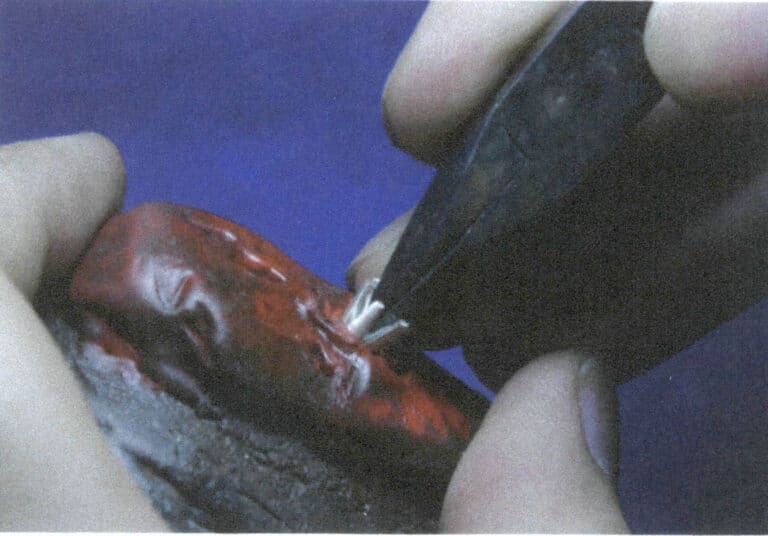
Figure 3-52 Adjusting the Setting
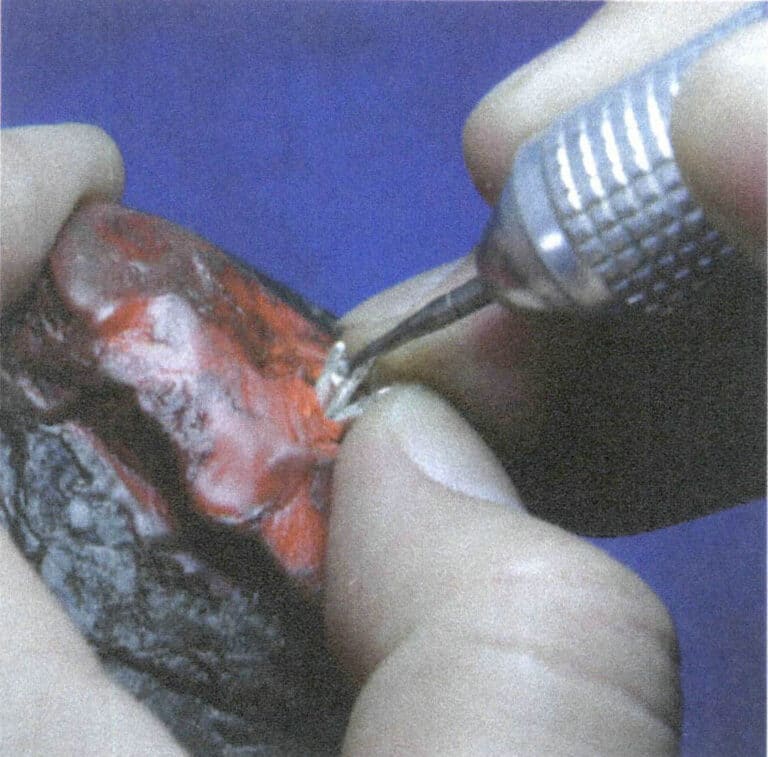
Figure 3-53 Opening the stone setting position
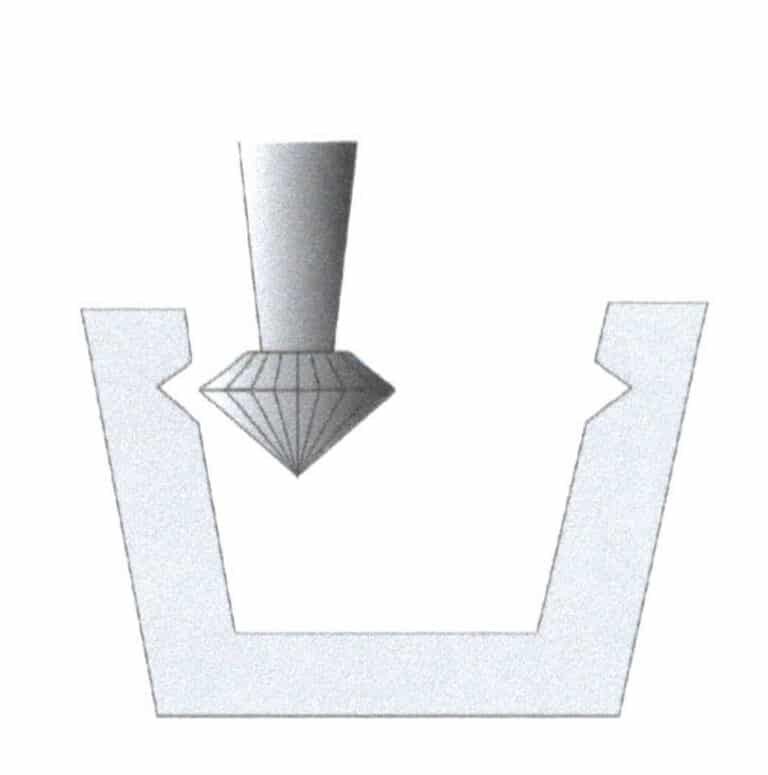
Figure 3-54 Schematic diagram of the opening stone setting position
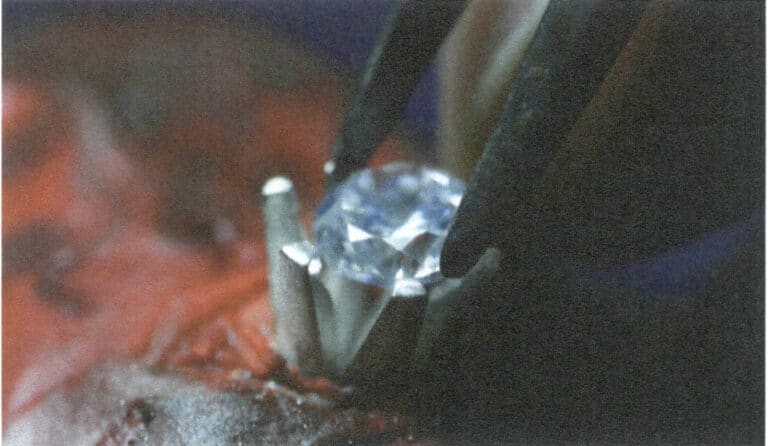
Figure 3-55 Placing the Stone
(6) Setting the Stone
The six-prong setting and four-prong setting are two prongs with equidistant symmetry; you can use sharp-nosed pliers directly from the diagonal direction of the clamping, do not have to pursue a completion, and can be repeated many times while adjusting the prongs to achieve uniform symmetry of the state, as shown in Figure 3-56.
(7) Finishing
File the prong head, then use sandpaper rolls and polishing wheels for polishing, as shown in Figure 3-57.
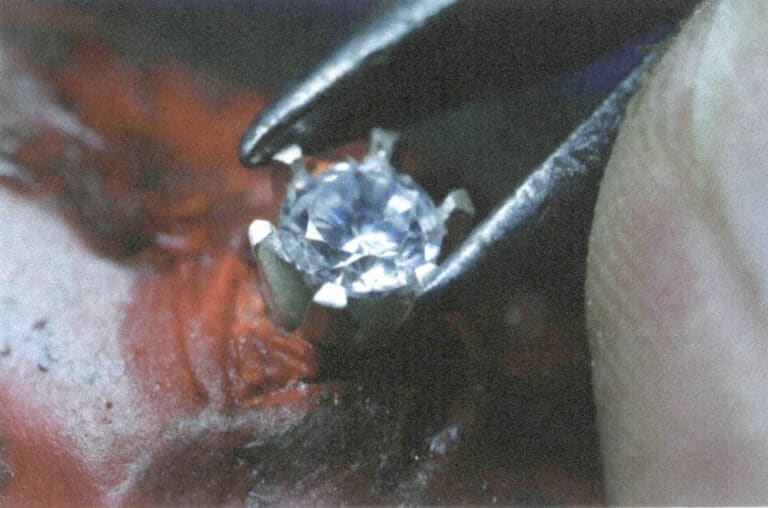
Figure 3-56 Setting the Stone
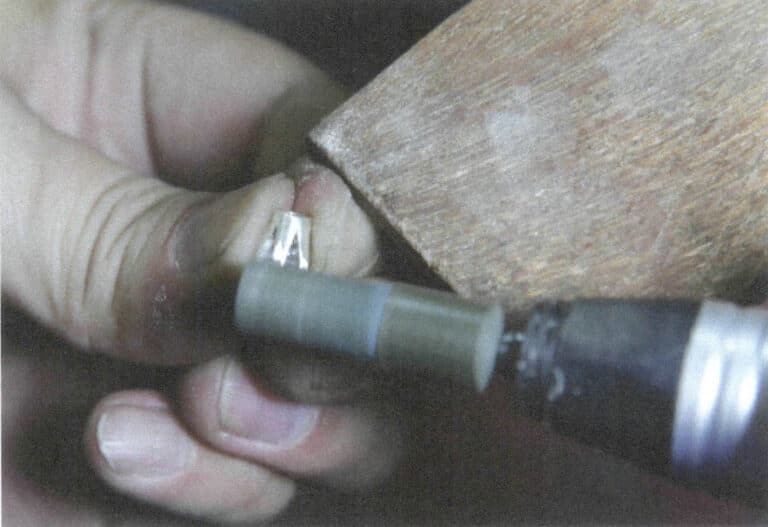
Figure 3-57 Finishing
(8) Completing the Round Brilliance Cut Gemstone Six-Prong Setting
The completed round brilliance cut gemstone six-prong setting is shown in Figure 3-58.
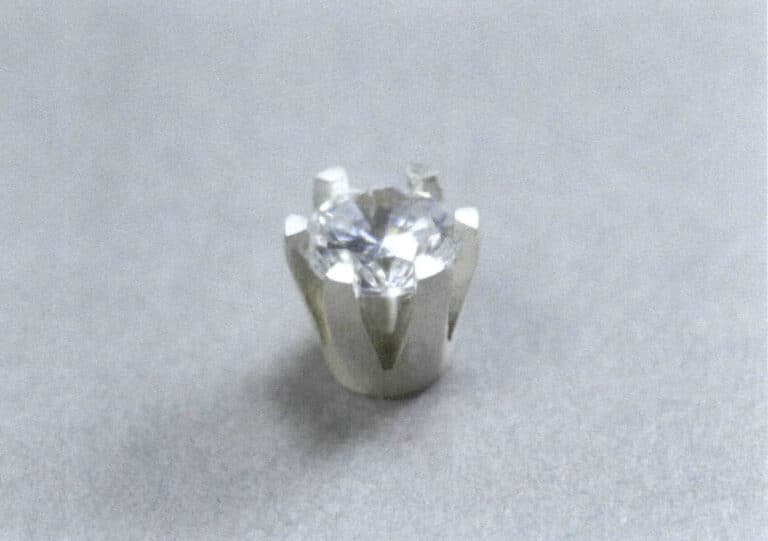
2.4 Shared Prongs Setting
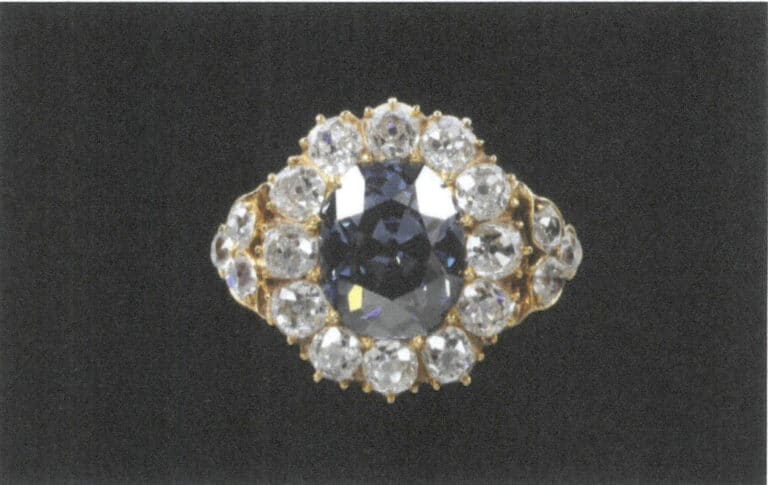
A shared prongs setting is a setting in which multiple stones are arranged so that some of the metal prongs can hold two stones simultaneously. This type of setting is generally used when the stones are arranged closely together and is usually used when the stones are arranged in a single row or in a multiple-around-one style setting. Shared prong settings can effectively use the metal prong structure to achieve the aesthetic effect of multi-stone prong settings, as shown in Figure 3-59.
İçin Adımlar Making Shared Prong Setting
(1) Malzeme Hazırlama
Model casting a stone setting for shared prongs setting ring and preliminary finishing, prepare 7 round brilliance cut gemstones with a diameter of 2.5 mm, as shown in Figure 3-60.
(2) Fixing the Metal
Fix the stone setting; in this case, the style is a ring, so choosing a round prong stone setting for fixing is relatively simple, as shown in Figure 3-61.
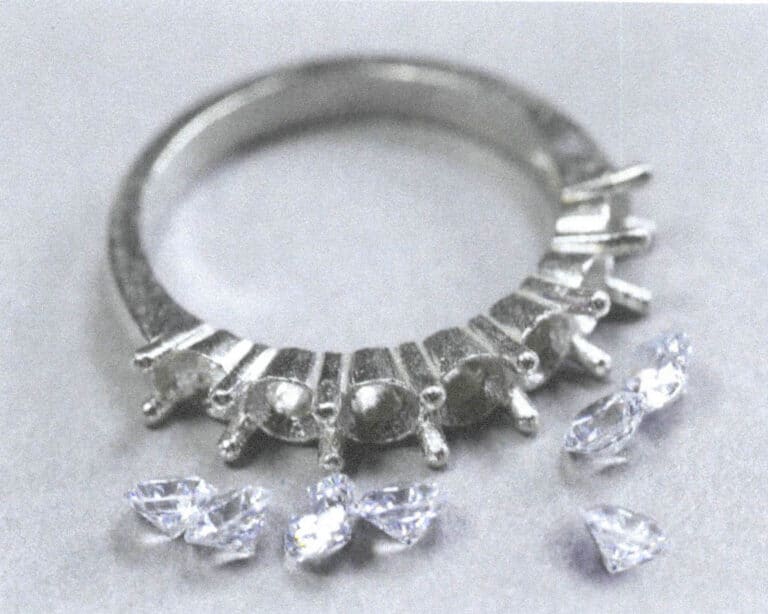
Figure 3-60 Preparing gemstones and stone setting
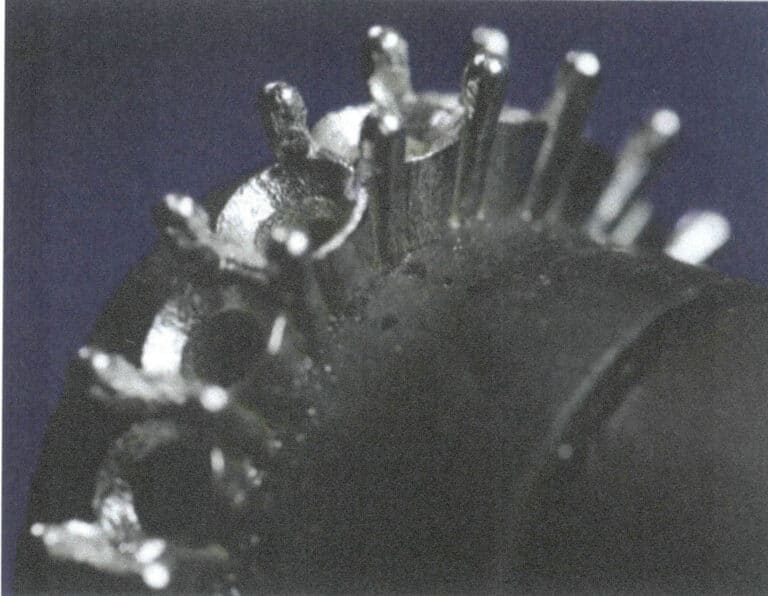
Figure 3-61 Fixed on the round prong stone setting
(3) Adjusting ve Stone Setting Position
Place the gem in the setting to test the size, and slightly open the metal prongs outward with pliers according to the size of the gem, as shown in Figures 3-62 and 3-63.
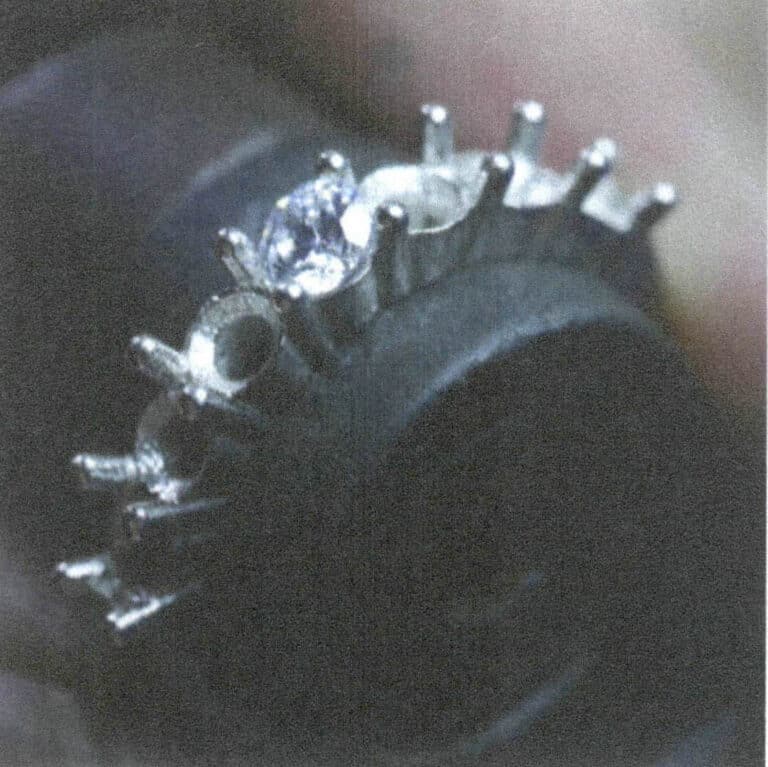
Figure 3-62 Testing the stone setting position size
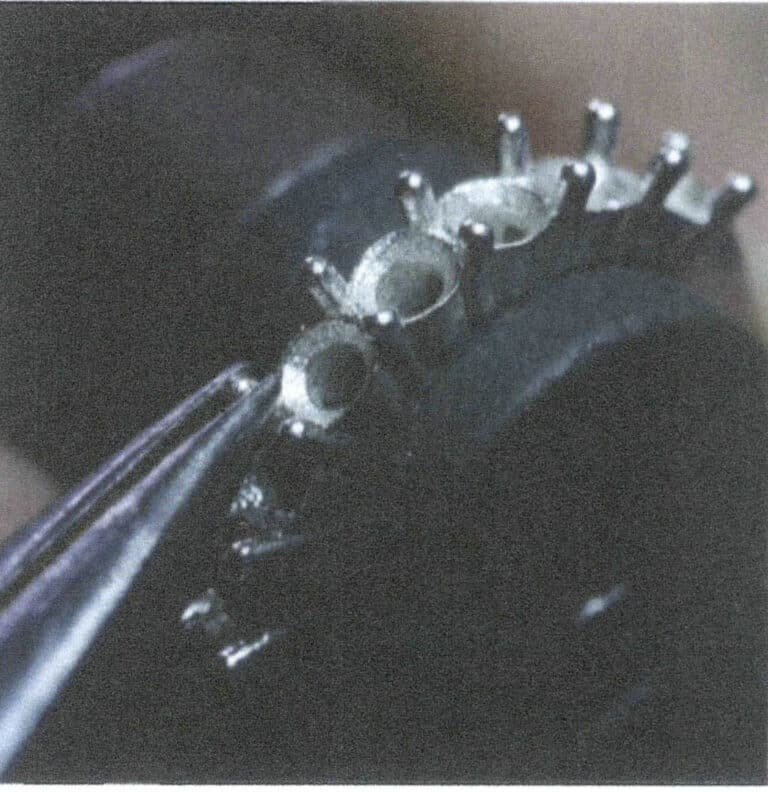
Figure 3-63 Adjusting the metal prongs with pliers
(4) Opening ve Stone Setting Position
Use a disc bur to open the stone setting position, except for the two ends where four prongs open one slot each; the middle prongs should open two slots of 90°, which are the slot positions where the prongs overlap with the gem in the prong setting top view, as shown in Figure 3-64. After opening the slots, place the stone to test if the stone setting position is suitable. Generally, start placing the stone from the middle position in a row, and after finding a suitable position, open all the stone setting positions, as shown in Figure 3-65.

Figure 3-64 Prong setting top view
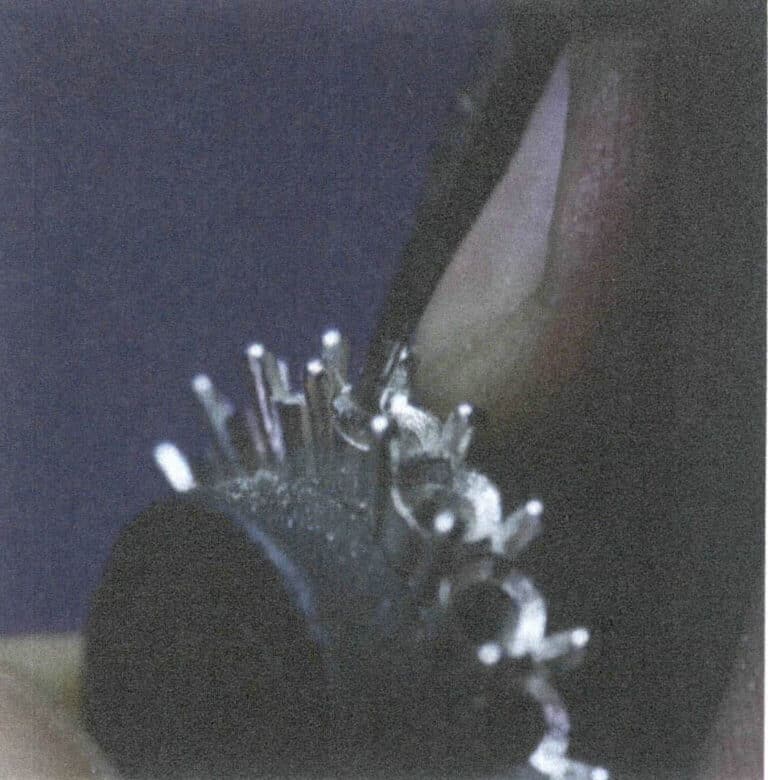
Figure 3-65 Opening the stone setting position
(5) Placing the Ston
In this case, the gems are arranged in a row. If the arrangement is long, you can start placing the stones from the middle in several batches, placing 2 or 3 gems simultaneously. Once they are fixed, you can continue placing the stones, as shown in Figure 3-66.
(6) Setting ve Taş
After the gems are placed flat in their positions, use pliers to clamp the stones inward. After clamping, you can use tweezers to check if they are stable, as shown in Figure 3-67.
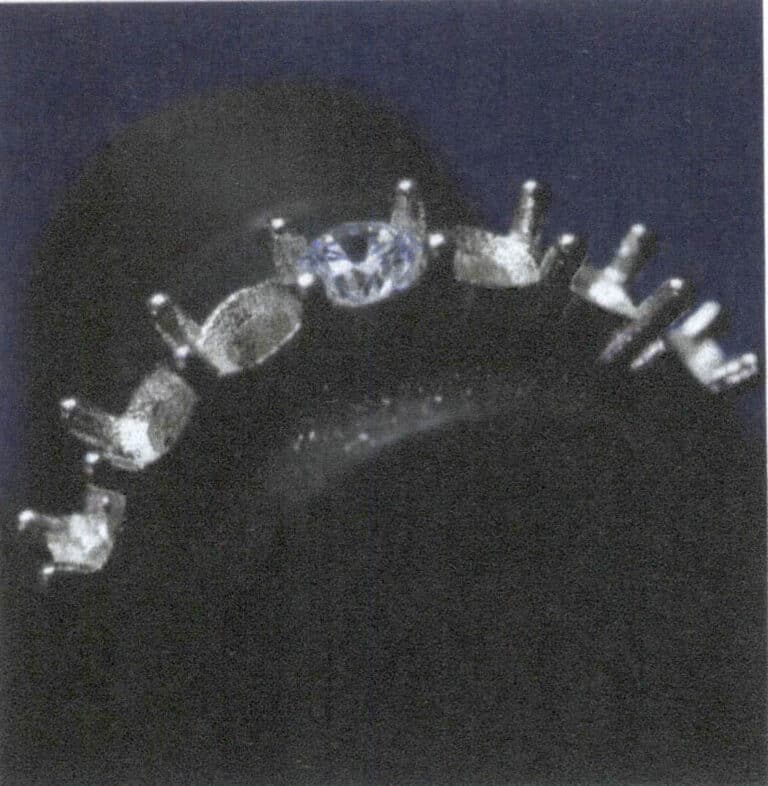
Figure 3-66 Placing the Stone
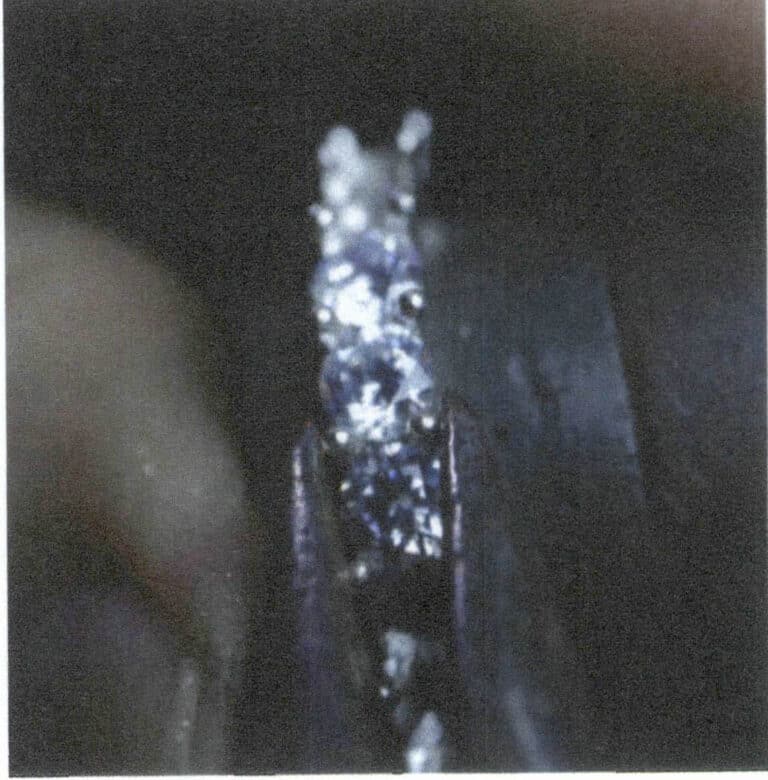
Figure 3-67 Setting the Stone
(7) Adjusting Prong Length
If the metal prongs are too long, they can be trimmed with cutting pliers. This step should be adjusted according to the thickness of the gem. In this case, the metal prongs are too long, and the excess part is cut off with cutting pliers, as shown in Figures 3-68 and 3-69.
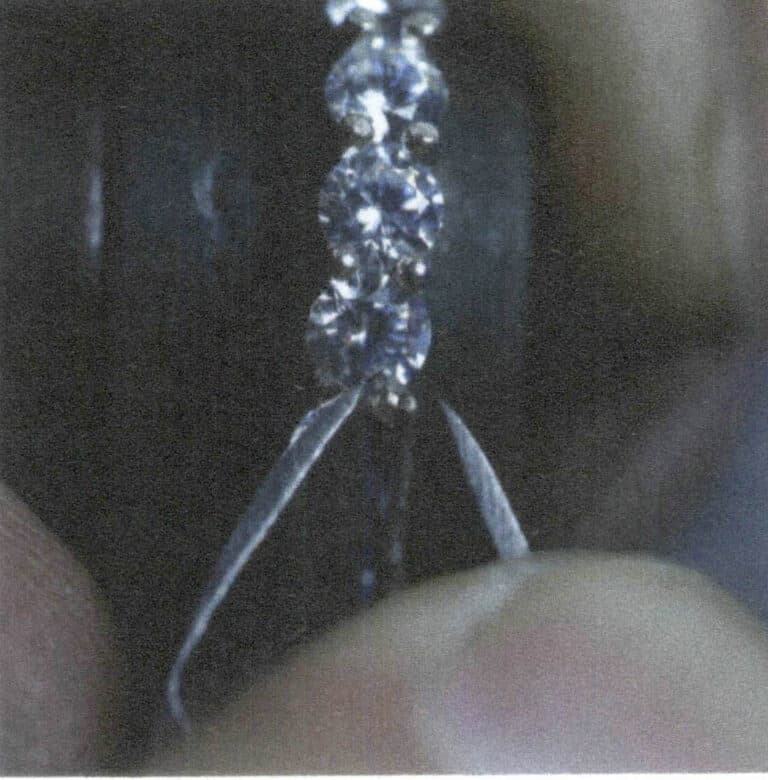
Figure 3-68 Shortening the Metal Prongs
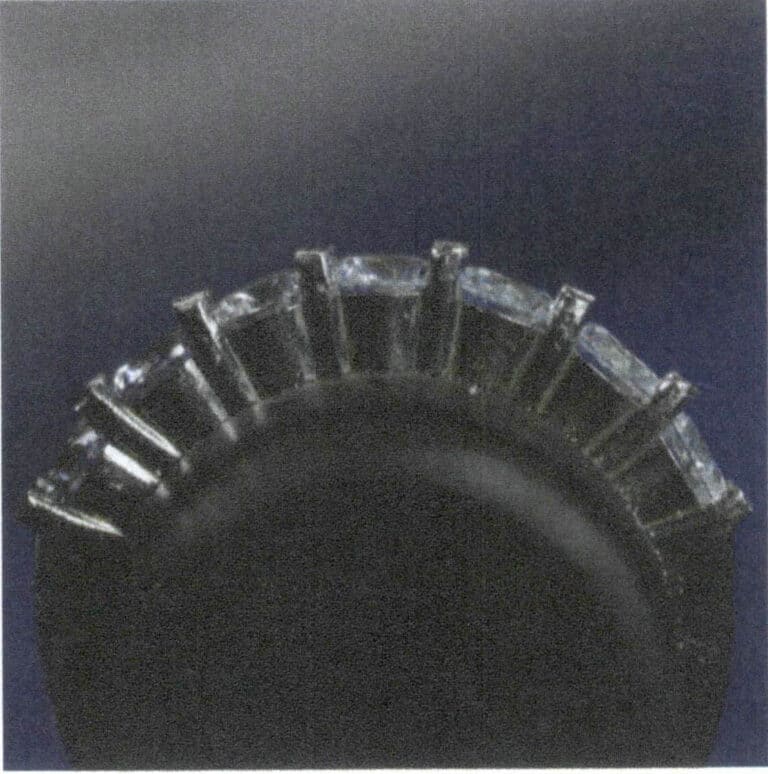
Figure 3-69 Adjusting the Metal Prongs to the Appropriate Length
(8) Beading
Use a cup bur with a hanging grinder to smooth the metal prong head. The size of the cup bur should be slightly thicker than the metal prong. When used, apply lubricating oil or other oily substances to protect the burs, as shown in Figure 3-70.
(9) Finishing
In this case, it is important to note that during the finishing process, due to the limited shapes of available tools, it is often necessary to adjust the shape of the rubber polishing wheel or sandpaper roll independently to achieve better finishing results based on different styles and shapes. For example, in this case, the groove part of the ring’s side may not be well polished with a normal rubber polishing wheel; the side edge of the rubber polishing wheel can be widened for use, as shown in Figures 3-71 and 3-72. Suitable tools can achieve twice the result with half the effort. Finally, use a graver to trim the excess metal skin at the refining positions.
(10) Tamamlandıing ve Shared Prongs Setting Yüzük
The completed shared prongs setting ring is shown in the picture. As shown in Figure 3-73.
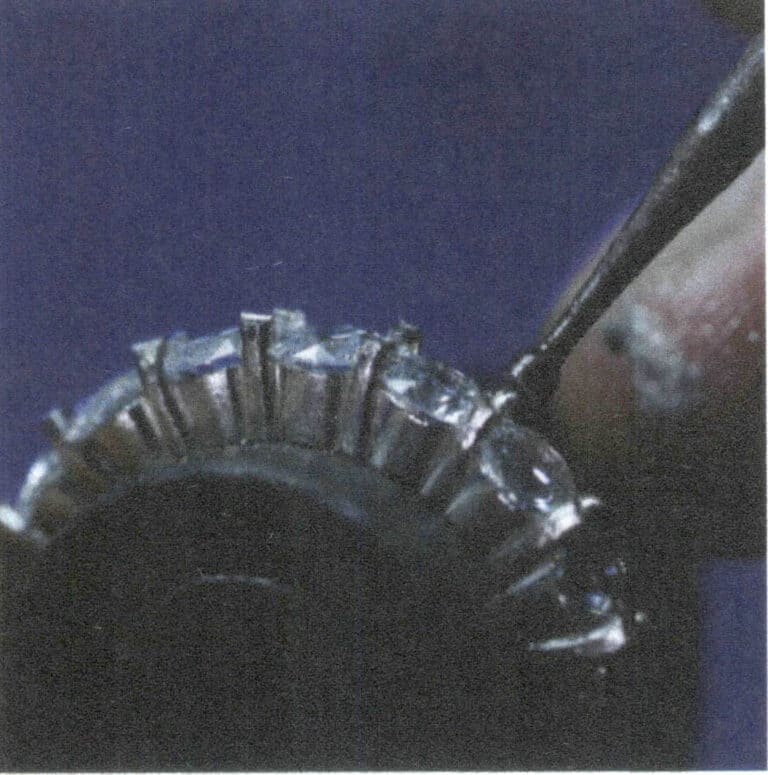
Figure 3-70 Refining the Prong Tips
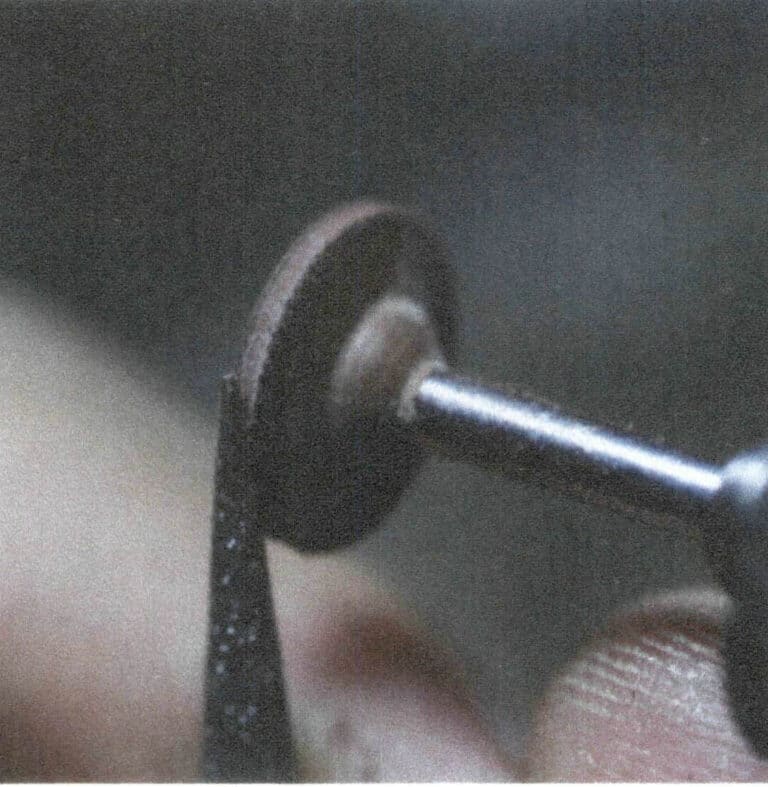
Figure 3-71 Modified Rubber Polishing Wheel
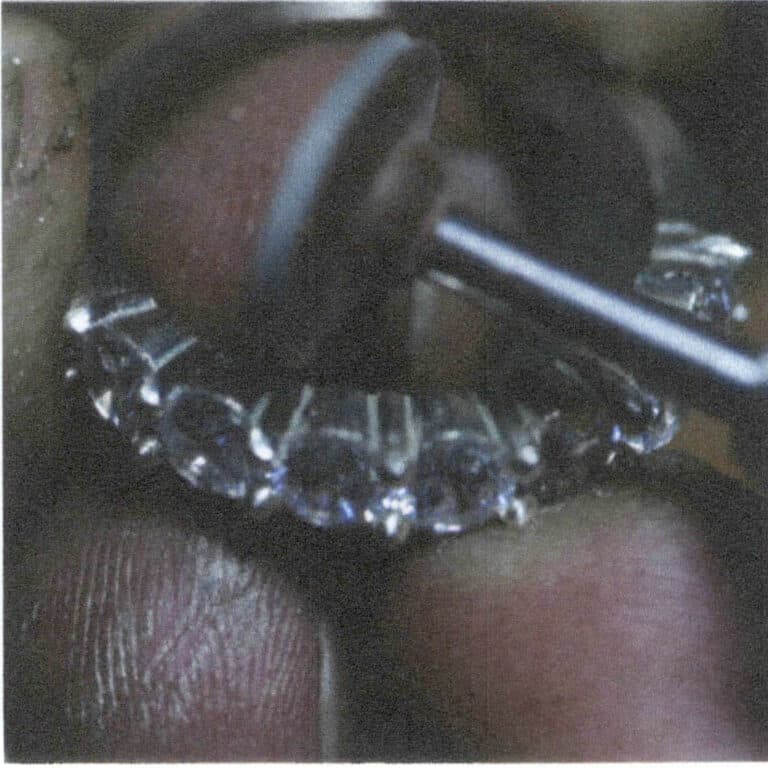
Figure 3-72 Polishing with a Modified Rubber Polishing Wheel
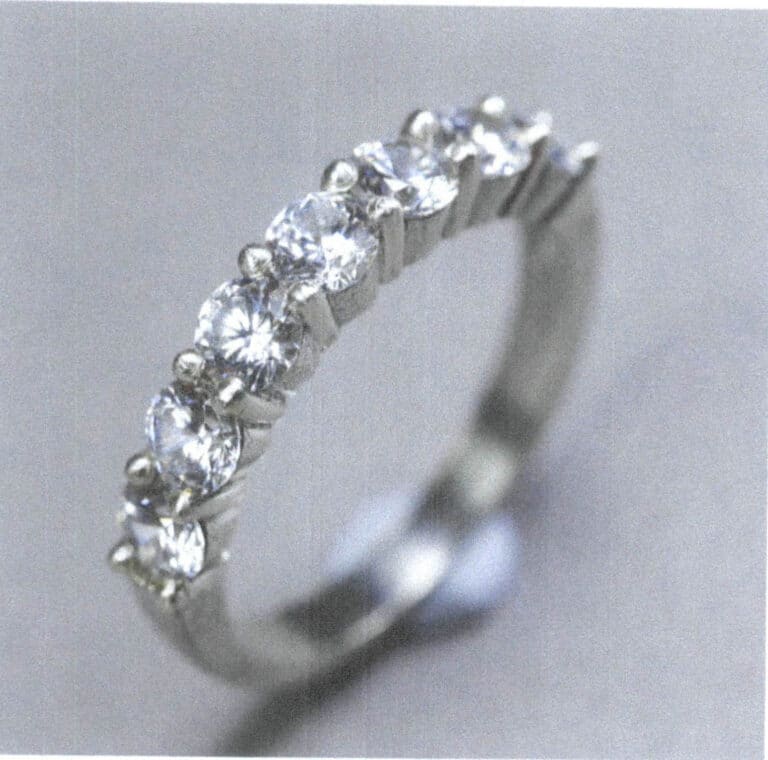
Figure 3-73 Completing the Shared Prongs Setting Ring
3. The Application of Prong Setting in Jewelry Design
The prong setting has a simple structure and strong applicability, so it is widely used in jewelry settings. Engagement rings are naturally the most common type of jewelry that uses prong settings. This type of jewelry emphasizes the weight of the diamond or gemstone itself, visually centering on the diamond or gemstone, making the minimalist four-prong and six-prong settings typical styles for engagement rings.
In prong settings, the optimization design of the setting structure that has become a classic is none other than Tiffany’s six-prong crown setting introduced in 1886, which became a classic in wedding rings as soon as it was launched. In the six-prong crown setting, the structure of the prong setting is combined with the style of the crown, which is both beautiful and imbued with a sense of nobility. The public has loved it for over a century, and it has become a model for many jewelry brands to emulate, as shown in Figure 3-74.
Prong settings are often the first choice for heavy gemstones. On the one hand, it can minimize the metal and highlight the gemstone while providing strong stability; conversely, it is easy to design shapes based on the basic claw setting structure. For example, in the emerald diamond ring shown in Figure 3-75, the visual center of the emerald is maximally highlighted, and the ribbon-like lines under the prong setting further enhance the visual center while adding a sense of detail and beauty.

Figure 3-74
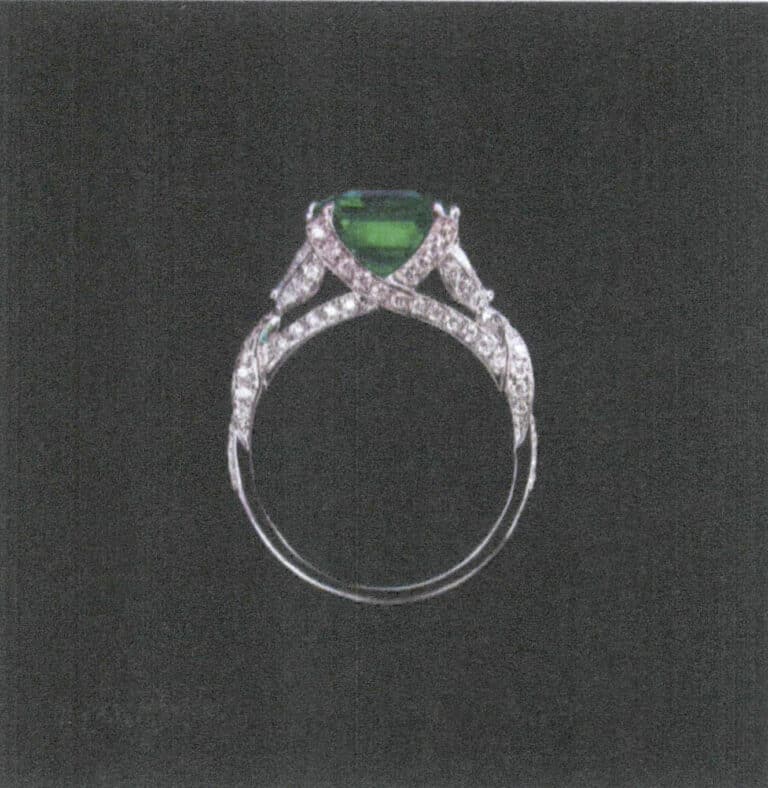
Figure 3-75 Jewelry artist Xiong Chen's work
The advantages of prong settings and their strong practicality in the setting process also give designers more room for creativity. For example, the independent design brand Hard Candy launched the “Magic Mirror” series, which reinterprets the prongs of the prong setting in a functional context. The prongs in the ear clips resemble animal prongs, while the prongs in the ring design extend from the structure of the ring, resembling dead branches, vividly integrating the structure with the main stone setting and making every detail resonate with the theme of “Magic Mirror.” The Hard Candy brand’s “Magic Mirror” series is shown in Figures 3-76 and 3-77.
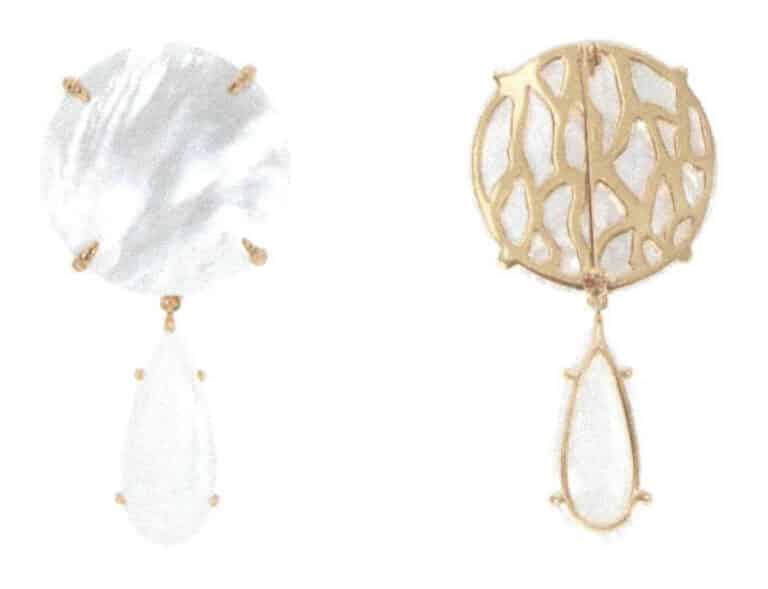
Figure 3-76 Hard candy brand "Magic Mirror" series (1)
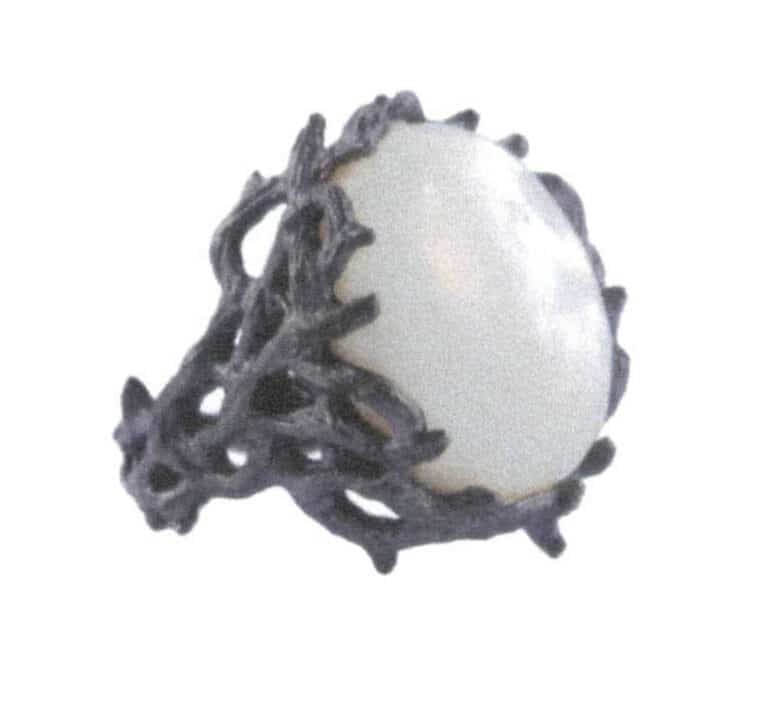
Figure 3-77 Hard candy brand "Magic Mirror" series (2)
Among contemporary art jewelry, prong settings not only serve as a structure for securing but often become the main concept or a highly symbolic part. For example, in the artwork Sugar and Barbed Wire Ring by artist Nina Basharova, the gem part of a prong-set ring is replaced with a heart-shaped sugar cube, and the prong setting along with the ring part is wrapped together with a steel wire, with the prong setting shaped into sharp points resembling hooks. This work uses the structure of the gem and metal parts in the ring to metaphorically imply the relationship between sweetness and pain, as shown in Figure 3-78.
Similarly, the work of New Zealand jewelry artist Warwick Freeman—Shell Brooch—creates a deliberate interlocking relationship between the polished shape of the shell and the metal prongs, contrasting with the gem’s cut, which is thought-provoking, as shown in Figure 3-79.
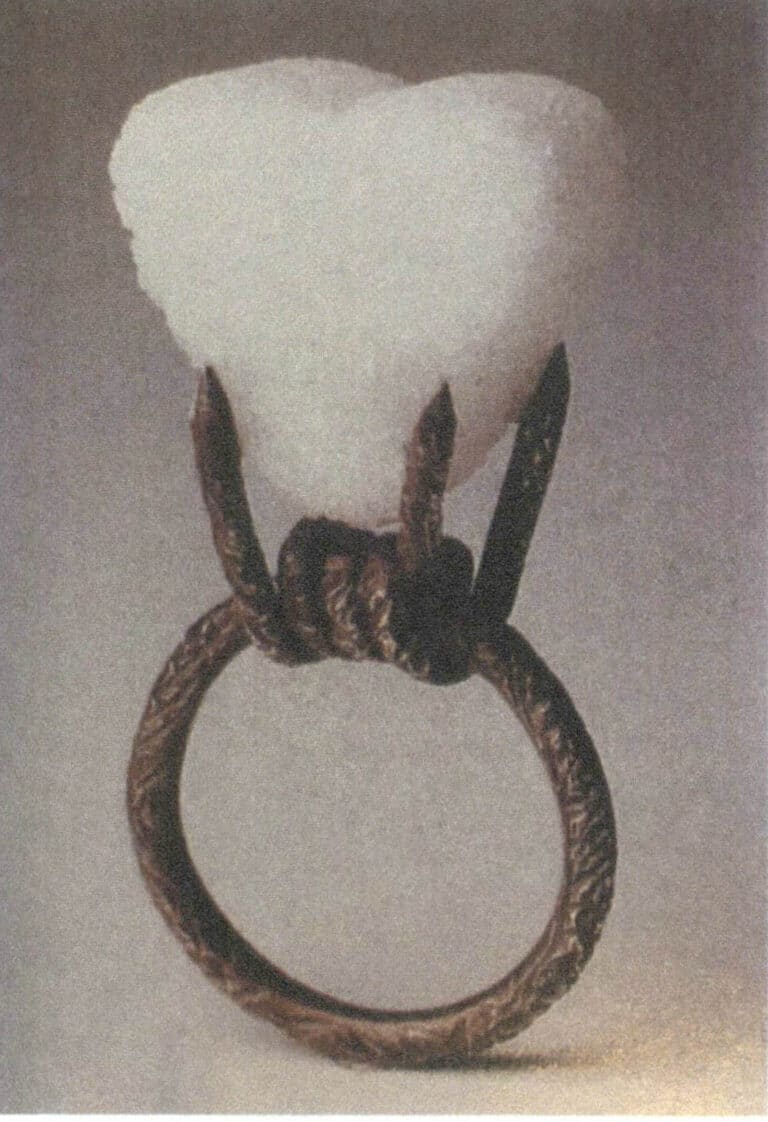
Figure 3-78 Nina Basharova's art jewelry Sugar and Barbed Wire Ring
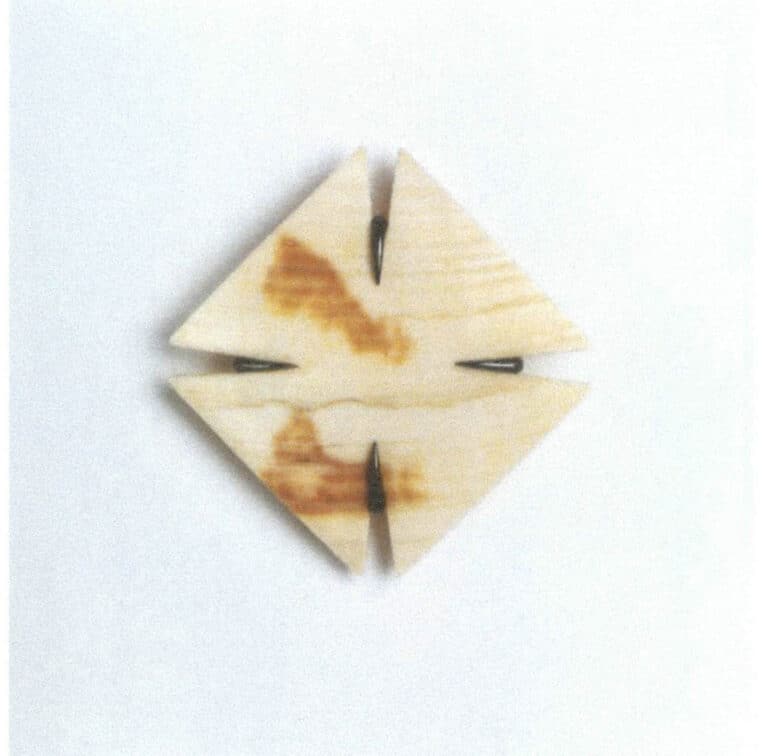
Figure 3-79 Warwick Freeman's artistic jewelry works (V&A Museum Collection)
A prong setting is a type of setting that can produce very rich variations, giving designers a great deal of creative space. Whether in the elegant subtle changes of the prong setting structure in engagement rings or the imaginative expressions in modern designs, it is based on the structure—the most natural and free combination of metal and gemstones.
Section II Pave Setting
Pave setting with the previously mentioned bezel and prong settings compared to the biggest difference is that the bezel and prong settings in the establishment of an independent gem-setting metal structure, such as stone setting and ring, can be understood as a detachable two parts, the principle of the face of the pave setting like a bulldozer, shoveling out a circle of metal on the surface of the original metal nail structure, the total amount of metal has not been increased, but only the use of metal tenacity to change the location of metal The metal is not increased. Still, the toughness of the metal is used to change the location of the metal, thus setting the stone.
1. Overview of Pave Setting
Pave setting refers to directly lifting metal from the surface with a jewelry engraver, gathering the lifted metal to form smooth small prongs, and using these prongs to press and secure the gemstones, as shown in Figure 4-1. Compared to bezel and prong settings, pave setting has a certain level of difficulty for beginners; the important process of lifting metal with a jewelry engraver is not something that learners with only basic exposure to metalworking can master easily. A certain amount of preliminary practice or foundation in goldsmithing practice is necessary. The demonstration case below will also introduce the jewelry engraver as a starting point.
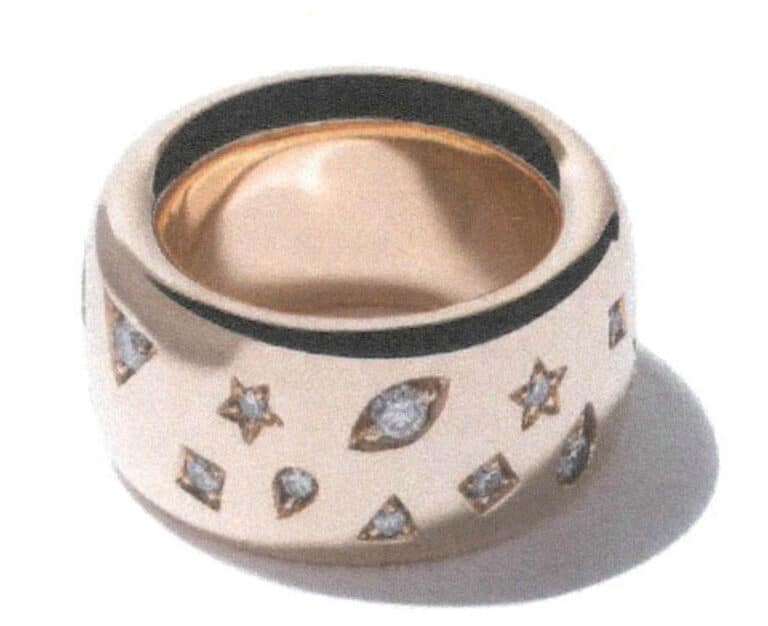
Pave setting can involve a single gemstone or multiple gemstones, with arrangements such as linear, triangular, planar, and irregular layouts. Depending on the number of gemstones and the arrangement method, common types include shared prongs, two-prong, three-prong, four-prong, five prongs, and random prongs, with the two-prong type further divided into head-to-head and diagonal prongs. From another perspective, the pave setting is also very flexible, allowing for different arrangement methods to be combined on a single piece of jewelry according to design needs, and the position of the prongs can be adjusted for aesthetics and stability based on the variations of the gemstones. As long as there is a 0.02 mm pressure from the metal on the gemstone, it can be secured, so the pave setting is also highly adaptable to design.
2. Preliminary Preparation for Pave Setting
Before starting the practice, the first step is to make a jewelry engraver. The jewelry engraver is an essential tool in some settings, and it is also used in other settings. For example, after using the bezel or prong setting, a flat-headed jewelry engraver is needed to assist in removing excess metal to make it smooth. However, for pave setting, the jewelry engraver is the most important tool, so the requirements for using the jewelry engraver are higher: on the one hand, it is necessary to grind different shapes of jewelry engravers to suit different situations; on the other hand, it should be made according to the user’s hand length to create a suitable jewelry engraver. This process is similar to custom tool making. In a pave setting, the jewelry engraver is more like an extension of the hand; a good tool can achieve twice the result with half the effort. Therefore, the first task before all practices is to make tools for oneself. The traditional pave setting also uses a wood graver handle, relying entirely on hand strength to scoop up metal. In recent years, pneumatic engraving machines used in gold carving and setting processes can effectively improve the efficiency and results of pave setting. The pneumatic jewelry engraving machine is shown in Figure 4-2.
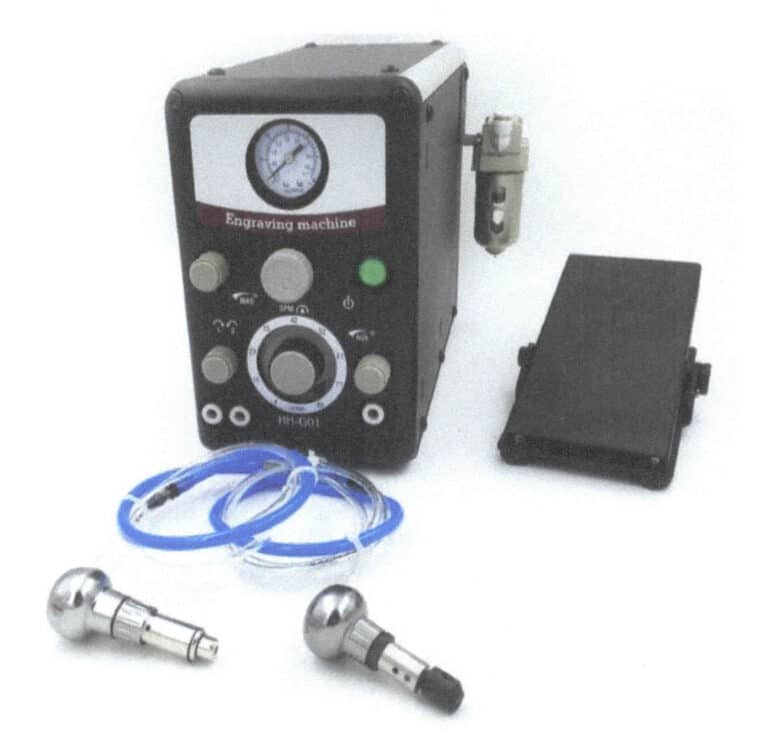
2.1 Making a Jewelry Engraver
First, prepare the wood graver handle and the jewelry graver, as shown in Figure 4-3. There are many shapes of jewelry graver, such as flat-headed, pointed, round, diamond, and arc shapes, among which the arc, flat head, and pointed jewelry graver are used more frequently, as shown in Figure 4-4. You can prepare three of them for practice. During the advanced process, different graver heads may be further honed according to different needs.
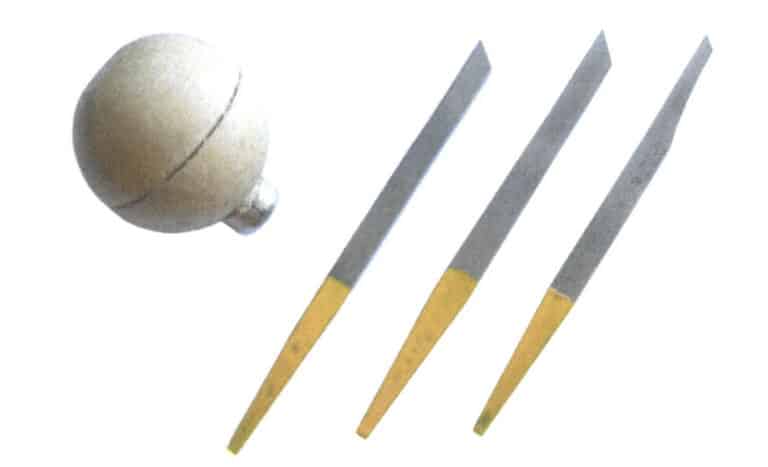
Figure 4-3 Wooden graver handle and jewelry graver

Figure 4-4 Three types of graver heads: arc, flat-headed, and pointed
Copywrite @ Sobling.Jewelry - Özel takı üreticisi, OEM ve ODM takı fabrikası
2.2 Steps to Make a Jewelry Graver
(1) Determining ve Overall Length of Jewelry Graver
The graver consists of two parts: the blade and the handle. Generally, the length of the graver is between 10~13 cm and should be determined based on the user’s hand size. You can use a long object like a pencil, placing one end on the palm and pinching the other with your index finger and thumb, marking the point at your fingertips. The length from the mark to the palm is the overall length of the graver. This is determined by mimicking the graver ‘s posture, as shown in Figure 4-5.
(2) Cutting ve Blade
The length of the blade is the overall length minus the length of the wooden graver handle plus the 2 cm length of the blade inserted into the wooden graver handle, as shown in Figure 4-6. Once the length of the blade is determined, use a cutting wheel to trim the excess from the end of the blade, as shown in Figure 4-7. Note that if your hand is unsteady during cutting, you can use a bench vise to secure it, but be sure to wrap the end of the blade with a cloth to prevent it from falling and injuring your skin when cutting the tail end. The blade will heat up quickly during cutting, so it is important to cool it down with cold or dripping cold water, especially when held in hand. The cut blade is shown in Figure 4-8.
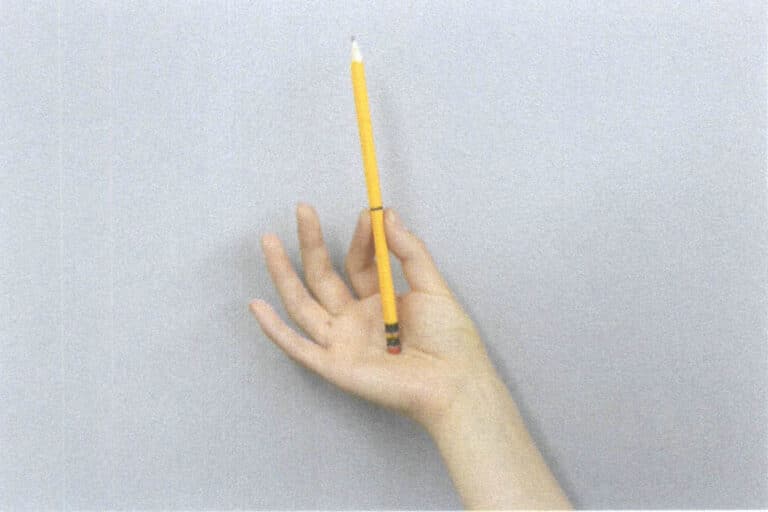
Figure 4-5 Determining the overall length of the jewelry graver.
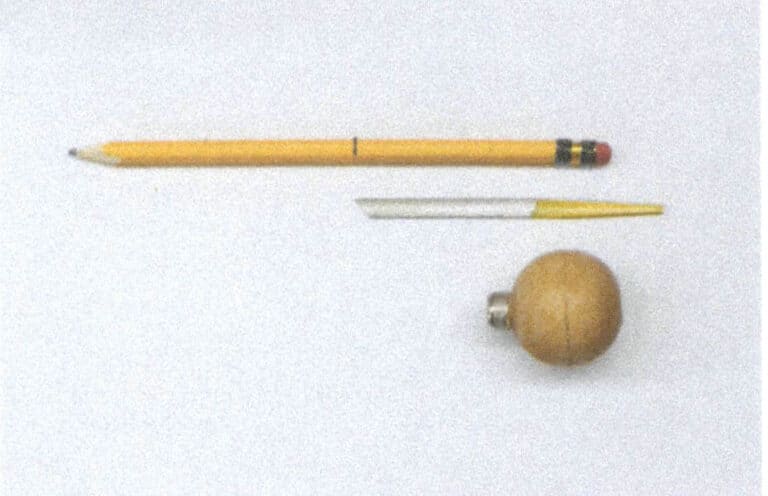
Figure 4-6 Determining the length of the blade
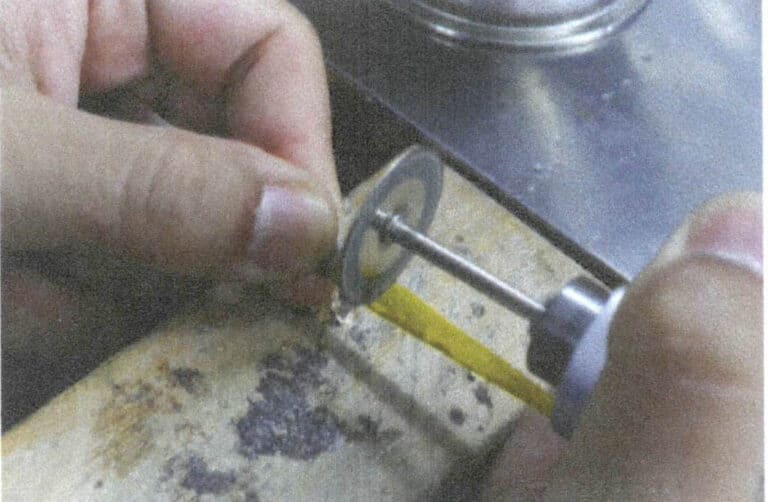
Figure 4-7 Trimming the excess part of the blade
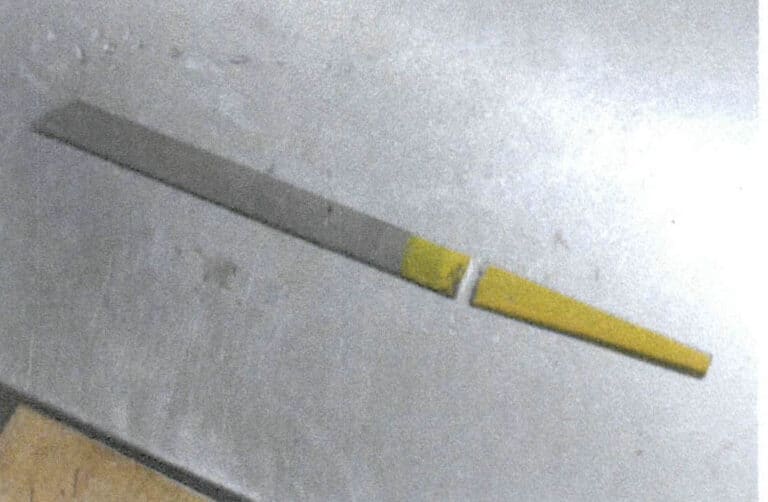
Figure 4-8 The blade after cutting
(3) Grinding the End of the Blade
At a distance of two centimeters from the end of the cut blade, grind at an angle from narrow to wide to facilitate the installation of the wooden graver handle. Note that during the grinding process, the temperature of the blade will rise rapidly, so prepare cold water to cool the blade at any time, as shown in Figure 4-9.
(4) Installing the Wooden Graver Handle
To install the wooden graver handle, grind the end of the blade to be inserted into the wooden graver handle into a flat square from thin to thick as in the initial state, and then make a hole in the wooden graver handle about 2 cm deep and 0.5 cm in diameter. When ready to clamp the blade horizontally in a vise, the end to be inserted into the wooden graver handle is exposed from the side of the vise, inserted into the wooden handle, and tapped solidly from the end of the wooden graver handle, as shown in Figure 4-10.
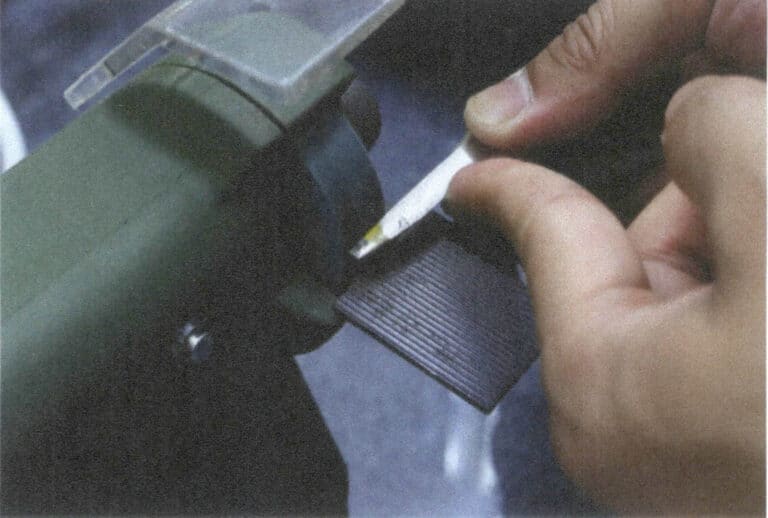
Figure 4-9 Grinding the end of the blade
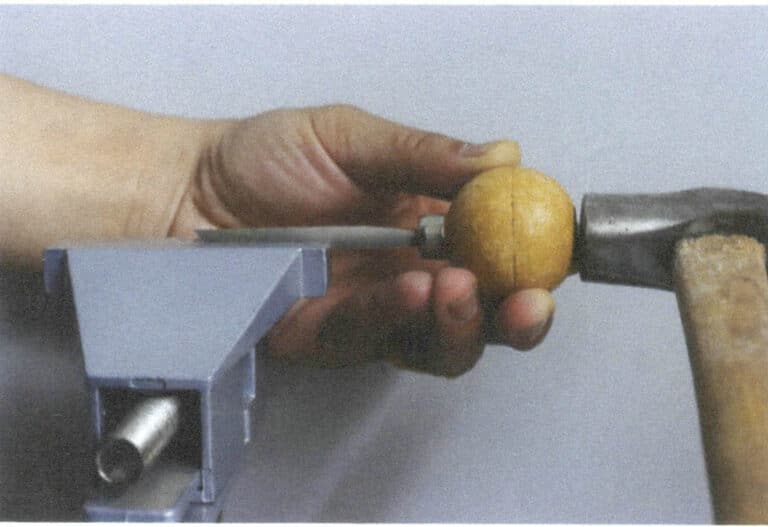
Figure 4-10 Installing the wooden graver handle
(5) Grinding the Spine of the Knife
After installing the wooden graver handle, grind the knife’s spine with a grinder. The entire blade has a certain width, and a portion of the spine needs to be ground down to gradually transition to a thinner and narrower tip. There are generally two styles for the spine: the first is ground into a concave arc shape, with a grinding length of about 2.5 cm; the second is to grind the spine into a conical shape, with a grinding length of 5~6.5 cm. Both styles can effectively reduce the size of the knife surface, and there is no difference in usage, as shown in Figure 4-11. Regardless of which grinding style is used, it is important to ensure that the sharp edges of the ridge are smoothed out to avoid cutting the hand during use. Overall, the treatment of the spine is similar to the treatment of the length of the graver; both should focus on the comfort of the user, as it is a personalized tool. Grinding the spine is illustrated in Figures 4-12 to 4-14.
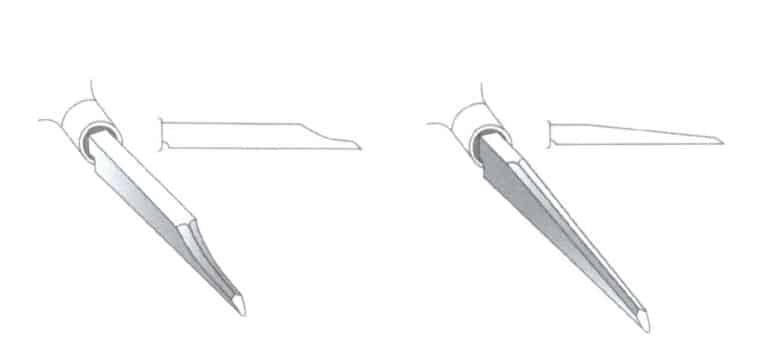
Figure 4-11 Two styles of grinding the spine
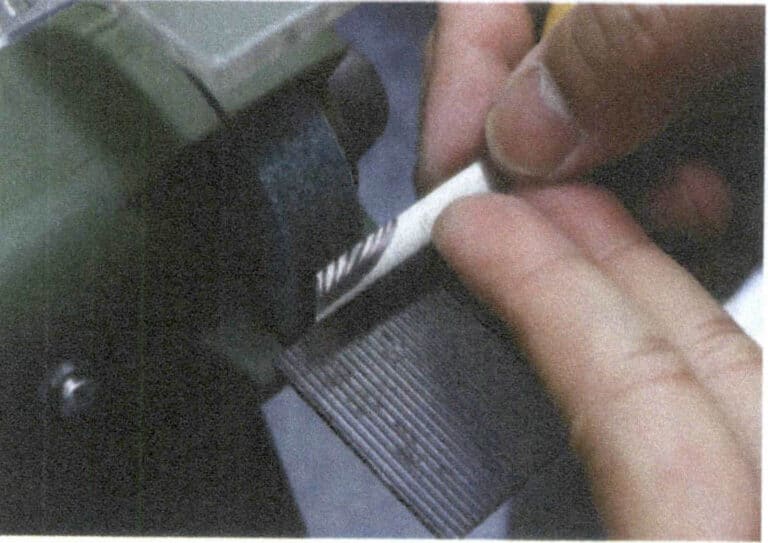
Figure 4-12 Grinding the spine (1)
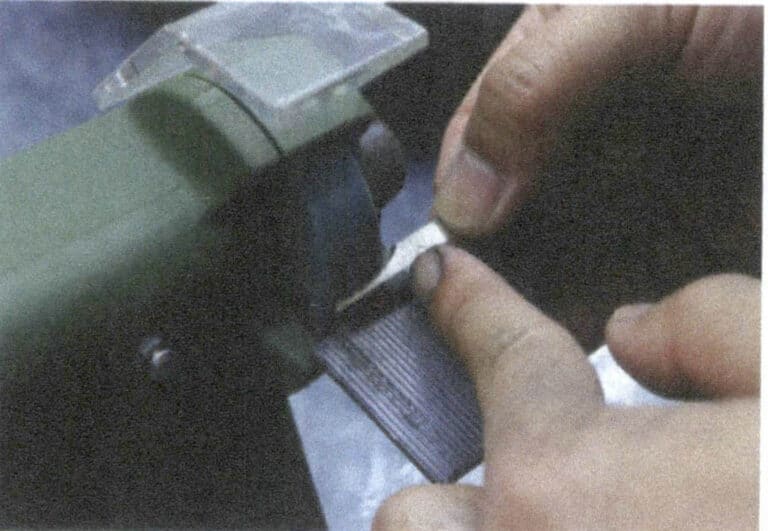
Figure 4-13 Grinding the back of the knife (2)
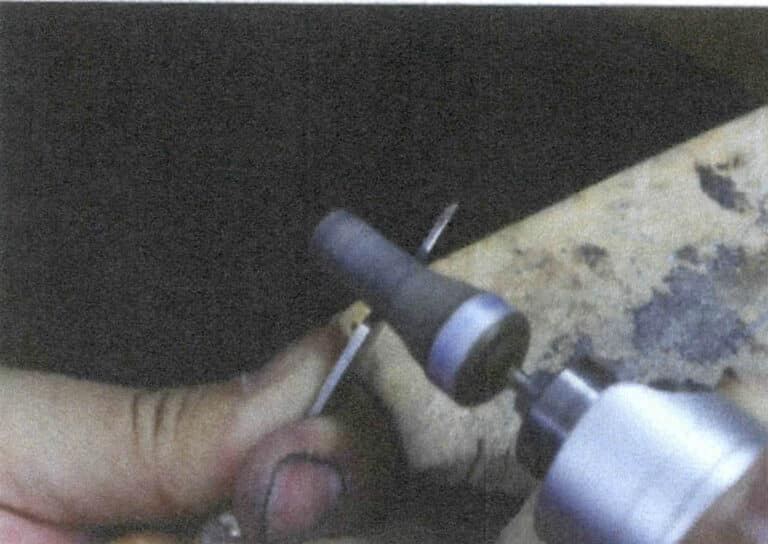
Figure 4-14 Grinding the back of the knife (3)
(6) Requirements for Grinding the Graver Head
The model of the blade represents its shape and size. Imported blade models are very specific; commonly used ones include curved #52, flat-headed #42, and pointed #4. The above models can be used as a reference; adjacent models have little difference in usage effects, and sizes can be chosen based on specific situations.
Among them, the curved graver is generally used in pave setting, and its hardness requirements are also relatively high. The height of the side of the curved graver head is 2~2.5 mm, and if the height is less than 2 mm, the head of the blade will need to be stronger. The angle of the head of the curved blade also needs to be adjusted; the angle of the head of the blade purchased should be 45°, and this angle results in a very thin blade, which is also relatively fragile and easily breaks during the scraping process. This angle must be adjusted to 55°~60°by grinding to avoid this situation, as shown in Figure 4-15.

The height of the pointed graver is 2~2.5 mm, the same as that of the curved graver. The pointed graver is generally used for scraping prongs and lines and has a relatively shallow cut. Due to the small force applied, the angle of the blade’s pointed head is maintained to 45°and does not need adjustment, as shown in Figure 4-16.

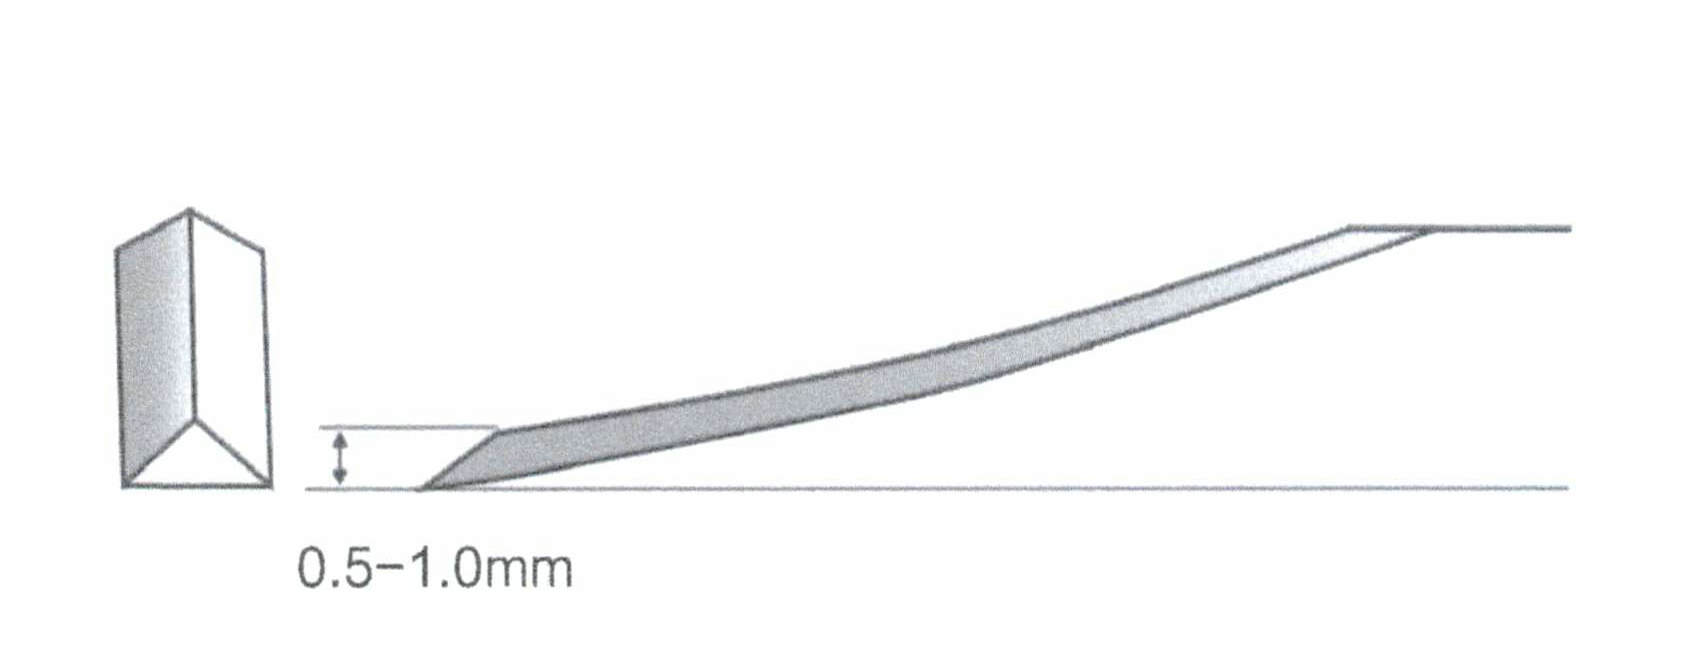
The function of the flat-headed graver is very similar to that of a chisel in woodworking, mainly used for scraping edges, making the metal surface thinner through repeated scraping, and removing uneven parts. Since the flat-headed graver requires almost no force, the back of the blade can be ground very thin, with a typical blade head height of o.5~1.0 mm, relatively small, so care must be taken during grinding, as shown in Figure 4-17.
(7) Methods for Sharpening Graver Heads
Traditional sharpening of graver heads mainly uses oil stones in conjunction with sharpening or machine oil. Sharpening a graver head involves using an oil stone to adjust it to the appropriate angle and sharpen it. Taking a curved graver as an example, if you need to sharpen a graver head at an angle of 55°~60°, the most common and quickest method is to stabilize the graver head with your index finger and thumb, hold the graver to find the desired angle, and smoothly grind it on the oil stone. The most important aspect of this method is to keep your hand steady throughout the grinding process and use your entire arm to maintain a level movement; otherwise, the graver head will be ground into a curved surface, as shown in Figure 4-18. There are also tools specifically designed to determine the angle of the graver head—graver sharpener. These tools can help inexperienced beginners accurately determine the angle and maintain stability, as shown in Figure 4-19. Some methods use a hanging grinder to drive the sharpening disc for grinding the graver head, which is more efficient but makes it more difficult to control the angle. Therefore, the sharpening disc can be ground first and then combined with the oil stone for further sharpening, as shown in Figure 4-20.
(8) Completing ve Sharpening of the Graver Head
After completing the sharpening of the graver head, the burrs on the edge should be polished off to avoid affecting the performance during use. Finally, the sharpened graver head can be placed vertically on the nail, as shown in Figure 4-21. It is acceptable if there is a feeling of resistance; if it is not sharp enough, the blade will slip.
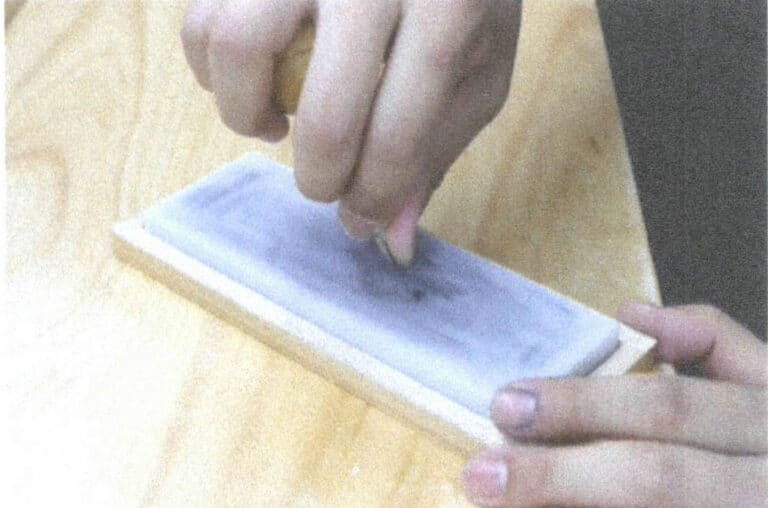
Figure 4-18 Grinding the Angle of the Graver Head with an Oil Stone
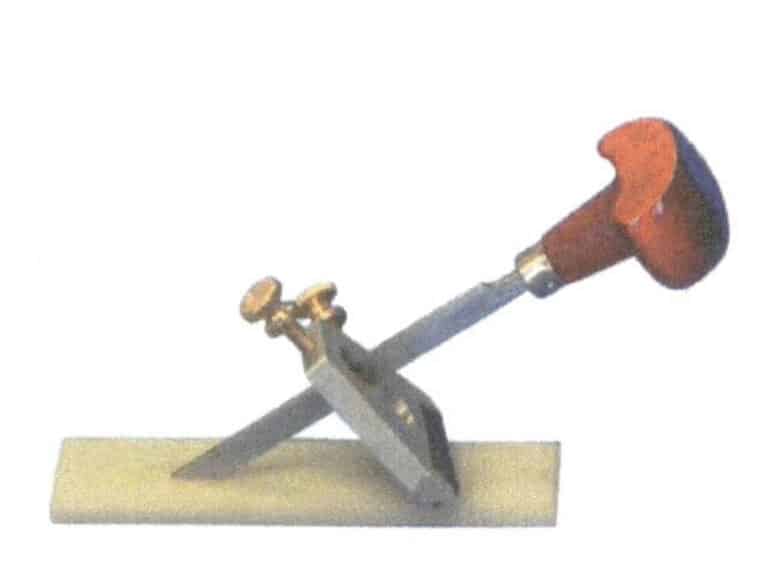
Figure 4-19 Graver Sharpener
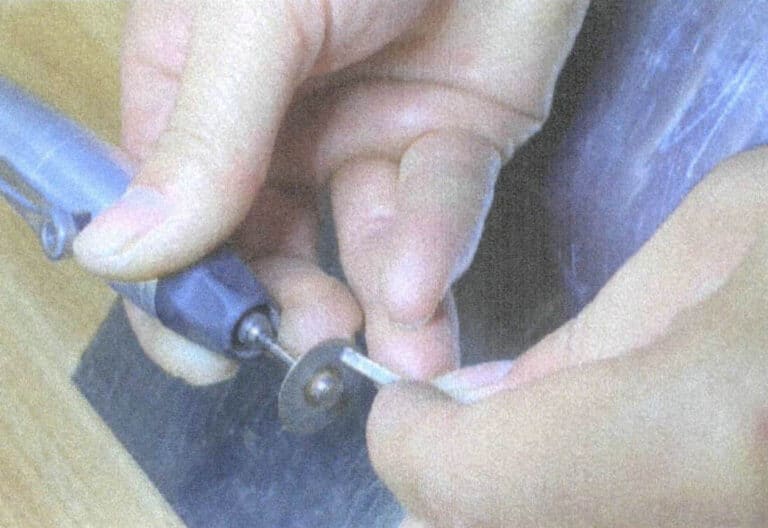
Figure 4-20 Grinding the Graver Head with Sharpening Disc
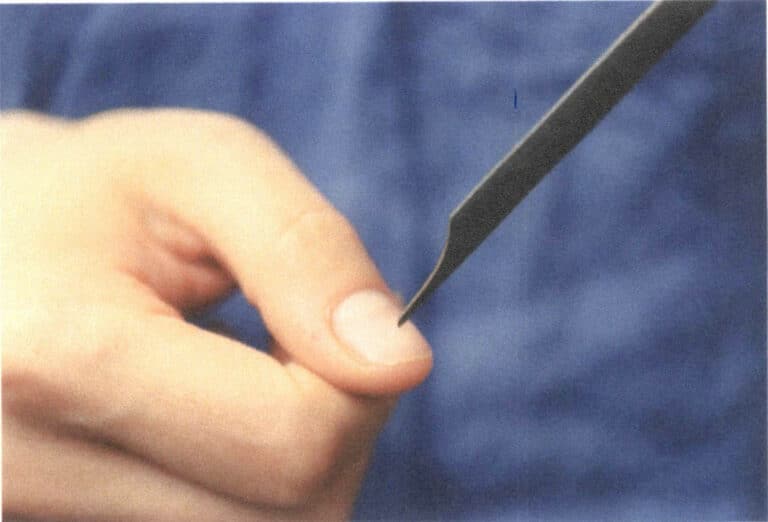
Figure 4-21 Test the graver head
2.3 Practice Using the Graver
For beginners, practicing using the graver before starting the pave setting practice is essential. After mastering the correct knife posture and method, familiarize yourself with the effects of different knife types through specific practice. Once you have a certain level of proficiency in using the graver, practicing pave setting will yield better results with less effort.
2.4 Graver Holding Posture
(1) Correct Graver Holding Posture
The correct graver-holding posture and force application method can improve efficiency and safety. First, hold the wooden graver handle in the palm, with the palm providing a stable backward push to the wooden graver handle. Then, place the thumb at the graver head, with the head of the thumb roughly leveling with the graver head; this is the length adjusted during the making of the graver. This effect can be achieved as long as the grip posture is correct. The thumb presses against the graver head while the other fingers comfortably grip the wooden graver handle, with the index finger pressing down on the graver head at about 2/3, opposing the force of the thumb. In this posture, the pointed graver ‘s tip faces downwards. Figures 4-22 to 4-24 show the correct graver holding posture.
(2) Correct Graver Using Posture
When scraping lines, the right thumb holding the graver against the metal surface to better control the direction and strength of the scrapping and the left hand to hold the sealing wax ball or stone setting base; you can put the left thumb against the right thumb so that the head of the graver will move more controllable and stable, as shown in Figure 4-25. It is important to always protect your hands when using a graver because graver are very sharp and can easily poke the skin. Therefore, the two thumbs should work together smoothly to avoid the tip of the graver slipping; the left hand holding the sealing wax ball or the stone setting base should be leaning down, not in front of the tip of the knife.
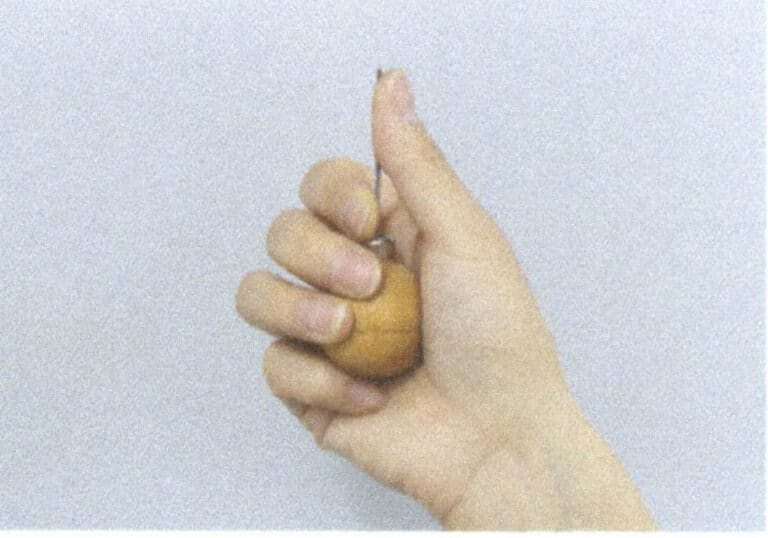
Figure 4-22 Graver Holding Posture (1)
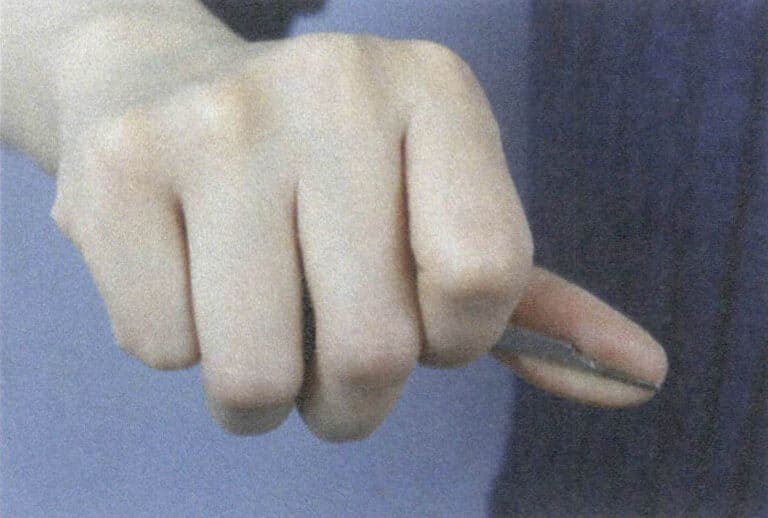
Figure 4-23 Graver Holding Posture (2)
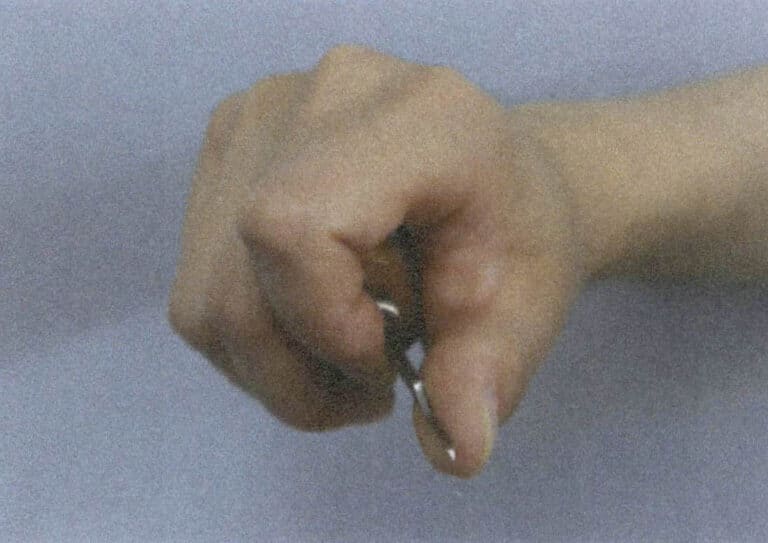
Figure 4-24 Graver Holding Posture (3)
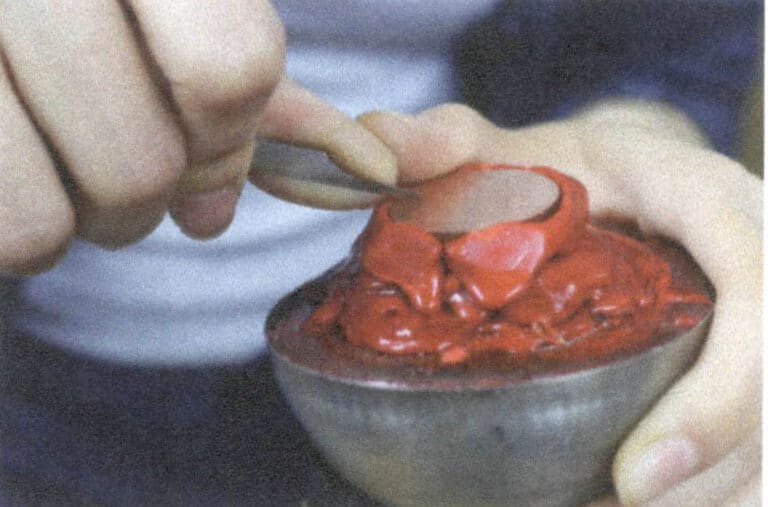
Figure 4-25 Correct Graver Using Posture
2.5 Scraping Line Practice
(1) Preparing the Metal Plate
First, prepare a copper or silver plate with a thickness of no less than 1.3 mm. The demonstration case uses a copper plate with a side length of 3 cm and a thickness of 2 mm, as shown in Figure 4-26. Before use, the surface of the metal plate should be smoothed, but polishing is not necessary; a silk or frosted effect is more conducive to observing the texture of the scraping line.
(2) Hazırlıking ve Tools
Scraping straight and wedge-shaped lines can use pointed graver, as shown in Figure 4-27.
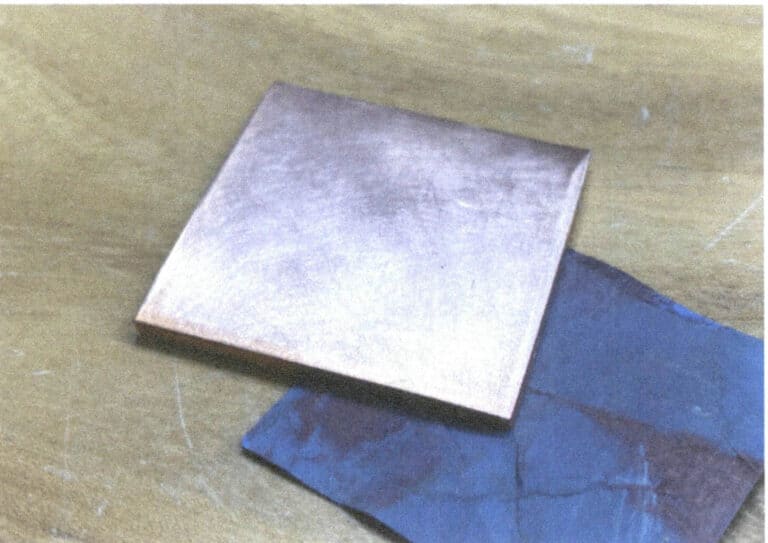
Figure 4-26 Preparing the metal sheet.
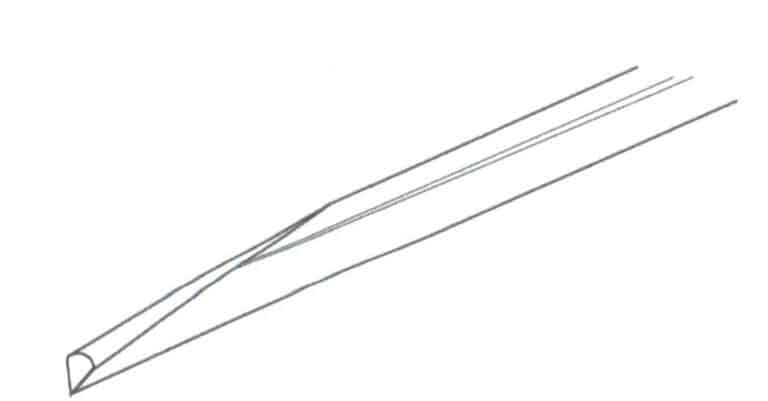
Figure 4-27 Pointed graver
(3) Angle of the Graver for Scraping Straight Lines
When scraping a straight line, first angle the graver downwards at 45 degrees, then gradually lower it to the line angle to push the graver forward smoothly. During the scraping process, once you reach the line angle, use minimal pressure to guide the blade to avoid cutting too deep. This exercise aims to scrape out fine lines with uniform width and spacing. Stop pushing forward when you reach the end of the line, do not change the angle of the blade, and with your hand relaxed, scrape off the metal wire with the tip pointing upwards. The angle for scraping straight lines is shown in Figure 4-28.
(4) Angle of the Graver for Scraping Wedge-Shaped Lines
Since the wedge shape has a variation in width, and this variation transitions uniformly, controlling the angle of the graver to change uniformly based on the length of the wedge-shaped line being scraped is the key and difficulty of the exercise. First, control the angle of the graver to be at an angle of 8 degrees to the horizontal plane, then push forward with even force. During the pushing process, adjust the speed of pressure change according to the length of the line being carved. Through repeated practice, try to ensure that the width at the end of each wedge shape is consistent. The angle of the graver for scraping wedge-shaped lines is shown in Figure 4-29.
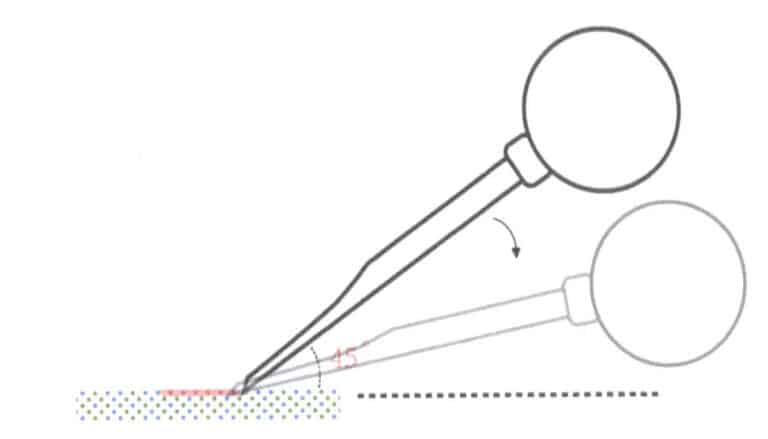
Figure 4-28 Angle of the Graver for Scraping Straight Lines
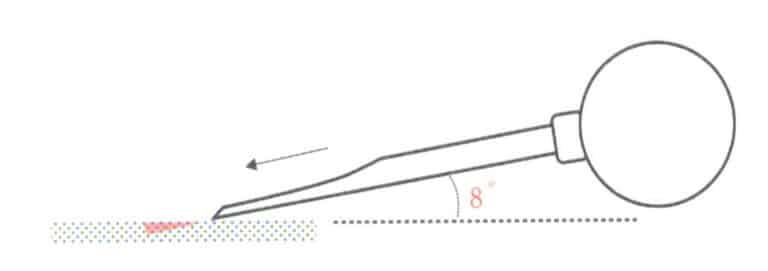
Figure 4-29 Angle of the Graver for Scraping Wedge-Shaped Lines
(5) Beading
The so-called beading involve pressing and grinding the metal that has been scooped up with cup bur, capable of containing metal fishing hooks, into a smooth, small, hemispherical shape. This small hemisphere is the “prong” used for pave setting. Unlike prong settings where the metal prongs have already securely embedded the gemstone, the sucking bead process is primarily a beautification process. In the case of pave settings, decorating and beautifying the metal fishing hook is just one aspect; more importantly, the embedding of the gemstone is achieved through pressing and grinding with the cup bur. This is why prong settings can use a hanging grinder to move the suction beads, as they only serve a polishing function, while pave settings require a wooden-handled cup bur to utilize hand strength. The cup bur is made of steel, and the head has various sizes of bowl-shaped hemispherical grooves, as shown in Figure 4-30. The diameter of the cup bur must be chosen to match the amount of metal being scooped; if it is too small, it cannot contain it, and if it is too large, it cannot create the round prong effect. The beading begin with a downward pressing action, placing the “bowl-shaped” cup bur on the scooped metal tip and pressing down, then grinding the metal prong, rotating until it becomes a smooth cut shape, as shown in Figure 4-31.
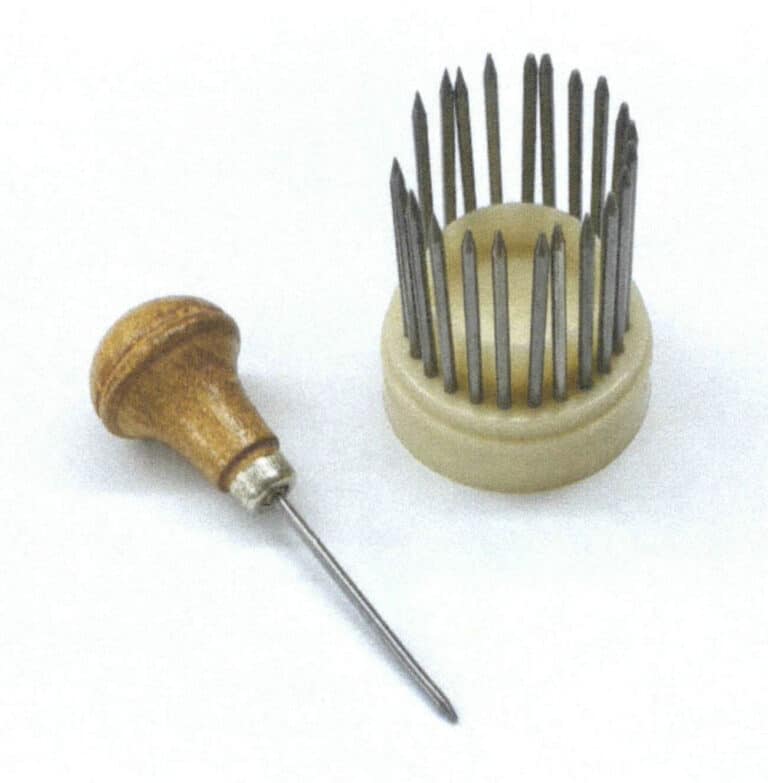
Figure 4-30 Cup bur
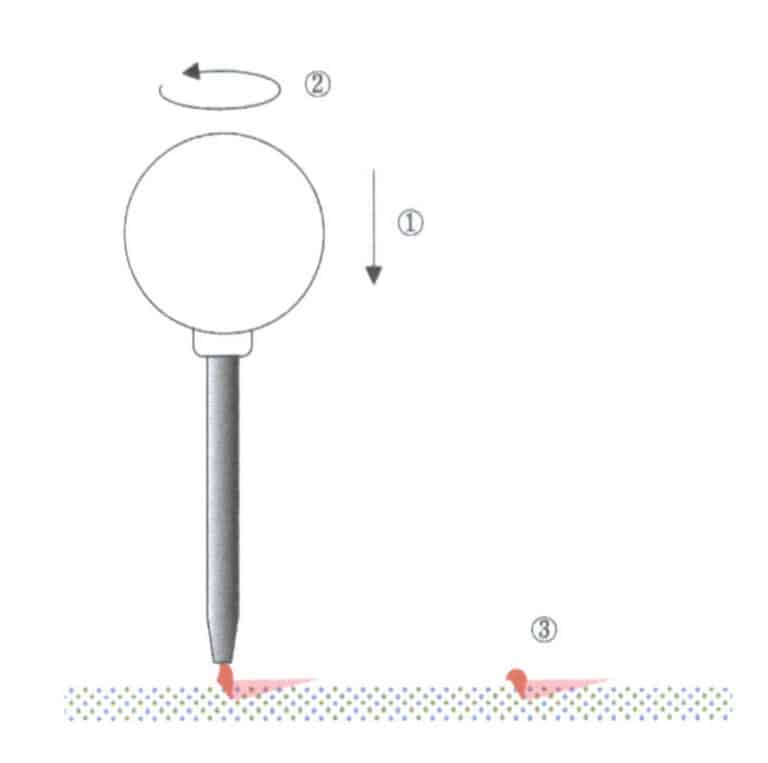
Figure 4-31 Beading
(6) Completing the Practice of Using a Graver
The completed graver usage practice is shown in Figure 4-32.
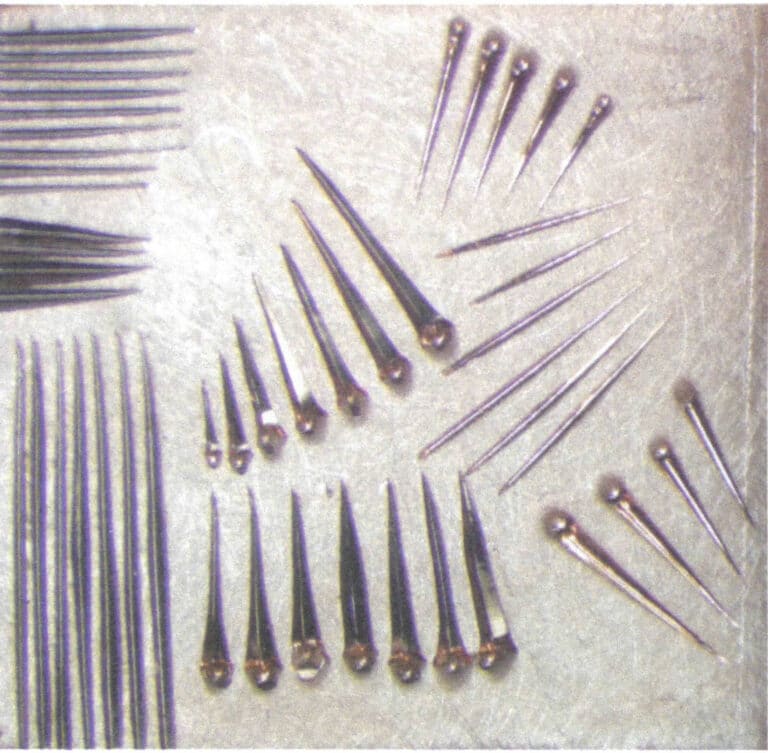
3. Method for Making the Pave Setting
After acquiring the knowledge of preparing the pave setting tools and practicing knife skills, entering the practice of making the pave setting will be much easier. The methods of pave setting vary due to the number of prongs, processing methods, and the method of gem placement. The subsequent pave setting will further extend the methods of pave setting, showing many similarities. In the practice of pave setting, the two typical single-gem starting pave setting cases of the eight-pointed star pave setting and the bright square four-prong pave setting will be demonstrated. Once the basic techniques of pave setting are mastered, the different arrangements of gems in the pave setting are also easy to understand and apply, with common pave setting styles shown in Figure 4-33.
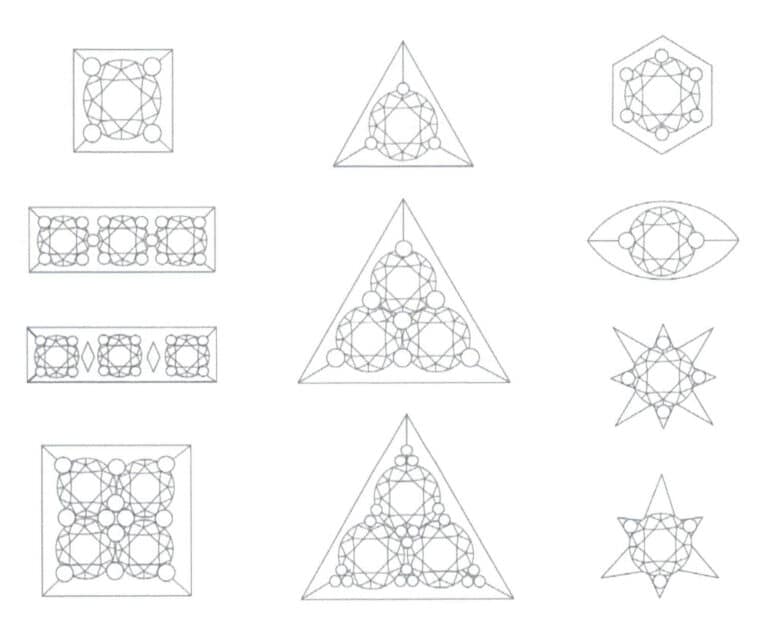
3.1 Steps for Making an Octagram Star Pave Setting
(1) Malzeme PTAZMİNAT
Metal plates can be made of either silver or copper, and the metal plate’s thickness should exceed 0.3~0.5 mm to the gemstone’s height. This example uses a 2 mm thick copper plate and a 2.5 mm diameter round brilliance cut gemstone, as shown in Figure 4-34.
(2) Hazırlıking Tools
The main tool used is a pointed graver, as Figure 4-35 shows.
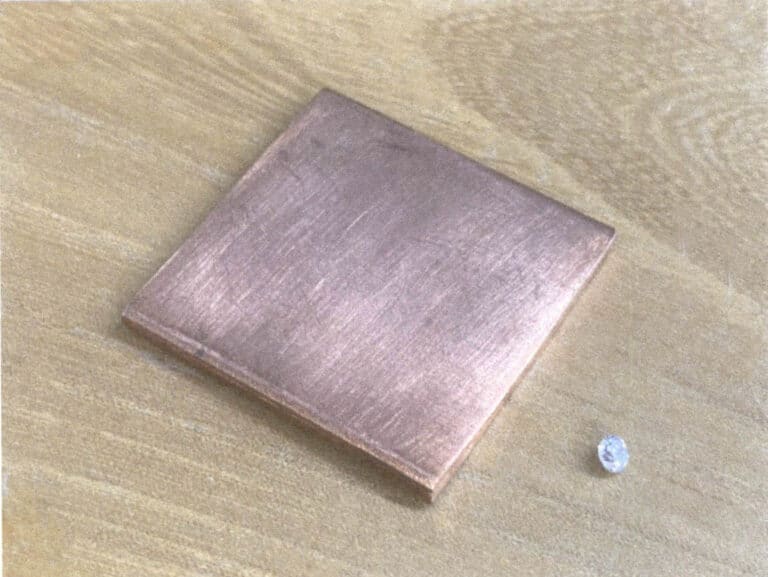
Figure 4-34 Preparing the metal plate and gemstones
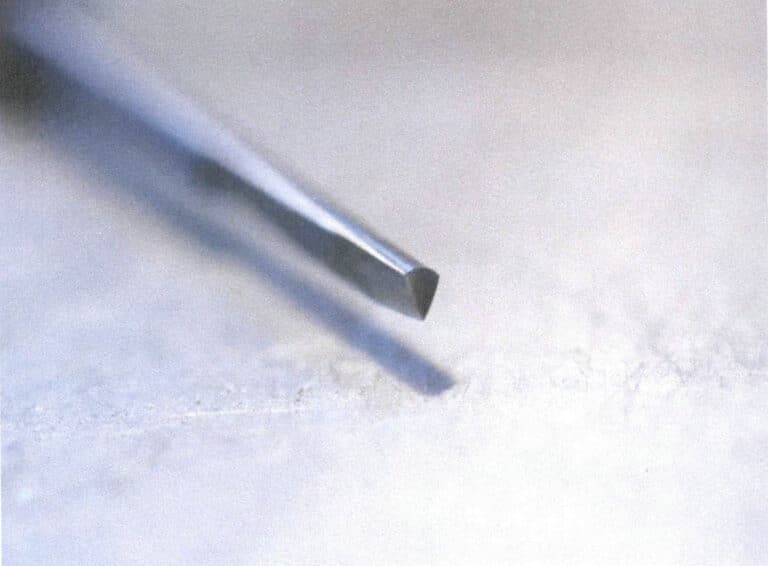
Figure 4-35 Pointed graver
(3) Fixing the metal
First, fix the copper plate on the stone setting and mark the setting position, as Figure 4-36 shows.
(4) Drilling
Drill a hole with a 1 mm drill bur at the center position to be embedded, as shown in Figure 4-37.
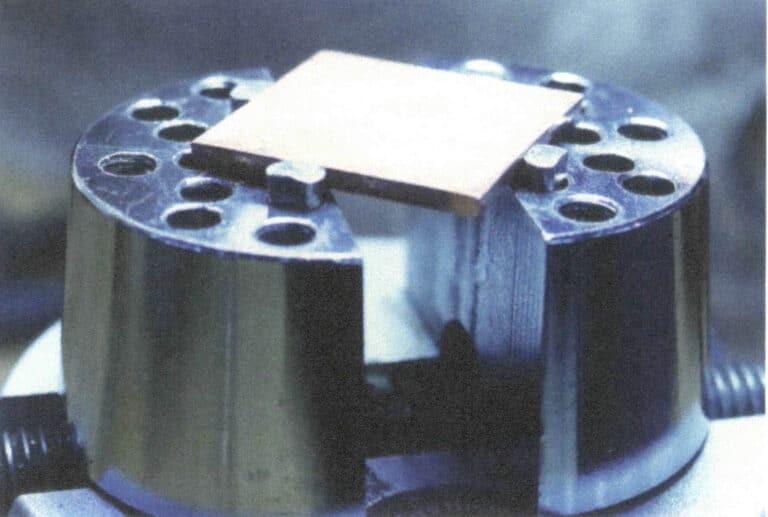
Figure 4-36 Fixing the Metal
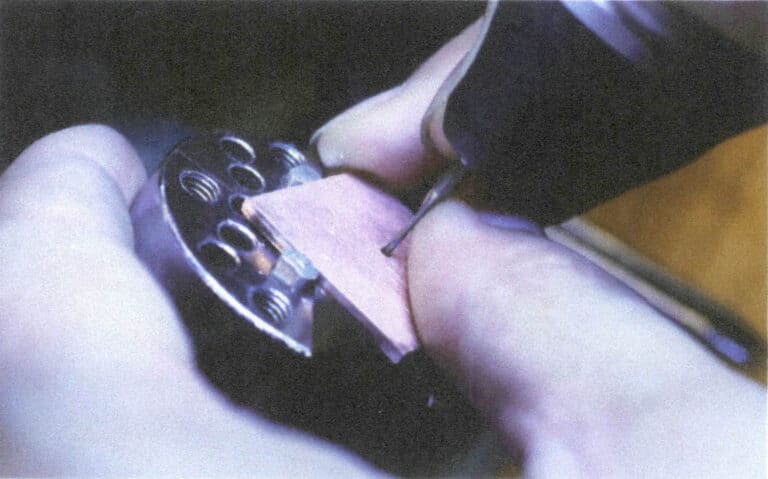
Figure 4-37 Drilling
(5) Enlarging the hole
Use a ball bur to ream the hole; reaming is gradually enlarging the hole from small to large with the ball needle, for example, using drill burs with diameters of 1.5 mm, 2 mm, and 2.5 mm in succession. The reaming depth should be about half the ball bur and not too deep, as shown in Figure 4-38.
(6) Cleaning the Ston Setting Position
Clean the residual metal powder on the reamed stone setting position with a brush, as Figure 4-39 shows.
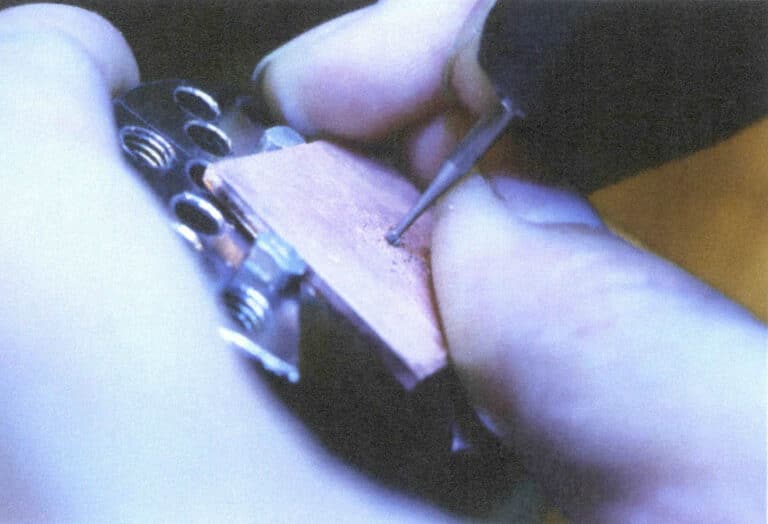
Figure 4-38 Enlarging the hole
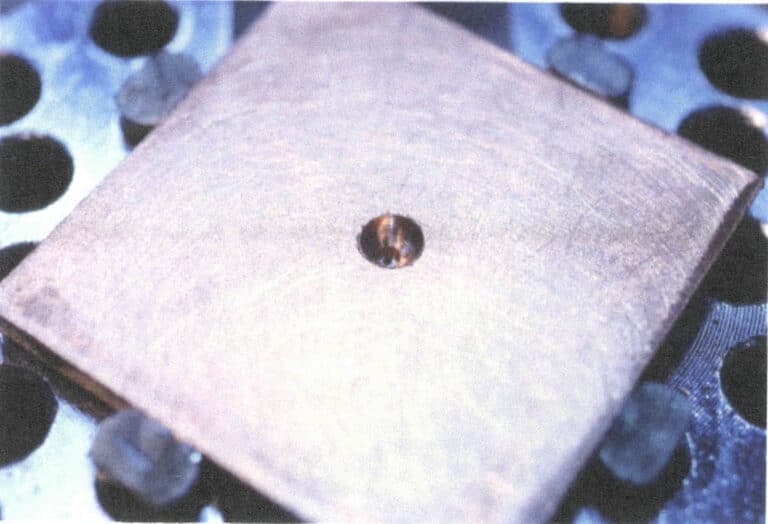
Figure 4-39 Cleaning the stone position
(7) Testing the Ston Montaj Ayarı
Place the gem into the stone setting position and observe whether the hole depth is appropriate. The appropriate depth is when the 25% of gem’s crown is above the metal surface. If the depth is insufficient, you can continue to deepen it with a ball needle, as shown in Figure 4-40.
(8) Making MarkS
Use a square template ruler to mark the outer edge of the stone setting position, and draw cross auxiliary lines to determine the position and direction of the prong scraping, as shown in Figure 4-41.
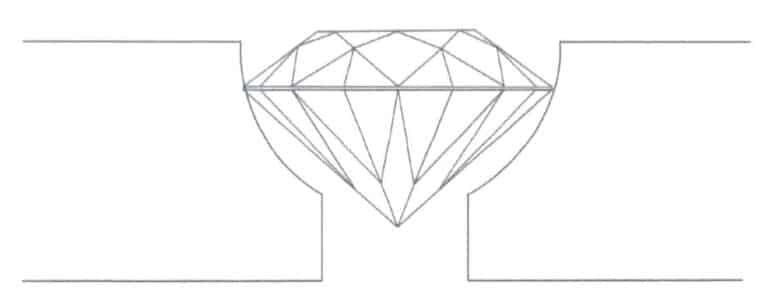
Figure 4-40 Suitable stone setting position depth
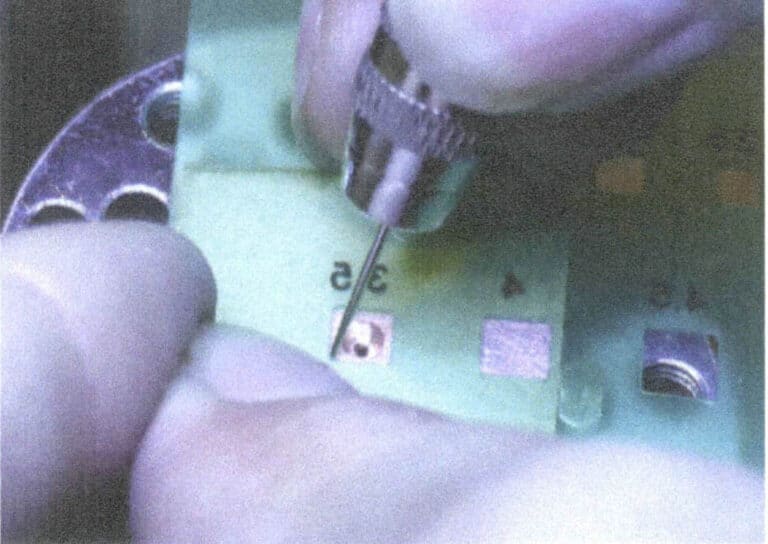
Figure 4-41 Marking
(9) Scraping Wedge-shaped Decoration
The octagram pave setting has four wedge-shaped corners as decoration. Before placing the stone, scrape the four wedge-shaped decorations in a diagonal order, which is more conducive to aligning the four corners with you, as shown in Figures 4-42 to 4-44.
(10) Placing the Taş
Place the stone not horizontally into the setting position, as shown in Figure 4-45.
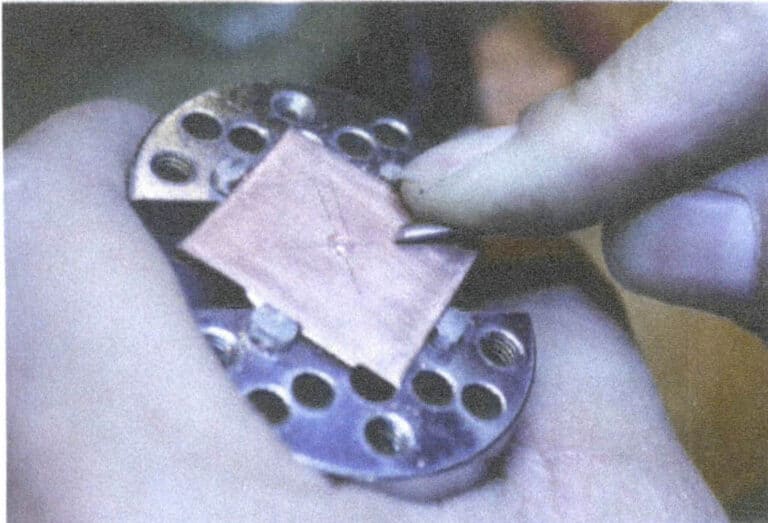
Figure 4-42 Scraping four wedge-shaped decorations (1)
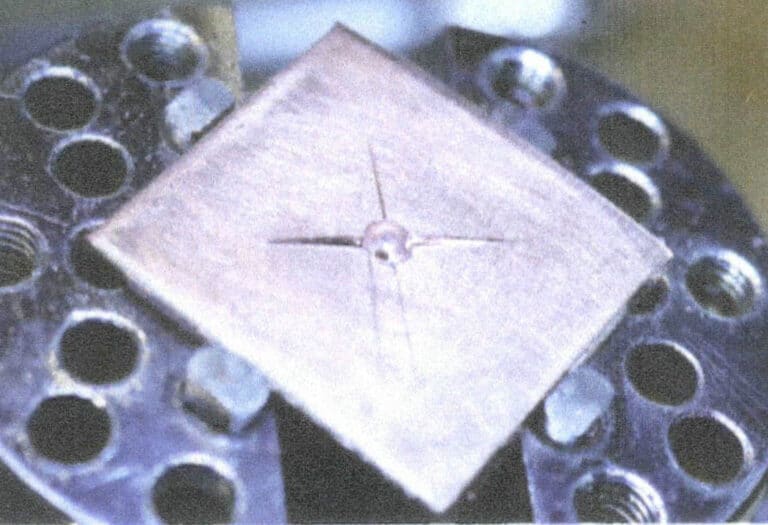
Figure 4-43 Scraping four wedge-shaped decorations (2)
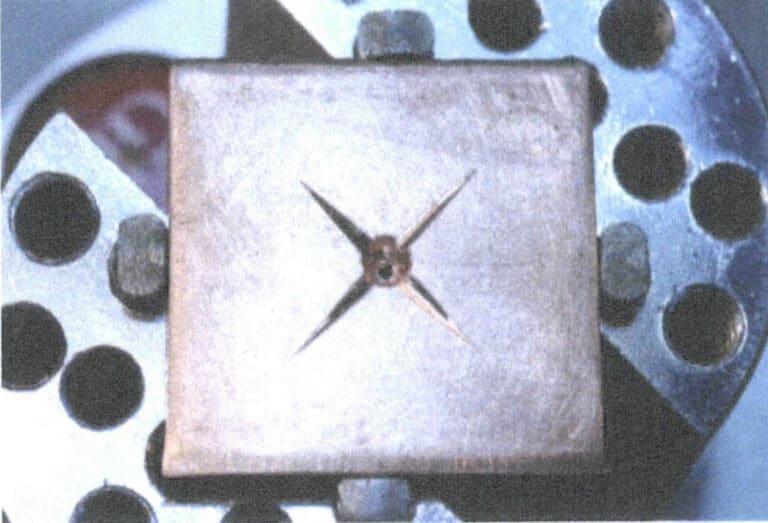
Figure 4-44 Scraping Four Wedge-Shaped Decorations (3)
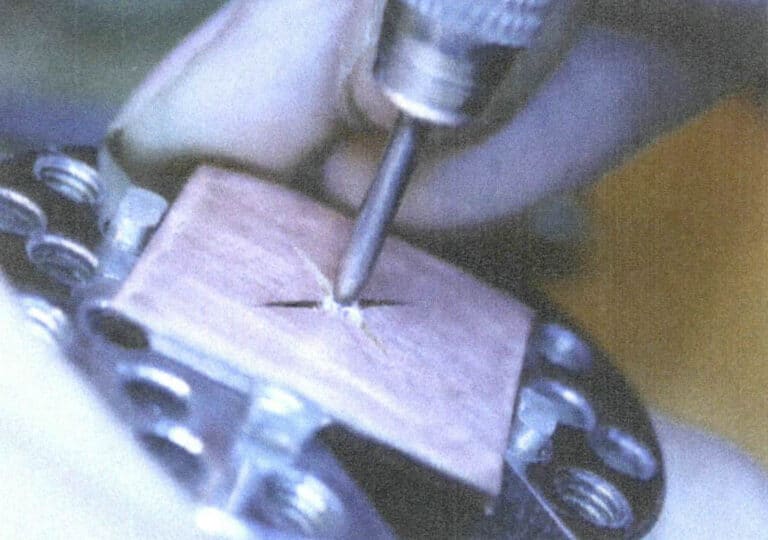
Figure 4-45 Placing the Stone
(11) Scraping Prongs
The positions of the four prongs and the wedge-shaped decorations intersect, forming an average division of 45 degrees. When scraping, it is still done in a wedge-shaped manner, scraping until it stops near the stone setting position, retaining the metal that has been scraped, and scraping in a diagonal order, as shown in Figures 4-46 and 4-47.
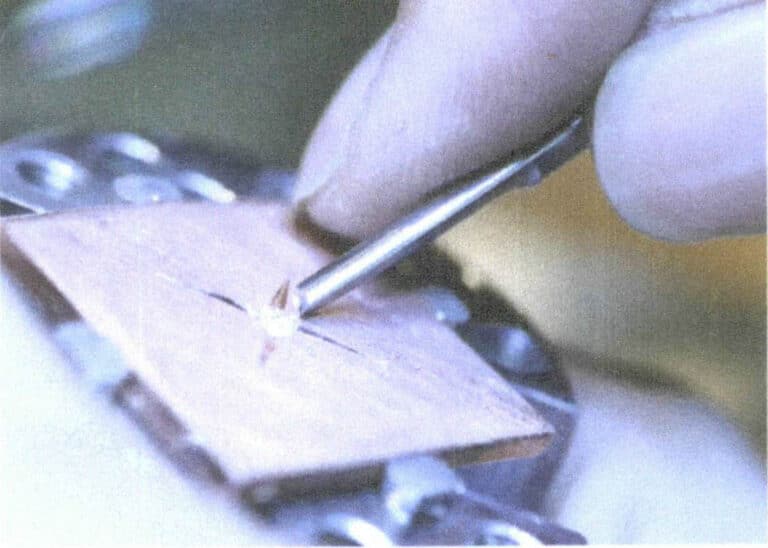
Figure 4-46 Scraping Prongs (1)
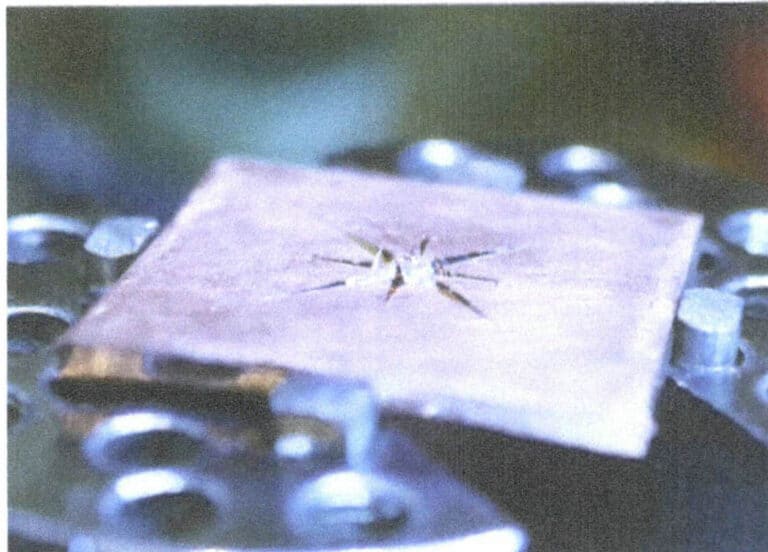
Figure 4-47 Scraping Prongs (2)
(12) Cutting Prongs
The metal that has been lifted is too long and needs to be cut off with pliers, as shown in Figure 4-48.
(13) Beading ve Ayar Stones
Choose a cup bur of the appropriate size to perform beading treatment on the metal prong while completing the setting of the gemstone, as shown in Figure 4-49.
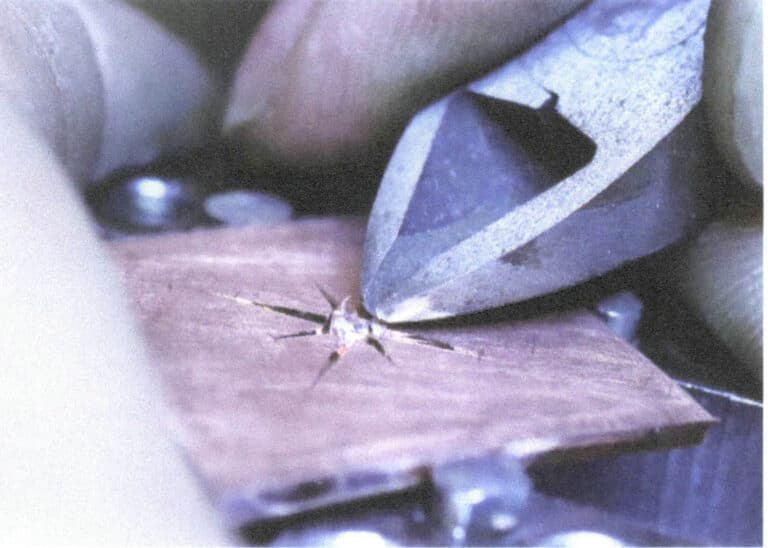
Figure 4-48 Cutting prongs
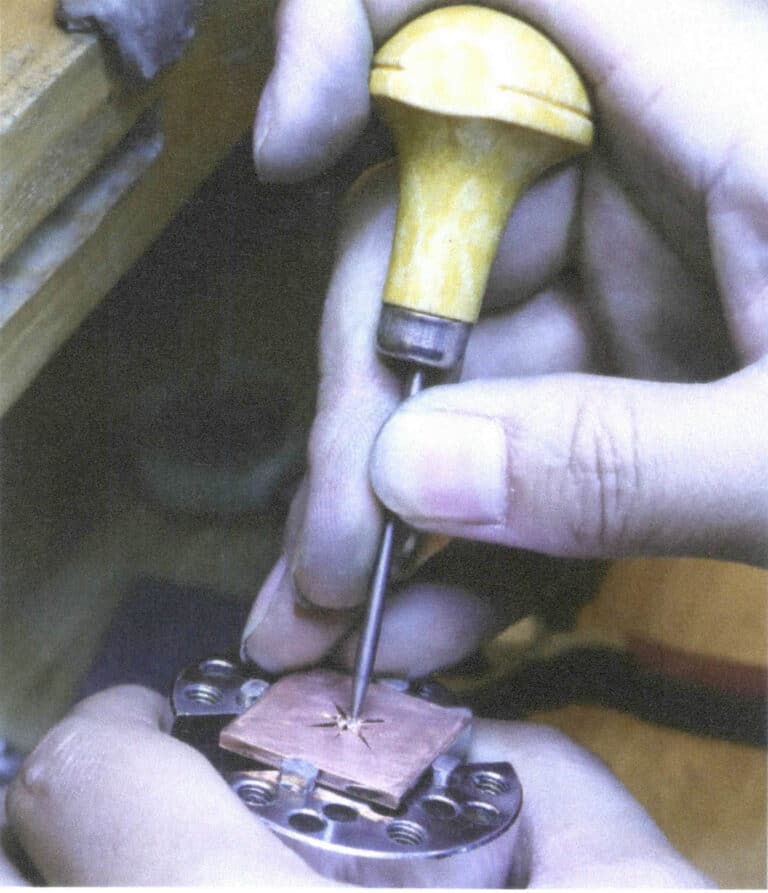
Figure 4-49 Beading and Setting Stones
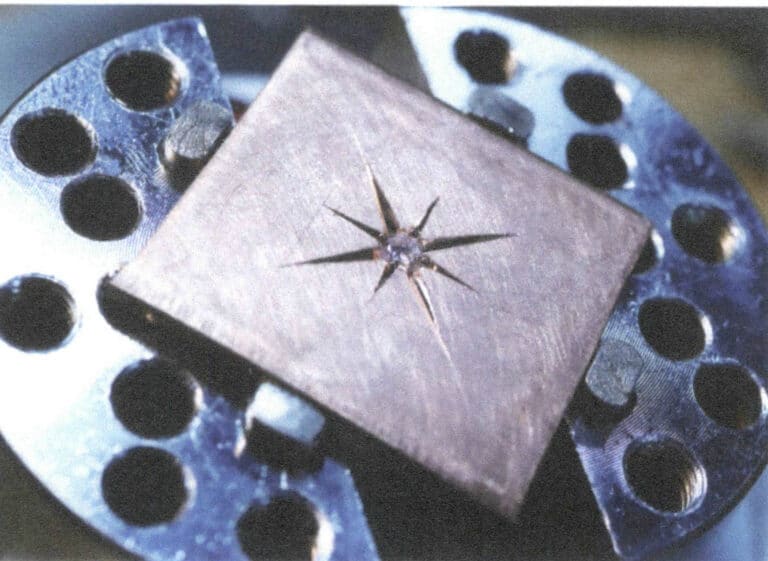
(14) Completing the Eight-Pointed Star Pave Setting
The Eight-Pointed Star pave setting is completed after making simple treatments to the edges, as shown in Figure 4-50.
3.2 Steps for Making a Bright Square Four-Pointed Pave Setting
(1) Malzeme Hazırlama
The metal plate can be made of silver or purple copper, and the metal’s thickness should exceed the gemstone’s height to 0.3~0.5 mm. This case uses a 2 mm thick 925 silver plate and a round brilliance cut gemstone with a diameter of 2.5 mm, as shown in Figure 4-51.
(2) Fixing the Metal
First, fix the metal plate onto the sealing wax ball and use a steel bur to mark the position for the pave setting on the metal plate, as shown in Figure 4-52.
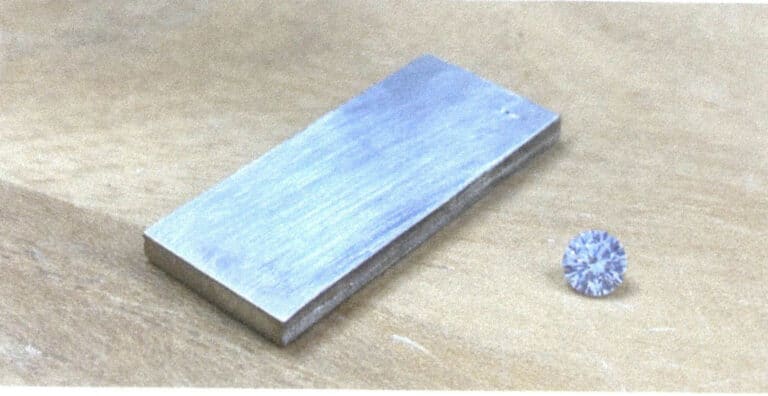
Figure 4-51 Material Preparation
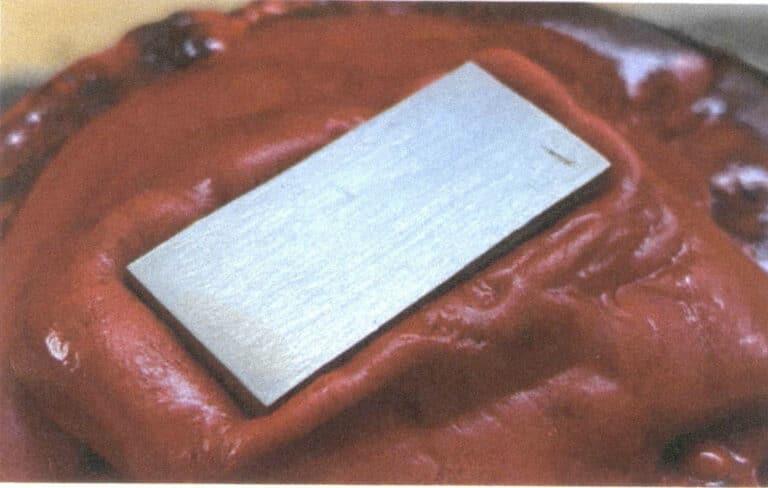
Figure 4-52 Fixing the Metal
(3) Sondaj
Drill a hole with a drill bur of about 1 mm at the center of stone setting position, as Figure 4-53 shows.
(4) Enlarging Holes
The process of enlarging a hole with a ball bur, where the ball bur gradually enlarges the hole from small to large, is shown in Figure 4-54.
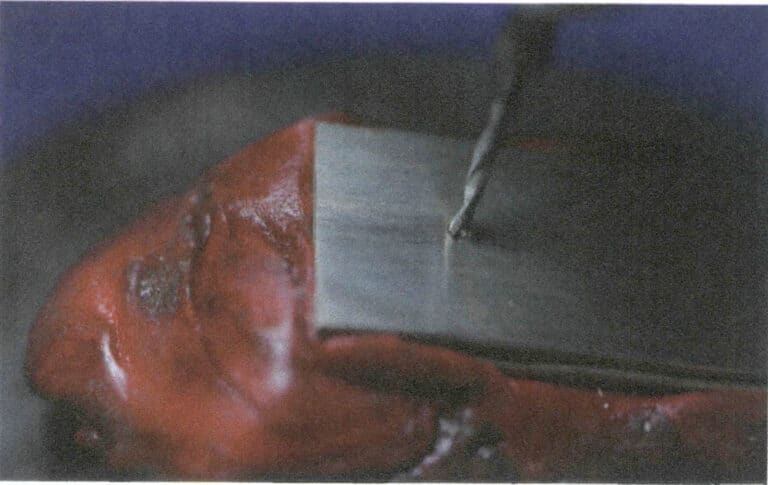
Figure 4-53 Drilling
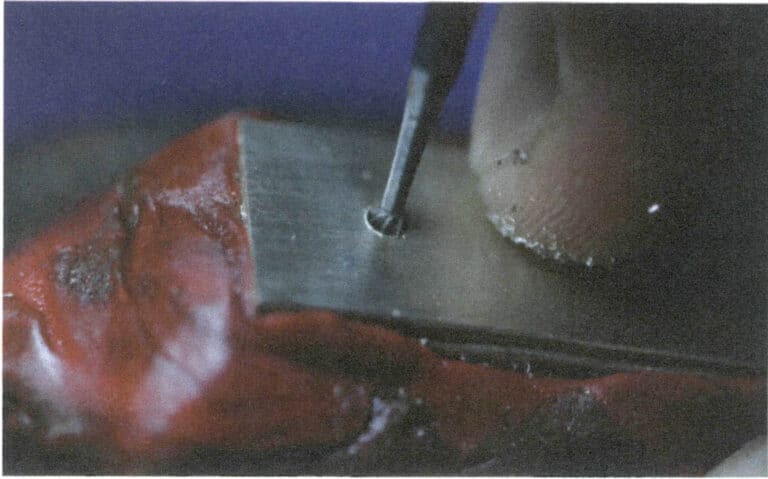
Figure 4-54 Enlarging the hole
(5) Cleaning the Ston Setting Position
Use a brush to clean the metal powder from the stone setting position, as shown in Figure 4-55.
(6) Testing the Stone Setting Mount and Placing the Stone
Place the gemstone in the stone position and observe whether the depth of the hole is appropriate; the appropriate depth is 25% of the crown of the gemstone exposed to the surface of the metal.
Once the hole depth is correct, place the stone in the stone setting position. Lower the stone to ensure that it is horizontal. Test the stone setting mount and place the stone as shown in Figure 4-56.
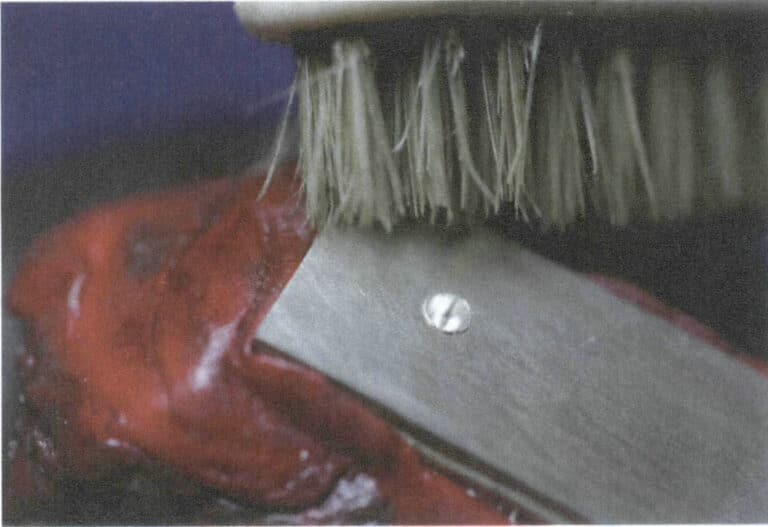
Figure 4-55 Cleaning the stone setting position
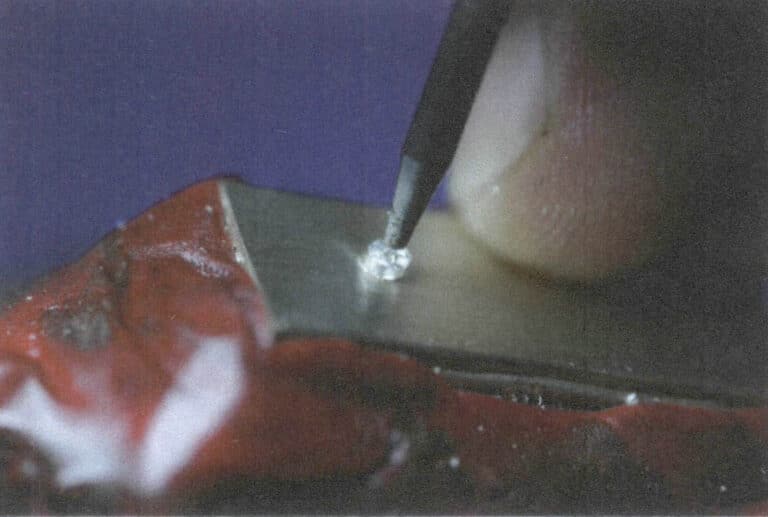
Figure 4-56 Testing the Stone Setting Mount and Placing the Stone
(7) Pave Setting Position
Shovel the corners of the square vertically outside the round stone with a flat-headed graver. This marks the next pave setting position and shoveling edge position, which can also be marked with a square template ruler. Schematic diagrams of the pave setting position, scraping stone setting position, and scraping stone setting position are shown in Figures 4-57 through 4-59, respectively.
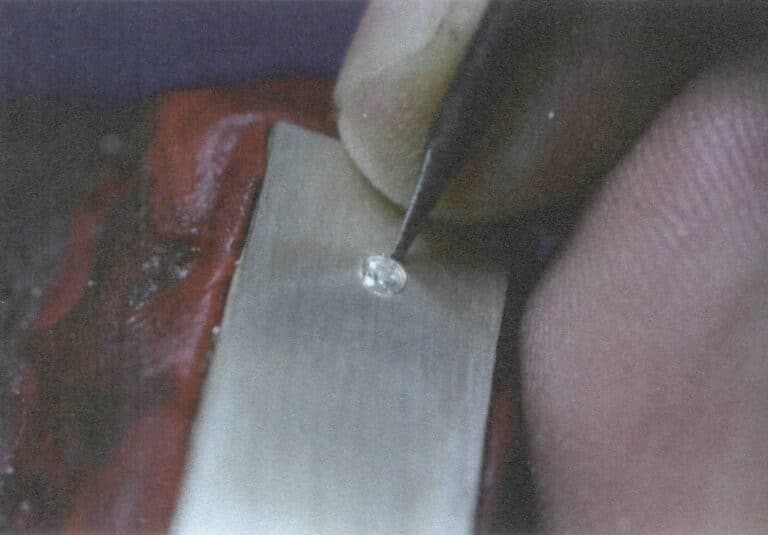
Figure 4-57 Pave Setting Position
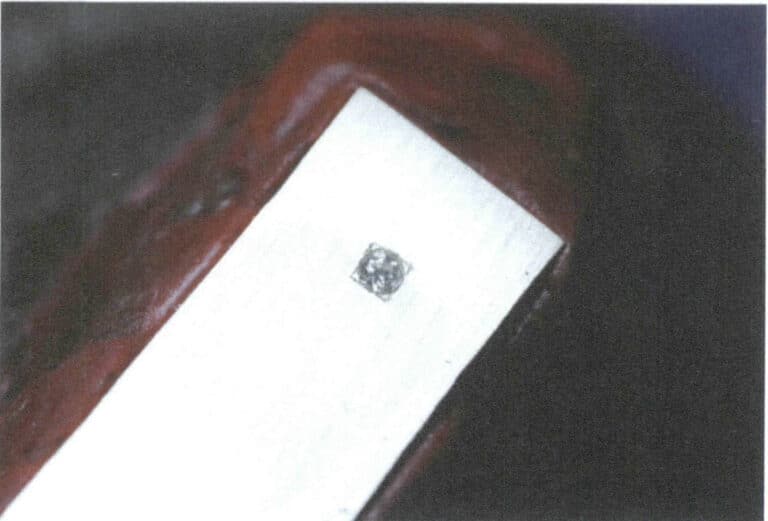
Figure 4-58 Scraping Stone Setting Position
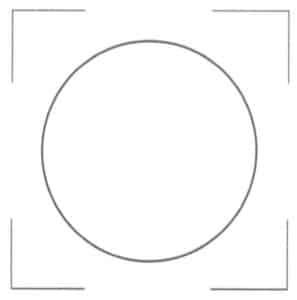
(8) Scraping Prongs
Use a curved graver to scrape from the square’s four corners toward the center. When the metal prong is close to the edge of the gem, gradually raise the graver and press it against it. Here, the four prongs are still taken in a diagonal order, as shown in Figures 4-60 and 4-61.
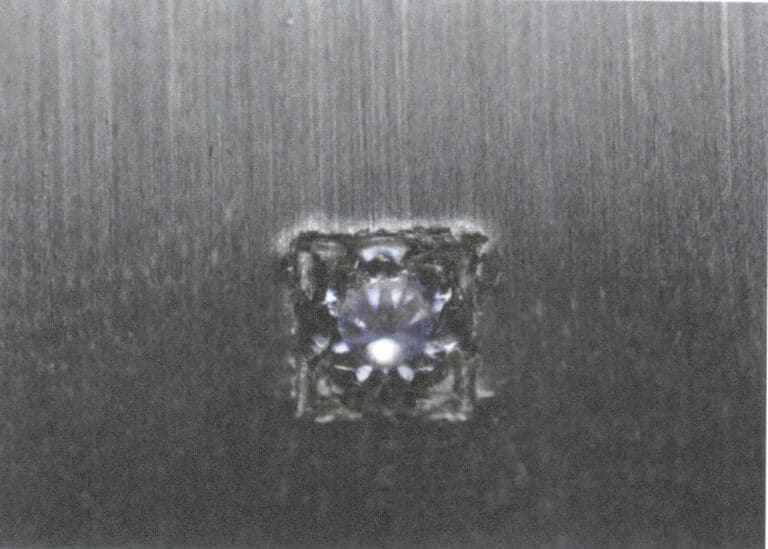
Figure 4-60 Scraping Prongs
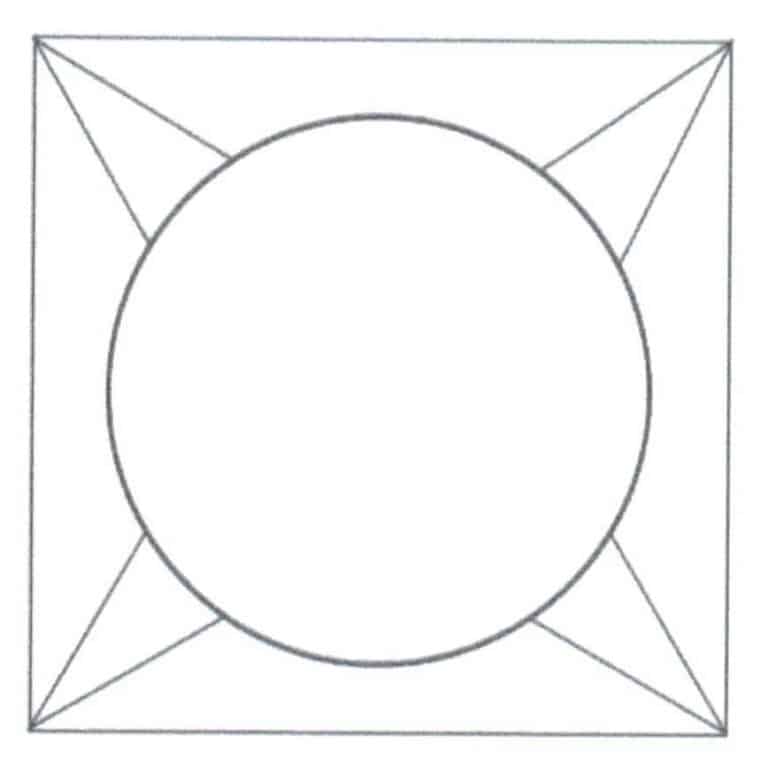
Figure 4-61 Schematic of Scraping Prongs
(9) Beading and Stone Ayar
Choose a suitable-sized cup bur and rotate it downwards to press and grind the metal prong until it forms a smooth round prong and set the gem, as shown in Figures 4-62 and 4-63.
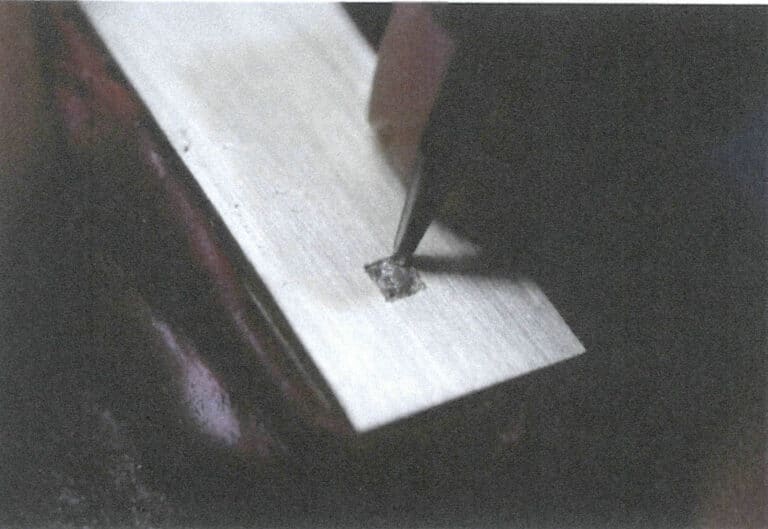
Figure 4-62 Beading and Stone Setting
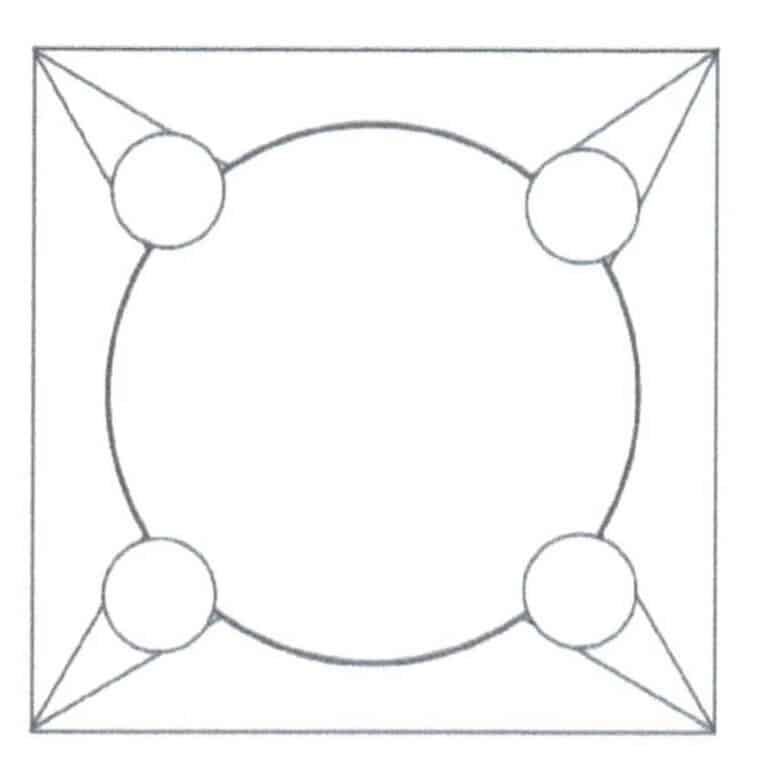
Figure 4-63 Schematic diagram of beading position
(10) Scraping ve Edges and Ctamamlanması Bright Square four-prong Pave Setting
The gem has already been secured with metal prongs, and the next step is to make the surrounding metal look nice. Use a flat-headed graver to carve out a downward-sloping square box shape along the outer square outline of the gem. Start from one corner and chisel along the straight edge, avoiding the round prongs and the gem. The completed bright square four-prong pave setting after shaping the edges is shown in Figure 4-64.
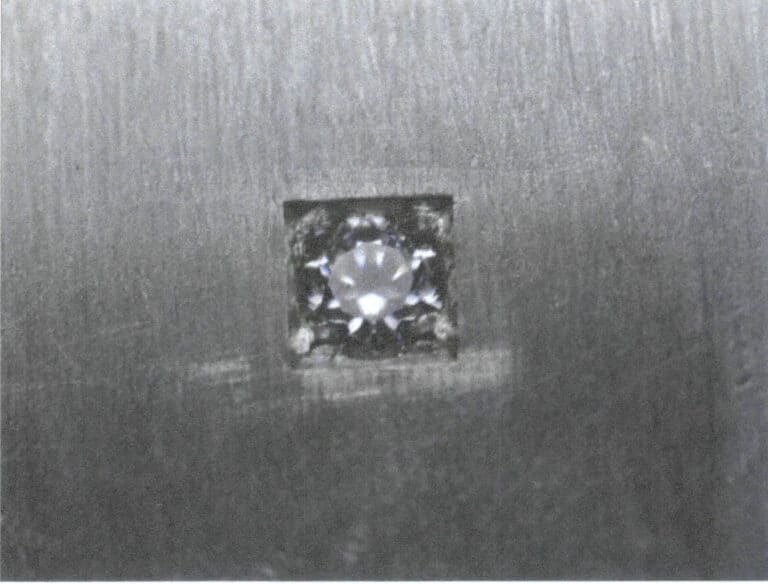
4. The Application of the Pave Setting in Jewelry Design
The pave setting technique has a long history in developing jewelry and is highly skilled in metal craftsmanship. The action of the tool pushing the metal gives it a sculptural feel, making the gemstones appear more dignified within it. Therefore, a pave setting is often used for single gemstones to highlight the sculptural and craftsmanship aspects of the setting. In today’s industrial production environment, due to the high time and craftsmanship costs associated with a pave setting, it can only be seen in the works of some metal artists or a few high-end jewelry brands. For example, the Bulgari MARRYME diamond wedding ring is a rare style in recent years that uses a pave setting to set diamonds, with a dignified and understated overall design. In antique jewelry, pave setting is still quite common, as shown in Figure 4-65, the earrings made by Van Cleef & Arpels between 1940-1950, where all the rubies are set using pave setting, giving a strong handmade feel, and the traces of carving add layers to the decoration. Another example is the bracelet from 1880 shown in Figure 4-66, where the geometrically arranged diamonds and pearls are all set using a pave setting, adding a sense of weight to the entire piece.
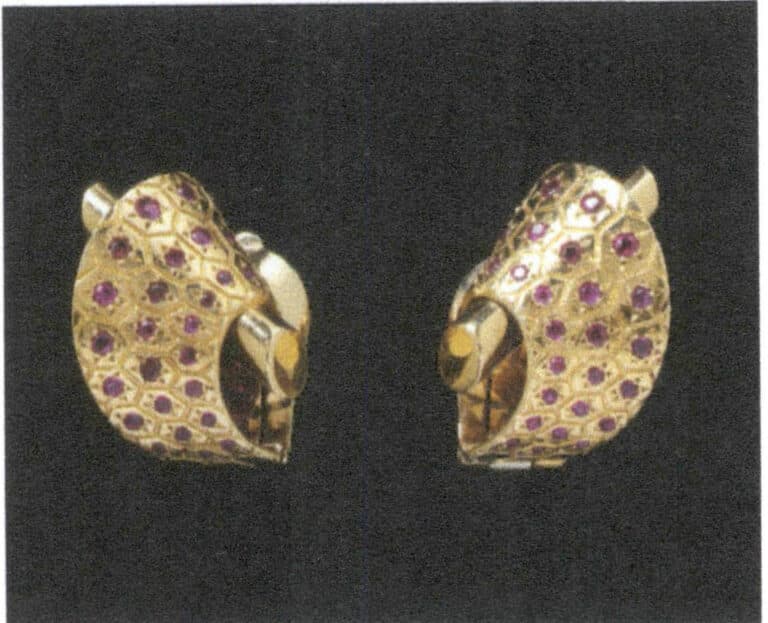
Figure 4-65 Van Cleef & Arpels earrings (V&A Museum Collection)
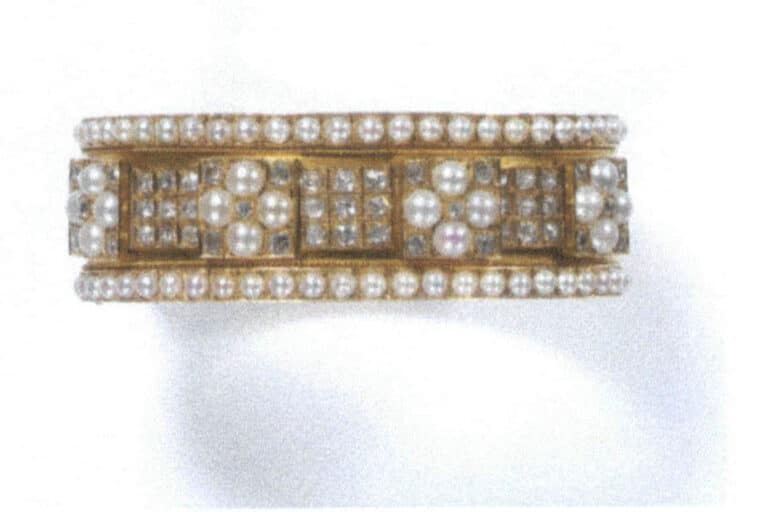
Figure 4-66 Bracelet (V&A Museum Collection)
In antique pocket watches and wristwatches, the pave setting is also very popular, so gold engraving, enamel, and pave settings are commonly used decorative techniques. Figure 4-67 shows that in this early 18th-century pocket watch collected by the V&A Museum in the UK, all the gemstones between the time scales are set using a bright square four-prong pave setting. As shown in Figure 4-68, the ring watch made in 1925, measuring 2.6 cm in length and 2.2 cm in width, has diamonds set beneath the outline drawn by the prong edges, making the shape appear small yet full. Today, in jewelry watch brands like Piaget, the use of pave setting is still quite prevalent. Although the production methods have become increasingly diverse, people remain enthusiastic about the fit between the craftsmanship quality and the precision mechanics of the watch, and the lasting charm and aesthetic value brought by the craftsmanship are also reasons why pave setting is often used in jewelry watches and high-end jewelry design.
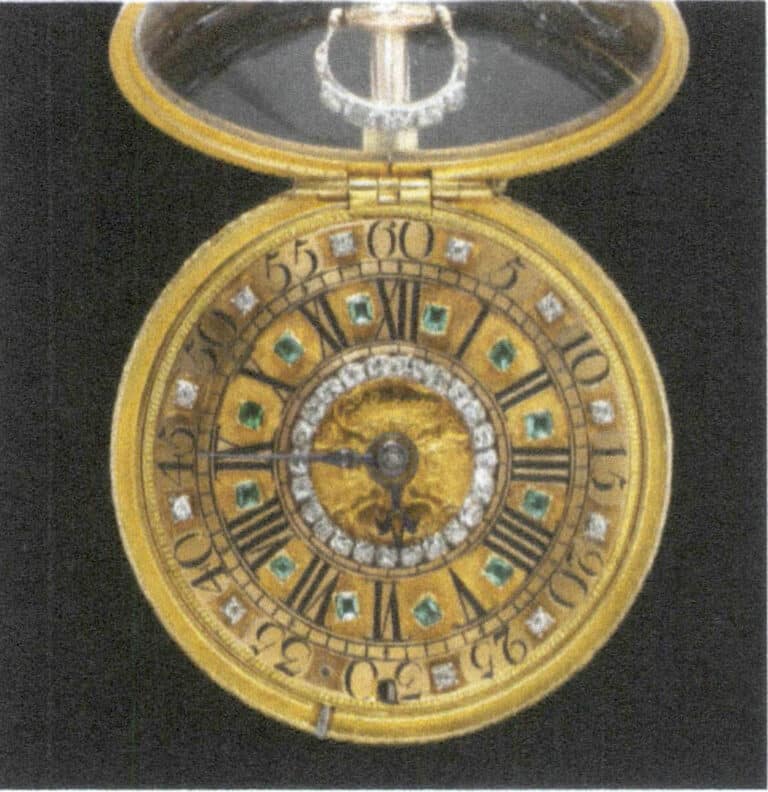
Figure 4-67 Pocket Watch (V&A Museum Collection)
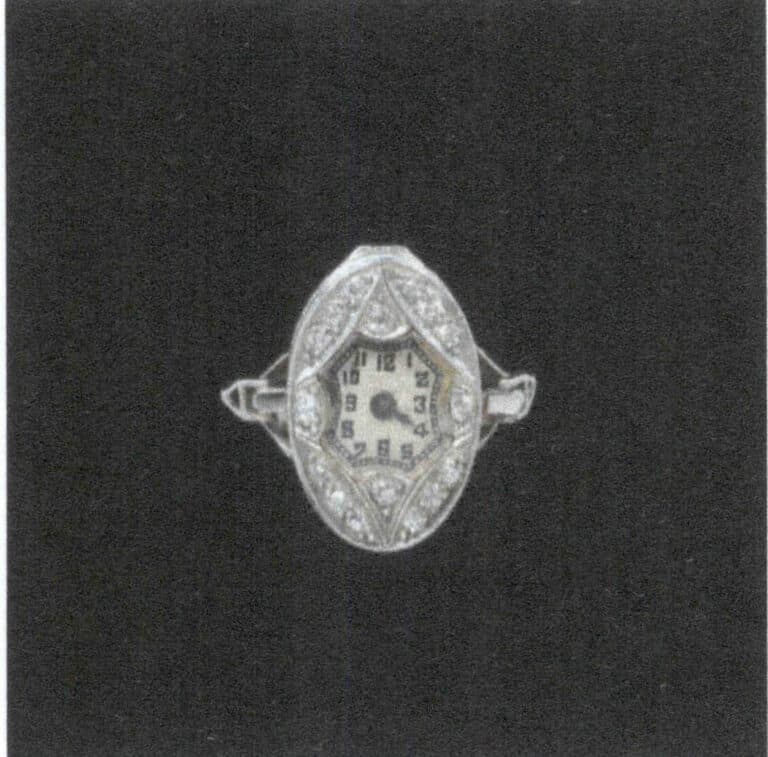
Figure 4-68 Ring Watch (V&A Museum Collection)
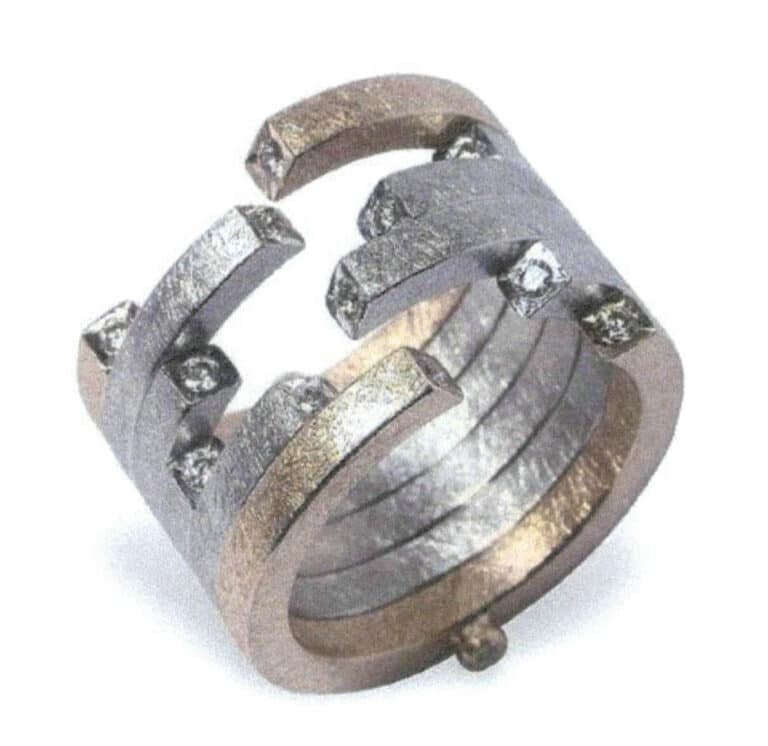
Pave setting is undoubtedly one of the more difficult techniques to master in a gem setting. Still, the workflow of pave setting also encompasses the fundamentals of most setting techniques, making it highly representative in the field. Although it often appears in high-end jewelry or in conjunction with pave setting for efficiency reasons, it is common to see designs that adhere to the classic pave setting style. Besides frequently appearing in wedding rings, it can also be found in some artistic jewelry or creative designs. For example, in the ring shown in Figure 4-69, the pave setting is well integrated into the shape of the ring. Therefore, whether the learning of the technique can be maximally effective often depends on how it is applied. Innovation in technique is about creating new production methods and finding new angles for applying the technique.
Section III Micro-pave Setting
Micro-pave setting is a type of setting that is similar to the pave setting. Micro-pave setting is a simplification of the pave setting based on the needs of its application and, therefore, differs from the pave setting in the specific methods of production, the use of tools, and the scope of application. Micro-pave setting is also widely used in the field of gemstone settings and has developed its own system.
1. Overview of Micro-pave Setting
In terms of technical skills, Micro-pave setting has many similarities with pave setting. The basic principle is to directly cut the metal surface into small prongs and then press and grind the prongs into smooth hemispheres to set the gemstones, as shown in Figure 5-1. The difference is that Micro-pave setting targets the large-scale setting of small-carat gemstones, usually at most 0.3 carats. The smaller size is not visible to the naked eye during the setting process, so the entire process must be conducted under a microscope. In Micro-pave setting, more often than not, excess metal is removed using a disc bur or teeth bur, and with the help of a cup bur, the prongs can slightly press down on the gemstones, resulting in higher efficiency compared to the pave setting. The advantage of Micro-pave setting lies in its aesthetic appeal: small gemstones arranged densely to create a brilliant effect. Additionally, its flexible arrangement provides more possibilities for design, with different arrangements leading to various styles of Micro-pave setting.
2. The Production Method of Micro-pave Setting
Common Micro-pave setting styles include pave setting, tiger prong setting, scraping setting, and snowflake setting, as shown in Figures 5-2 to 5-5. Pave setting is a relatively common style in Micro-pave setting, mainly following two patterns: horizontal parallel arrangement or horizontal staggered arrangement, creating a neat surface effect. Below, the pave setting’s horizontal parallel arrangement and horizontal staggered arrangement will be demonstrated separately. Although the two cases are similar, the specific operations in the production methods are presented in different ways, allowing beginners to find suitable tools for specific operations by combining the two cases.
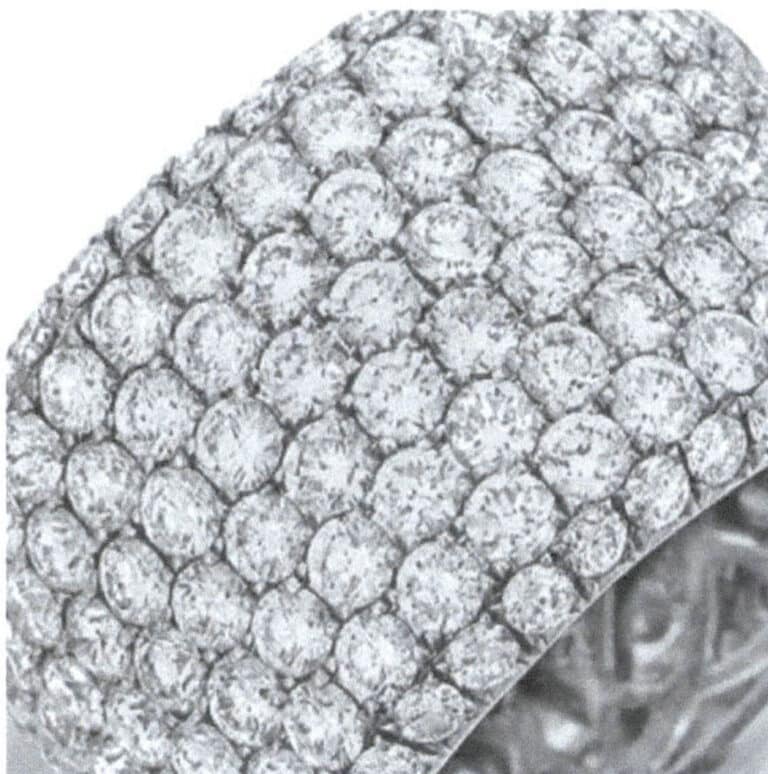
Figure 5-2 Pave Setting
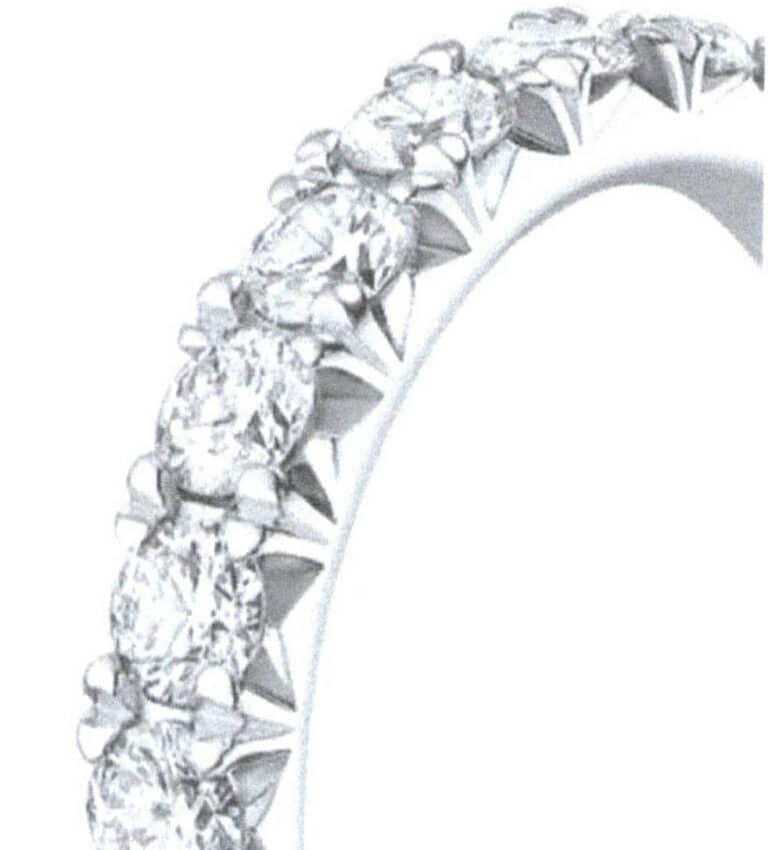
Figure 5-3 Tiger Prong Setting
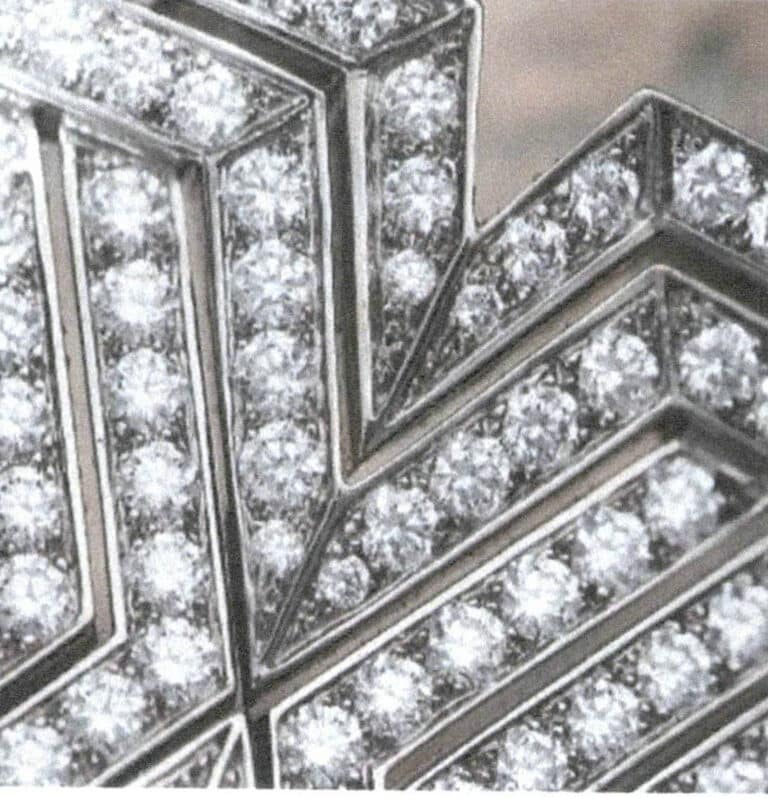
Figure 5-4 Scraping Setting
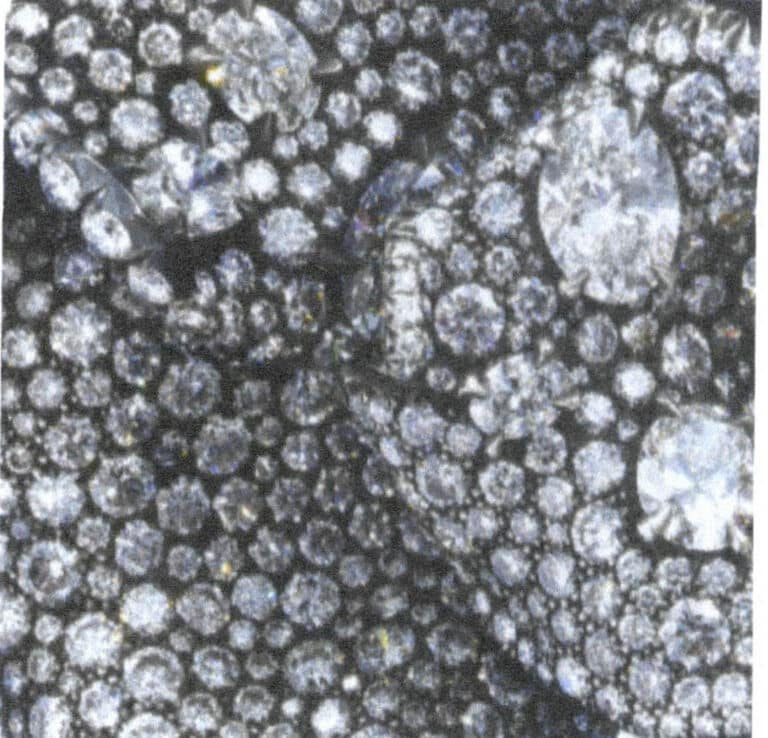
Figure 5-5 Snowflake Setting
2.1 How to Use a Microscope
The most important device in Micro-pave setting is the microscope. It is only possible to achieve a beautiful and standard Micro-pave setting with a microscope, and it may even be impossible to complete. In other setting methods, a microscope is also required if small gemstones or fine details are involved. The use of a Micro-pave setting microscope is not complicated and can be completed in three steps: first, adjust the height of the microscope, generally keeping a distance of about 15 cm between the objective lens and the setting target; second, adjust the eyepiece distance according to your interpupillary distance; finally, adjust the focus knob to set the focal length of the eyepiece. Once you can see the enlarged position of the stone setting position, you can start the Micro-pave setting work. The Micro-pave setting microscope is shown in Figure 5-6.
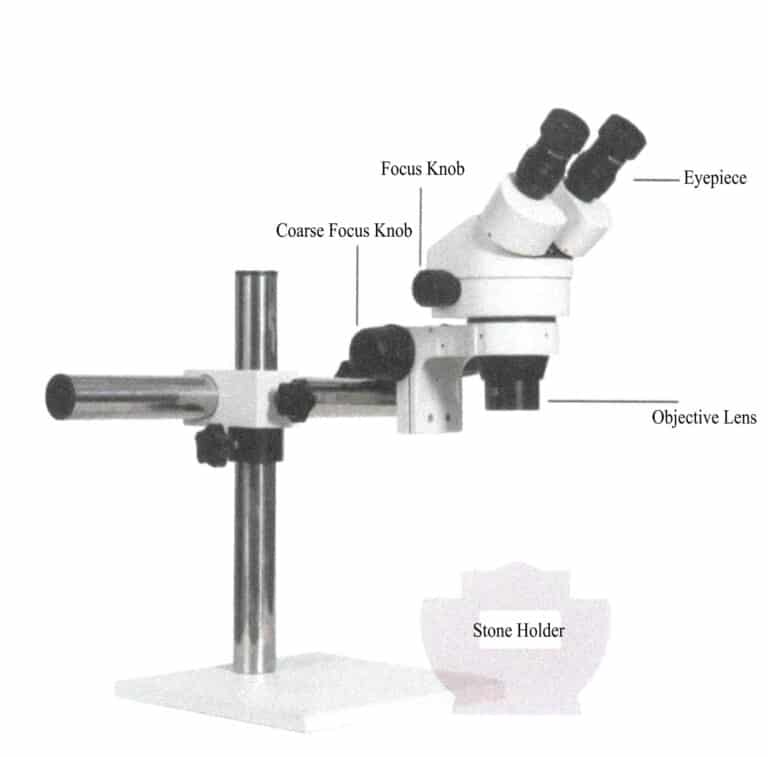
2.2 Steps for Making Horizontal and Parallel Pave Setting
(1) Malzeme PTAZMİNAT
In this case, a round brilliance cut stone with a diameter of 2 mm is used. Micro-pave setting gemstones are relatively small, unlike pinpoint or flush setting, which require a certain metal thickness. However, it is still important to emphasize that the metal thickness must be greater than the height of the gemstone. The material preparation is shown in Figure 5-7.
(2) Fixing the Metal
Fix the metal plate on the sealing wax ball, as shown in Figure 5-8.
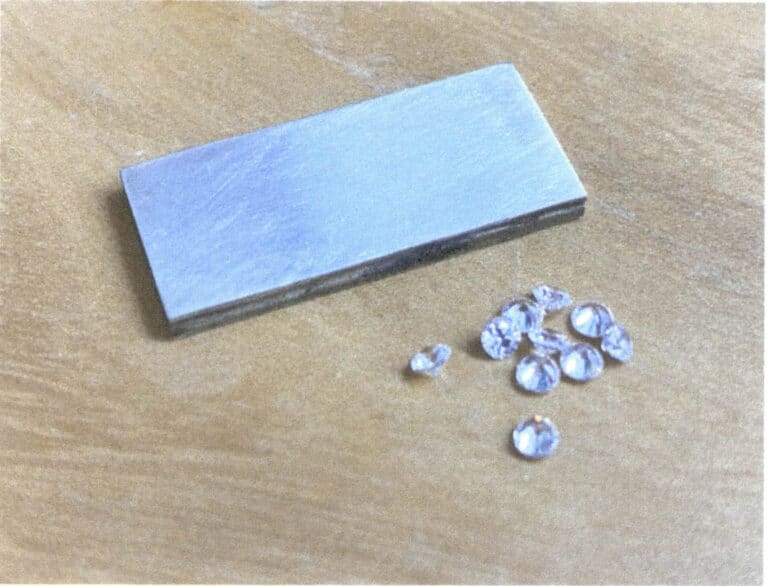
Figure 5-7 Material Preparation
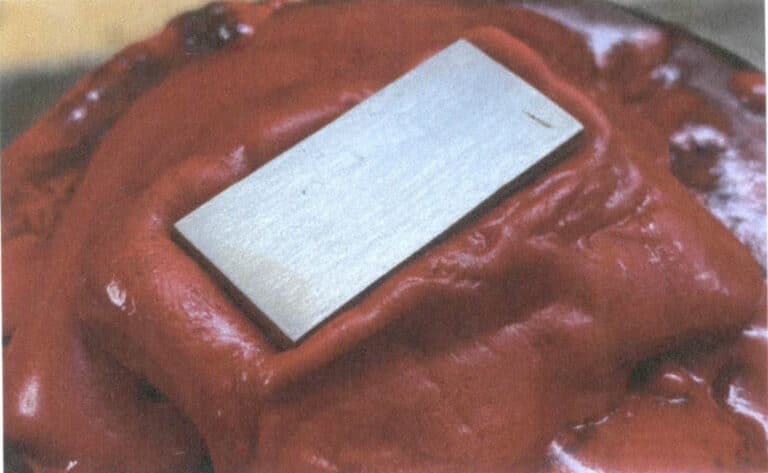
Figure 5-8 Applying Sealing Wax
(3) Marking Gemstone Ayar Positions
Nine gemstones with a diameter of 2 mm are arranged in a square on the metal, maintaining a gap of 0.15~0.25 mm between the gemstones. Use a wing divider or a cup bur with a diameter of 2 mm to mark the positions of the gemstones on the metal surface. Figure 5-9 shows the marked gemstone setting positions.
(4) Expanding Gemstone Ayar Positions
The method for expanding gemstone setting positions refers to the method for pinpoint setting , using a ball bur that matches the size of the gemstones to expand the positions. Use the ball bur to expand the holes in ascending order of size, as shown in Figure 5-10. Since the gemstones are smaller in Micro-pave setting, it is acceptable not to pierce through the holes; directly using the ball bur to expand the holes is also fine. In this case, the method of not piercing holes is used; if holes are to be pierced, they need to be done before expanding the holes.
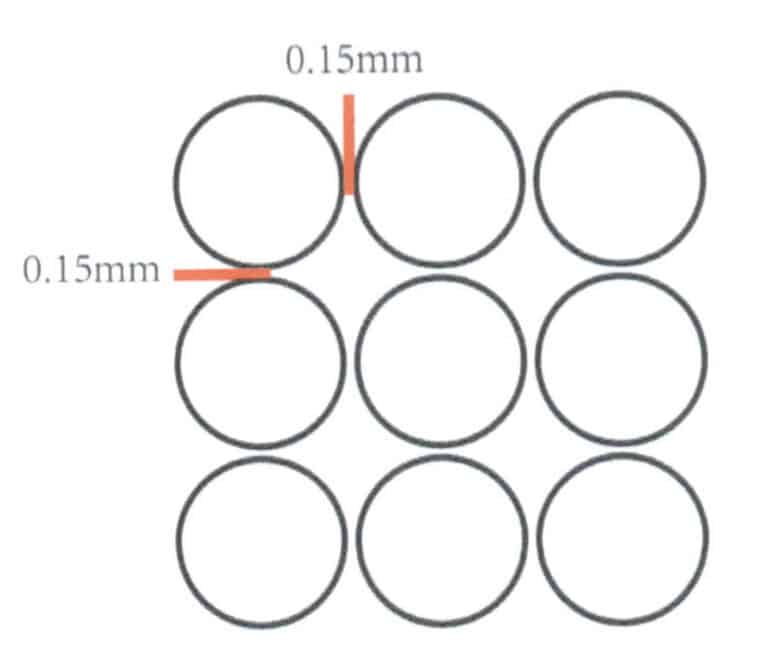
Figure 5-9 Marking Gemstone Setting Positions
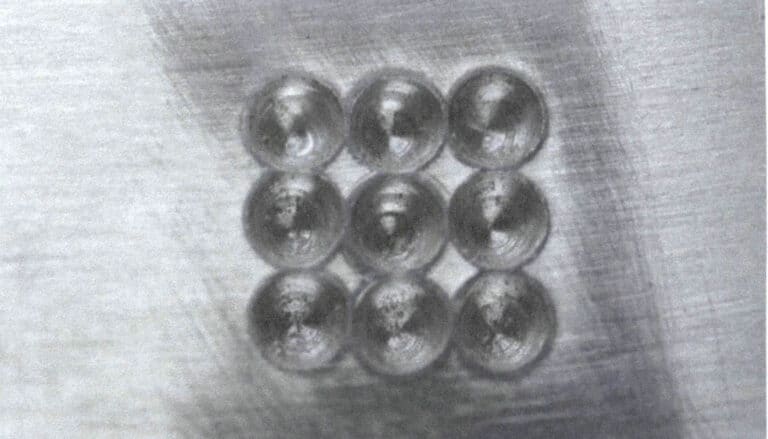
Figure 5-10 Expanding Holes
(5) Testing the Setting Mount
After reaming, put the stone into the stone position to test the size of the stone setting position; the standard is that the top surface of the stone is flush with the metal, or at most one-quarter of the height of the pavilion is exposed, as shown in Figure 5-11.
(6) Preparing Tools
In addition to the microscope being an essential instrument, the disc bur is also very important, and it is necessary to choose the thinnest disc bur possible. If you do not have a sufficiently thin disc bur, you can adjust and modify it as needed, as shown in Figure 5-12. The blade head required for Micro-pave setting should also be smaller. As for whether the thickness of the disc bur is appropriate, you can judge by placing the disc bur on the stone position and making a visual comparison.
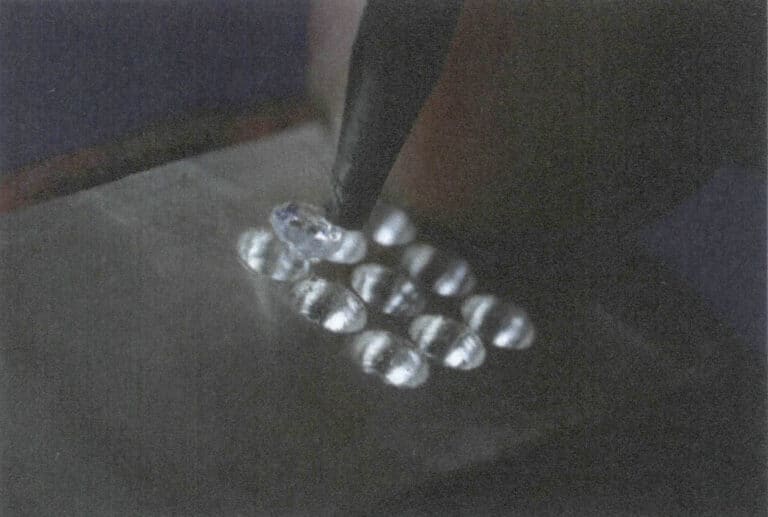
Figure 5-11 Testing the Setting Mount
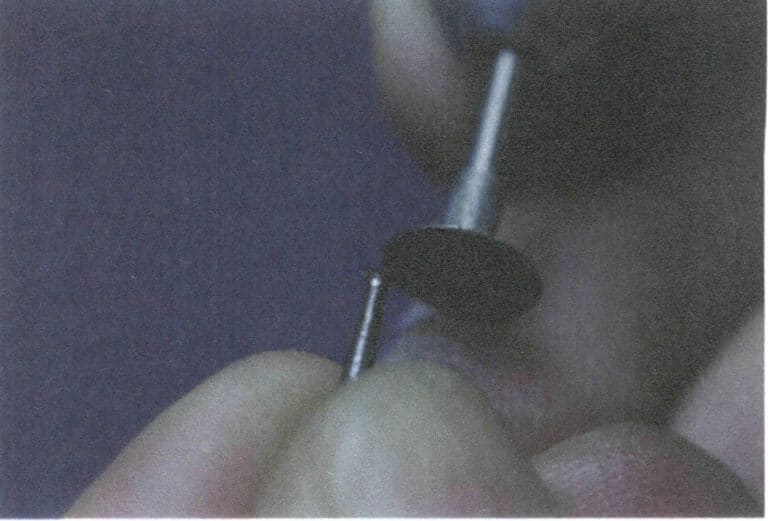
Figure 5-12 Modified to Thin Disc Bur
(7) Engraving Lines
Use the prepared thin disc bur to engrave lines under the microscope. Engraving lines refers to using the disc bur to create groove lines on the metal surface. This process is similar to a simplified pinpoint setting scraping operation. The order of engraving lines is as follows: first, engraving lines around the outline of the stone setting position, then make a critical line at the critical points between each row of stone setting positions, and finally, remove the metal at the divergent positions of the two stone setting positions, as shown in Figures 5-13 to 5-15.
(8) Scraping Grooves
Use a graver to deepen and level the vehicle’s shallow trench, ensuring that each trench’s depth is consistent, as shown in Figure 5-16.
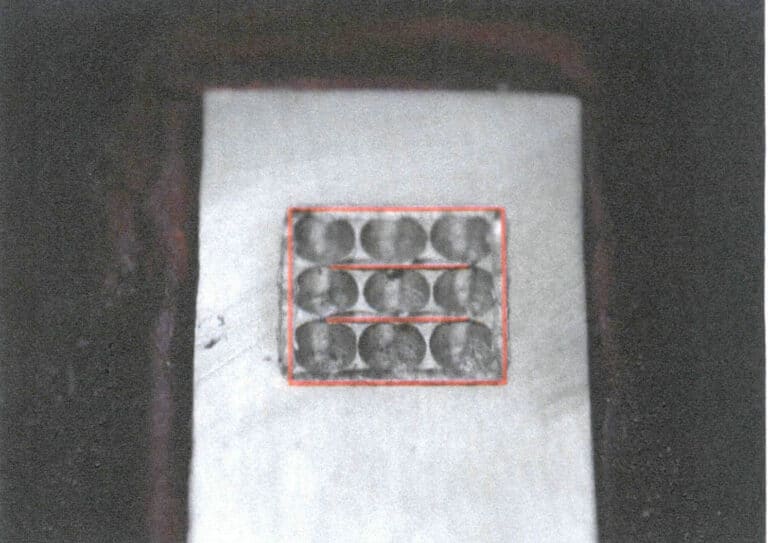
Figure 5-13 Position of Outline of the Engraving Line and Critical Line
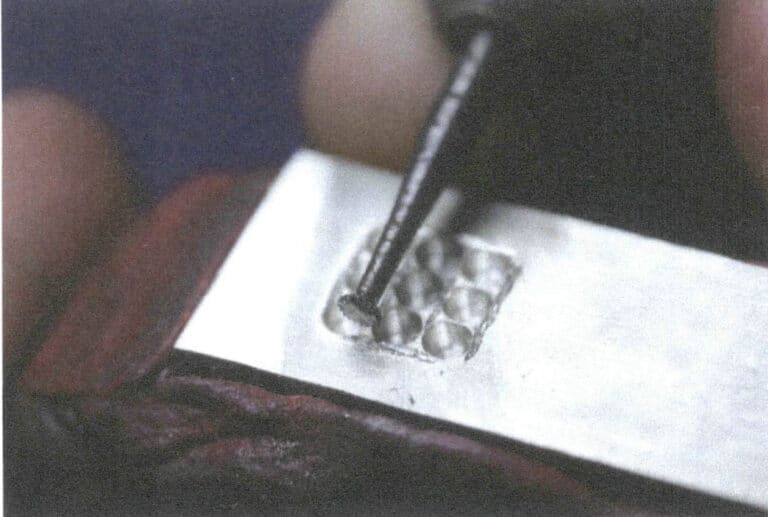
Figure 5-14 Outline of the Engraving Line and Critical Line
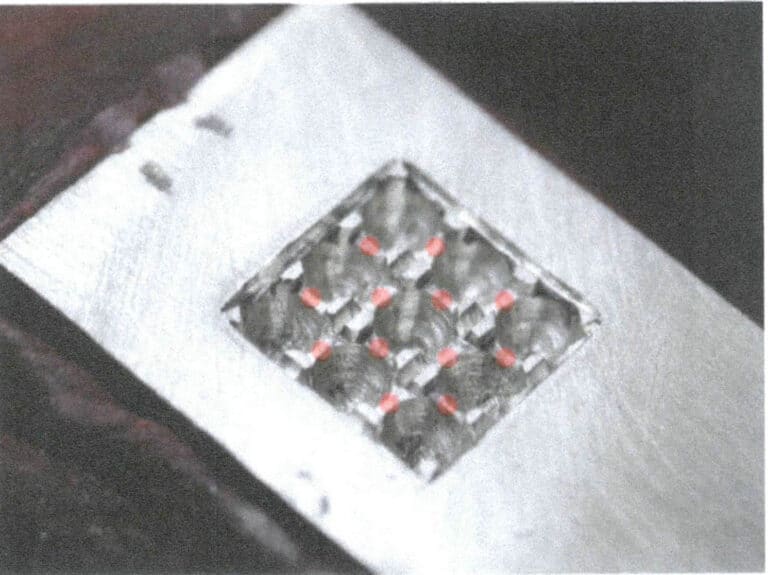
Figure 5-15 Engraving the metal at the position where the stone setting positions are tangent (marked in red)
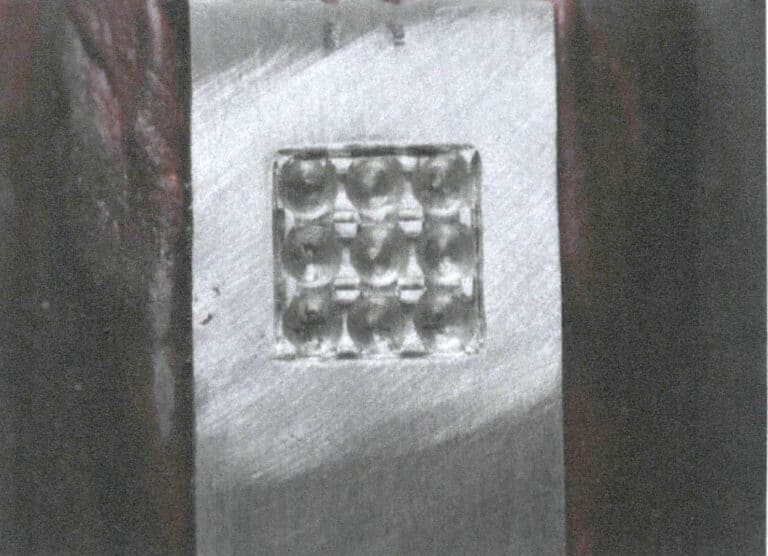
Figure 5-16 Stone setting position after trenching
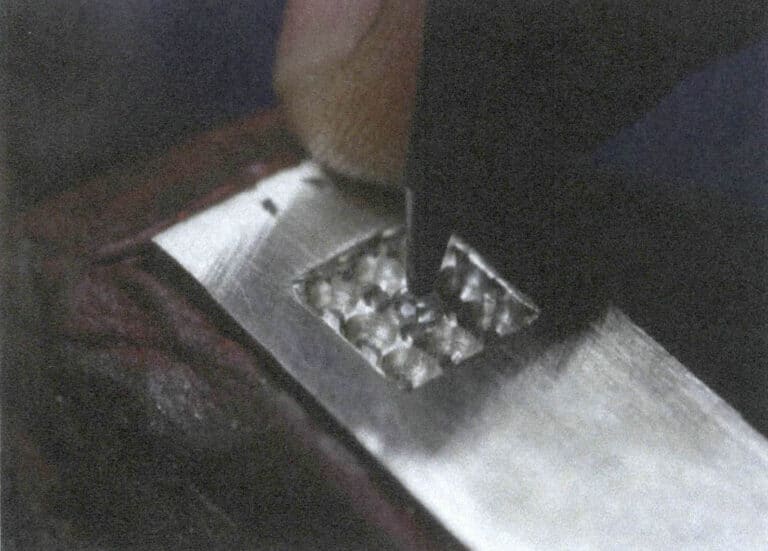
(9) Placing the Stone
Place the gem into the stone position, generally starting from the middle, and level the top surface of the gem after placing the stone, as shown in Figure 5-17.
(10) Splitting Prongs
At the prong position left by engraving lines, use a flat-headed graver and a slotted cross to intersect, splitting it in half from the middle. The middle prong is divided into four petals, and the surrounding prongs is divided into two. Splitting prongs is also the process of pressing the prongs towards the gem, as shown in Figures 5-18 and 5-19. The red line shown in Figure 5-20 indicates the position of the graver splitting prongs. Figure 5-21 is the appearance after the prongs are split, the gem has been initially set.
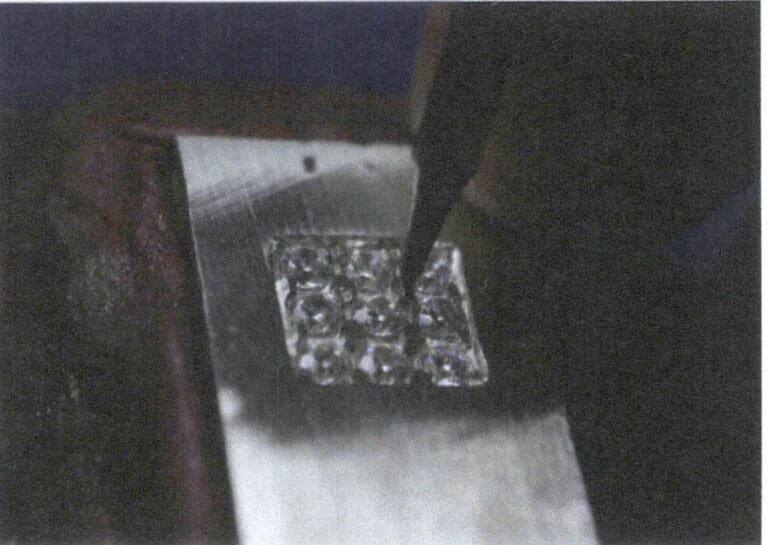
Figure 5-18 Pushing prongs

Figure 5-19 Graver splitting prongs and pressing metal
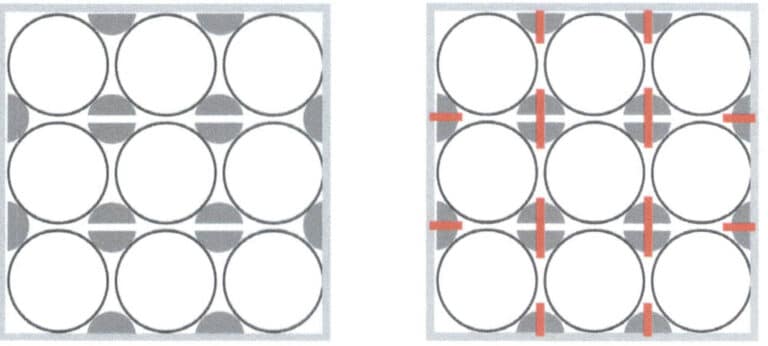
Figure 5-20 Schematic diagram before and after splitting prongs (the red line indicates the position of the split prongs )
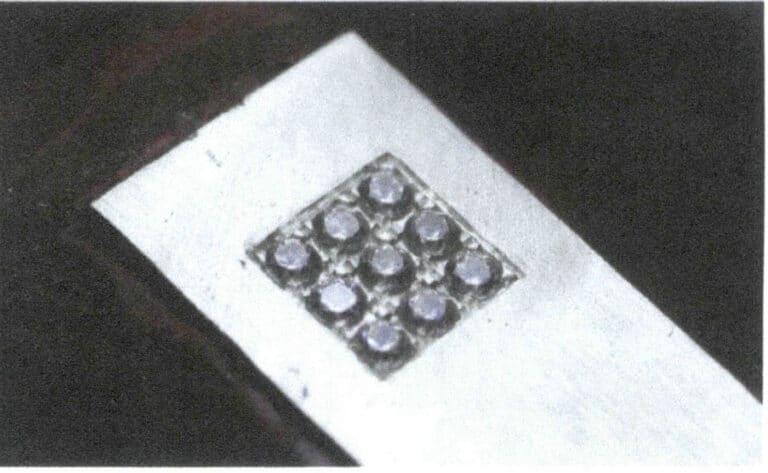
Figure 5-21 Completed prongs splitting
(11) Beading
Choose the appropriate cup bur for beading. Beading is the process of re-compressing the gemstone and ultimately embedding it, so during the process of rotating the cup bur, it is necessary to control the metal prong to press towards the center of the gemstone, as shown in Figure 5-22.
(12) Completing ve Horizontal and Parallel Arrangement of Pave Ayarı
A graver is used to scrape off the excess prong material after the beading, and the edges around the metal plate are smoothed to ensure the overall effect is clean and beautiful, as shown in Figure 5-23.
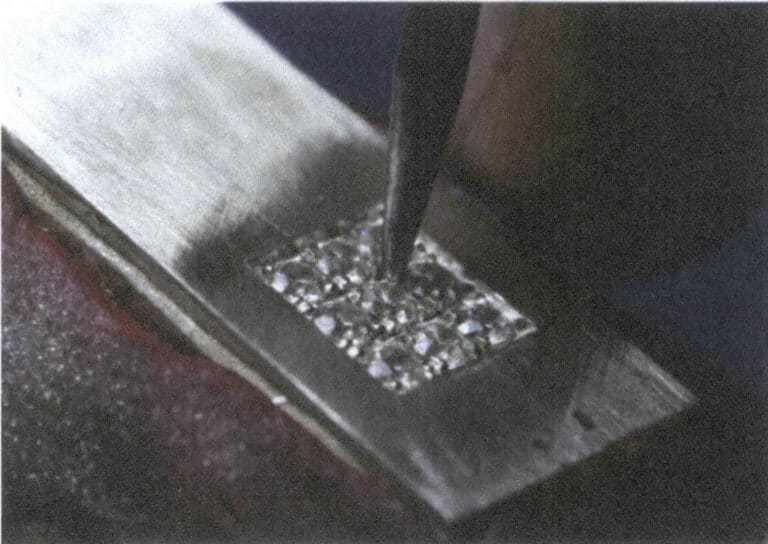
Figure 5-22 Beading
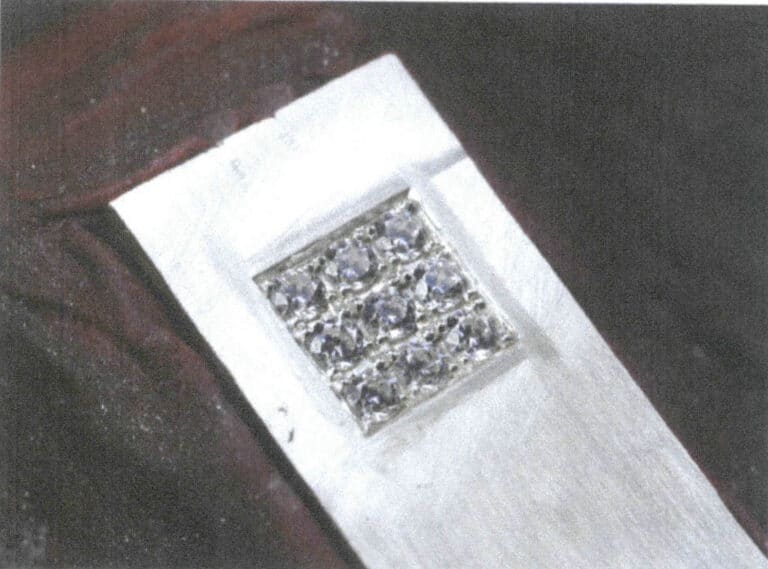
Figure 5-23 Completing the Horizontal and Parallel Arrangement of Pave Setting
2.3 Steps for Making a Staggered Arrangement of Pave Setting in a Horizontal Row
(1) Preparing Materials and Fixing ve M
In this case, a round brilliance cut gemstone with a diameter of 1.5 mm is used, arranged in a staggered triangular pattern. The metal thickness must still be greater than the set height; in this case, a 1.5 mm thick purple copper plate is used, and then the metal plate is fixed onto the stone setting. The prepared metal and gemstone are shown in Figure 5-24.
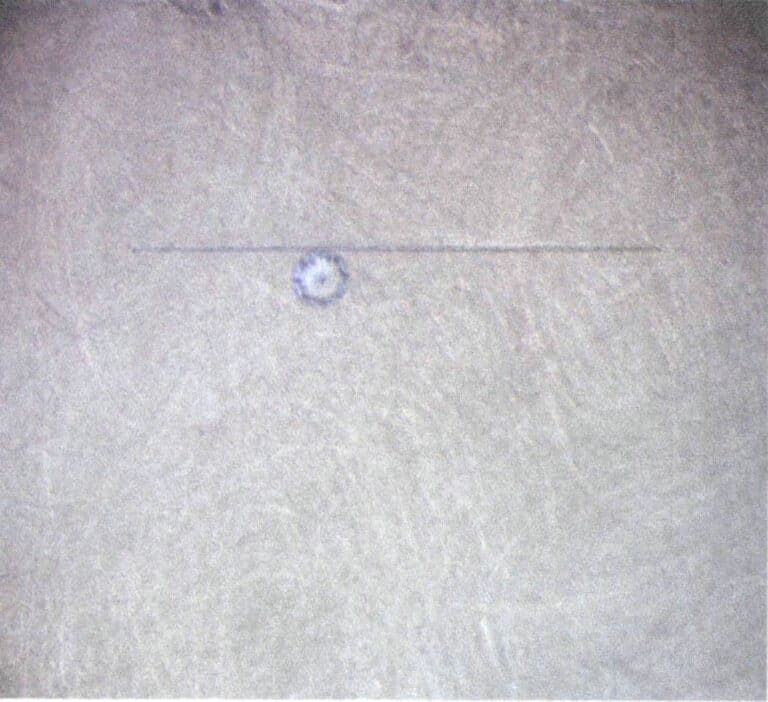
(2) Marking Gemstone Ayar Positions
Use a cup bur with a diameter of 1.5 mm to mark the positions of the gemstones on the metal surface, arranging the gemstones in a triangular formation with a spacing between 0.15~0.25 mm, as shown in Figures 5-25 and 5-26.
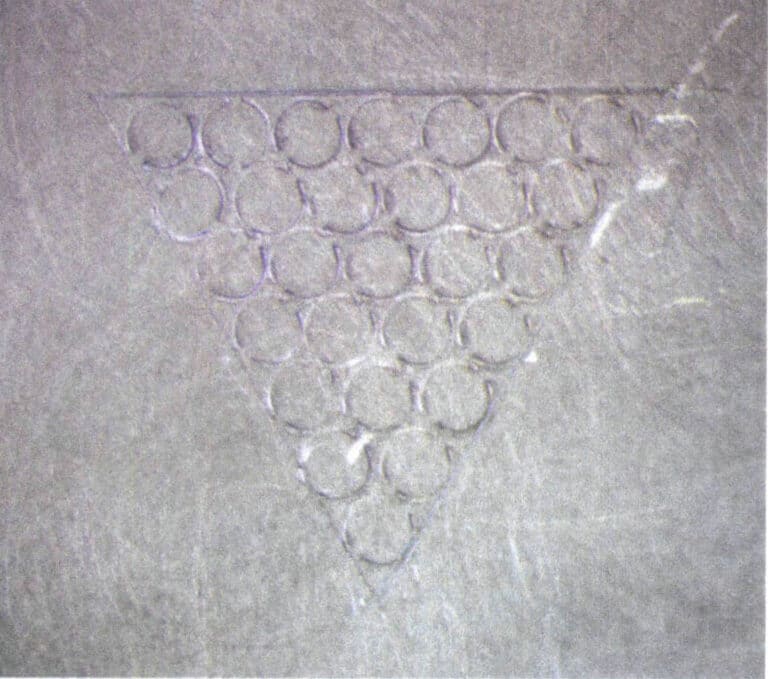
Figure 5-25 Staggered Configuration of Gemstones
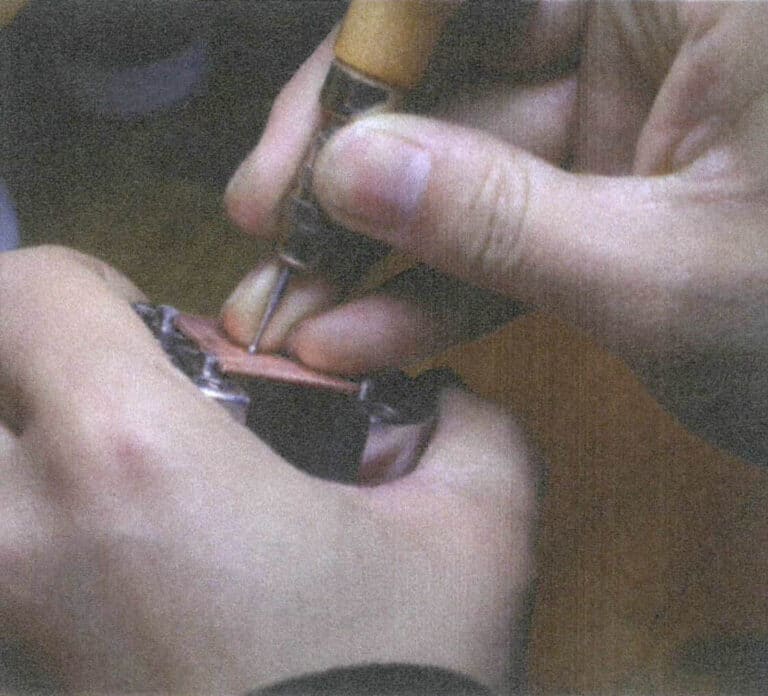
Figure 5-26 Pressing the Marked Stone Setting Position with a Cup Bur
(3) Sondaj
This case uses the method of drilling followed by reaming to create the stone positions. First, use a ball bur of about 0.7 mm to create a groove at each center point, then drill holes with a drill bur of about 0.7 mm, as shown in Figures 5-27 and 5-28. The purpose of creating grooves with the ball bur is to ensure accurate drilling and avoid misaligning the holes.
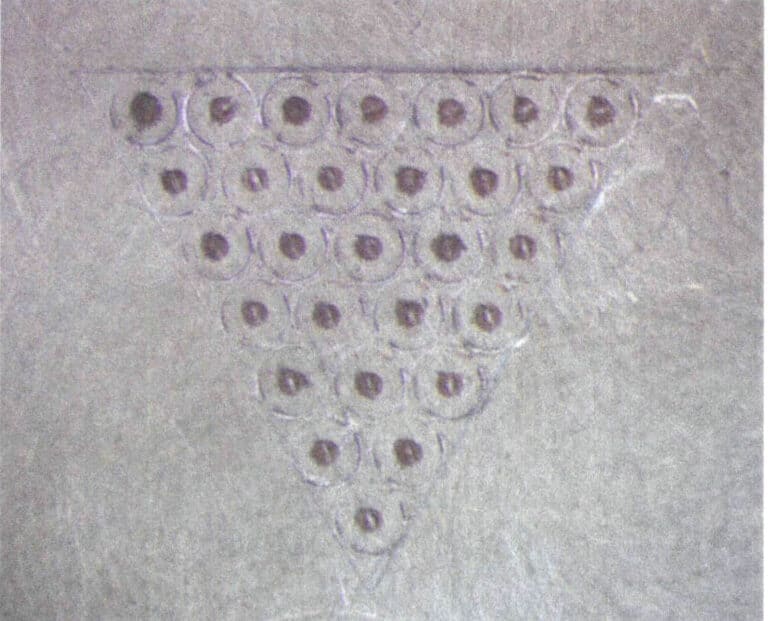
Figure 5-27 Creating grooves with a ball bur
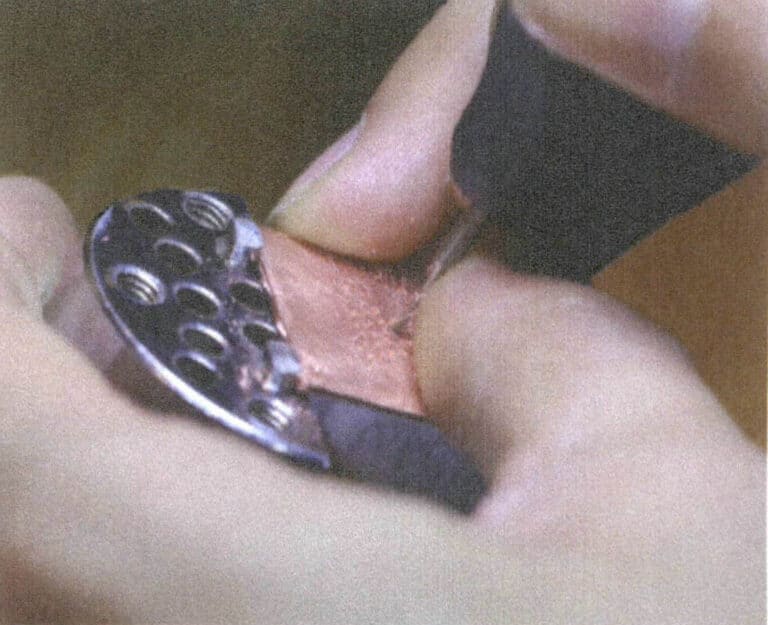
Figure 5-28 Drilling
(4) Scraping Lines
A pointed shovel scrapes the edge line along the triangular edge. This step can also be done with a disc bur, as shown in Figures 5-29 to 5-31.
(5) Enlarging Holes
Enlarge the hole with a ball bur; the ball bur size in the order of small to large gradually expands the hole to a diameter of 1.5mm, as shown in Figure 5-32.
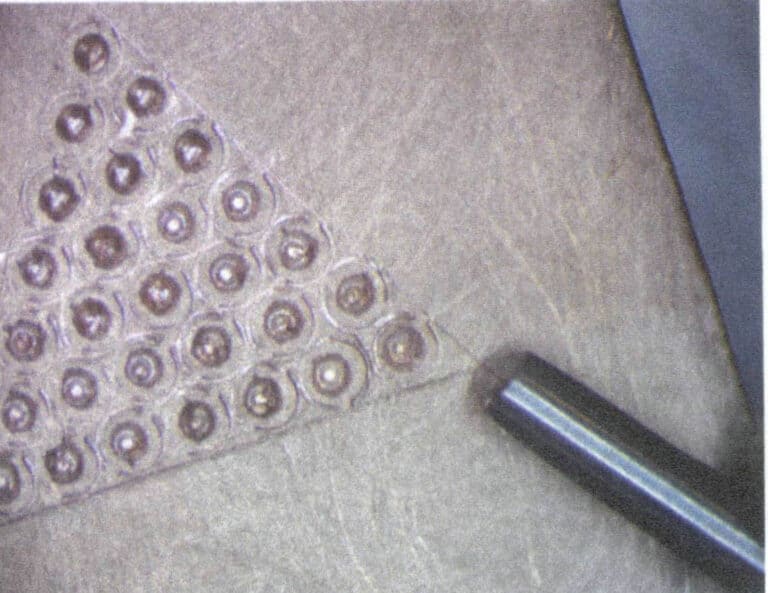
Figure 5-29 Pointed Shovel Scraping Line
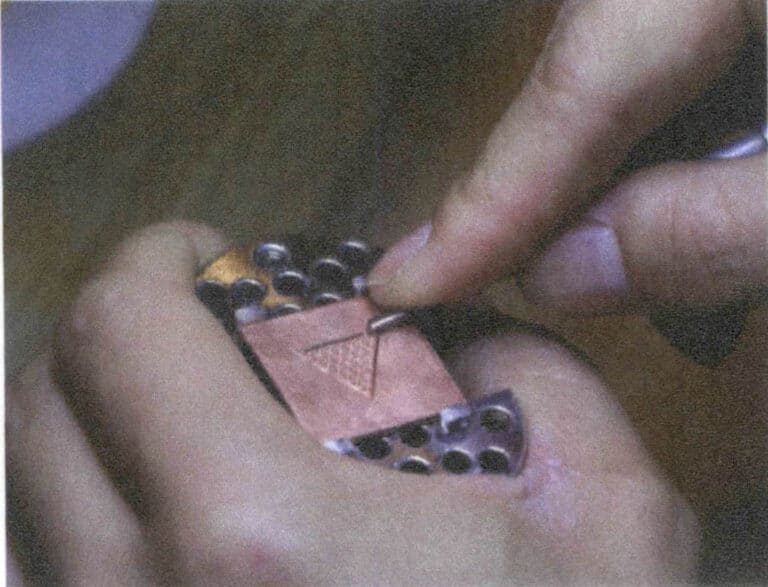
Figure 5-30 Scraping Edge Line
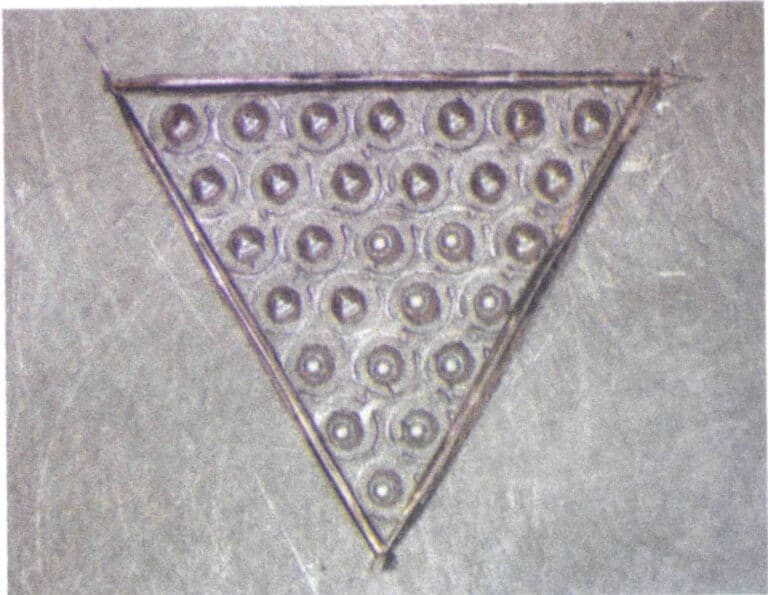
Figure 5-31 Completed Scraping Edge Line
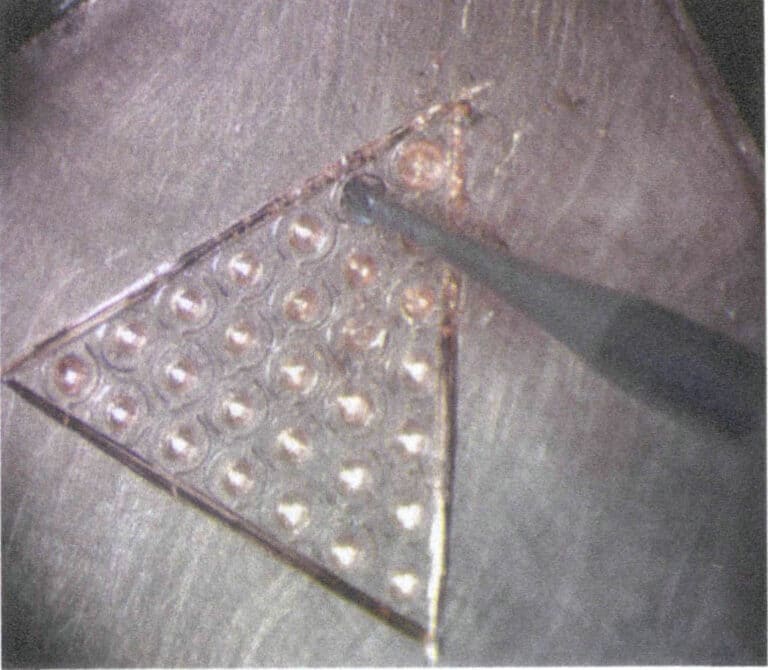
Figure 5-32 Enlarging Holes
(6) Testing the Stone Mount
After enlarging the hole, put the gemstone into the stone setting position to test the size of the stone setting mount, the standard for the top surface of the gemstone and the metal flush, or at most a quarter of the height of the pavilion, as shown in Figure 5-33.
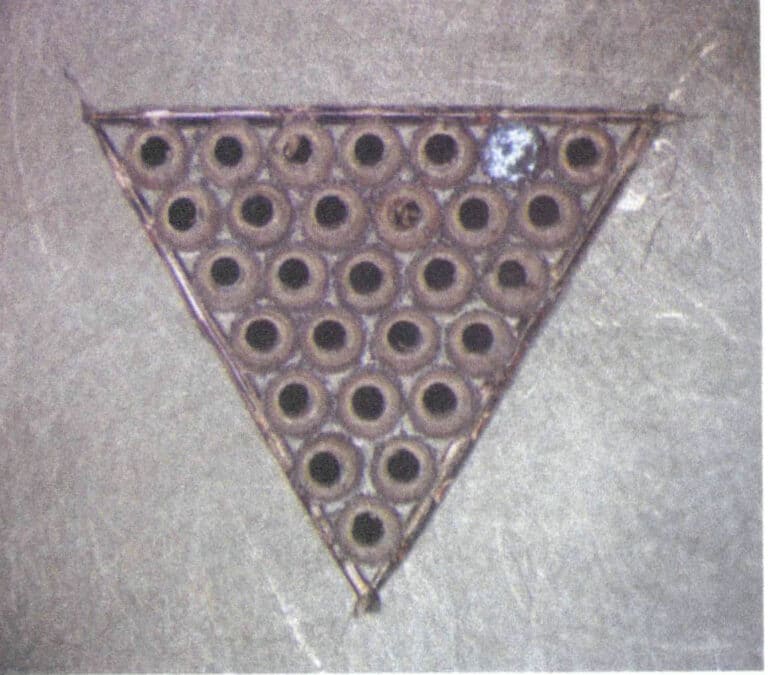
(7) Scraping the Edge Grooves
Use a flat-headed graver to remove the metal from the edge of the jewel at the point where it is tangent to the edge line of the triangle, as shown in Figures 5-34 and 5-35.
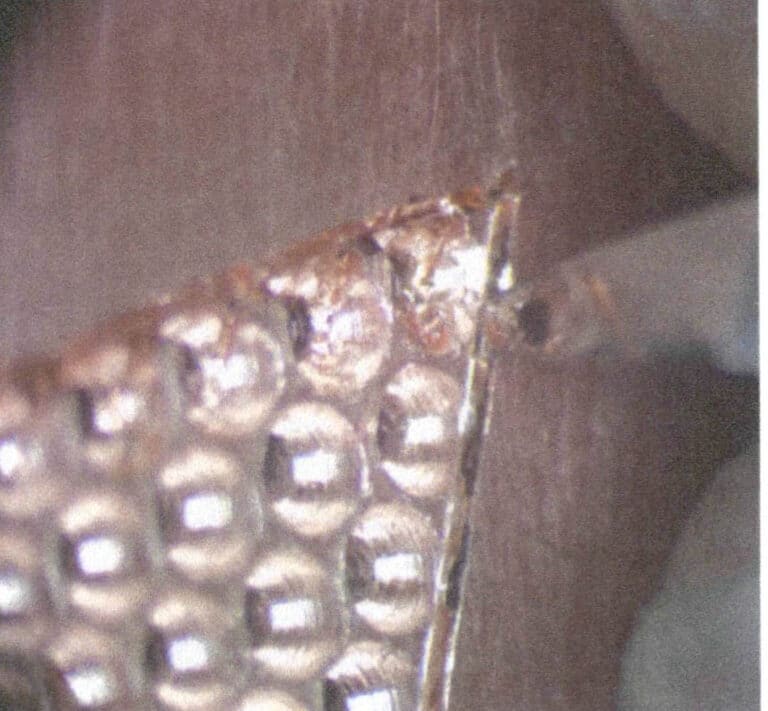
Figure 5-34 Scraping the Edge Grooves
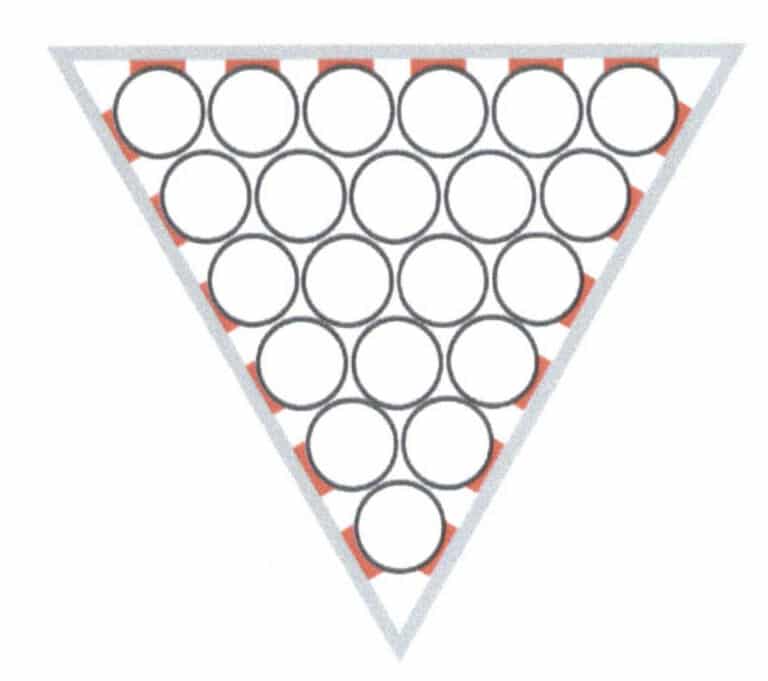
Figure 5-35 Schematic of Scraping the Edge Grooves (red indicates the removed part)
(8) Opening Middle Grooves
A teeth bur can create a groove between the treasures; a wheel bur can also be used here, as shown in Figures 5-36 to 5-39.
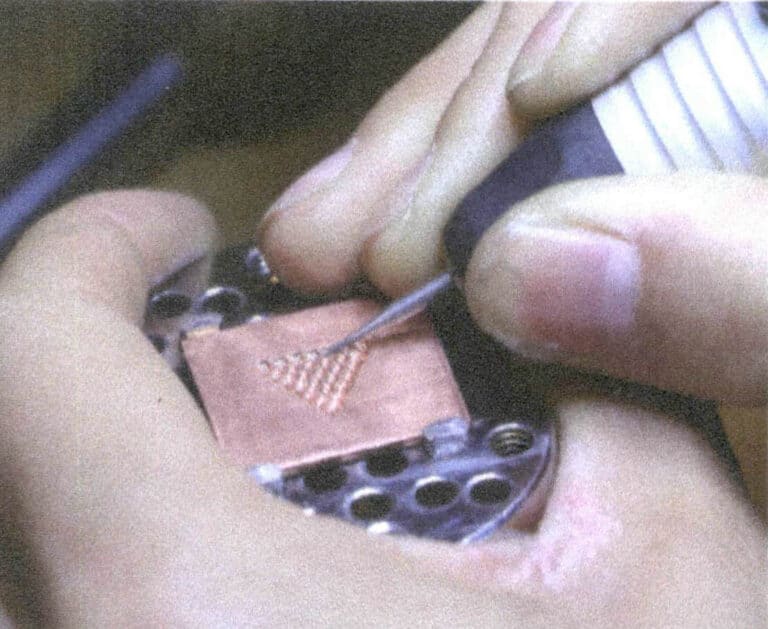
Figure 5-36 Teeth Needle grooving (1)
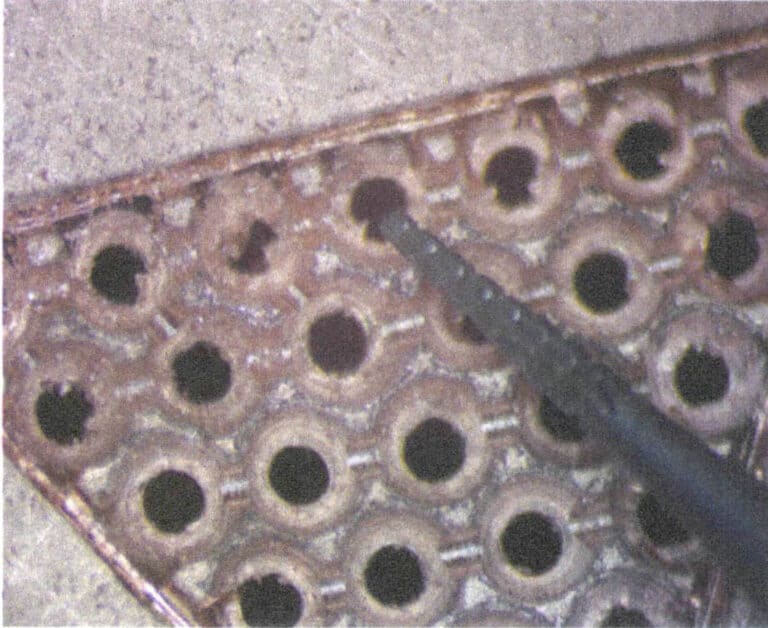
Figure 5-37 Teeth Needle Grooving (2)
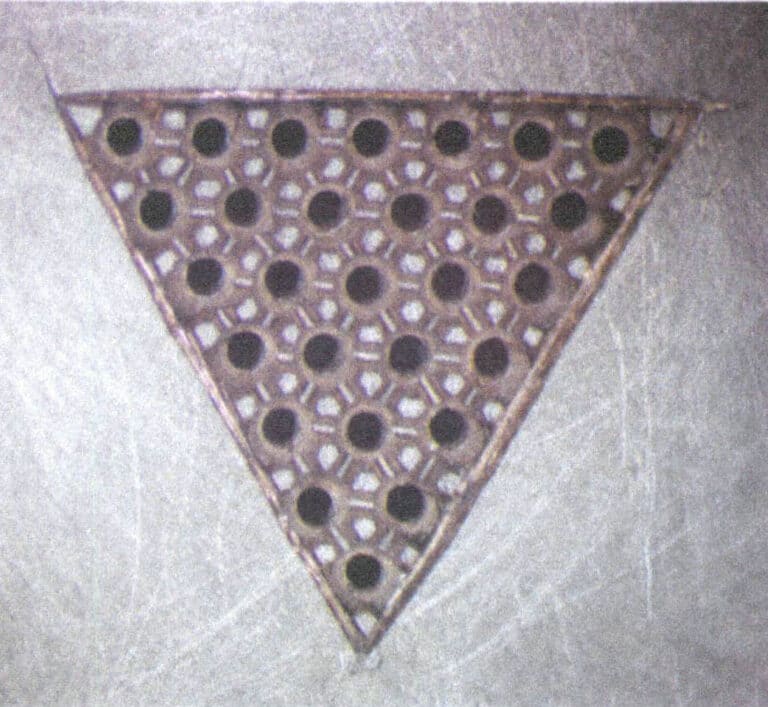
Figure 5-38 Grooving Completed (1)
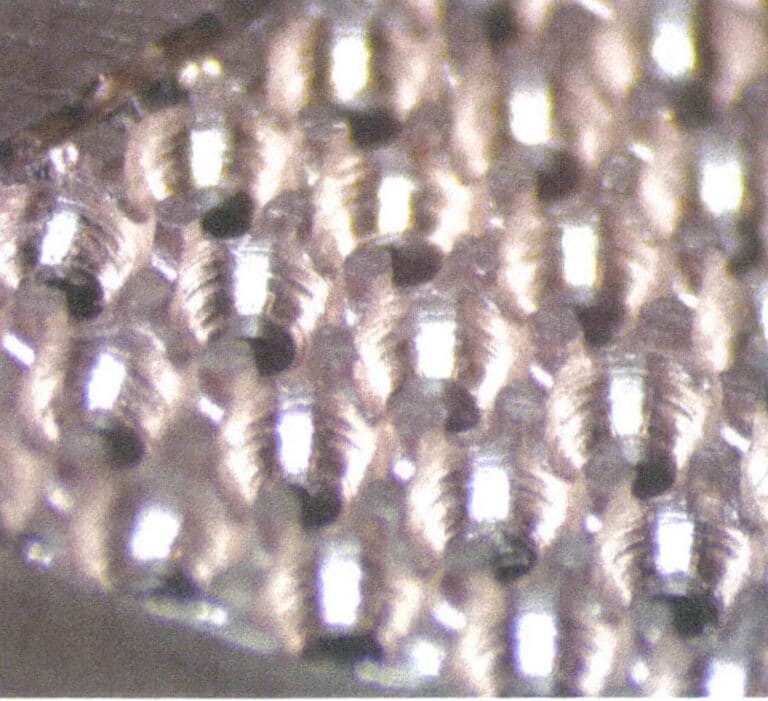
Figure 5-39 Grooving Completed (2)
(9) Placing the Stone
First, place a row of stones unevenly into the stone position, then after beading the stones, place the next row, as shown in Figure 5-40
(10) Beading
After placing a row of gems properly, use the cup bur to set the inner row of prongs, completing each row of beading in order. Then, attach the edge prongs with suction beads, as shown in Figure 5-41. The compression relationship of the prongs is illustrated in Figure 5-42. In this case, except for the three prongs, each prong compresses two gems. The compression relationship of the prongs depends on the arrangement; if the arrangement is tighter, a prong in the middle can compress three gems simultaneously; if the arrangement is looser, there may be empty prongs that do not compress gems and are used purely for decoration.
(11) Completing Horizontal Staggered Arrangement of Pave Setting
The completed horizontal staggered arrangement of pave setting is shown in Figure 5-43.
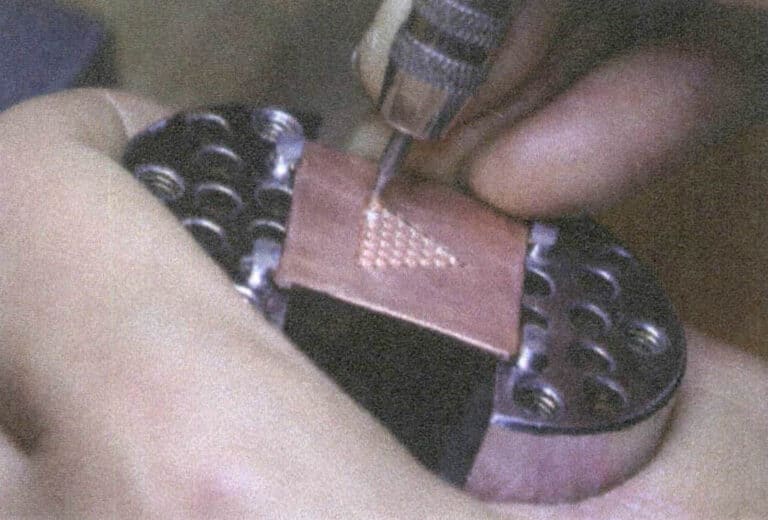
Figure 5-40 Placing the Stone
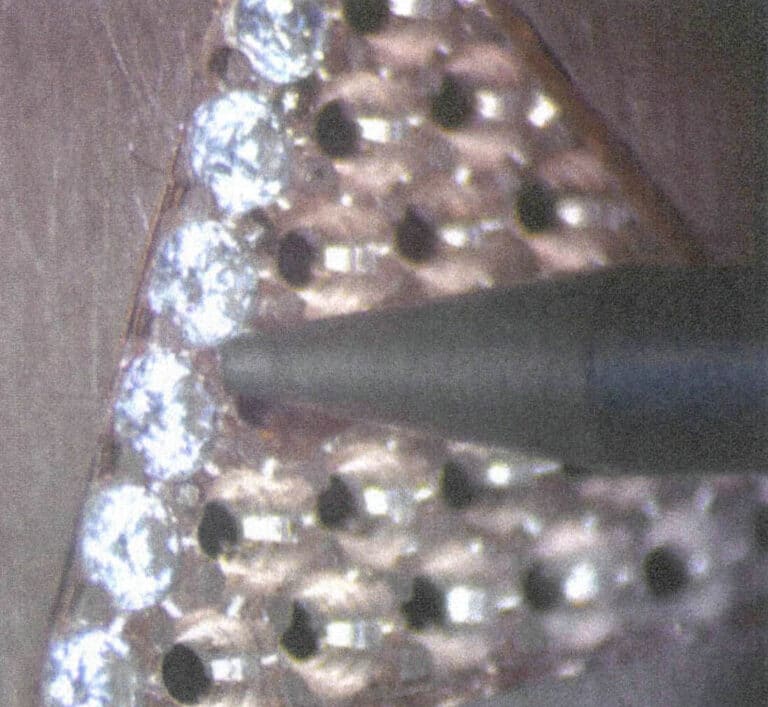
Figure 5-41 Beading
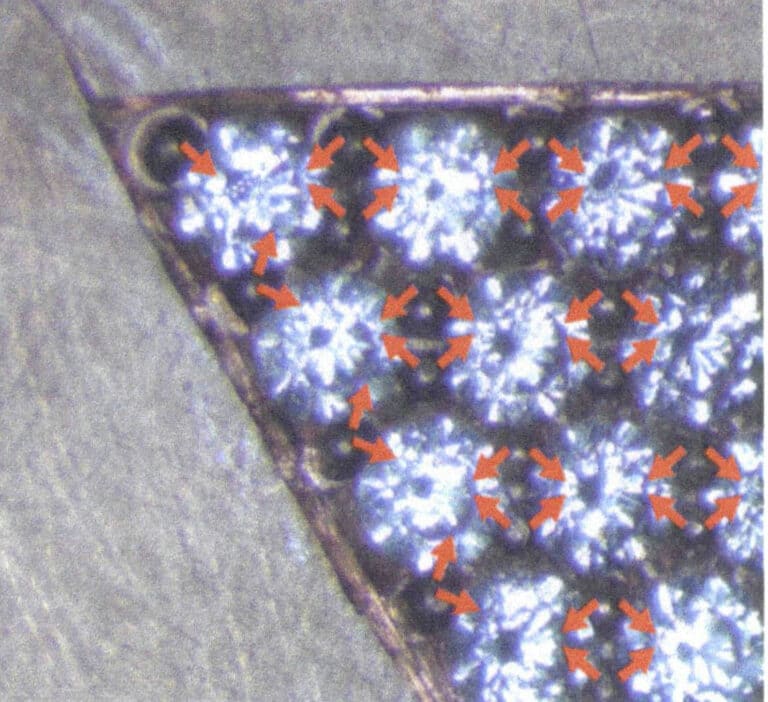
Figure 5-42 Compression relationship of the prongs
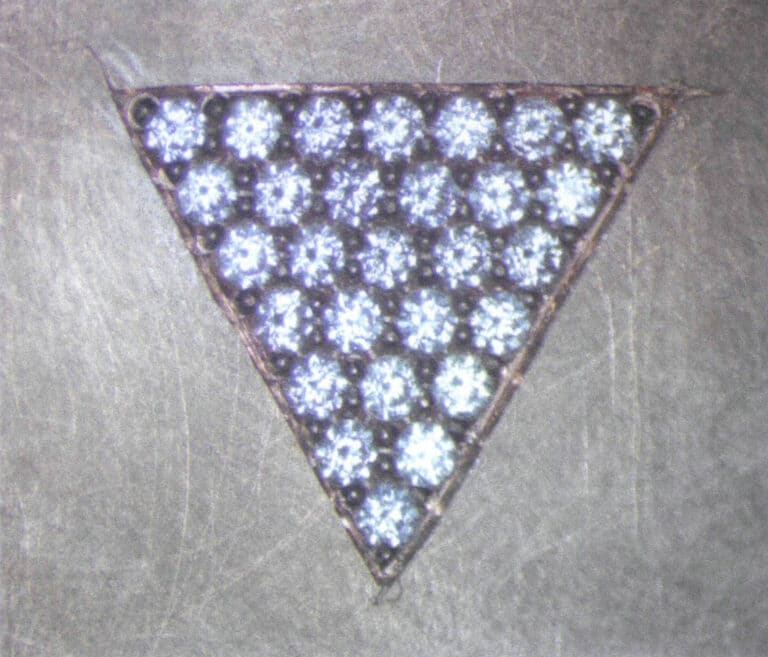
Figure 5-43 Completing Horizontal Staggered Arrangement of Pave Setting
3. The Application of Micro-pave Setting in Jewelry Design
The principles of Micro-pave setting and pinpoint setting are fundamentally similar, with different techniques used, primarily depending on the gemstone’s size. At the same time, the gemstone’s size also determines the differences in visual effect orientation. In the pinpoint setting, the metal prongs are complementary to the gemstone and are part of the setting. In contrast, Micro-pave setting is designed to arrange smaller-carat gemstones together to create a large area of brilliance with a generally smaller total weight of gemstones. Therefore, in many cases, both setting methods appear simultaneously or are in a state that is difficult to clearly distinguish. The platinum diamond crown shown in Figure 5-44 features an interweaving of Micro-pave setting and scraping setting.
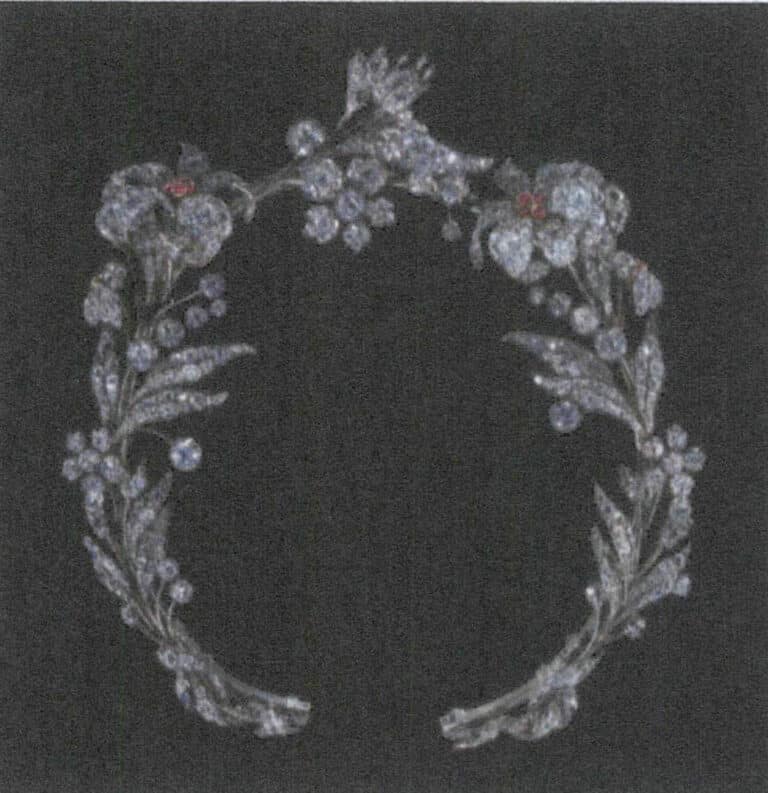
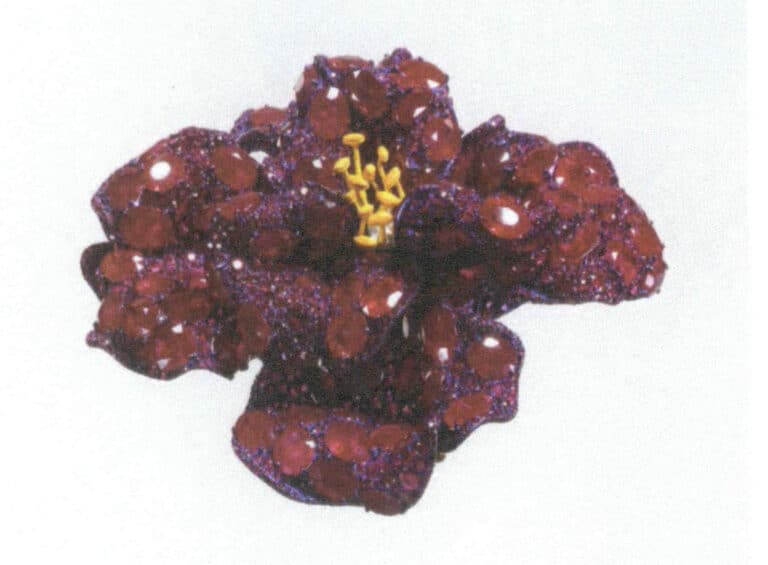
Taking the “Vine Garden Series” by jewelry artist Xiong Chen as an example, as shown in Figures 5-45 and 5-46, the two pieces “Vine Garden – Leaf Stream” and “Vine Garden – Bloom” present one as full and dignified, and the other as lively and free. Both use emerald and diamond as materials, but from the main stone’s cut to the surrounding Micro-pave setting’s design, they exhibit completely different artistic concepts under the creator’s varied techniques. While the materials themselves indeed limit the creative language of jewelry design, it is precisely through continuous innovation and breakthroughs within these limited materials and techniques that jewelry has consistently radiated charm across different eras.
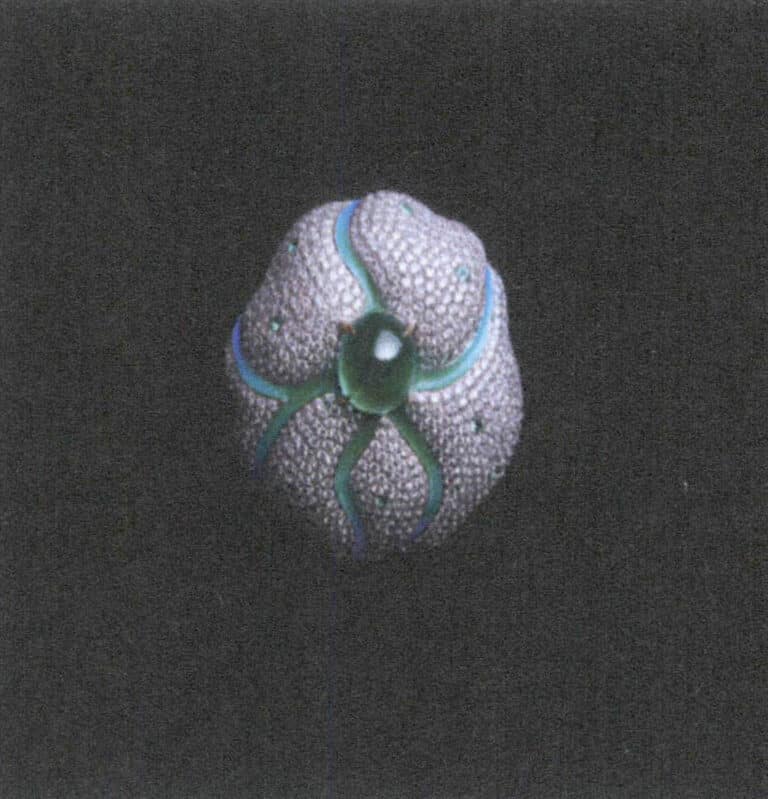
Figure 5-45 Jewelry artist Xiong Chen's work "Vine Garden - Leaf Stream"
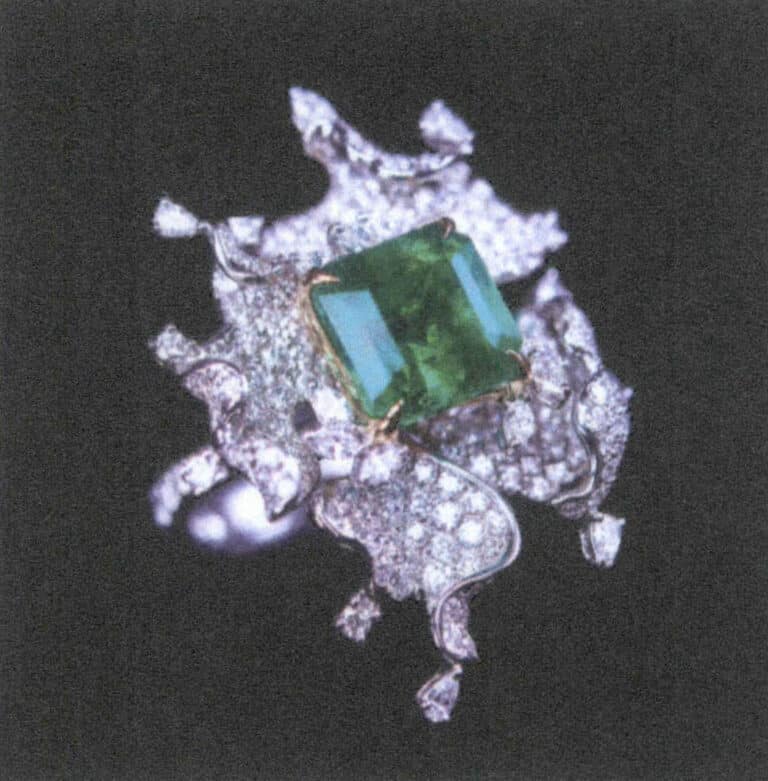
Figure 5-46 Jewelry artist Xiong Chen's work "Vine Garden - Bloom"
Figure 5-47 shows a platinum diamond brooch designed and made between 1930 and 1940, which is part of the collection at the V&A Museum in the UK. The main body of the bow is set with round diamonds in a staggered arrangement. Under the symmetrical and orderly shape, the regular arrangement of the closely set gemstones better expresses the stable form of the entire piece of jewelry. In contrast, this CINDY CHAO jewelry, inspired by the bow design shown in Figure 5-48, presents the entire bow flowing. The snowflake setting enhances the texture of the bow’s undulations, and the varying sizes of the gemstones create differences in light perception, making this piece of jewelry appear more vibrant.
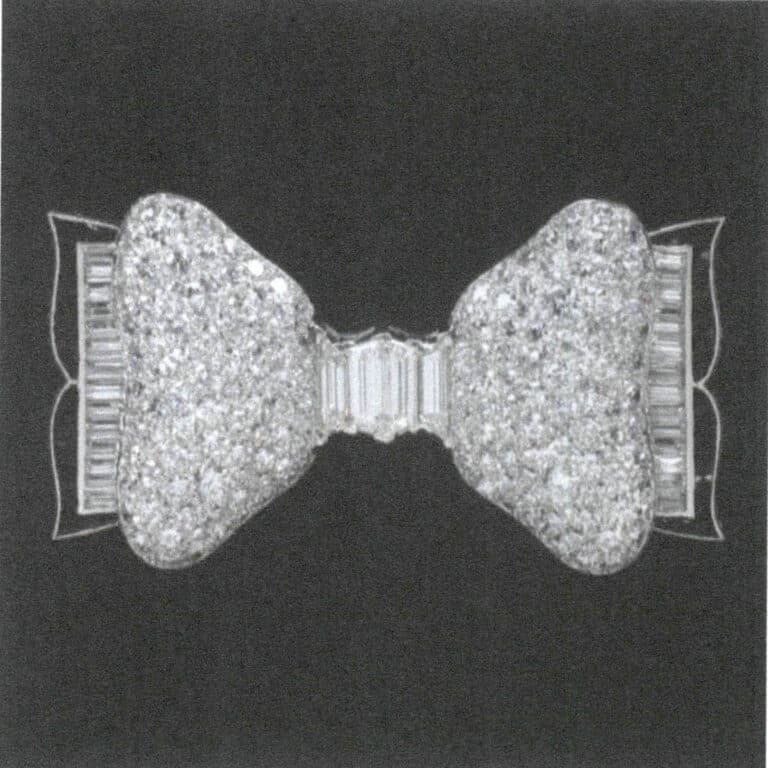
Figure 5-47 Platinum diamond brooch (Collection of the V&A Museum)
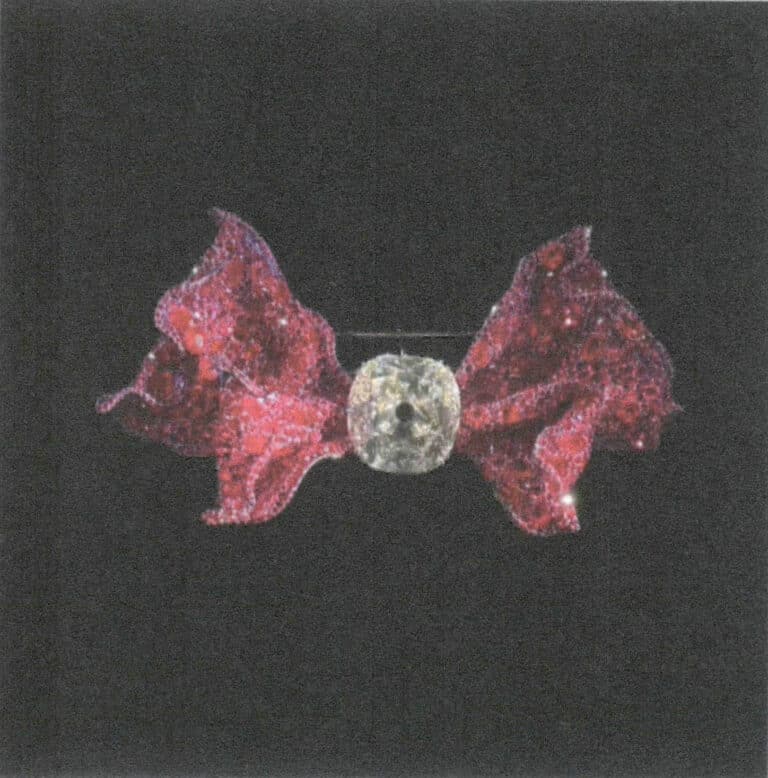
Figure 5-48 CINDY CHAO High Jewelry
The use of micro-pave setting in jewelry is very efficient and eye-catching. While large gemstones are certainly precious and rare, the need for their brilliance can only be satisfied with large gemstones. Large gemstones can exhibit dazzling brilliance with perfect cutting. At the same time, the beauty formed by the density and fluidity of smaller gemstones is also distinctive and offers more creative space for design. Different setting methods serve different treasures and cater to different designs, as shown in Figures 5-49 and 5-50.
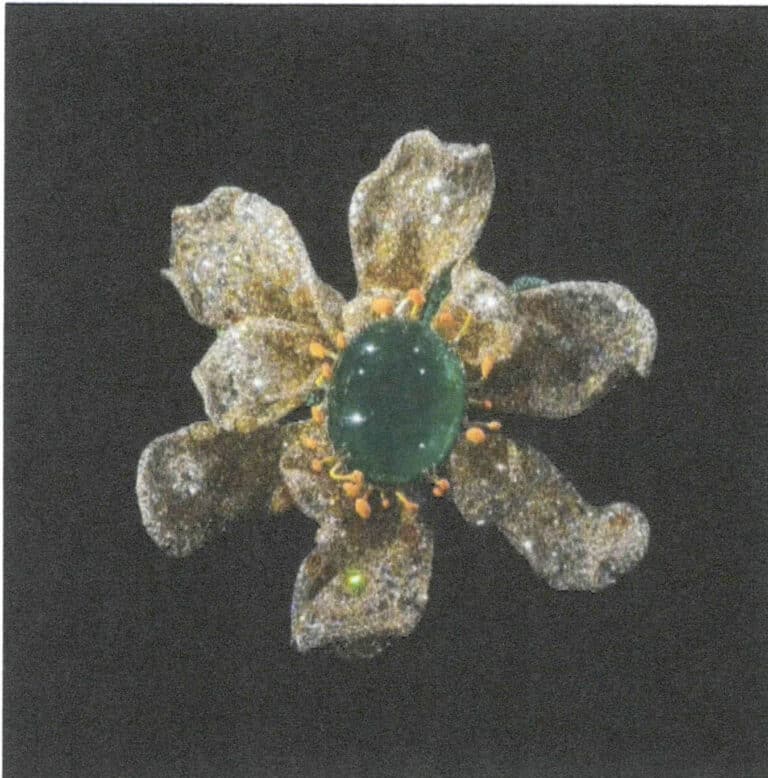
Figure 5-49 Cindy Chao High Jewelry
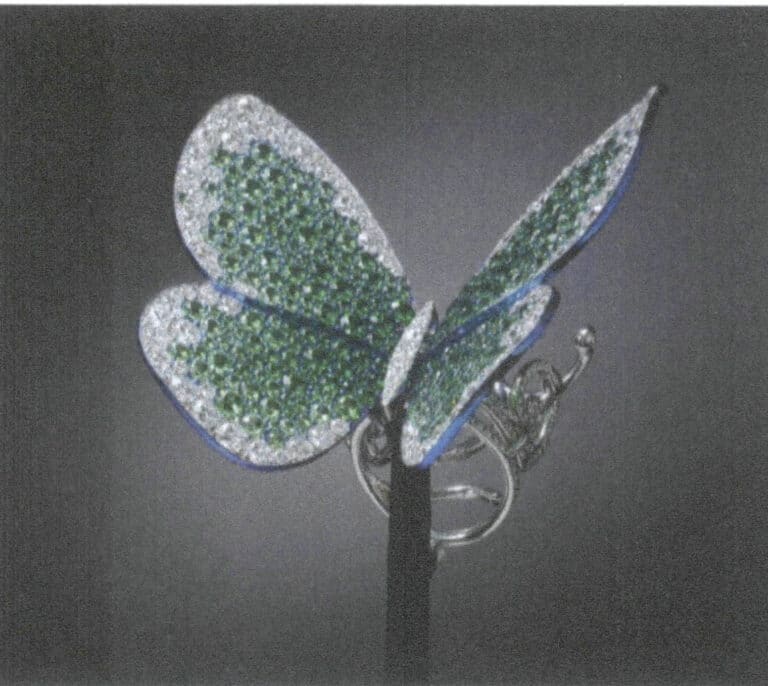
Figure 5-50 Glenn Spiro High Jewelry (V&A Museum Collection)


