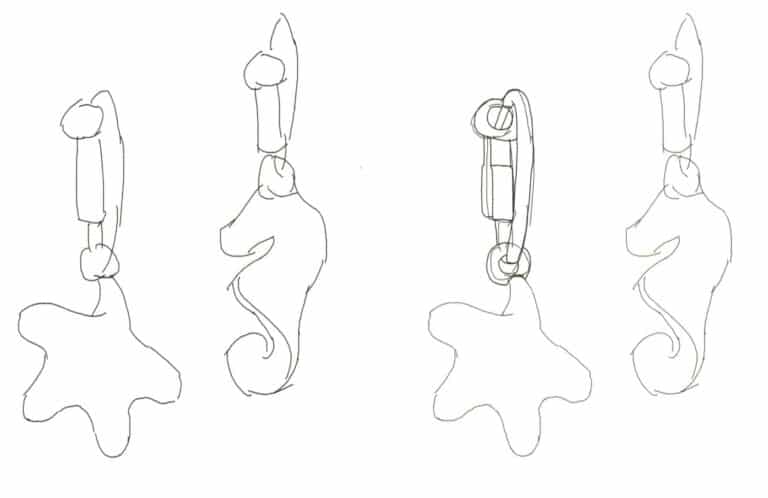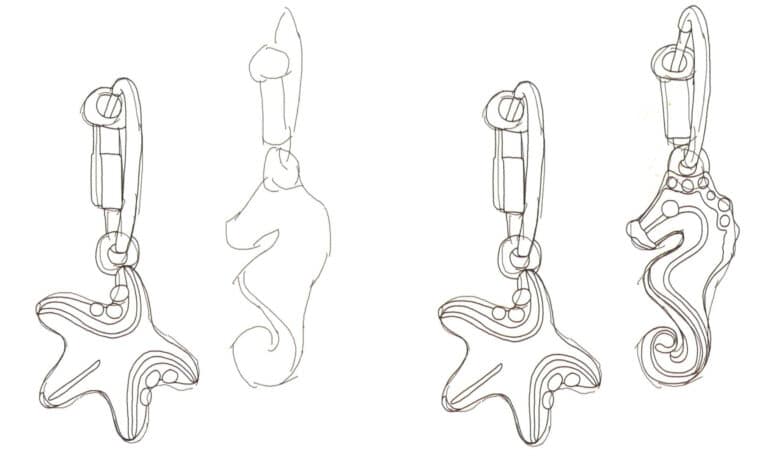
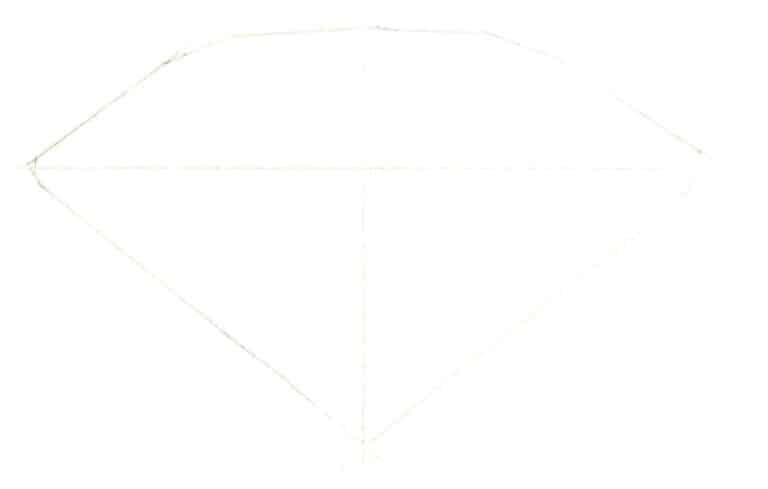
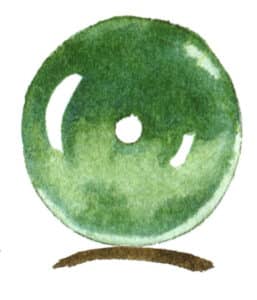
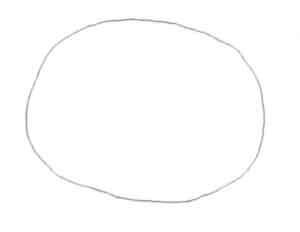
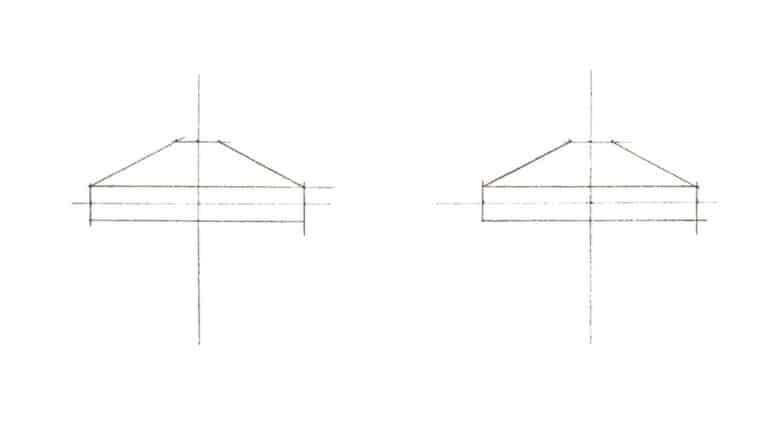
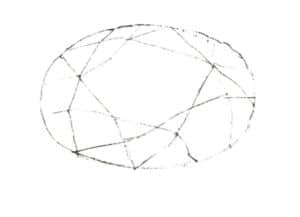
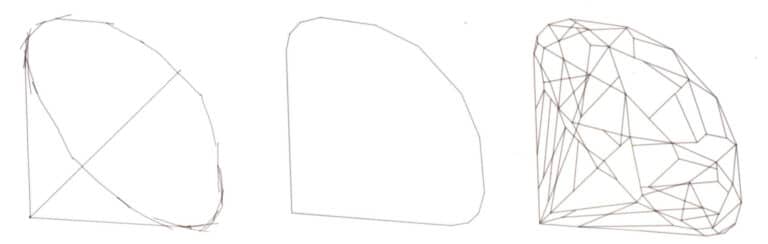
Step 01 Use straight lines to draw a cross-shaped guide. Outline the loose diamond’s basic shape based on proportional measurements.
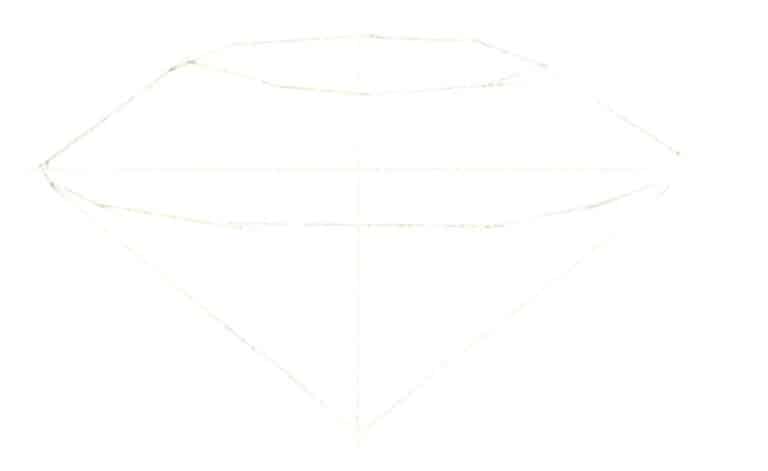
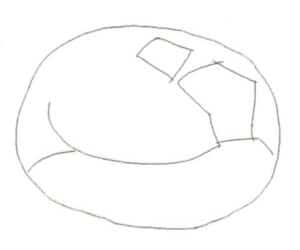
Step 02 Refine the diamond’s primary structural lines over the initial sketch, ensuring accurate perspective.
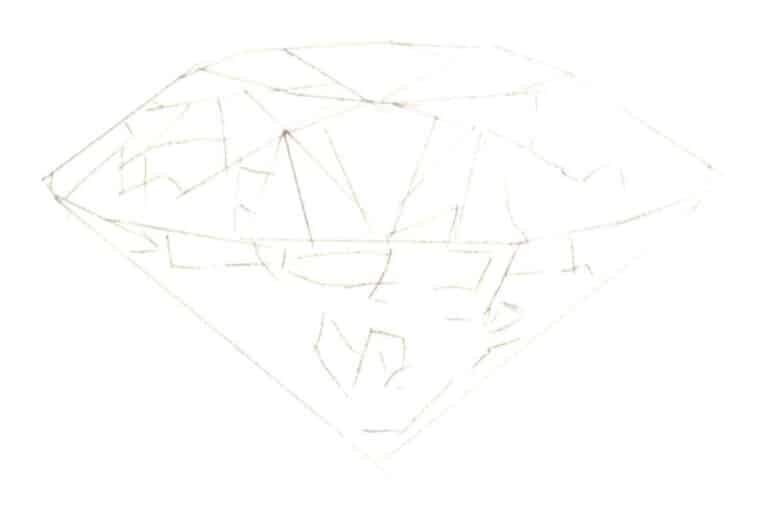
Step 03 Lightly sketch the internal facets with a pencil, completing the underdrawing with clear, precise lines.
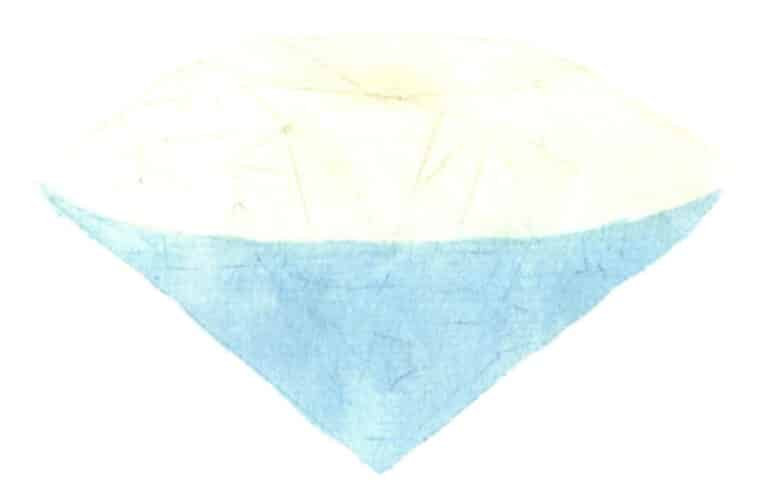
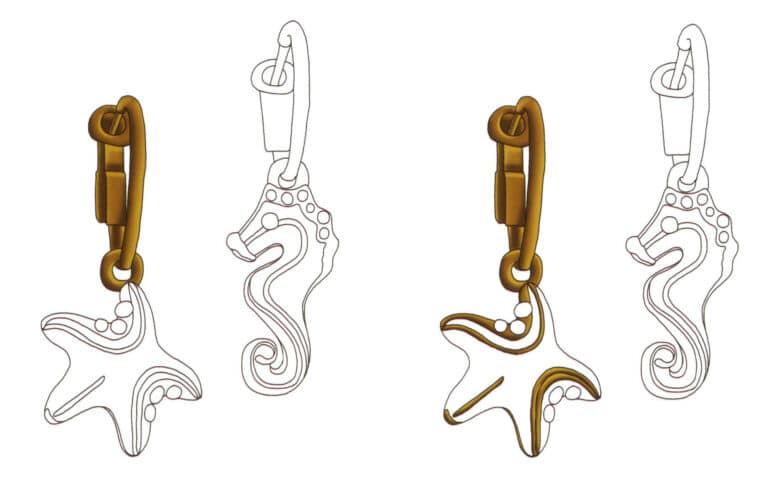
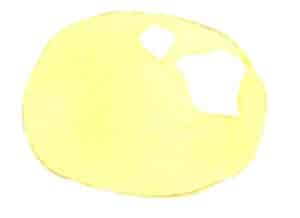
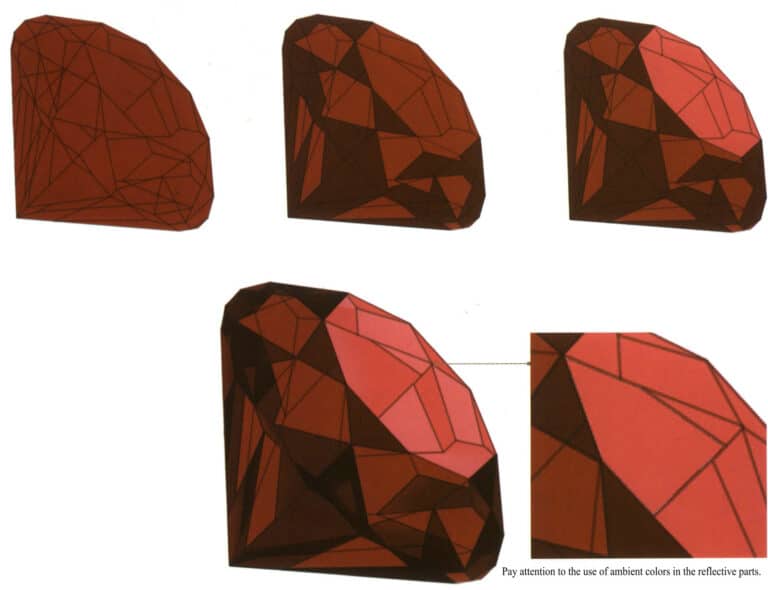
Step 04 Coat the paper with clean water. Once slightly absorbed, apply a diluted base layer using cerulean blue and lemon yellow.
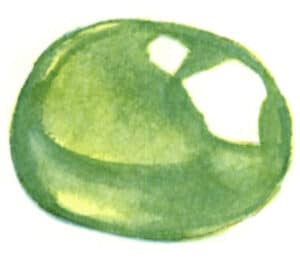
Step 05 Mix ultramarine with hints of violet to paint the darker areas at the diamond’s base.
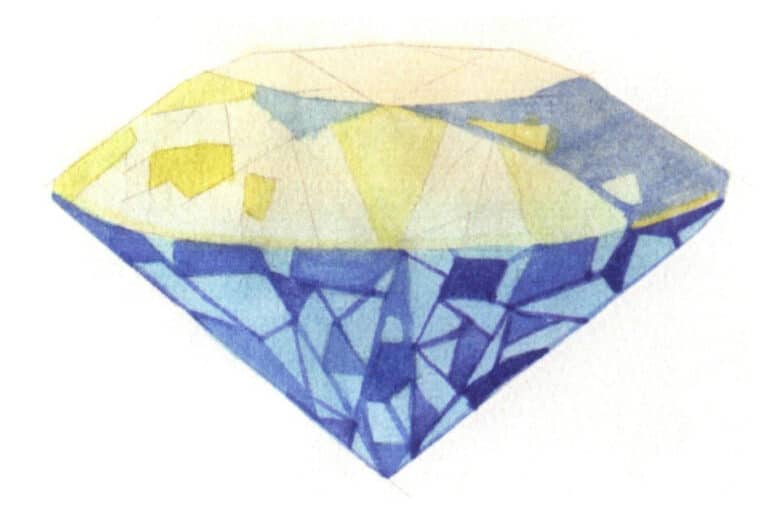
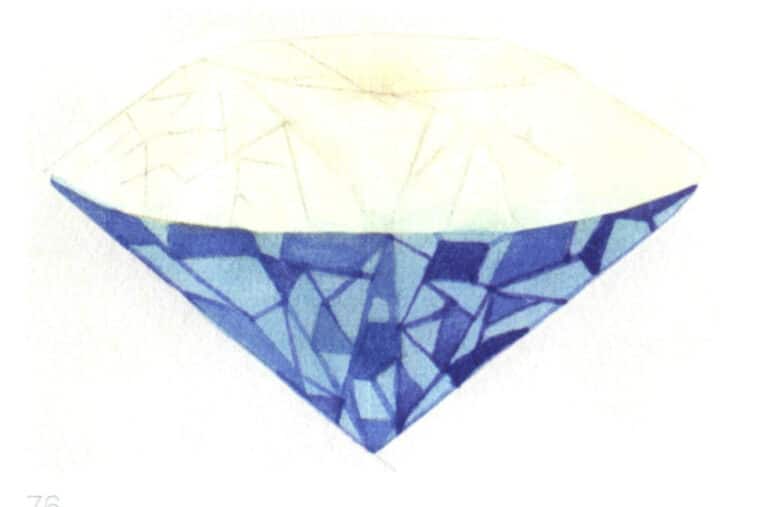
Step 06 Deepen shadows on the upper sections with ultramarine. For highlights, blend lemon yellow and permanent light green.
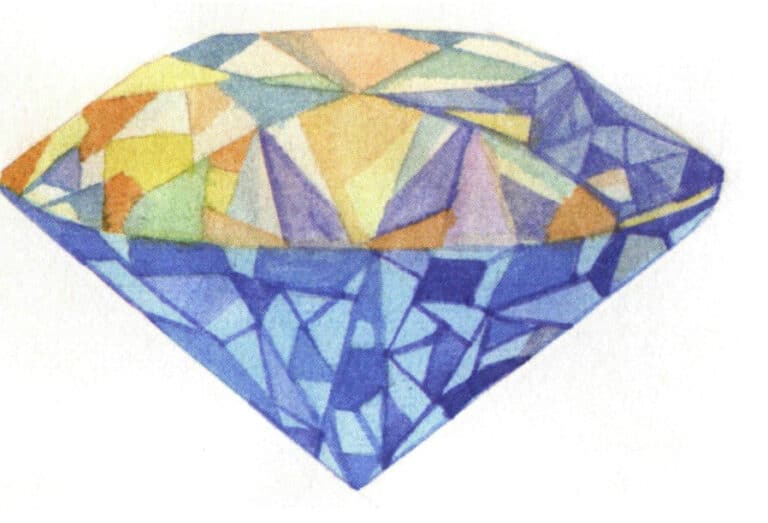
Step 07 Enhance remaining areas using burnt sienna, violet, and yellow ochre. Maintain subtlety---avoid over-saturation.
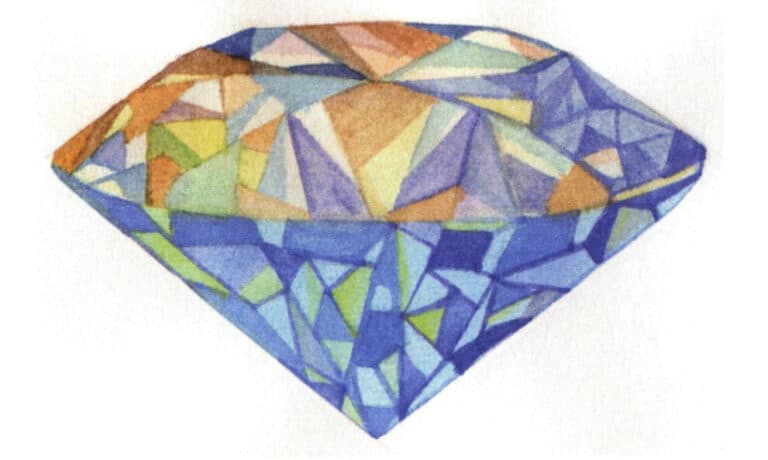
Step 08 Intensify facet effects with medium yellow, permanent light green, and sapphire blue. Strengthen light-dark contrast.
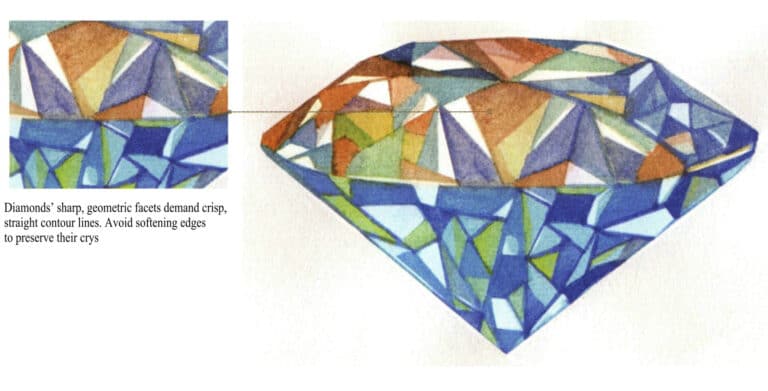
Step 09 Use white gouache to accentuate highlights and reflections. Adjust overall balance to complete the rendering.
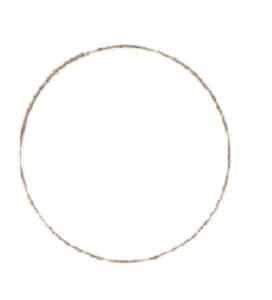
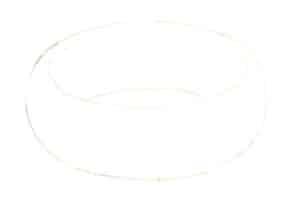
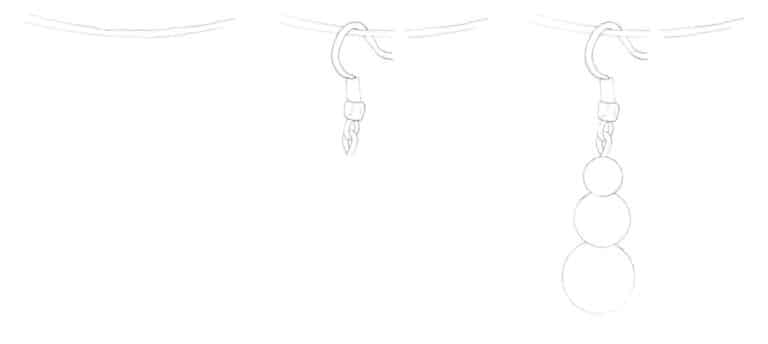
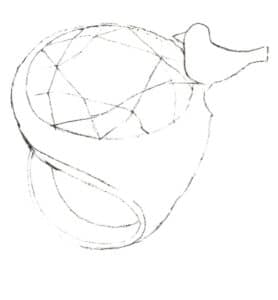
Step 01 Use a circular template ruler to draw a moderately sized circle.
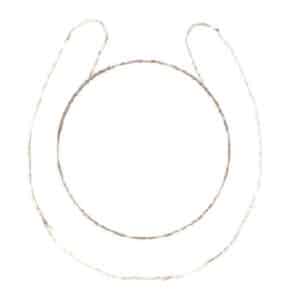
Step 02 Sketch the outer "U"-shaped contour of the diamond pendant with a pencil.
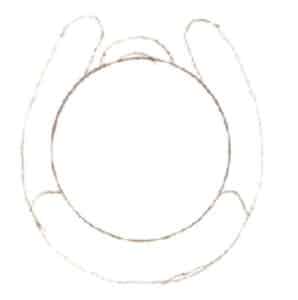
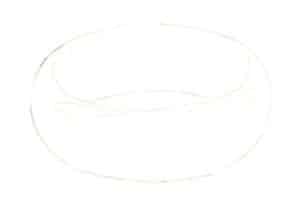
Step 03 Refine the diamond pendant’s shape and add localized details.
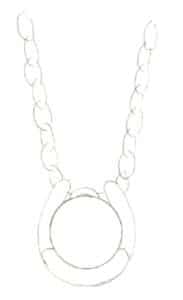
Step 04 Draw the general outline of the necklace chain with loose, casual lines to complete the composition.
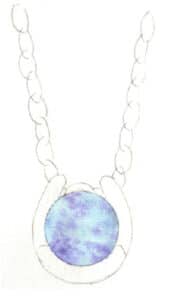
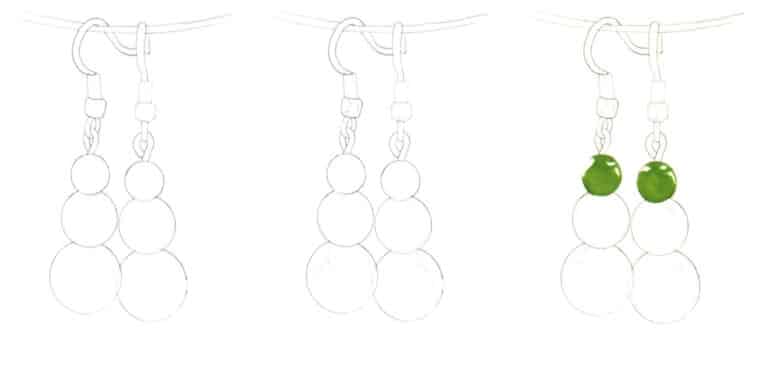
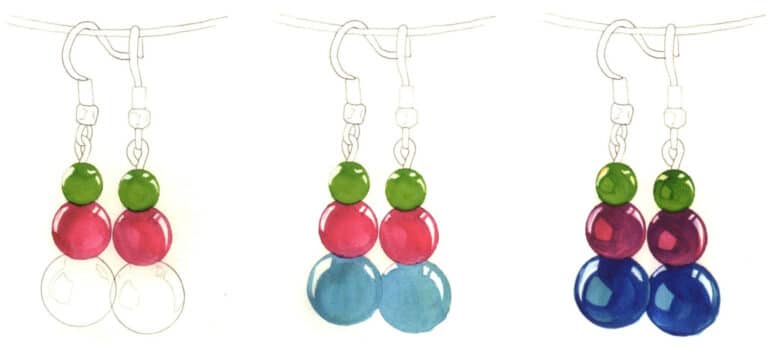
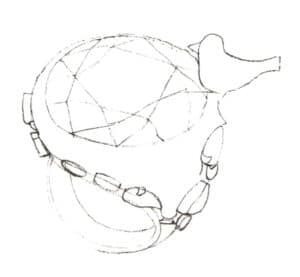
Step 05 Lighten the pencil sketch with a soft eraser for easier coloring. Apply a faint base layer of cerulean blue to the diamond area, then quickly dot with violet to let colors blend naturally on the paper.
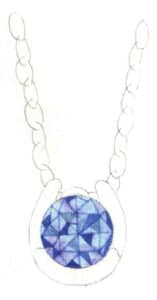
Step 06 After the surface dries completely, outline the diamond’s internal facets with ultramarine and define shadow areas.
Step 07 Mix lemon yellow, vermilion, and cerulean blue to enrich the color scheme, ensuring previous layers remain partially visible.

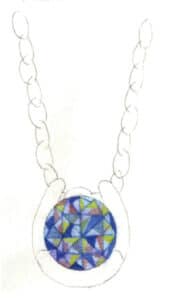
Step 08 Apply a base layer of yellow ochre to the metallic chain, suggesting basic light-dark relationships while leaving intentional gaps for breathability.

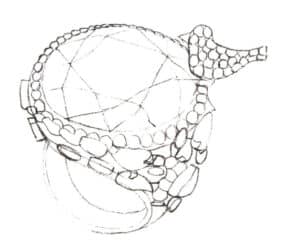
Step 09 Use a liner brush dipped in burnt sienna to detail the metal’s shadows, then blend with clean water for natural color transitions.
Step 10 Mix burnt umber and raw umber to deepen shadows, enhancing contrast and three-dimensionality.
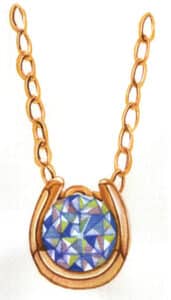
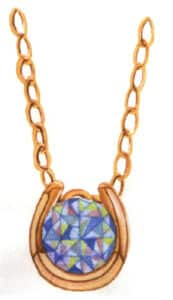
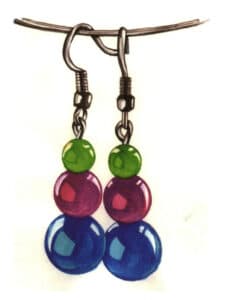
Step 11 Highlight reflective areas and add finishing sparkle with white paint using a liner brush, completing the artwork.
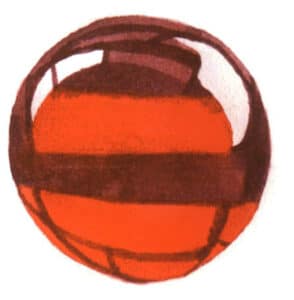
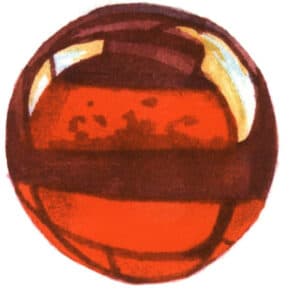
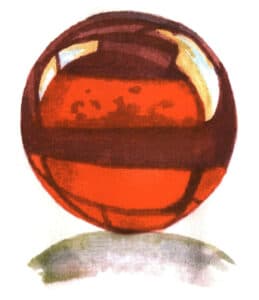
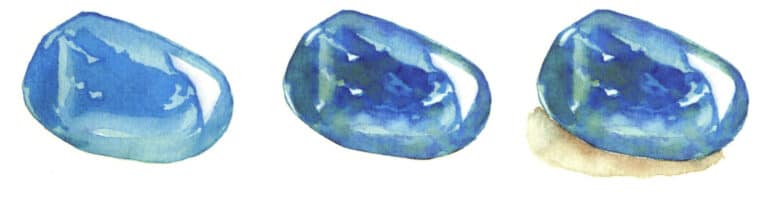
Step 01 Use a circular template ruler to draw a moderately sized circle.
Step 02 Wet a watercolor brush with clean water and apply a base layer of medium yellow to the pearl surface.
Step 03 Locate the core shadow area. Use yellow ochre to paint the pearl’s shaded parts, ensuring the previous layer remains partially visible.
Step 04 Continue defining shadows with orange to intensify light-dark contrast.
Step 05 Paint the cast shadow with Payne’s grey. Adjust and finalize the artwork to complete.

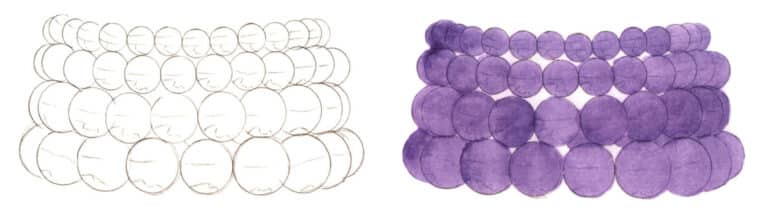
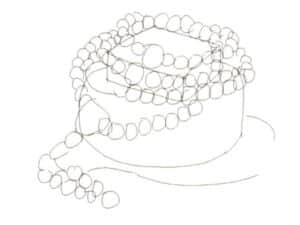
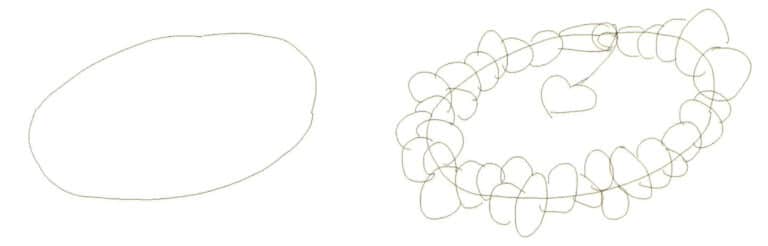
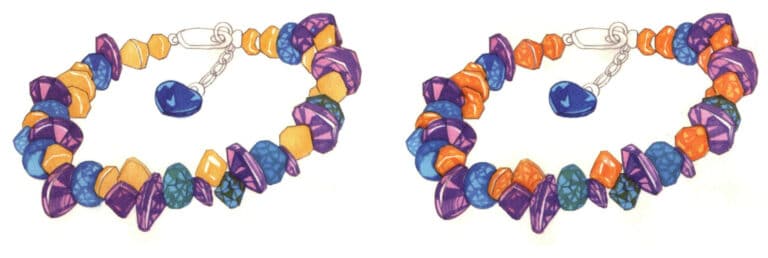
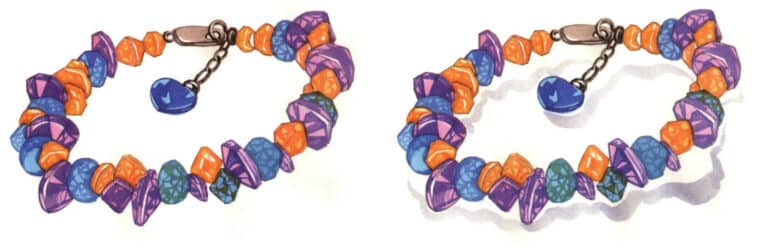
Step 01 Use curved lines to lightly sketch the general outline of the pearl bracelet.
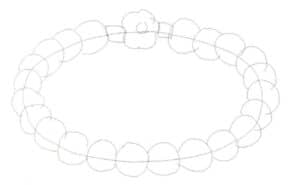
Step 02 Over the initial sketch, loosely define pearl shapes with casual lines, establishing their positions and sizes.
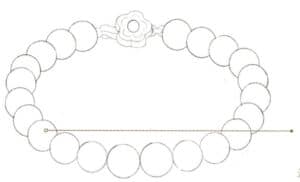
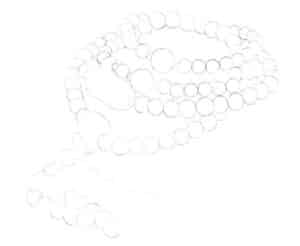
Step 03 Lighten the draft with a soft eraser. Use a circular template ruler and pencil to refine the clean line art, maintaining neatness.
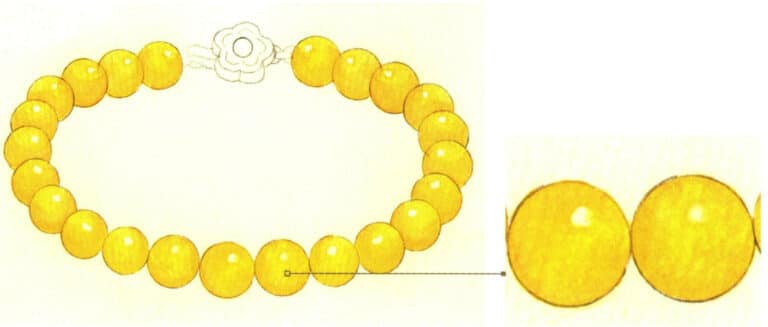
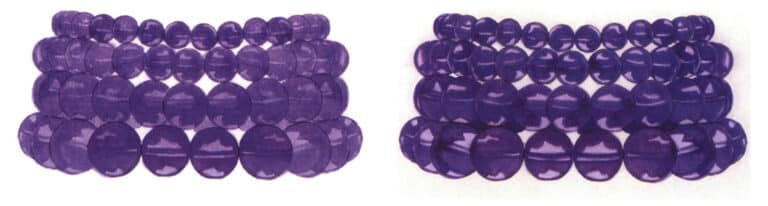
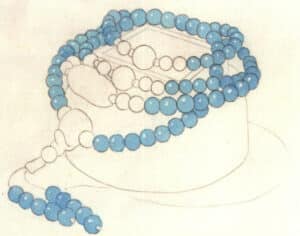
Step 04 Apply a base layer of medium yellow to the pearls, reserving highlight areas and ensuring even color blending.
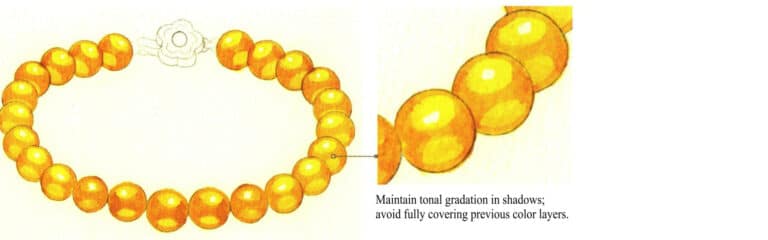
Step 05 Add yellow ochre to the pearls' shadow areas to enhance volume and spatial depth.
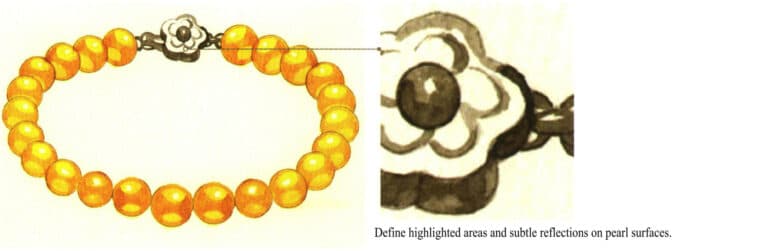
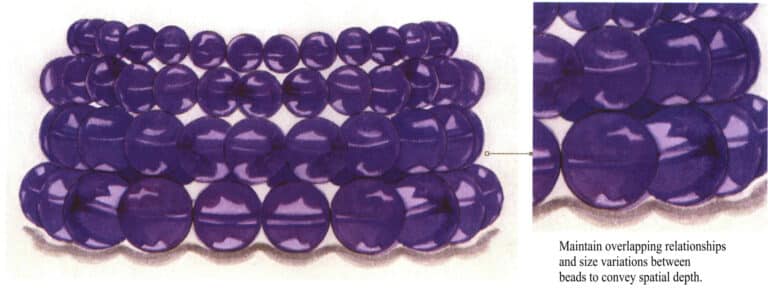
Step 06 Paint the metal connector areas with ivory black. Use diluted pigment (more water, less paint) to mimic silver's subtle metallic sheen.
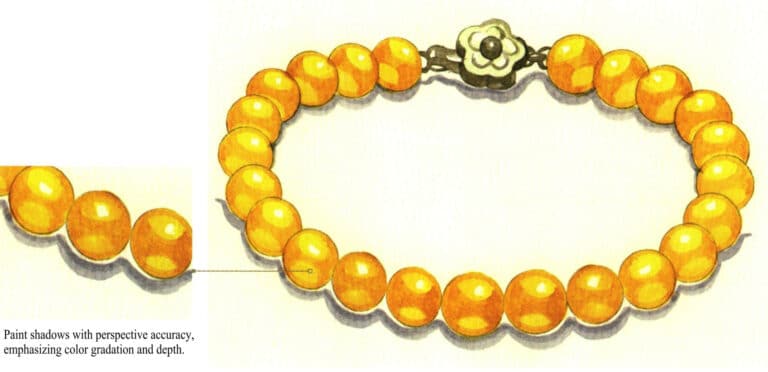
Step 07 Use Payne's grey to render the bracelet's cast shadow. Finalize details and complete the artwork.
Step 01 Use a circular template ruler to draw a moderately sized circle.
Step 02 Draw a smaller circle at the center of the first one to refine the structure.
Step 03 Mix cerulean blue with lemon yellow. Apply a diluted base layer to create a translucent texture, reserving highlight areas.
Step 04 Before the base layer fully dries, use a watercolor brush dipped in phthalocyanine blue and sap green to add shadows and enhance color variation.
Step 05 Paint the jade pendant’s cast shadow with ivory black and raw umber to complete the artwork.
Step 01 Start from a partial section and sketch the floral contour on the jade pendant of the necklace with a pencil.
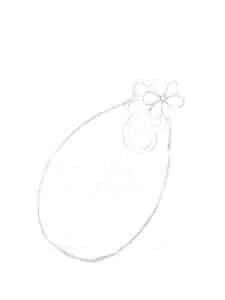
Step 02 Use curved lines to outline the remaining parts of the jade pendant and refine the pendant’s form.
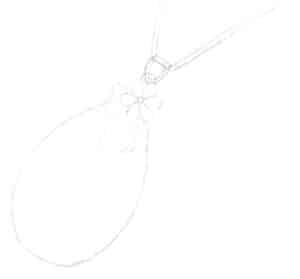
Step 03 Draw the chain’s outline with loose lines.
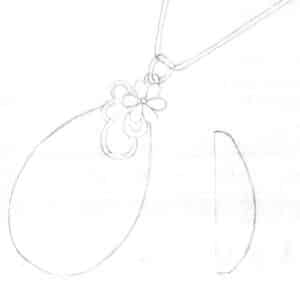
Step 04 Sketch the jade’s side view contour in the blank area on the right, adjust lines for accuracy, and maintain a clean layout.
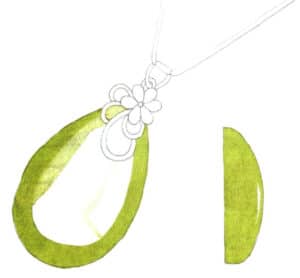
Step 05 Mix Permanent Light Green with Lemon Yellow to paint the jade’s highlight areas.

Step 06 Blend Gem Green and Sap Green to color the central and edge sections, capturing the jade’s local color.
Step 07 Apply Medium Yellow as the base layer for the metal floral motifs and chain.
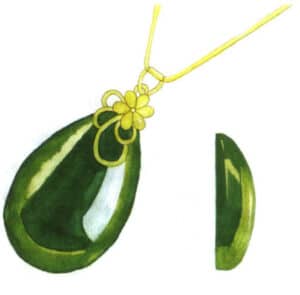
Step 08 Use Yellow Ochre to darken shadow areas on the metal, hinting basic light-dark relationships.
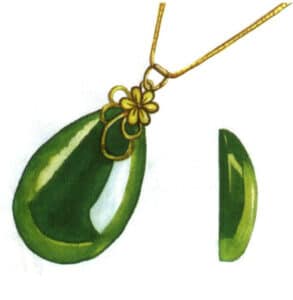
Step 09 Mix Raw Umber and Burnt Sienna to deepen shadows on the metal, enhancing color contrast.
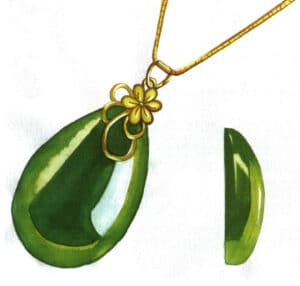
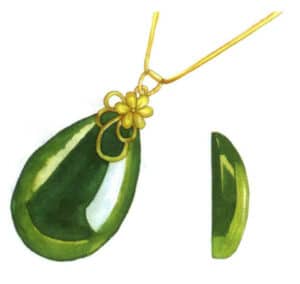
Step 10 After the artwork fully dries, use a liner brush with white pigment to define highlights and reflections, completing the piece.
Step 01 Use a circular template ruler to draw a moderately sized circle.
Step 02 Sketch the material’s internal structures (e.g., light-dark boundaries) with loose, casual lines.
Step 03 Paint the agate’s local color with vermilion. Add violet to the mixture and apply it to shadow areas.
Step 04 Introduce ultramarine to deepen shadows, enrich color layers, and refine details. Use lemon yellow for subtle highlights on illuminated surfaces.
Step 05 Mix Payne’s grey with the previous agate colors to paint the cast shadow, noting the interplay of environmental hues.
Step 01 Lightly sketch the general oval-shaped outline of the agate bracelet with a pencil.
Step 02 Define the bracelet’s precise contour within the oval, clarifying its structure, perspective, and thickness.
Step 03 Identify the illuminated areas based on the light source, outline highlight shapes, and finalize the line drawing.
Step 04 Mix crimson with ample water for a diluted base layer. Apply it to the bracelet, then quickly blend yellow ochre into shadow areas for natural blending.
Step 05 Enrich shadow tones with vermillion, carefully handling color gradients.
Step 06 Deepen shadows with darker vermillion and purplish red to emphasize the material’s translucency and veined texture.
Step 07 Paint the cast shadow using ivory black and raw umber, ensuring light-dark variation in the shadow’s coloration.

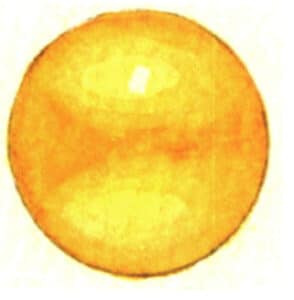
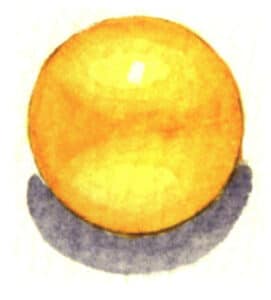
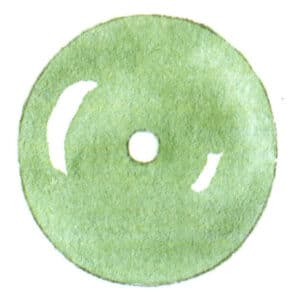
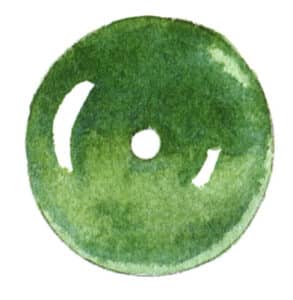
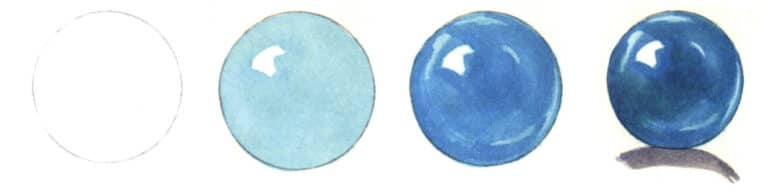
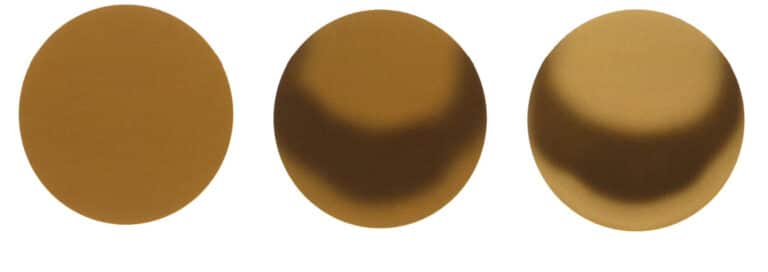
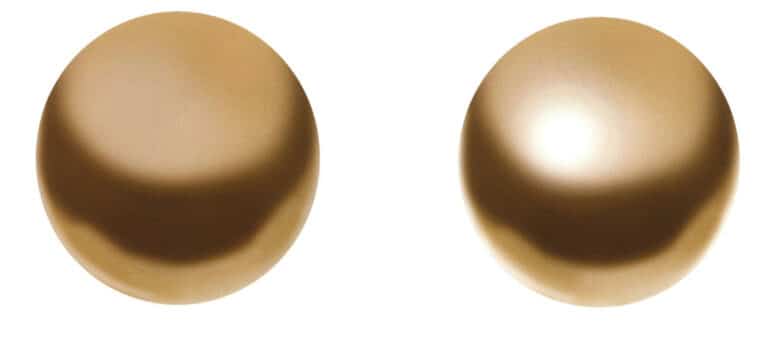
Step 01 Use a circular template ruler to draw a moderately sized circle.
Step 02 Lightly sketch the light-dark boundary line inside the gold bead with casual, loose lines.
Step 03 Paint the gold bead’s base color with Medium Yellow, suggesting basic light-dark variations.
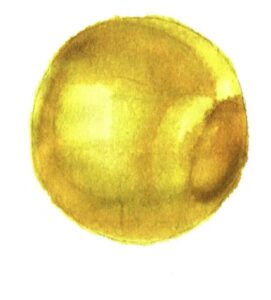
Step 04 Use Yellow Ochre to define the artwork’s shadow areas, maintaining a sense of color layering.
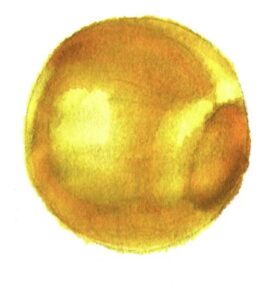
Step 05 Add a small amount of orange to the shadows to enrich color depth and intensify contrast.
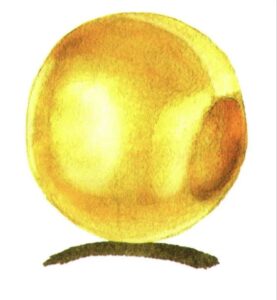
Step 06 Paint the gold bead’s cast shadow with Ivory Black. Adjust highlights using white pigment to complete the artwork.
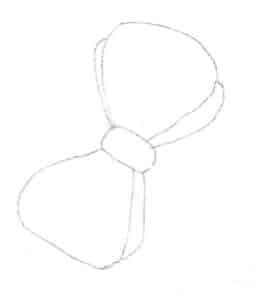
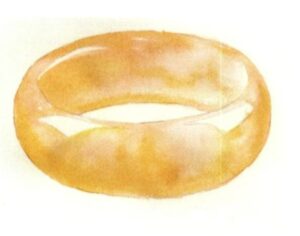
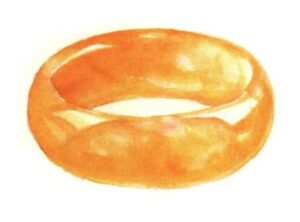
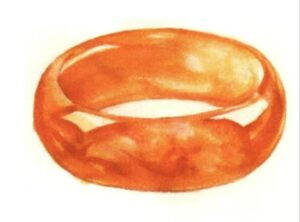
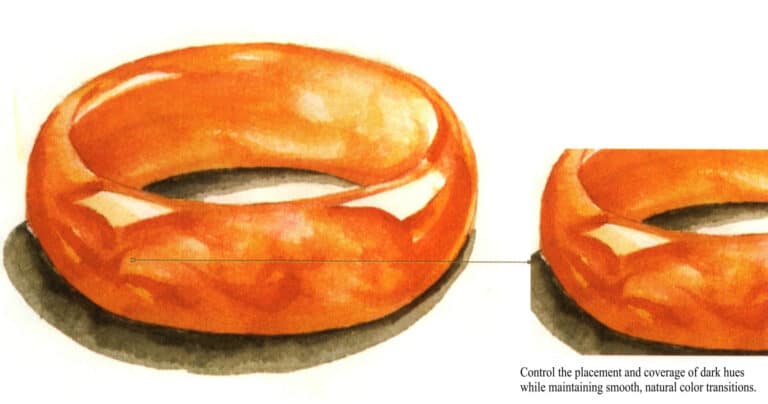
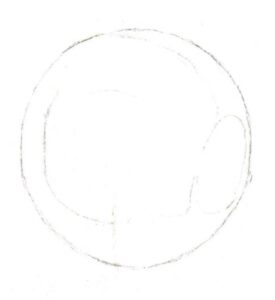
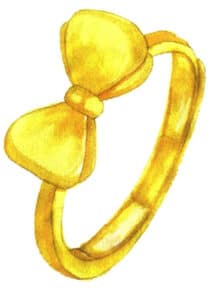
Step 01 Accurately sketch the bow’s contour with a pencil, using double layers to enhance its shape.
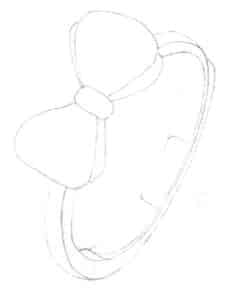
Step 02 Draw the ring band’s outline with loose lines following perspective rules, ensuring clear structural definition.

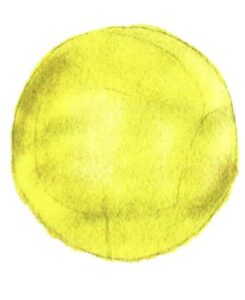
Step 03 Apply Lemon Yellow as the base layer to the bow.
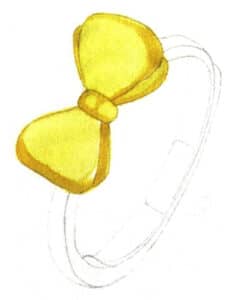
Step 04 Once slightly dry, use Medium Yellow to define the bow’s shadows and suggest light-dark relationships.
Step 05 Add orange to the color mixture to further deepen the bow’s shadows.
Step 06 Paint the ring band’s base layer with Lemon Yellow, ensuring even color blending and reserving highlights.
Step 07 Initially define the ring band’s shadows with Medium Yellow.
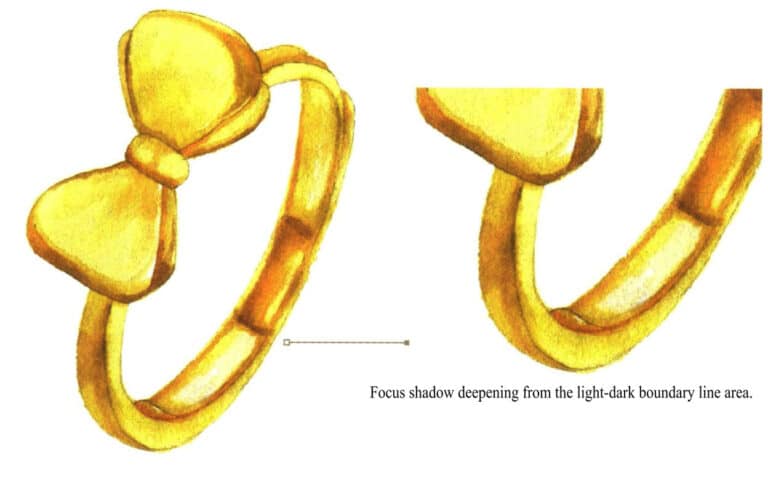
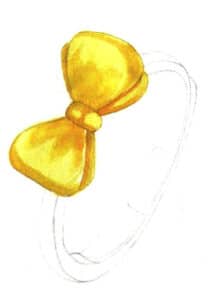
Step 08 Use Yellow Ochre and orange to deepen overall shadows and refine local details.
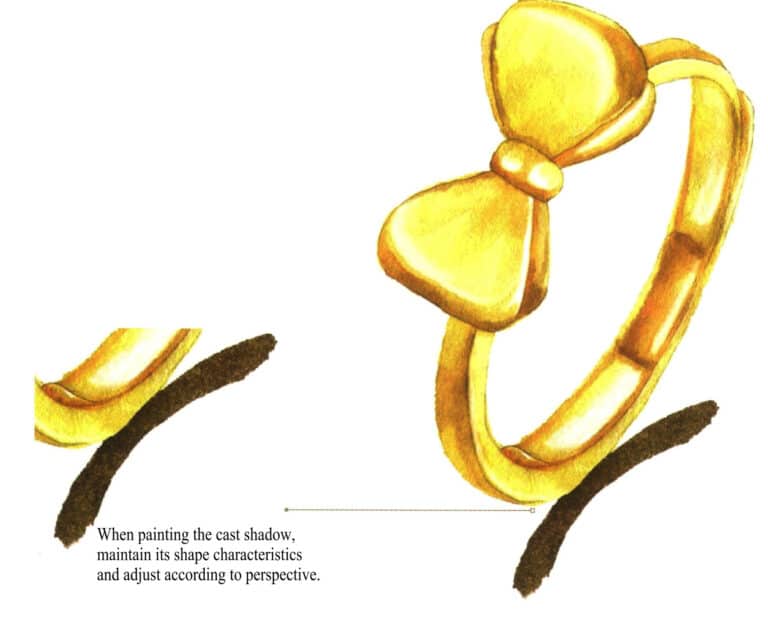
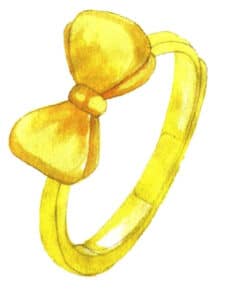
Step 09 Paint the gold ring’s cast shadow with Ivory Black and Yellow Ochre. Use white pigment to define highlights and reflections, completing the artwork.


Step 01 Sketch the jewelry box’s general shape with a pencil, establishing perspective.
Step 02 Lightly outline the turquoise bracelet with loose, light lines to finalize the composition, maintaining proper layering.
Step 03 Lighten the draft with a soft eraser. Precisely define the bracelet and other elements’ contours using a circular template ruler and pencil, refining the line art.
Step 04 Apply cerulean blue as the base layer to the turquoise sections, reserving whites for highlights to ensure breathability.
Step 05 Paint the remaining beads with orange, ultramarine, and lemon yellow, balancing warm and cool tones across the composition.
Step 06 Begin defining shadow areas with phthalocyanine blue, yellow ochre, violet, and vermilion, keeping shadow color coverage restrained.
Step 07 Apply burnt umber as the jewelry box’s base layer. Use raw umber to paint its shadows and the bracelet’s cast shadow on the box, emphasizing volume and spatial depth.
Step 08 Paint ground cast shadows for both the box and bracelet with Payne’s grey. Finalize highlights and reflections using white pigment, then adjust the entire composition to complete.
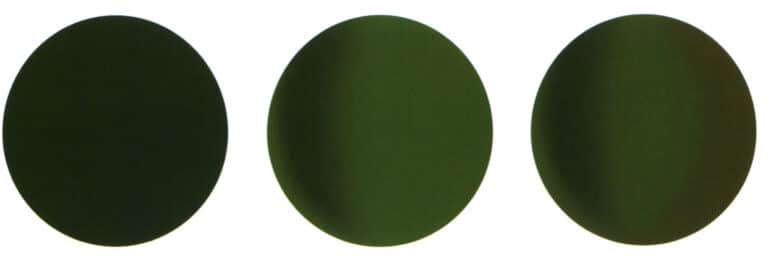
Step 01 Sketch the garnet’s general shape with loose, fluid lines.
Step 02 Lightly outline the garnet’s internal light-dark boundary line with a pencil.
Step 03 Lighten the pencil sketch with a soft eraser. Apply a base layer of lemon yellow to the garnet, reserving whites on illuminated surfaces.
Step 04 Before the surface fully dries, paint the garnet’s shadows with cerulean blue, allowing colors to blend naturally with the paper’s moisture.

Step 05 Mix emerald green and sap green to deepen shadows. Combine Payne’s grey and emerald green to paint the garnet’s cast shadow, completing the artwork.


Step 01 First, use a pencil to position and compose on the paper, drawing the three-dimensional coordinate axes for the front and side views. The three-dimensional coordinate axes are used as auxiliary lines for drawing three-view diagrams.
Step 02 Based on the size specifications of the women's ring, outline the main parts of the front view and side view of the ring with straight lines, paying close attention to the overall structure and perspective relationships of the three-view diagram of the ring.
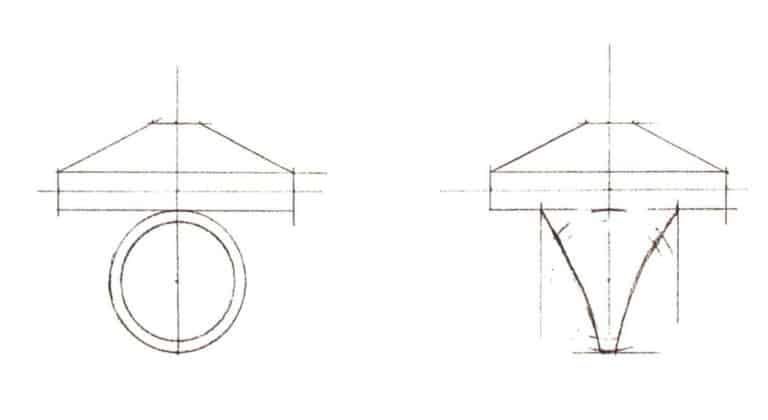
Step 03 Use a circular arc to draw the general outline of the ring; you can use a compass or a circular drawing template for this.
Step 04 Delve into the details, depicting the internal structure of the ring's front and side views, and adjust the overall composition.
Step 05 Based on the horizontal coordinate dimensions of the ring's side view, casually draw the outer contour of the ring's top view with relaxed lines.
Step 06 Depict the internal structure of the ring's top view, and clearly explain the shape and pattern, ensuring that everything is drawn with a ruler to ensure accuracy.
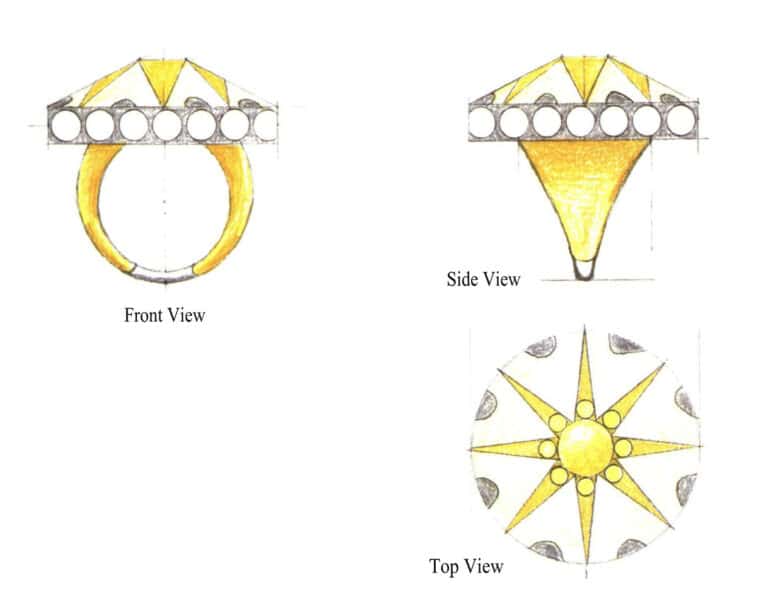
Step 07 Use colored pencils No. 407, No. 409 and No. 495 to color the three-view drawing of the ring and complete the drawing.
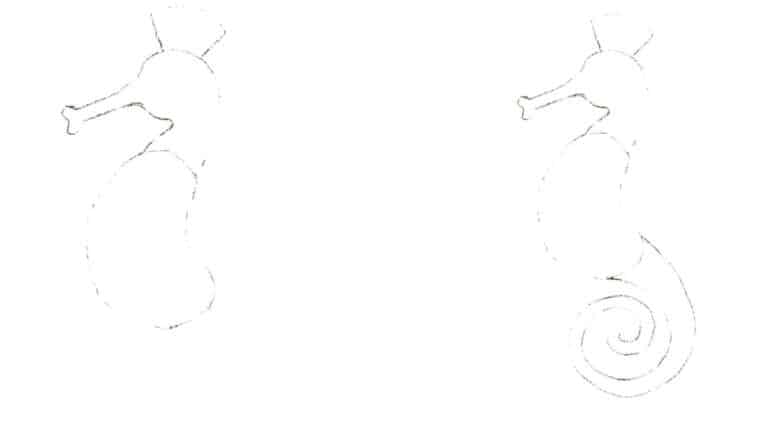

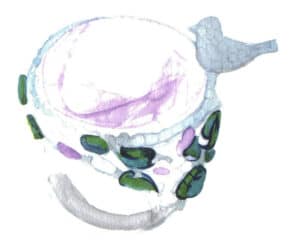
Step 01 Sketch the gemstone’s outer contour with loose, casual curves, using an oval shape as the base.
Step 02 Lightly outline the gemstone’s faceted shape with a pencil.
Step 03 Draw the ring band and decorative bird’s general contours based on perspective principles.
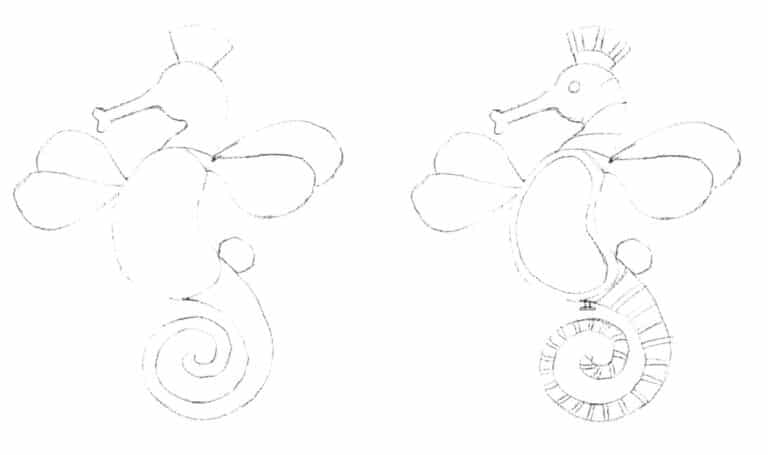
Step 04 Add gemstone embellishments along the ring’s edges to enrich the design.
Step 05 Refine the ring’s internal structures (e.g., diamonds). Prioritize proportional accuracy and structural clarity with light pencil pressure.

Step 06 Soften the previous pencil lines with a soft eraser to prepare for coloring, avoiding smudging. Ensure faint guidelines remain visible.
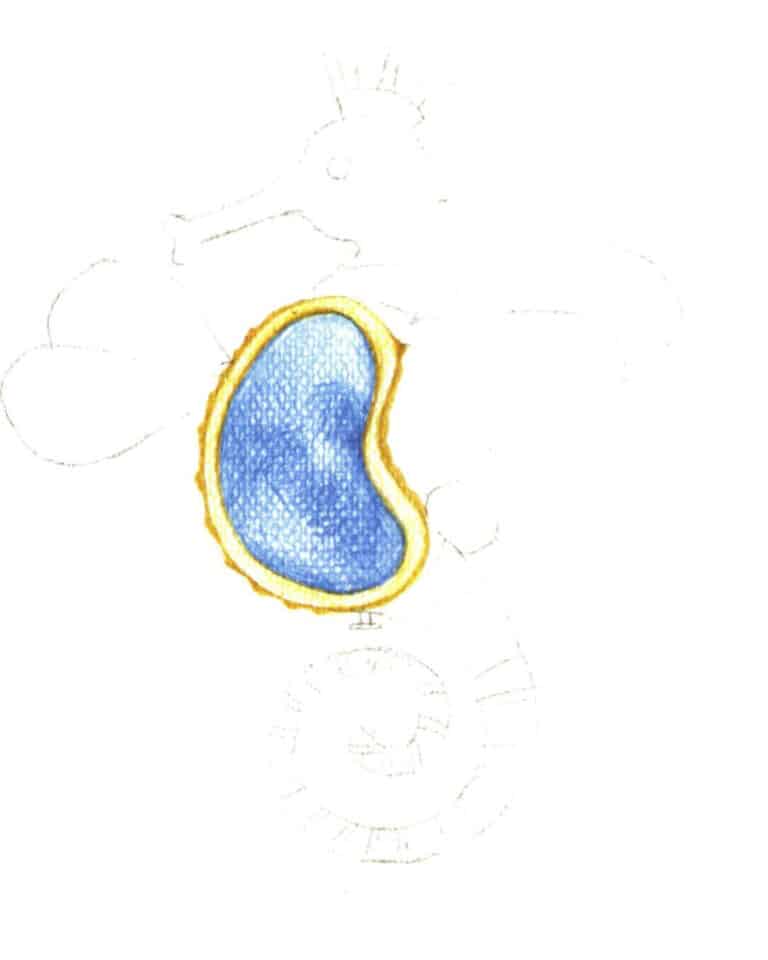
Step 07 Begin coloring: Use a small watercolor brush to apply premixed green tones along the gemstone’s outlined areas, suggesting basic light-dark relationships; Paint the remaining ring sections with pink (magenta + lemon yellow) and muted green (emerald green + Payne’s grey + Chinese white) for the first wash, keeping colors thin and translucent.

Step 08 Gradually deepen colors to enhance three-dimensionality and refine details (e.g., gemstone’s translucent effects). Maintain layered color variation.
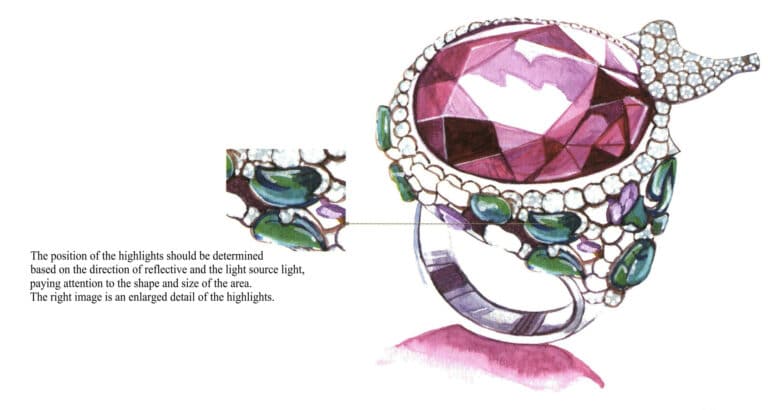
Step 09 Paint the ring’s cast shadow with pink (magenta + lemon yellow), emphasizing layered tonal shifts. Highlight reflective areas and reserved whites with white pigment. Adjust and finalize the artwork to complete.
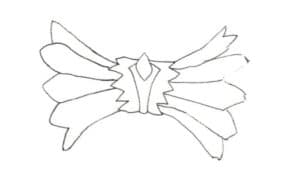
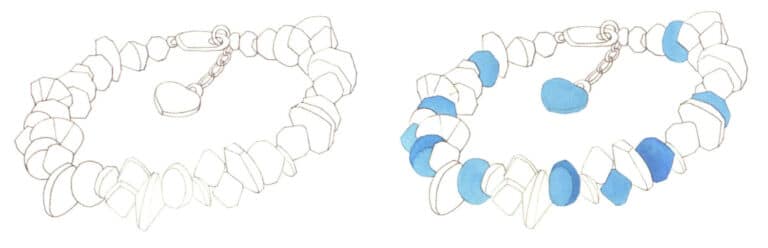
Step 01 Start from a partial section and sketch the bracelet’s central structure with a pencil.
Step 02 Based on perspective, lightly define local thickness over the previous sketch.
Step 03 Outline the triangular gemstone decorations on both sides of the bracelet with a pencil, maintaining overall symmetry.
Step 04 Continue sketching the bracelet’s clasp contours to finalize the composition.
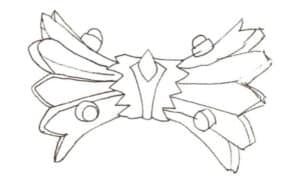
Step 05 Precisely outline the central design atop the bracelet with a technical pen, ensuring structural clarity.
Step 06 Draw triangular gemstone contours with curved lines, maintaining accurate perspective and overlapping relationships.
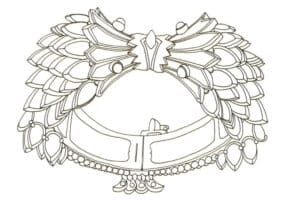
Step 07 Complete the bracelet’s remaining outlines with a technical pen. Erase pencil lines to preserve cleanliness.
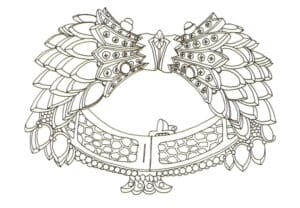
Step 08 Add and refine localized details for enhanced precision.
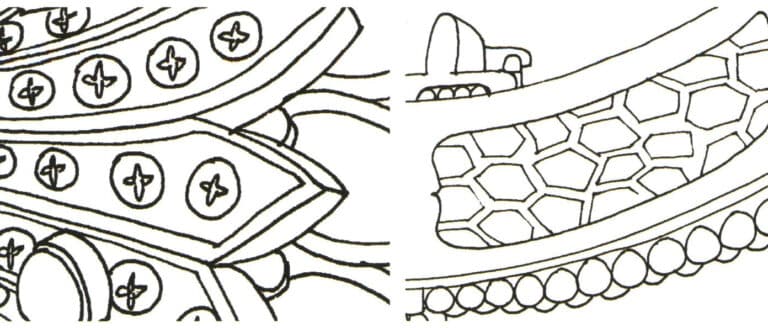
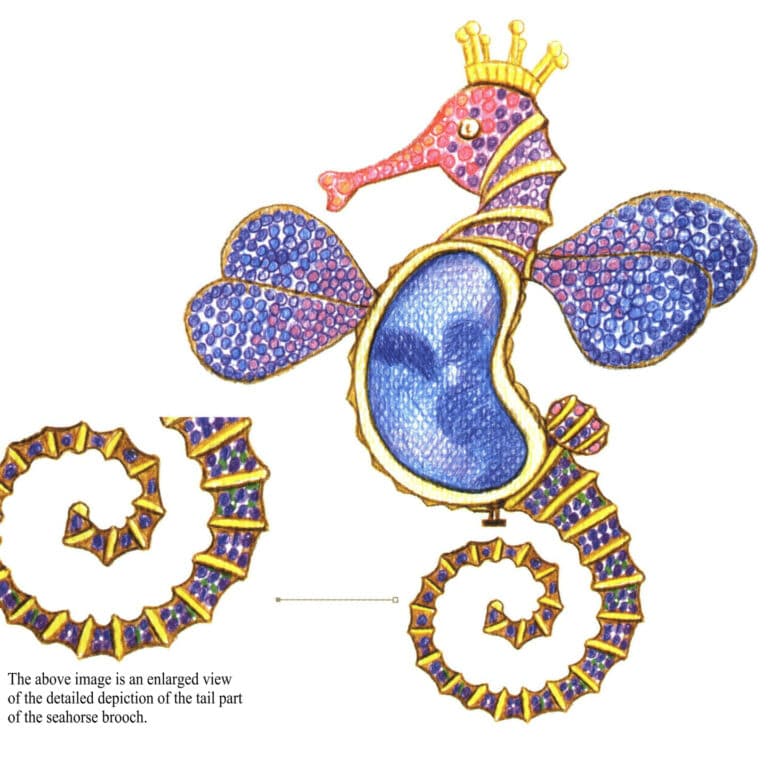
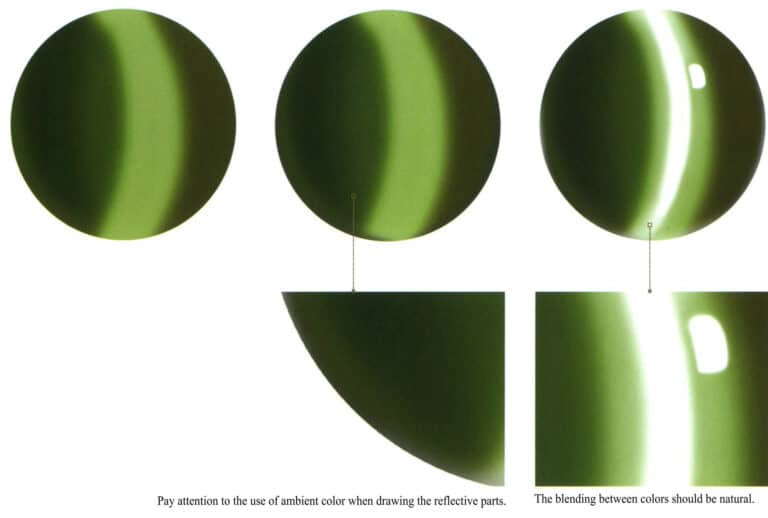
Detailed texture additions are also drawn with lines based on perspective. The picture on the left is an enlarged view of the local detail engraving
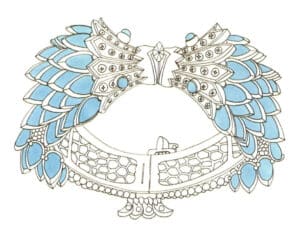
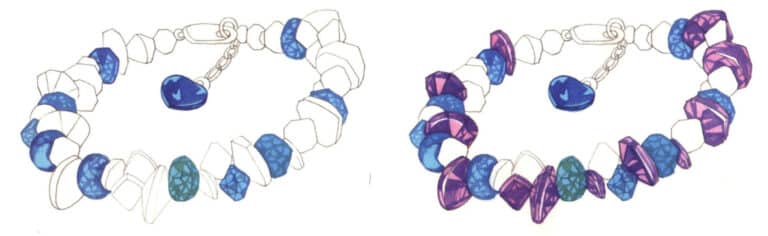
Step 09 Apply the first color layer to the triangular gems on both sides using No.67 marker.
Step 10 Use No.63 and No.183 markers to define the gems’ shadow areas, intensify light-dark contrast, and achieve three-dimensional and realistic textures.
Step 11 Paint the metal trim’s local color with No.141 marker. Use No.100 marker to deepen shadows, shaping light-shadow relationships, volume, and spatial depth.
Step 12 Apply No.17 marker to the bottom gemstones. Use No.16 marker to moderately deepen shadows, avoiding excessive coverage of previous layers.
Step 13 Refine remaining sections with No.68 marker and No.461 colored pencil. Highlight with a white gel pen, adjust details, and complete the artwork.
Step 01 Create a new canvas. Select the "Soft Round Pressure Opacity" brush tool and set the brush size to 80 pixels. Use yellow ochre ( to paint the amber’s general shape and base color, capturing its characteristic form.
Step 02 Apply pale yellow to the amber’s central area, preserving edges from the previous layer to suggest thickness.
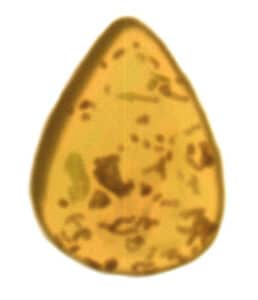
Step 03 Create a "Texture 1" layer. Select dark brown and reduce opacity to paint internal impurities and forms, conveying the amber’s translucent quality through simplified rendering.
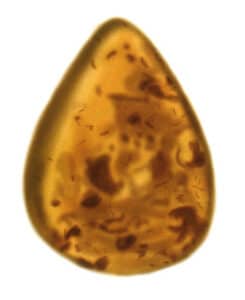
Step 04 Create a "Texture 2" layer. Use bright yellow and dark red to define internal shadows and adjust color balance. Further refine light-dark relationships, then finalize the artwork to complete.

Step 01 Create a "Draft Reference" layer. Select the "Pencil" brush tool and set the brush size to 6 pixels. Sketch the bracelet’s composition roughly with black.
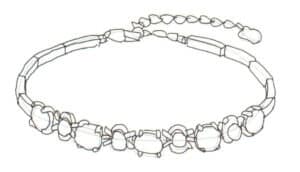
Step 02 Lower the "Draft Reference" layer’s opacity. Create a "Draft" layer and outline the bracelet’s overall shape, emphasizing local features and perspective accuracy.

Step 03 Lower the "Draft" layer’s opacity. Create a "Line Art" layer. Use the "Hard Round Pressure Opacity" brush tool to outline the central gemstone’s contour.
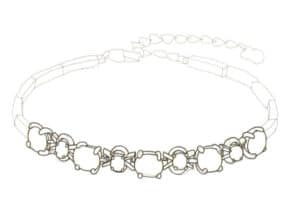
Step 04 Outline other decorative gemstones with precise lines and clear structural definition.

Step 05 Draw the metal chain’s contour.
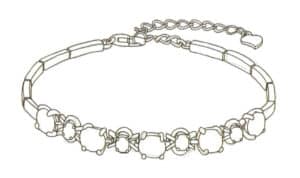
Step 06 Outline remaining sections like the bracelet’s tail.
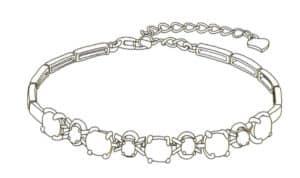
Step 07 Refine details and metal chain structures to complete the line art.
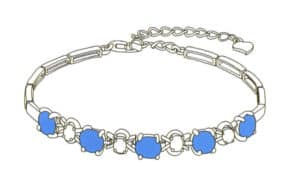
Step 08 Create a "Sapphire Color" layer. Use the "Hard Round Pressure Opacity" brush tool to apply sky blue as the main gemstone’s base color.
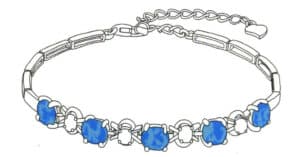
Step 09 Switch to the "Soft Round Pressure Opacity" brush tool. Paint highlights with light blue.
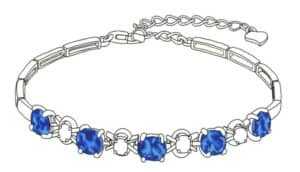
Step 10 Define shadows with dark blue to enhance three-dimensionality and light-dark contrast.
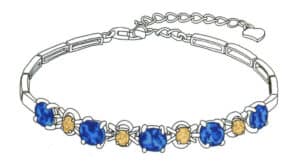
Step 11 Create a "Yellow Gem Color" layer. Use yellow tones to model the gemstone’s volume.
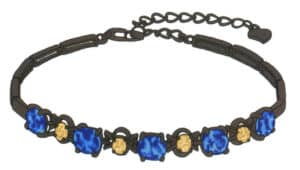
Step 12 Create a "Metal Chain Color" layer. Use the "Hard Round Pressure Opacity" brush tool to apply gray as the base color.
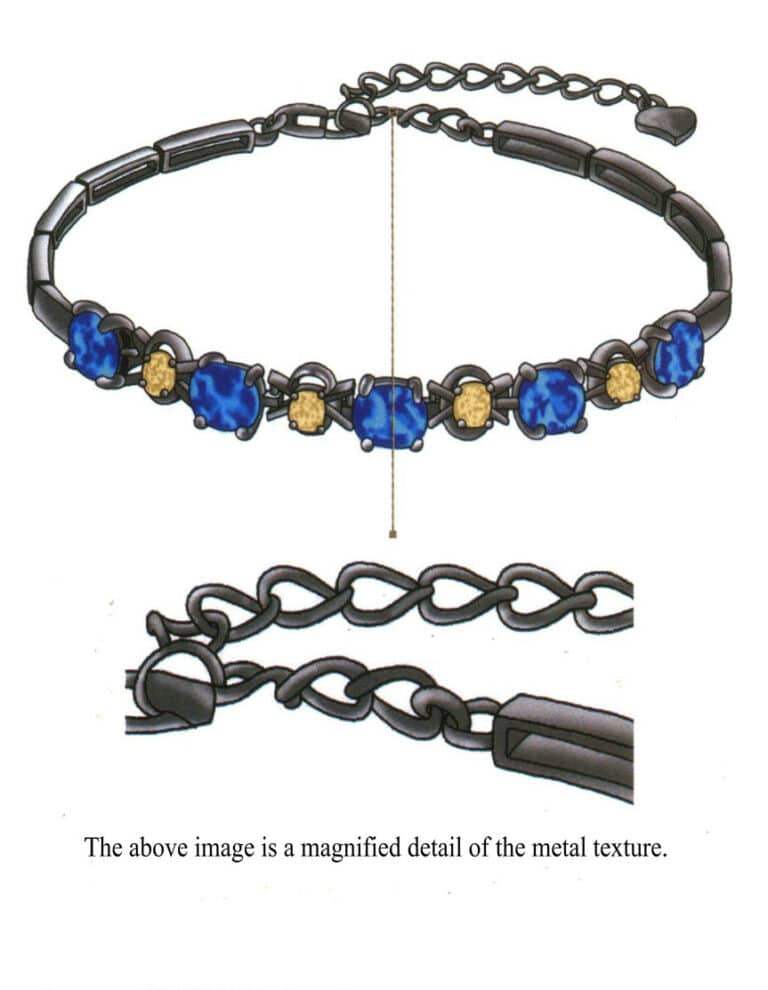
Step 13 Select the "Soft Round" brush tool. Reduce opacity to 75% and paint highlights/reflections on the metal chain based on the light source.
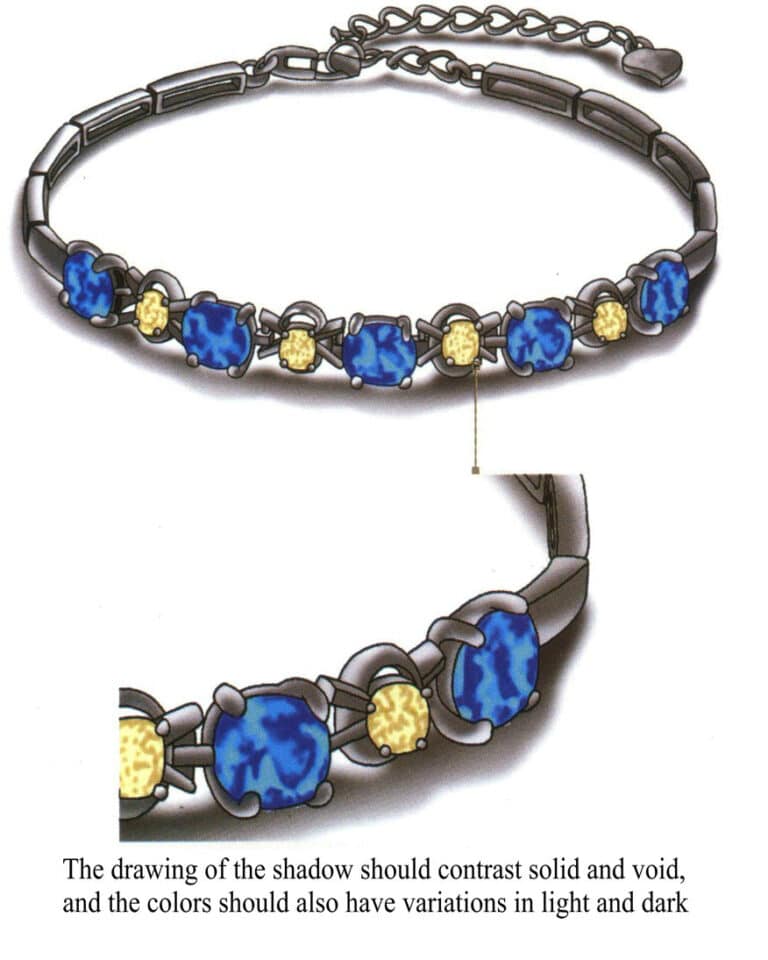
Step 14 Create a "Shadow" layer. Use the "Magic Wand" tool (check "Contiguous"), hold "Shift" to select inner/outer blank areas. Paint shadows with gray using the "Soft Round Pressure Opacity" brush tool. Adjust and complete the artwork.