Küpeler, Yüzükler, Broşlar ve Bilezikler Nasıl Tasarlanır? Adım Adım Kılavuz

Küpe, yüzük, broş ve bilezik tasarlamayı öğrenin. Ametist, elmas, altın, granat, yakut ve pembe kuvars gibi malzemeleri kesme ve eşleştirme konusunda ipuçları alın. Farklı mücevher parçaları için çizim adımlarını takip edin. Mücevher mağazaları, stüdyolar, markalar, tasarımcılar ve e-ticaret satıcıları için mükemmeldir.

Küpeler, Yüzükler, Broşlar ve Bilezikler Nasıl Tasarlanır? Adım Adım Kılavuz

Practical Jewelry Design: Earrings, Rings, Brooches & Bracelets Creation Guide

Giriş:

Want to learn jewelry design? This guide covers designing earrings, rings, brooches, and bracelets. It includes material cutting and matching, size specifications, drawing key points, step-by-step drawing instructions, and technique summaries. Perfect for jewelry makers and designers looking to create beautiful pieces.
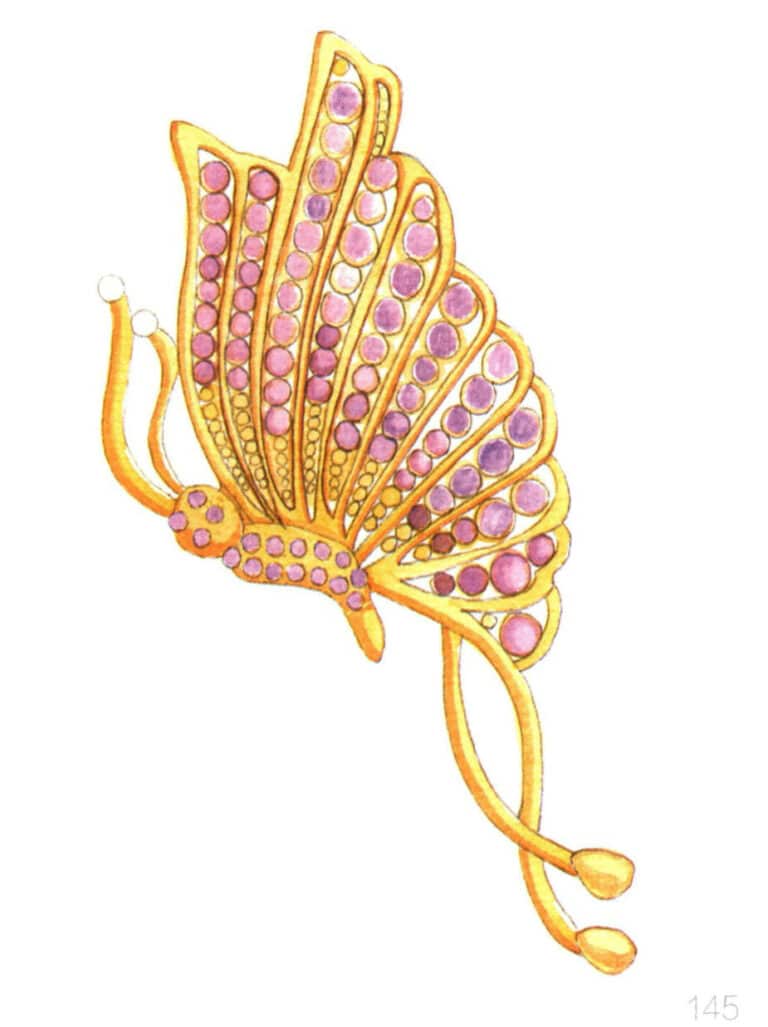
Adım 08 Renkli elmasların ilk katmanı için gül kurusu ve menekşeyi karıştırın, renkleri açık tutun.

İçindekiler

Section I Earring Design Practicing

We have previously learned the basics of hand drawing, using colors, and representing materials. Next, we will explain the training in earring design. This chapter mainly introduces the material cutting and matching for earring design, key points for drawing, drawing steps, and a summary of techniques.

1. Malzeme Kesme ve Eşleştirme

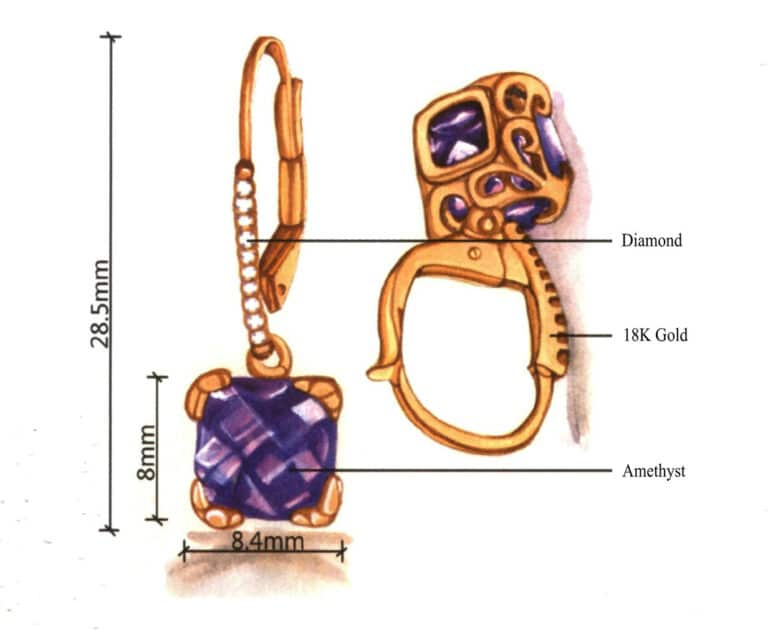
This earring design mainly uses amethyst, diamonds, and 18K gold. Each earring stud features a square amethyst paired with 10 diamonds set in metal, completed with an inlay technique for the design. The overall color tone is filled with a romantic atmosphere. Wearing them on the ears gives a beautiful and noble feeling. Due to the beneficial properties of amethyst for the wearer’s health and its charming hue, its price is also moderate, making it easily accepted by buyers, which makes it very suitable for students and office workers to wear.
Amethyst + Diamond + 18Kgold

2. Size Specifications

Boyut Özellikleri

3. Drawing Key Points

(1) The overlay of gem colors should blend, rich but not abrupt.

(2) The metallic texture is expressed through color gradients, reflections, and highlights.

(3) When composing, it is necessary to consider the display characteristics of an earring design, and different angles can be chosen for representation.
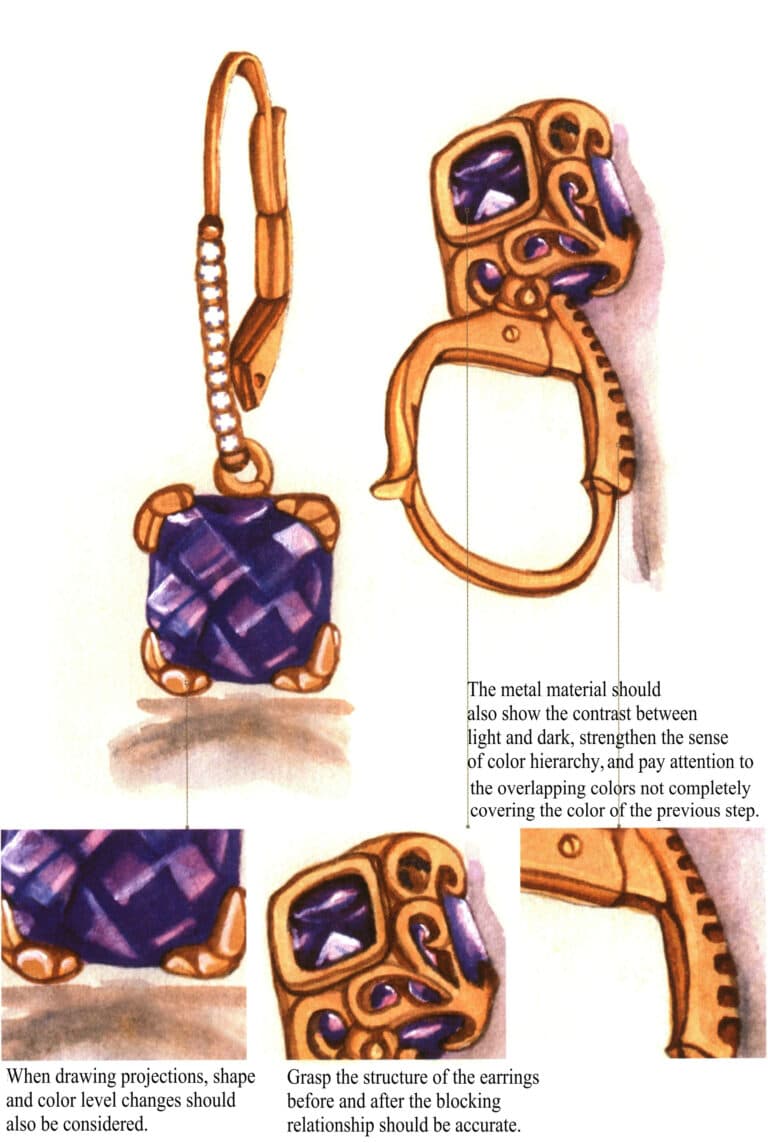
(1) The overlay of gem colors should blend, rich but not abrupt. (2) The metallic texture is expressed through color gradients, reflections, and highlights. (3) When composing, it is necessary to consider the display characteristics of an earring design, and different angles can be chosen for representation.

4. Çizim Adımları
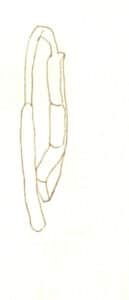
Step 01 Begin with partial sections. Use a pencil to outline the earring’s metal parts based on perspective principles, ensuring clear structural definition and characteristic form.
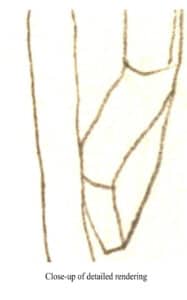
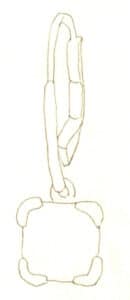
Step 01 Begin with partial sections. Use a pencil to outline the earring’s metal parts based on perspective principles, ensuring clear structural definition and characteristic form.

Step 01 Begin with partial sections. Use a pencil to outline the earring’s metal parts based on perspective principles, ensuring clear structural definition and characteristic form.
Step 02 Sketch the contour of the earring pendant with loose, natural-flowing lines.
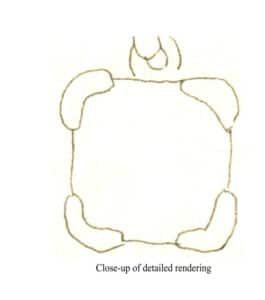
Step 02 Sketch the contour of the earring pendant with loose, natural-flowing lines.
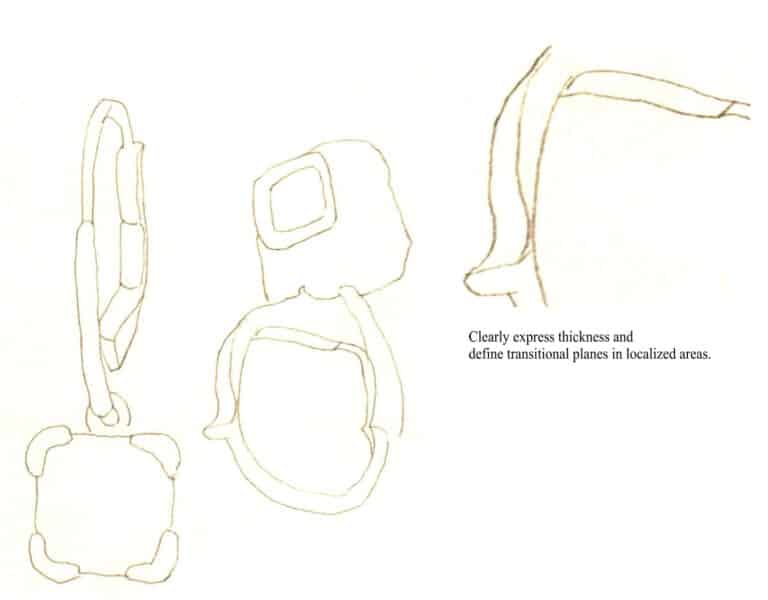
Step 02 Sketch the contour of the earring pendant with loose, natural-flowing lines.
Step 03 Add another earring at a different angle beside the first one to showcase design features from multiple perspectives, enhancing the composition.
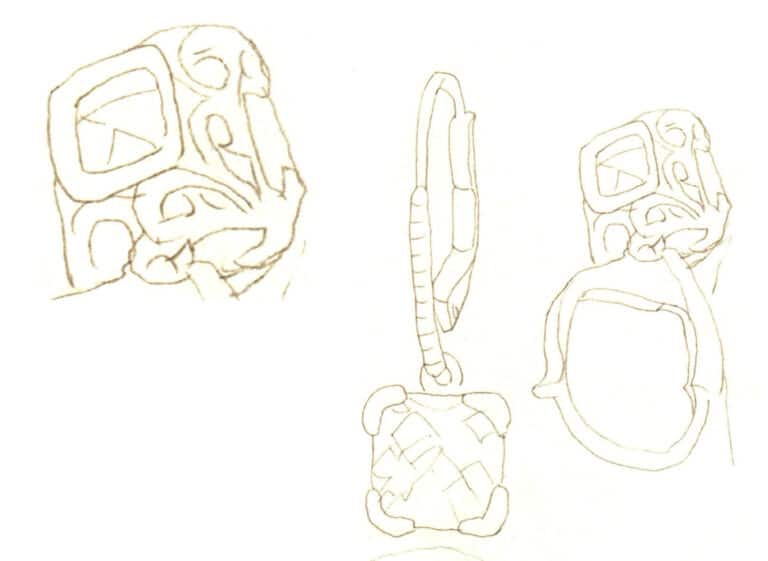
Step 03 Add another earring at a different angle beside the first one to showcase design features from multiple perspectives, enhancing the composition.

Step 04 Add details, refine line art, polish local shapes, and erase redundant lines to maintain cleanliness.
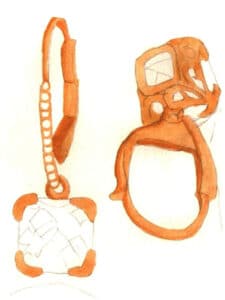
Step 04 Add details, refine line art, polish local shapes, and erase redundant lines to maintain cleanliness.

Step 05 Lighten the pencil sketch with a soft eraser to prevent smudging during coloring. Mix yellow ochre and flesh tone to apply a base layer to the metal parts, suggesting basic light-dark relationships.
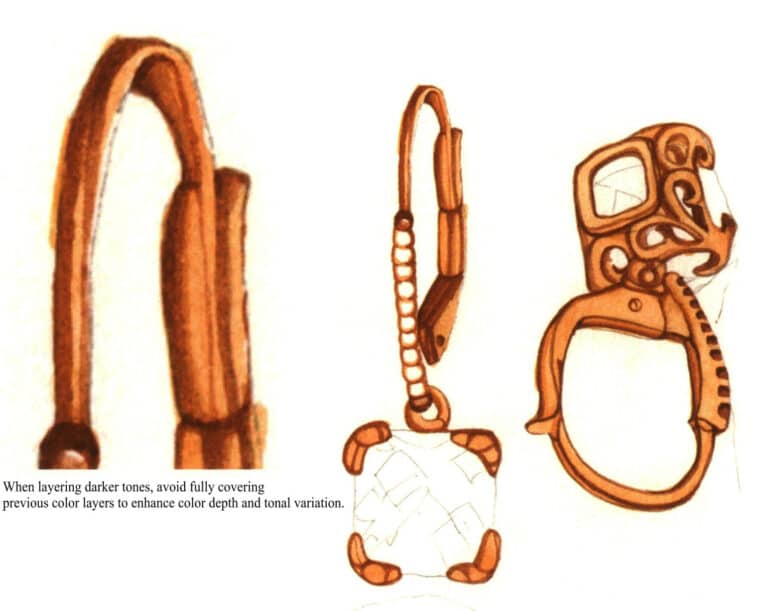
Step 05 Lighten the pencil sketch with a soft eraser to prevent smudging during coloring. Mix yellow ochre and flesh tone to apply a base layer to the metal parts, suggesting basic light-dark relationships.

Step 06 Blend burnt umber and burnt sienna. Use a small watercolor brush to paint metallic shadows, intensifying contrast and three-dimensionality.

Step 06 Blend burnt umber and burnt sienna. Use a small watercolor brush to paint metallic shadows, intensifying contrast and three-dimensionality.


İpuçları

When applying the base color, you can first brush a layer of water on the areas that need coloring to ensure a natural color transition.
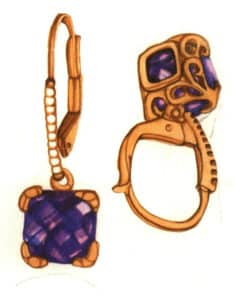
Step 07 Wet the gemstone area. Mix rose madder and violet to apply the amethyst’s base layer. Once slightly dry, add sapphire blue to define shadows and enhance chromatic complexity, emphasizing faceted effects.
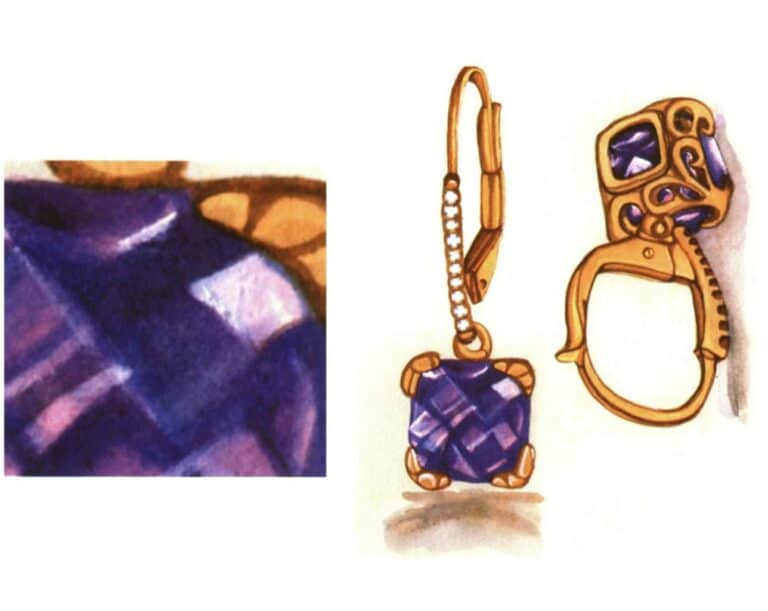
Step 07 Wet the gemstone area. Mix rose madder and violet to apply the amethyst’s base layer. Once slightly dry, add sapphire blue to define shadows and enhance chromatic complexity, emphasizing faceted effects.

Step 08 Paint the earring’s cast shadow. Highlight reflections and sparkle with white pigment. Adjust and finalize the artwork to complete.

Step 08 Paint the earring’s cast shadow. Highlight reflections and sparkle with white pigment. Adjust and finalize the artwork to complete.

5. Tekniklerin Özeti

(1) Değerli taşların hacmini nasıl ifade edersiniz?

The volume of gemstones can be expressed through variations in color depth and highlights, and it is important to depict the facets of the gemstones.


(2) How do you blend and diffuse colors in the painting?

The colors in watercolor are often not painted on but can mix or blend freely on the paper, thus creating a natural color effect. Learning this skill requires a lot of practice and familiarity with the characteristics of your painting tools, such as watercolor brushes, paper, and paints, as well as practicing and mastering moisture control.


(3) How to keep the painting clean?

During the drawing process, you can place a tissue under your hand to prevent sweat from dirtying the painting. Drawing paper is often very easy to get dirty; once it is dirty, it isn’t easy to apply color. Therefore, when painting for a long time, you can place a tissue or wash your hands after painting to solve this problem effectively.

Section II Ring Design Practicing

There are many types of rings, with common shapes, including square rings and line rings, and common materials, including diamonds and jade. This chapter mainly introduces jade ring design, material cutting and matching, drawing key points, drawing steps, and technique summaries.

1. Malzeme Kesme ve Eşleştirme

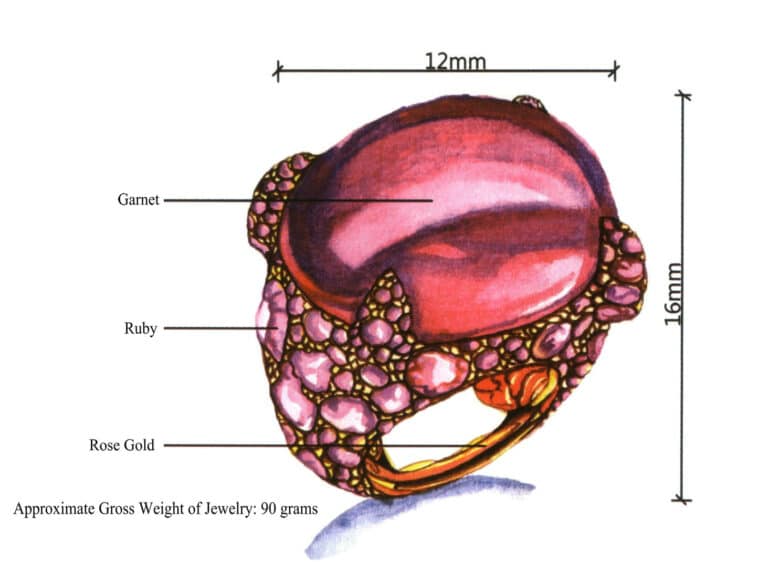
This ring design mainly uses garnet, ruby, and rose gold. The main part features a red semi-circular garnet with a glass-like luster, while the band is made of metal paired with irregular rubies crafted using inlay techniques. The overall color scheme is passionate, vibrant, and lively.

Since it combines garnet, which symbolizes loyalty, authenticity, friendship, and blessings, with ruby, which symbolizes nobility and love, this ring can be worn as a talisman or given as a gift to elders or loved ones.
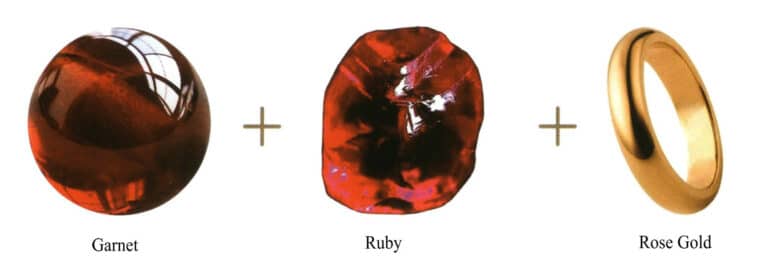
Garnet + Ruby + Rose Gold

2. Size Specifications

Boyut Özellikleri

3. Çizim için Önemli Noktalar

(1) Pay attention to the representation of the gem’s transparency.

(2) Small gems on the ring should be distinguished.
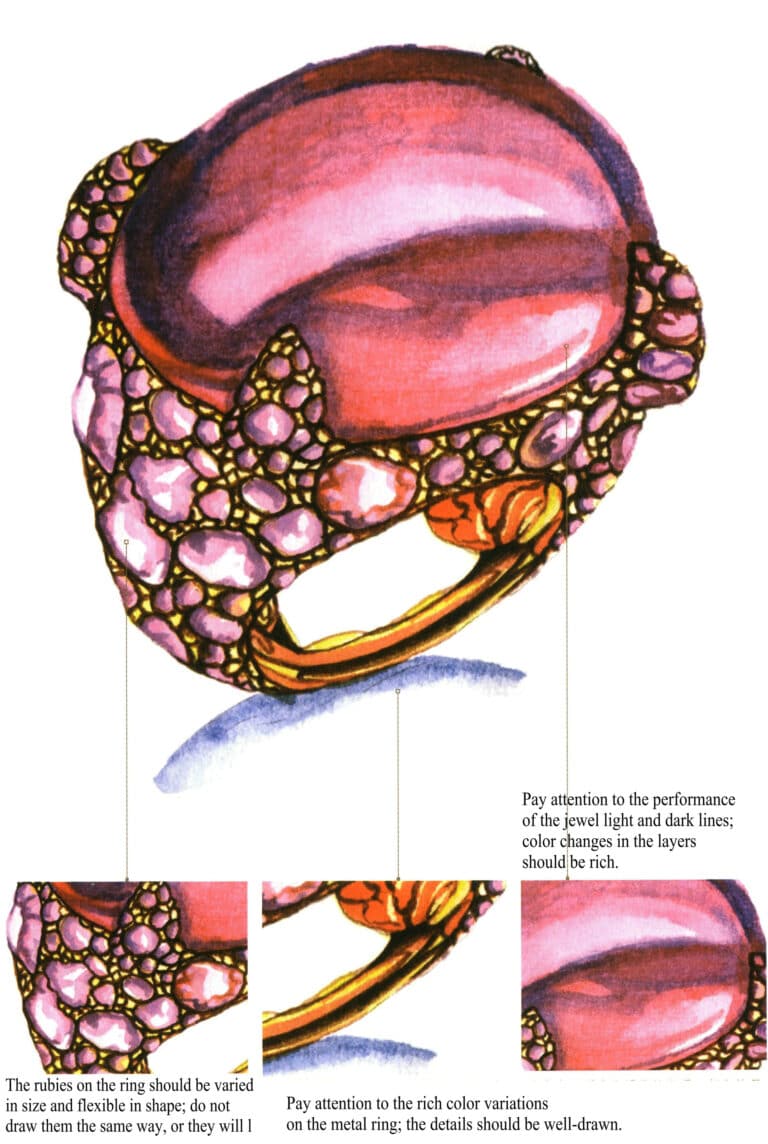
(1) Pay attention to the representation of the gem's transparency. (2) Small gems on the ring should be distinguished.

4. Çizim Adımları
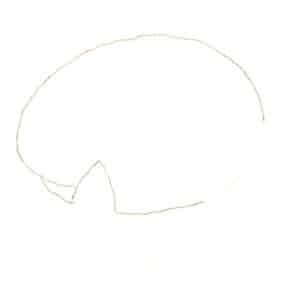
Step 01 Begin with partial sections. Lightly outline the main gemstone’s general contour of the ring with loose, casual lines.
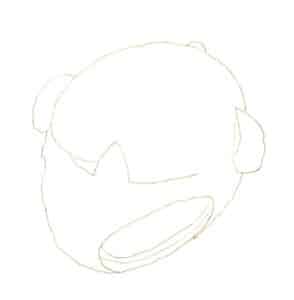
Step 01 Begin with partial sections. Lightly outline the main gemstone’s general contour of the ring with loose, casual lines.

Step 02 Sketch the ring band’s contour with a pencil based on perspective principles, maintaining natural line flow.
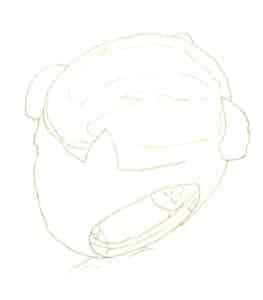
Step 02 Sketch the ring band’s contour with a pencil based on perspective principles, maintaining natural line flow.

Step 03 Lightly outline internal structures like the gemstone’s light-dark boundary line with a pencil.
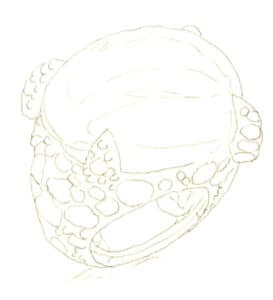
Step 03 Lightly outline internal structures like the gemstone’s light-dark boundary line with a pencil.

Step 04 Add details, refine line art, polish local shapes. Erase redundant lines and soften pencil guidelines with a soft eraser to prevent coloring smudges.
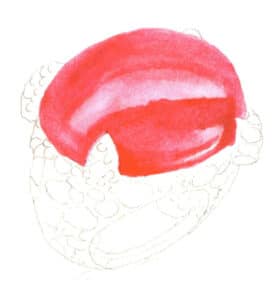
Step 04 Add details, refine line art, polish local shapes. Erase redundant lines and soften pencil guidelines with a soft eraser to prevent coloring smudges.

Step 05 Wet the garnet area on the ring’s main section. Mix vermilion with violet to paint the gemstone’s base color, reserving highlight areas.
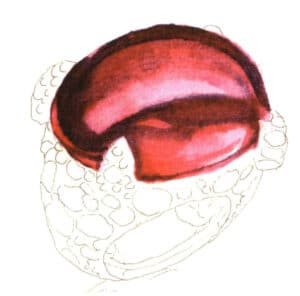
Step 05 Wet the garnet area on the ring’s main section. Mix vermilion with violet to paint the gemstone’s base color, reserving highlight areas.

Step 06 Blend rose madder, cerulean blue, and violet to deepen the gemstone’s shadows, ensuring natural color transitions.
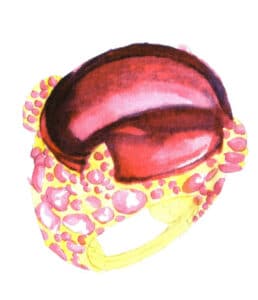
Step 06 Blend rose madder, cerulean blue, and violet to deepen the gemstone’s shadows, ensuring natural color transitions.

Step 07 Dilute rose madder with water to apply the ruby’s base layer on the ring band. Use lemon yellow for a faint base layer on metal parts, leaving intentional gaps for breathability.
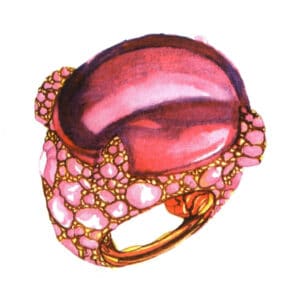
Step 07 Dilute rose madder with water to apply the ruby’s base layer on the ring band. Use lemon yellow for a faint base layer on metal parts, leaving intentional gaps for breathability.

Step 08 Mix burnt umber and vermilion. Use a small watercolor brush to define the ring band’s shadows and refine metal details.
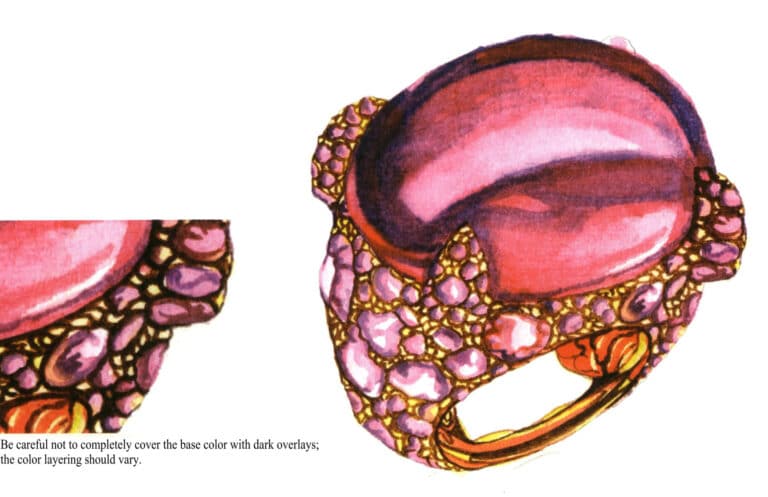
Step 08 Mix burnt umber and vermilion. Use a small watercolor brush to define the ring band’s shadows and refine metal details.

Step 09 Blend rose madder and violet to refine the ruby’s shadows.
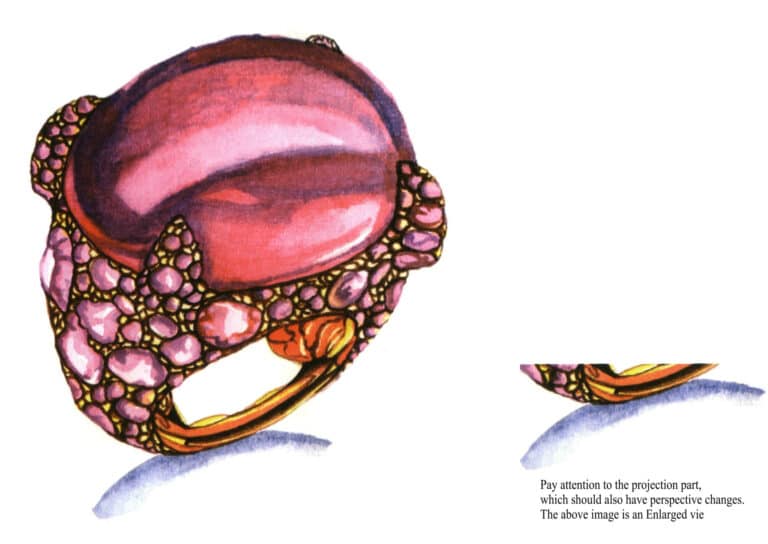
Step 09 Blend rose madder and violet to refine the ruby’s shadows.

Step 10 Deepen metal shadows with raw umber. Paint the ring’s cast shadow with Payne’s grey. Adjust and complete the artwork.

Step 10 Deepen metal shadows with raw umber. Paint the ring’s cast shadow with Payne’s grey. Adjust and complete the artwork.

5. Tekniklerin Özeti

(1) Değerli taşların hacmini nasıl ifade edersiniz?

When drawing gemstones, the sense of volume is generally expressed through variations in color depth and the depiction of highlights and reflections.


(2) How do we unify the color tone of the picture?

Every picture has its main tonal feeling. This chapter’s design renderings of jade rings are primarily in red and yellow, leaning towards warm tones. Therefore, the colors in the picture should not be too many to avoid chaos or inconsistent tones.


(3) How to accurately grasp the external characteristics of jewelry?

First, observe and analyze the perspective relationships of the jewelry, then determine the local shapes’ design style and characteristics, and finally start from the outer contour and gradually refine the internal structure.

Section III Brooch Design Practicing

The selection of brooches varies due to differences in season, age, personal preference, and economic conditions. Wearing different brooches also represents different meanings; for example, a swan brooch symbolizes purity, loyalty, and nobility.

This chapter mainly introduces the design materials, cutting and matching of butterfly brooches, key drawing points, drawing steps, and a summary of techniques.

1. Malzeme Kesme ve Eşleştirme

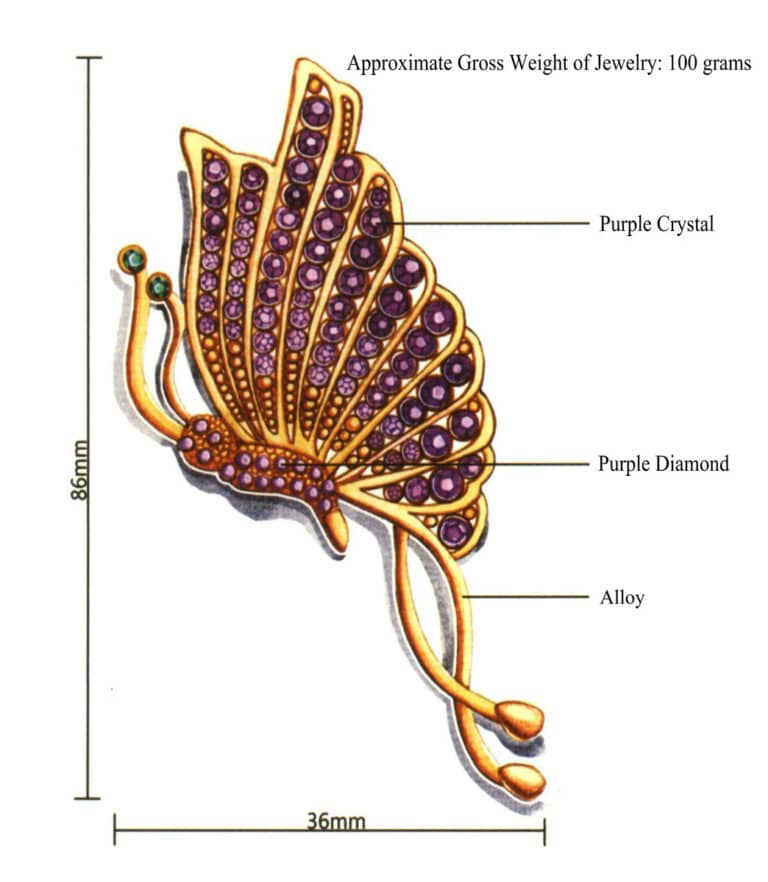
This butterfly brooch design mainly uses purple crystals, diamonds, and alloys. The overall shape features a lightweight butterfly element, with gemstones of varying sizes and independent facets adorning the wings, eyes, and abdomen, paired with a delicate, smooth, and fade-resistant alloy. It employs a handmade inlay technique, ensuring solid quality, and the overall design is dazzling and radiant, giving a feeling of luxury, elegance, and romance.

Wearing it can become the most beautiful embellishment, highlighting the subtle beauty of women and reflecting the wearer’s composure and elegance.
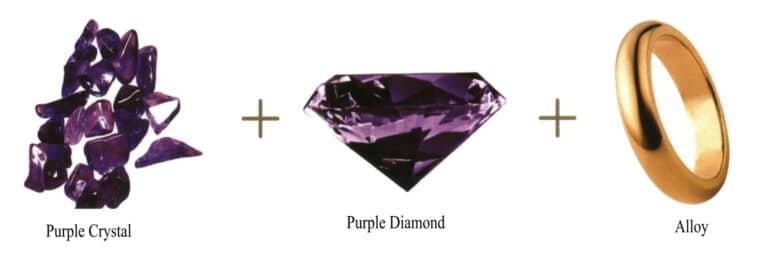
Purple Crystal + Purple Diamond + Alloy

2. Size Specifications

page 144 docsmall.com 副本1

3. Key Points of Drawing

(1) Dark areas are generally depicted using deeper shades of the same color system.

(2) The dark side, bright side, and highlight parts of the gemstone should be distinguished to emphasize the sense of volume.

(3) Due to the light source factors, the butterfly brooch will have variations in color brightness.
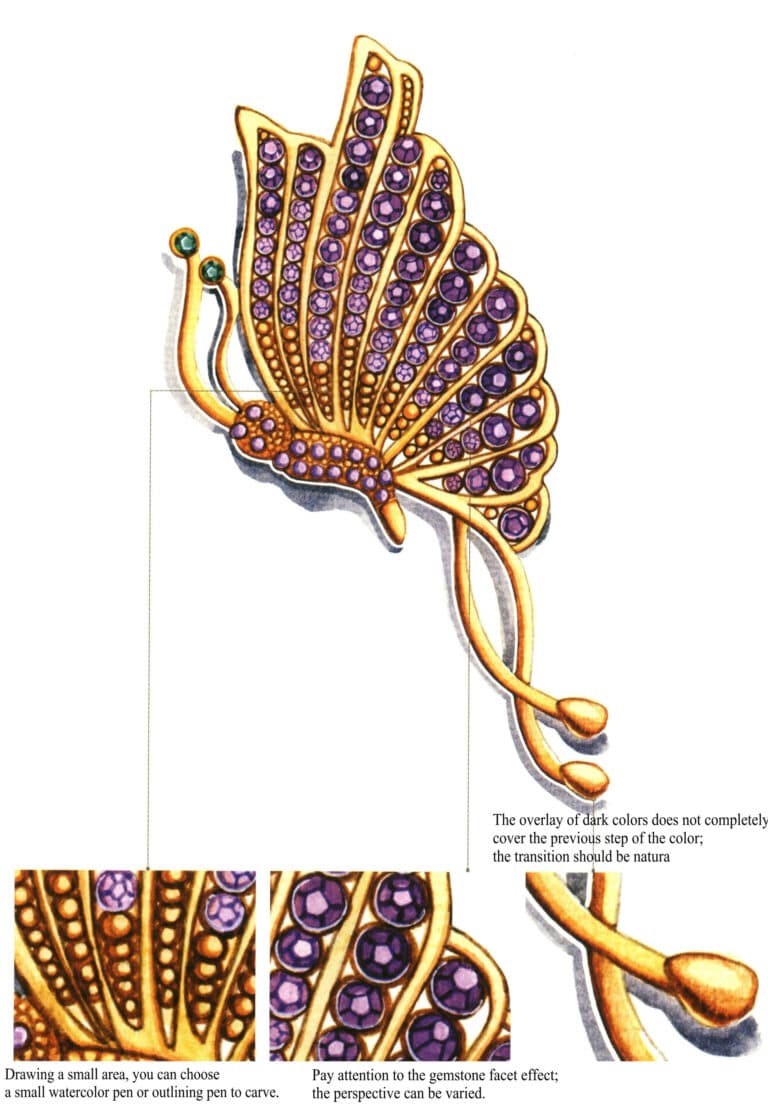
(1) Dark areas are generally depicted using deeper shades of the same color system. (2) The dark side, bright side, and highlight parts of the gemstone should be distinguished to emphasize the sense of volume. (3) Due to the light source factors, the butterfly brooch will have variations in color brightness.

4. Çizim Adımları
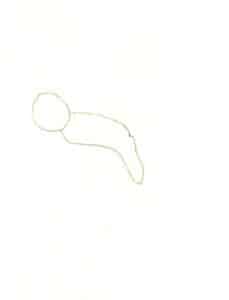
Step 01 Begin with partial sections. Lightly sketch the butterfly brooch’s head and abdomen contours with loose, casual lines as reference.
Step 01 Begin with partial sections. Lightly sketch the butterfly brooch’s head and abdomen contours with loose, casual lines as reference.

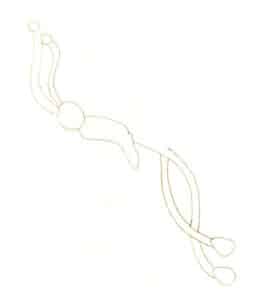
Step 02 Based on overall proportions, outline the brooch’s antennae and tail with natural, flowing pencil lines.
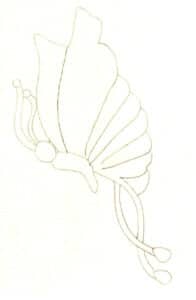
Step 02 Based on overall proportions, outline the brooch’s antennae and tail with natural, flowing pencil lines.

Step 03 Draw the wings’ outer contour with relaxed curved lines.
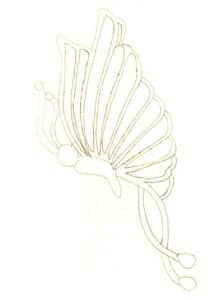
Step 03 Draw the wings’ outer contour with relaxed curved lines.

Step 04 Define the wings’ internal structures with a pencil.
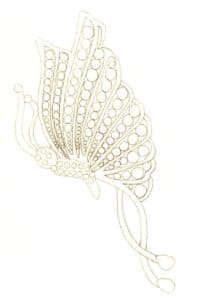
Step 04 Define the wings’ internal structures with a pencil.

Step 05 Mark gemstone positions and shapes using simplified circles. Adjust local shapes and erase redundant lines for cleanliness.
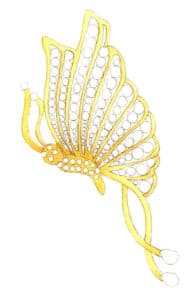
Step 05 Mark gemstone positions and shapes using simplified circles. Adjust local shapes and erase redundant lines for cleanliness.

Step 06 Coat the metal parts with water. Use a medium watercolor brush to apply the first wash with yellow ochre diluted in ample water.
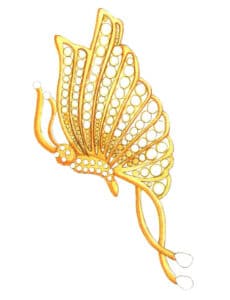
Step 06 Coat the metal parts with water. Use a medium watercolor brush to apply the first wash with yellow ochre diluted in ample water.

Step 07 Paint metallic shadows with burnt umber, keeping coverage minimal.
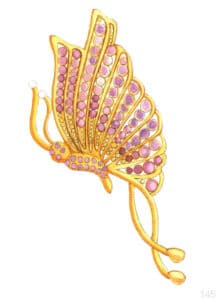
Step 07 Paint metallic shadows with burnt umber, keeping coverage minimal.

Adım 08 Renkli elmasların ilk katmanı için gül kurusu ve menekşeyi karıştırın, renkleri açık tutun.
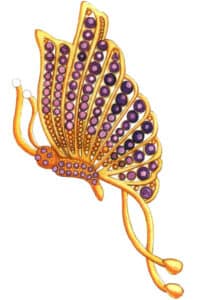
Adım 08 Renkli elmasların ilk katmanı için gül kurusu ve menekşeyi karıştırın, renkleri açık tutun.

Step 09 Reinforce colored diamonds with saturated rose madder and violet mixtures for deeper tones.
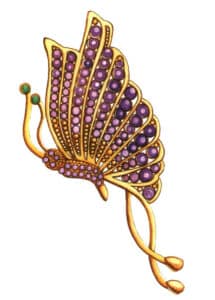
Step 09 Reinforce colored diamonds with saturated rose madder and violet mixtures for deeper tones.

Step 10 Apply emerald green to antennae gemstones. Deepen metal shadows with burnt umber, enhancing color depth.
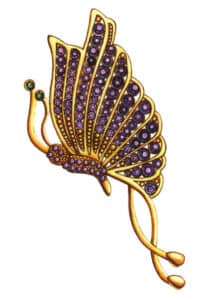
Step 10 Apply emerald green to antennae gemstones. Deepen metal shadows with burnt umber, enhancing color depth.

Step 11 Refine antennae gemstones with emerald green and Payne’s grey. Detail wing gemstones with violet and sapphire blue. Highlight with white.
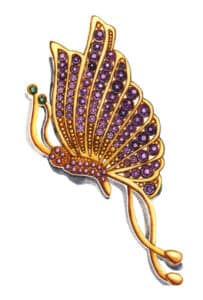
Step 11 Refine antennae gemstones with emerald green and Payne’s grey. Detail wing gemstones with violet and sapphire blue. Highlight with white.

Step 12 Paint the brooch’s cast shadow with Payne’s grey. Adjust and finalize the artwork to complete.

Step 12 Paint the brooch’s cast shadow with Payne’s grey. Adjust and finalize the artwork to complete.

5. Tekniklerin Özeti

(1) How can the sense of volume in metal parts be expressed?

Due to the smooth surface of the metal material, which has good reflective properties, the sense of volume is mainly expressed through the layering of dark colors and the embellishment of reflective areas.


(2) How do you handle the details of the picture well?

The gemstones on the butterfly brooch should be arranged in an orderly manner, and the contrast of light and dark can express the details of the material, highlighting the luster and texture of the crystal and diamond.

Section IV Bracelet Design Practicing

The styles of bracelet design are rich and diverse, with common styles including fashionable multi-strand beaded bracelets, colorful diamond woven thin bracelets, multi-layer crystal stone bracelets, and vintage leather double-ring bracelets. This chapter mainly introduces the material cutting and matching for bracelet design, size specifications, drawing key points, drawing steps, and a summary of techniques.

1. Malzeme Kesme ve Eşleştirme

The processing of handmade beads mainly includes four processes: material selection, shaping, grinding, and polishing. Due to the complexity and difficulty of the processing steps, the yield of perfect bead products is generally very low.

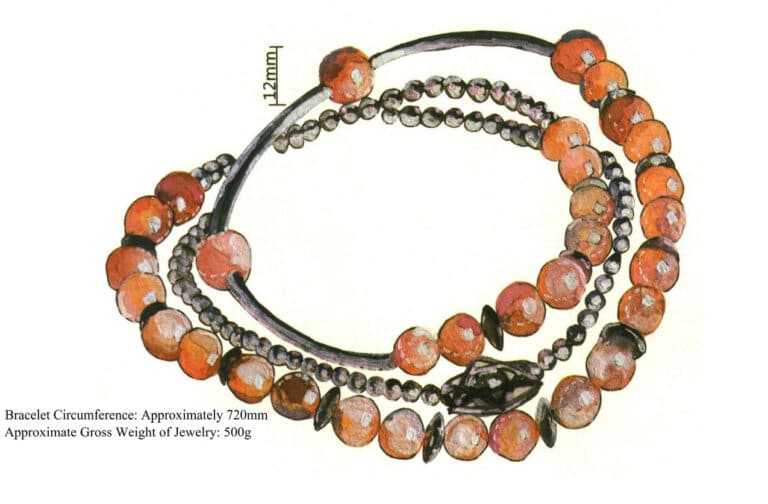
This bracelet design mainly uses crystal-clear, fresh and refined, warm and delicate pink quartz, paired with metal materials to highlight the bracelet’s elegance and restraint, giving a warm and sweet feeling like jade, with a soft pink and watery appearance. Wearing it on the wrist looks very elegant and radiant; not only can it highlight the wearer’s temperament well, but it can also ease tension. In addition, it can promote harmony in interpersonal relationships and enhance attraction to the opposite sex. However, the pink quartz bracelet should be worn on the left hand to exert its best spiritual effect.
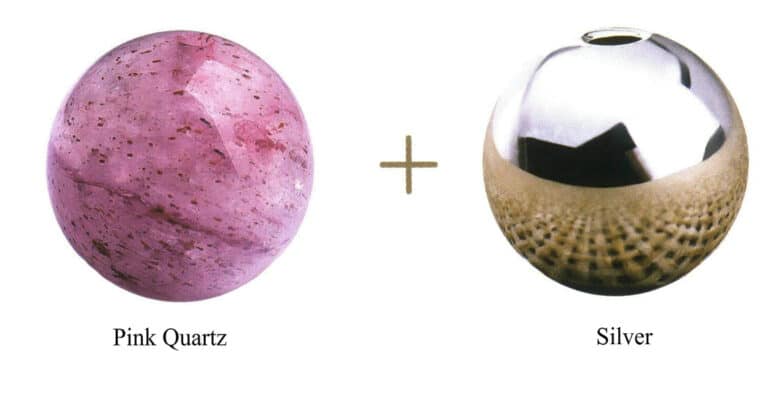
Pink Quartz + Silver

2. Boyut Özellikleri

The diameter of a single pink crystal bead is 12 mm. This bracelet uses 32 pink crystals, 75 round silver beads, and 13 oval silver beads, with a circumference of approximately 720 mm.

3. key Points of Drawing

(1) The bracelet is in a circular stacked state, and when drawing, it is important to grasp the sense of layering between the upper and lower parts.

(2) When drawing metal beads, it is necessary to express the ambient color and the texture of strong reflections, enhancing the sense of space in the picture through the reflective parts of the chain.

(3) The direction of the light source in the overall picture needs to be unified, and attention should be paid to the distribution of highlight positions.
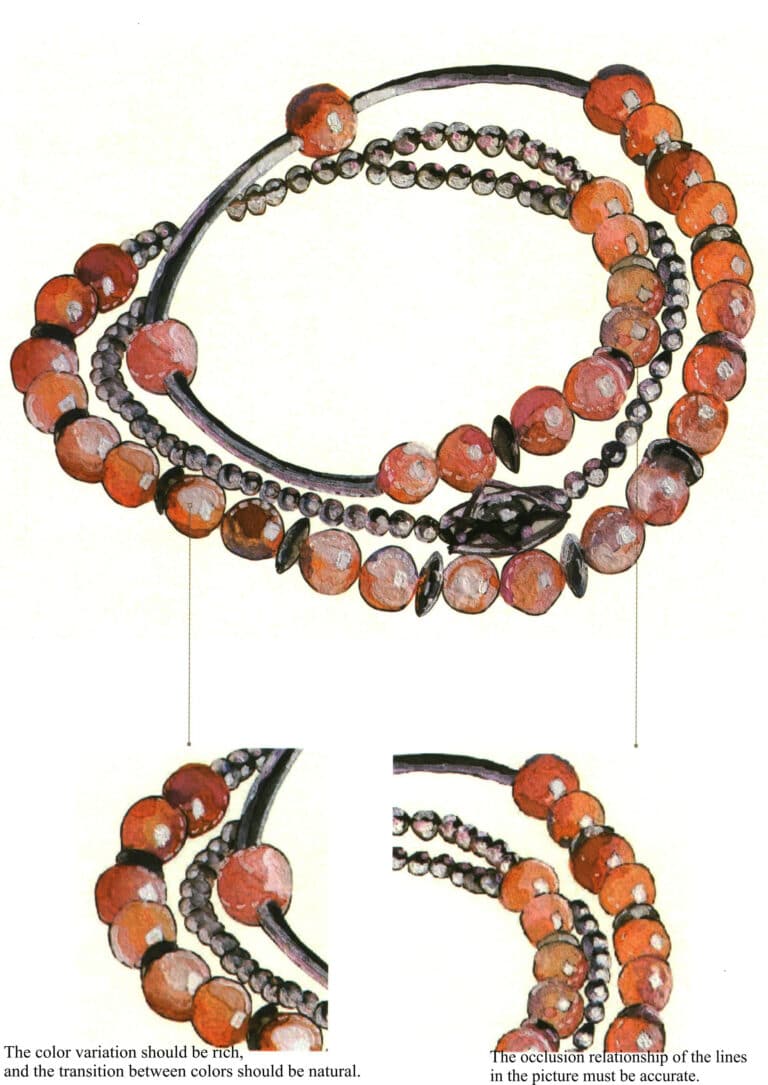
(1) The bracelet is in a circular stacked state, and when drawing, it is important to grasp the sense of layering between the upper and lower parts. (2) When drawing metal beads, it is necessary to express the ambient color and the texture of strong reflections, enhancing the sense of space in the picture through the reflective parts of the chain. (3) The direction of the light source in the overall picture needs to be unified, and attention should be paid to the distribution of highlight positions.

4. Çizim Adımları
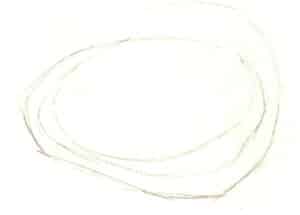
Step 01 Sketch the bracelet’s general contour with light, casual pencil lines, avoiding heavy pressure.

Step 01 Sketch the bracelet’s general contour with light, casual pencil lines, avoiding heavy pressure.

Step 02 Outline the large beads to define the bracelet’s basic shape.
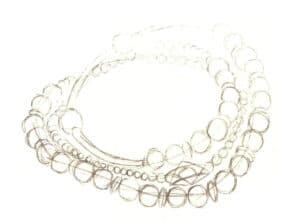
Step 02 Outline the large beads to define the bracelet’s basic shape.

Step 03 Draw remaining structures (small beads, gemstones) with smooth lines.
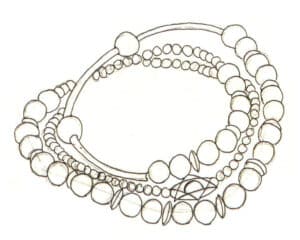
Step 03 Draw remaining structures (small beads, gemstones) with smooth lines.

Step 04 Precisely outline the bracelet’s contours with a 0.2mm technical pen over the pencil draft.
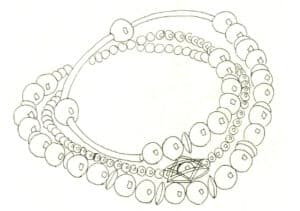
Step 04 Precisely outline the bracelet’s contours with a 0.2mm technical pen over the pencil draft.

Step 05 Add pendant textures and details. Erase pencil marks thoroughly with a soft eraser.
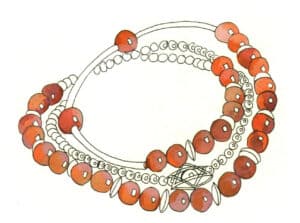
Step 05 Add pendant textures and details. Erase pencil marks thoroughly with a soft eraser.

Step 06 Apply a base layer to large round gemstones using vermilion, lemon yellow, and magenta, reserving whites for highlights.
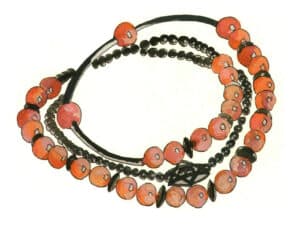
Step 06 Apply a base layer to large round gemstones using vermilion, lemon yellow, and magenta, reserving whites for highlights.

Step 07 Paint the metal parts with Payne’s grey and ivory black, leaving gaps for breathability.
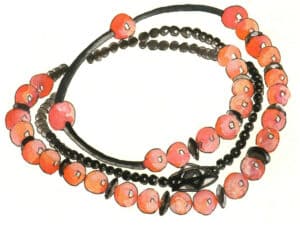
Step 07 Paint the metal parts with Payne’s grey and ivory black, leaving gaps for breathability.

Step 08 Deepen metallic shadows with Payne’s grey mixtures.
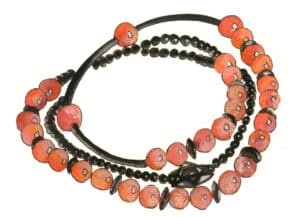
Step 08 Deepen metallic shadows with Payne’s grey mixtures.

page 157 docsmall.com 副本1

Step 09 Blend lemon yellow and rose madder to intensify shadows on pink gemstones, enhancing contrast and volume.
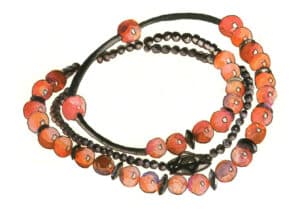
Step 10 Darken shadows on metal beads with Payne’s grey and ivory black.
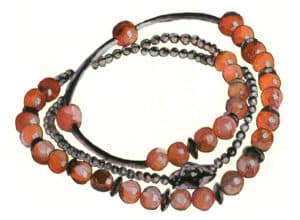
Step 10 Darken shadows on metal beads with Payne’s grey and ivory black.

Step 11 Deepen colors using burnt umber, burnt sienna, lemon yellow, and rose madder. Accent highlights on pink gemstones and metal beads with white.
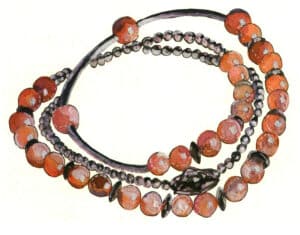
Step 11 Deepen colors using burnt umber, burnt sienna, lemon yellow, and rose madder. Accent highlights on pink gemstones and metal beads with white.

page 158 docsmall.com 副本1

Step 12 Refine gemstones with yellow ochre, rose madder, and orange to amplify three-dimensionality. Adjust and finalize the artwork to complete.

5. Technique Summary

(1) How do we express the sense of volume of crystal beads?

The sense of volume of pink crystal beads can be expressed through variations in color depth, as well as highlights and reflections.


(2) Metal malzemelerin renklerini nasıl eşleştiriyorsunuz?

Metal malzemelerin çizimi, metalin yansıtıcı özelliklerini ifade etmek üzere arıtma için yansıtıcı renklerin uygun şekilde eklenmesini gerektirir.


(3) How to unify the color tone of the picture?

Every picture has its main tonal feeling, such as warm tones, cool tones, etc. The size of the color blocks can determine the main tone, and care should be taken not to use too many colors in the picture to avoid making it chaotic or inconsistent.

Heman'ın resmi
Heman

Mücevher Ürünleri Uzmanı --- 12 yıllık engin deneyim

Merhaba canım,

Ben Heman, iki harika çocuğun babası ve kahramanıyım. Mücevher ürünleri konusunda bir uzman olarak mücevher deneyimlerimi paylaşmaktan mutluluk duyuyorum. 2010 yılından bu yana Hiphopbling ve Silverplanet gibi dünyanın dört bir yanından 29 müşterime yaratıcı mücevher tasarımı, mücevher ürünü geliştirme ve üretim konularında yardımcı ve destek oldum.

Mücevher ürünü hakkında herhangi bir sorunuz varsa, beni aramaktan veya e-posta göndermekten çekinmeyin ve sizin için uygun bir çözümü tartışalım ve işçilik ve mücevher kalitesi ayrıntılarını kontrol etmek için ücretsiz mücevher örnekleri alacaksınız.

Birlikte büyüyelim!

Bir yanıt yazın

E-posta adresiniz yayınlanmayacak. Gerekli alanlar * ile işaretlenmişlerdir

POSTALAR Kategoriler

Mücevher Üretimi Desteğine mi İhtiyacınız Var?

Sorgunuzu Sobling'e Gönderin
202407 heman - Kuyumculuk ürünleri uzmanı
Heman

Mücevher Ürünleri Uzmanı

Merhaba canım,

Ben Heman, iki harika çocuğun babası ve kahramanıyım. Mücevher ürünleri konusunda bir uzman olarak mücevher deneyimlerimi paylaşmaktan mutluluk duyuyorum. 2010 yılından bu yana Hiphopbling ve Silverplanet gibi dünyanın dört bir yanından 29 müşterime yaratıcı mücevher tasarımı, mücevher ürünü geliştirme ve üretim konularında yardımcı ve destek oldum.

Mücevher ürünü hakkında herhangi bir sorunuz varsa, beni aramaktan veya e-posta göndermekten çekinmeyin ve sizin için uygun bir çözümü tartışalım ve işçilik ve mücevher kalitesi ayrıntılarını kontrol etmek için ücretsiz mücevher örnekleri alacaksınız.

Birlikte büyüyelim!

Beni takip edin.

Neden Sobling'i Seçmelisiniz?

Sobling Ekip Üyeleri gümüş takı üreticisi ve fabrikası
SERTİFİKALAR

Sobling Kalite Standartlarına Saygılıdır

Sobling, TUV CNAS CTC gibi Kalite sertifikalarına uygundur

En yeni gönderiler

Şekil 3-33 Yüksek Frekanslı İndüksiyonla Eritme

Mücevher Hassas Döküm nasıl yapılır?

Yüksek kaliteli parçalar yaratmak için mücevher yatırım döküm sürecini öğrenin. Temel adımlar arasında kauçuk kalıpların preslenmesi, balmumu enjeksiyonu ve altın ve gümüş gibi metallerin dökümü yer alır. Kuyumcular, stüdyolar ve tasarımcılar için zanaatlarını geliştirmek ve mükemmel özel mücevherler üretmek için gereklidir.

Daha Fazla Oku "
Şekil 2-2 Hidrotermal yöntemle kristal büyütmek için elektrikli fırın ve yüksek basınçlı reaktörde kullanılan tipik aparat

Sentetik Değerli Taşlar Nasıl Üretilir - 8 çeşit Sentezid yöntemi ve üretim süreci detayları

Sentetik değerli taşlar, doğal taşlara yüksek kaliteli alternatifler sunarak mücevher dünyasında devrim yaratıyor. Oluşumları, hidrotermal ve flux gibi sentez yöntemleri ve piyasayı nasıl dönüştürdükleri hakkında bilgi edinin. Yenilik yapmak ve rekabetçi kalmak isteyen mücevher uzmanları için vazgeçilmez bir okuma.

Daha Fazla Oku "
boncuklarla takı nasıl yapılır

Boncuklu Takı Nasıl Yapılır? Takı Yaratıcıları için Temelden İleri Düzeye Boncuk Teknikleri

İplik geçirme, düğüm atma ve metal aksesuar kullanma gibi temel boncuk tekniklerini öğrenin. Bu kılavuz tek ve çapraz iplik geçirme, ters ve ileri yöntemleri, boncuk dönüşü ve düz dikişi kapsamaktadır. Ayrıca boncuk kordonu, elastik kordon ve son rötuşlar için ipuçları da içerir. Kuyumcular, stüdyolar, tasarımcılar ve özel parçalar yapan herkes için mükemmeldir.

Daha Fazla Oku "
Şekil 8-30 Halka şaftının yuvarlatılması (Klotz F, 2003'e göre)

Kuyumculukta Mekanik İşleme Teknolojisi için kapsamlı bir rehber

Metalden son parçaya kadar mücevherin nasıl yapıldığını öğrenin! Döküm, altın levhaları şekillendirme, boru ve tel yapımı ve damgalama adı verilen harika bir işlem hakkında konuşuyoruz. Her şey takıları daha hızlı ve daha iyi yapmakla ilgili. Mücevher işinde olan veya özel mücevher isteyen herkes için harika.

Daha Fazla Oku "

10% Kapalı!!!

Tüm birinci dereceden

Haber bültenimize katılın

En son güncellemeleri ve teklifleri almak için abone olun!

Sobling mücevher üreticisi mücevherleriniz için fiyat teklifi alın
Nihai kaynak bulma rehberi - Yeni tedarikçilerden kaynak bulma sürecinizde milyonlarınızı kurtaracak 10 ipucu
Ücretsiz İndirme

Nihai Ticari Kaynak Bulma Rehberi

10 Değerli İpucu Yeni Tedarikçilerden Mücevher Tedarikiniz İçin Milyonlarınızı Kurtarabilir
Sobling mücevher üreticisi mücevher tasarımlarınız için ücretsiz özelleştirme

Takı fabrikası, takı özelleştirme, Moissanite Takı fabrikası, Pirinç bakır Takı, Yarı Değerli Takı, Sentetik Taşlar Takı, Tatlısu İnci Takı, Gümüş CZ Takı, Yarı Değerli Taşlar özelleştirme, Sentetik Taşlar Takı