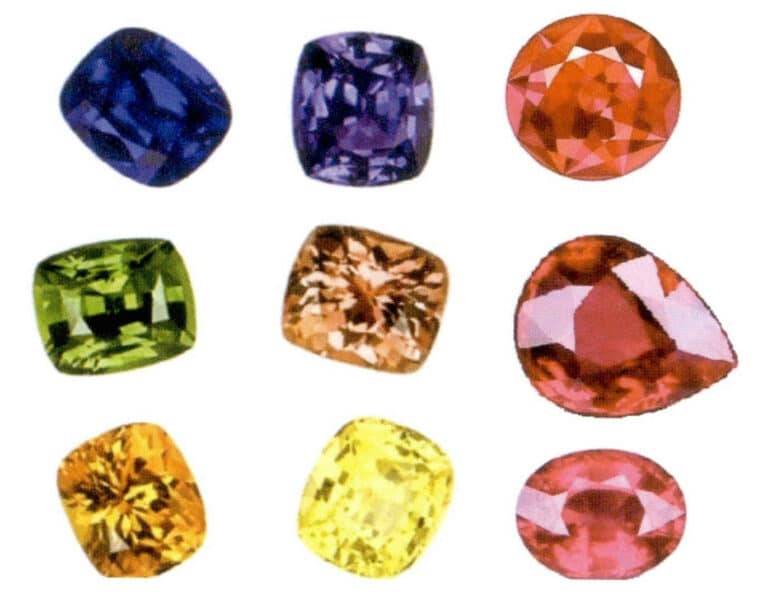
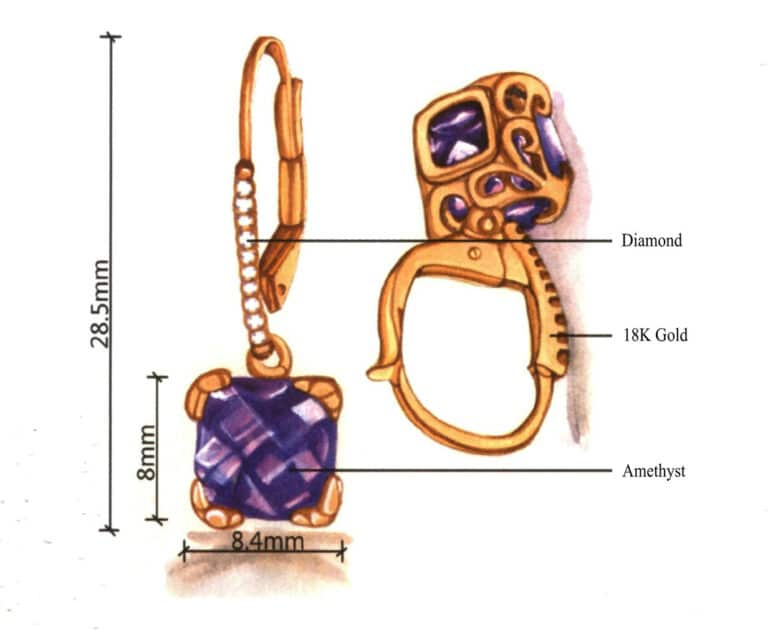
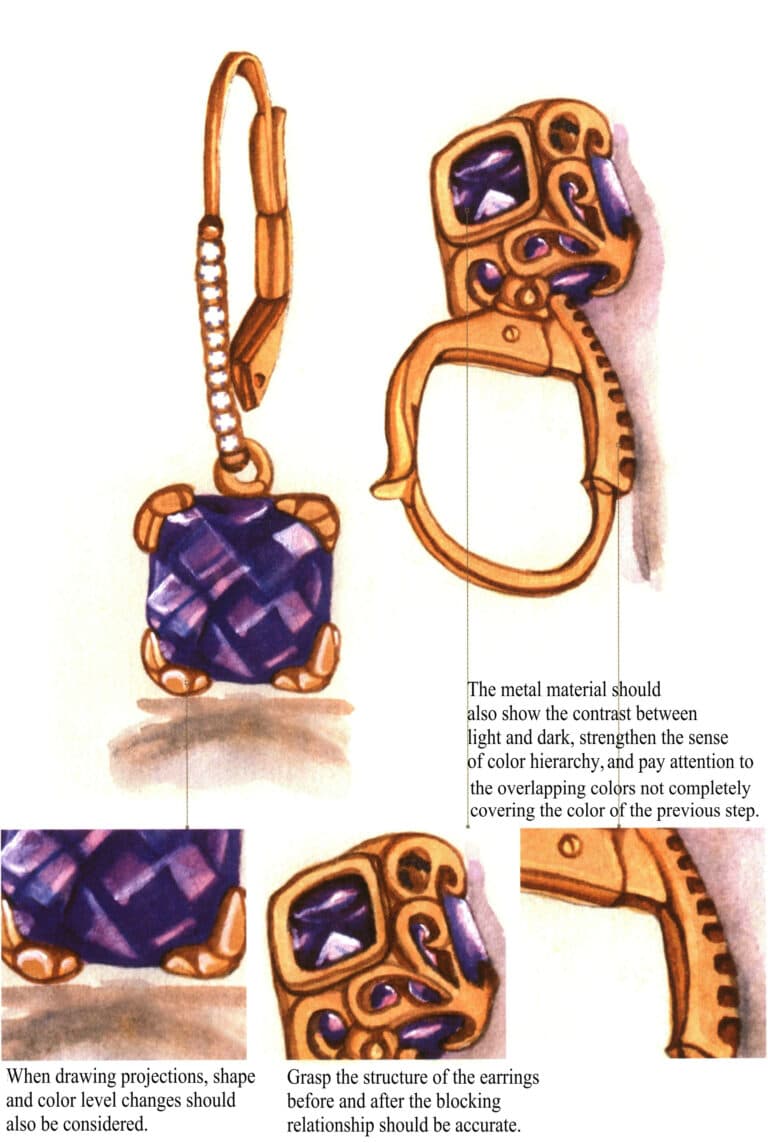

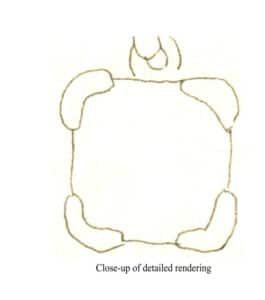
Steg 01 Börja med partiella sektioner. Använd en penna för att skissera örhängenas metalldelar baserat på perspektivprinciper, vilket säkerställer en tydlig strukturell definition och karakteristisk form.
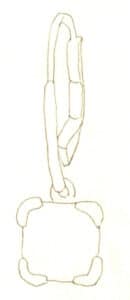
Steg 02 Skissa konturen av örhänge med lösa, naturligt flödande linjer.
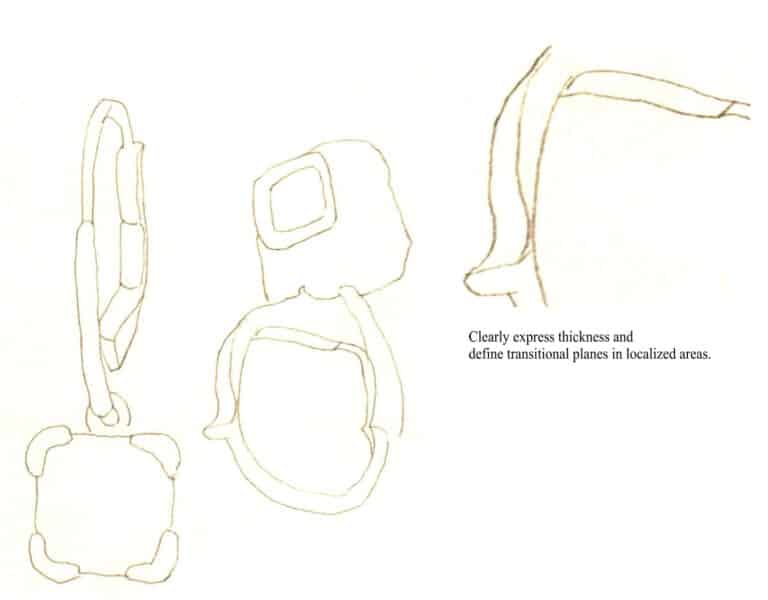
Steg 03 Lägg till ett annat örhänge i en annan vinkel bredvid det första för att visa designdetaljerna från flera perspektiv, vilket förstärker kompositionen.
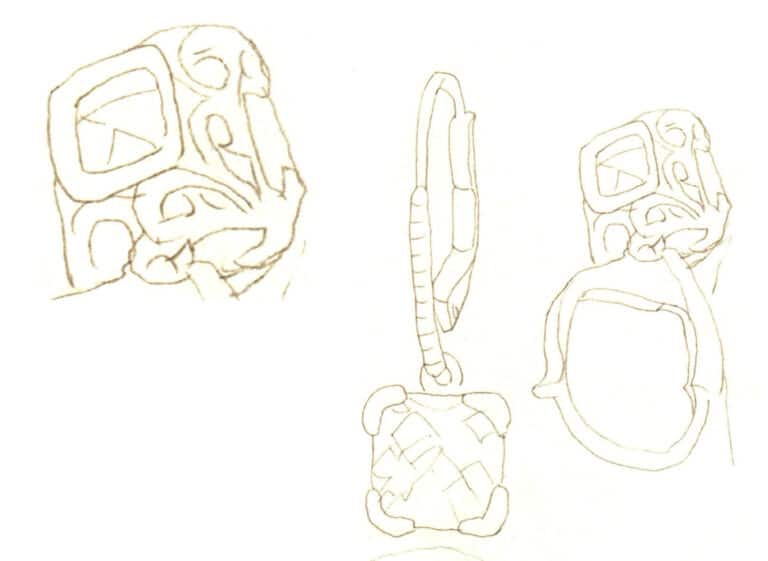
Steg 04 Lägg till detaljer, förfina linjer, polera lokala former och radera överflödiga linjer för att bibehålla renheten.
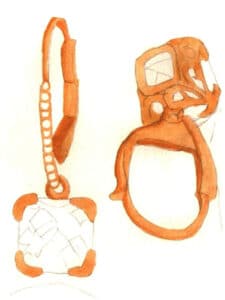
Steg 05 Ljusa upp blyertsskissen med ett mjukt suddgummi för att förhindra kladd under färgläggningen. Blanda gulockra och köttton för att lägga ett baslager på metalldelarna, vilket antyder grundläggande ljus-mörker-förhållanden.
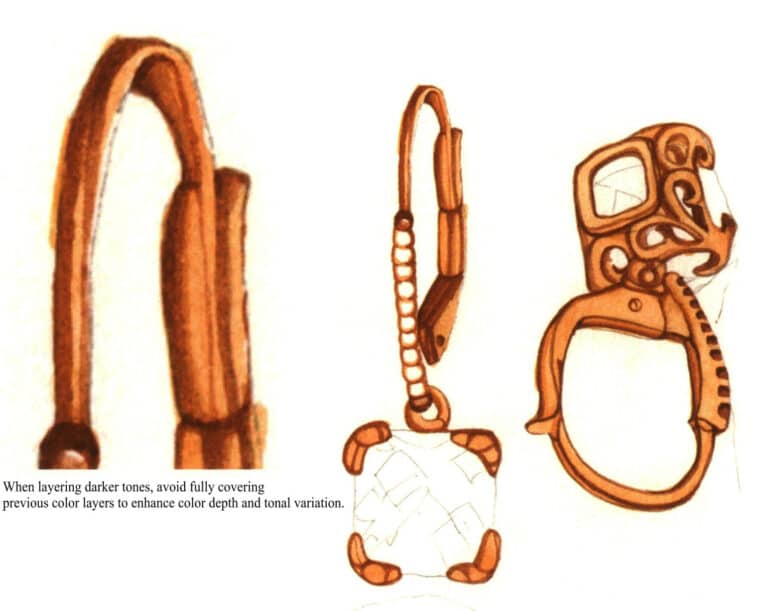
Steg 06 Blanda bränd umbra och bränd sienna. Använd en liten akvarellpensel för att måla metalliska skuggor som förstärker kontrasten och tredimensionaliteten.
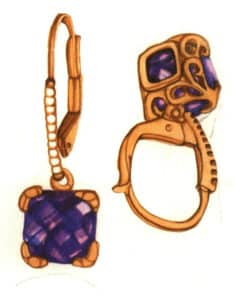
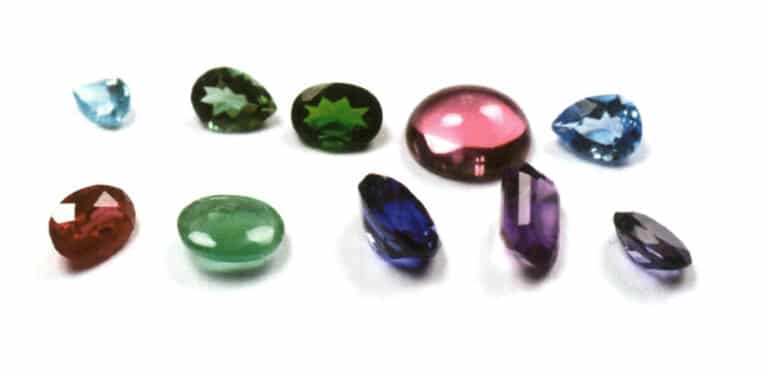
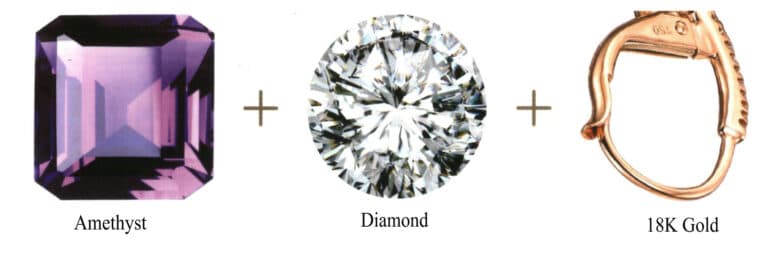
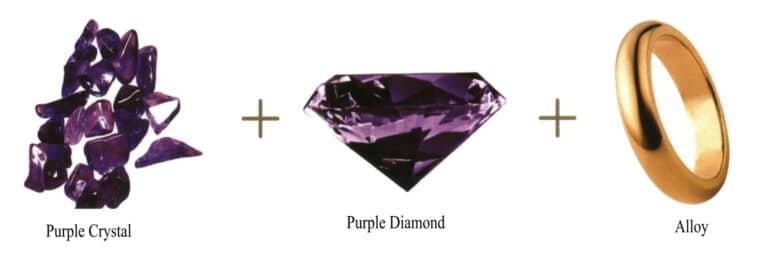
Steg 07 Fukta ädelstensområdet. Blanda rosenkrapp och violett för att applicera ametistens baslager. När det är lite torrt lägger du till safirblått för att definiera skuggor och förbättra kromatisk komplexitet, vilket framhäver fasetterade effekter.
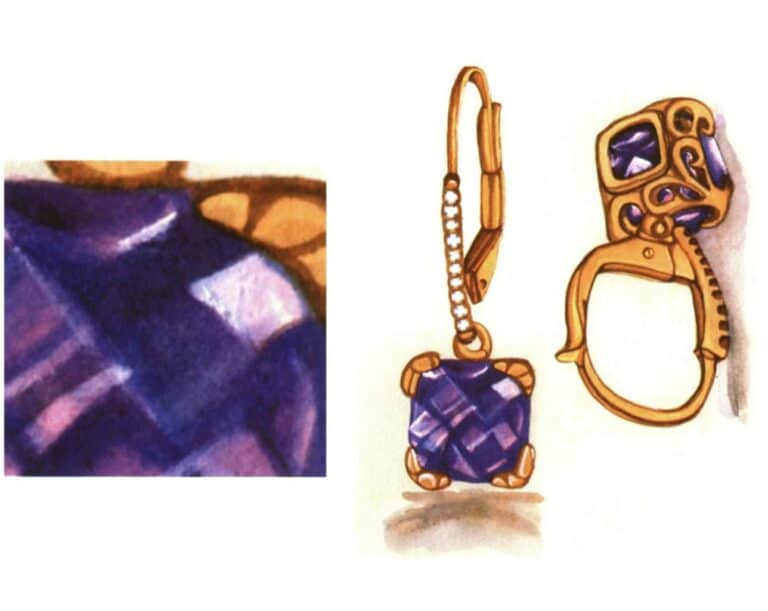
Steg 08 Måla örhängenas kastskugga. Framhäv reflektioner och glitter med vitt pigment. Justera och slutför konstverket för att slutföra.
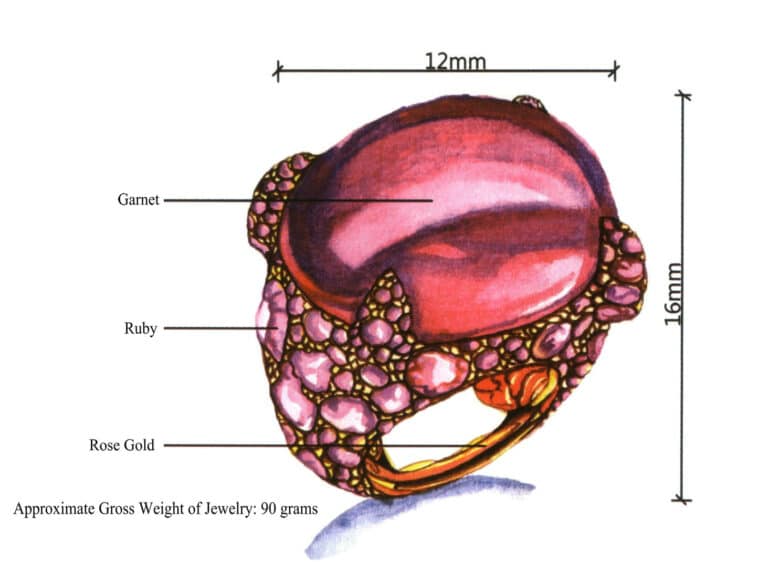
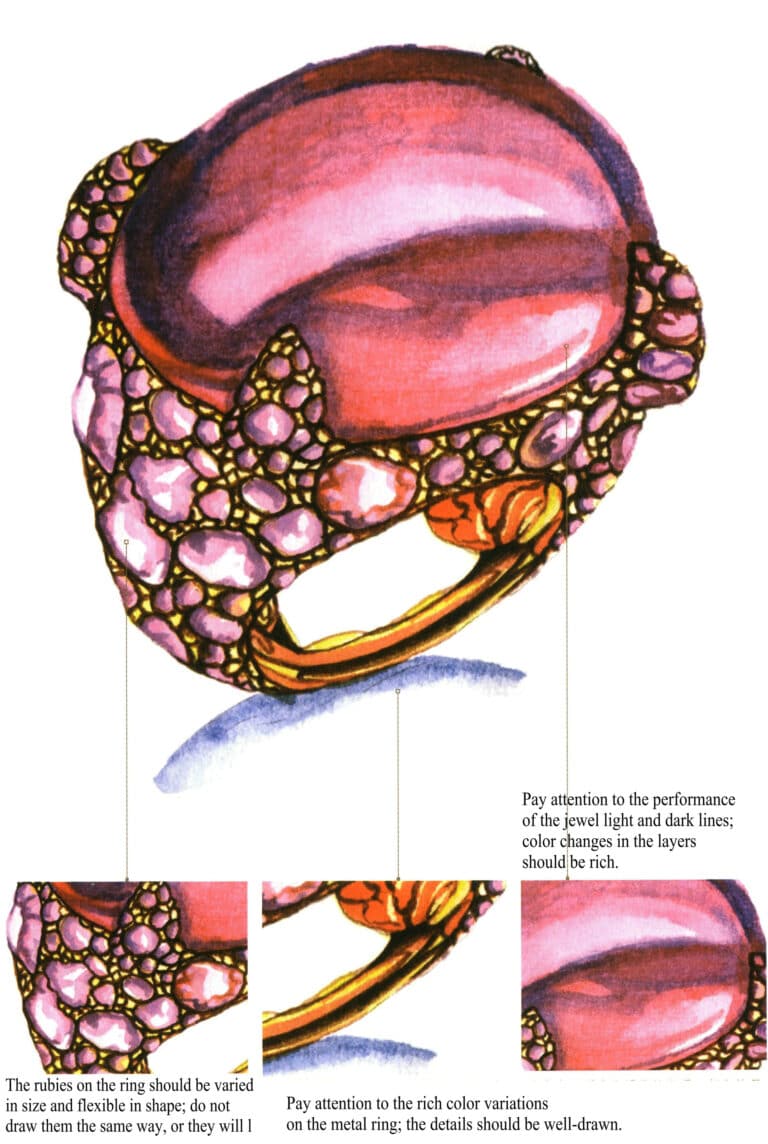
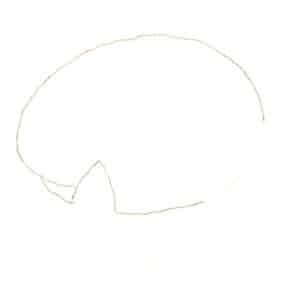
Steg 01 Börja med partiella sektioner. Skissera lätt huvudstenens allmänna kontur på ringen med lösa, avslappnade linjer.
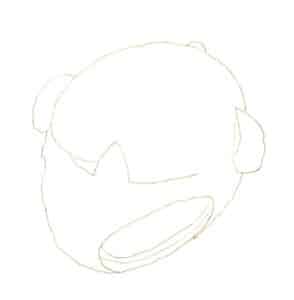
Steg 02 Skissa ringbandets kontur med en blyertspenna baserat på perspektivprinciper, med bibehållet naturligt linjeflöde.
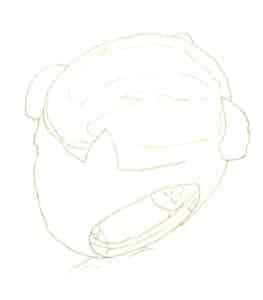
Steg 03 Skissera lätt interna strukturer som ädelstenens ljus-mörka gränslinje med en penna.
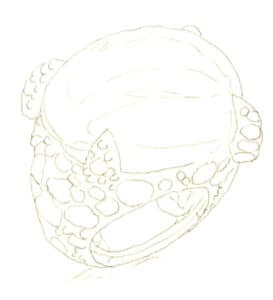
Steg 04 Lägg till detaljer, förfina linjeteckning, polera lokala former. Radera överflödiga linjer och mjuka upp blyertslinjer med ett mjukt suddgummi för att förhindra färgfläckar.

Steg 05 Våt granatområdet på ringens huvuddel. Blanda vermilion med violett för att måla ädelstenens basfärg och reservera markerade områden.
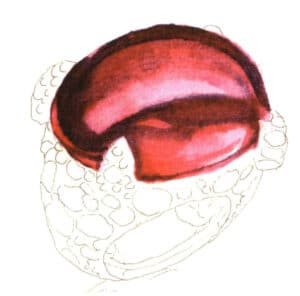
Steg 06 Blanda rosenkrapp, ceruleanblått och violett för att fördjupa ädelstenens skuggor och säkerställa naturliga färgövergångar.
Steg 07 Späd ut rosenkrapp med vatten för att applicera rubinens baslager på ringbandet. Använd citrongult för ett svagt baslager på metalldelar och lämna avsiktliga luckor för andningsförmåga.

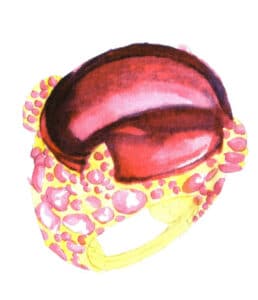
Steg 08 Blanda bränd umbra och vermilion. Använd en liten akvarellpensel för att definiera ringbandets skuggor och förfina metalldetaljer.
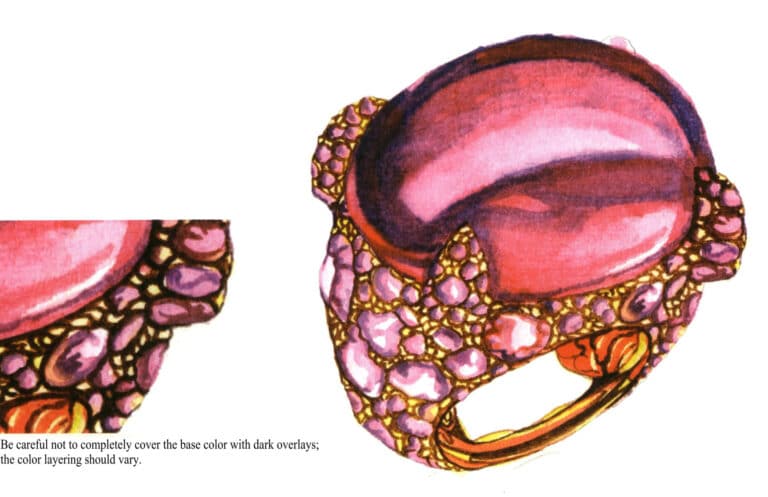
Steg 09 Blanda rosenkrapp och violett för att förfina rubinens skuggor.

Steg 10 Fördjupa metallskuggorna med rå umbra. Måla ringens slagskugga med Payne's grey. Justera och färdigställ konstverket.
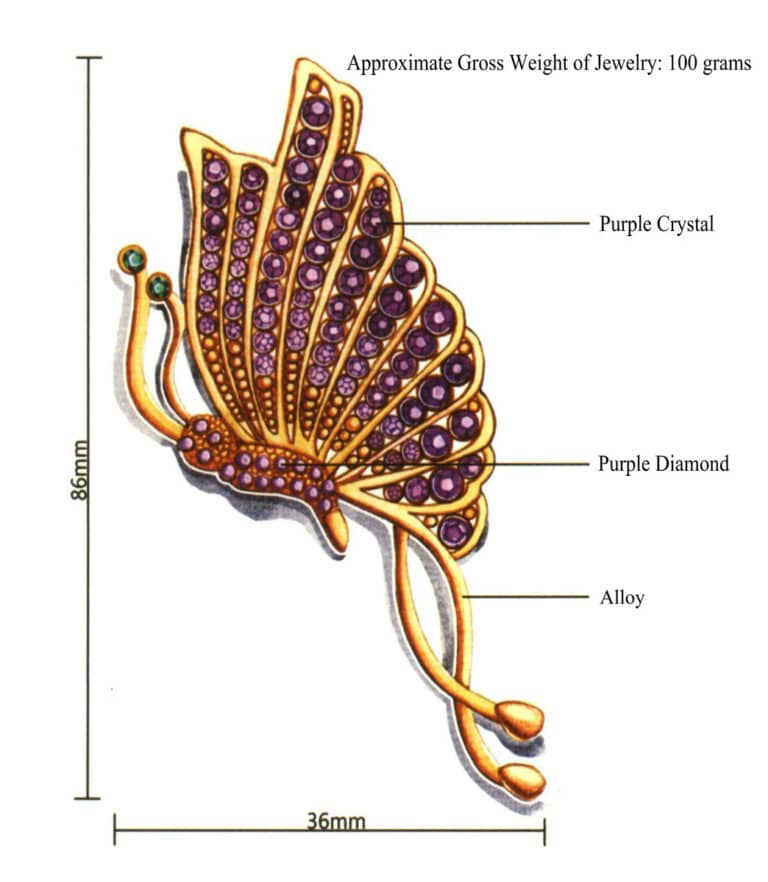
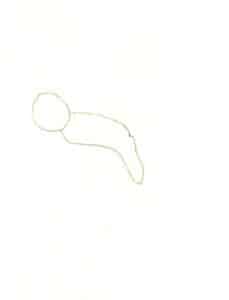
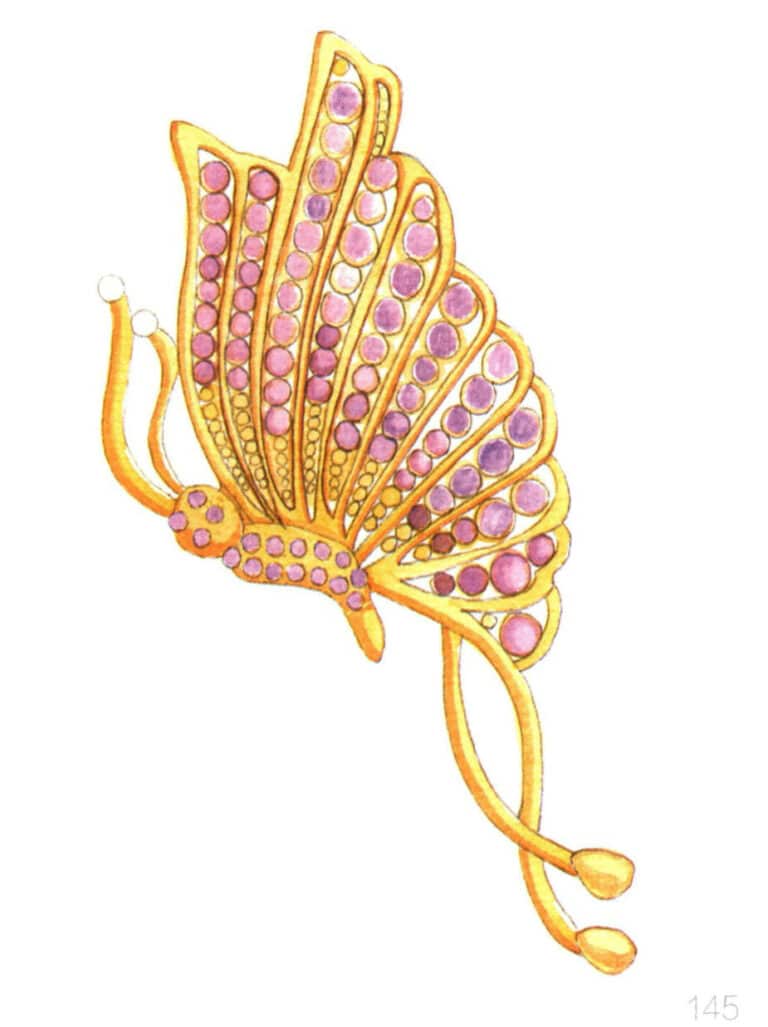
Steg 01 Börja med partiella sektioner. Skissa lätt på konturerna av fjärilsbroschens huvud och buk med lösa, avslappnade linjer som referens.
Steg 02 Baserat på de övergripande proportionerna, skissera broschens antenner och svans med naturliga, flytande blyertslinjer.
Steg 03 Rita vingarnas yttre kontur med avslappnade böjda linjer.
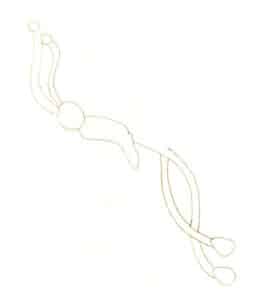
Steg 04 Definiera vingarnas inre strukturer med en penna.
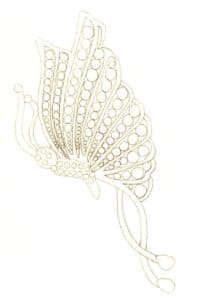
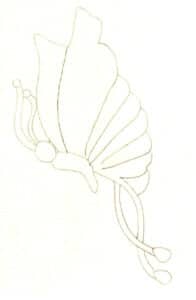
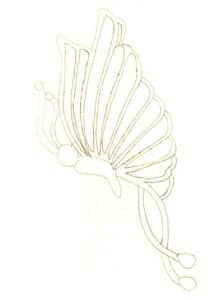
Steg 05 Markera ädelstenarnas positioner och former med hjälp av förenklade cirklar. Justera lokala former och radera överflödiga linjer för renhetens skull.
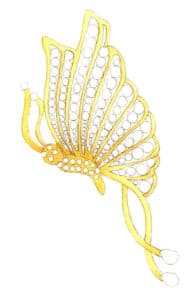
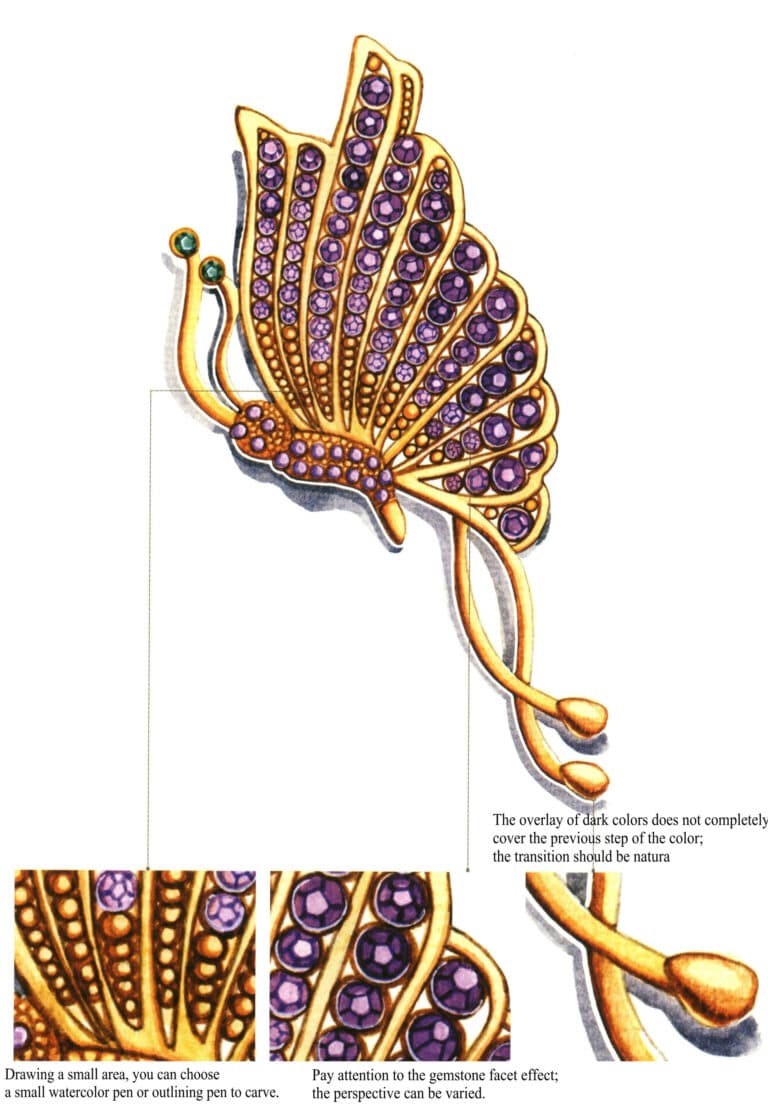
Steg 06 Måla metalldelarna med vatten. Använd en medelstor akvarellpensel för att applicera den första tvätten med gulockra utspädd i rikligt med vatten.
Steg 07 Måla metallicskuggor med bränd umbra och håll täckningen minimal.

Steg 08 Blanda rosenkrapp och violett för de färgade diamanternas första lager, håll färgerna ljusa.
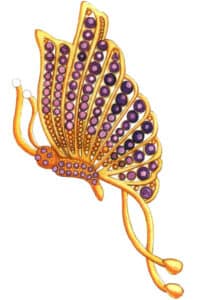
Steg 09 Förstärk färgade diamanter med mättade rosenkrapp- och violettblandningar för djupare toner.

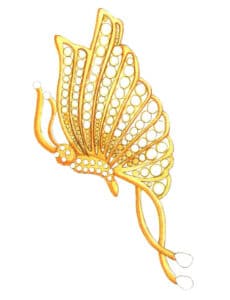
Steg 10 Applicera smaragdgrönt på antennens ädelstenar. Fördjupa metallskuggorna med bränd umbra för att öka färgdjupet.
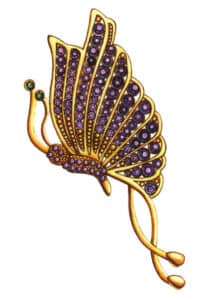
Steg 11 Förfina antennernas ädelstenar med smaragdgrönt och Payne's grey. Detaljera vingens ädelstenar med violett och safirblått. Markera med vitt.
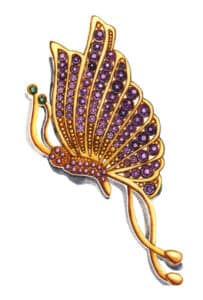
Steg 12 Måla broschens slagskugga med Paynes grå. Justera och slutför konstverket för att slutföra.

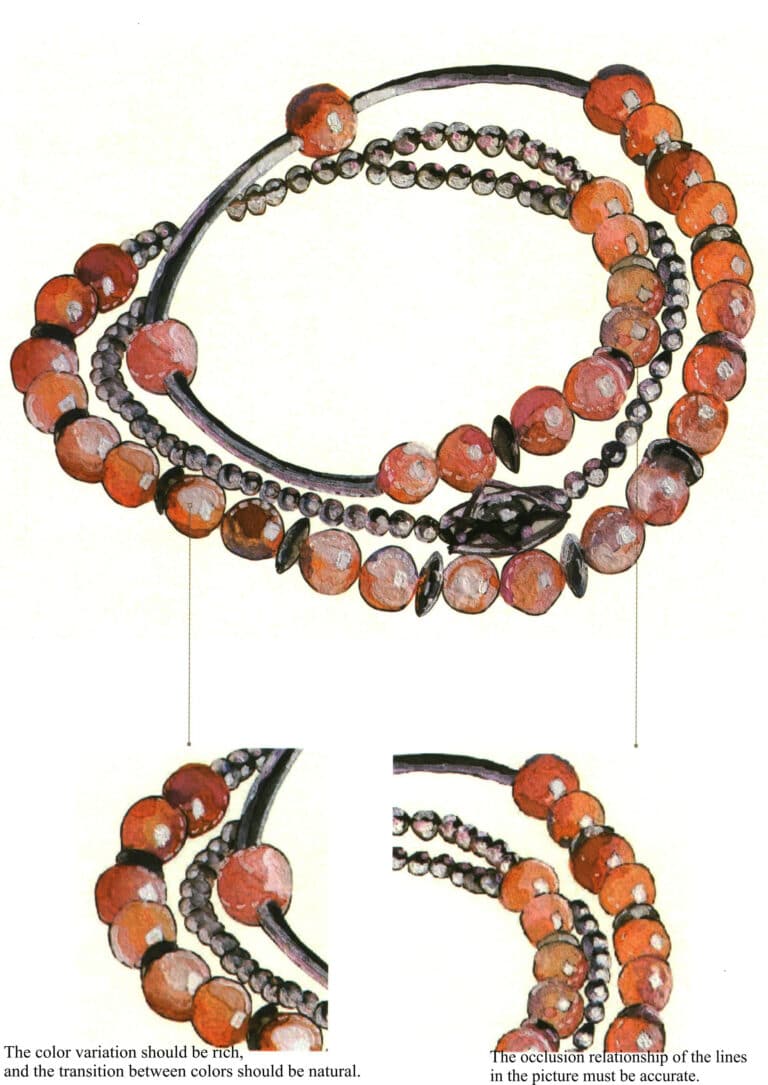
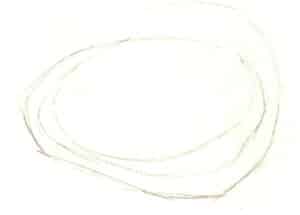
Steg 01 Skissa armbandets allmänna kontur med lätta, avslappnade blyertslinjer, undvik hårt tryck.

Steg 02 Skissera de stora pärlorna för att definiera armbandets grundform.
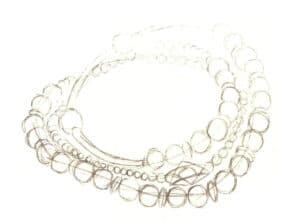
Steg 03 Rita resterande strukturer (små pärlor, ädelstenar) med släta linjer.
Steg 04 Skissera armbandets konturer exakt med en 0,2 mm teknisk penna över blyertsskissen.
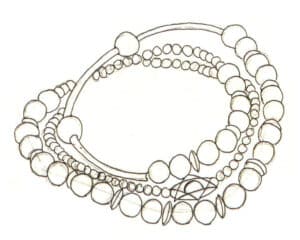
Steg 05 Lägg till hängande texturer och detaljer. Sudda ut blyertsmärken noggrant med ett mjukt suddgummi.
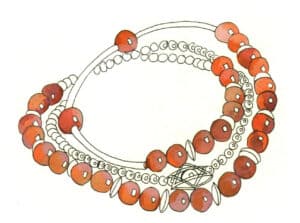
Steg 06 Applicera ett baslager på stora runda ädelstenar med vermilion, citrongult och magenta, och reservera vitt för höjdpunkter.
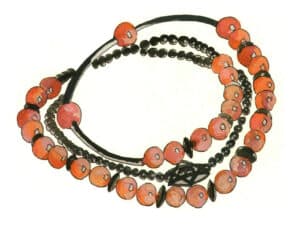
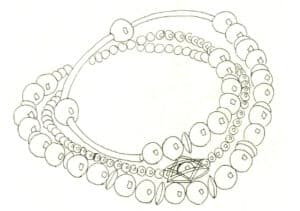
Steg 07 Måla metalldelarna med Payne's grey och ivory black och lämna springor för andningsförmåga.
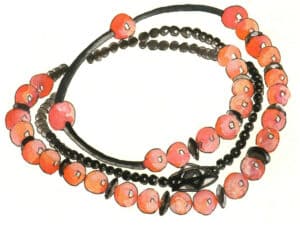
Steg 08 Fördjupa metallicskuggor med Paynes grå blandningar.
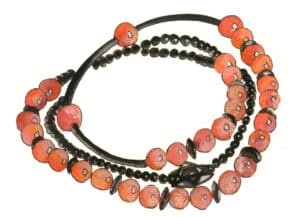
Steg 09 Blanda citrongult och rosenkrapp för att intensifiera skuggorna på rosa ädelstenar och förstärka kontrasten och volymen.
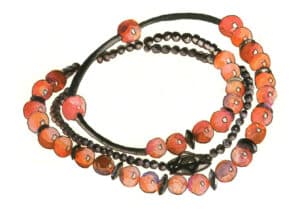
Steg 10 Mörka skuggorna på metallpärlorna med Paynes grå och elfenbenssvart.
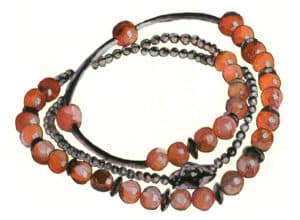
Steg 11 Fördjupa färgerna med bränd umbra, bränd sienna, citrongult och rosenkrapp. Accentuera höjdpunkter på rosa ädelstenar och metallpärlor med vitt.
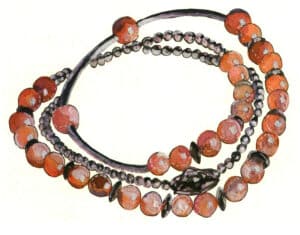
Steg 12 Förfina ädelstenarna med gul ockra, rosenkrapp och orange för att förstärka tredimensionaliteten. Justera och slutför konstverket för att slutföra.