Letnia dżungla, czyste srebro 999, grawerowane

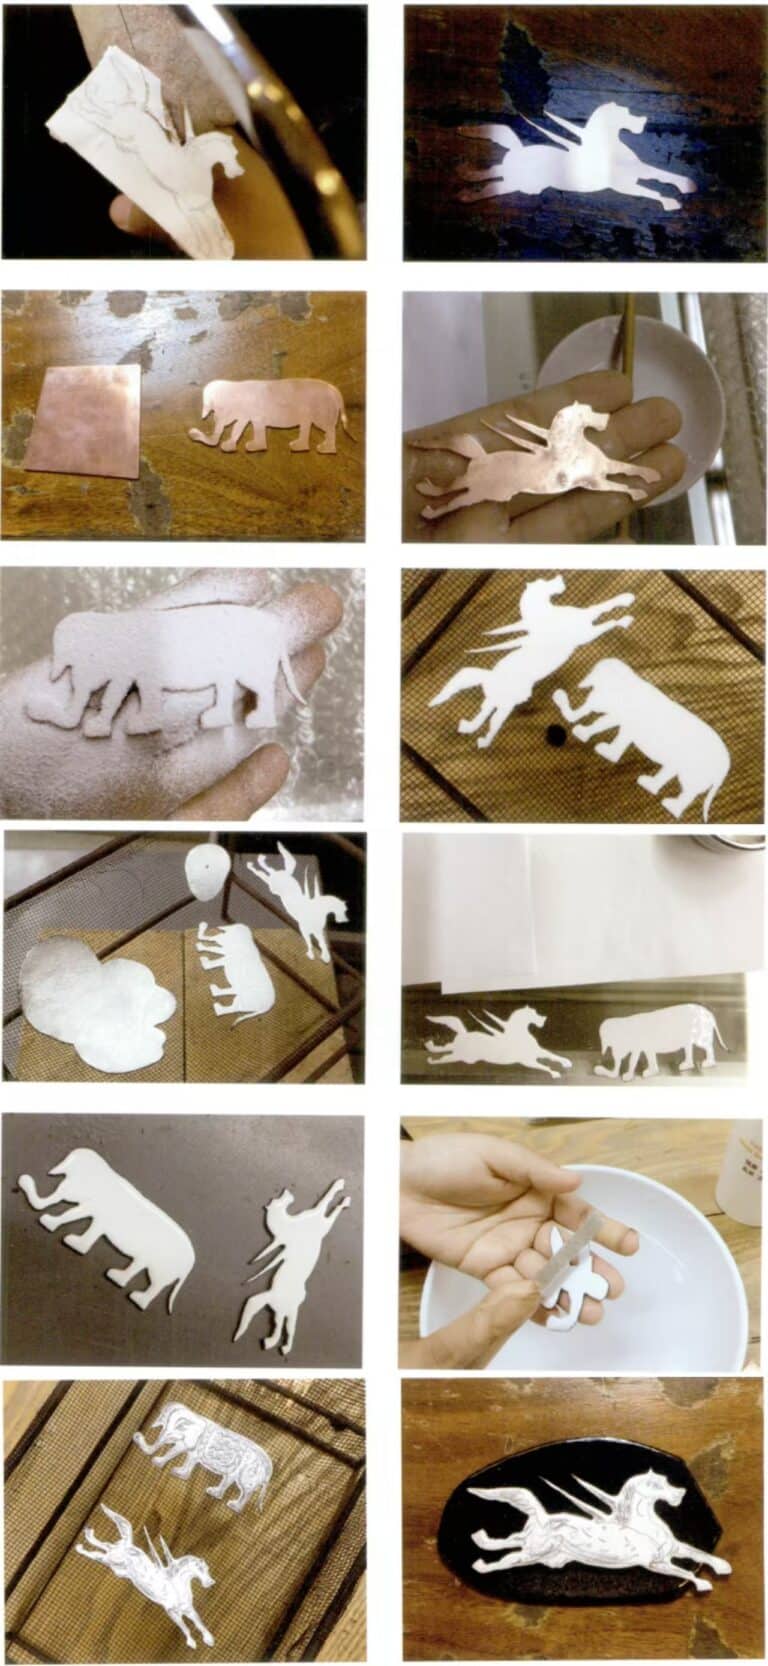
1. Przenoszenie wzoru: Po zaprojektowaniu wzoru musimy przenieść go na metal; w przypadku płaskich elementów metalowych zazwyczaj używamy kalki kreślarskiej do narysowania lub bezpośrednio rysujemy wzór, a następnie przyklejamy go do metalowego elementu za pomocą pasty.
2. Użyj dłuta i młotka, aby zlokalizować miejsce wiercenia.
3. Użyj wiertła do szlifierki wiszącej, aby wykonać otwór.
4. Wydrążenie: Włóż brzeszczot wyrzynarki przez otwór i zamontuj go, a następnie wytnij kształt od wewnątrz.

5. Po wyżarzeniu użyj drewnianego patyczka, aby nadać wydrążonej części kształt łuku.
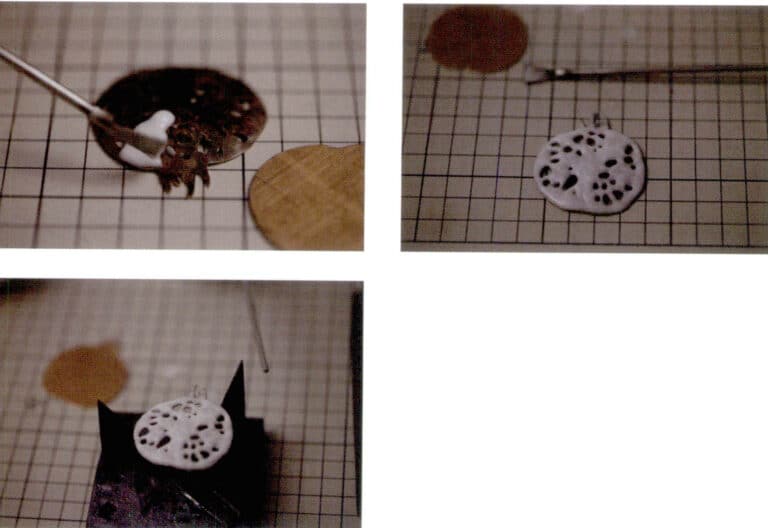
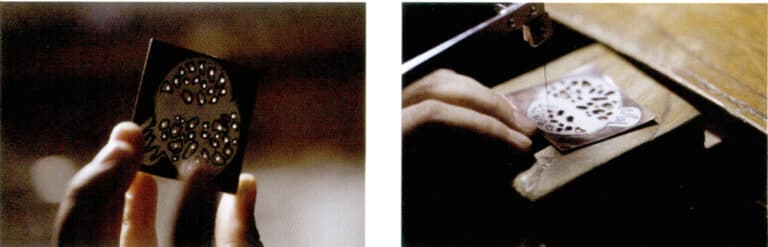
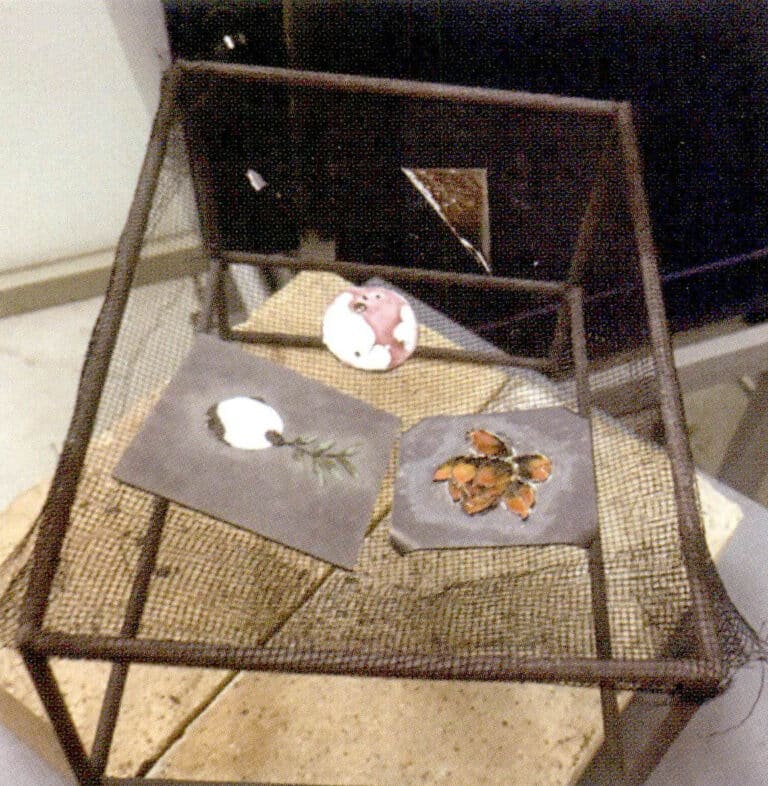
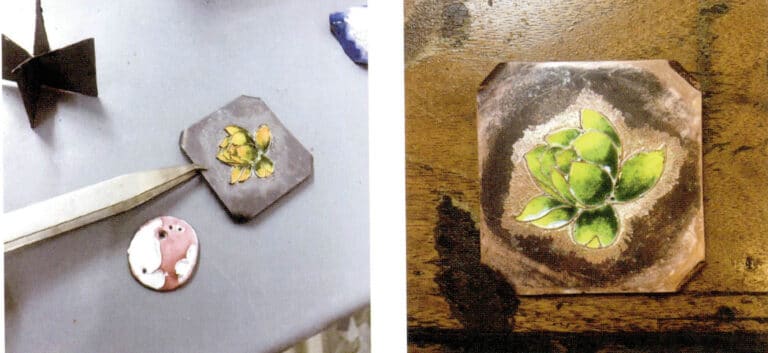
6. Wypełnić szkliwo.
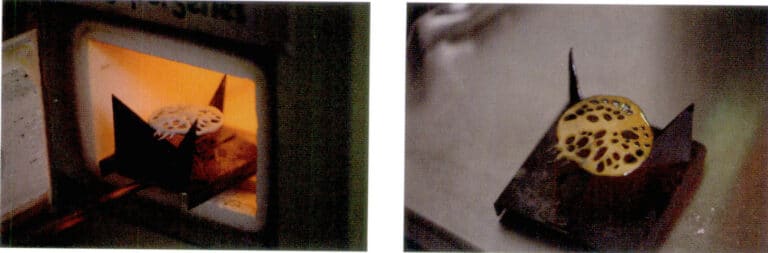
7. Umieść go w piecu do emaliowania i wypalaj przez około 1 minutę w temperaturze około 750 ℃.
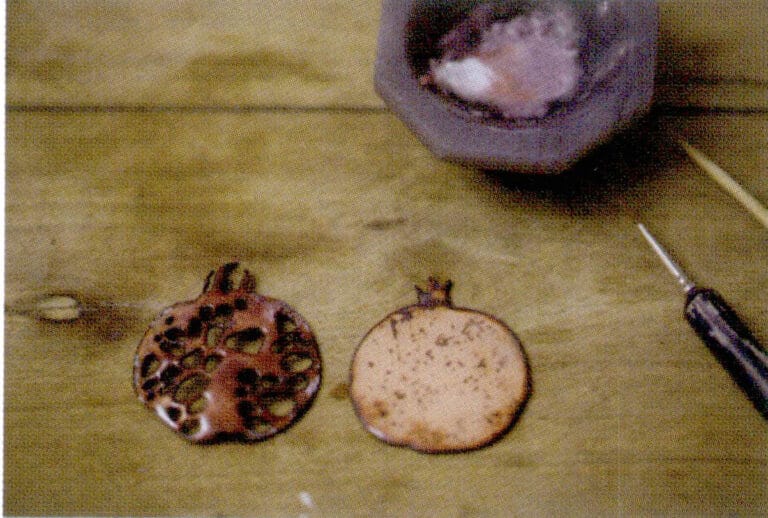
8. Różne kolory emalii mogą być dodawane i wypalane wielokrotnie w zależności od koloru granatu.
9. Suszenie granatu na powietrzu jest zakończone.

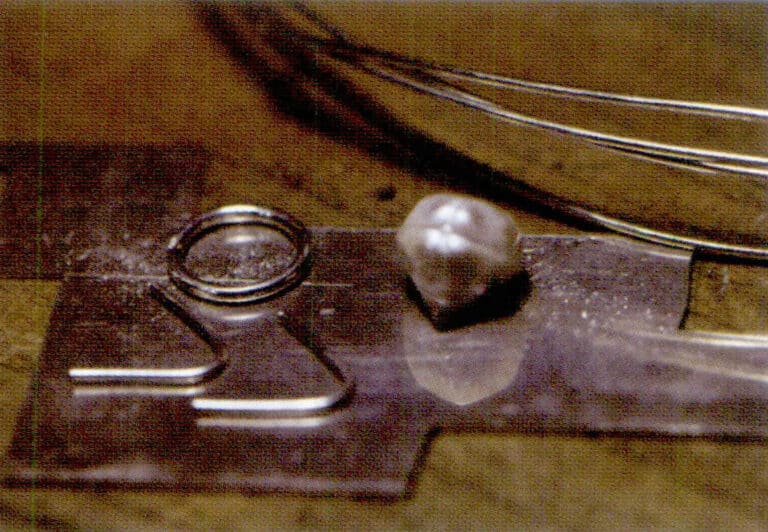
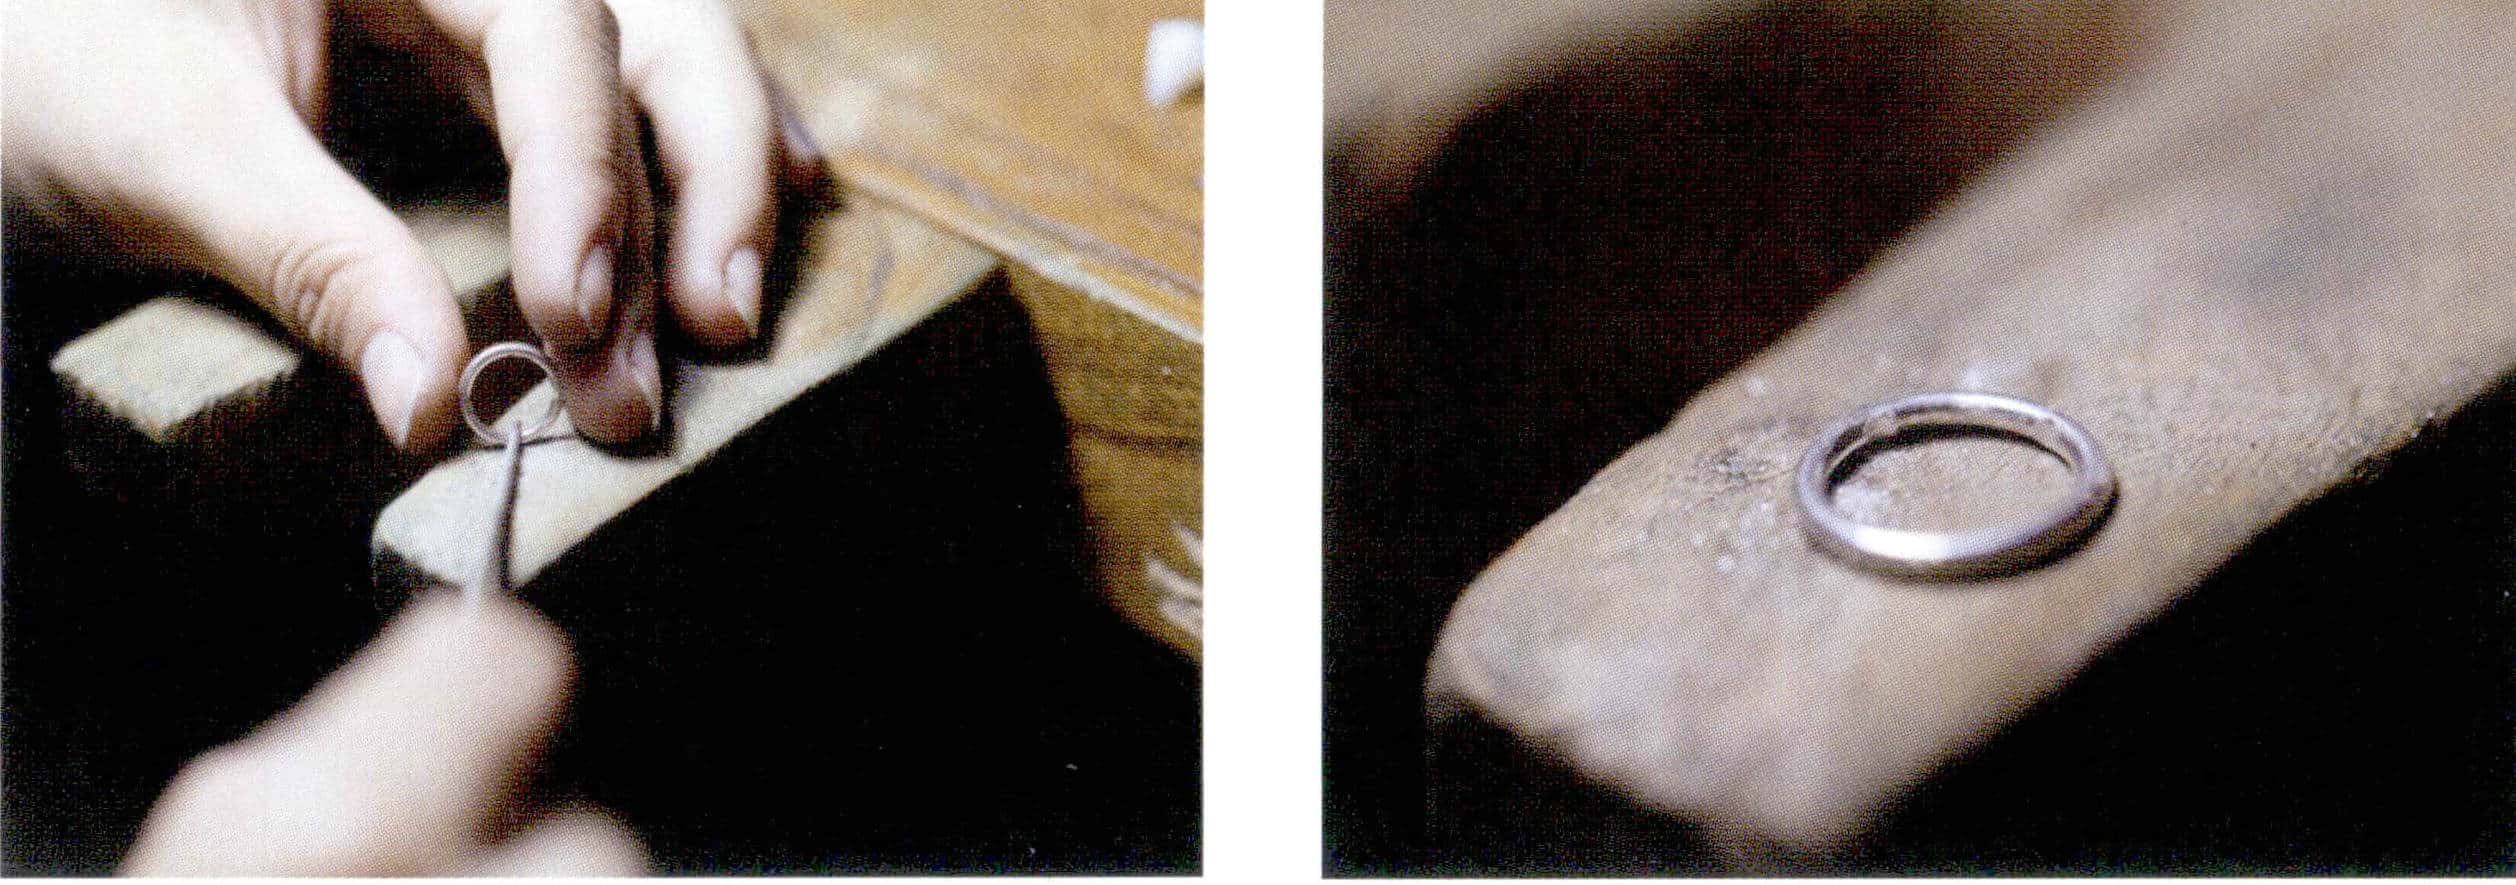
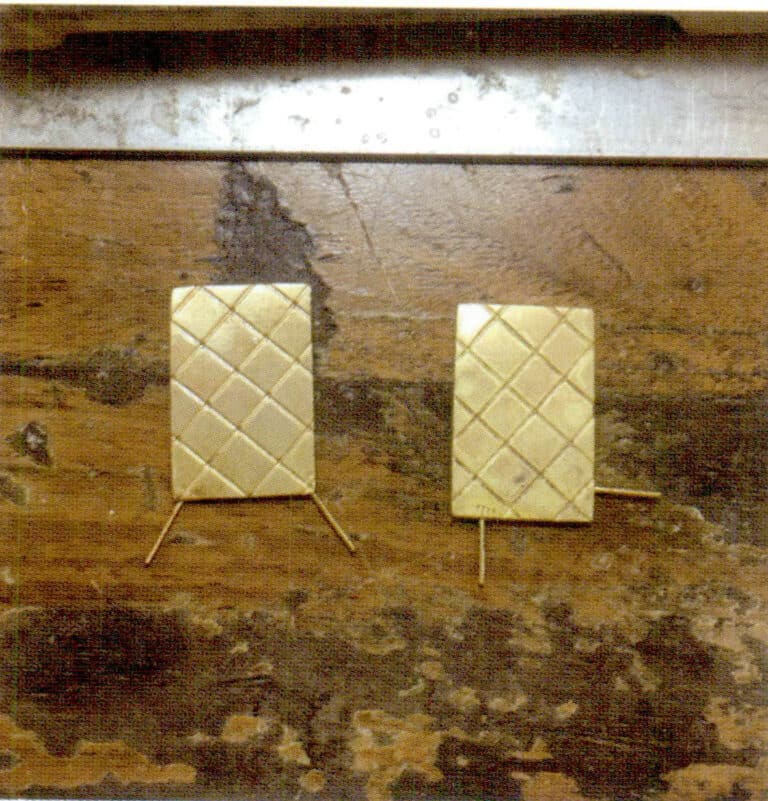
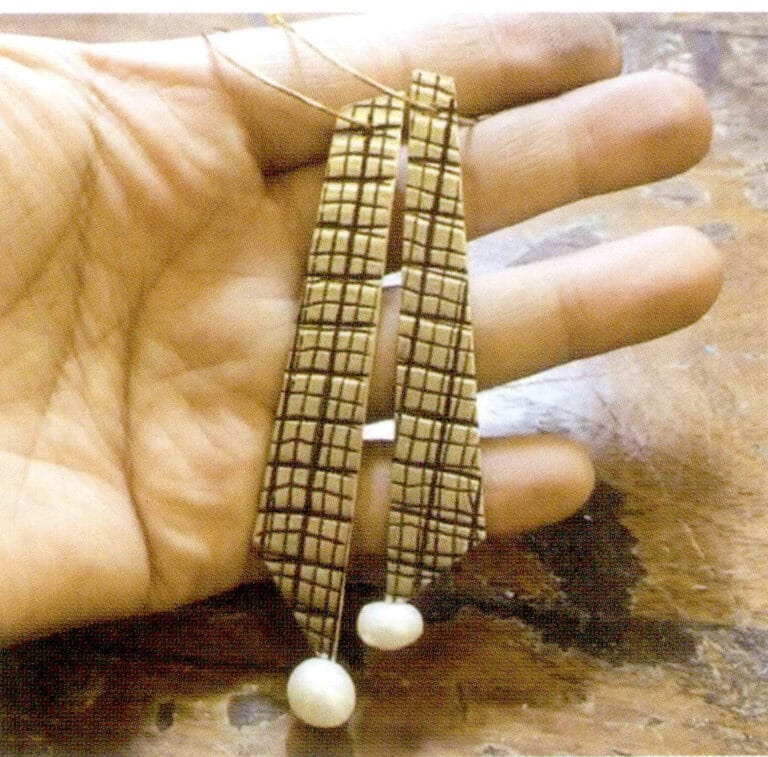
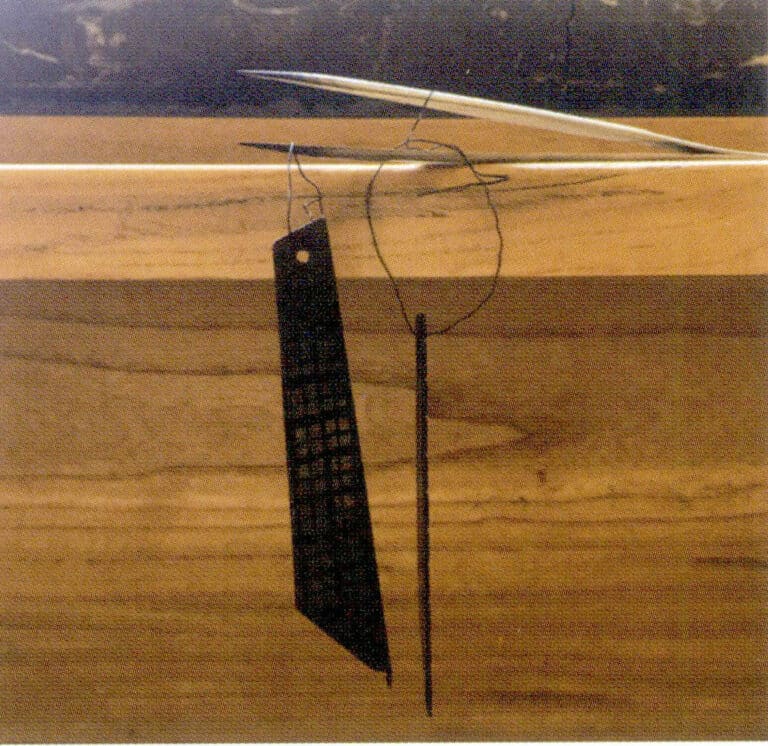
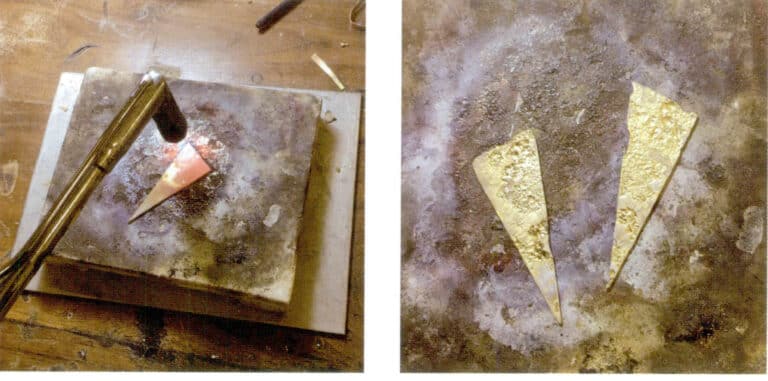
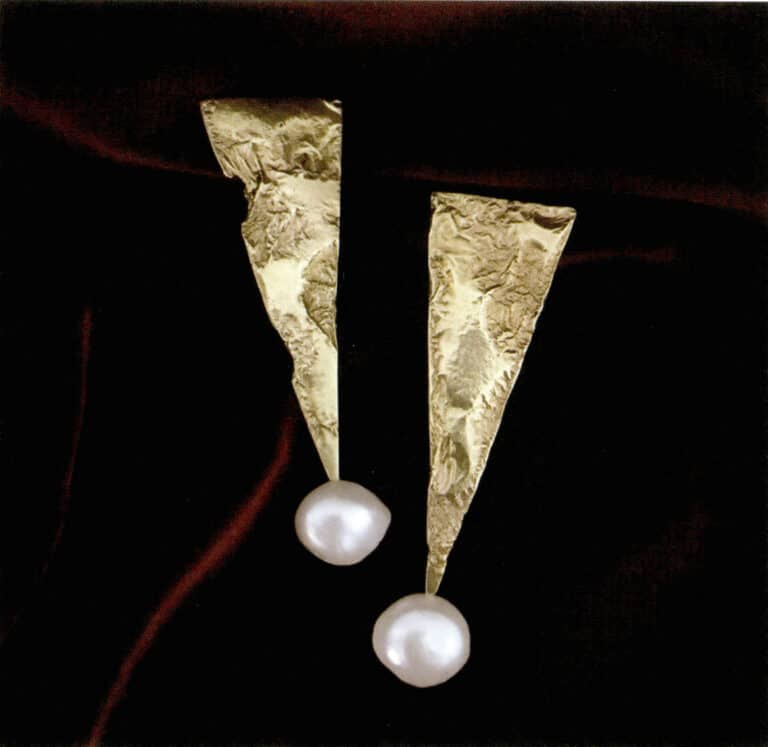
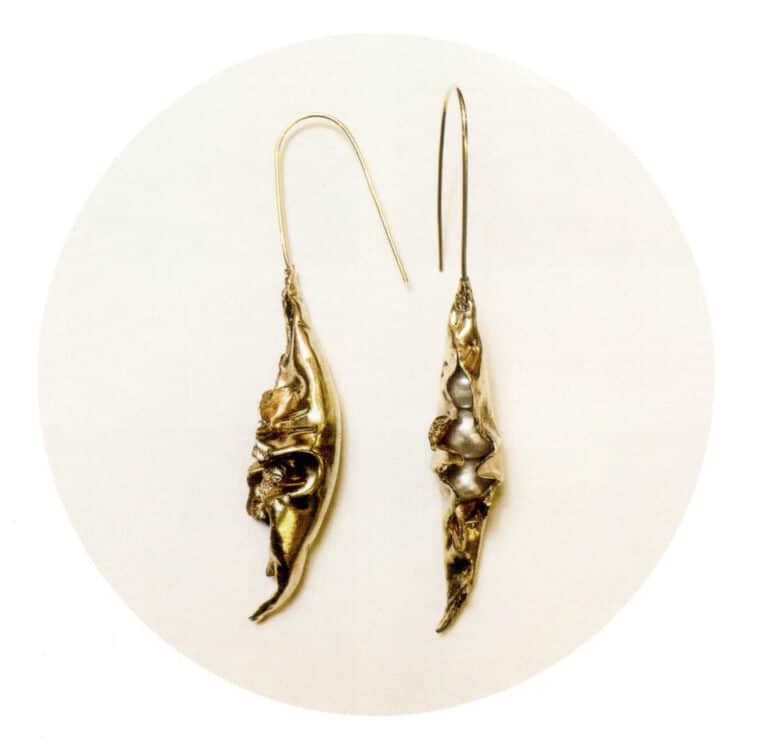
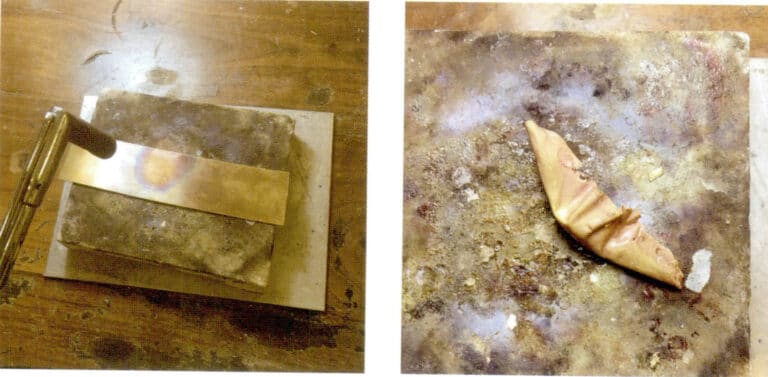
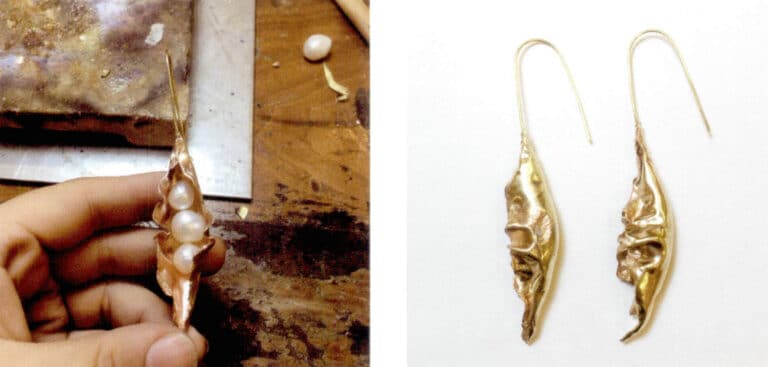
1. Potrzebne materiały: Blacha srebrna 925, drut srebrny, perły barokowe.

2. Cięcie deski, rozmiar 5 cm x 1,4 cm.
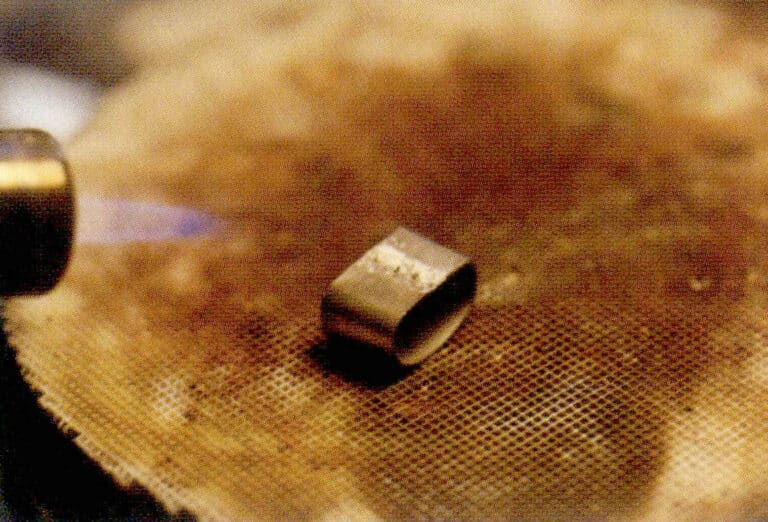
3. Wyżarzanie kawałka srebra.
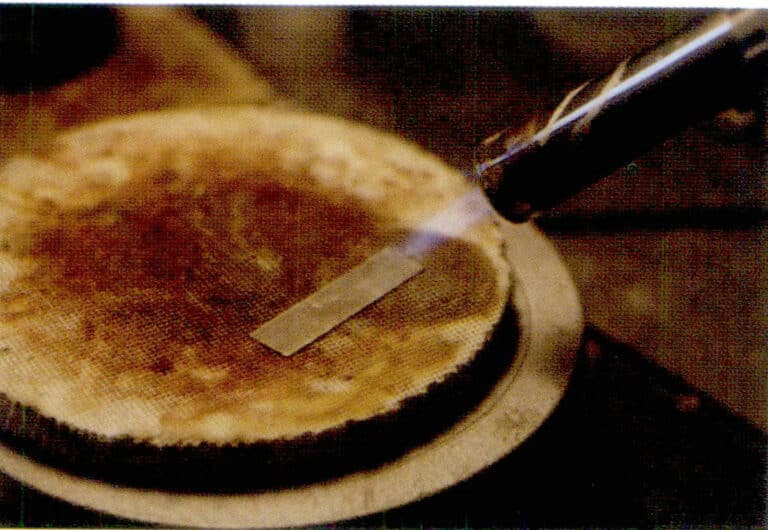
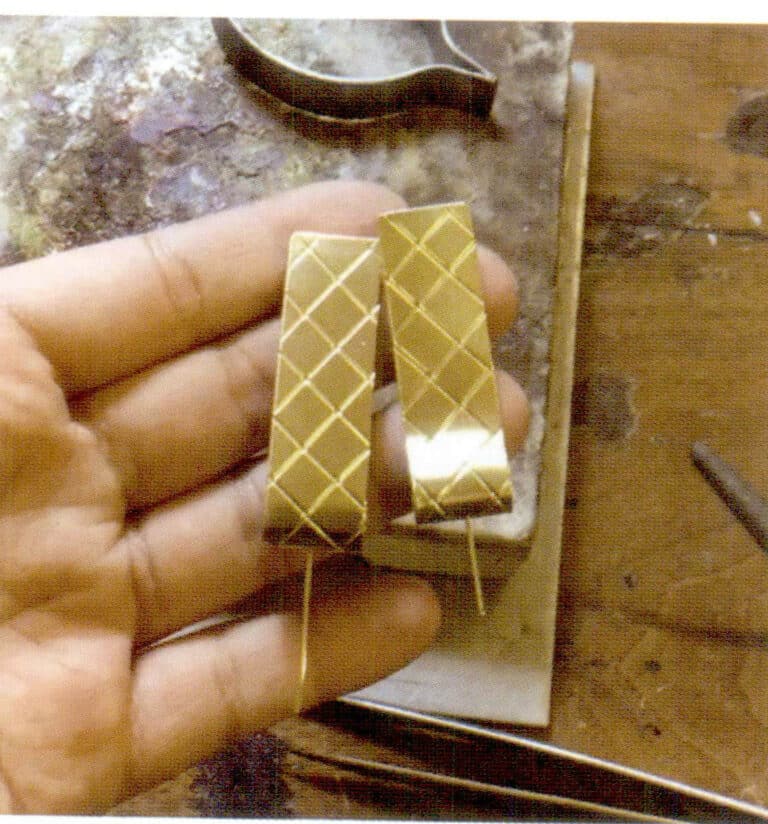
1. Za pomocą szczypiec płaskich symetrycznie zgiąć blachę na obu końcach pod kątem 90°.
2. Zegnij oba końce w zamknięte półkole.
3. Pokryj złącza boraksem.
4. Odetnij odpowiednią ilość topnika lutowniczego i umieść go na spawanej części.
5. Spawanie za pomocą pistoletu spawalniczego w celu stopienia lutu.
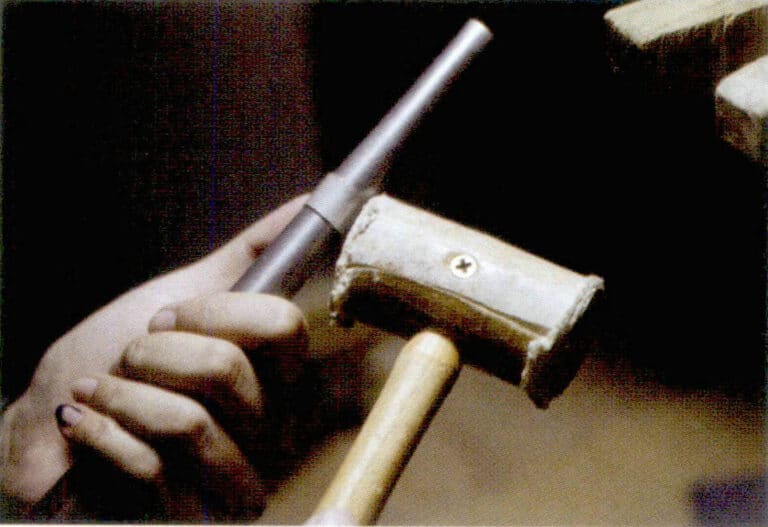
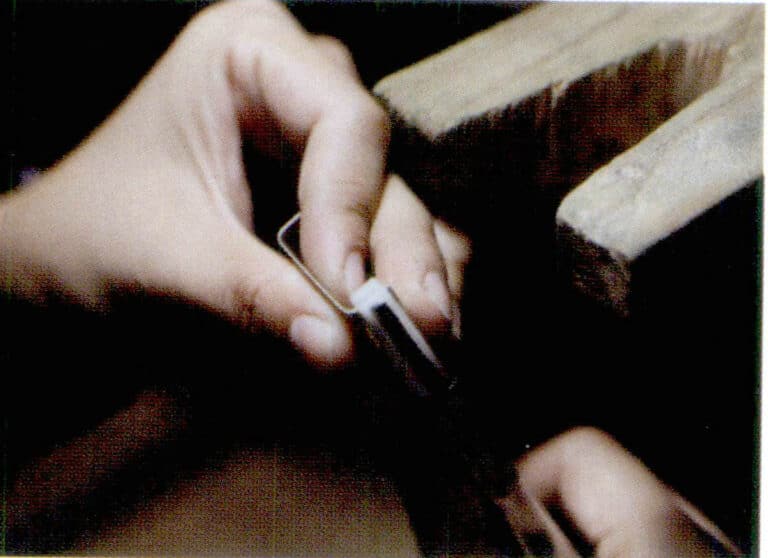
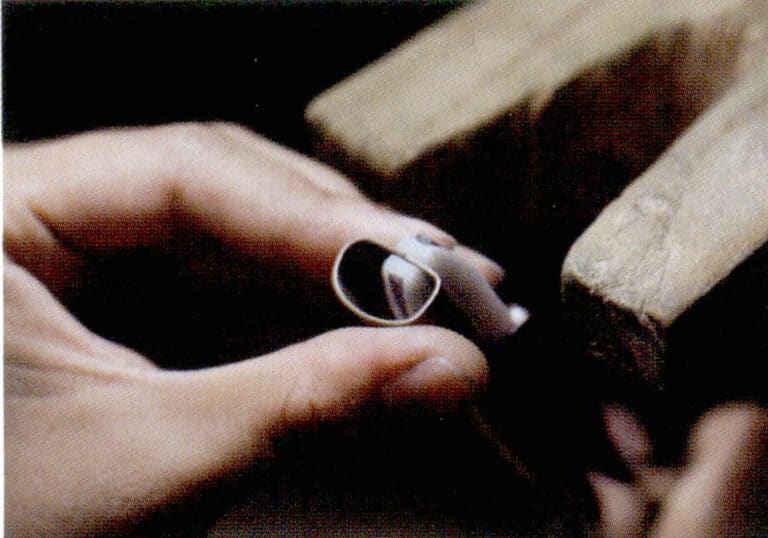
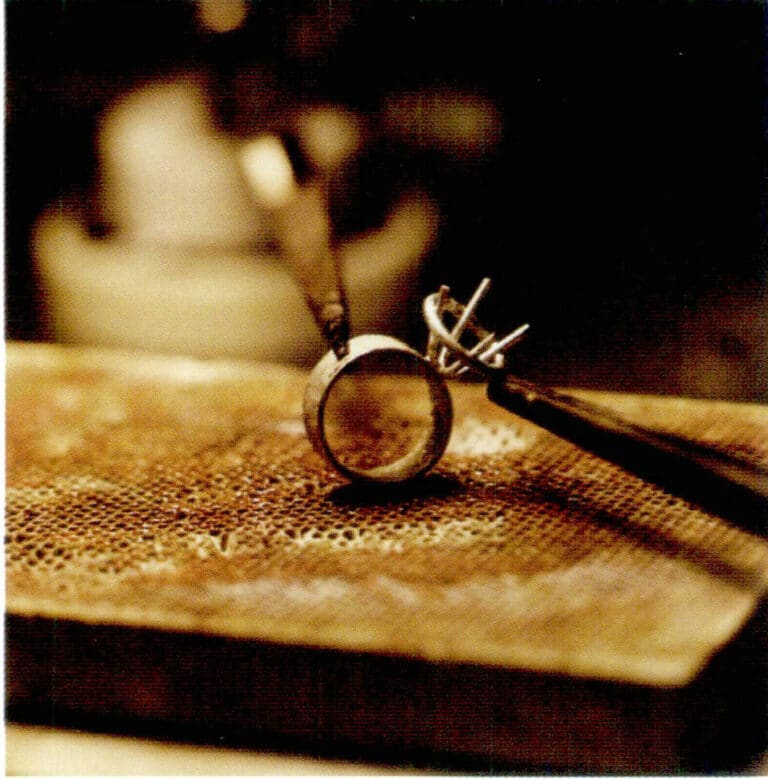
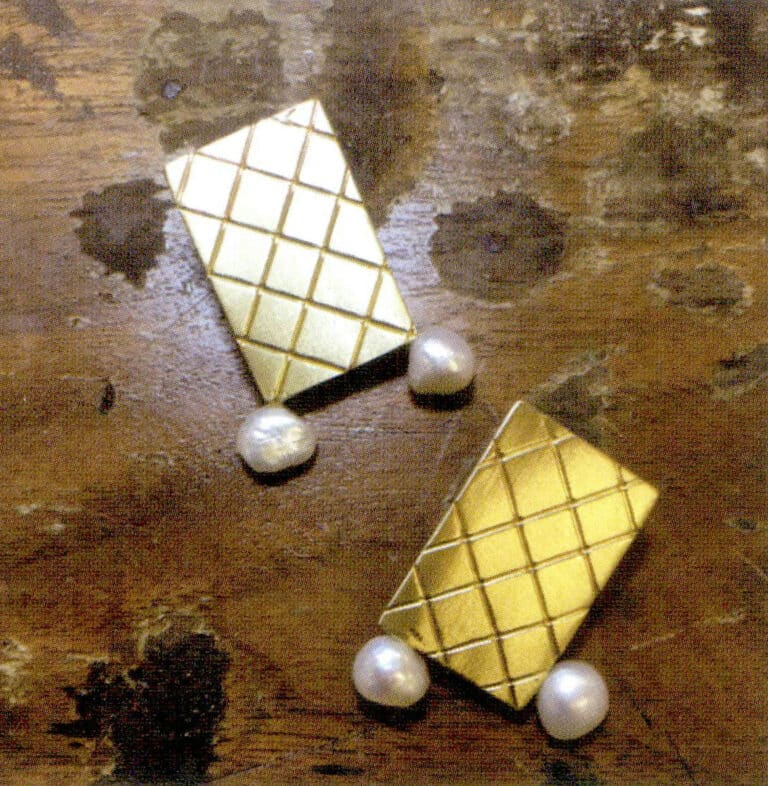
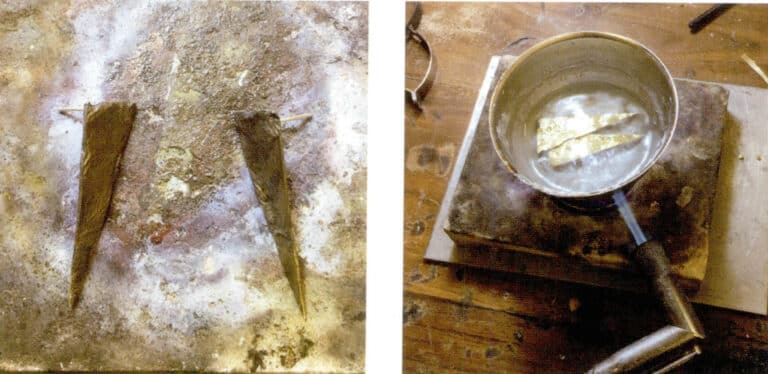
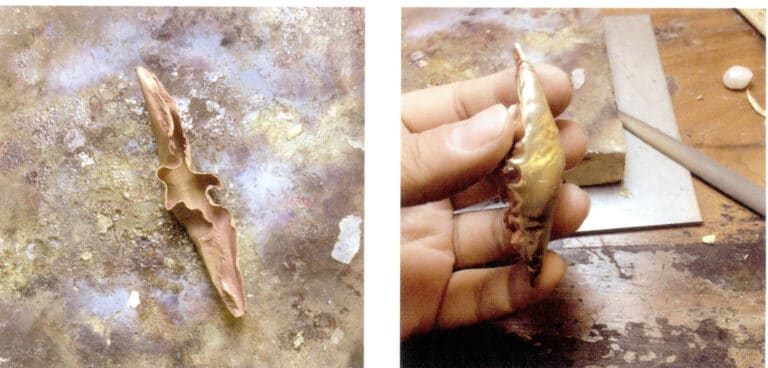
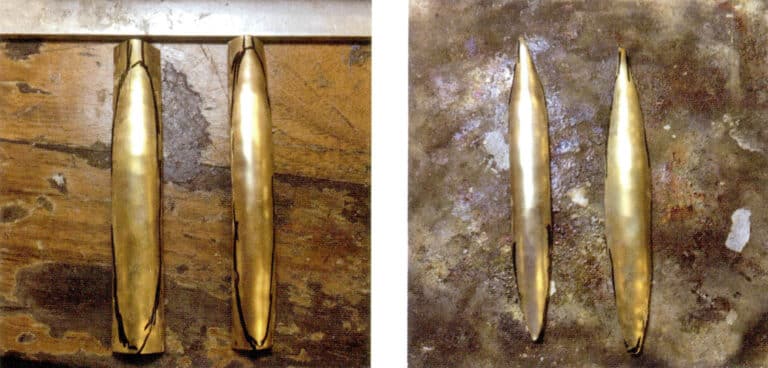
1. Po zakończeniu spawania nadaj mu kształt za pomocą pierścienia i drewnianego młotka.
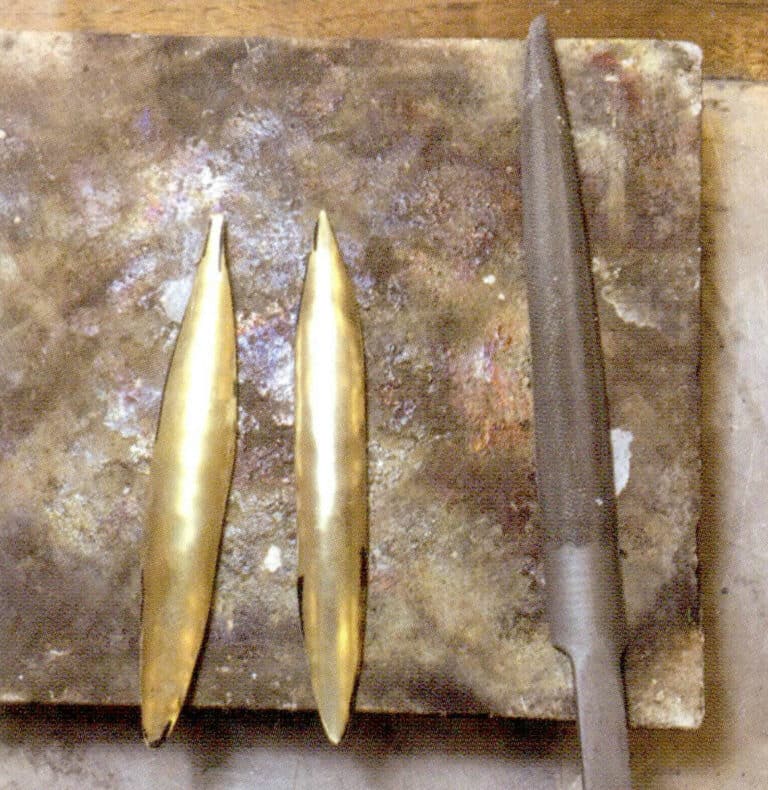
2. Użyj suwmiarki, aby równomiernie podzielić i ustawić metalowy pierścień.
3. Wytnij równo metalowy pierścień, aby przygotować parę symetrycznych kolczyków.
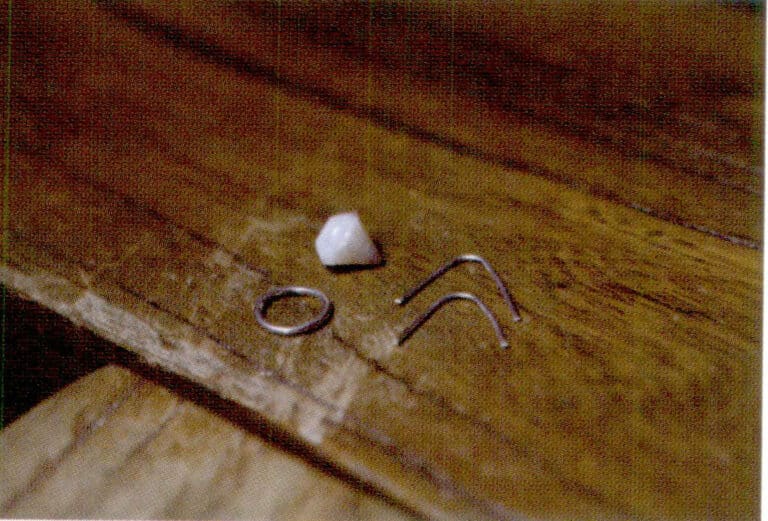
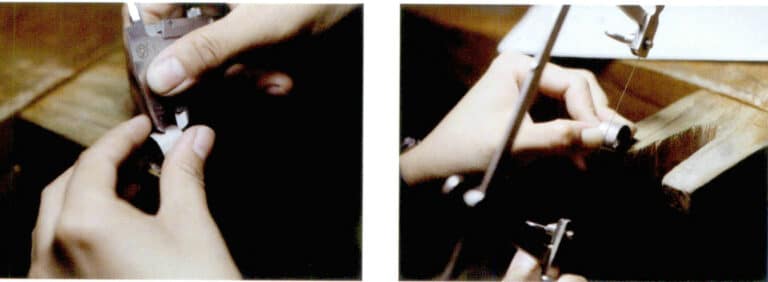
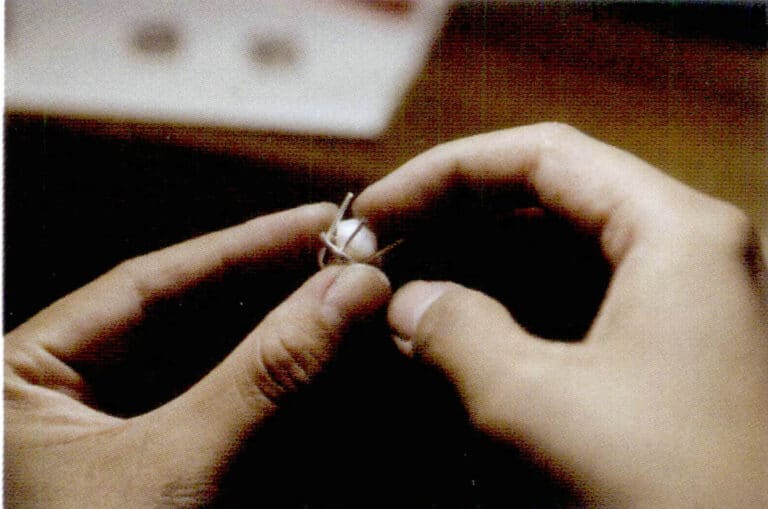
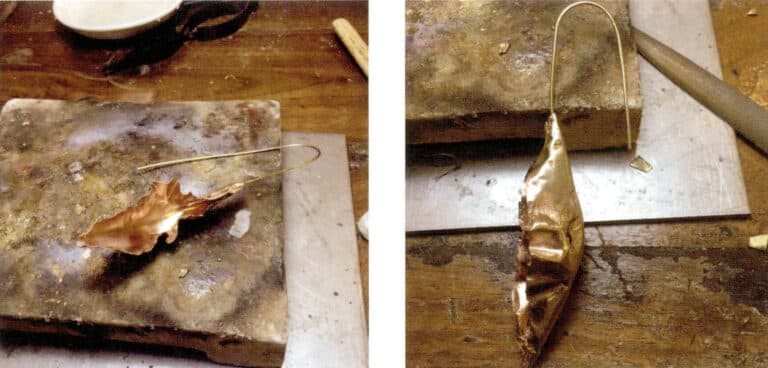
1. Zmierz odpowiednią długość struktury w kształcie litery U podstawy pazura zgodnie z rozmiarem perły w kształcie rombu; drut metalowy o średnicy 0,8 mm może być użyty do wykonania struktury w kształcie litery U, a drut metalowy o średnicy 1 mm może być użyty do wykonania pierścienia.
2. Za pomocą okrągłego pilnika wyszlifuj szczelinę poniżej dolnej części kształtu U do spawania.
3. Oszlifować rowki w średnim 4-punktowym położeniu po wewnętrznej stronie pierścienia za pomocą okrągłego pilnika do spawania.
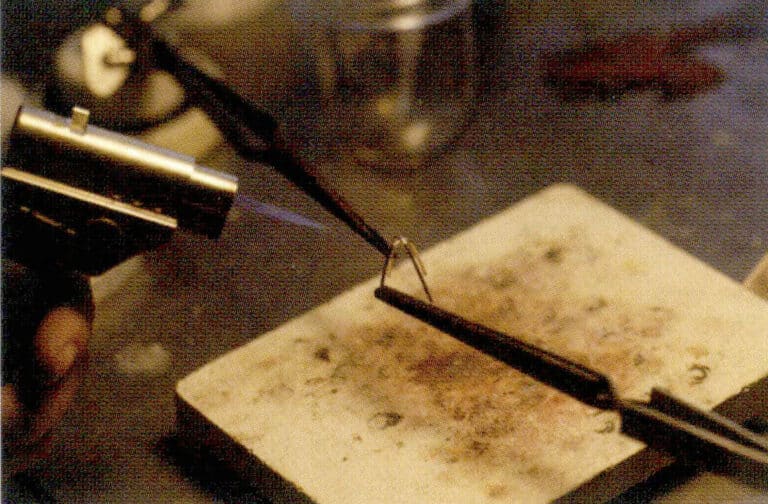
1. Najpierw zespawaj dwa metalowe druty w kształcie litery U.
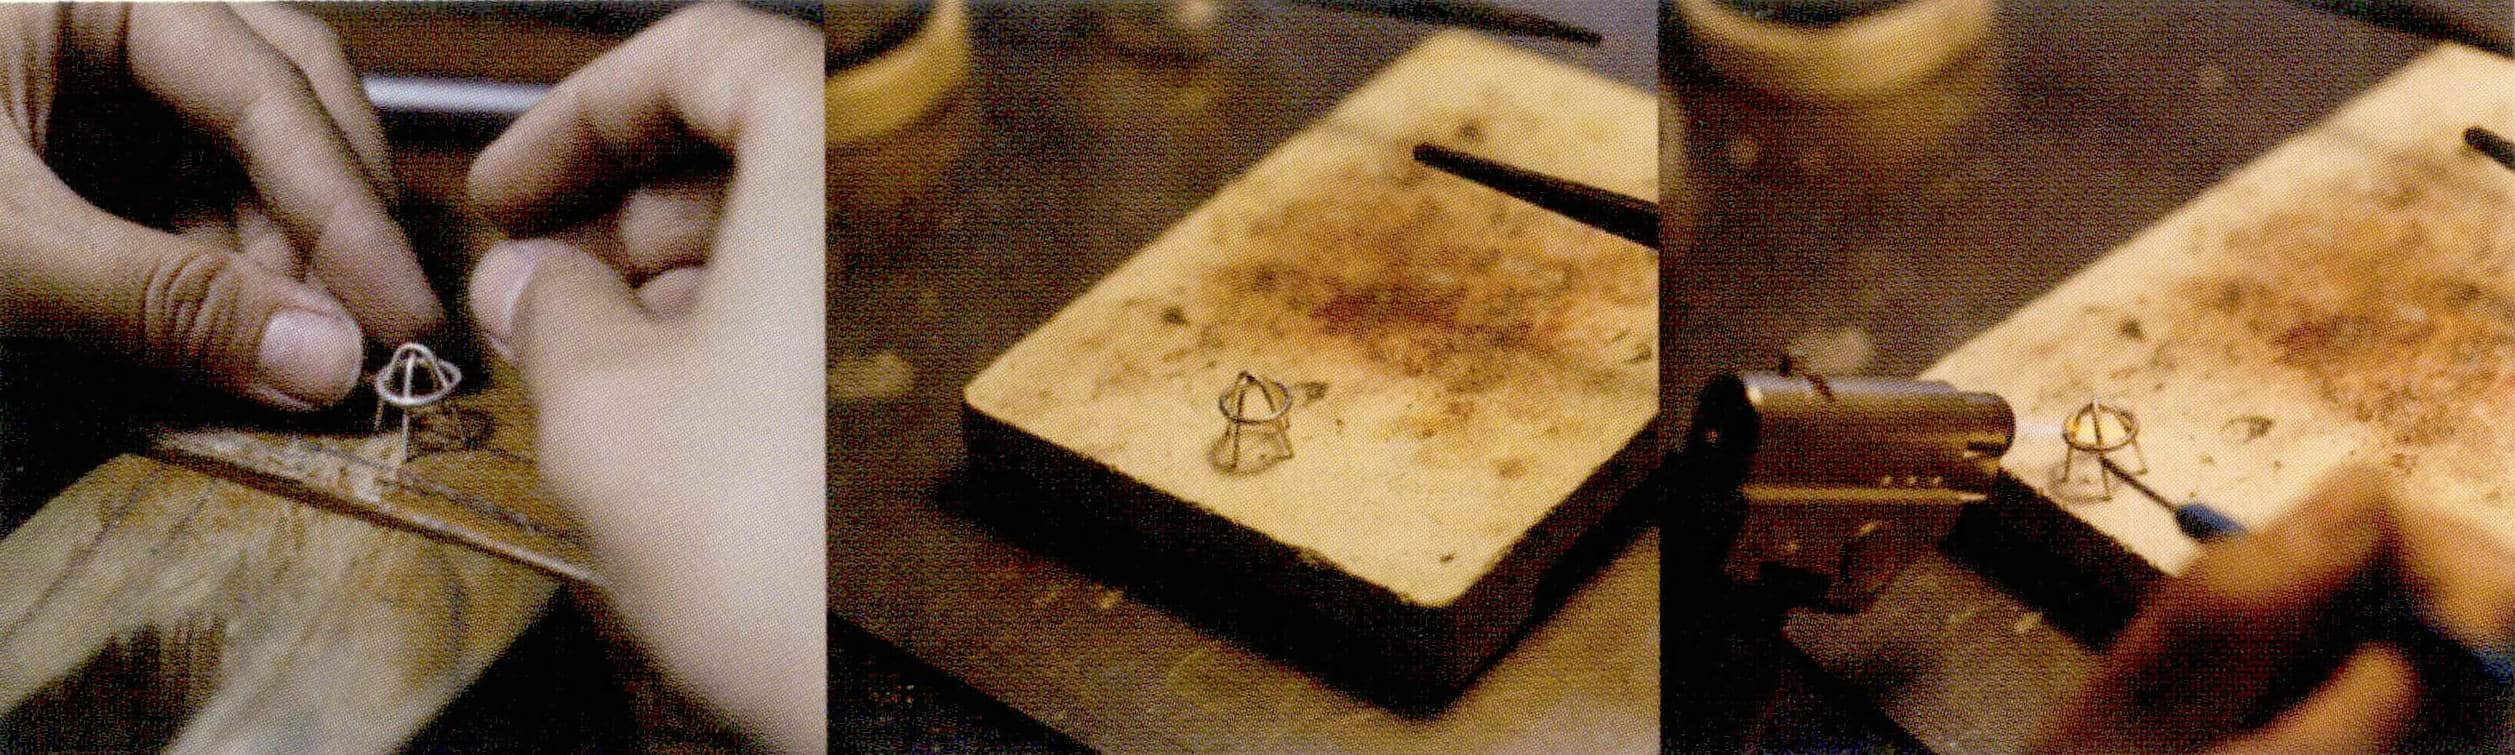
2. Następnie przyspawaj pierścień do spawanego metalu.
3. Na koniec, gotowe ustawienie pazura zostanie przyspawane do pierścienia, a szpilka do ucha zostanie przyspawana do tylnej strony pierścienia.
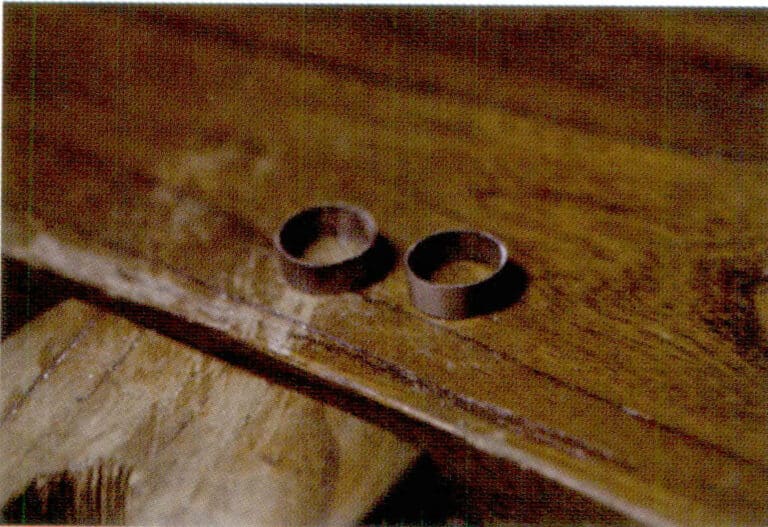
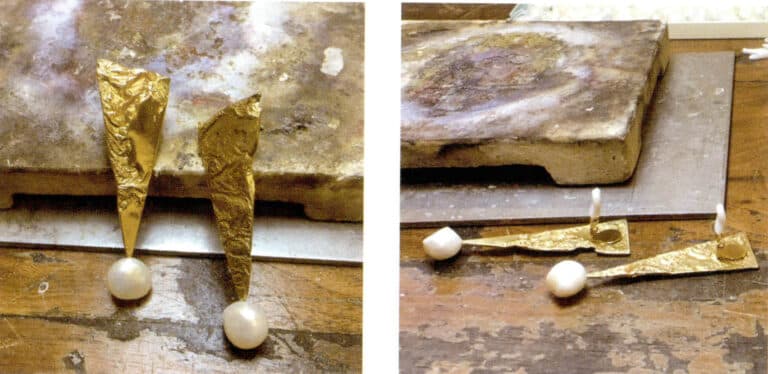
1. Metalowa oprawa jest wytrawiona, wypolerowana i bezpiecznie zamontowana za pomocą pereł w kształcie diamentu.
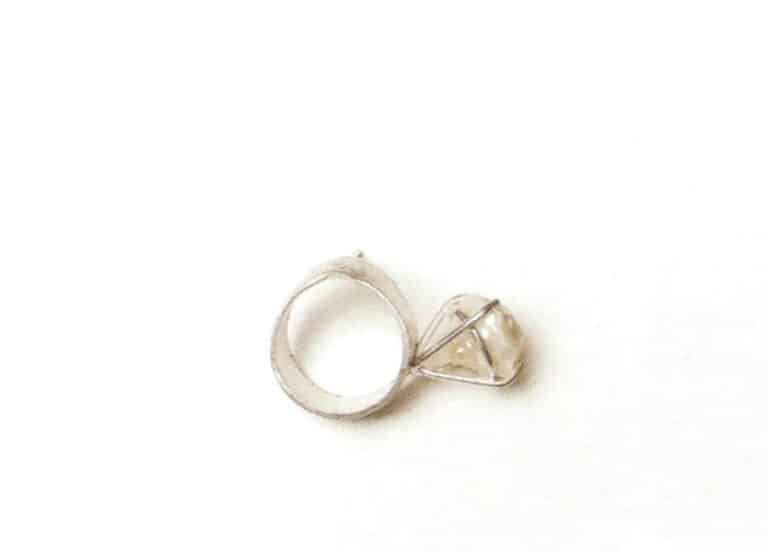
2. Zakończone.

Wypełnianie wnętrza metalowych naczyń ołowiem
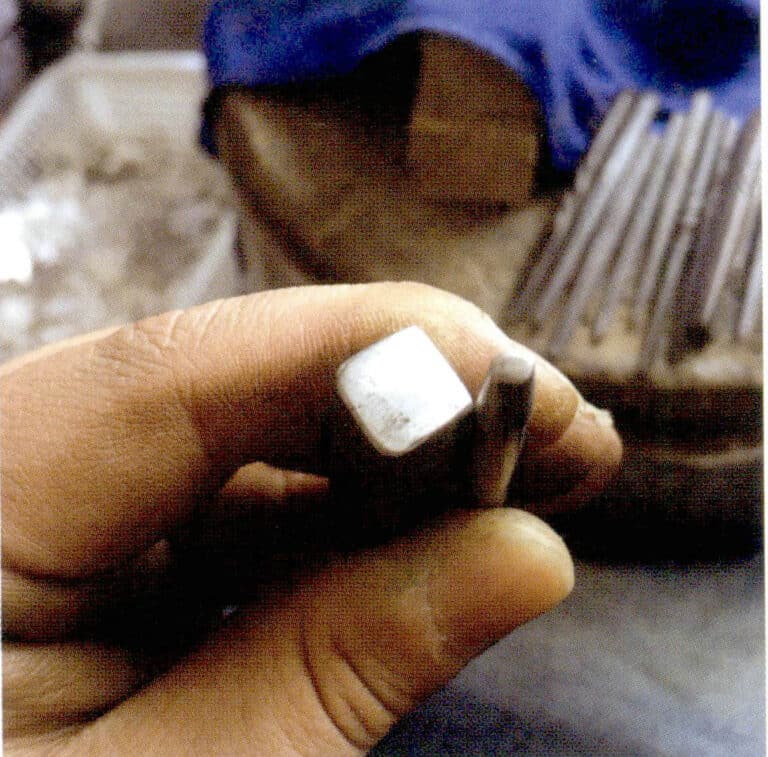
Wybierz odpowiednie dłuto
Młotkowanie nierównej tekstury młotkiem i dłutem
Bezpośrednie uderzanie młotkiem w teksturę

Zmiana kształtu metalowej puszki za pomocą młotka
Przycinanie krawędzi metalowej miski

Metal musi być wyżarzony przed każdą operacją nadruku.
Duży efekt nadruku siatki miedzianej
Efekt nadruku z drobnej siatki miedzianej
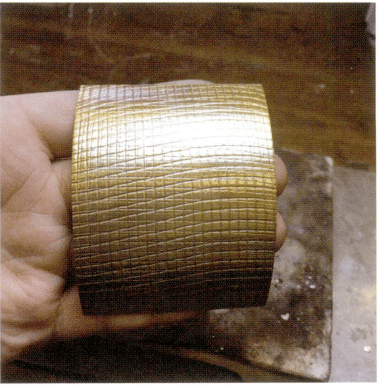
Efekt wielokrotnego nadruku siatki miedzianej
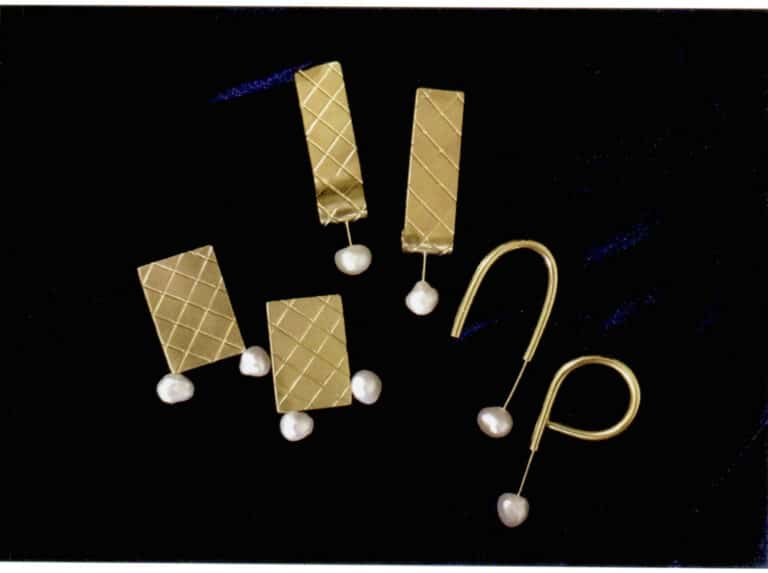
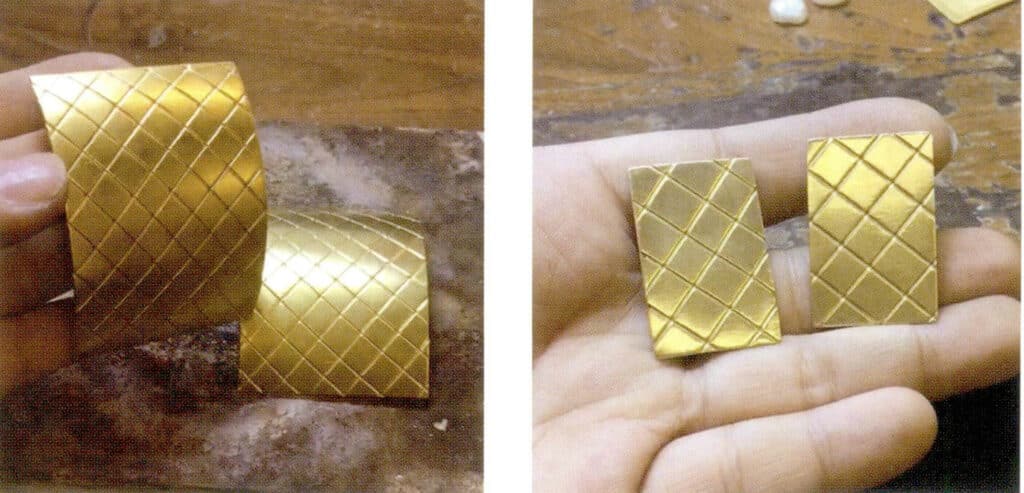
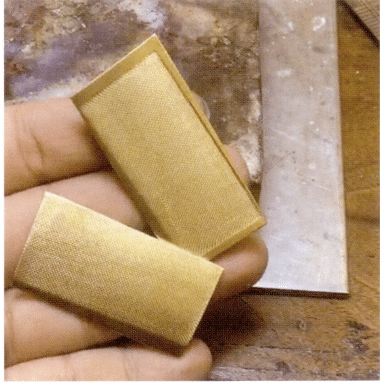
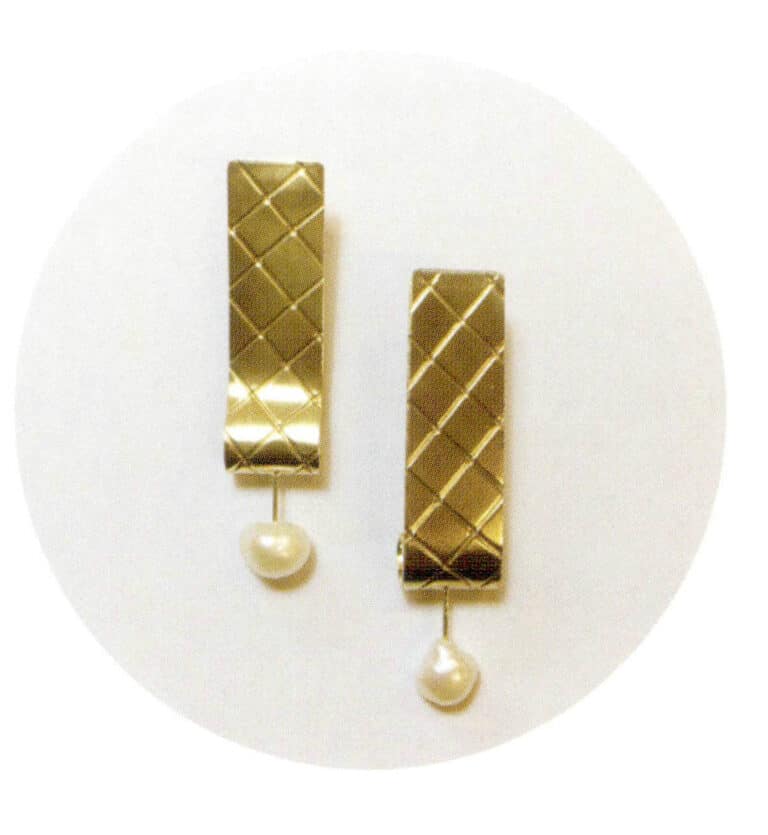
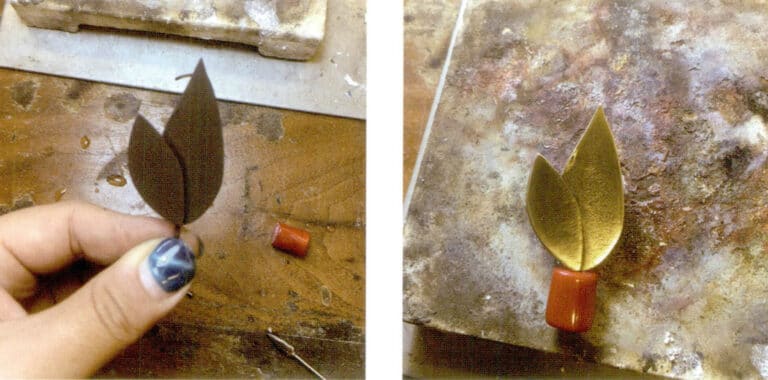
Xiebai, diamentowa czekolada, seria kolczyków, mosiądz, perły barokowe
1. Umieść wyżarzoną blachę mosiężną i siatkę miedzianą w prasie w celu utworzenia tekstury, wytnij wzorzyste arkusze metalu zgodnie z potrzebami i przyspawaj mosiężne kołki.
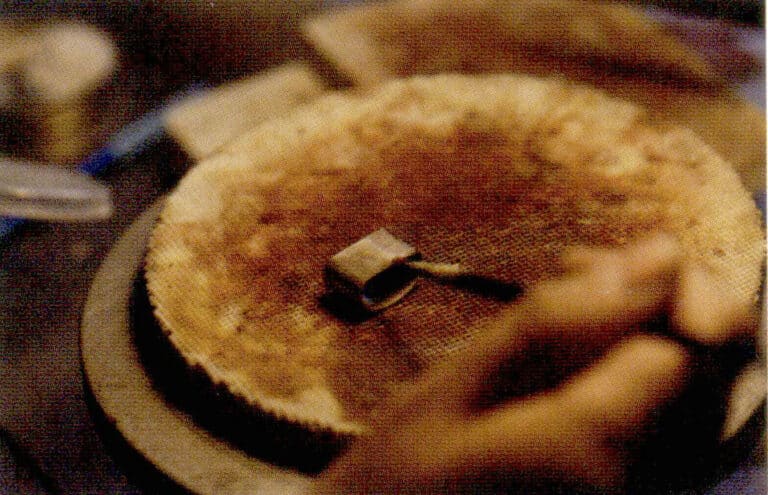
2. Mycie kwasem, a następnie polerowanie i szlifowanie.
3. Mocno przymocuj perełki za pomocą kleju 502.
4. Zakończenie produkcji.
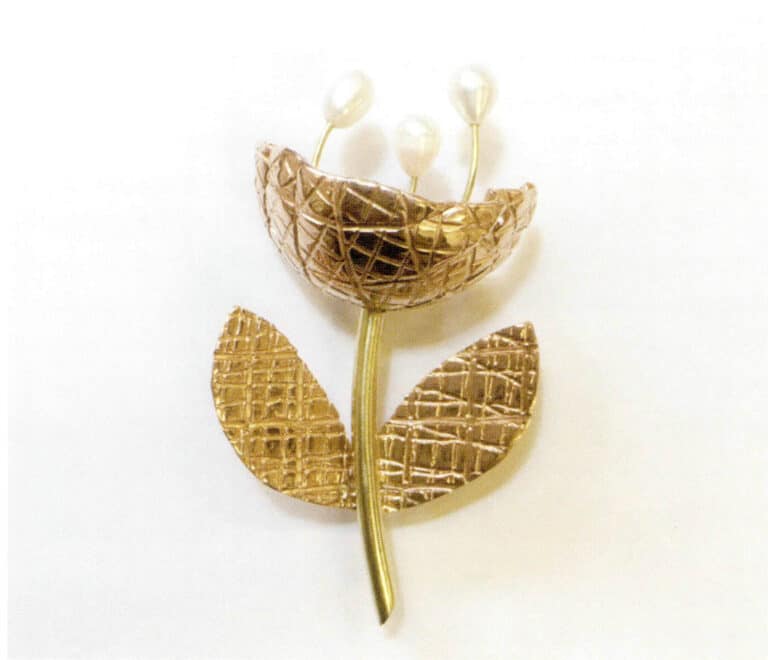
Xiebai, bratek, broszka, fioletowa miedź, mosiądz, perła barokowa

1. Użycie młotka do wbicia przygotowanego teksturowanego kawałka metalu w łuk 1/4 przed spawaniem.
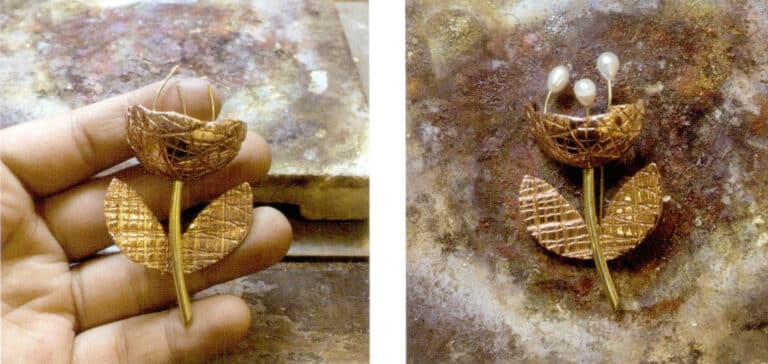
2. Polerowanie po myciu kwasem, jeśli chcesz, aby metalowy połysk miał wrażenie warstw, możesz użyć agatowego noża do wypalania wystających metalowych części.

Produkcja metalowych broszek dzieli się na dwa rodzaje: jeden to agrafka typu 9, a drugi to agrafka sprężynowa
Cold Mountain 1, kolczyki, mosiądz
Efekt po polerowaniu i szlifowaniu
Bogate tekstury wymagają wielokrotnego prasowania w celu uformowania
Naturalne suszenie

Cold Mountain 2, kolczyki, mosiądz, perły barokowe
Xiebai, seria biżuterii z techniką marszczenia, Flowing Golden Years, mosiądz, perły barokowe

Xiebai, seria biżuterii Wrinkling Technique, płyn w płynie, mosiądz, perły barokowe
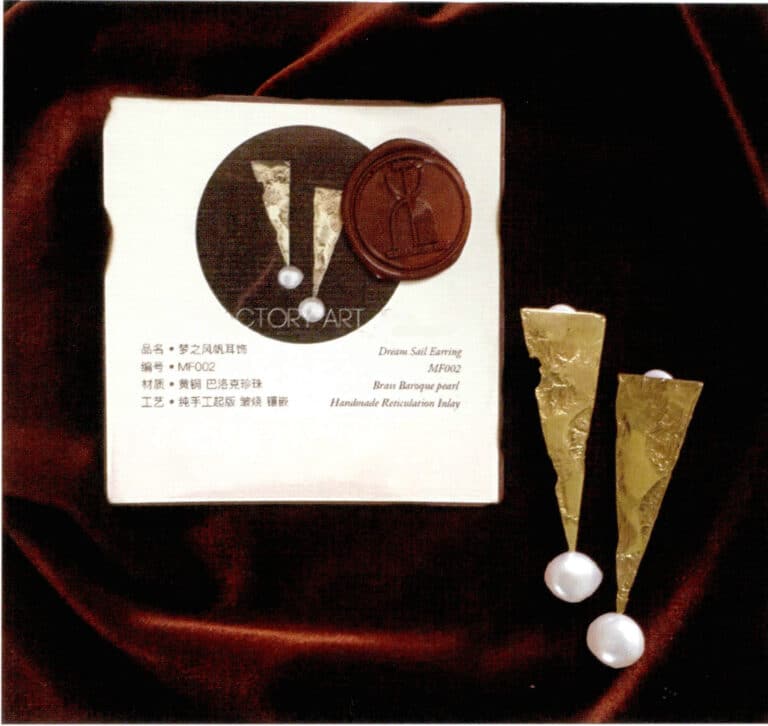
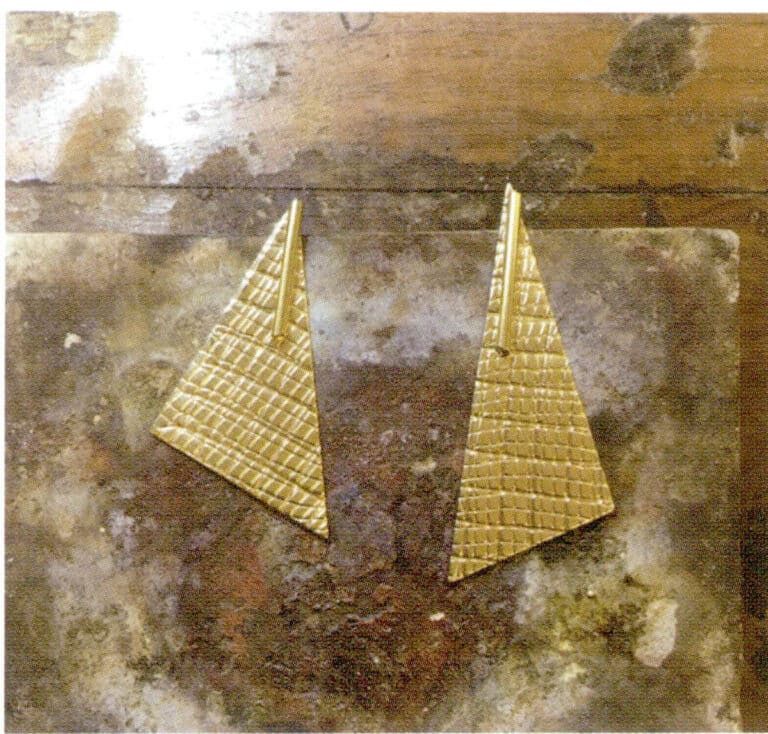
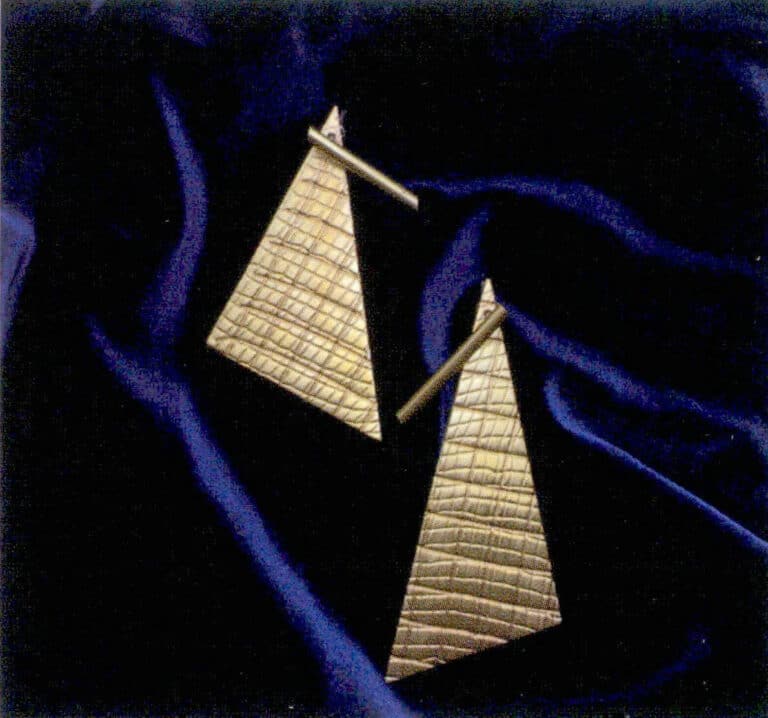
Xiebai, kolczyki Dream's Wind Sail, mosiądz, perły barokowe
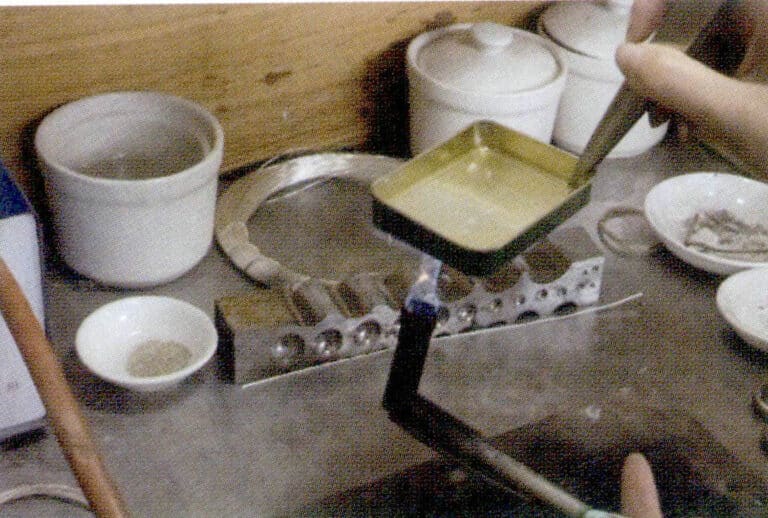
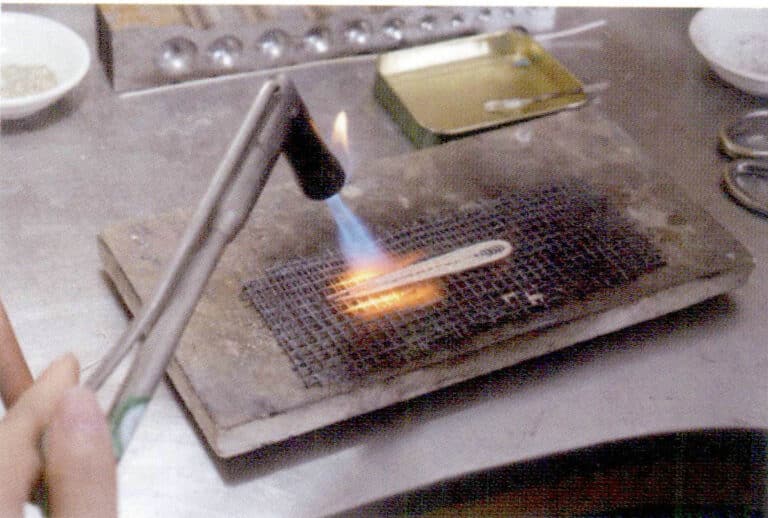
1. Podgrzej wycięte metalowe kawałki mosiądzu za pomocą dużego i miękkiego płomienia, aby ogrzać cały obszar. Gdy mosiądz stopniowo zmieni kolor na czerwony, dostosuj płomień do twardego ognia w celu miejscowego ogrzewania, pozwalając temu obszarowi stopniowo osiągnąć efekt topienia, dostosowując obszar ogrzewania w razie potrzeby.
2. Po zakończeniu marszczenia należy schłodzić mosiężny element, a następnie umieścić go w wodzie z ałunem w celu podgrzania i oczyszczenia.
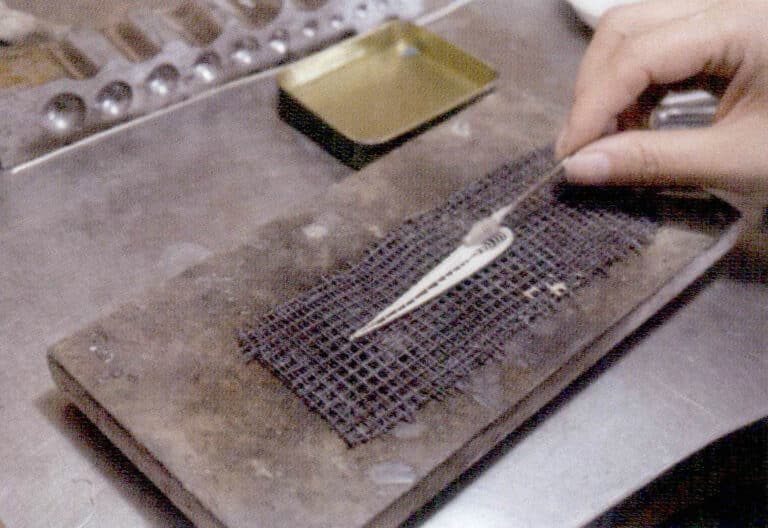
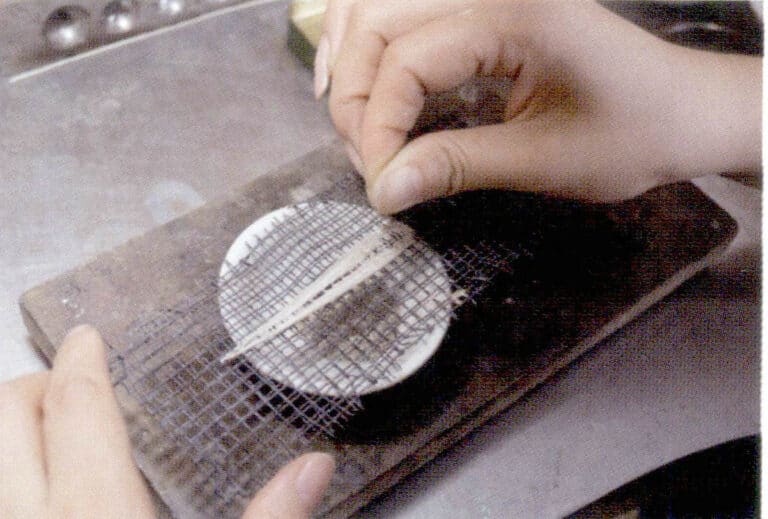
3. Po spłukaniu czystą wodą i wysuszeniu należy wybrać odpowiednie narzędzia do szlifowania i polerowania, takie jak wisząca szczotka miedziana, bęben magnetyczny lub nóż do wypalania agatu. Tekstura prac wykonanych techniką marszczenia silnie opisuje warstwowanie.
4. Po wypolerowaniu należy wykonać czyszczenie ultradźwiękowe, a na koniec przymocować perły, kończąc produkcję; ta para kolczyków może być wykonana jako sztyfty lub klipsy w zależności od potrzeb.
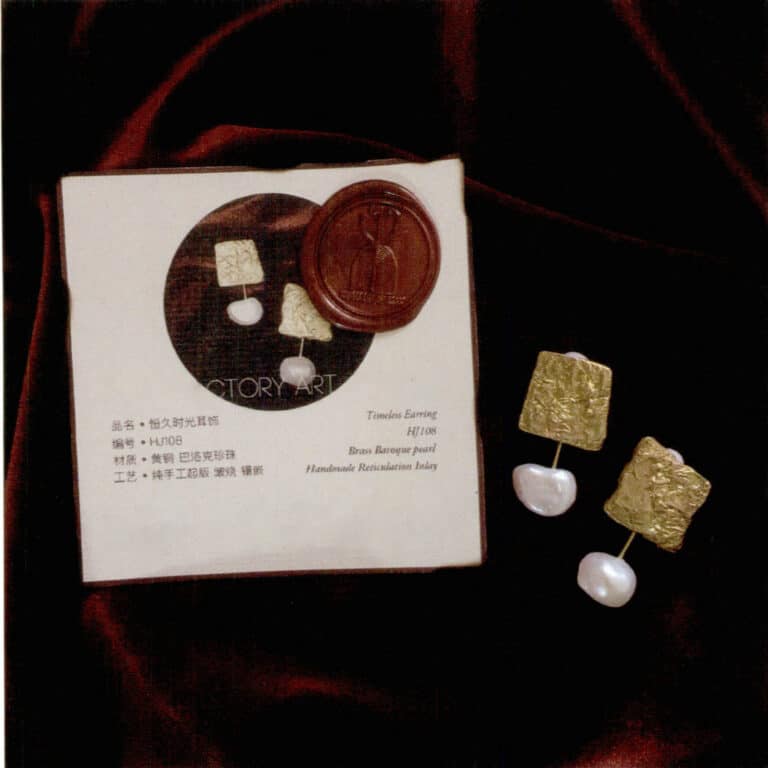
Xiebai, kolczyki Eternal Time, mosiądz, perły barokowe
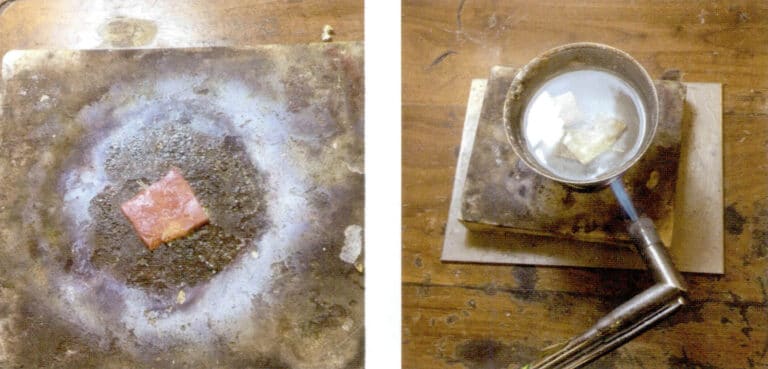
1. Podgrzej metal ogniem, aby zakończyć marszczenie i poczekaj, aż czerwony kolor metalu zniknie przed przystąpieniem do hartowania i czyszczenia ałunem.
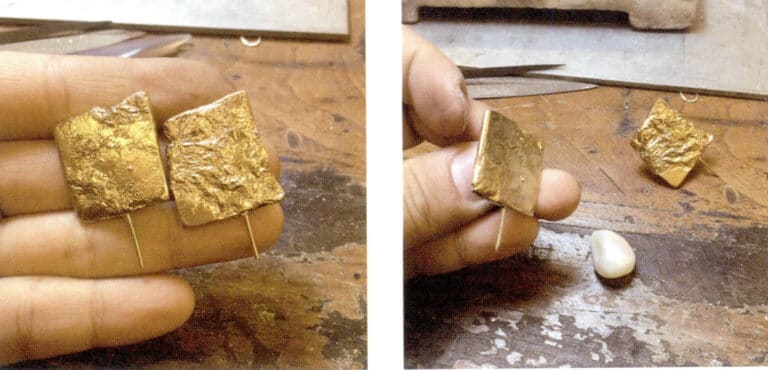
2. Przyspawaj perłę i igły do uszu do metalu, który zakończył marszczenie.
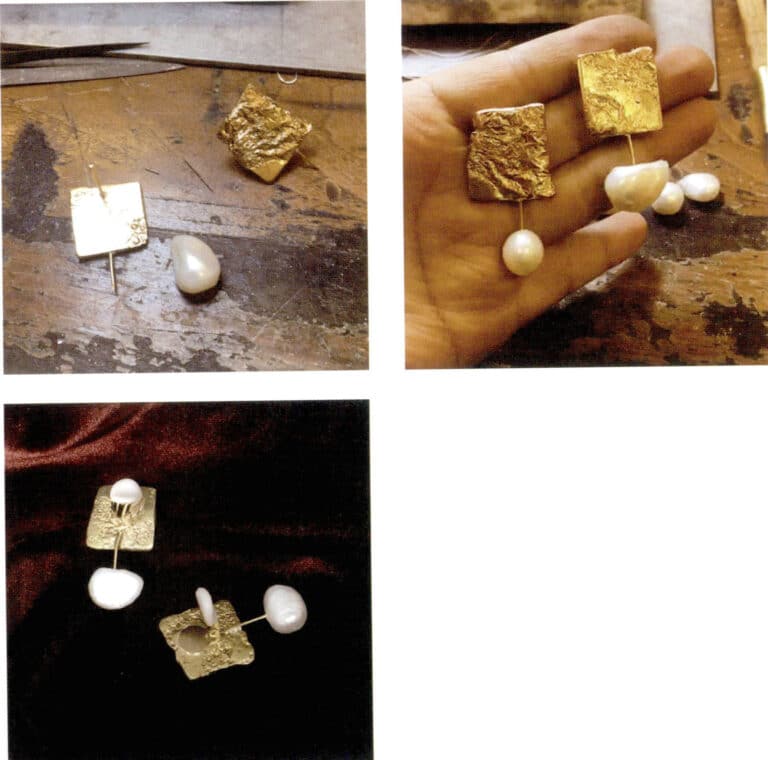
3. Po czyszczeniu, polerowaniu i inkrustowaniu pereł produkcja jest zakończona.
Xiebai, złote kolczyki, mosiądz, perły barokowe
1. Weź blachę mosiężną o grubości 0,5 mm, wyżarz ją i wygnij w kształt strąka.
2. Użyj techniki marszczenia, aby stopić metalową krawędź w celu uzyskania naturalnie płynnego efektu, a po przemyciu kwasem użyj pilnika, aby wygładzić szorstkie krawędzie.
3. Po wypolerowaniu w bębenku magnetycznym, zamocuj zaczepy w metalowych szczelinach.
4. Pozostaw odpowiednią przestrzeń, aby włożyć trzy perły barokowe i użyj szczypiec, aby je zacisnąć i zabezpieczyć. Użyj noża do wypalania agatu, aby wypalić wystającą część strąka do pożądanej wysokości, kończąc proces.

Xiebai, złoty wisiorek z pędem bambusa, mosiądz
1. Po wyżarzeniu mosiężnego arkusza, użyj młotka, żelazka i żelaznego pręta, aby uformować go w łuk.
2. Za pomocą markera obrysuj ogólny kształt pędu bambusa i wytnij kontur nożyczkami.
3. Użyj pilnika, aby lekko przyciąć zadziory na metalowych krawędziach i zagnij jedną stronę spiczastej części szczypcami, aby utworzyć otwór na naszyjnik.
4. Użyj techniki marszczenia, aby osiągnąć pożądany efekt.
5. Polerowanie po czyszczeniu ałunem.
6. Złota zawieszka w kształcie pędu bambusa jest gotowa.

Xiebai, starożytny i nowoczesny wisiorek moneta, mosiądz
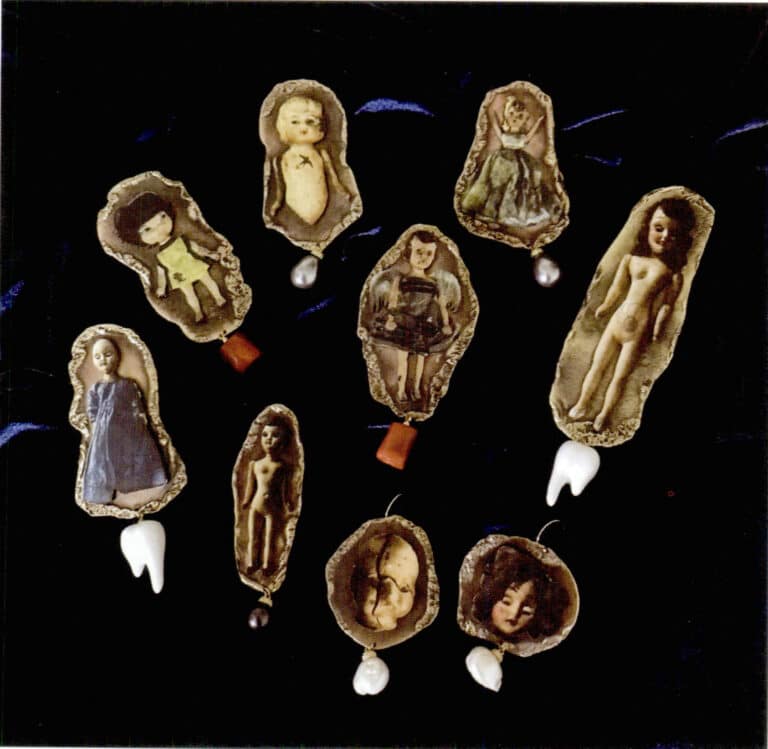
Biżuteria z serii Museum Fantasy Night, mosiądz, zabytkowe drewniane lalki, barokowe perły, ceramika, morski koral bambusowy itp.
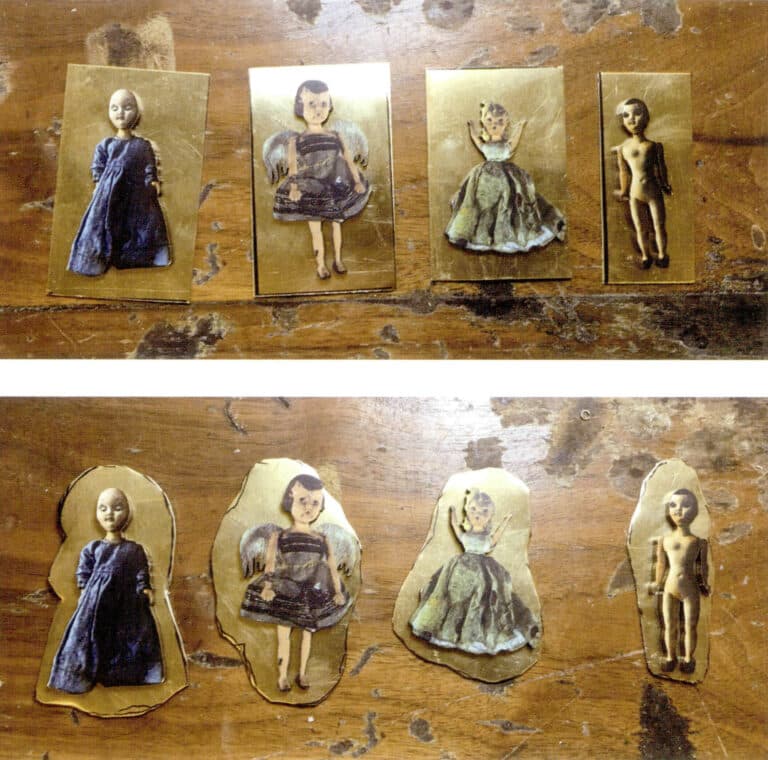
1. Wytnij mosiężne elementy zgodnie z rozmiarem drewnianych elementów i użyj szczypiec, aby uzyskać swobodny kształt sylwetki.
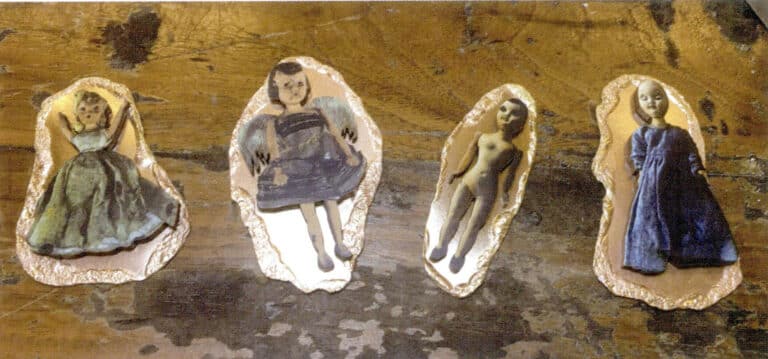
2. Użyj techniki wypalania i marszczenia, aby stopić krawędzie blachy miedzianej, tworząc naturalny efekt płynnej ramy; wyczyść ałunem, a następnie wypoleruj metal w bębnie magnetycznym.
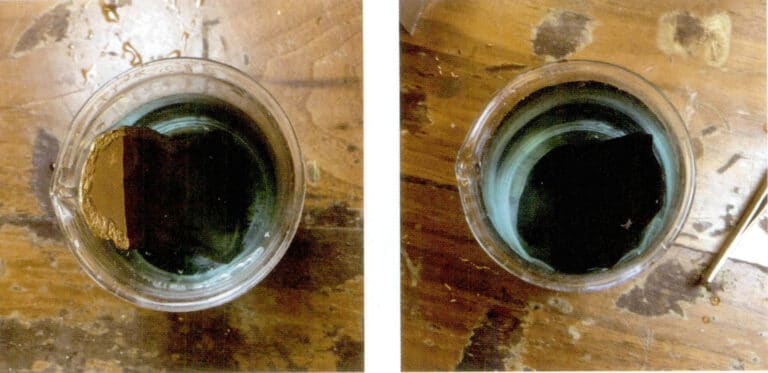
3. Namocz metal w roztworze do postarzania przez około 5 minut (Uwaga: konkretny czas trwania powinien odnosić się do instrukcji roztworu do postarzania każdej marki).
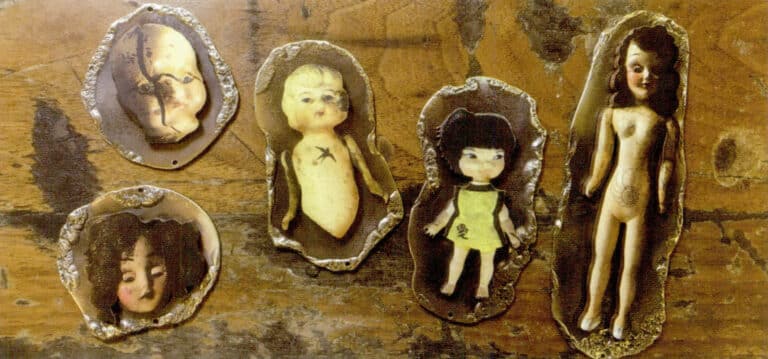
4. Zdejmij metal do naturalnego wyschnięcia na powietrzu, a na koniec użyj szlifierki wiszącej, miedzianej szczotki drucianej i drobnego papieru ściernego, aby wykonać miejscowe polerowanie, nadając metalowi efekt vintage z ciemnym połyskiem. Ręczne polerowanie można wykonać za pomocą najdelikatniejszej gąbki polerskiej, jeśli pożądany jest gładszy dotyk.
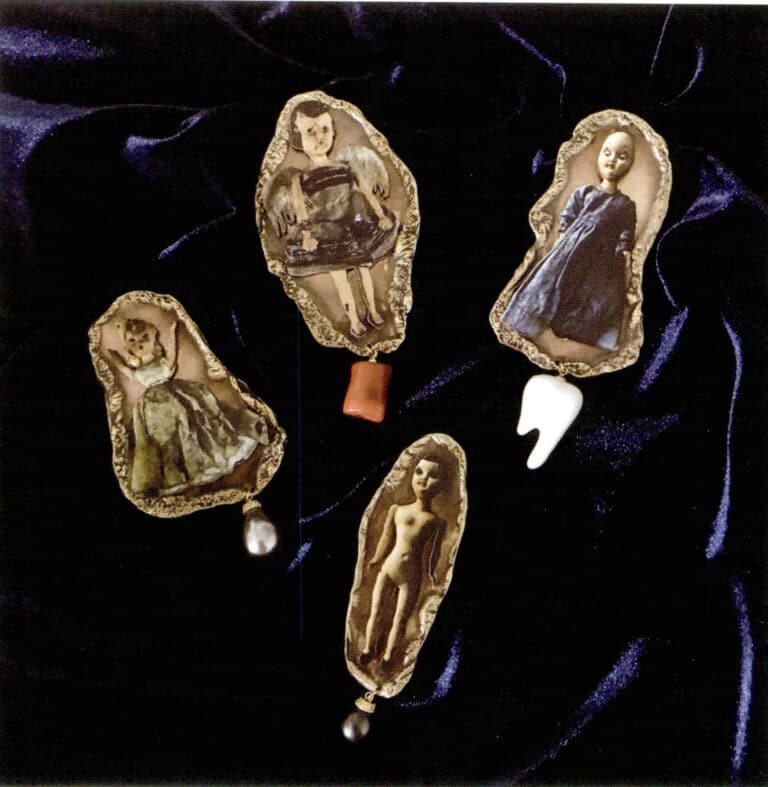
5. Wywierć otwory w pobliżu metalowej krawędzi, zainstaluj akcesoria, takie jak perły i morskie korale bambusowe, i zabezpiecz drewniane elementy lalki Vintage metalowym klejem AB, kończąc produkcję.
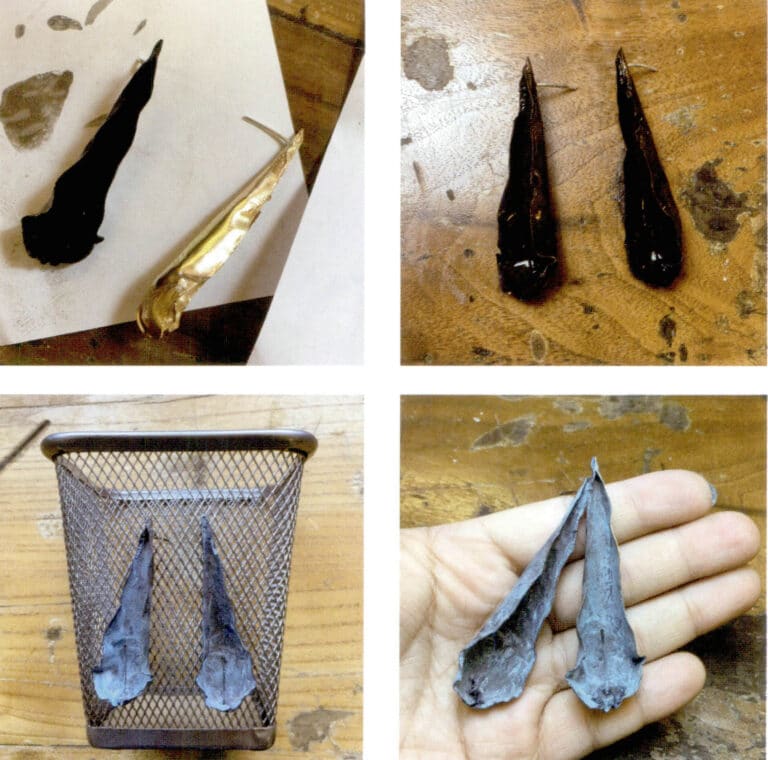
Ilustracja procesu tworzenia kolczyków z falą.
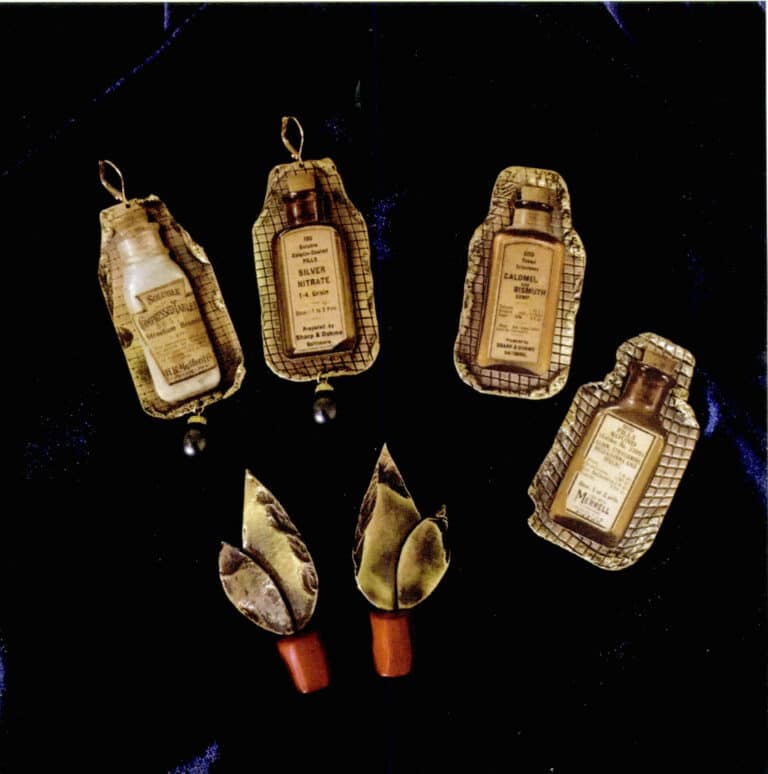
Xiebai, biżuteria z serii Worry-relieving Powder, mosiądz, kawałki drewna z butelki lekarskiej w stylu vintage, morski koral bambusowy, perła muszlowa
Ilustracja procesu tworzenia kolczyków Worry-relieving Powder
Kolczyki z procesem postarzania metalu
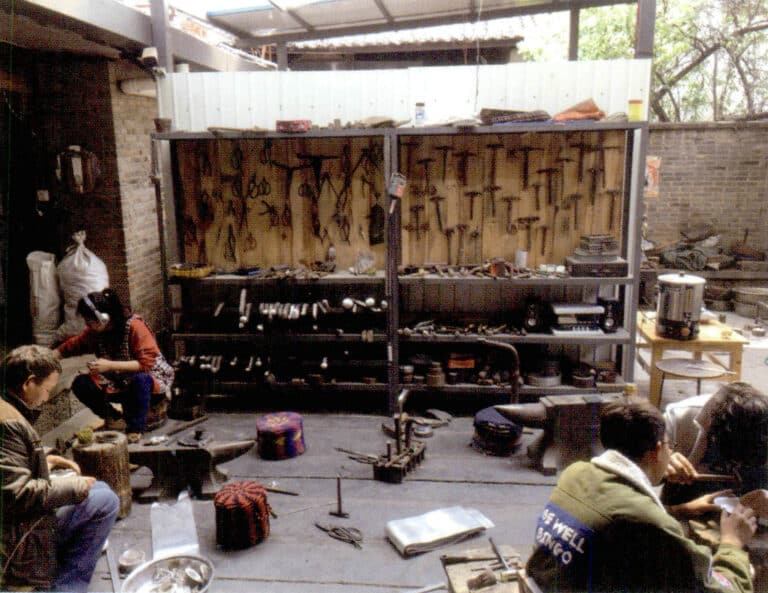
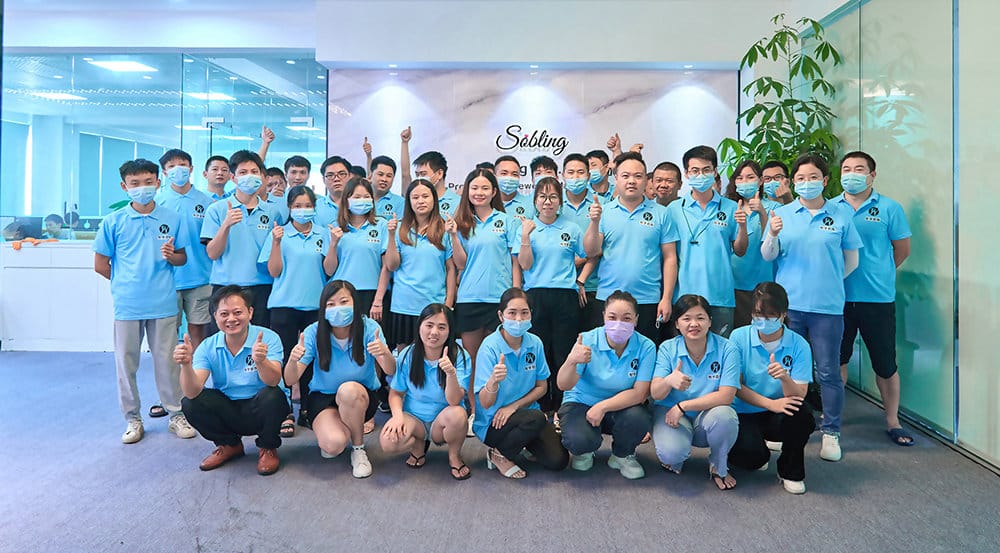
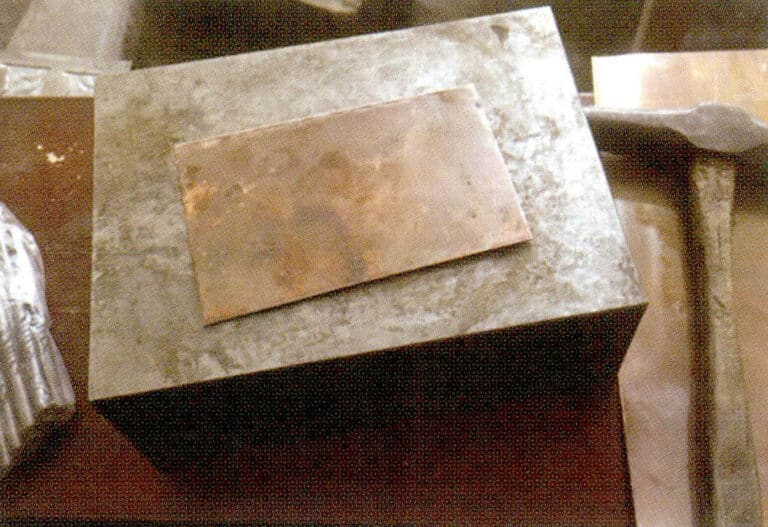
Warsztat grawerski (Yunnan)

Srebrny materiał o zawartości srebra 990‰ lub wyższej
Ołówek
Uszczelniająca kulka woskowa
Płyta kalafonii
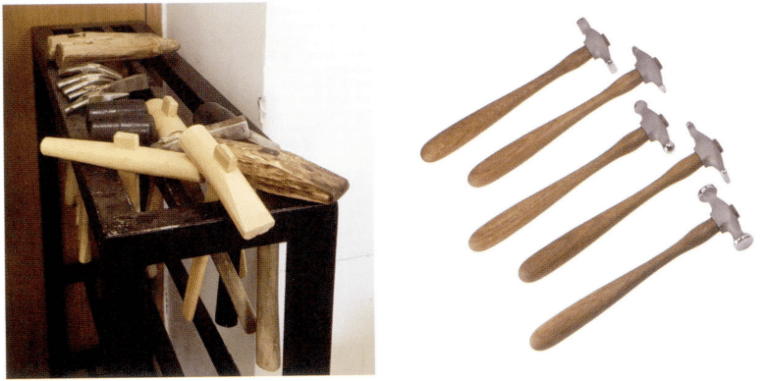
Wszystkie rodzaje młotków
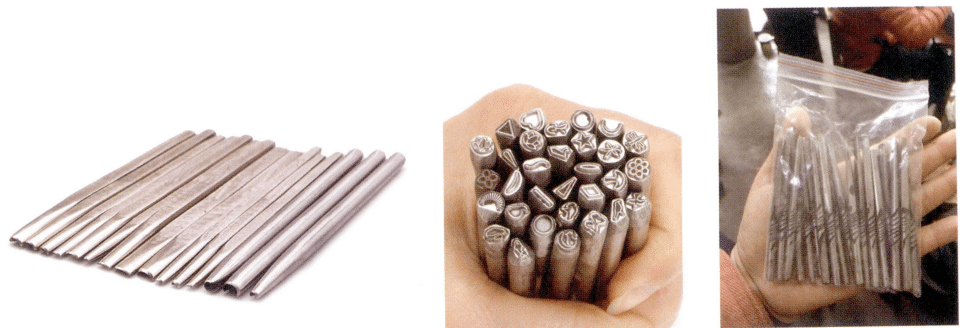
Wszystkie rodzaje dłut
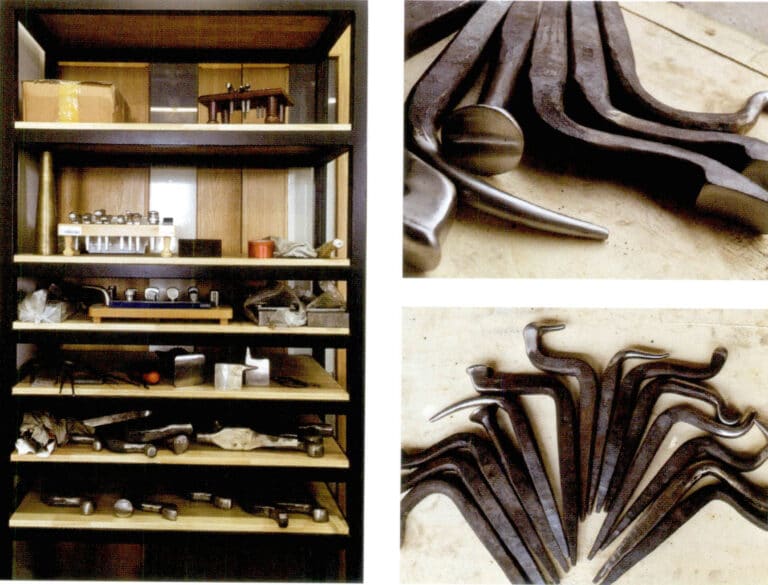
Wszystkie rodzaje haków żelaznych
Inne narzędzia i materiały
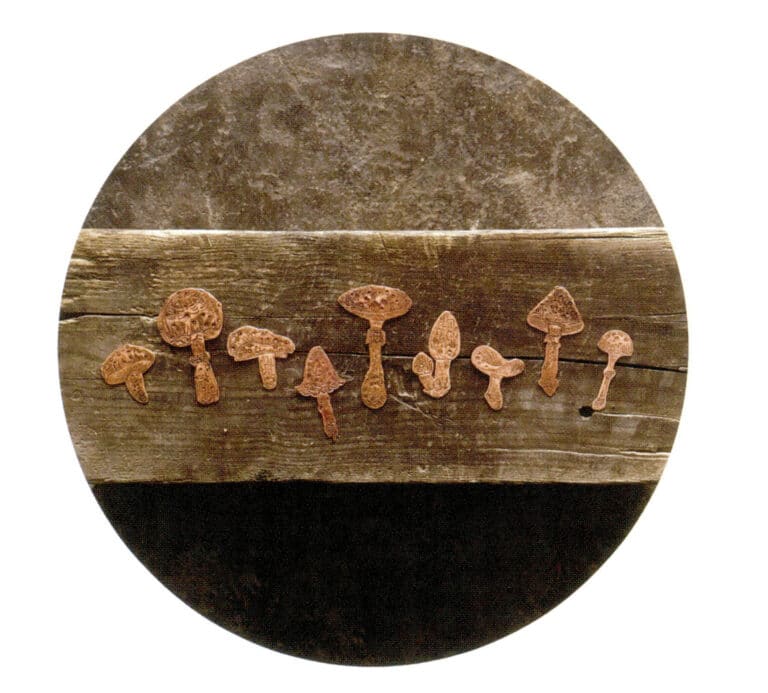
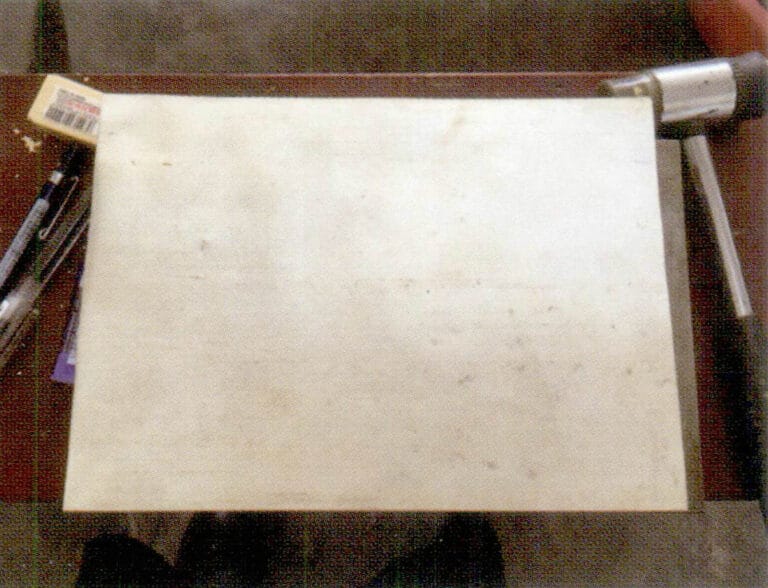
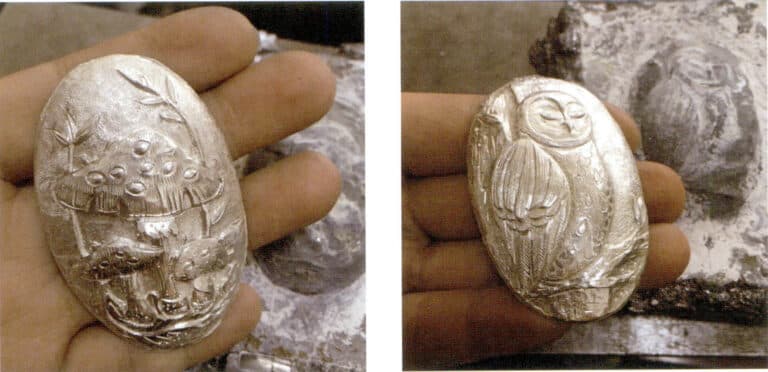
Xiebai, Fantasy Fungus, fioletowa miedź, grawerowanie
1. Nożyce do cięcia fioletowej blachy miedzianej.
2. Wyżarzanie i wyrównywanie metalu.
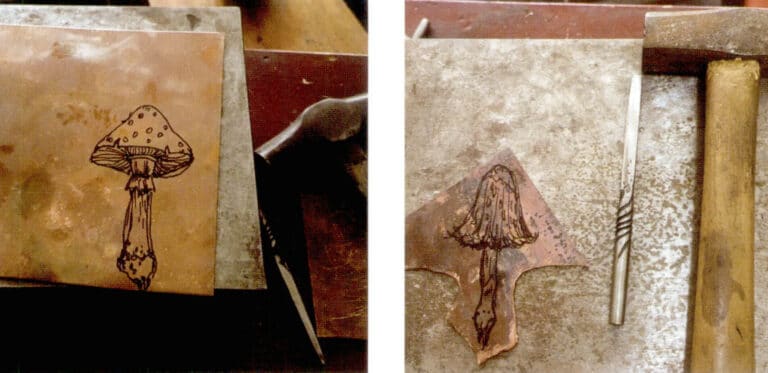
3. Do narysowania szkicu grawerunku użyj markera olejowego.
4. Wykonaj rowki wzdłuż wzoru za pomocą dłuta do wyrównywania i młotka do dłut, a następnie narysuj linie za pomocą dłuta, tak jakbyś rysował obrazek.
5. Należy zwrócić uwagę na grawerowanie przez pewien czas. Należy go wyżarzać, aby uniknąć utwardzenia i kruchości metalu.
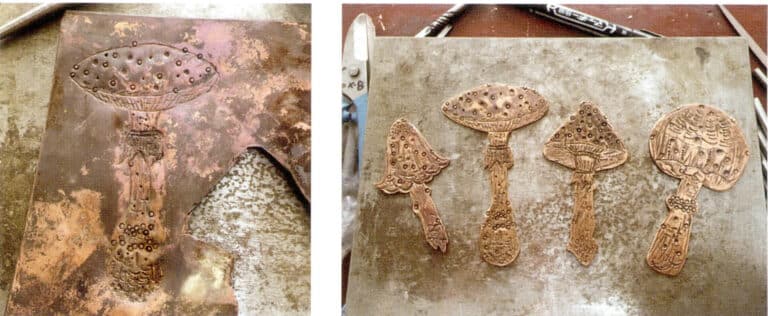
6. Wymień dłuta o różnych wzorach, aby jeszcze bardziej wzbogacić projekt.
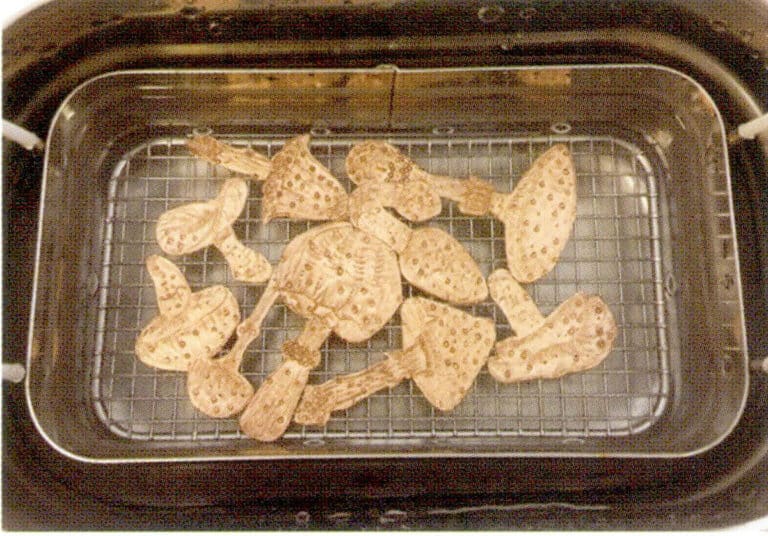
7. Po wypolerowaniu należy umieścić go w bębnie ultradźwiękowym w celu oczyszczenia, co kończy produkcję.
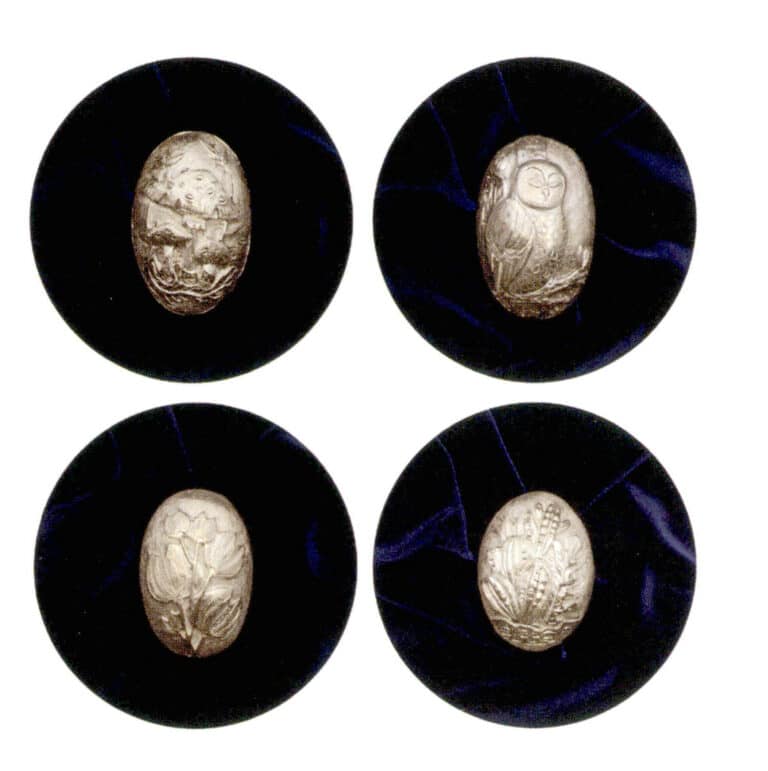
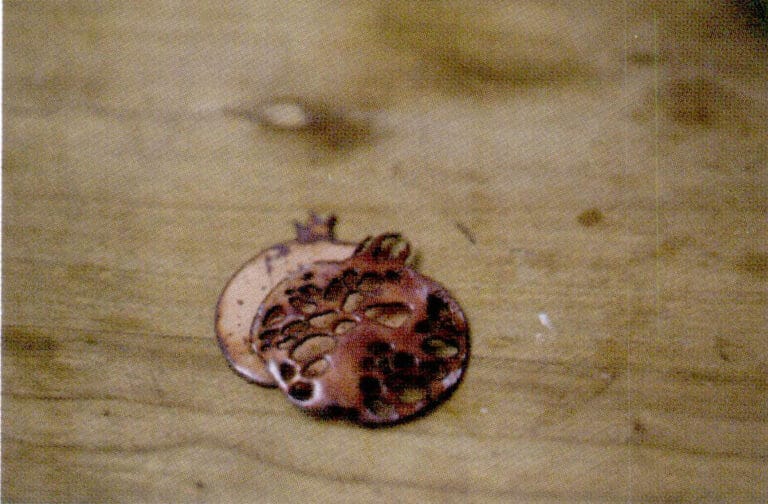
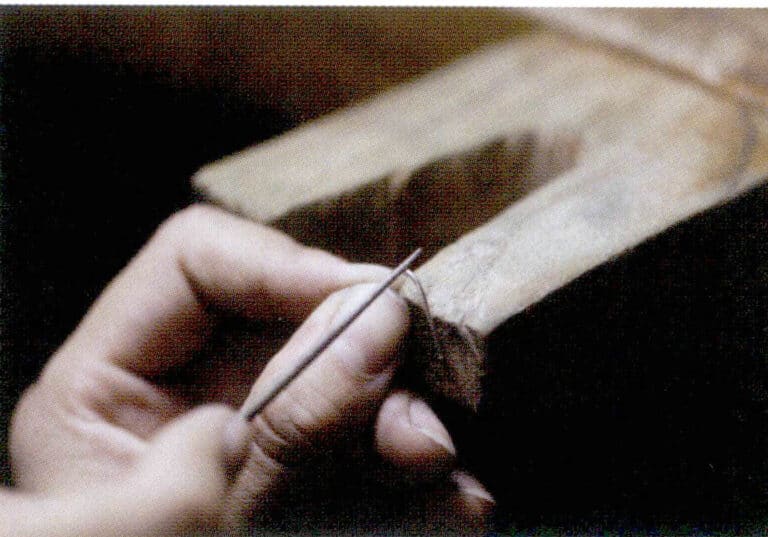
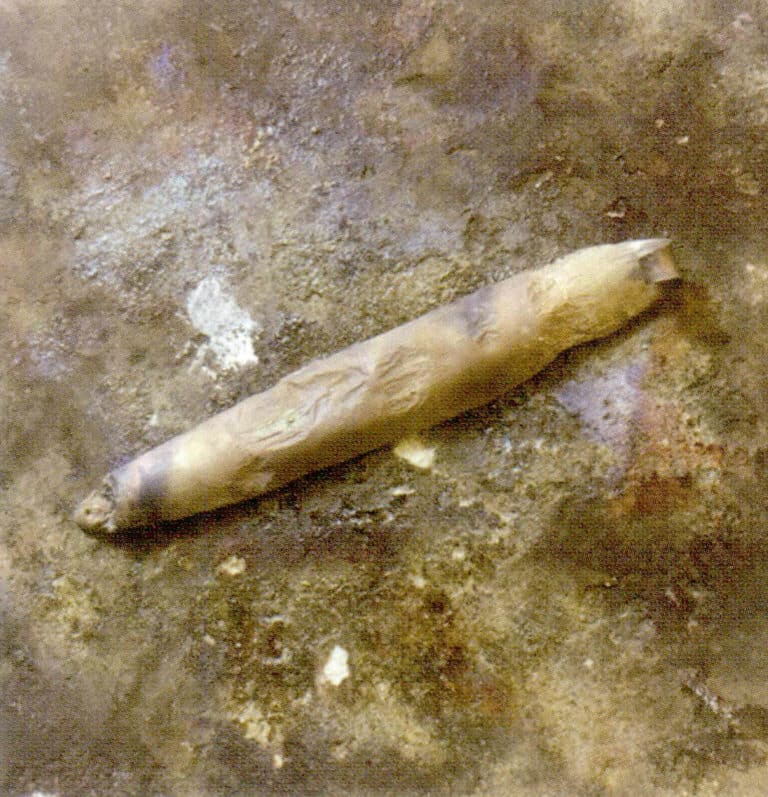
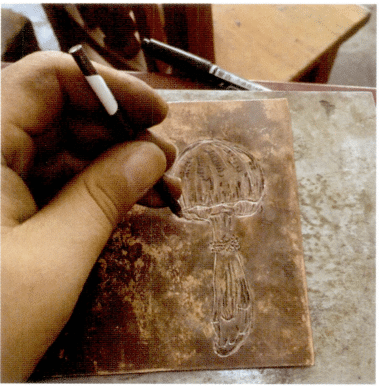
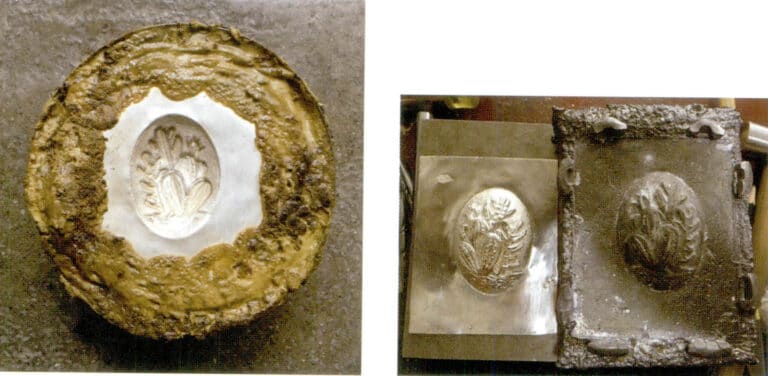
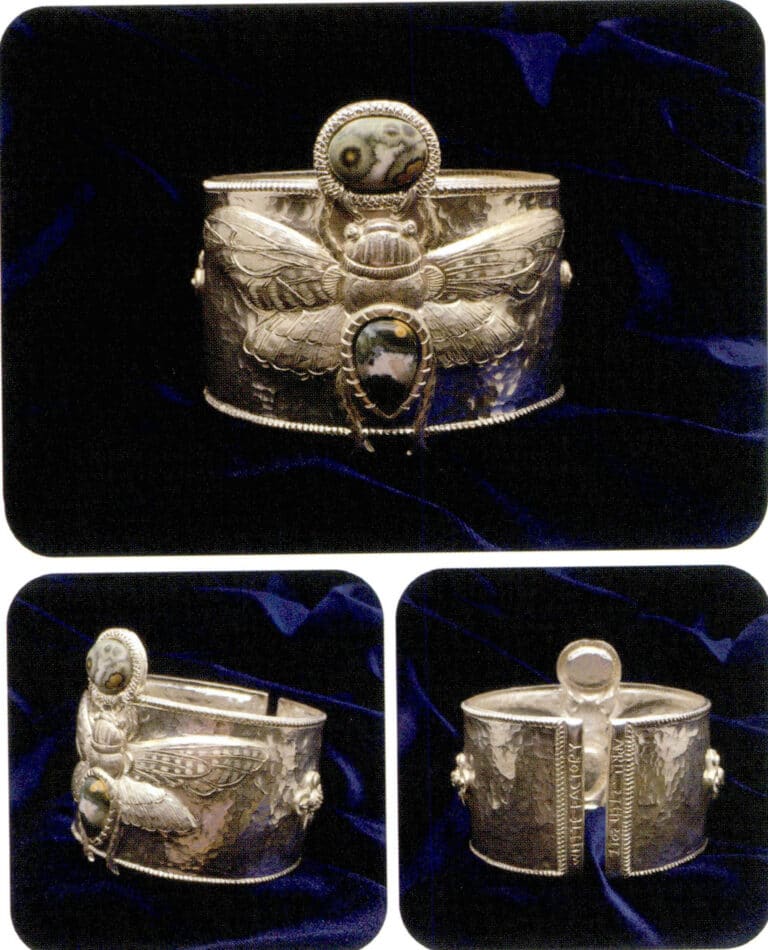
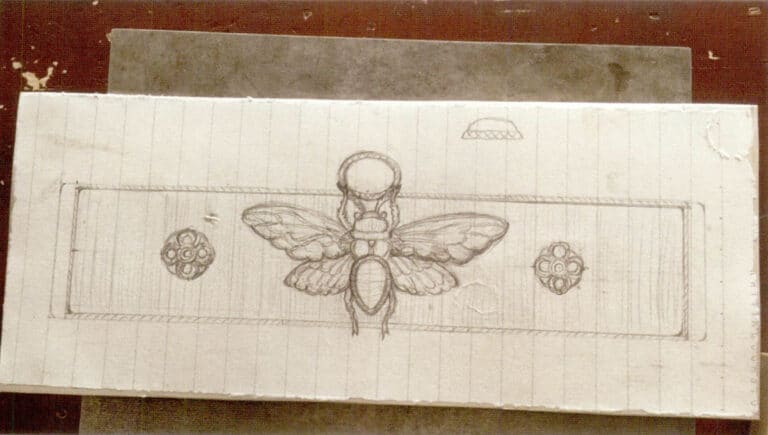
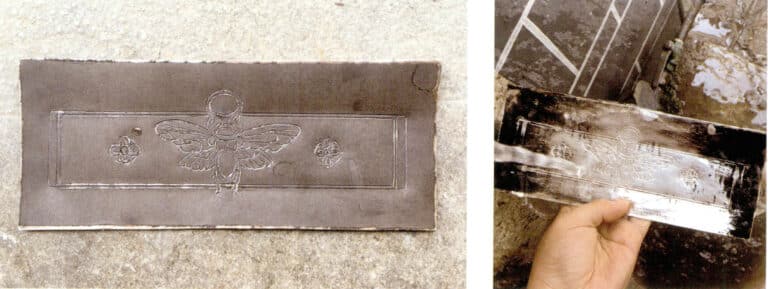
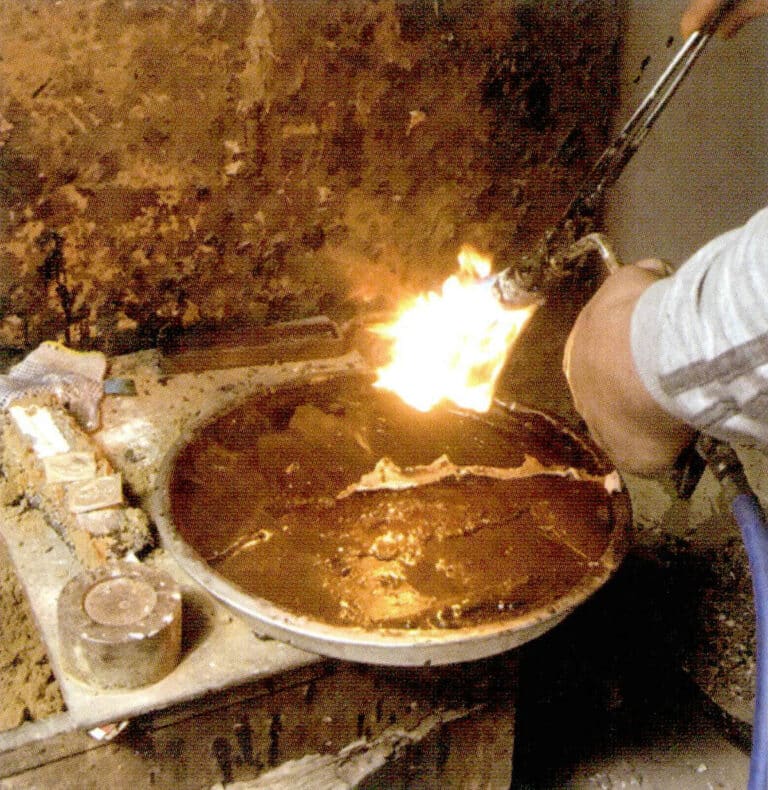
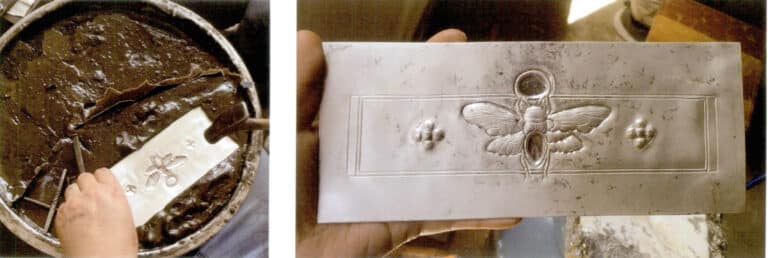
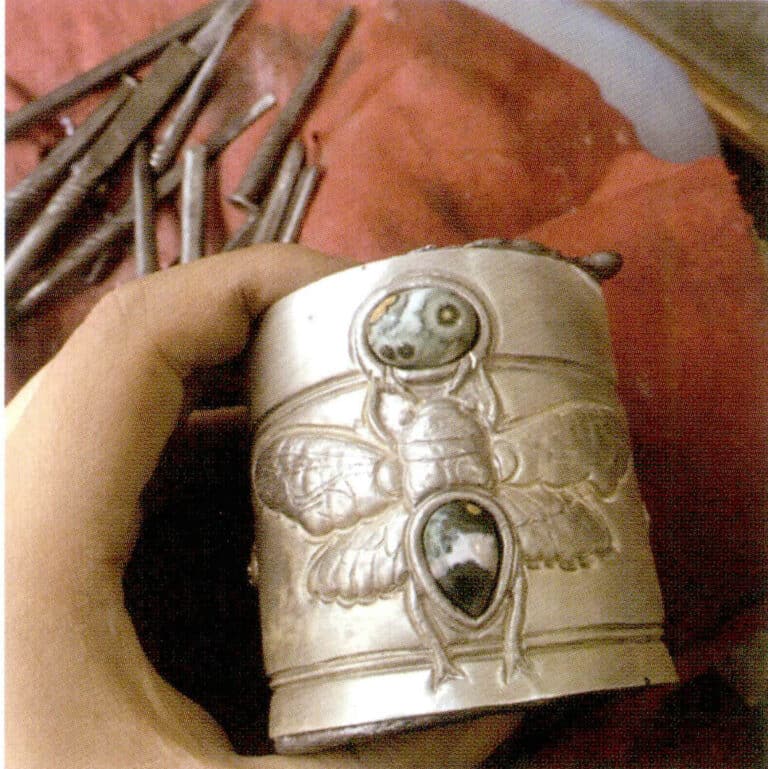
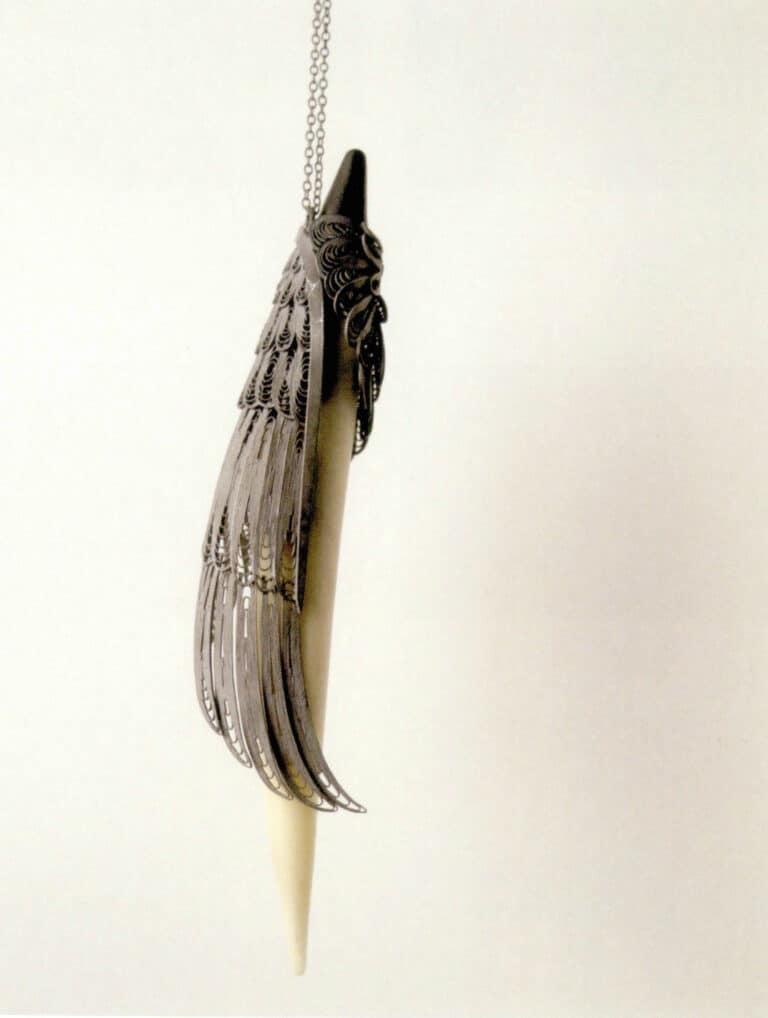
Xiebai, Letnia dżungla, czyste srebro 999, grawerowane
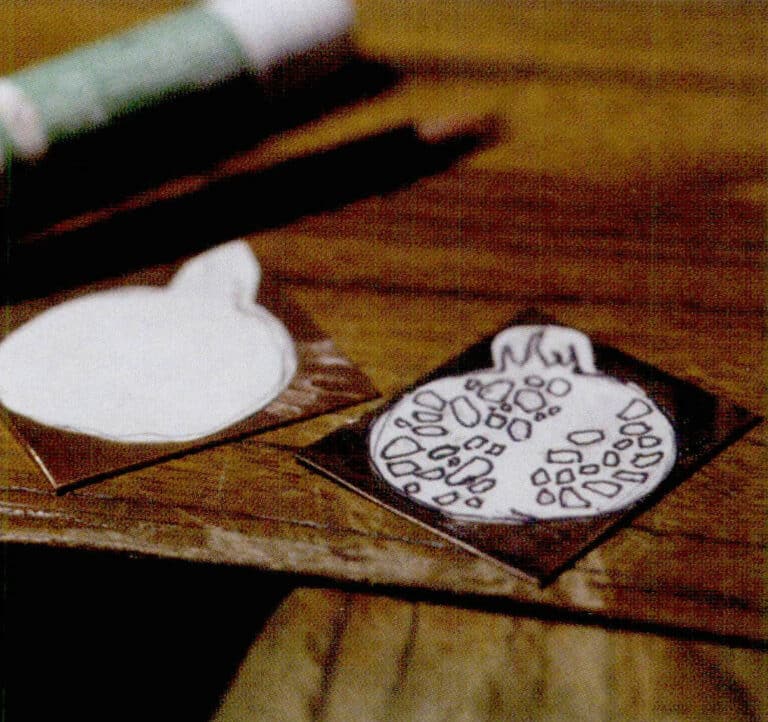
1) Przygotować płytkę z czystego srebra 999 i wyżarzyć ją.
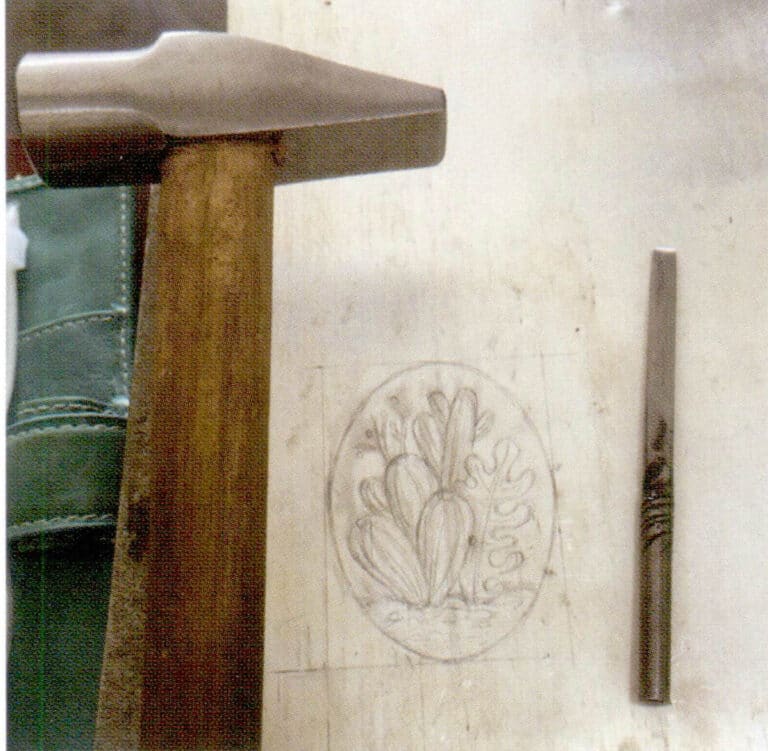
2. naszkicuj wzór ołówkiem na srebrnej płytce.
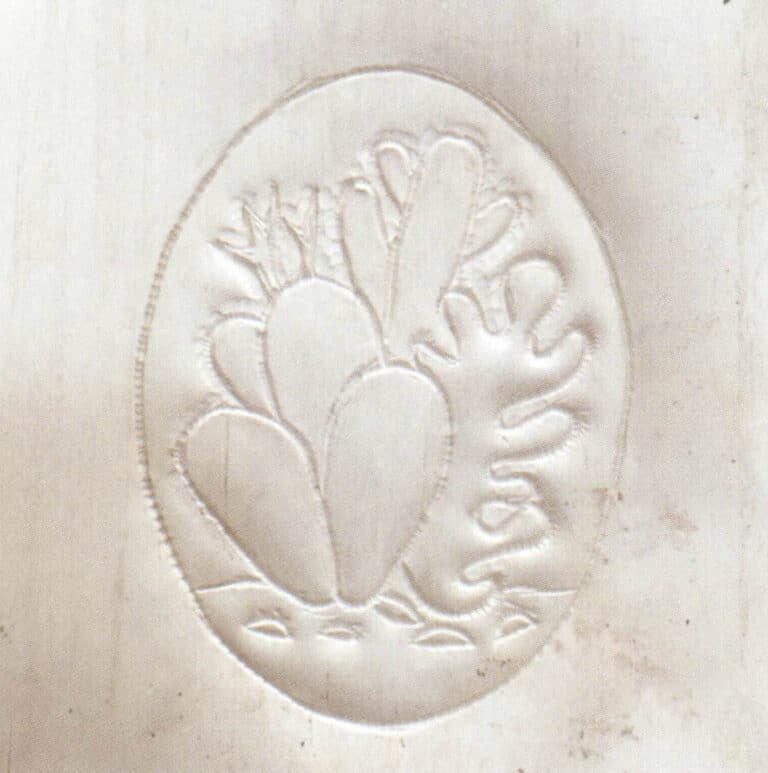
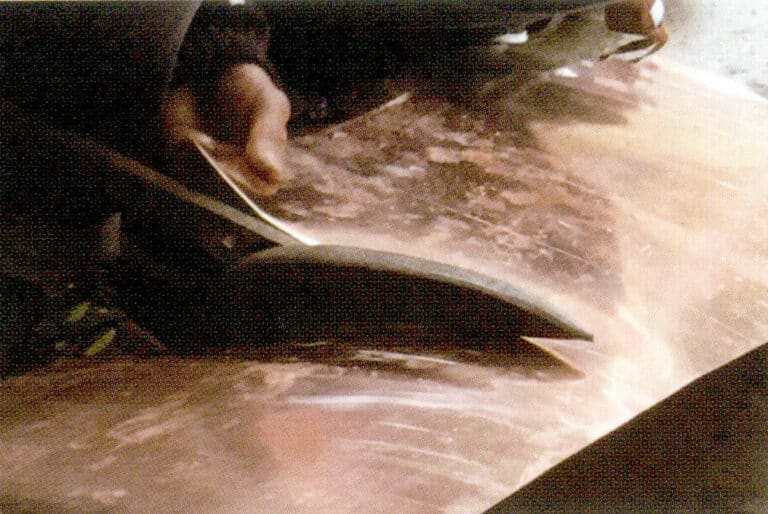
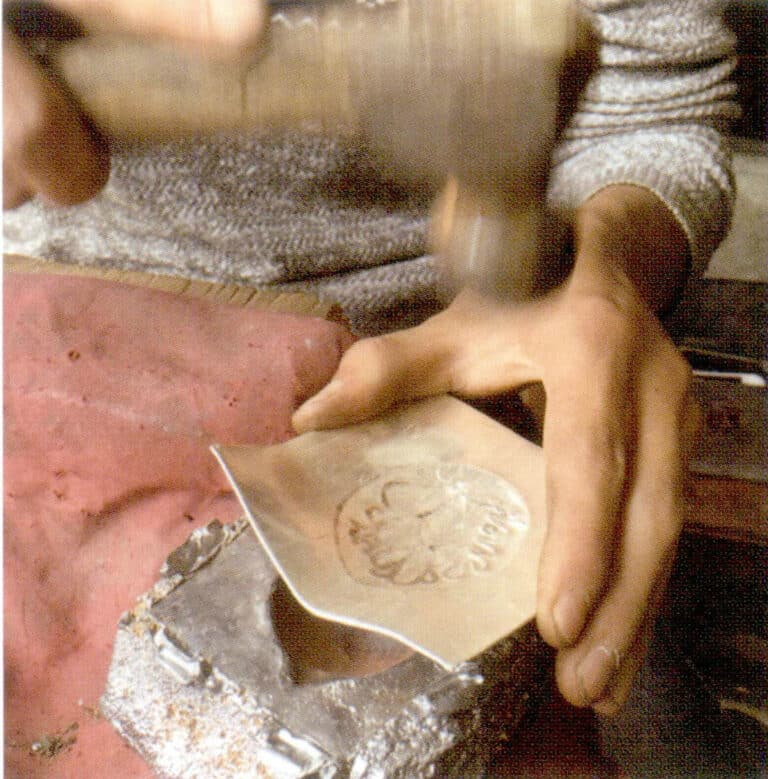
3. naszkicuj kontur wzoru na srebrnej płytce za pomocą dłuta i młotka.
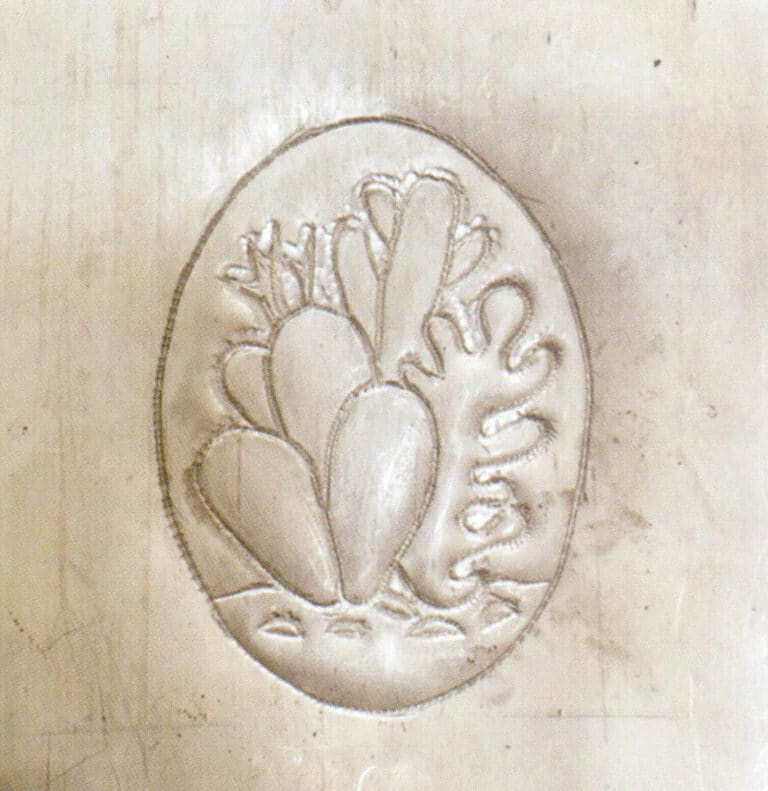
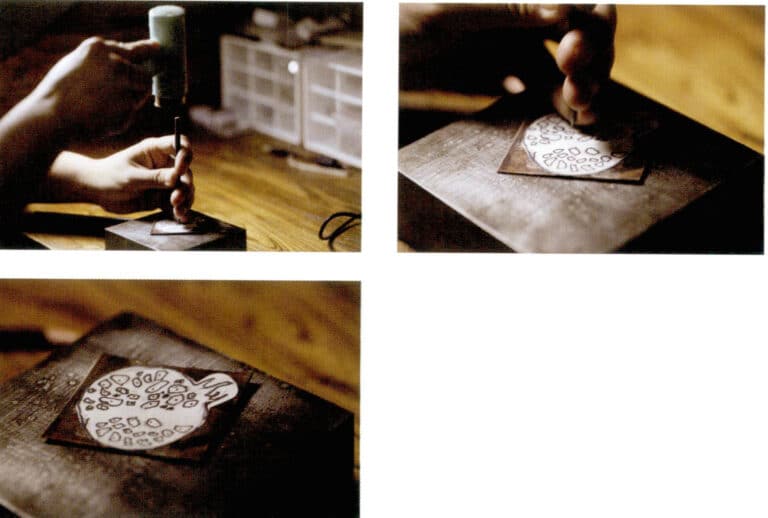
4. pogłębić grawerowanie wyrównujące.
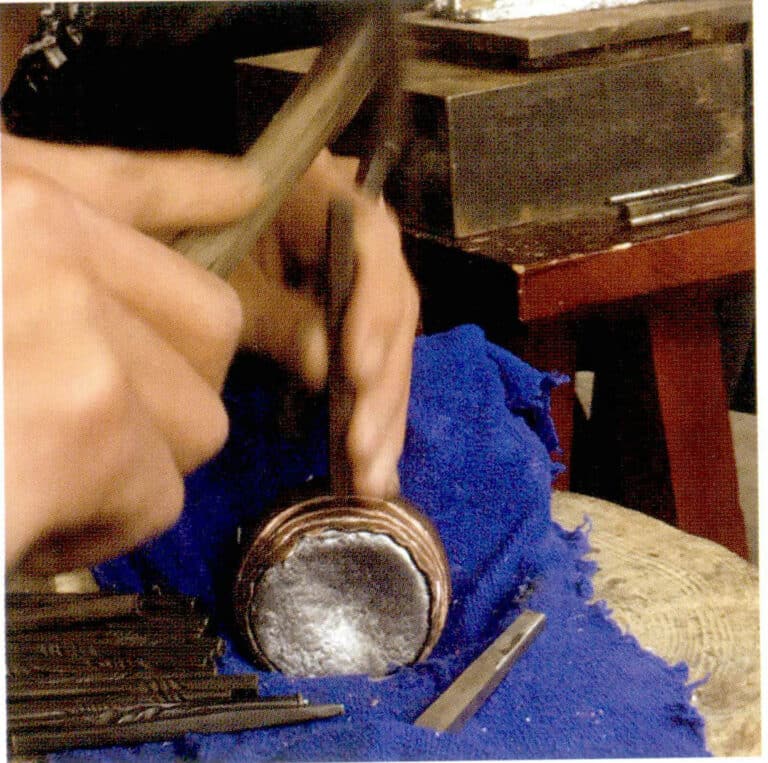
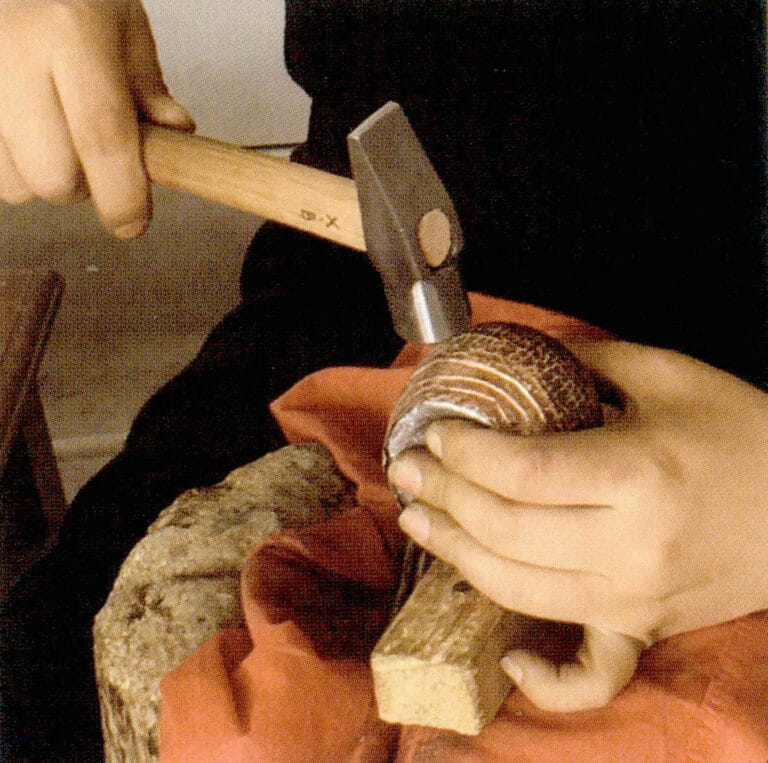
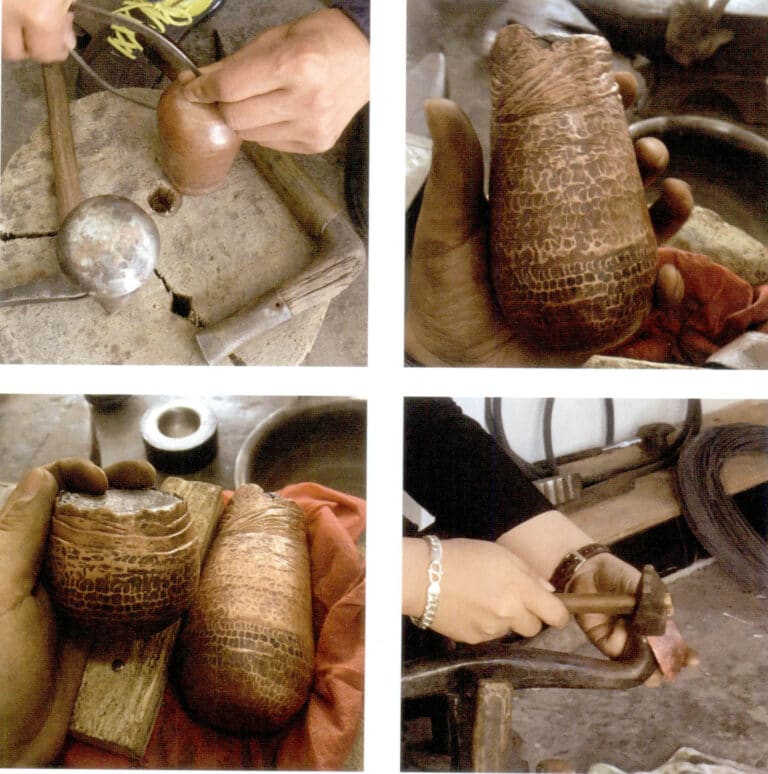
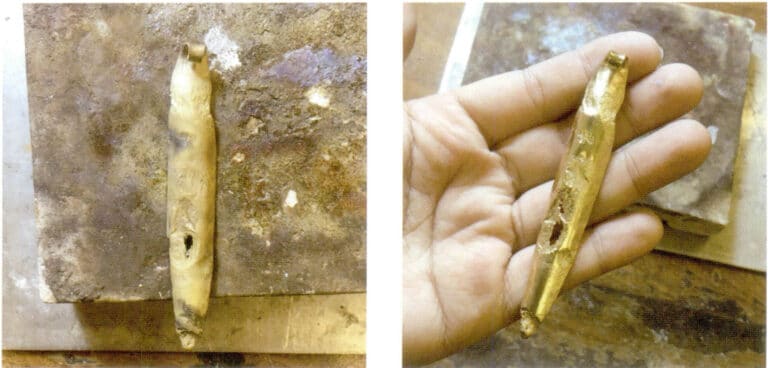
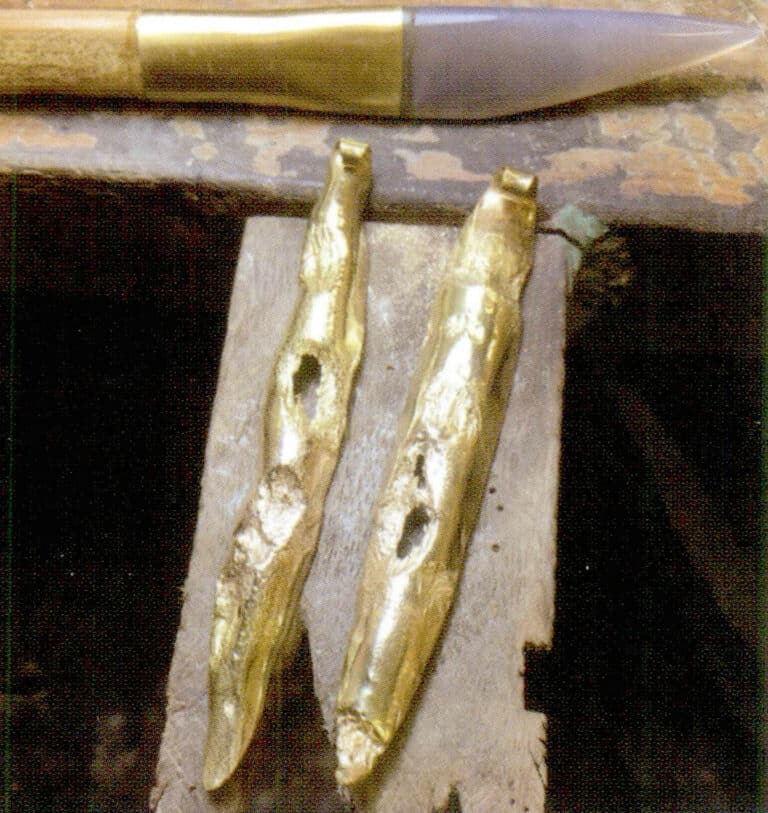
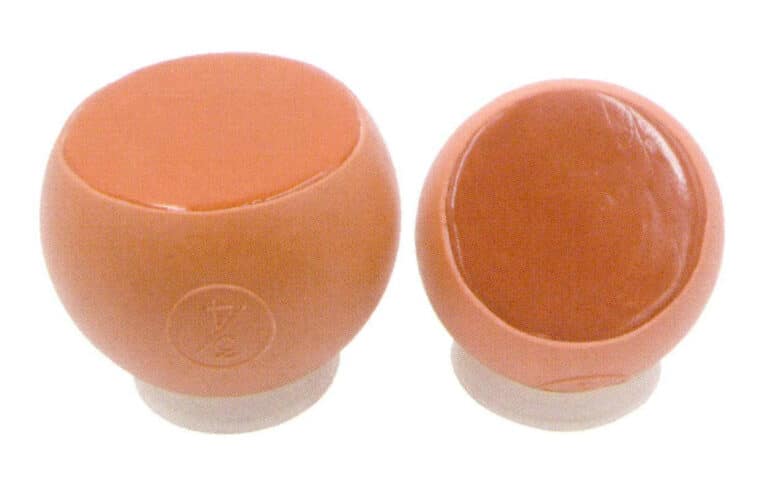
5) Za pomocą drewnianej łopatki lub młotka z okrągłą główką wybij półkole z tyłu srebrnej płytki, umieszczając pod spodem ołowiany klocek, aby uniknąć uszkodzenia srebrnej płytki.

6) Po wykonaniu półokrągłego łuku wybierz mniejszy młotek, aby wykonać miejscowe wklęsłe i wypukłe kształty, dzięki czemu wzór kaktusa będzie rytmicznie prezentował efekt wklęsłości i wypukłości od przodu.
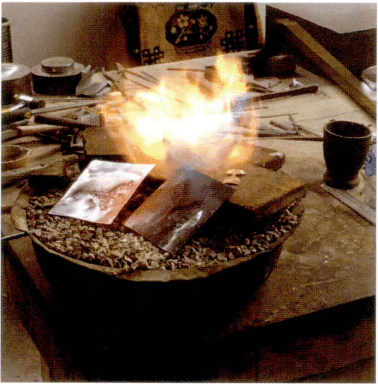
7. chronić srebrną płytkę, owijając ją wodą wapienną.

8) Podgrzanie srebrnej płytki owiniętej w wodę wapienną za pomocą palnika może szybko wysuszyć wodę wapienną, a także wyżarzyć srebrną płytkę.
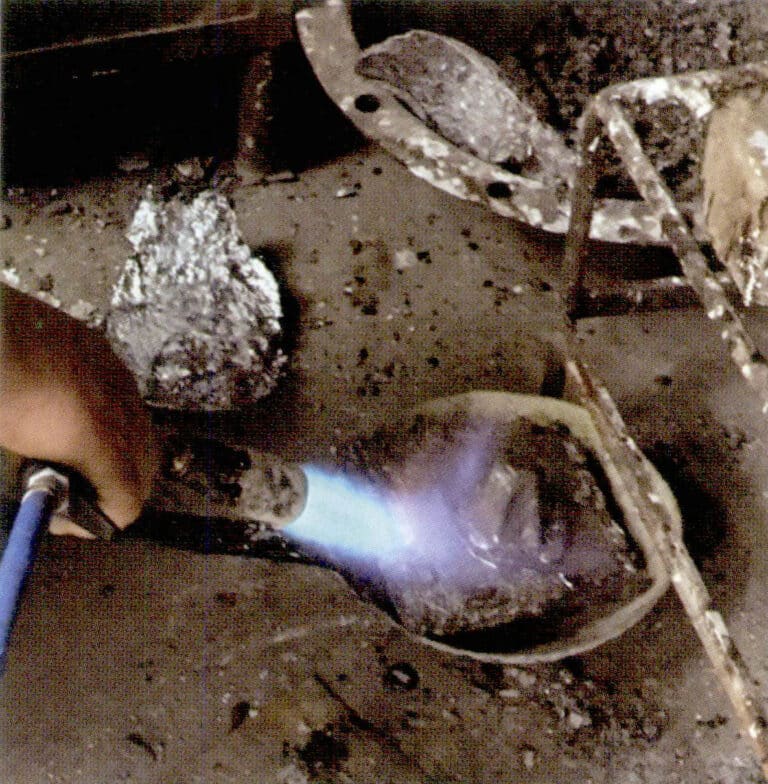
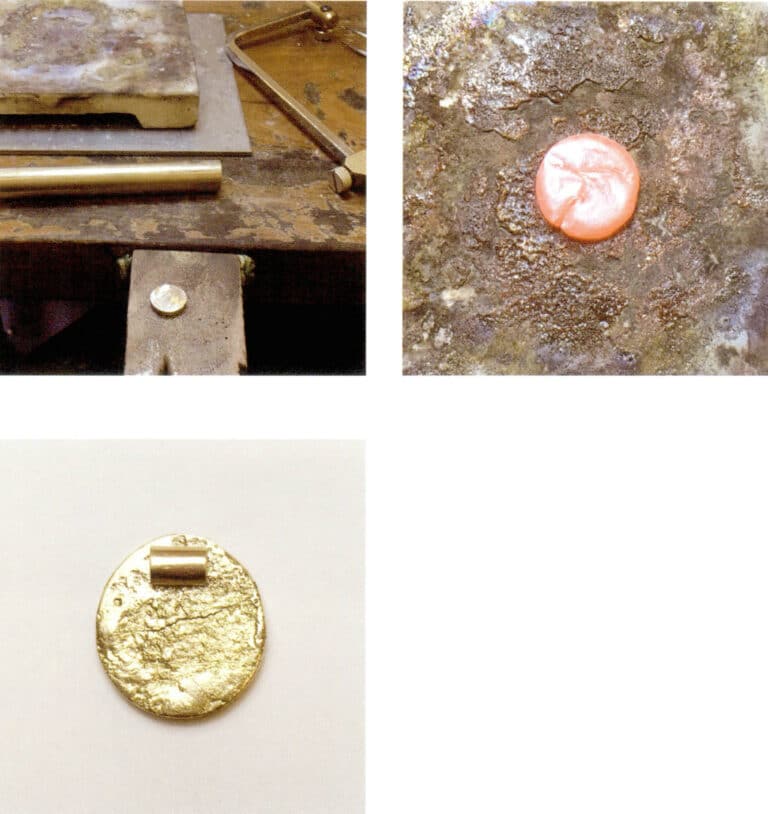
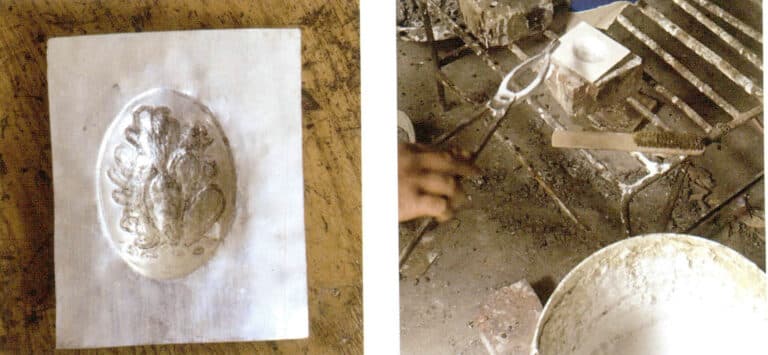
9 Ogień stopił ołów.
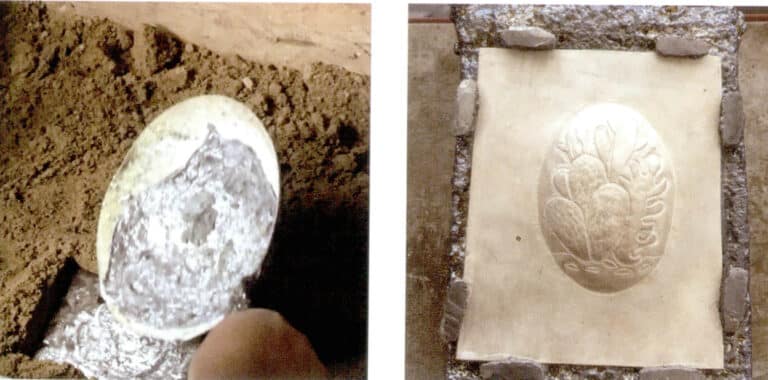
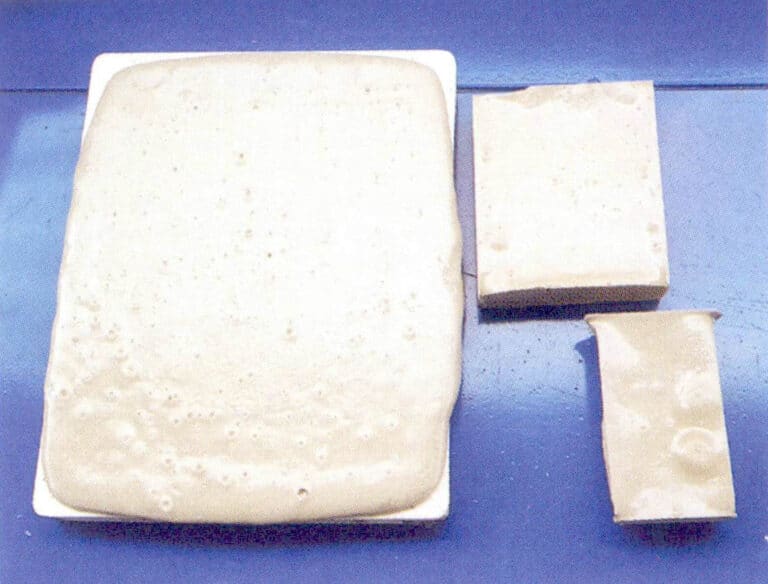
10. wykop odpowiedniej wielkości kwadraty piasku. najpierw umieść srebrną blaszkę w piaskownicy przodem do piasku, a następnie wlej roztopiony ołów do srebrnej blaszki i piaskownicy. Po zastygnięciu i ostygnięciu można usunąć osadzony srebrny arkusz.
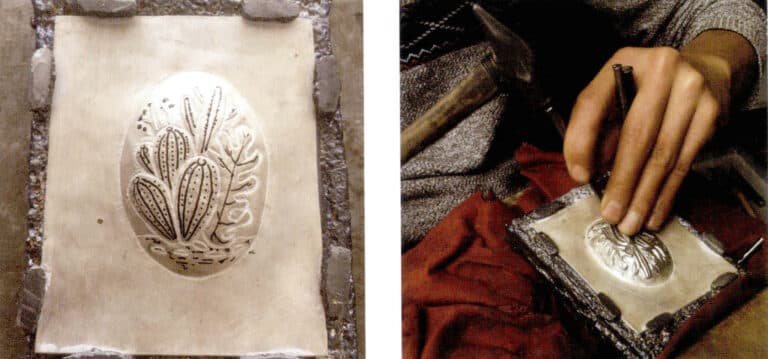
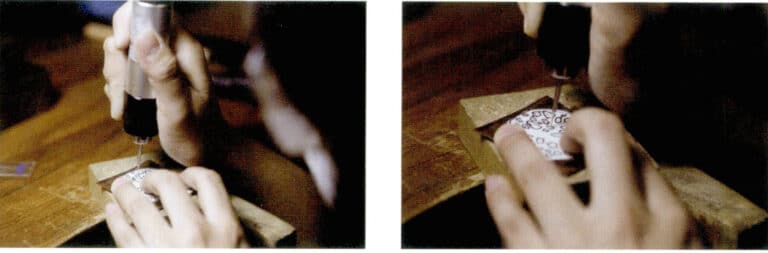
11. użyj markera, aby wyraźnie zarysować wzór, użyj ołowianego bloku jako podstawy i rzeźb za pomocą różnych dłut z młotkiem.
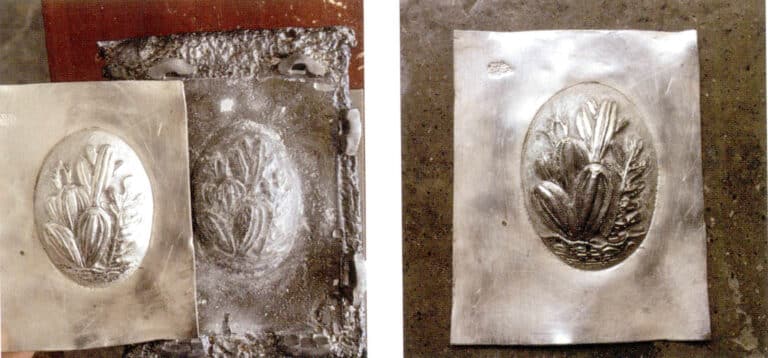
12) Po zakończeniu grawerowania zdejmij srebrny element i użyj miedzianej szczotki drucianej, aby usunąć proszek wapienny z powierzchni.
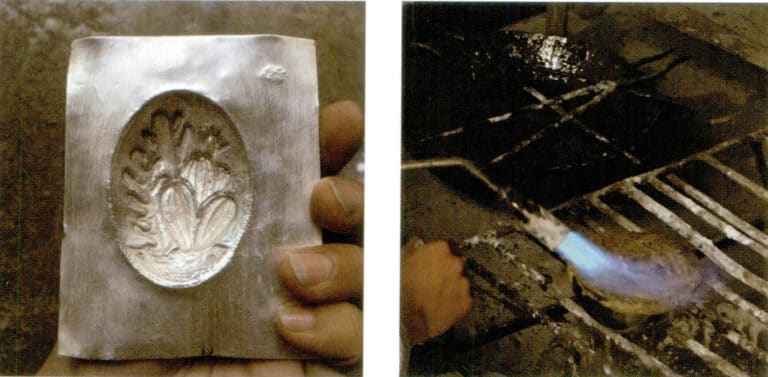
13) Kolczasta część kaktusa musi być wygrawerowana z tyłu srebrnego elementu. Podgrzej i roztop garnek z kalafonią, a następnie umieść w nim srebrny element, aby go zabezpieczyć.
14 Po zakończeniu grawerowania od tyłu, roztop kalafonię i usuń srebrny element.
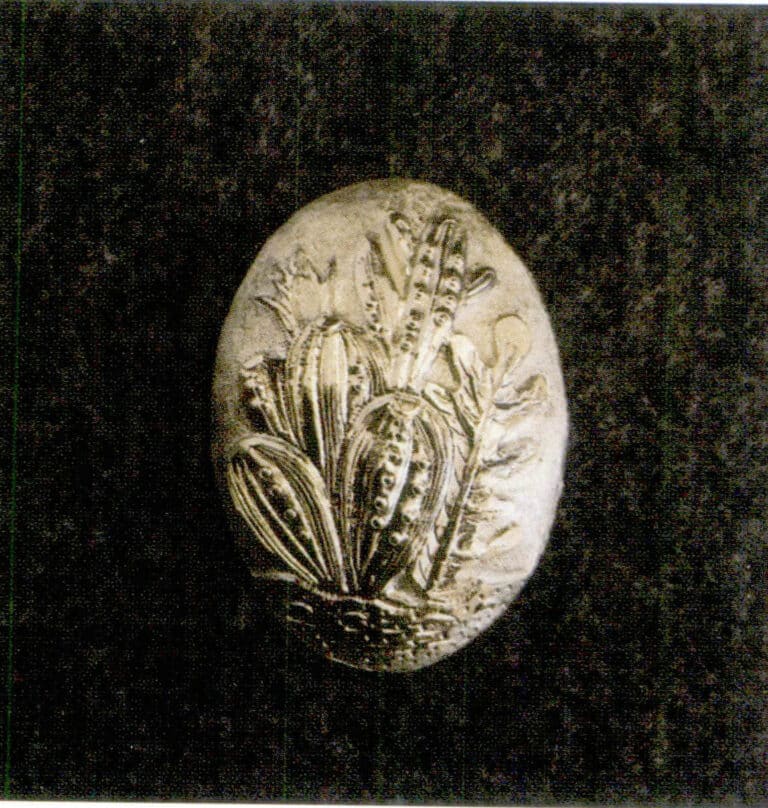
15 Po czyszczeniu i polerowaniu, grawerowanie zakrzywionej powierzchni jest zakończone.
16. Metoda ta umożliwia tworzenie serii zakrzywionych grawerunków powierzchniowych.
Xiebai, taniec fal, jadeit oceaniczny, czyste srebro 999, grawerowane
1. Przyklej narysowany szkic do wyżarzonej płytki z czystego srebra 999 za pomocą mlecznego kleju lub pasty.

2. Do dłutowania krawędzi użyj dłuta liniowego i młotka.
3. Wykonaj wyżarzanie, wypal papier i oczyść powierzchnię za pomocą miedzianej szczotki drucianej.

4. Ponowne przyzwyczajenie.
5. Roztop kalafonię i umieść srebrny arkusz w garnku kalafonią do góry, aby go zabezpieczyć.
6. Po wybiciu skrzydeł owadów i części kwiatowych, zdejmij srebrną płytkę, zabezpiecz tył kalafonią, twarzą do góry i wybij rowki na wkładkę z kamieniami szlachetnymi.
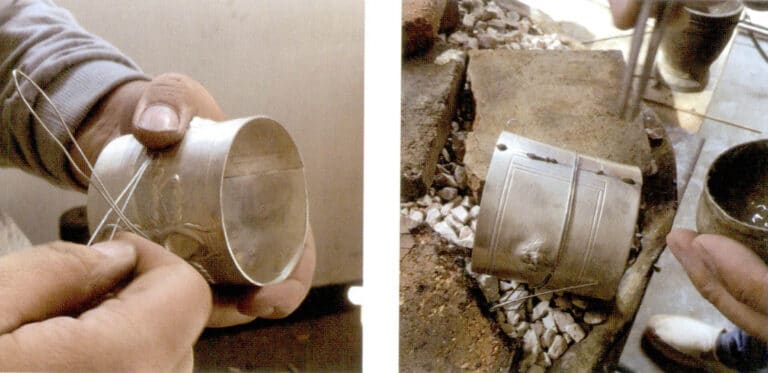
7. Uformuj srebrny arkusz w okrąg, ciasno owiń go drutem stalowym i umieść go w pastowatym lutowiu do spawania, przekształcając go w cylindryczny.
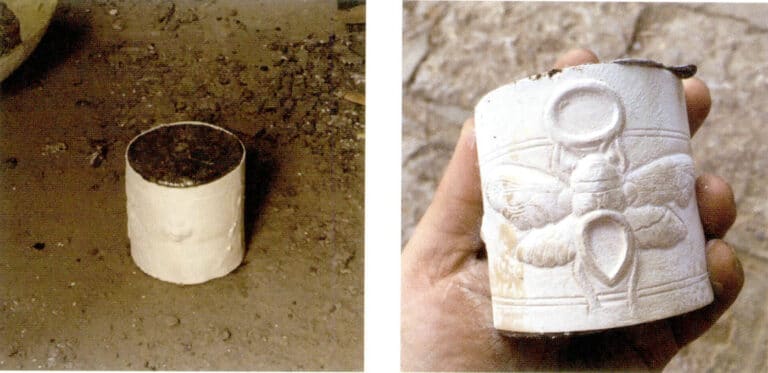
8. Po namoczeniu w wodzie wapiennej wlej ołów do srebrnego cylindra.
9. Użyj ołowianego bloku jako podstawy do szczegółowego grawerowania.
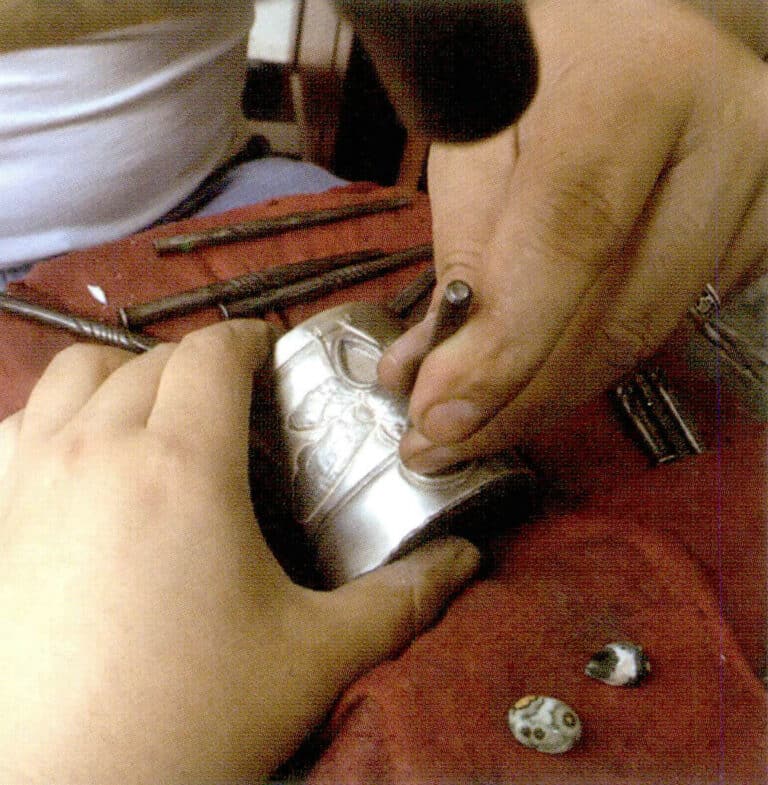
10. Umieść go w kamieniu szlachetnym, nadając mu kształt.
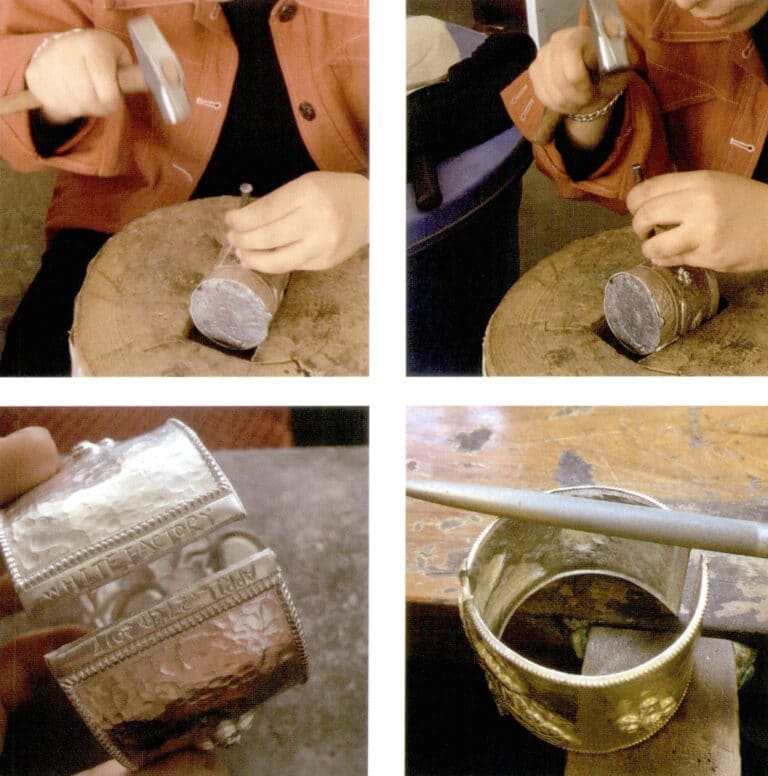
11. Użyj płaskiego dłuta, aby stworzyć subtelną teksturę młotka na głównej części bransoletki, a następnie użyj cienkiego dłuta, aby wygrawerować imię i datę.
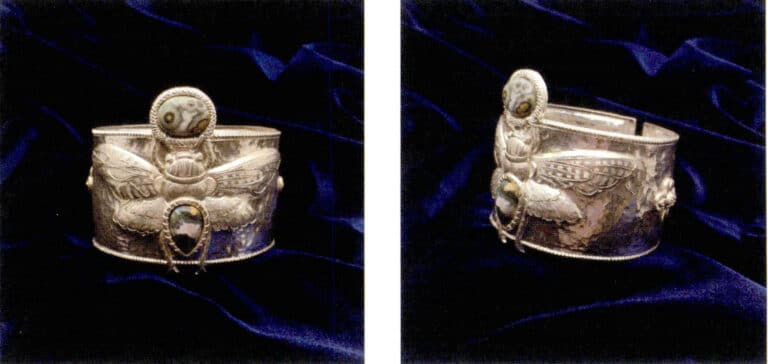
12. Po wygrawerowaniu ołów jest topiony, a srebrna bransoleta jest usuwana. W tym momencie na srebrnej bransolecie mogą pozostać ślady ołowiu, które można namoczyć w rozcieńczonym kwasie azotowym i umyć wodą. Odetnij nadmiar srebra, a na koniec wypoleruj i wypoleruj; bransoletka jest gotowa.
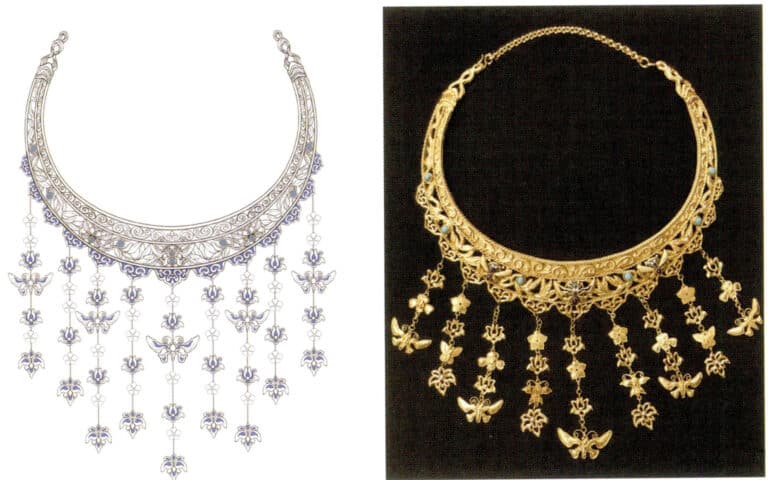
Grawerowany naszyjnik noszony przez postać Zhou Xun w filmie "The Poetry Eye Weary of the Horizon", wykonany ze srebra próby 999, naturalnych kamieni szlachetnych i pokryty czystym złotem.
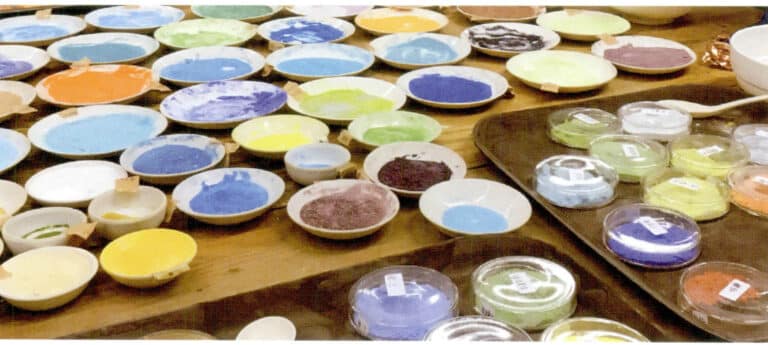
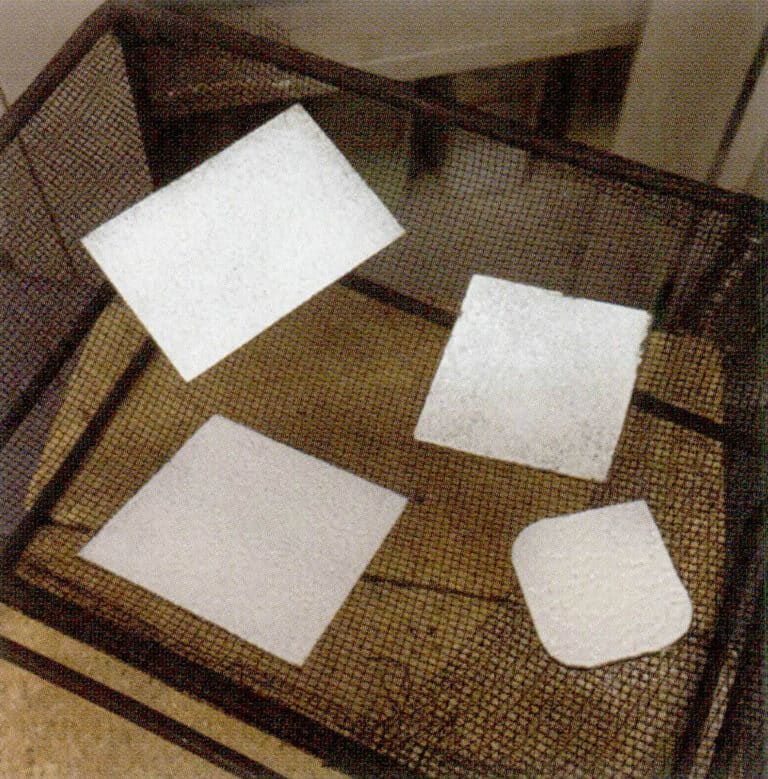
Szkliwo emaliowane

Próbki kolorów szkliwa po wypaleniu

1. Zegnij cztery rogi miedzianej płytki, aby utworzyć blat, a następnie przygotuj szablon i pęsetę.
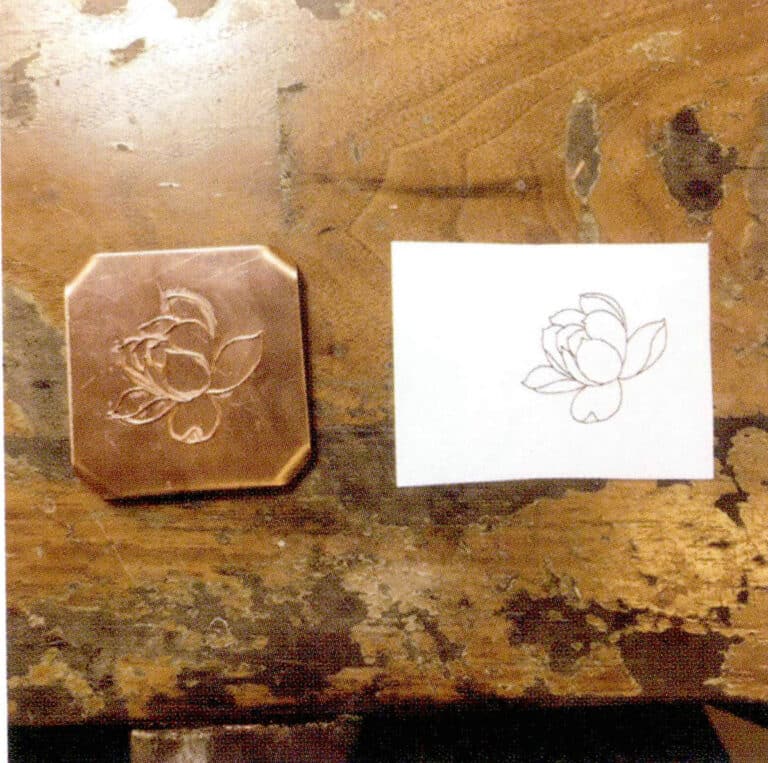
2. Za pomocą pęsety utwórz wzór lotosu z drutu miedzianego, zanurz go w białym kleju i przyklej do miedzianej płytki.

3. Równomiernie posypać proszkiem spawalniczym.
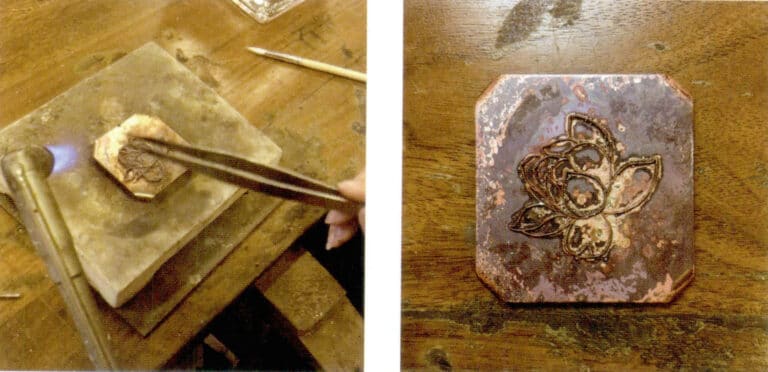
4. Podgrzej część lotosu palnikiem, aby przyspawać drut miedziany do płytki.
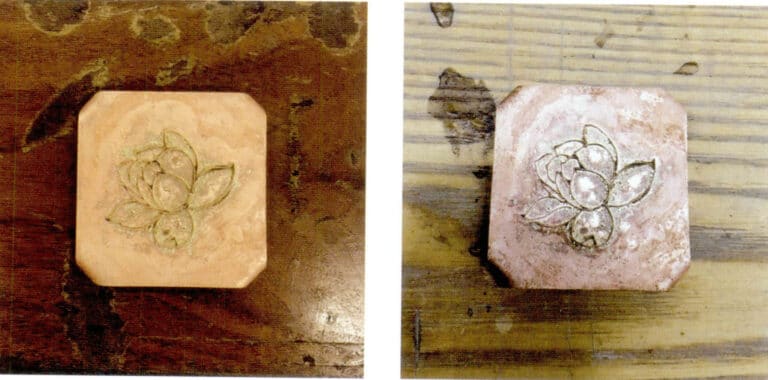
5. Przeprowadzić mycie kwasem w celu usunięcia brudu związanego z powierzchnią.

6. Najpierw wypełnij wzór lotosu białą miedzianą glazurą jako bazą.
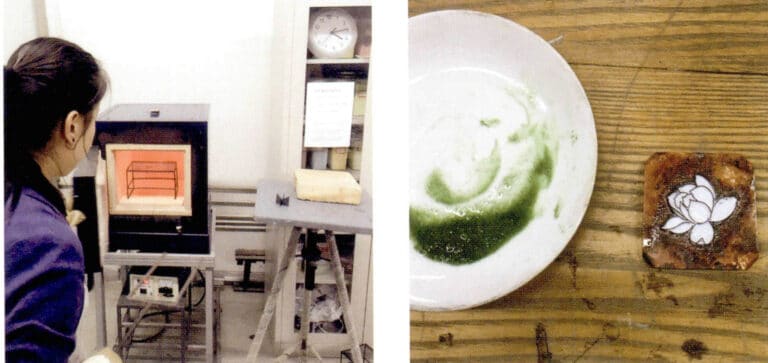
7. Umieść go w piecu elektrycznym i wypalaj przez 1 minutę w temperaturze około 800 ℃.
8. Usunąć lotos z białą glazurą, dodać zieloną, żółtą i inne przejściowe glazury i wielokrotnie wypalać.
9. Lotos emaliowany z gradientem drutu jest teraz gotowy.

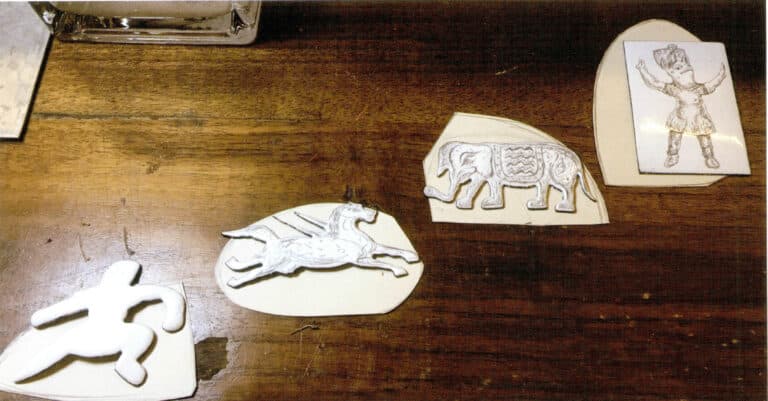
Xiebai, marzenie o sztukach walki, rysunek ołówkiem, emalia rzemieślnicza

1. Dodaj drobno zmieloną białą glazurę do czystej wody i równomiernie nałóż ją na blachę miedzianą.

2. Umieść wysuszoną białą glazurę w koszyczku i równomiernie posyp nią wilgotną miedzianą blachę.
3. Umieścić w piecu elektrycznym w celu podgrzania.
4. Biała glazura bazowa musi być wypalana wielokrotnie, aby osiągnąć równomierny stan.

5. Po każdym wypalaniu powierzchnia glazury musi być wypolerowana na płasko diamentowym pilnikiem, a następnie biała glazura jest ponownie posypywana do wypalania.
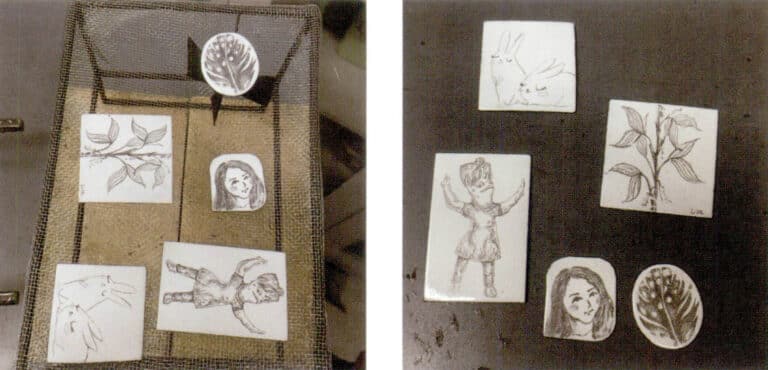
6. Po wypaleniu i wypolerowaniu białej glazury do matowego wykończenia, wzory można narysować ołówkiem 2B lub 4B; ponieważ kolor ołówka nieco wyblaknie podczas procesu wypalania, możemy odpowiednio pogłębić kolor podczas malowania.
7. Umieść go w piecu elektrycznym na około 1 minutę; zbyt długie wypalanie spowoduje nadmierne wyblaknięcie koloru.

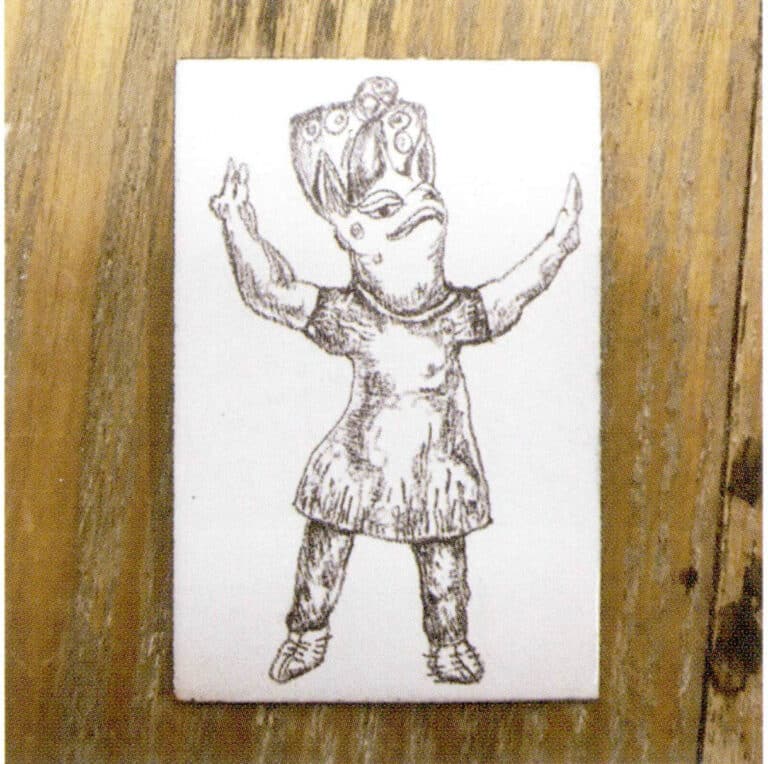
8. Czasami podczas procesu produkcji mogą wystąpić nieoczekiwane efekty, takie jak tylna część metalu pokazująca kolorowe odcienie retro.
Ukończony rysunek ołówkiem w emalii
9. Tą samą metodą można stworzyć serię prac emaliowanych rysowanych ołówkiem.

Seria Metamorphosis #6, naszyjnik, srebrne włókno, szkło
Broszka Harvest, 18-karatowe złoto, diamenty, żarnik, odlew, rzemiosło inkrustacji

Picking Up Fun, Nakrycia głowy, Silver Filament
Morska bryza, kolczyki, filigranowe rękodzieło
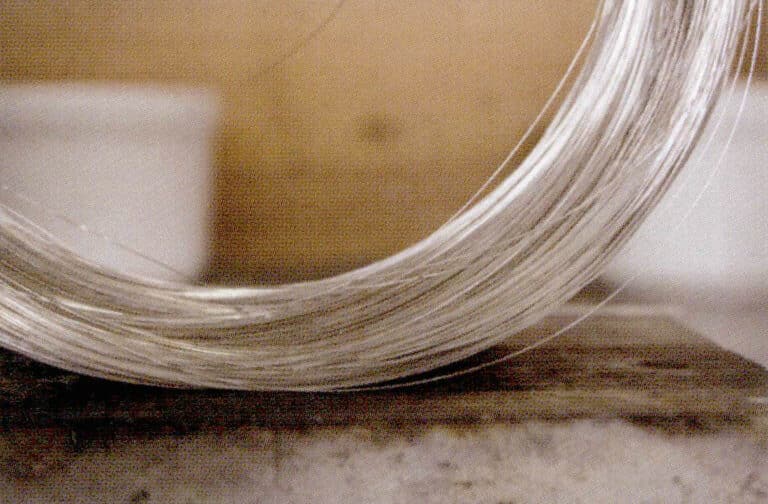
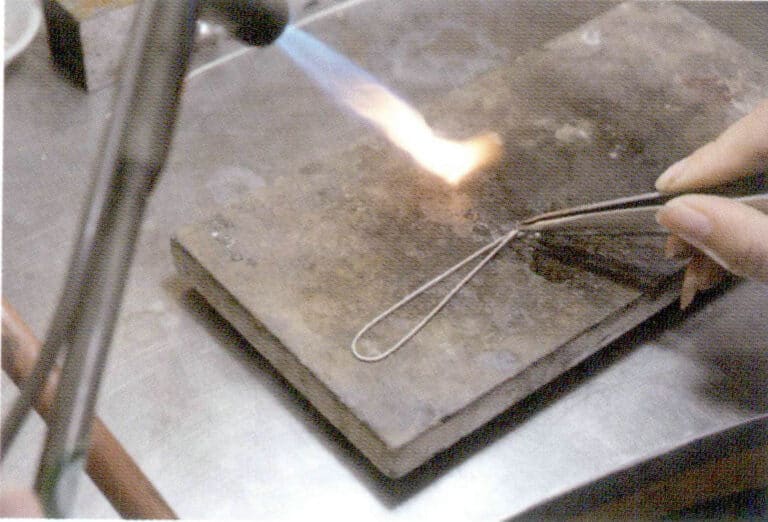
Drut srebrny 0,3 mm
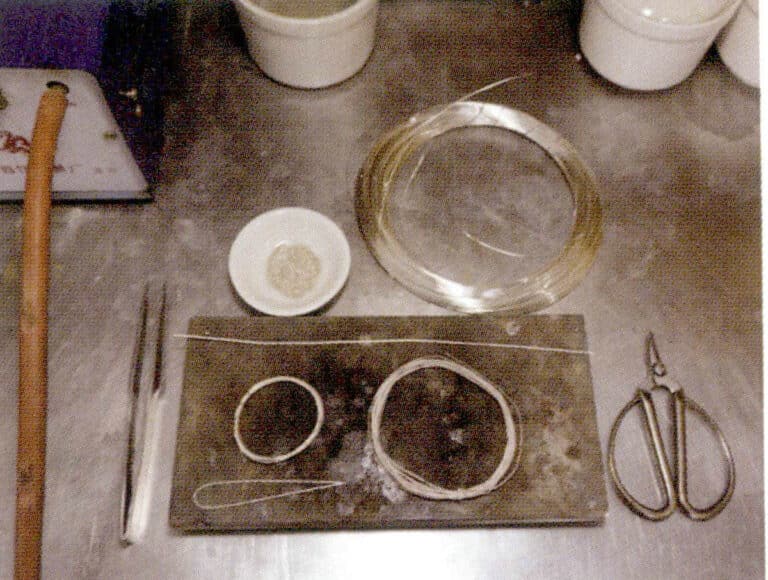
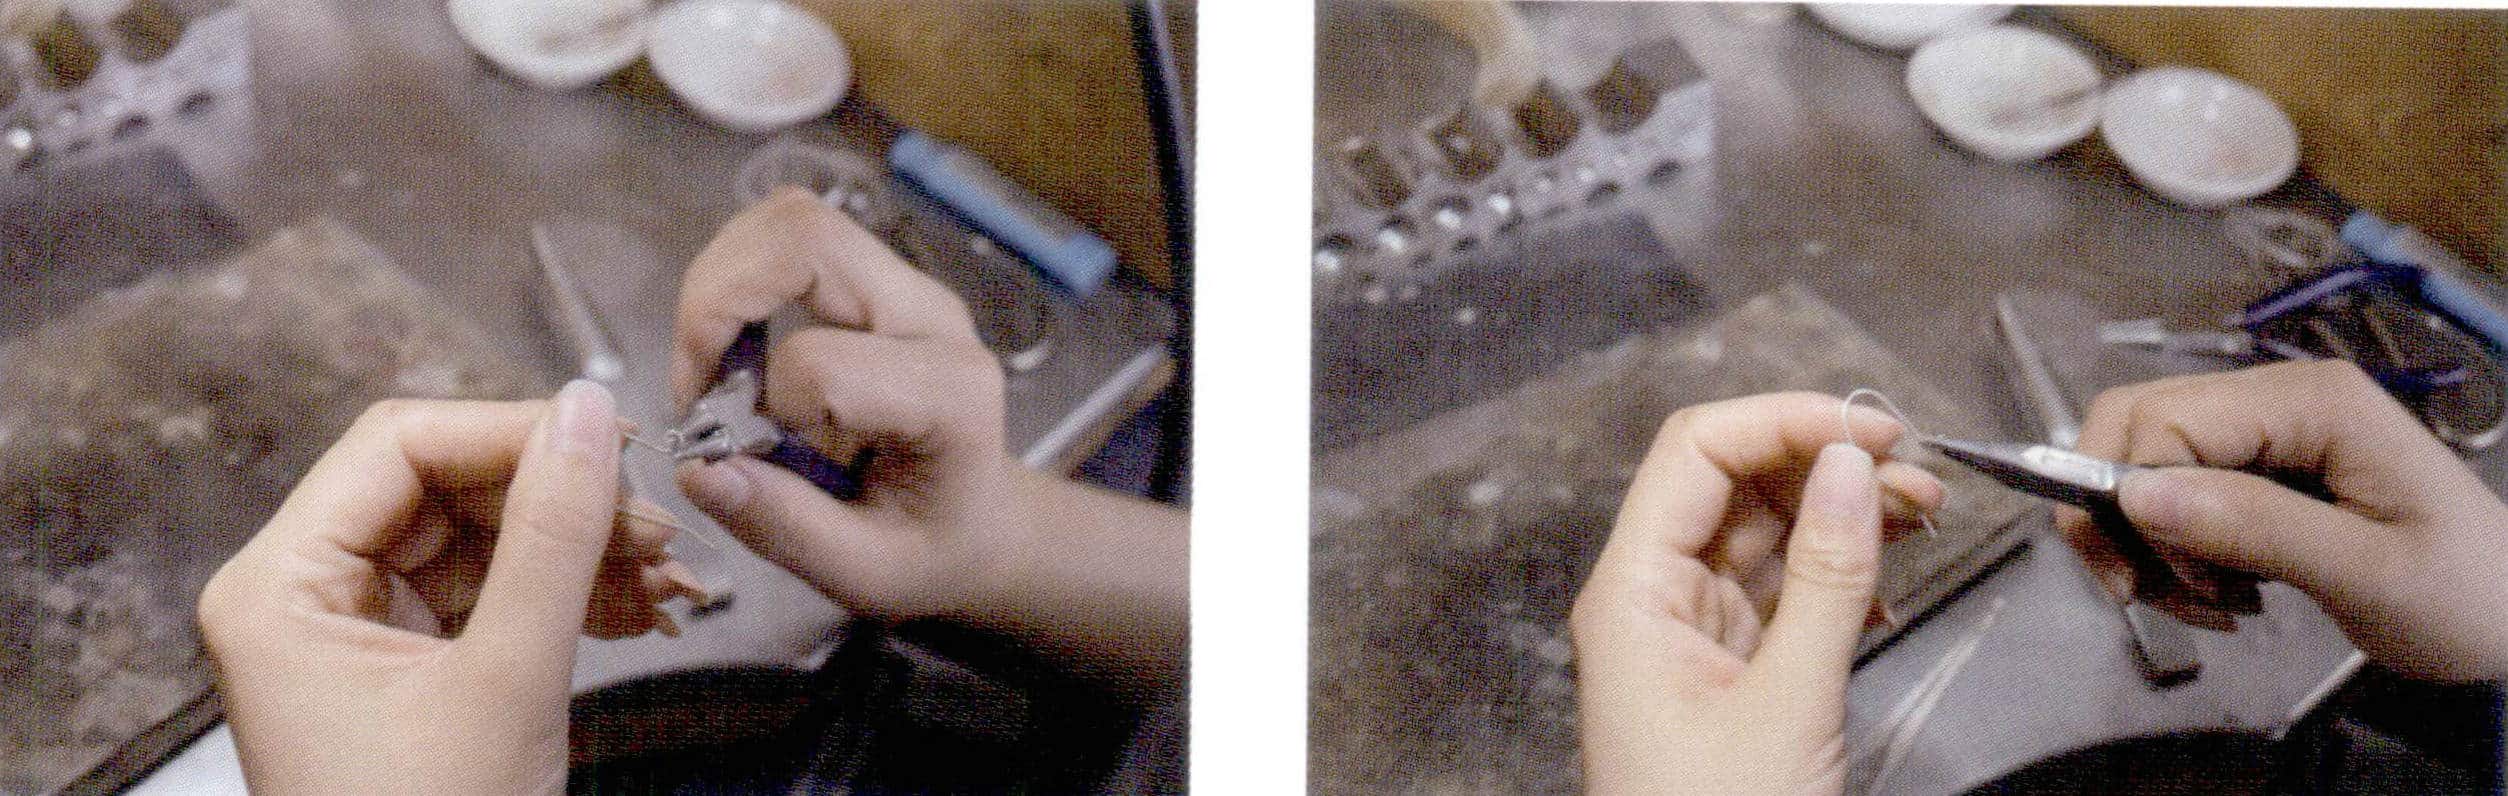
1. Narzędzia i materiały przygotowawcze: pęseta, nożyczki, lut, pistolet lutowniczy, cegły lutownicze, drut z czystego srebra 999.
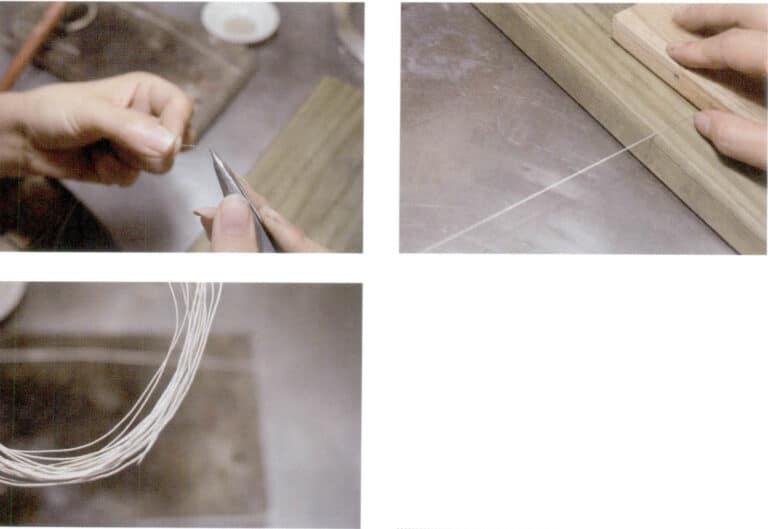
2. Po nałożeniu na siebie 0,3 mm srebrnego drutu, skręć go w kształt spirali; następnie użyj drewnianej deski, aby zacisnąć spiralny drut.
3. Wyżarzanie

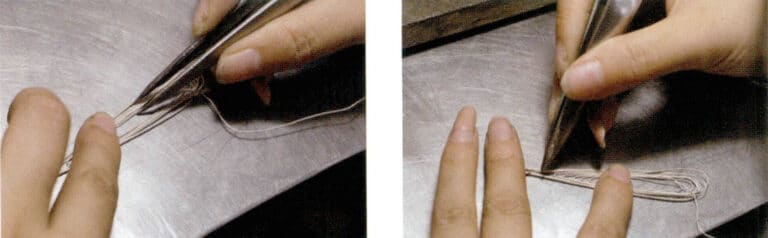
4. Zwykła rama druciana po wyżarzaniu.
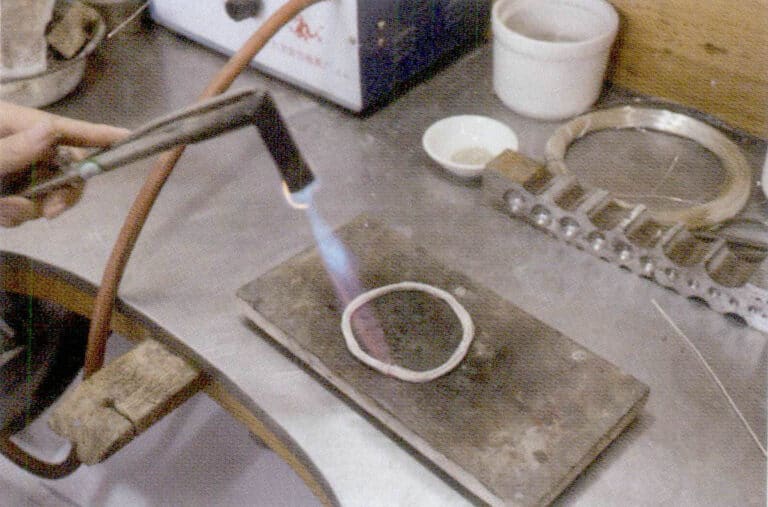
5. Dokończ kształtowanie ramki w kształcie kropli wody.
6. Spawać ramę.
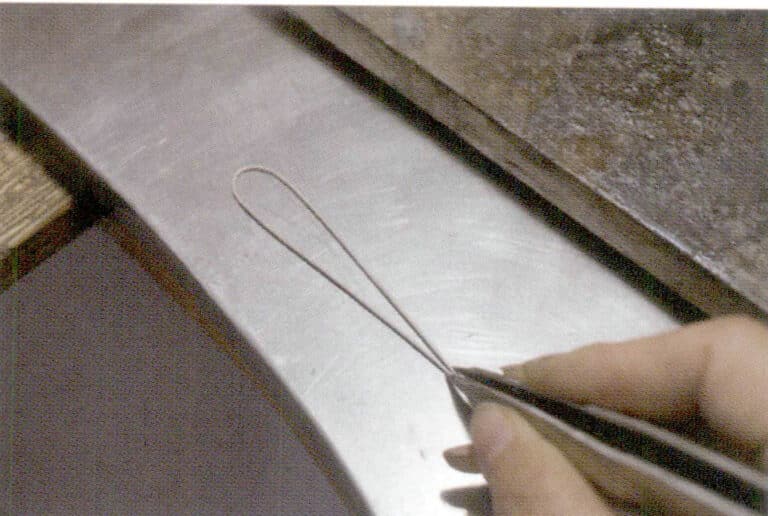
7. Wypełnij żarnik, żarnik wypełniający jest nieco cieńszy niż żarnik na granicy.
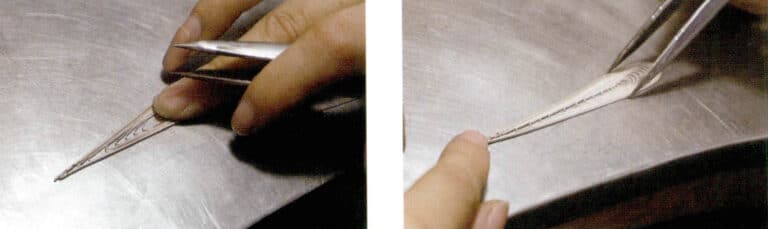
8. Dostosuj ogólny kształt.
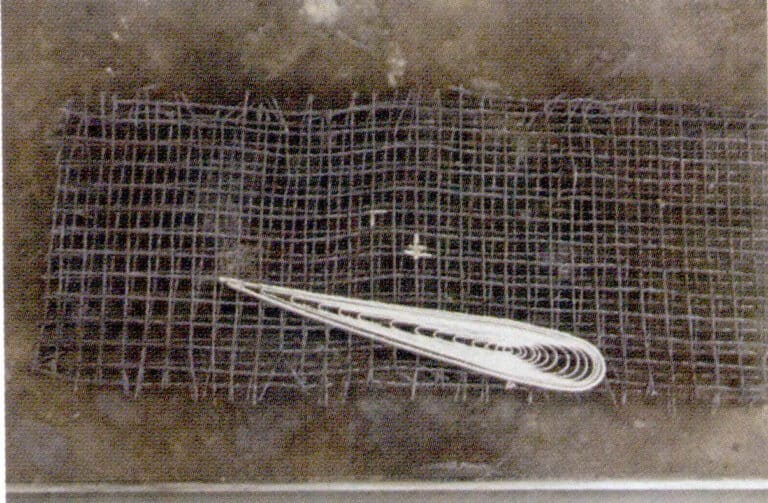
9. Zakończ skręcanie drutu i przygotuj się do spawania.
10. Podgrzać wodę z boraksem.
11. Całkowicie pokryj żarnik wodą z boraksem.
12. Równomiernie rozsypać topnik spawalniczy.
13. Ogólne spawanie.
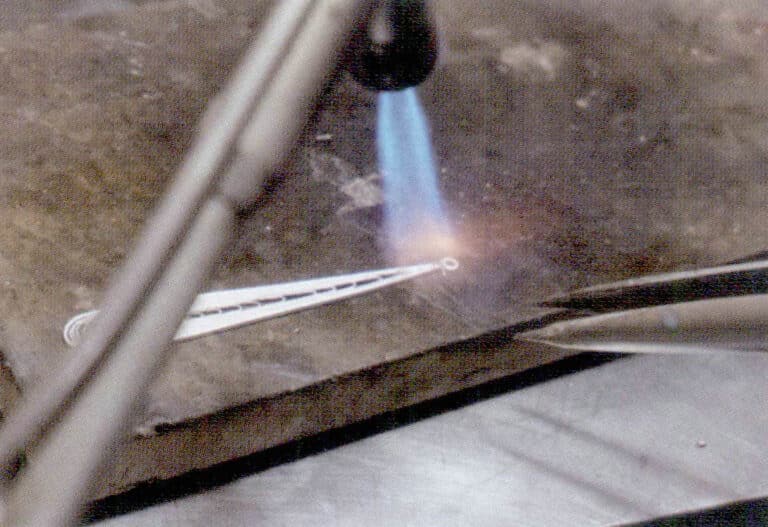
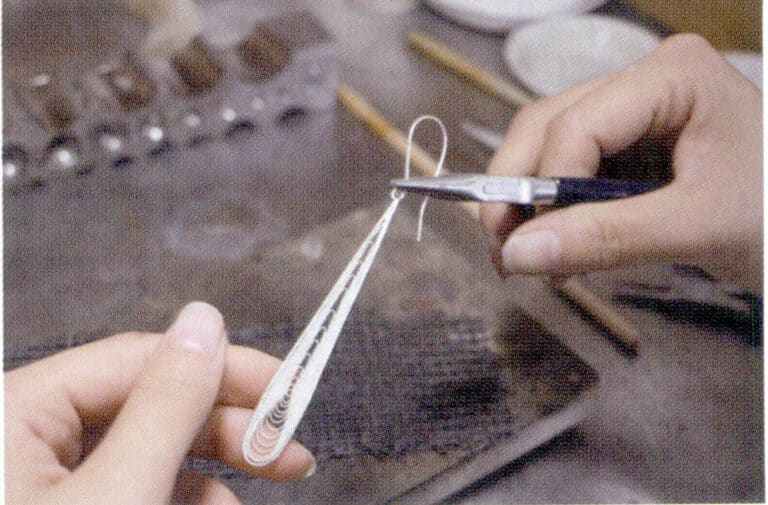
14. Przyspawać pierścień podnoszący.
15. Wykonywanie haczyków na uszy.
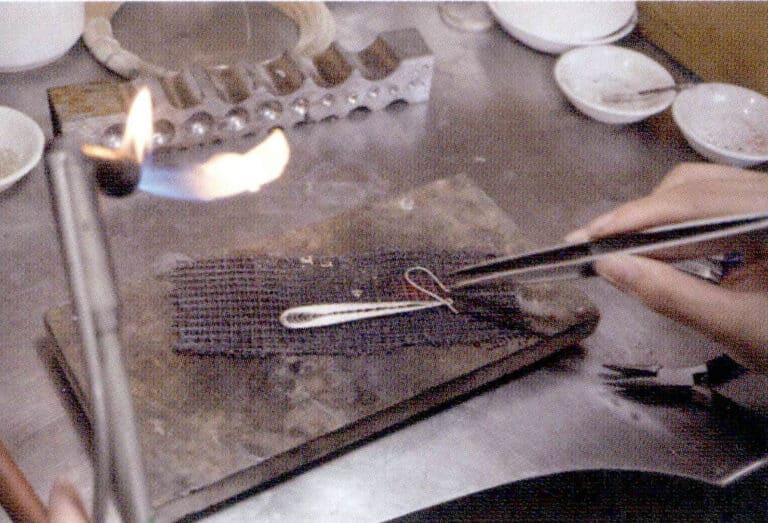
16. Haczyki do spawania.

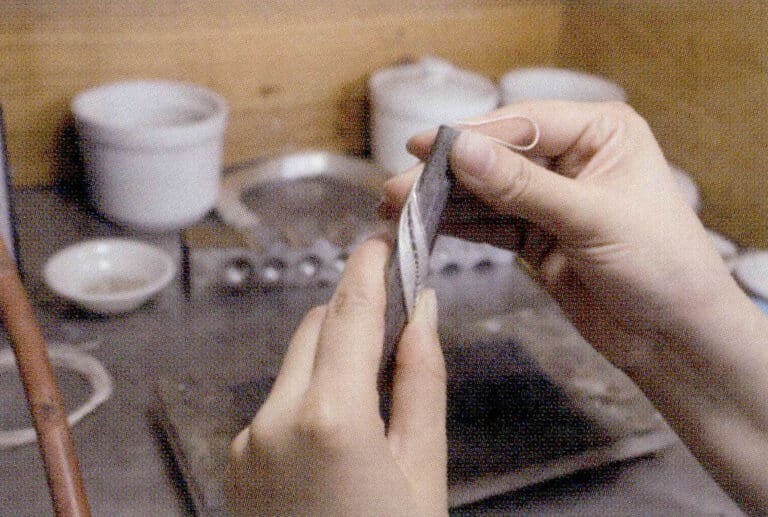
17. Wytrawianie
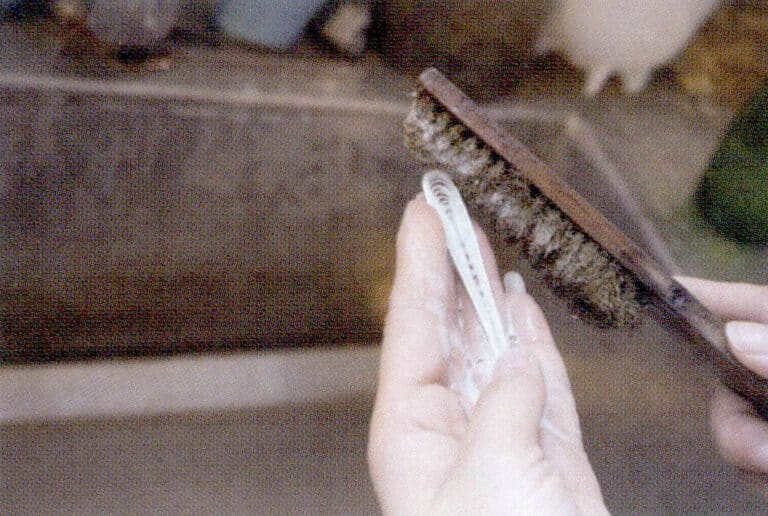
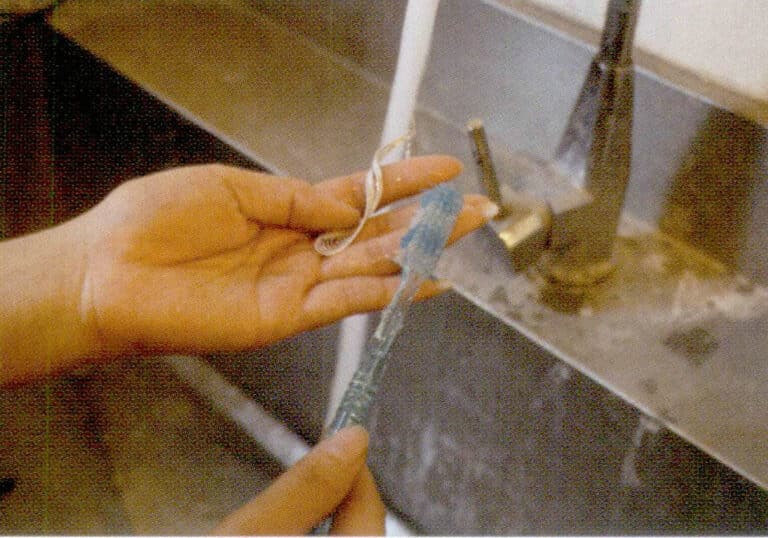
18. Czyszczenie kolczyków za pomocą miedzianej szczotki drucianej.
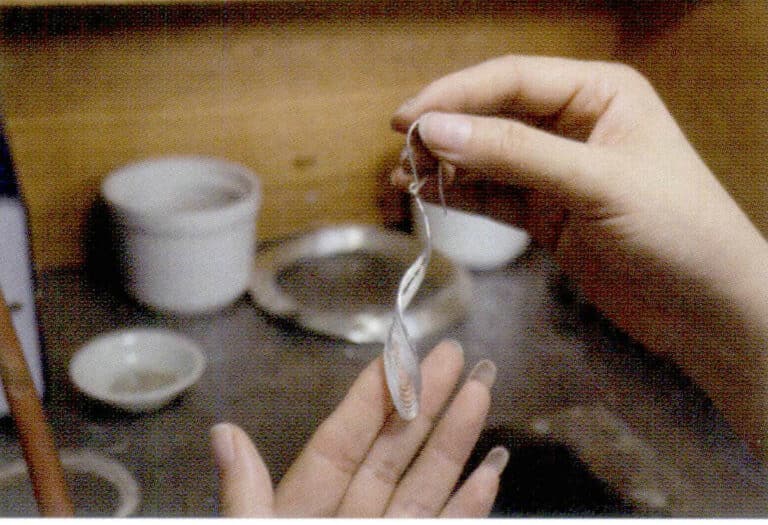
19. Gotowe kolczyki z płaskich włókien.
20. Użyj pierścienia, aby obrócić i dostosować kształt, tworząc trójwymiarowy efekt.

21. Wyczyść za pomocą bębna magnetycznego (nadaje się tylko do ściśle ustrukturyzowanych i bezpiecznie zespawanych filamentów).
22. Staranne czyszczenie.
23. Zakończono.
Metamorphosis Series #1, naszyjnik, srebrny żarnik