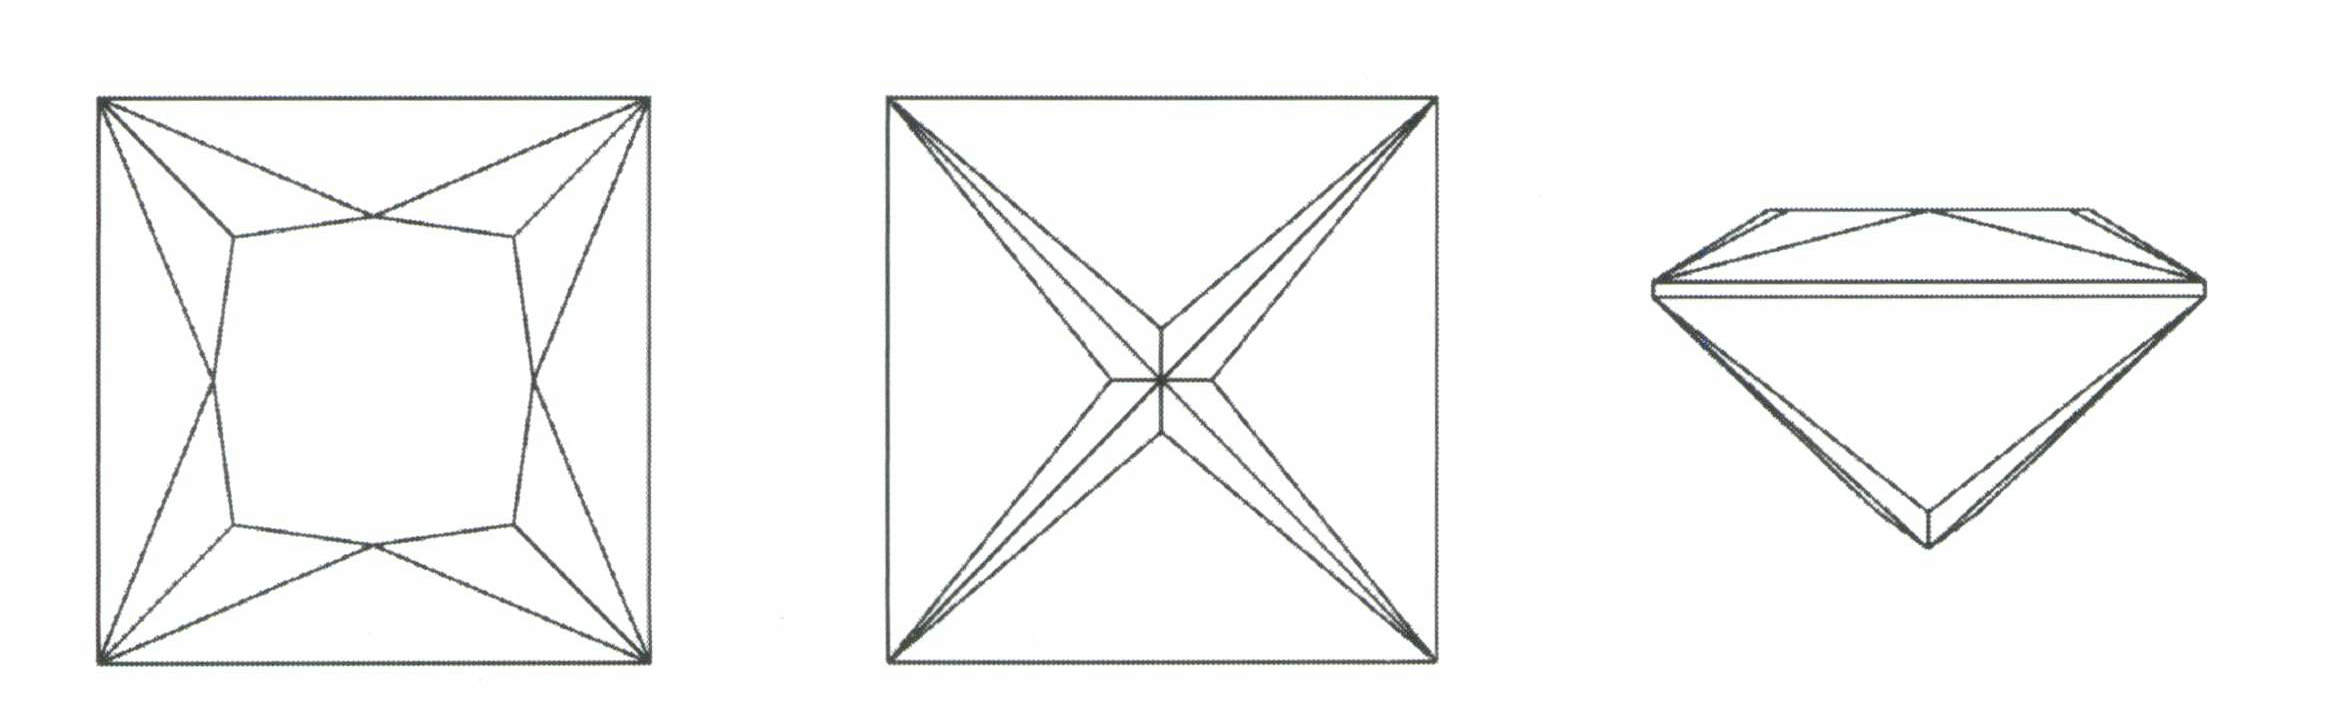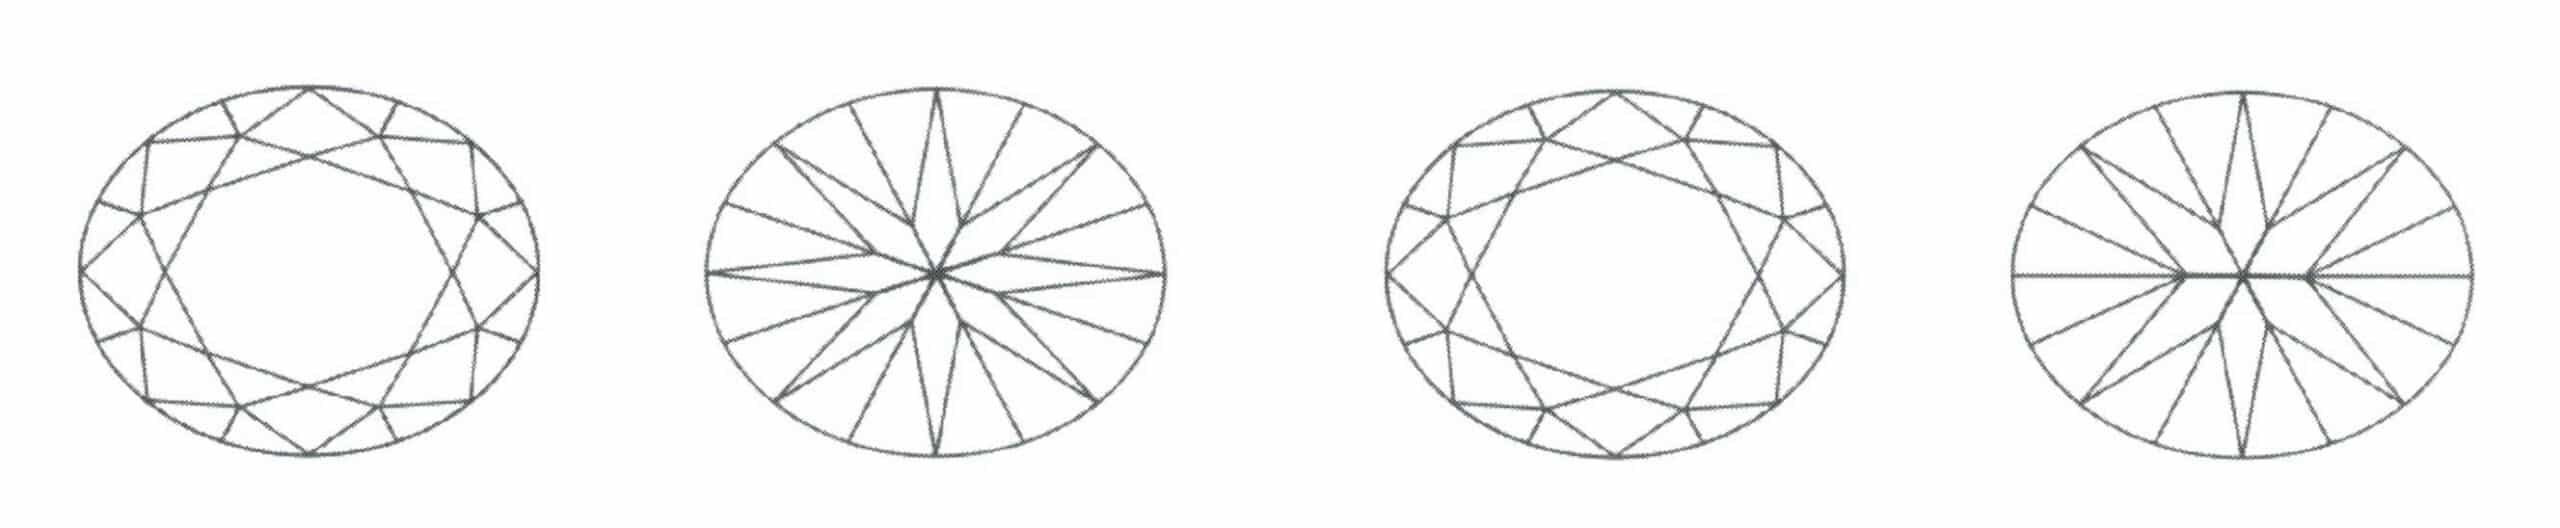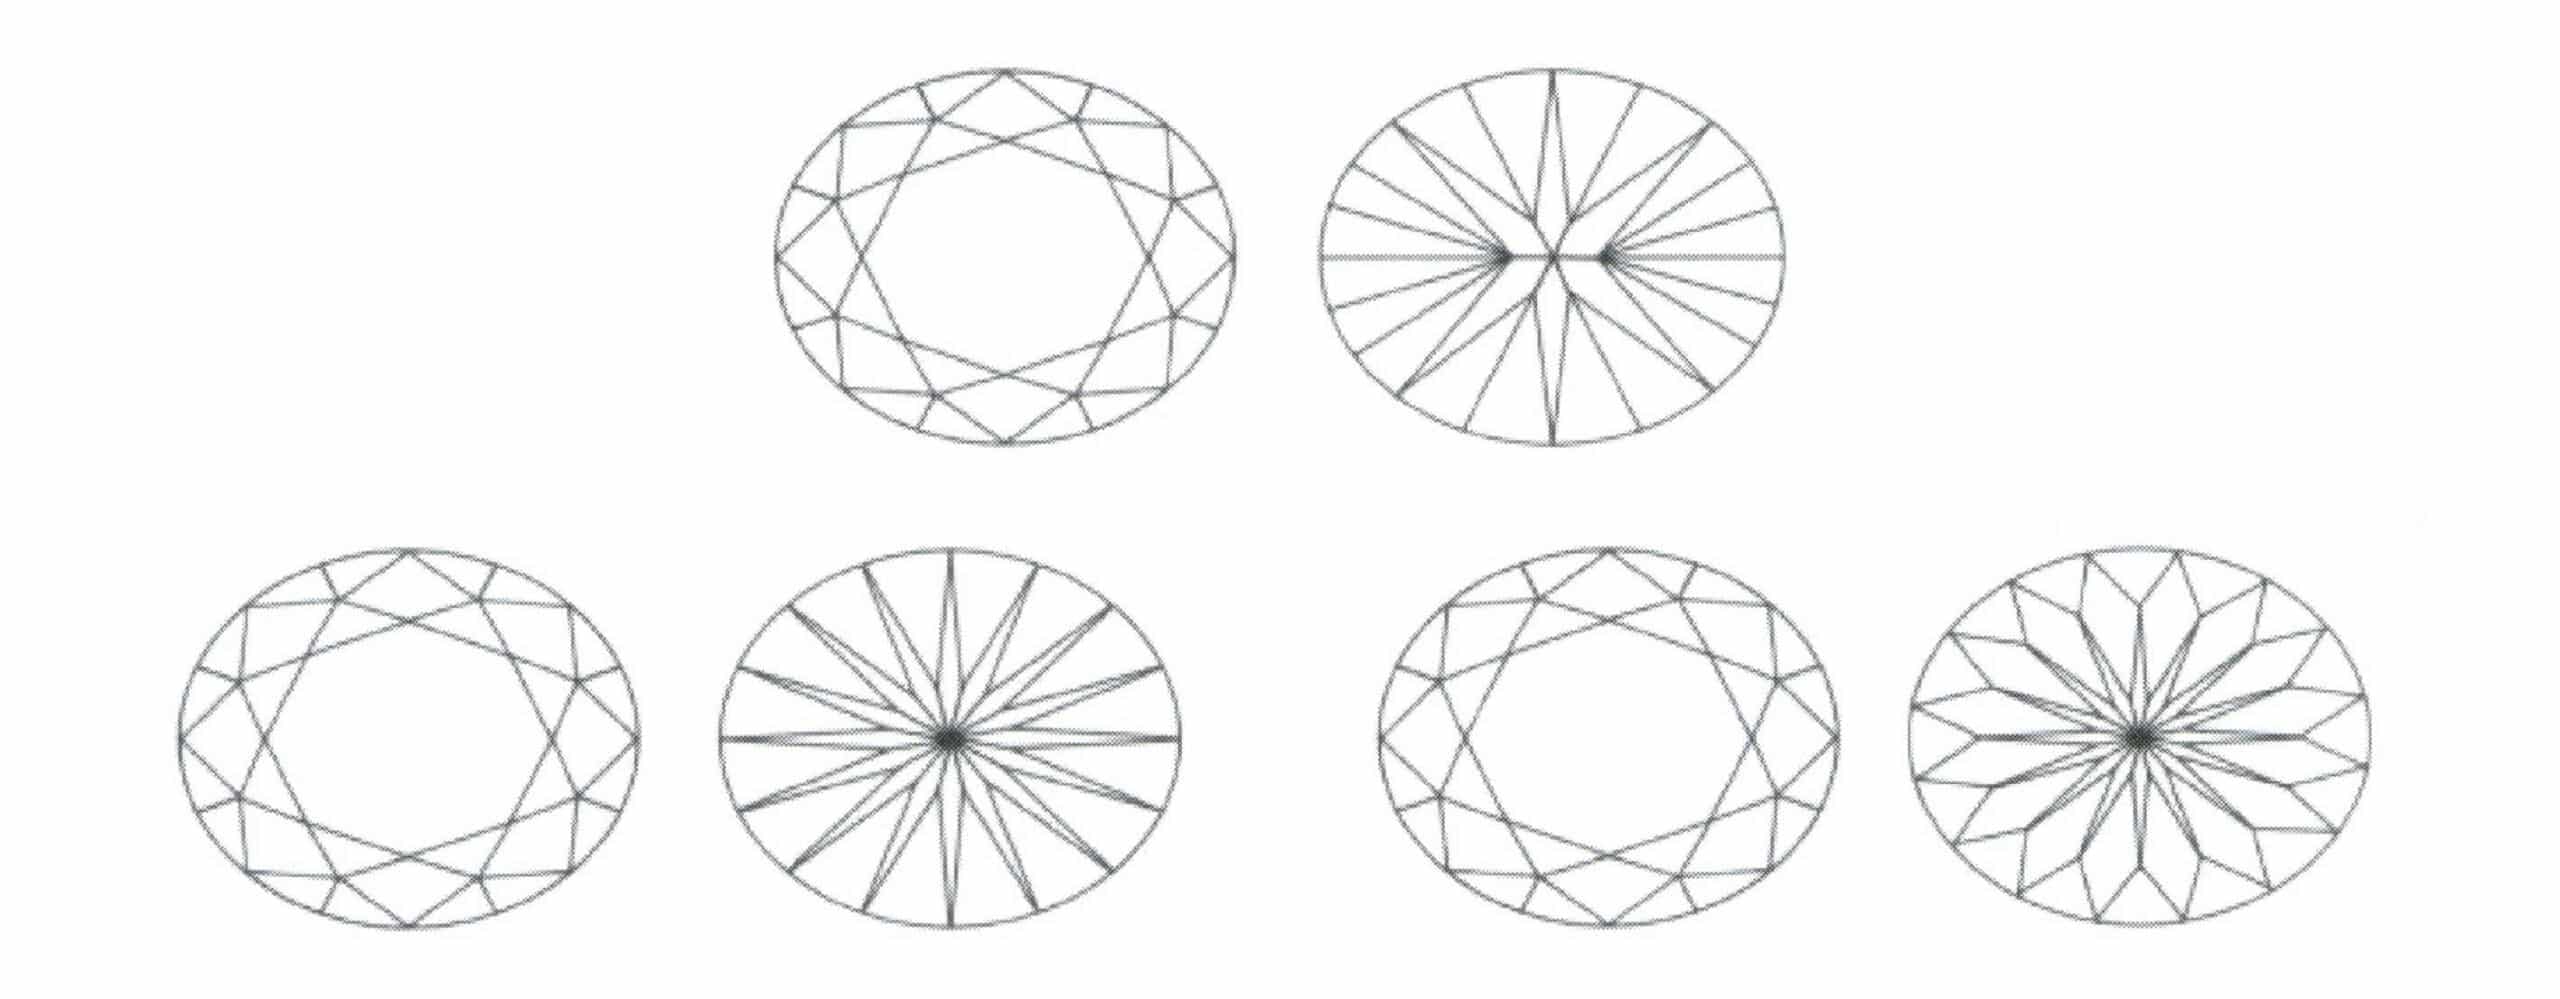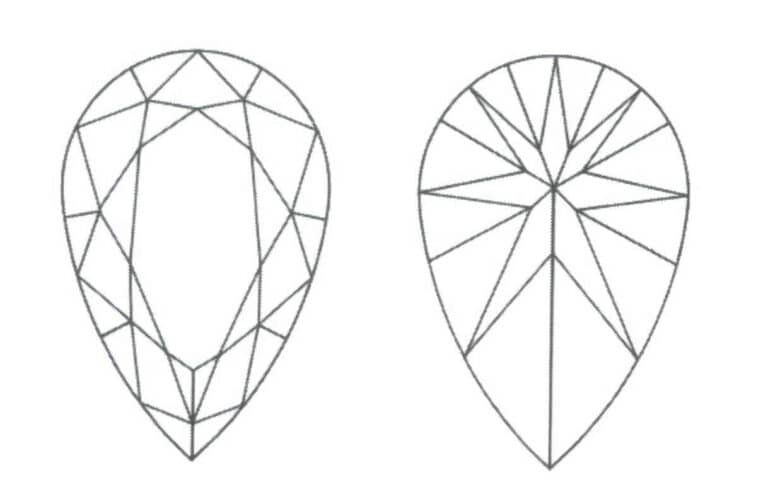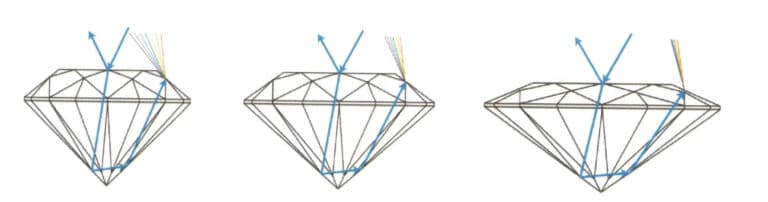
The effect of crown angle on gemstone fire
| Nazwa | Line type | General Application |
|---|---|---|
| Thick solid line |

|
1. Visible contour line; 2. Visible transition line |
| Thin solid line |

|
1. Dimension line and dimension boundary line; 2. Section line; 3. Overlapping section contour line; 4. Leader line; 5. Boundary line and range line; 6. Bend line ;7 . Auxiliary line |
| Thin dashed line |

|
1. Invisible contour lines; 2. Invisible transition lines |
| Fine dotted lines |

|
1. Axis lines; 2. Symmetry center lines; 3. Trajectory lines; 4. Fillet circles and fillet lines |
| Fine double dotted lines |

|
1. Contour lines of adjacent auxiliary parts; 2. Contour lines of limit positions; 3. Contour lines of defective materials or contour lines of finished products in rough drawings; 4. Imaginary projection contour lines; 5. Interrupted lines |
| Wavy line (freehand continuous line) |

|
1. Boundary line at the break; 2. Boundary line between view and section in a local section view |
| Double broken line |

|
Boundary line at the break |
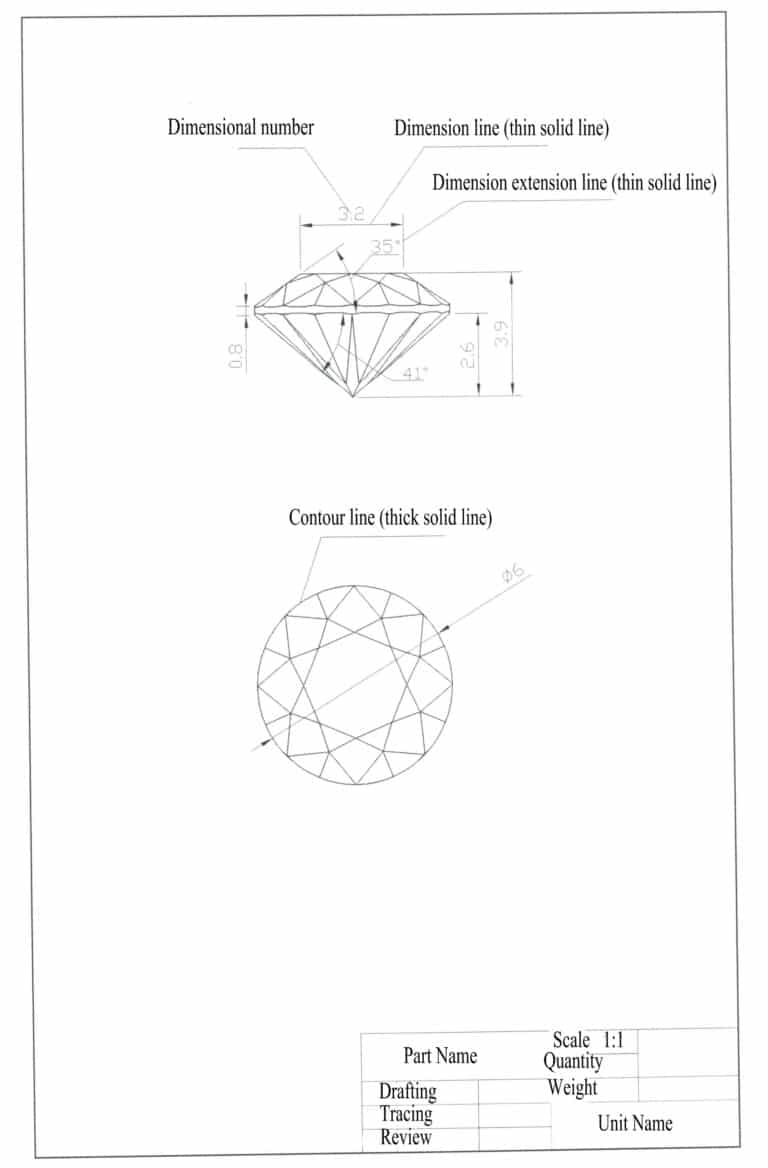
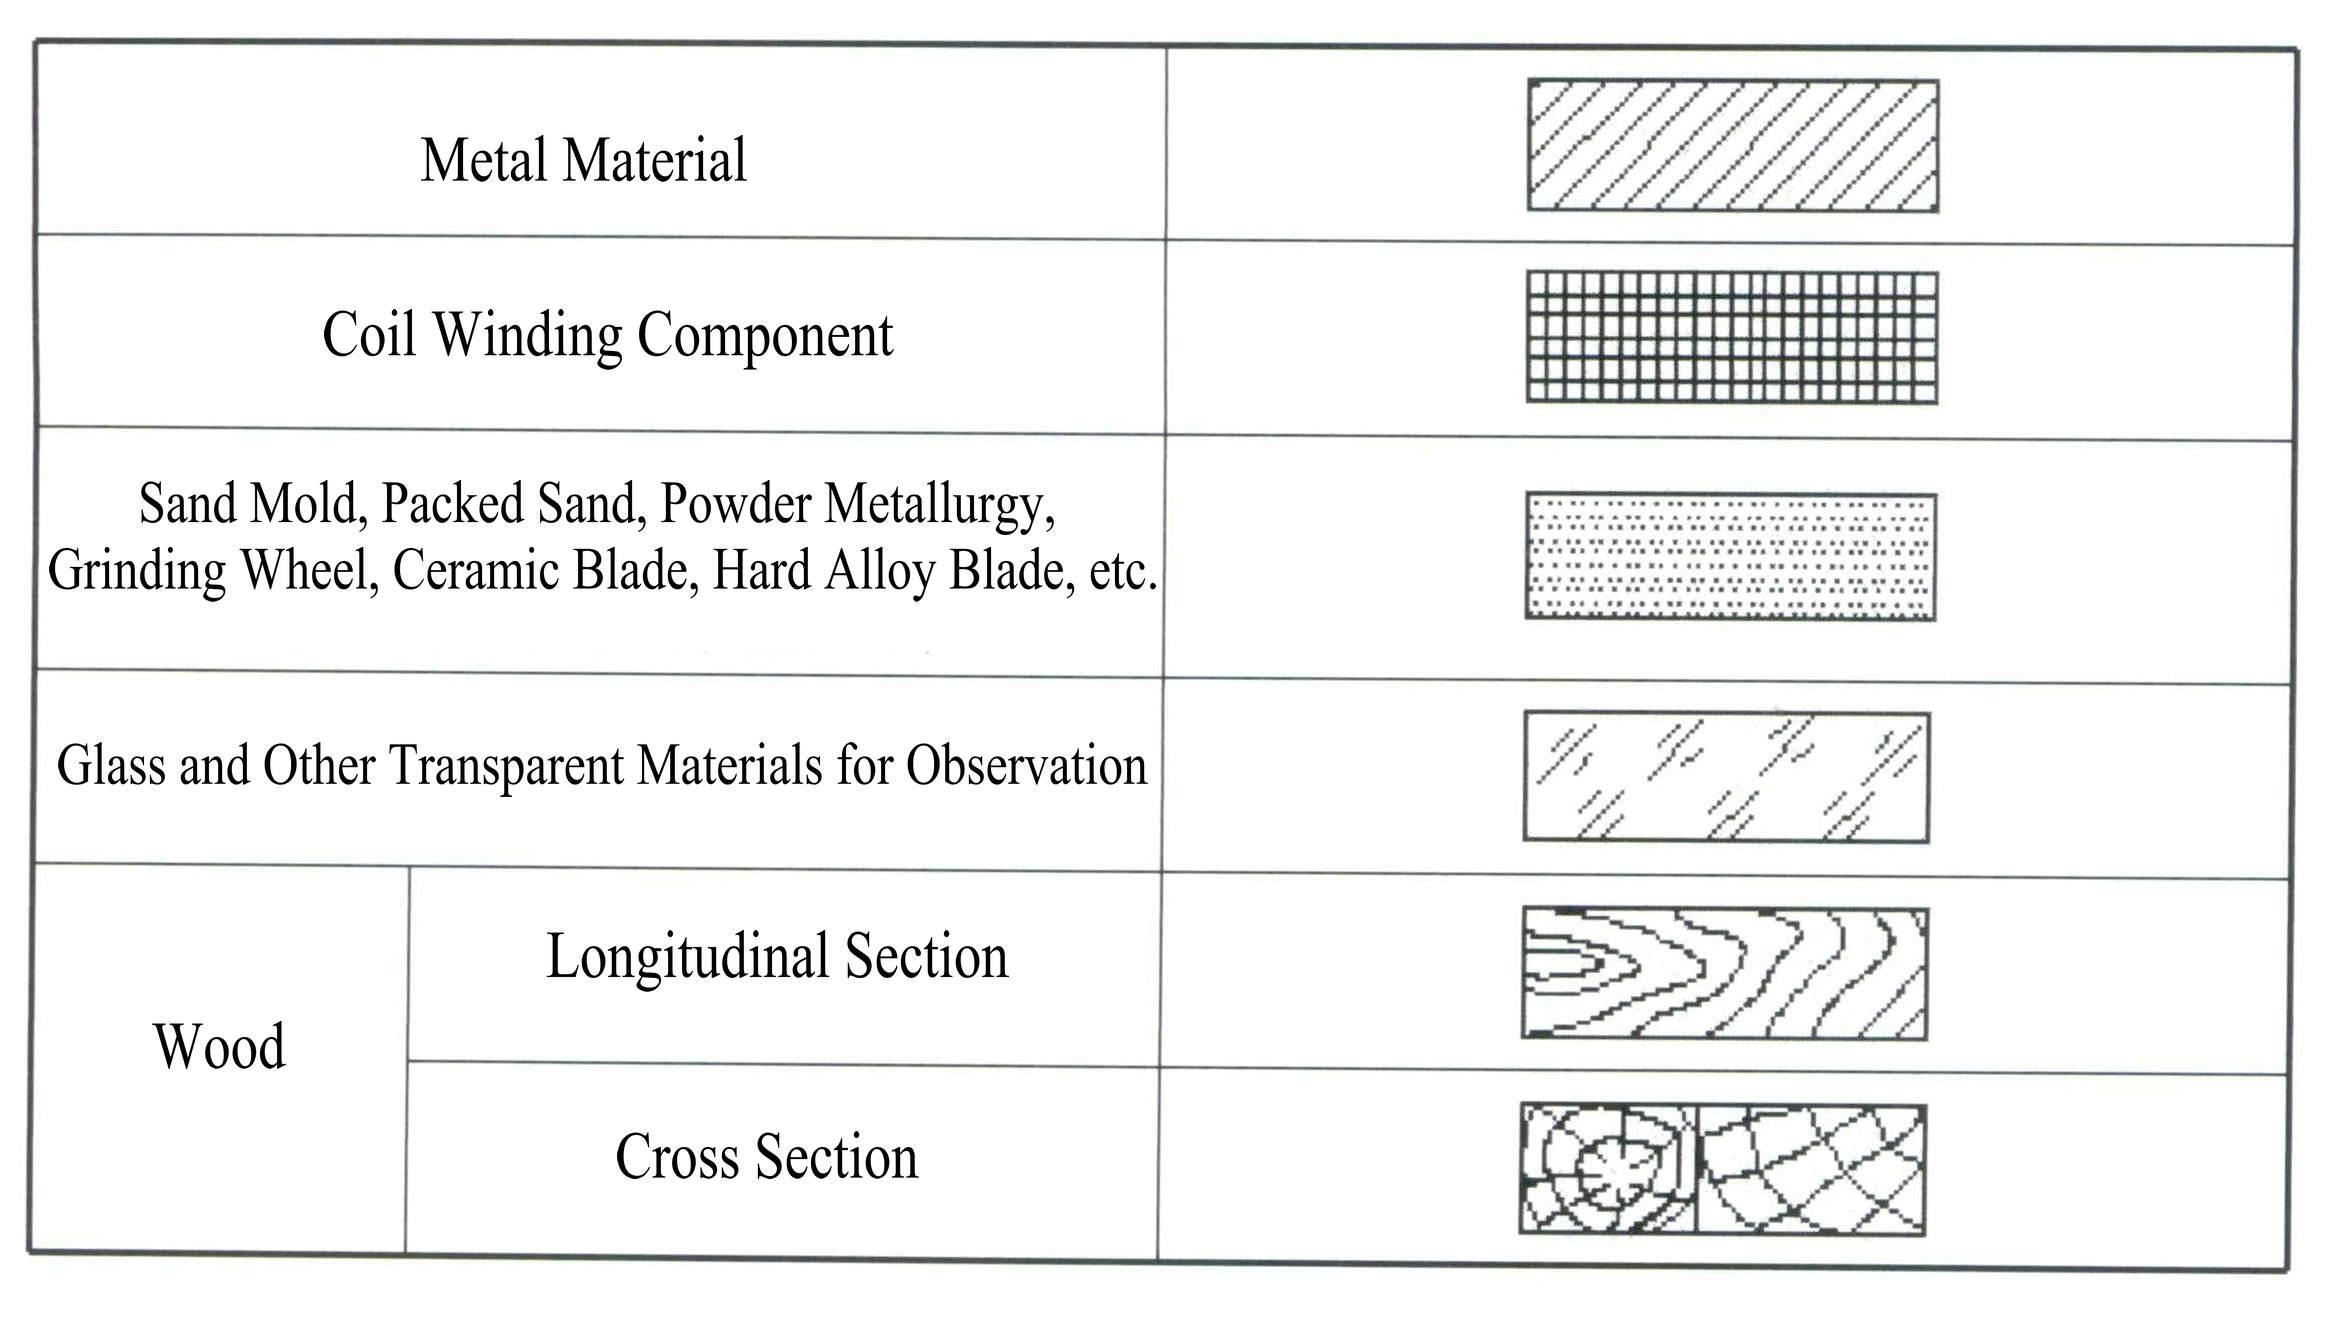


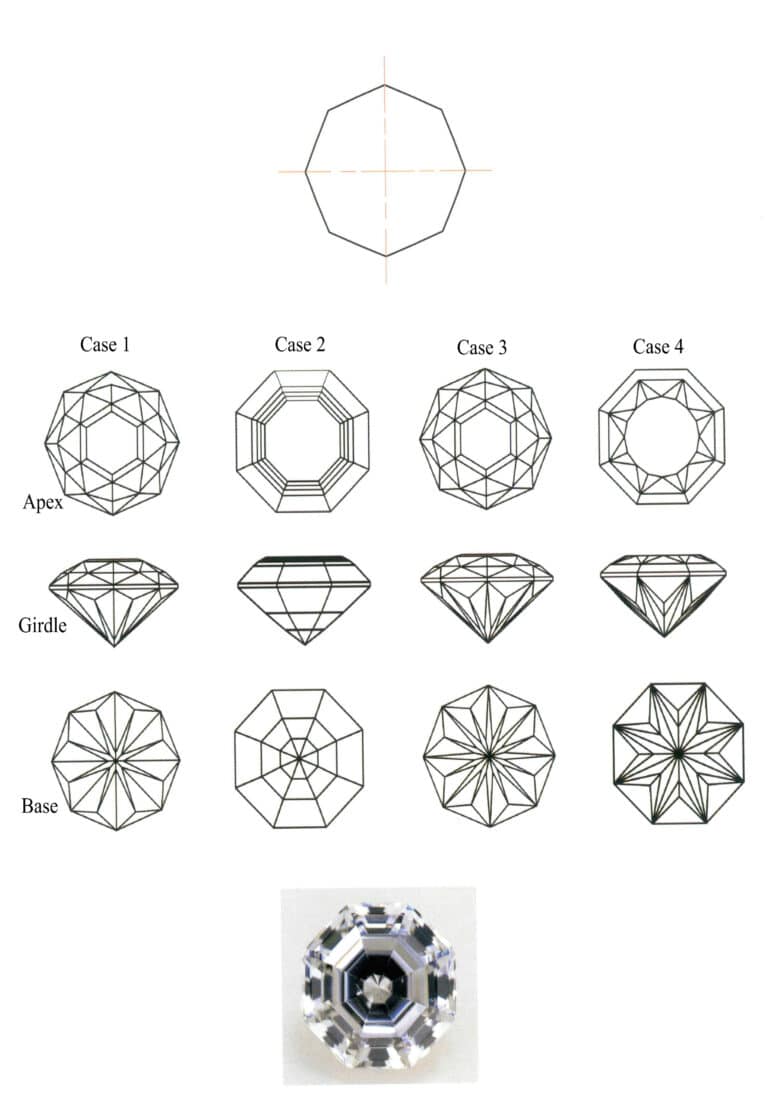
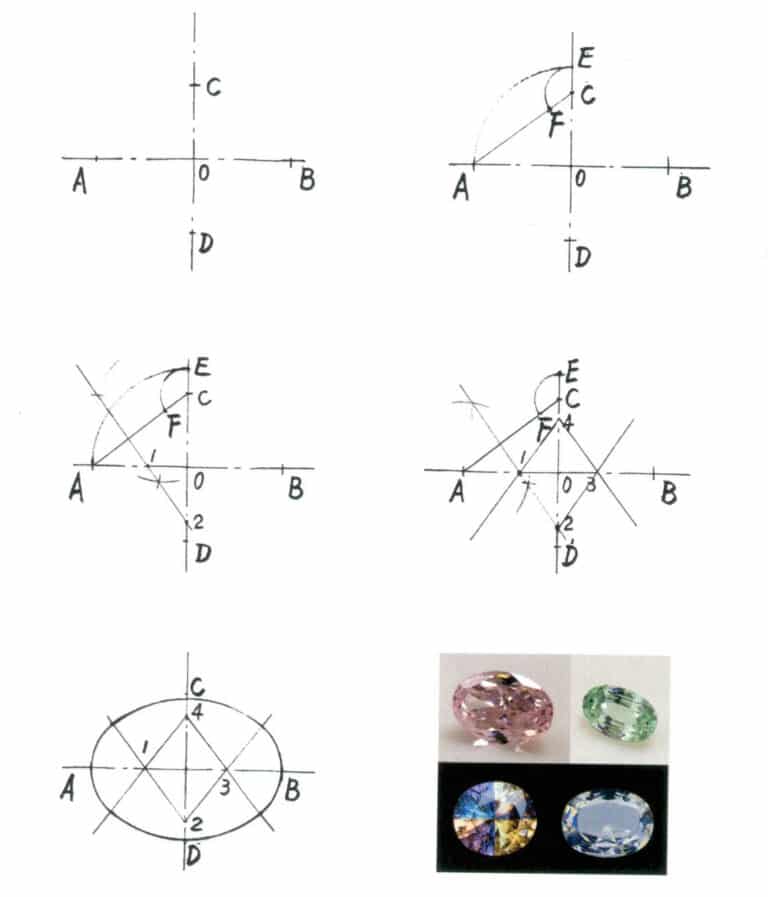
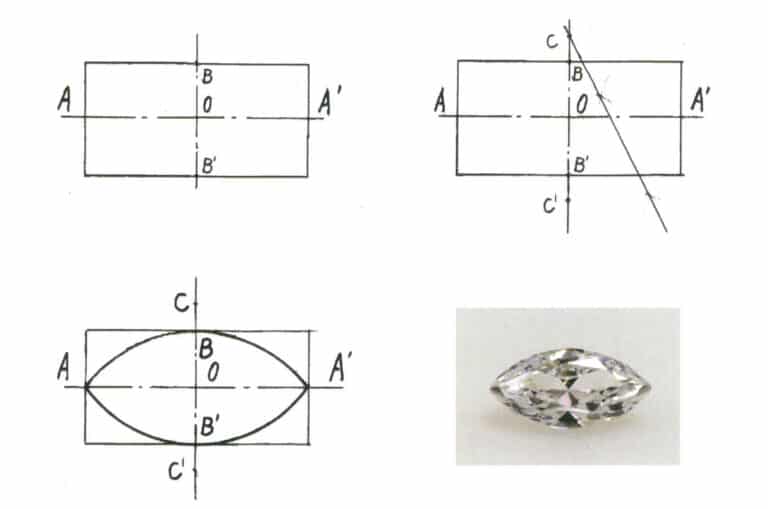
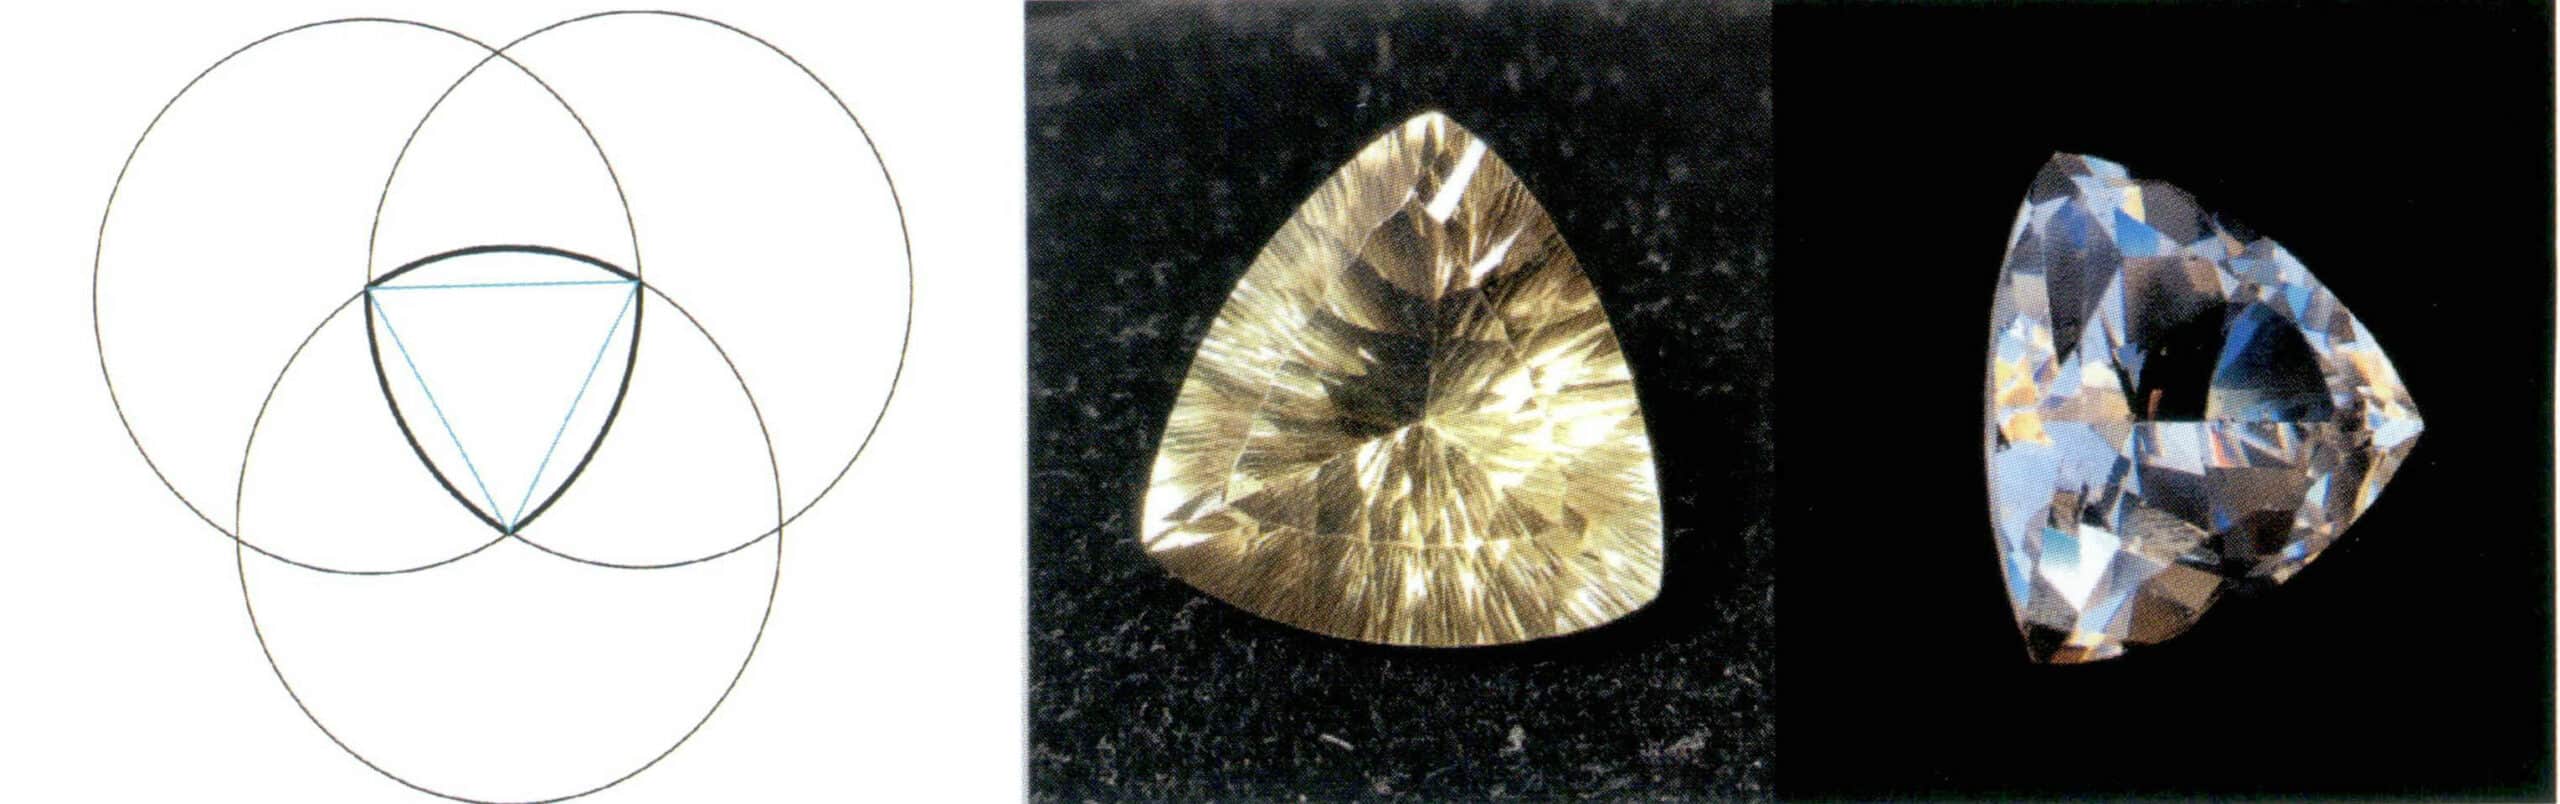
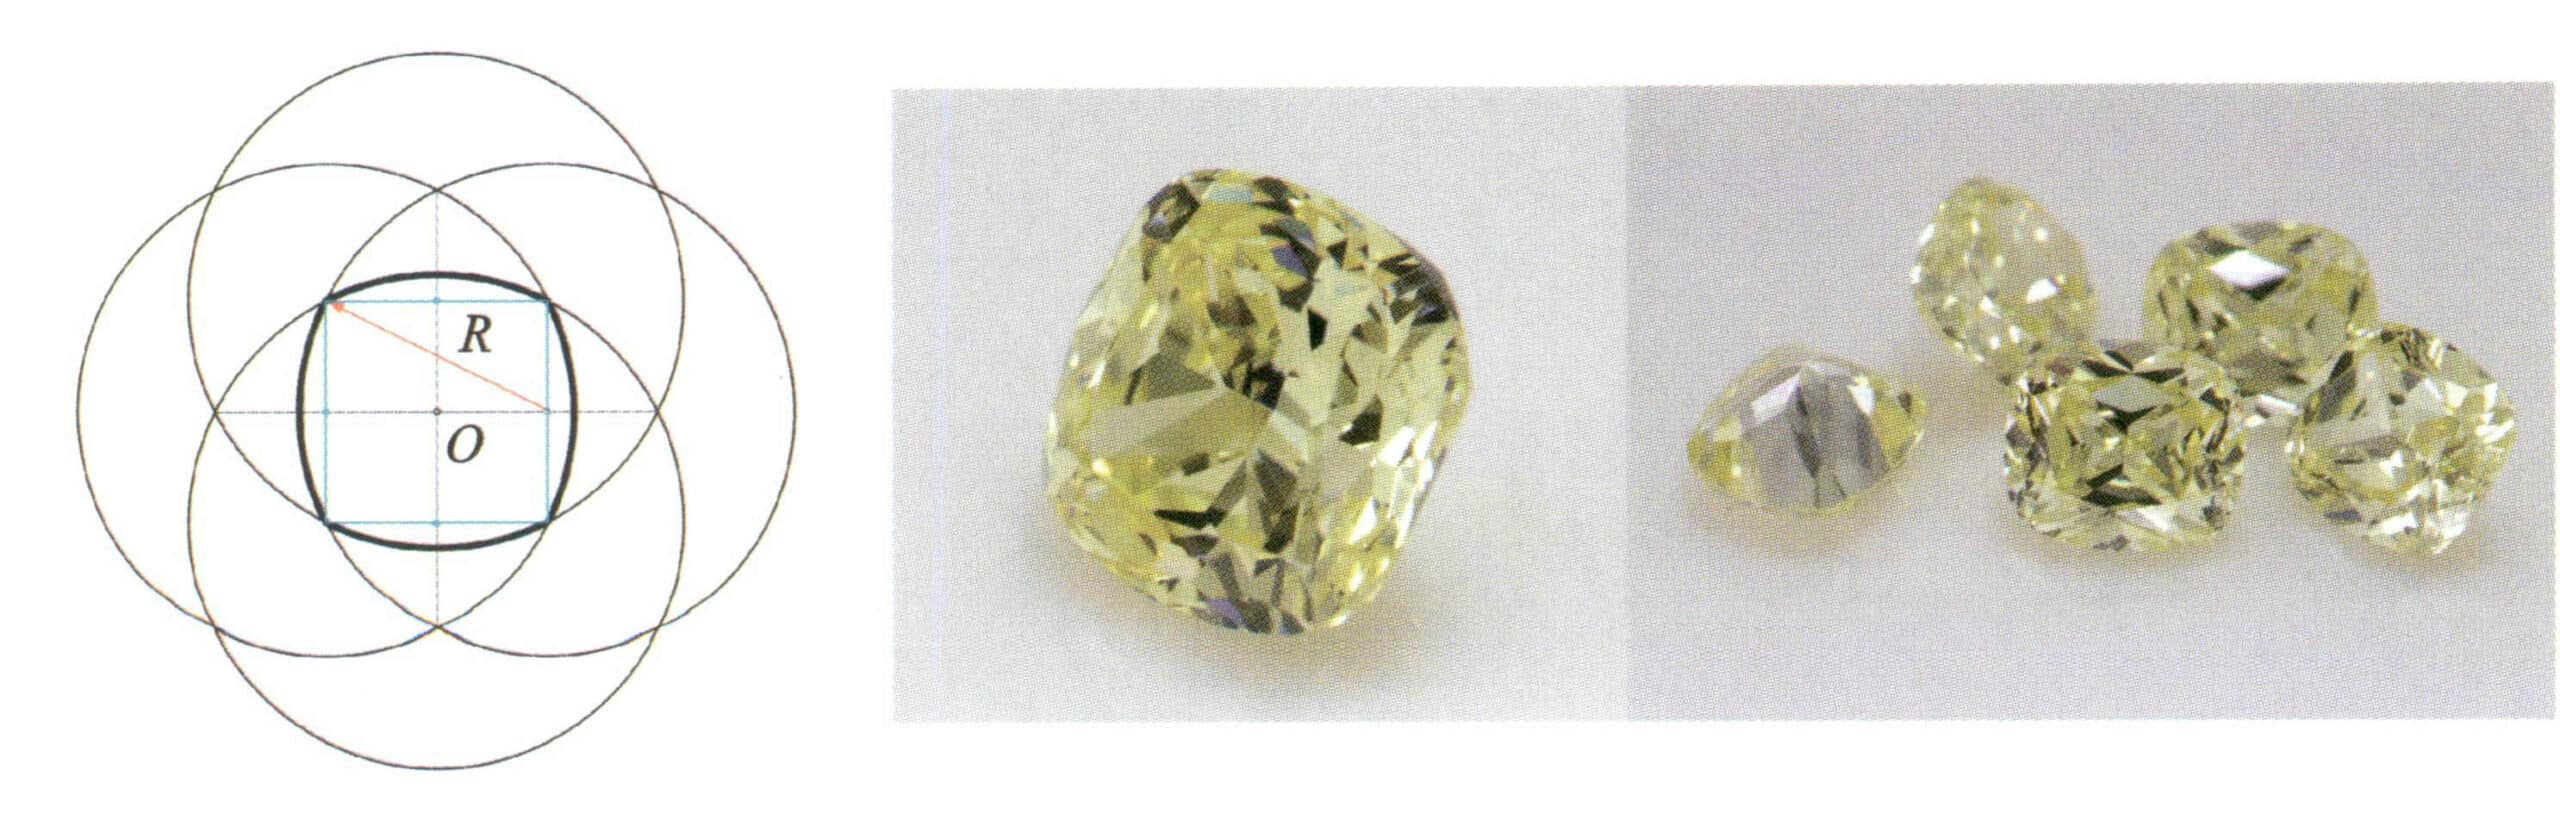
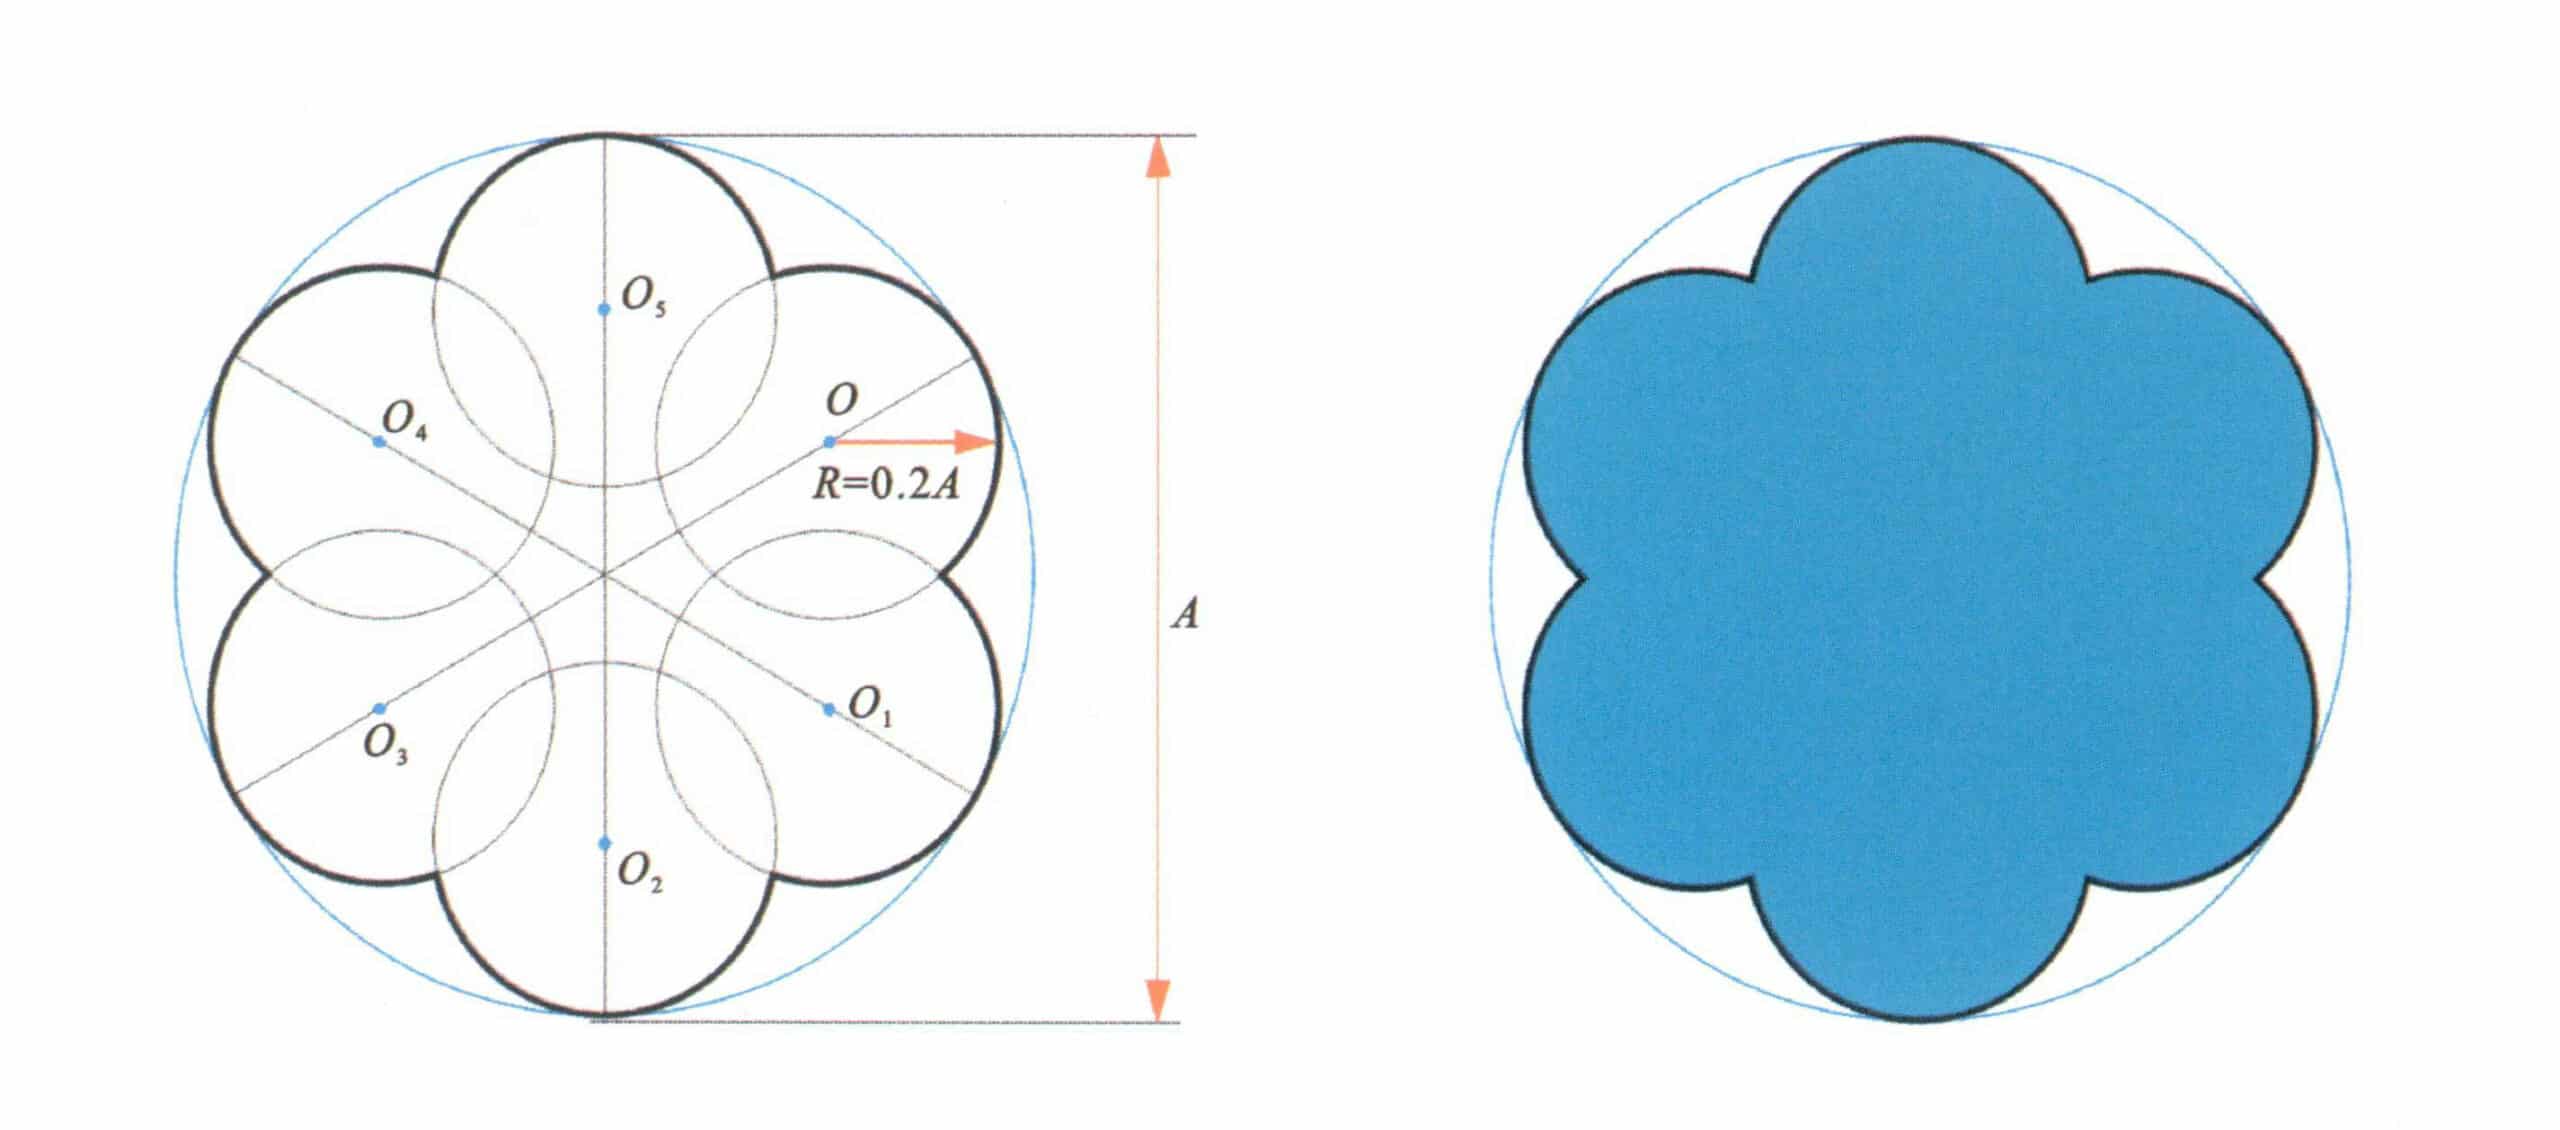
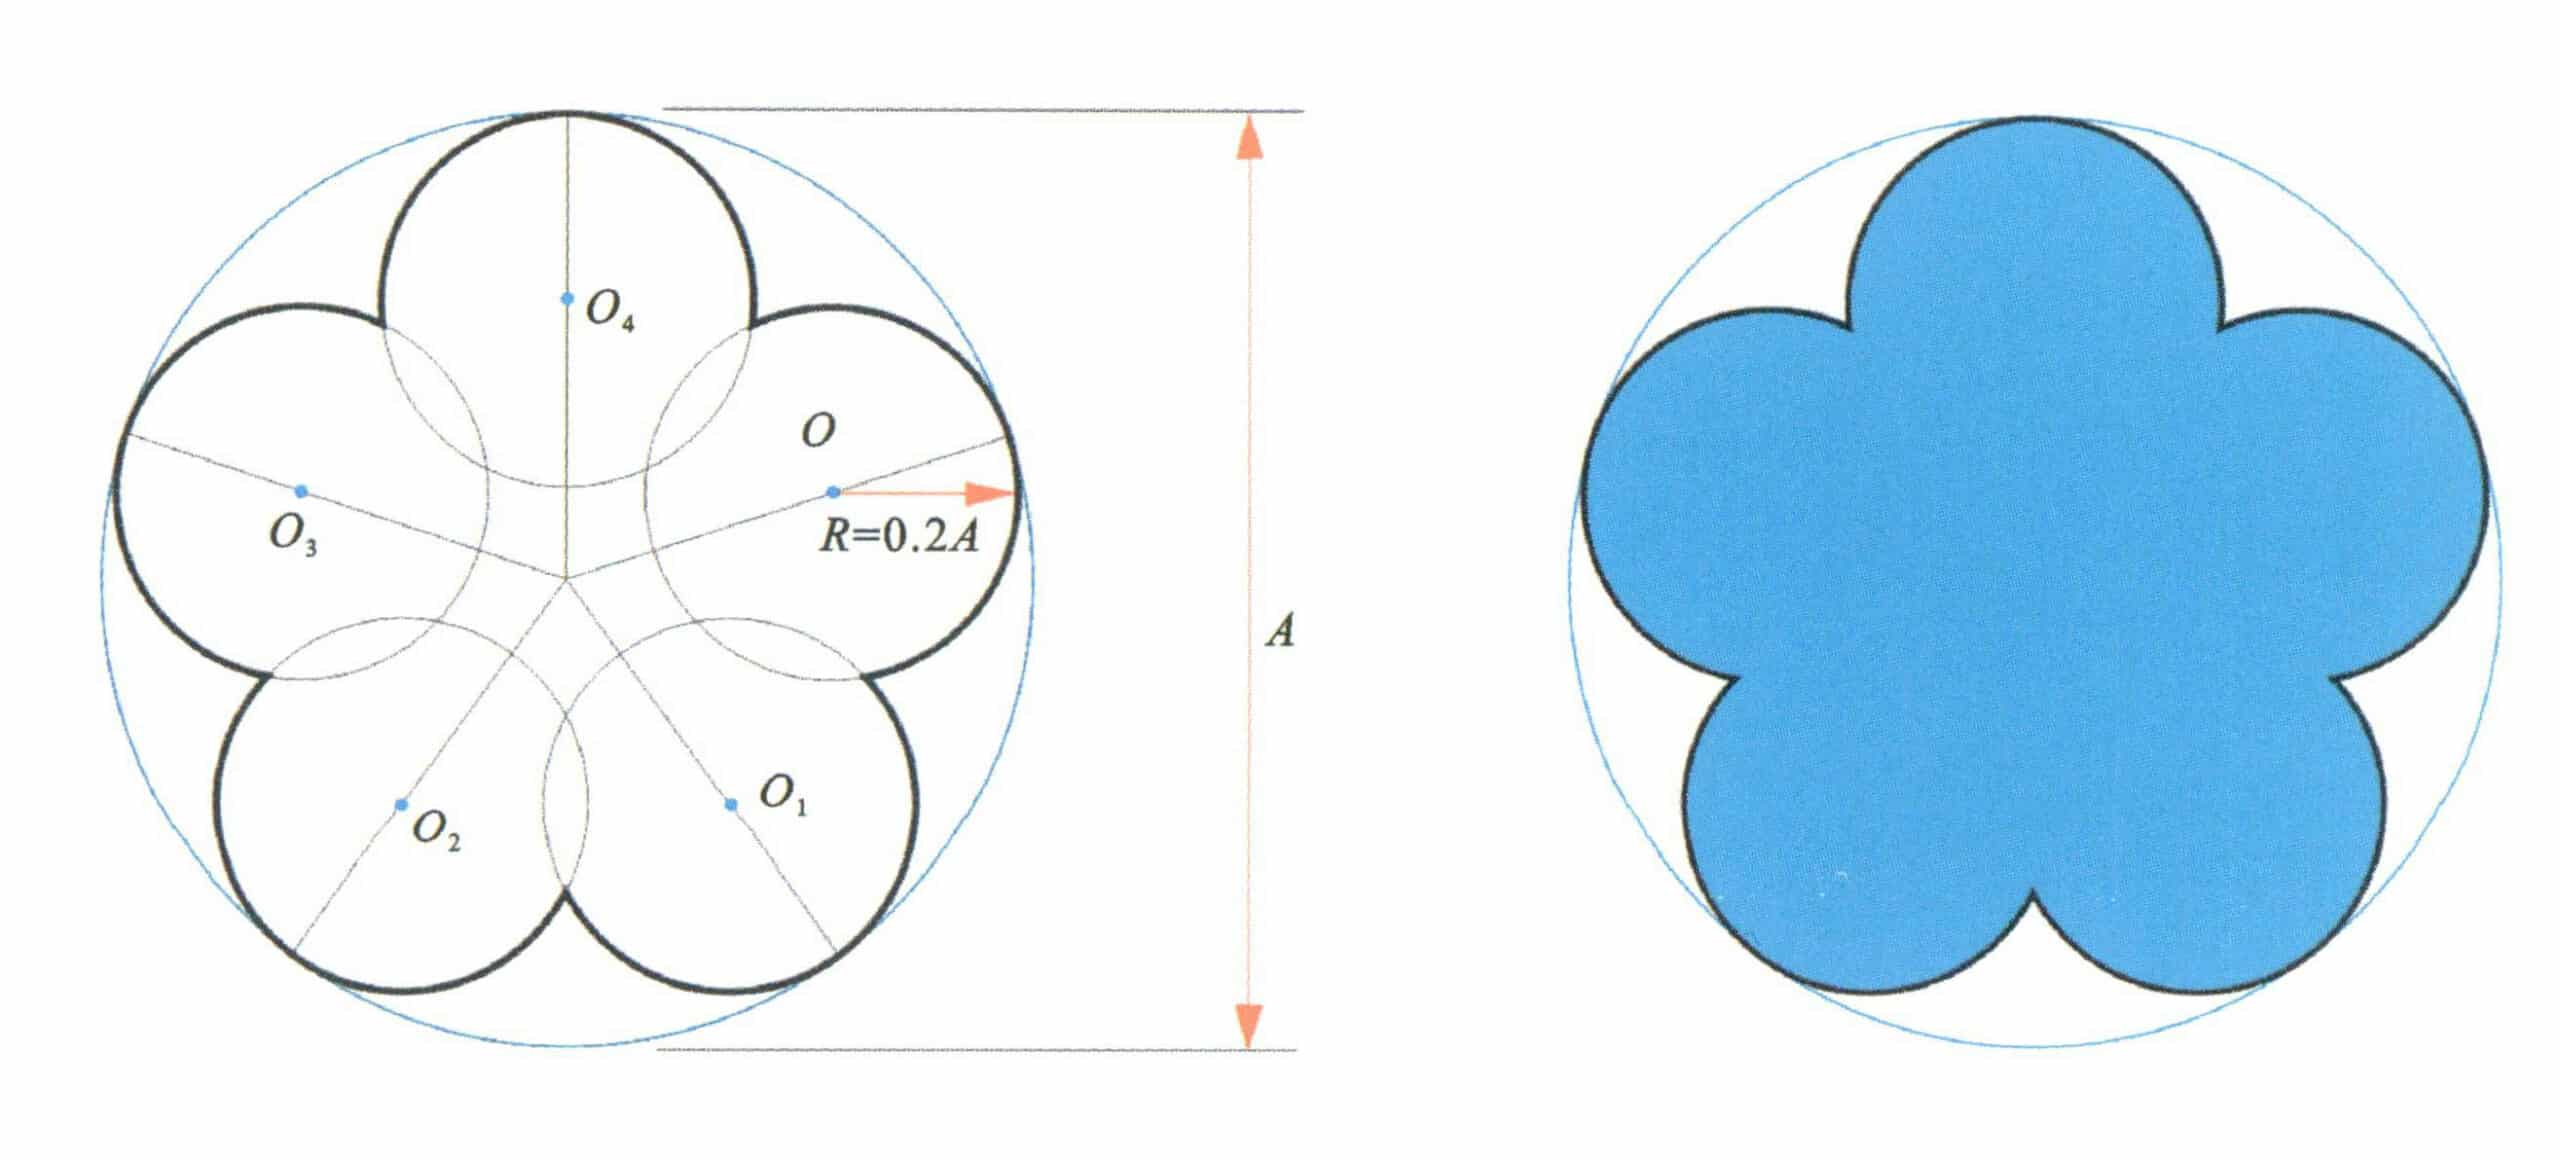


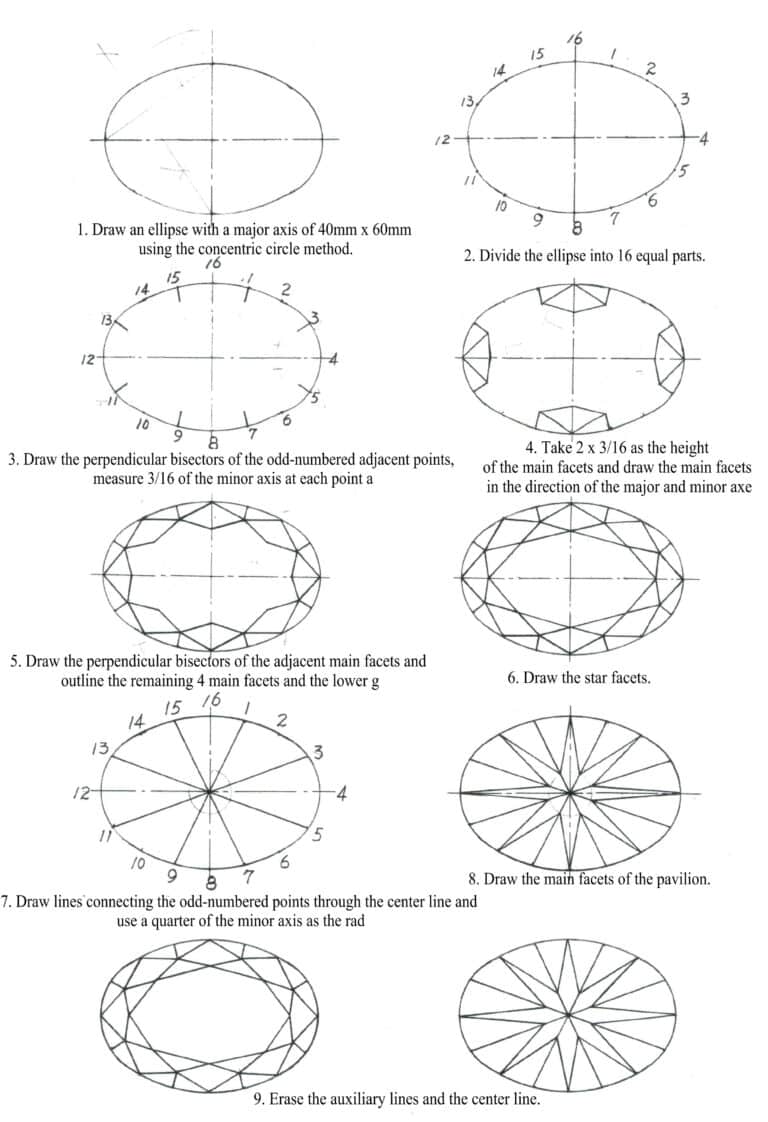

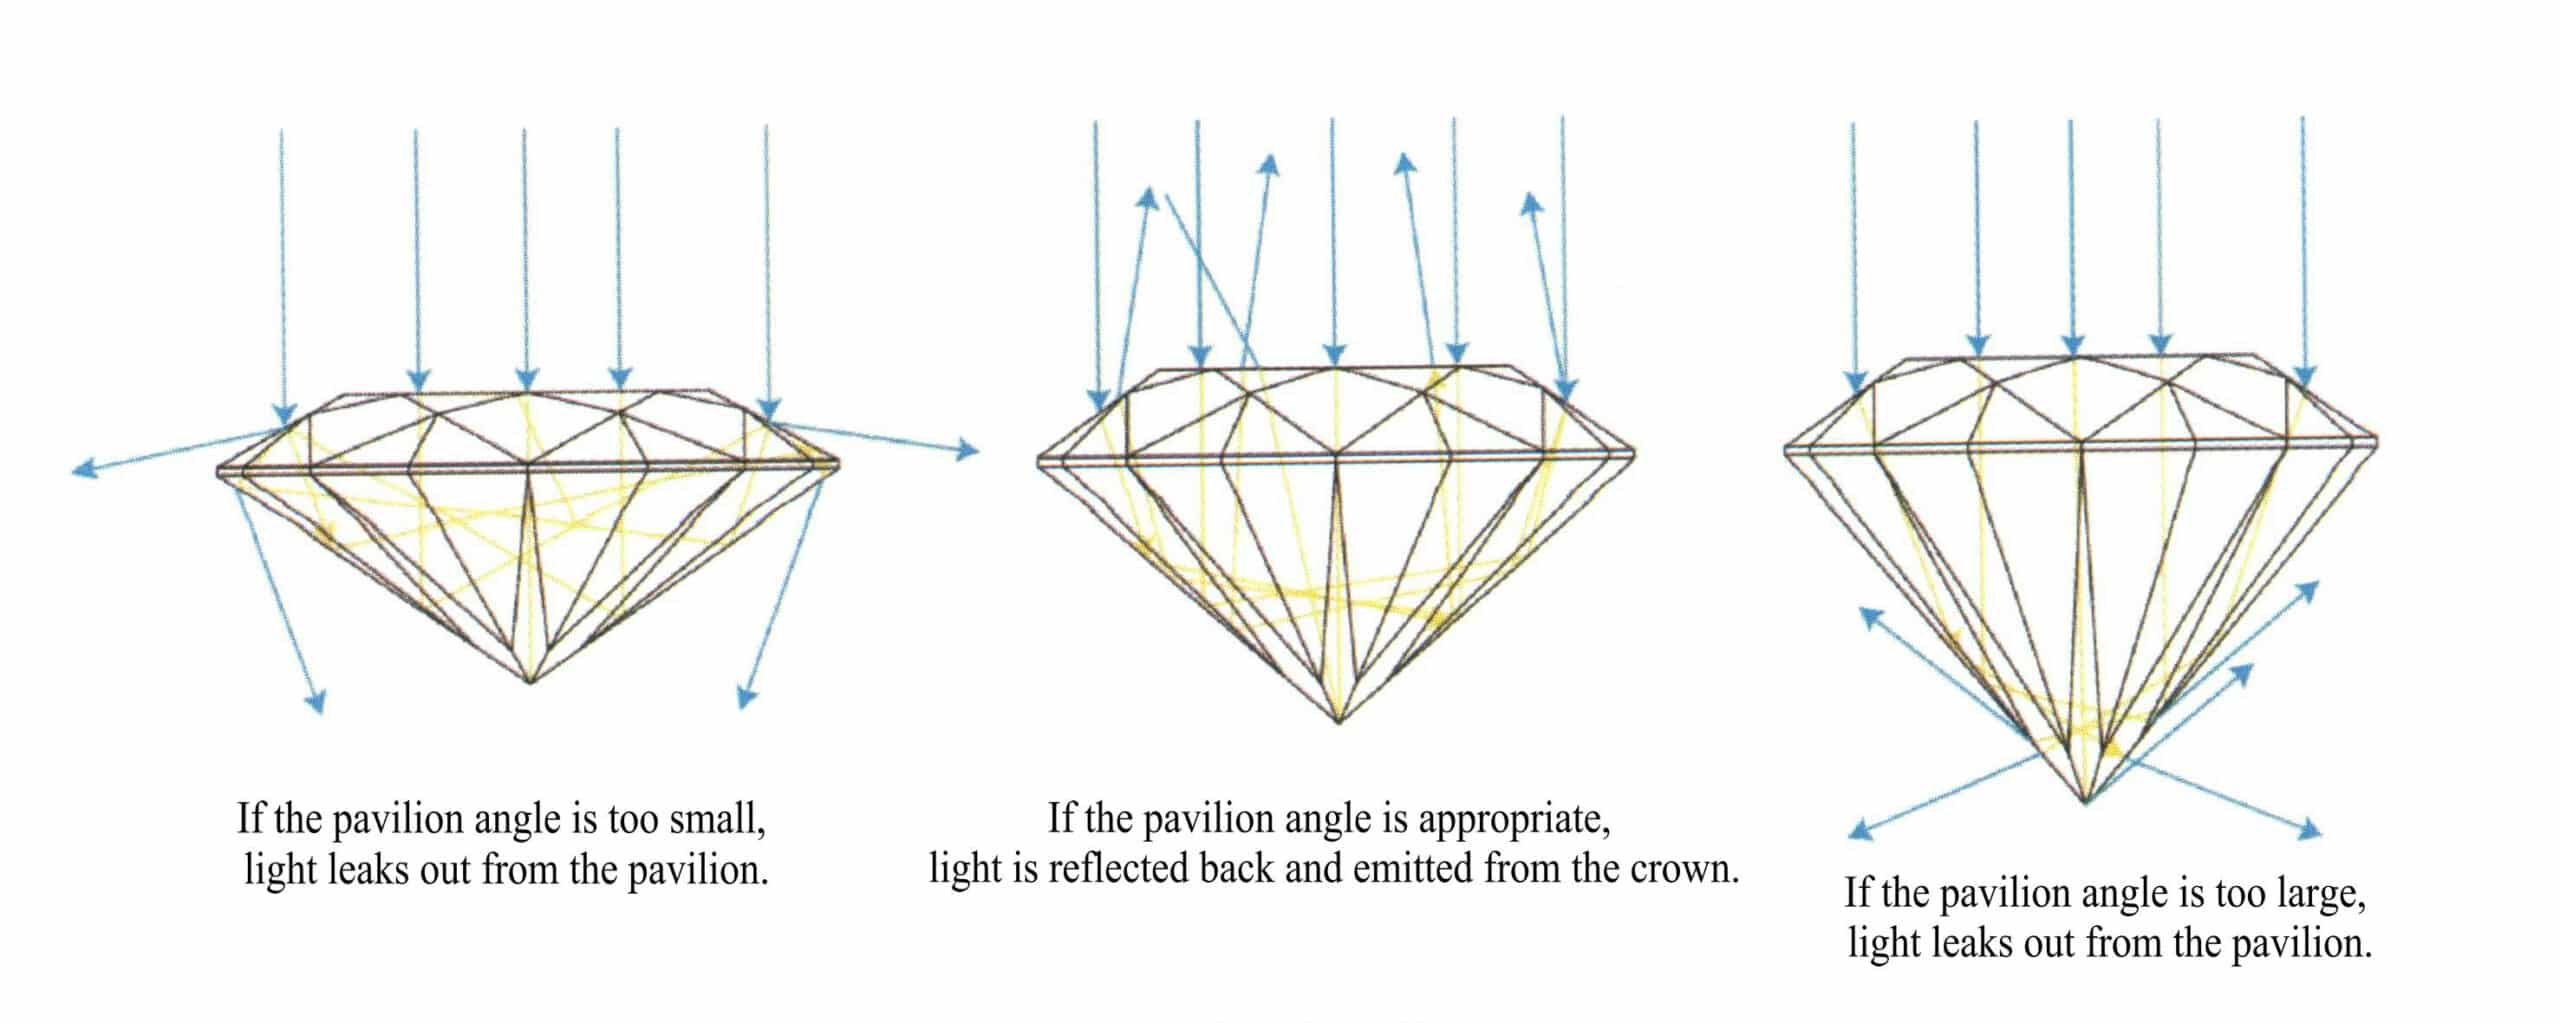
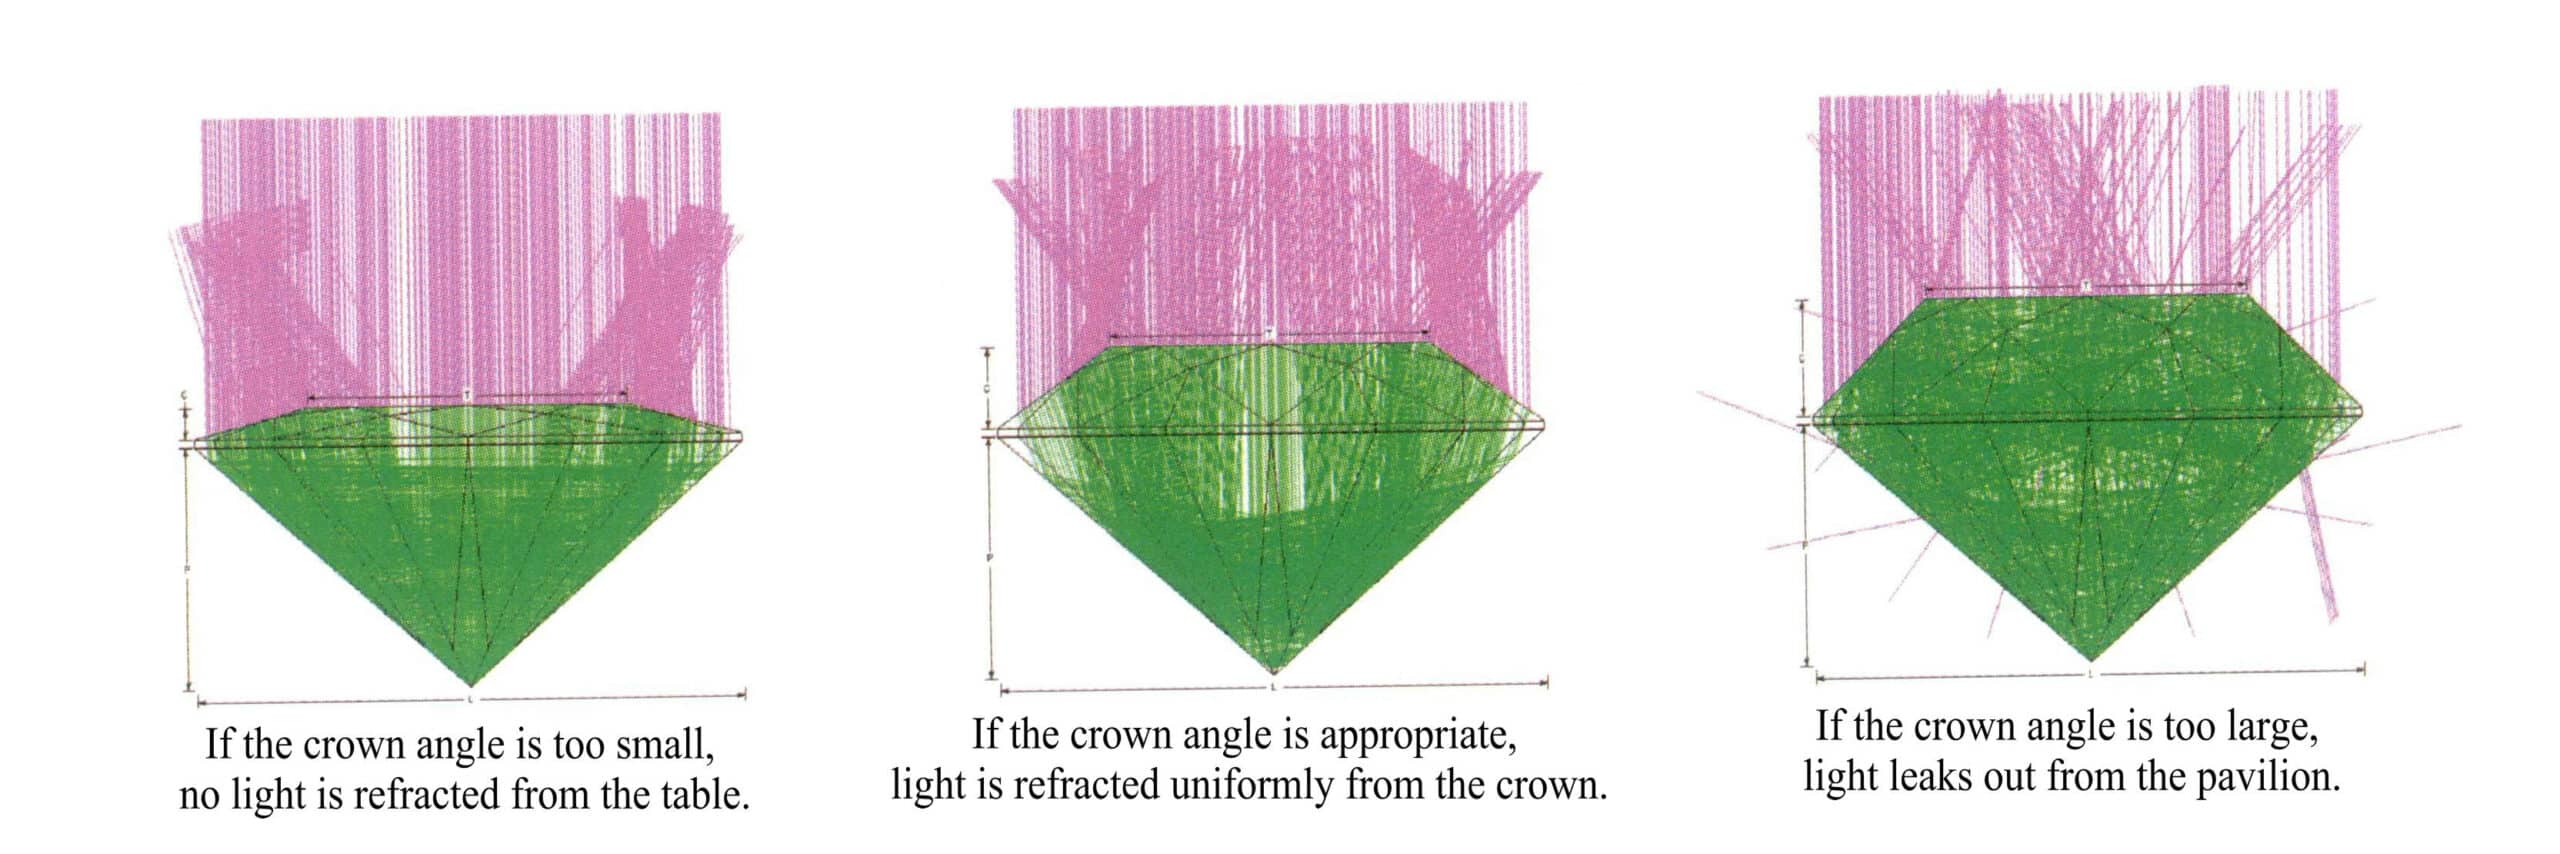

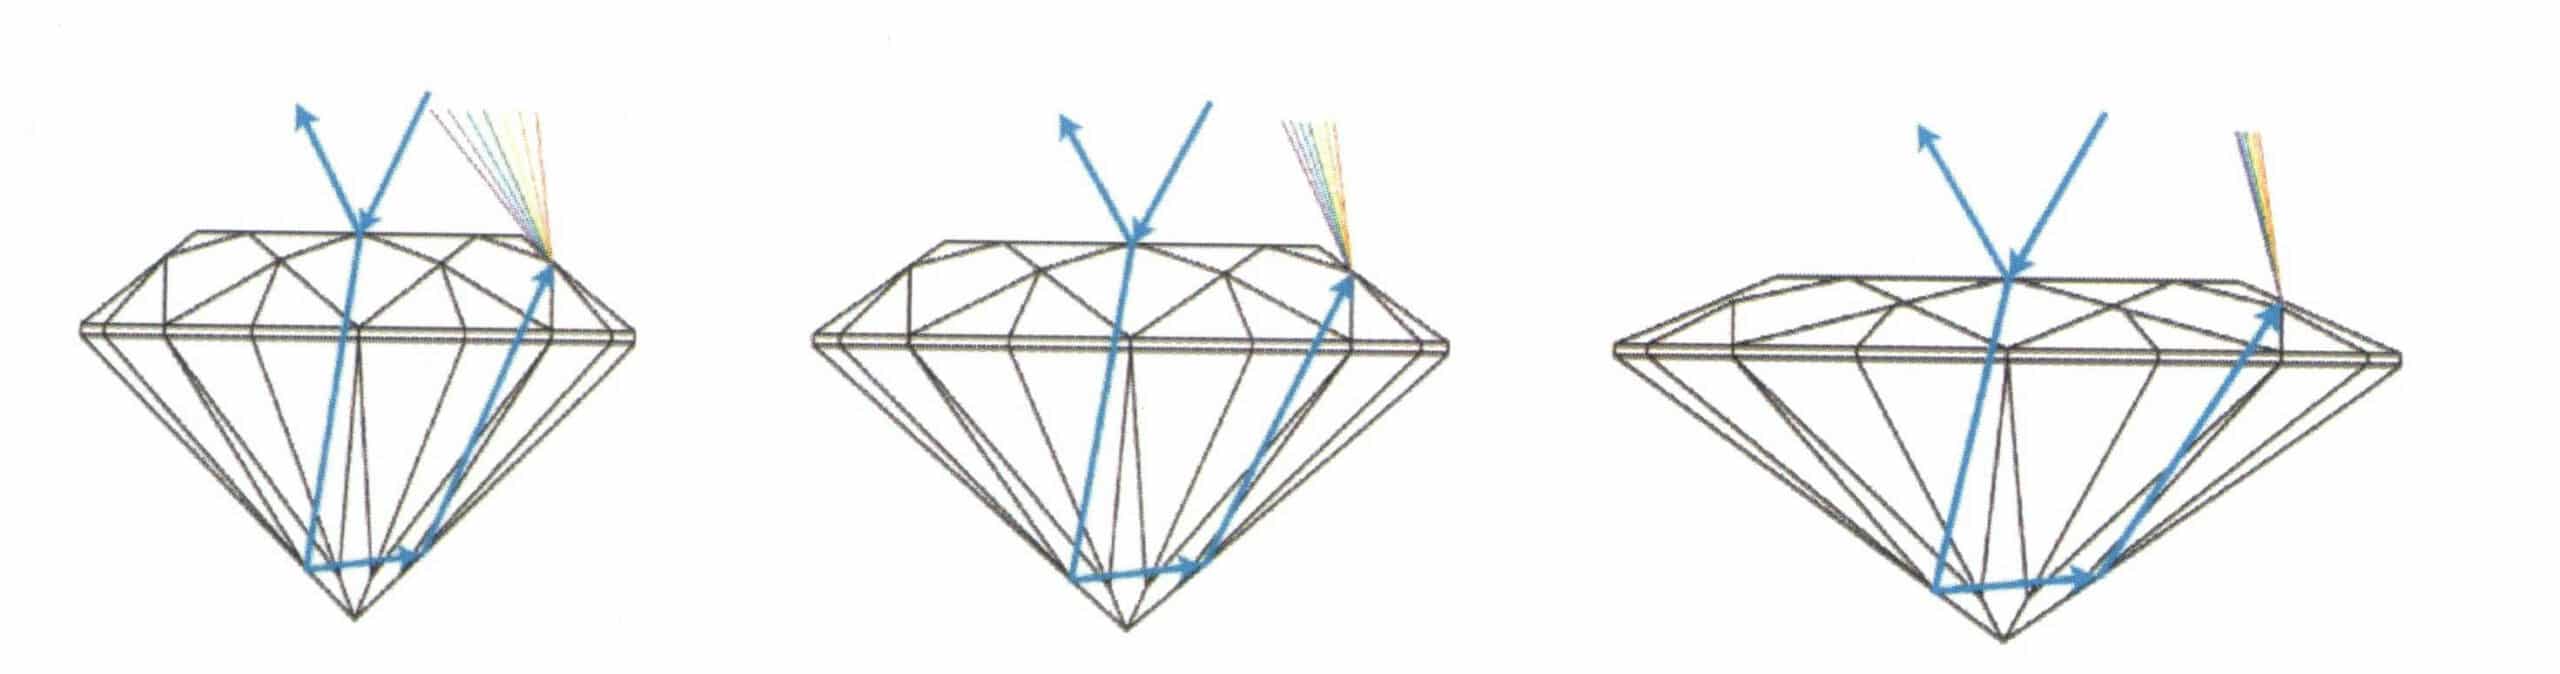


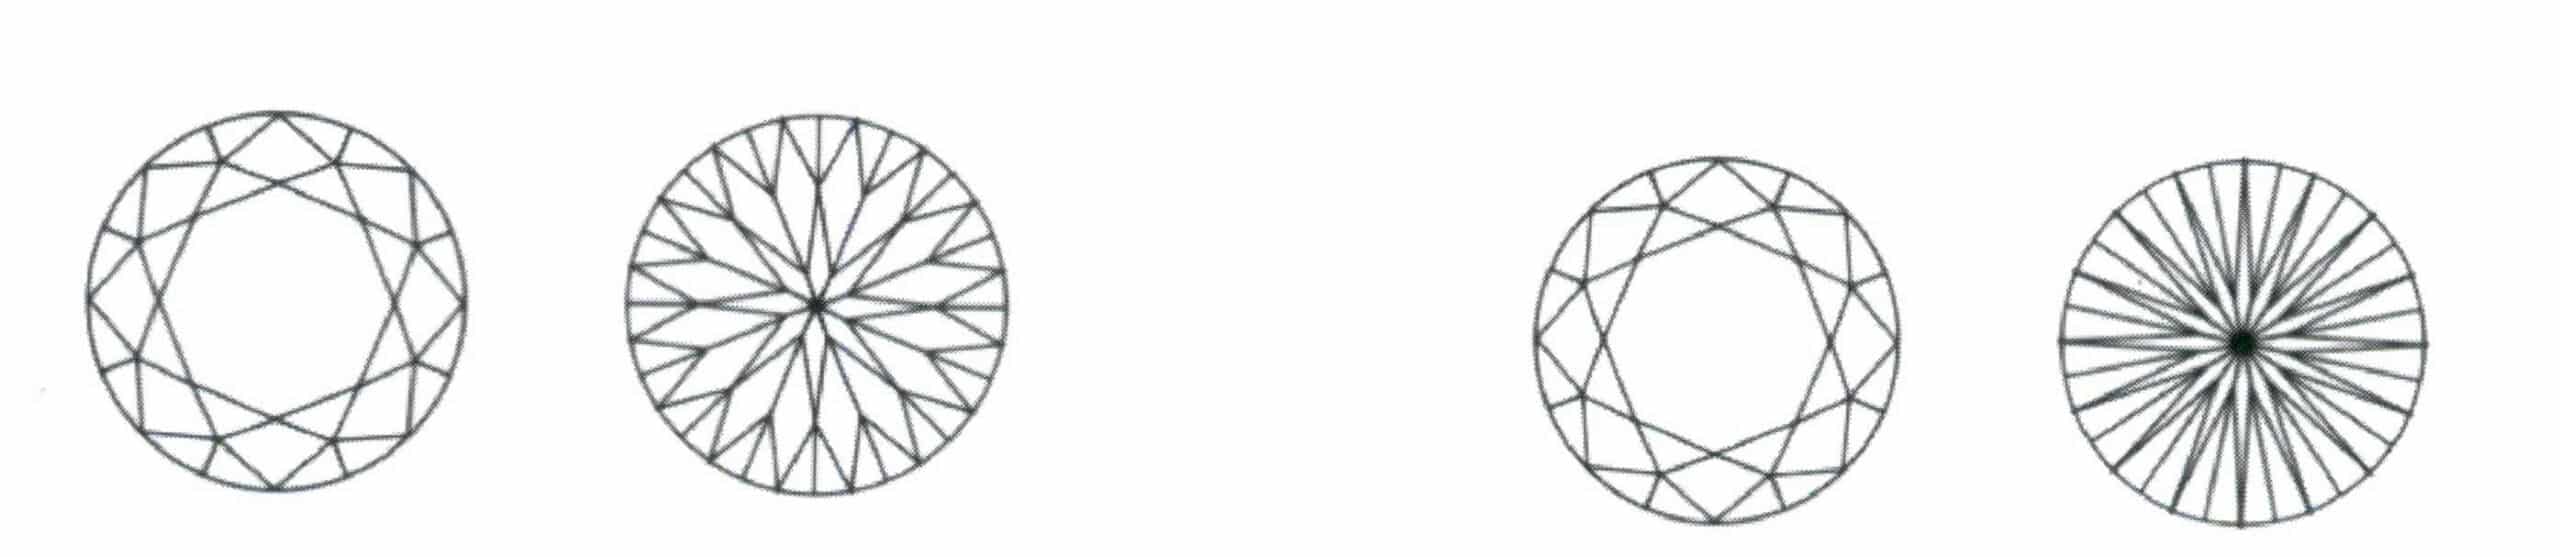
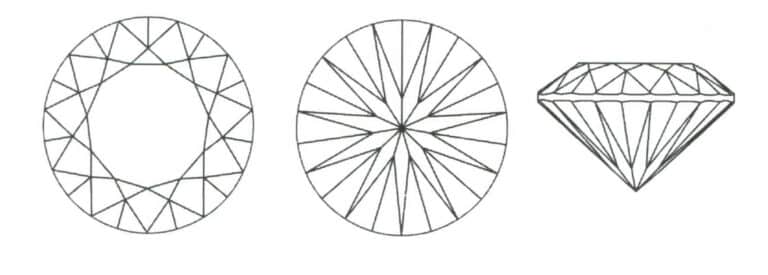
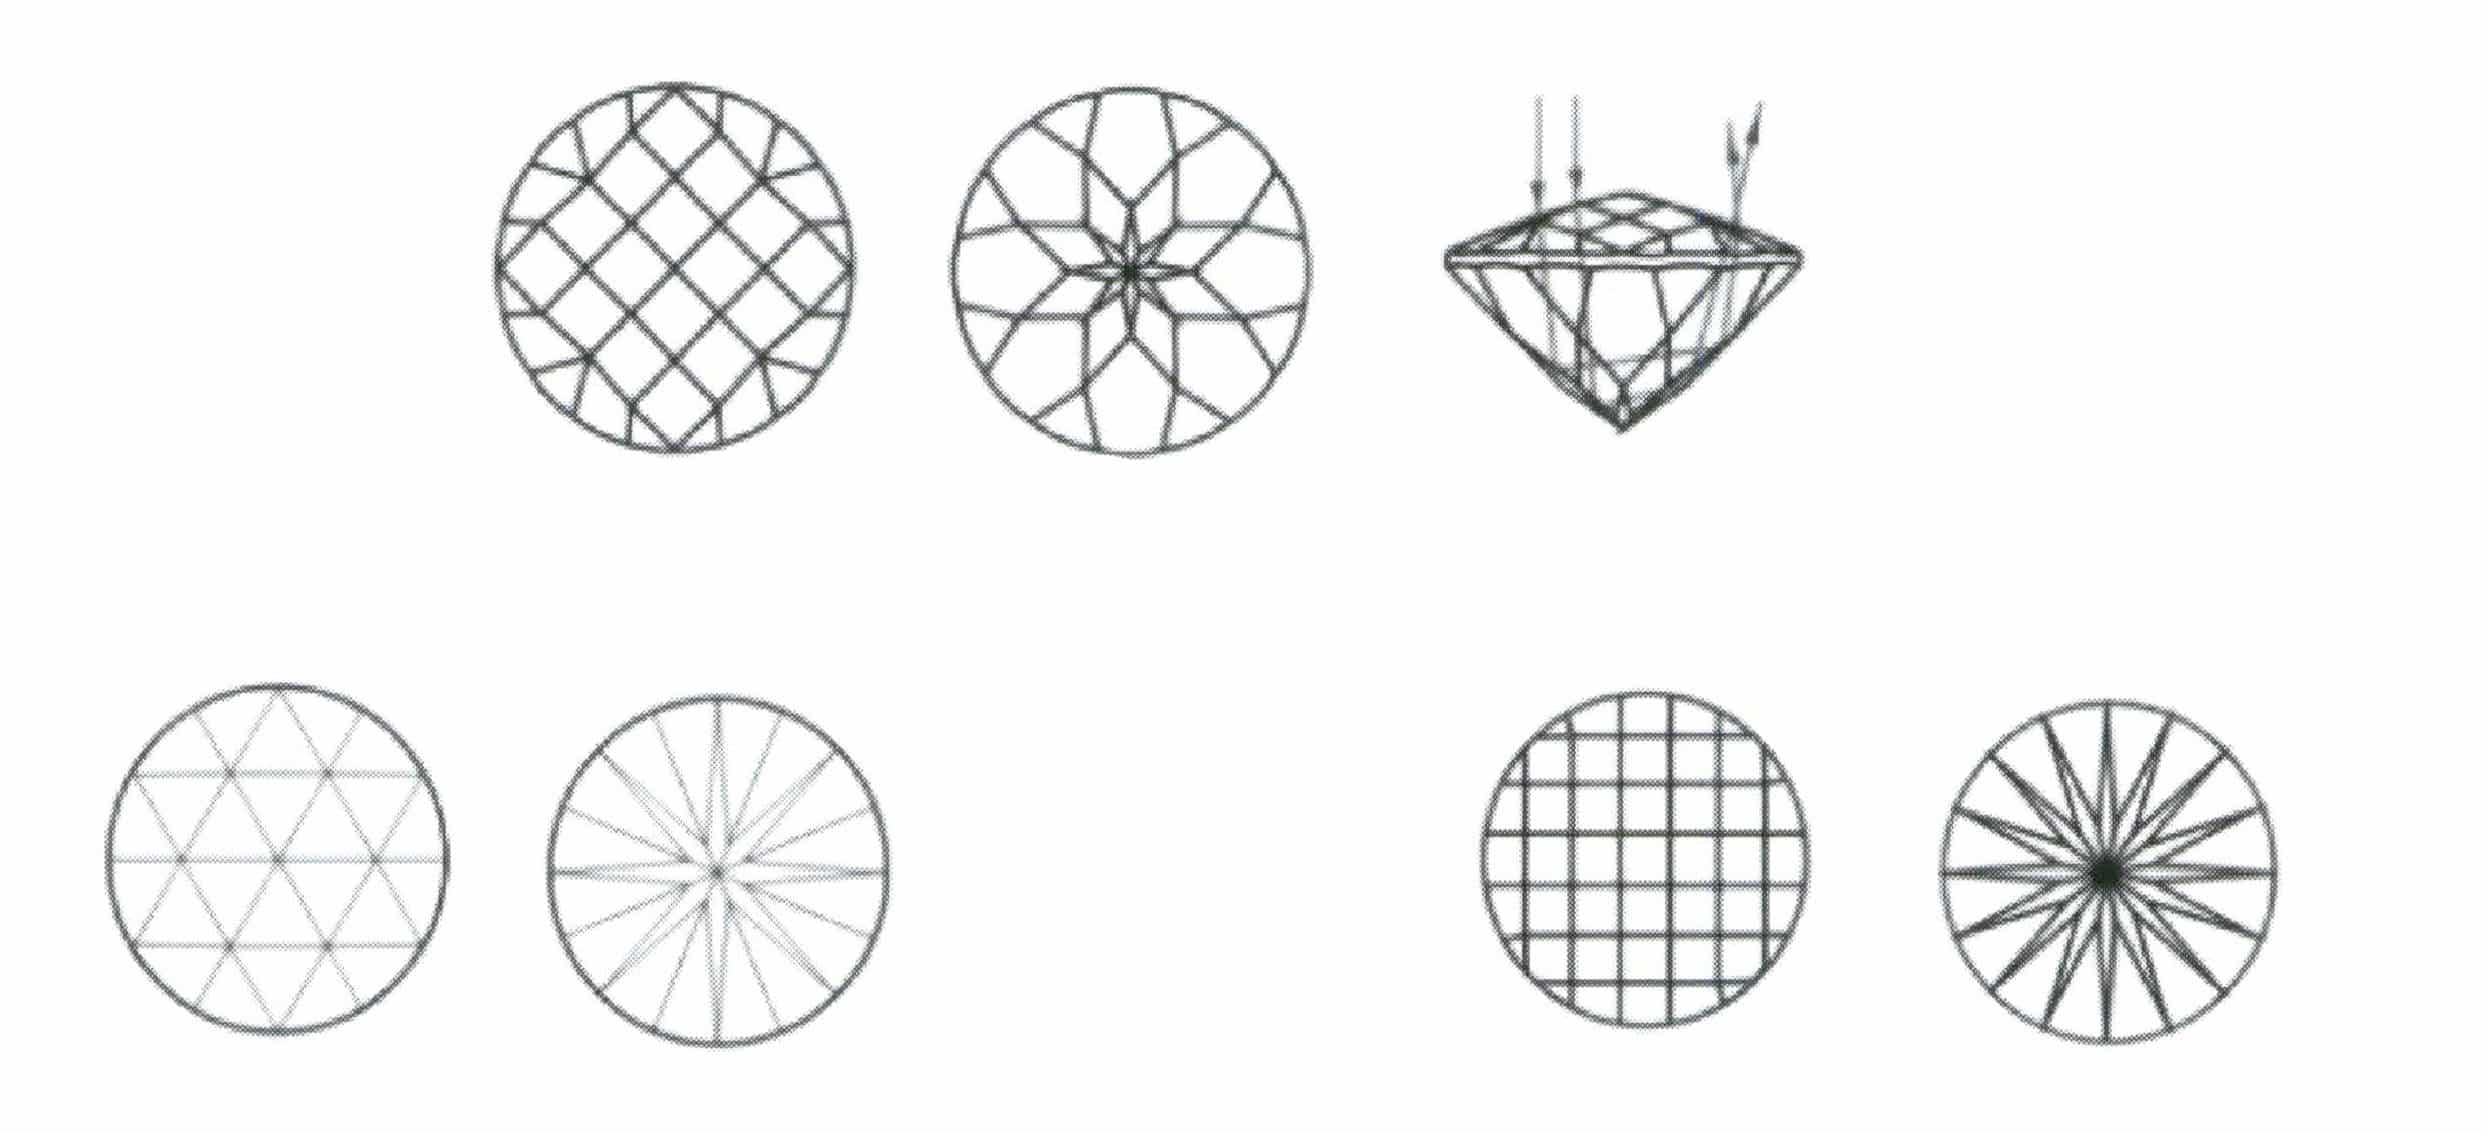
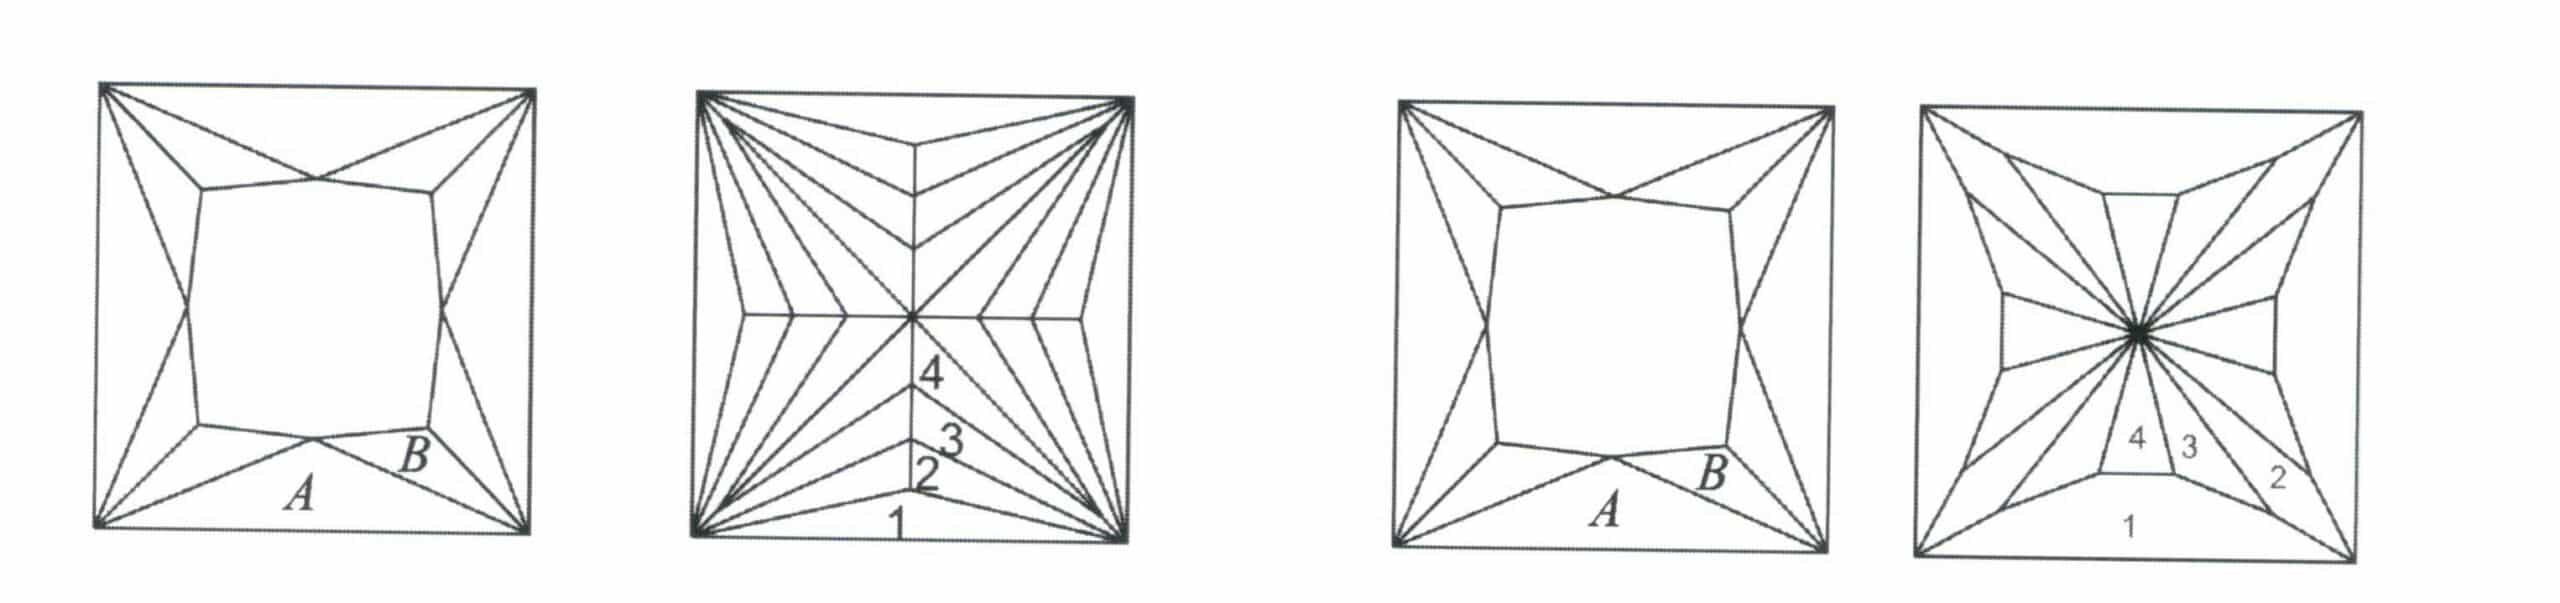
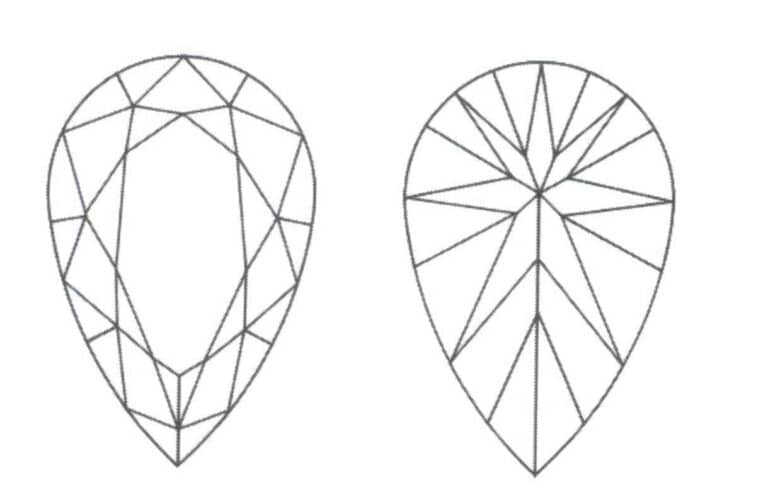
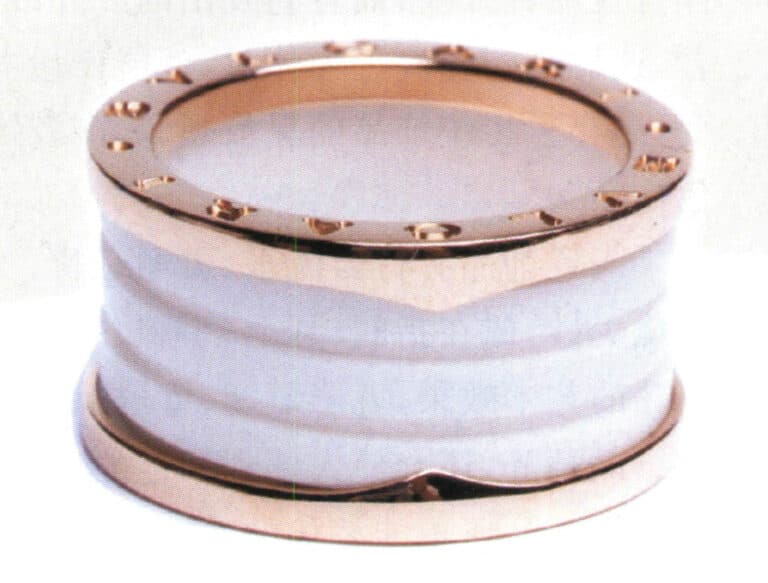
Figure 2-46 11 Basic Round Shape
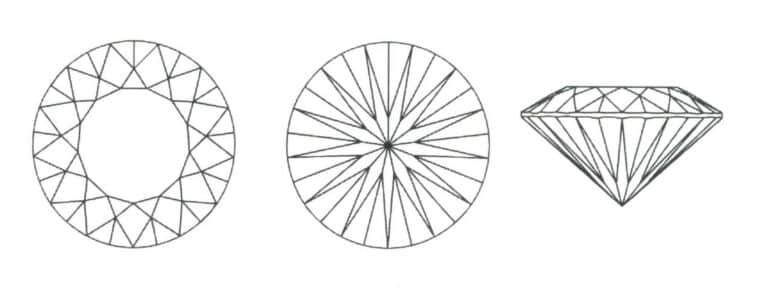
Figure 2-47 13 Basic Round Shape