Hogyan lehet elsajátítani az ékszertervezést: Nyakláncok, fejdíszek és tematikus szettek?
Essential Techniques for Crafting Exquisite Jewelry Designs: Necklaces, Headwear, and Thematic Sets
Bevezetés:
Want to learn the secrets of designing stunning jewelry? This guide covers everything you need to know about creating necklaces, headwear, and thematic sets. Discover how to cut and match materials like jade, sapphires, and diamonds, and follow detailed steps to draw and color your designs. Get insights into themed collections like the “Happiness” four-piece set and the “Eternal” three-piece set. Learn about material selection, design concepts, and key drawing techniques. Perfect for jewelry designers, stores, and anyone looking to create beautiful, custom pieces.
Tartalomjegyzék
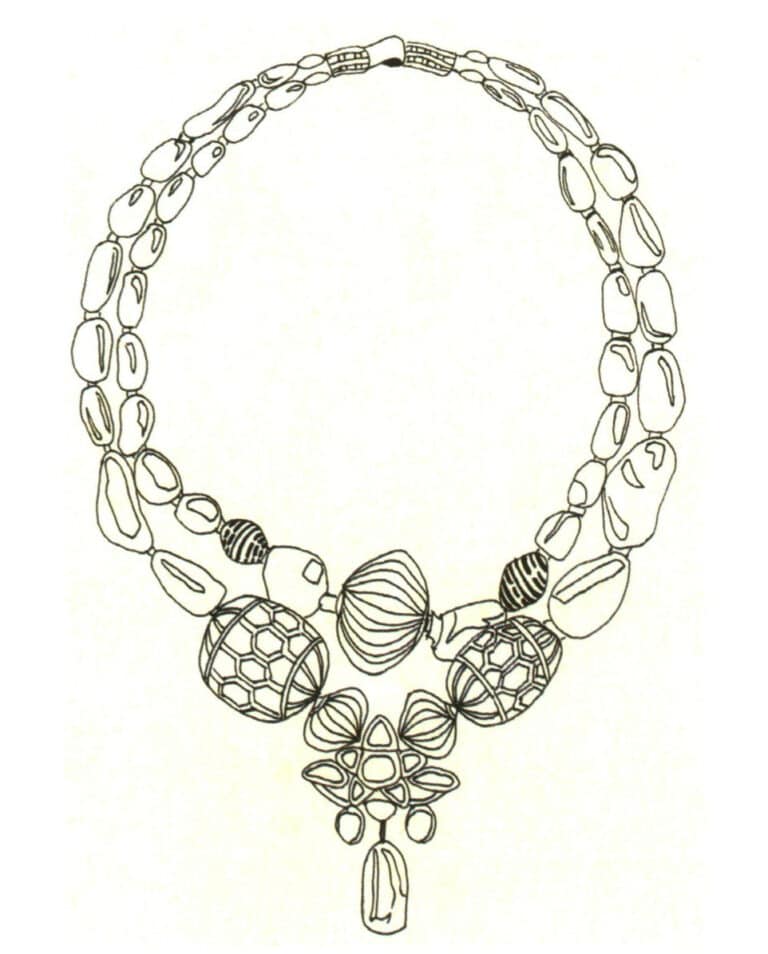
Section I Necklace Design Practicing
1. Anyagvágás és illesztés

2. Méret specifikáció

3. A rajzolás legfontosabb pontjai
(1) Pay attention to the shape characteristics of the gemstone and the direction of the necklace’s outer contour.
(2) The color tone of the picture should be harmonious and unified.
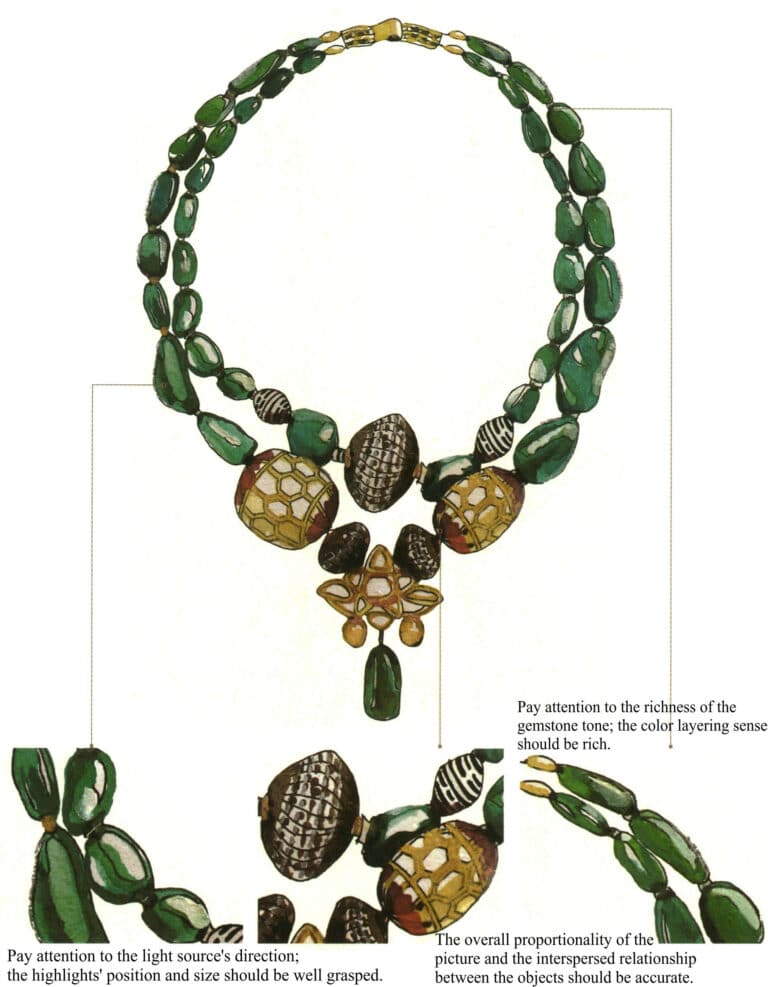
4. Rajzolási lépések
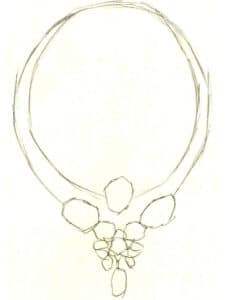
Step 01 First sketch the necklace’s general outline with a pencil.
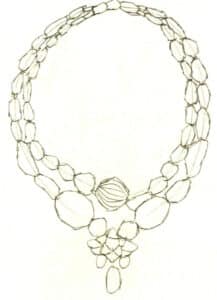
Step 02 Then outline the basic shapes of the gemstones on the necklace.
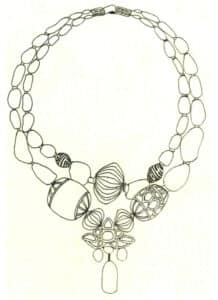
Step 03 Define the beaded chains and pendant with smooth lines. Draw oval-shaped beads and pendant textures. Use a 0.2mm technical pen to finalize line art and erase pencil lines.
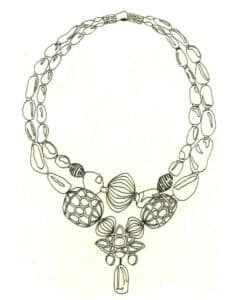
04. lépés Rajzoljon kiemelő formákat a gyöngyökre a technikai tollal. Állítsa be a helyi részleteket.
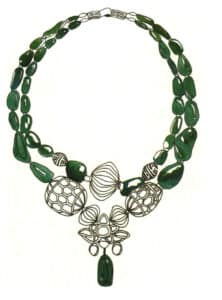
Step 05 Apply base layers to gemstones using emerald green, sap green, and cerulean blue, avoiding over-saturation.
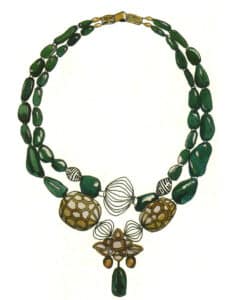
Step 06 Mix yellow ochre, flesh tone, and burnt umber to apply base layers to the pendant and clasp.
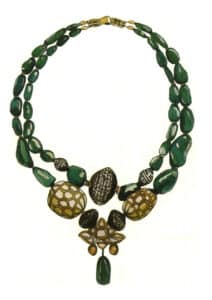
Step 07 Deepen brown bead colors with raw umber, burnt umber, and ivory black over previous layers.
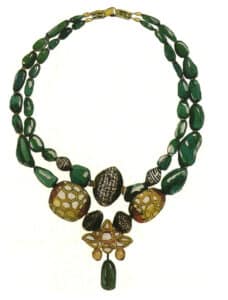
Step 08 Refine gemstone details with yellow ochre, vermilion, and Payne’s grey to enrich color variation and amplify three-dimensionality. Finalize the artwork to complete.
5. A technikák összefoglalása
(1) How do you handle the highlights well?
Highlights can generally be expressed using two methods: reserving whites in the early stage and adding details later. However, highlights created by manually reserving whites during the initial coloring tend to look more natural.
(2) How do colors transition naturally?
Before coloring, you can first brush a layer of clean water, and after the water slightly penetrates the paper, use the prepared paint to apply color.
Section II Headwear Design Training
1. Anyagvágás és illesztés
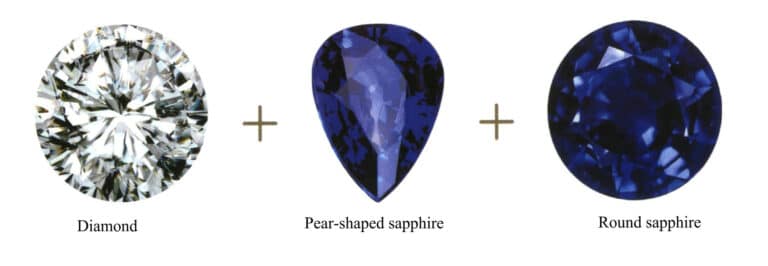
2. Key Points for Drawing
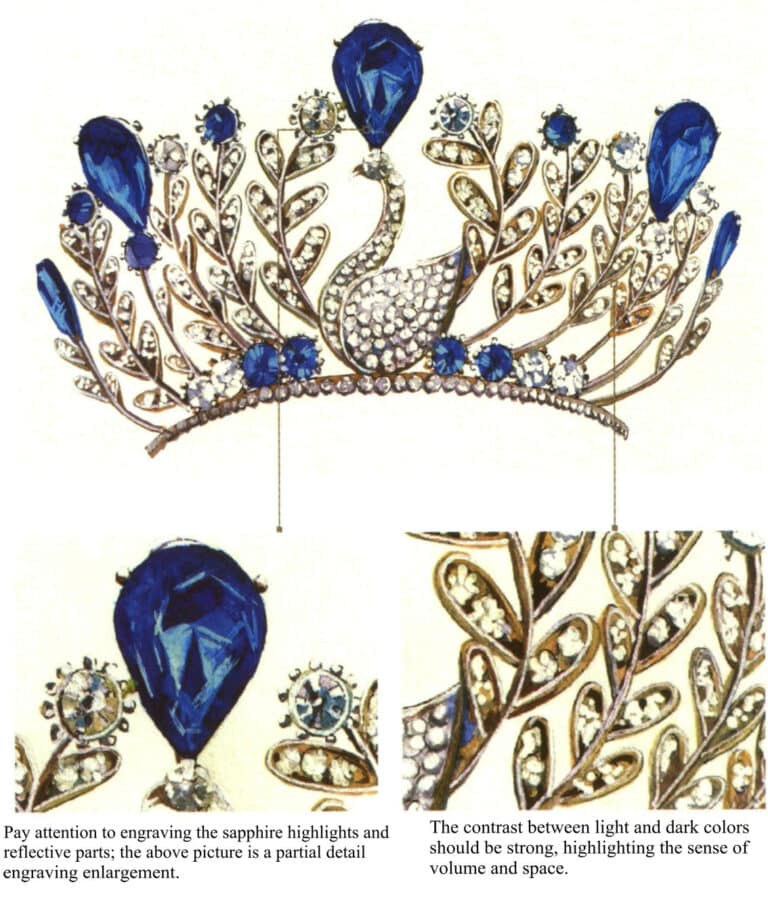
(1) When drawing white diamonds, it is necessary to appropriately add some ambient colors to enrich the picture’s colors and reflect the diamond’s reflective properties. Be careful not to reserving all whites.
(2) The color of metallic materials should include reflective colors; do not use a single color for flat painting, as it will appear stiff.
(3) When composing, attention should be paid to the symmetry of the crown shape.
3. Drawing Steps

Step 01 Sketch the tiara’s general outer contour with simple lines.

Step 02 Outline the small round gemstones on the tiara’s right side over the contour.
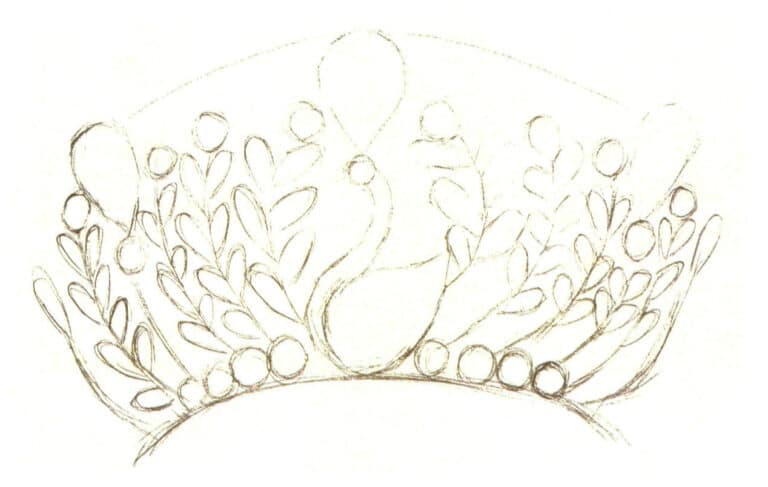
Step 03 Continue outlining remaining gemstones and floral branches on both sides.
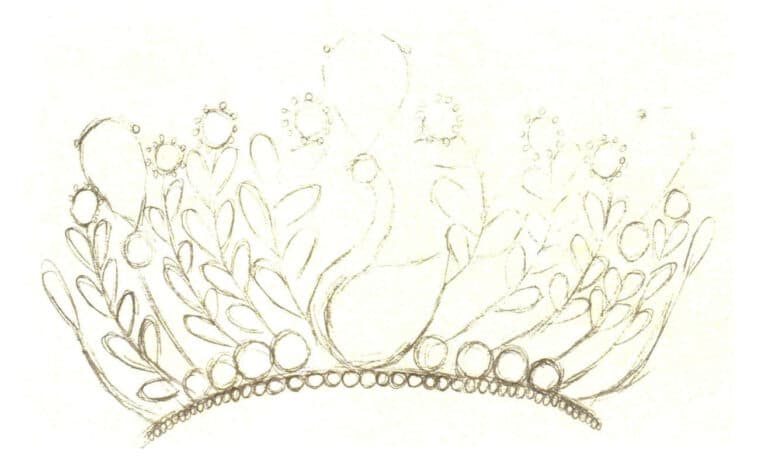
Step 04 Outline small gemstones at the tiara’s base and refine detailed shapes.
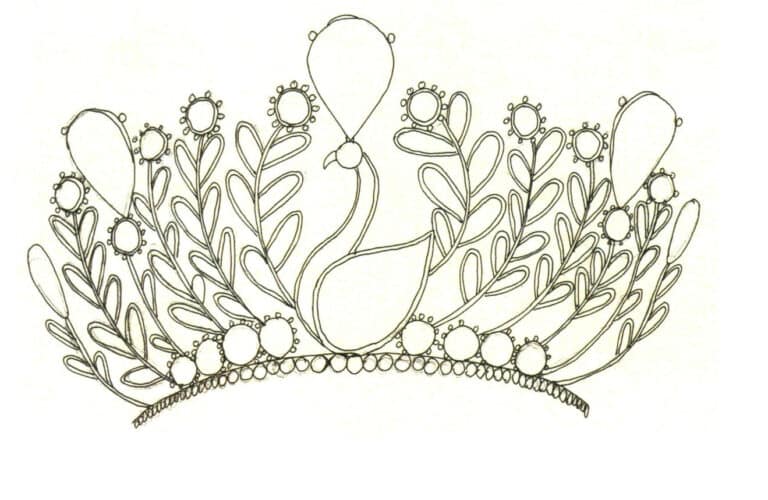
Step 05 Finalize the tiara’s outline with a 0.2mm technical pen. Erase pencil lines with a soft eraser.
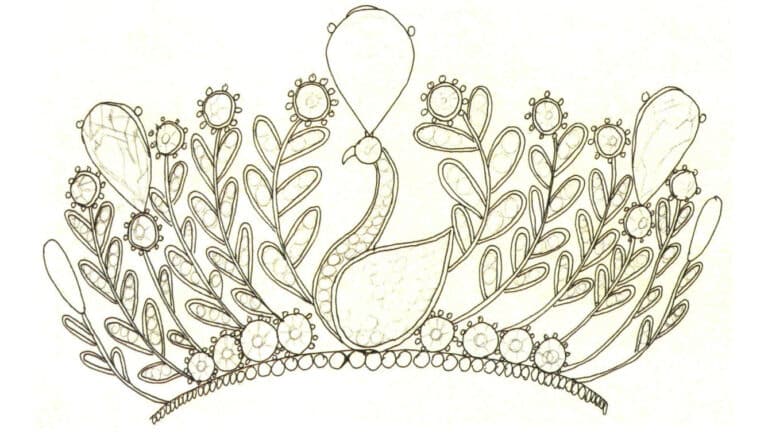
Step 06 Draw facets of teardrop gemstones and outline small diamonds on branches and swans with a pencil.
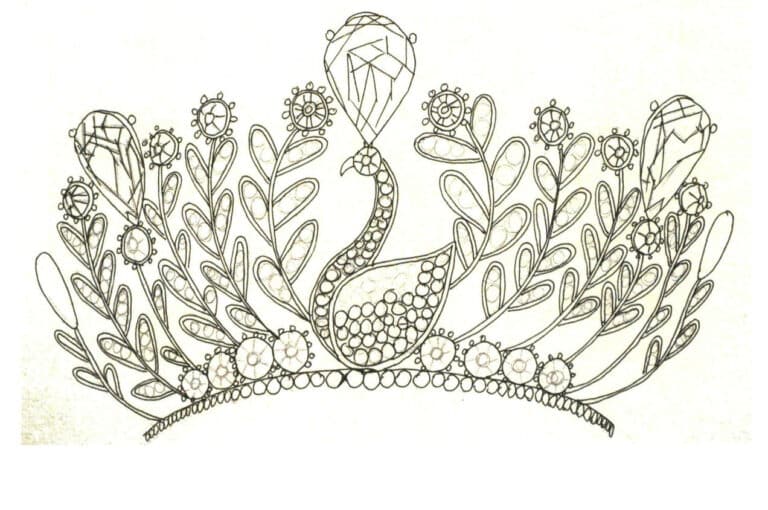
Step 07 Use the 0.2mm technical pen to refine gemstone details. Adjust overall line art.
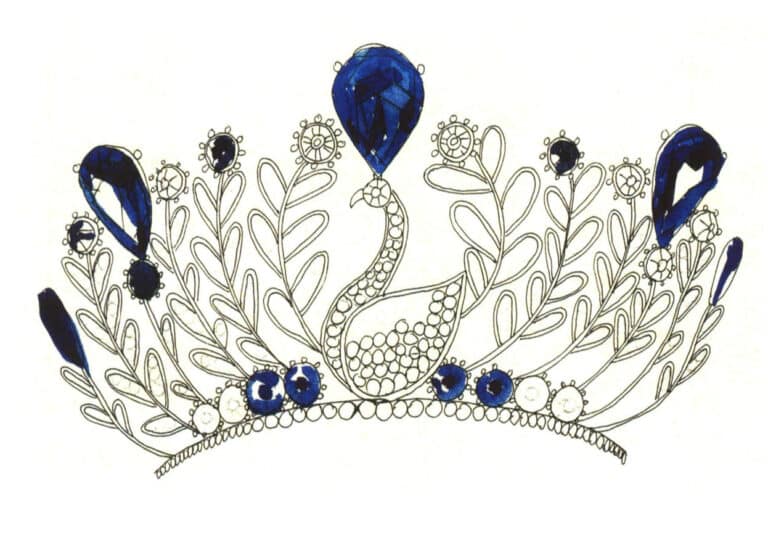
Step 08 Apply base layers to teardrop and round sapphires with cobalt blue and cerulean blue, reserving whites for highlights.
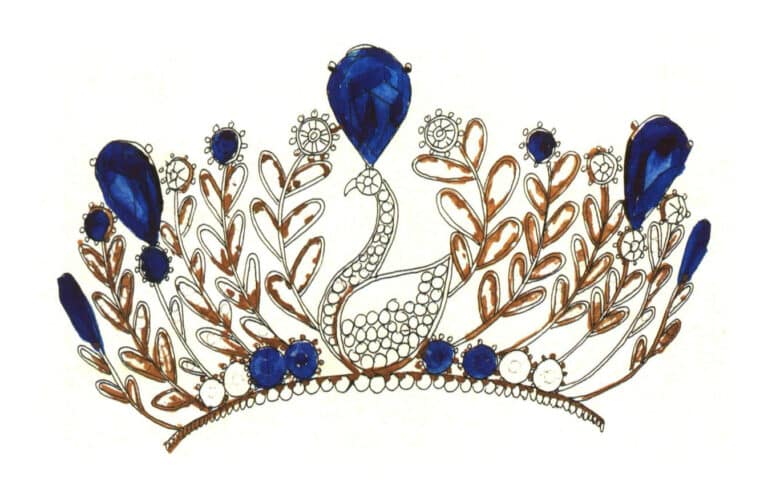
Step 09 Paint floral branches’ base layers with burnt umber and medium yellow.

Step 10 Deepen sapphire shadows with violet and cerulean blue. Use violet, Payne’s grey, and yellow ochre for small diamonds’ shadows, leaving intentional gaps for highlights.
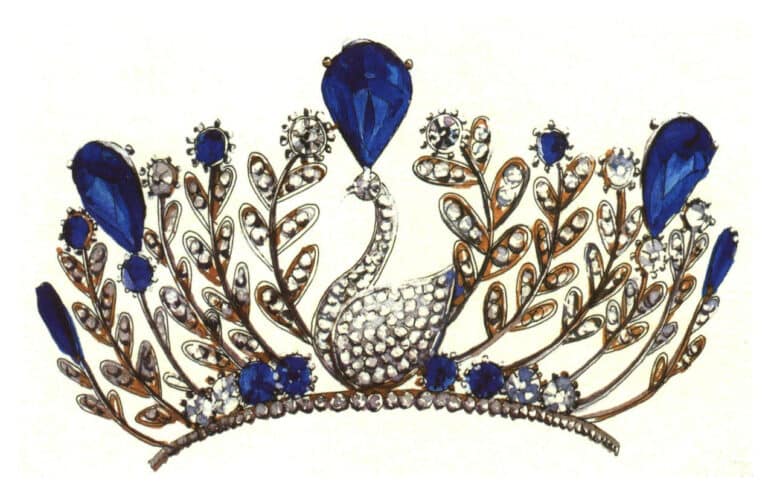
Step 11 Further deepen colors with violet, cerulean blue, Payne’s grey, dark brown, and burnt umber.
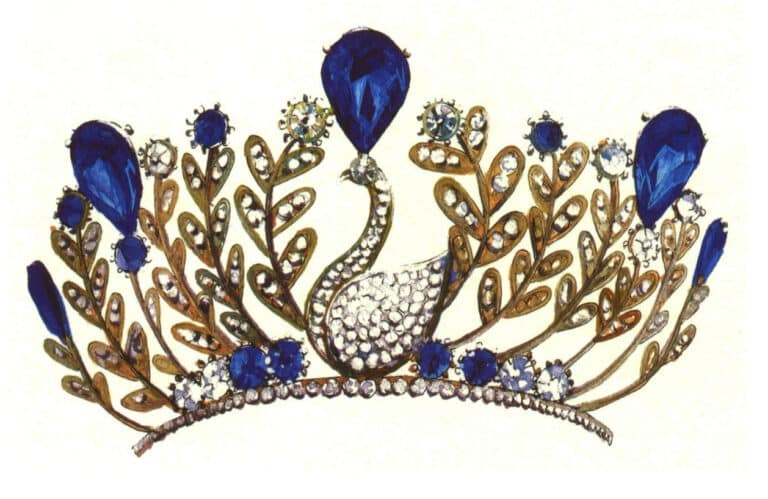
Step 12 Refine floral branches’ colors using a small watercolor brush with burnt umber and yellow ochre for cohesive unity.

Step 13 Accent small diamonds with light blue (cerulean blue + Chinese white), burnt umber, and Chinese white in floral speckle patterns.
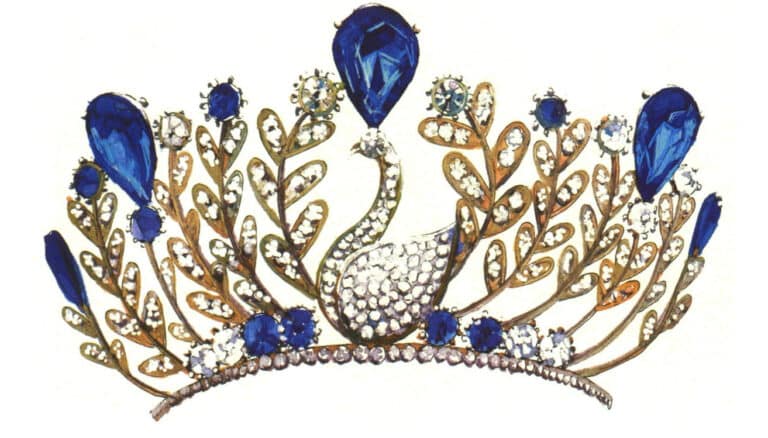
Step 14 Intensify sapphire shadows with sapphire blue and ultramarine. Use light blue (cerulean blue + Chinese white) for reflections to enhance gemstone brilliance.
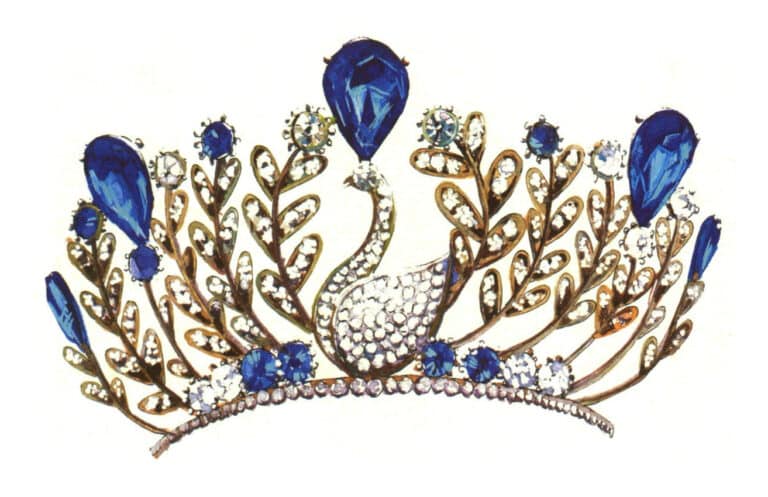
Step 15 Outline dark borders on floral branches with burnt umber.
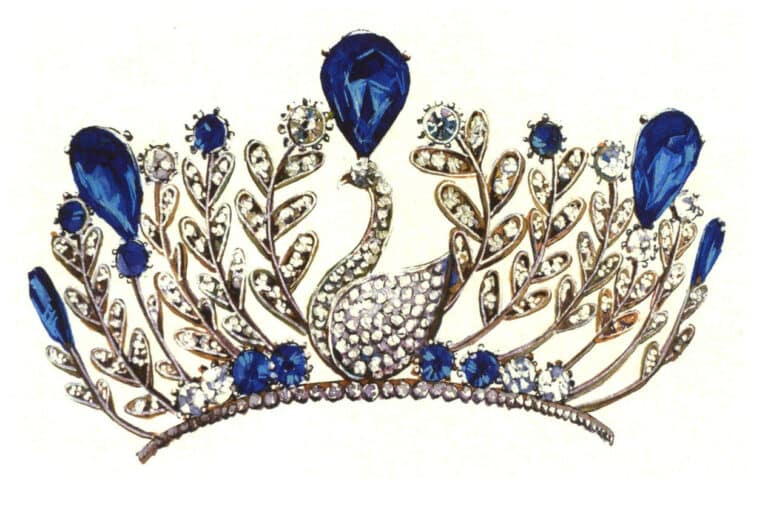
Step 16 Brighten overall highlights with Chinese white. Adjust and finalize the artwork to complete.
4. Summary of Techniques
(1) Hogyan fejezzük ki a drágakövek térfogatát?
The sense of volume of gemstones is mainly expressed through the variation in color depth and highlights; pay attention to the effect of the gemstone’s facets.
(2) Hogyan lehet a fémanyagok színeit egymáshoz illeszteni?
A fémanyagok rajzolásához a fém fényvisszaverő tulajdonságainak kifejezése érdekében a finomításhoz megfelelő fényvisszaverő színek hozzáadása szükséges.
(3) How do we handle the composition’s relationship between light and dark?
Start depicting from the main part of the entire composition, focusing on the light and dark relationship of the object at the visual center, while the shadows and dark parts of surrounding objects can be appropriately weakened or omitted, using light and dark contrast to highlight the main part.
Section III Thematic Series Design Practicing
1. "Happiness" Theme Four-Piece Jewelry Design
1.1 Theme and Associations
“Happiness” refers to a feeling of joy that arises when a certain need of a person is satisfied, and this joy can be maintained for a long time. Although it is subjective, it is closely related to objective factors such as nature, society, and psychology.
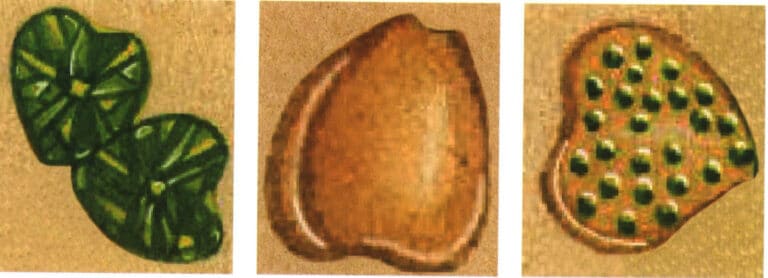
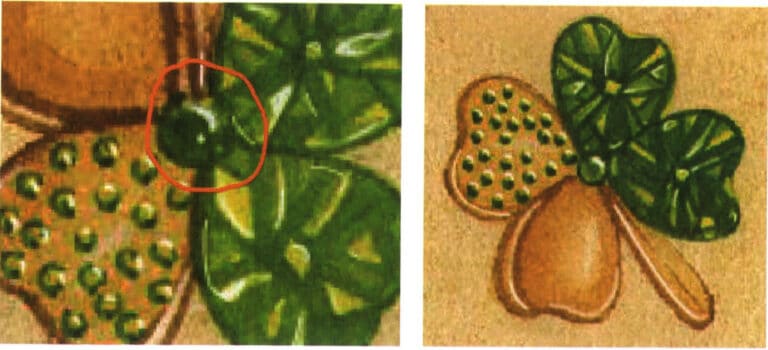
So, how should we express the “Happiness” theme in jewelry design? First, we must associate elements related to the “Happiness” theme, such as Ferris wheels, lavender, drift bottles, wind chimes, and four-leaf clovers. By selecting these related elements and determining the main design elements, we can conceive the details of the “Happiness” theme four-piece jewelry design.
1.2 Theme Elements
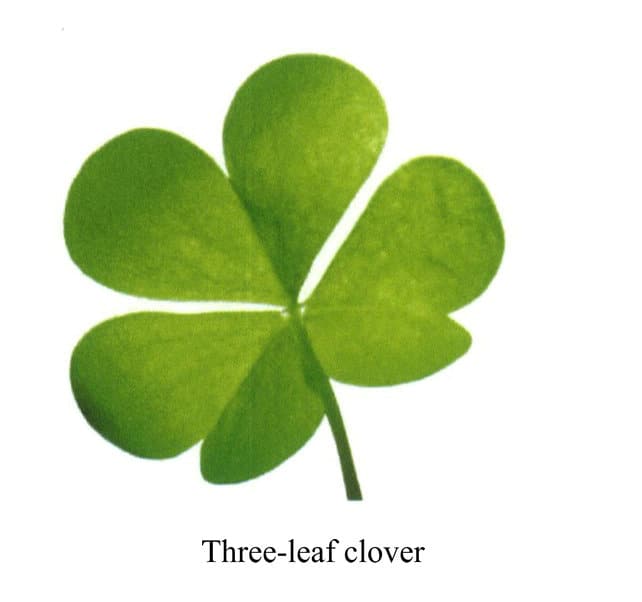
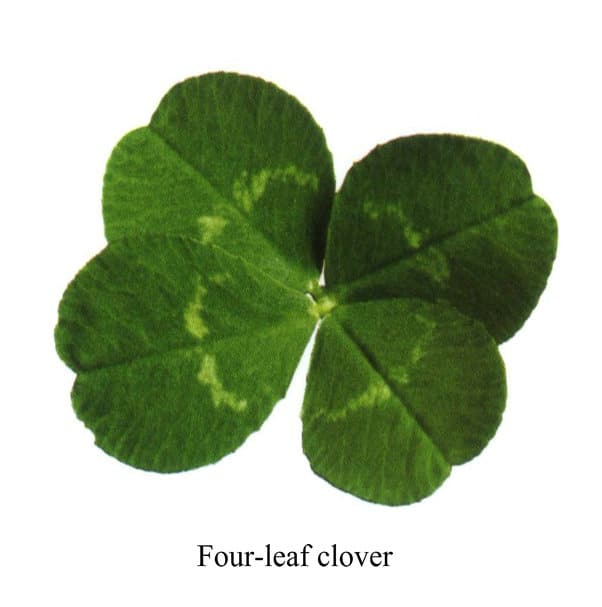
As a universally recognized symbol of luck, each leaf of the four-leaf clover has a different meaning: fame, wealth, love, and health are the meanings it embodies, representing that having all four at the same time is lucky, which is why it is also known as “lucky grass.”
In addition, the four-leaf clover also symbolizes freedom, unity, solidarity, and equality.
1.3 Material Selection
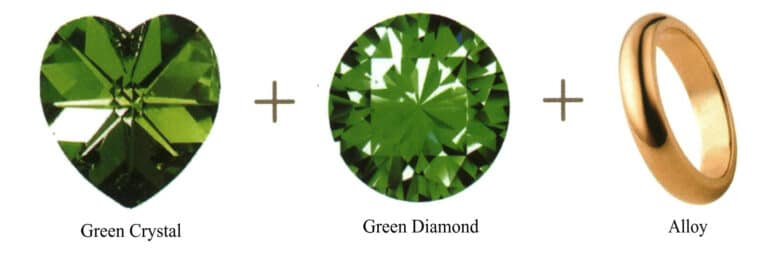

1.4 Design Concept
1.5 Size Specifications

1.6 Key Points for Drawing
(1) The layout of the overall picture should be reasonable, grasping the size ratio of the jewelry according to the distance in the picture.
(2) Pay attention to the mutual blending and penetration of colors.
(3) When drawing gemstones, pay attention to the expression of the cutting effect.

Copywrite @ Sobling.Jewelry - Egyedi ékszergyártó, OEM és ODM ékszergyár
1.7 Drawing Steps

Step 01 Start from partial sections. First sketch the necklace pendant’s general contour with a pencil as reference.

Step 02 Draw the necklace chain’s contour based on overall proportions and compositional positioning.
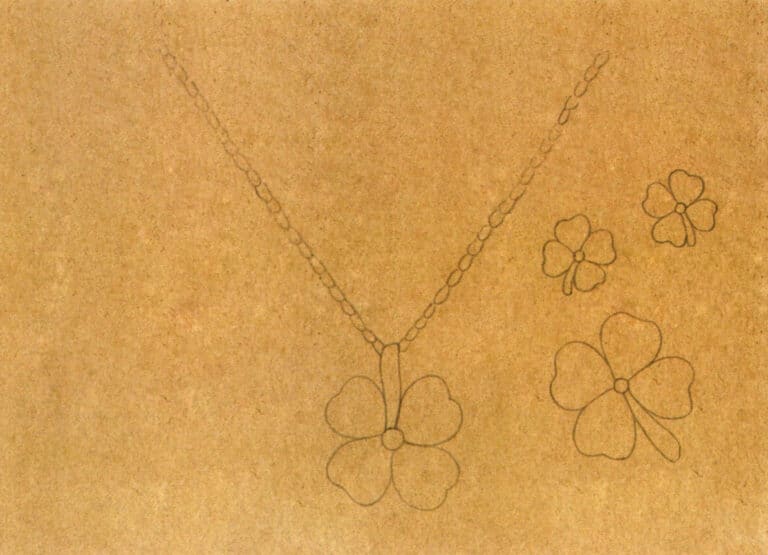
Step 03 Sketch the earring and ring’s front contours in the right blank area, maintaining consistent clover element shapes.
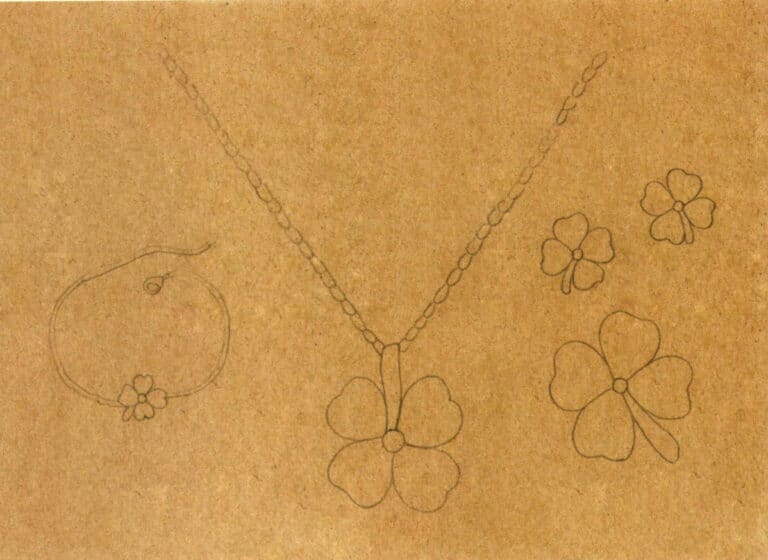
Step 04 Finally, outline the bracelet on the left to complete the composition.
Tippek
The main purpose of the pencil sketch is to make it easier for later watercolor coloring, so the pencil sketch should be light; do not draw too heavily, just enough to see the outlines.
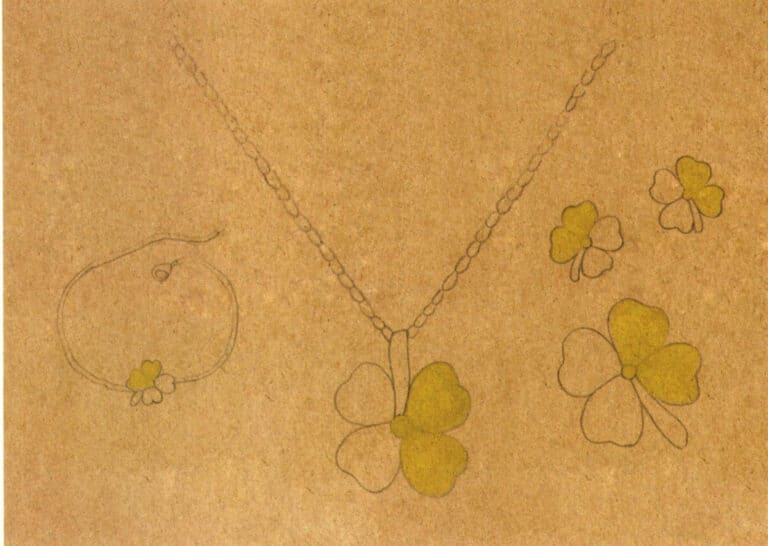
Step 05 Wet the leaf sections with a watercolor brush. Apply a diluted base layer with medium yellow after moisture absorption.
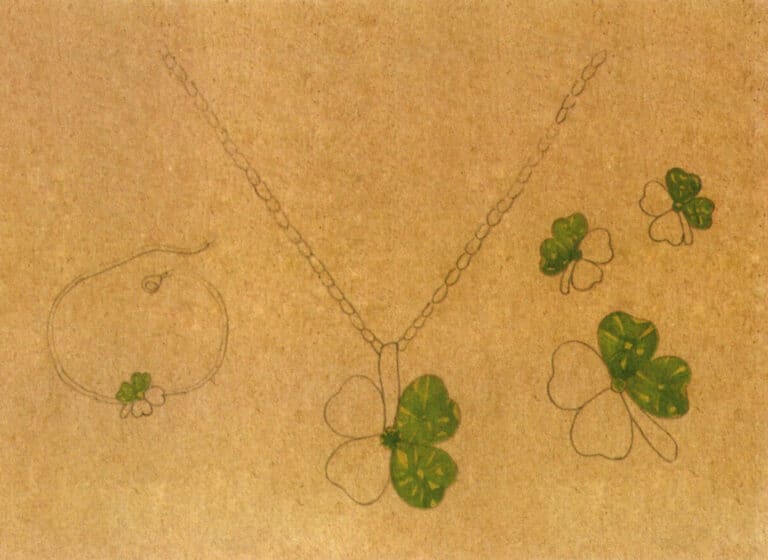
Step 06 Once dry, layer sap green for the second wash, reserving highlights from the previous layer.
Tippek
The facets and roundness of the gemstone material are quite strong, so when layering, it needs to be clean and neat. Therefore, wait until the surface is completely dry to avoid color bleeding when layering colors.
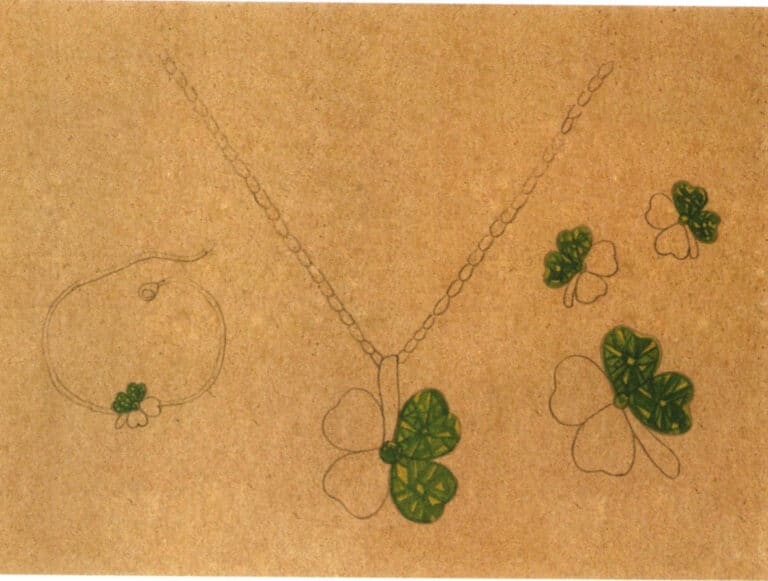
Step 07 Mix emerald green with cerulean blue to paint gemstone shadows, intensifying light-dark contrast.
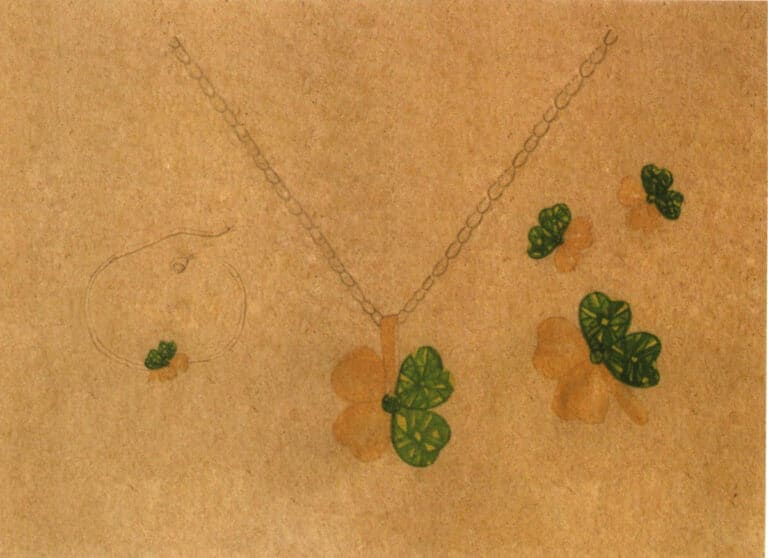
Step 08 Dilute yellow ochre with water to apply the clover’s metallic leaf base color.
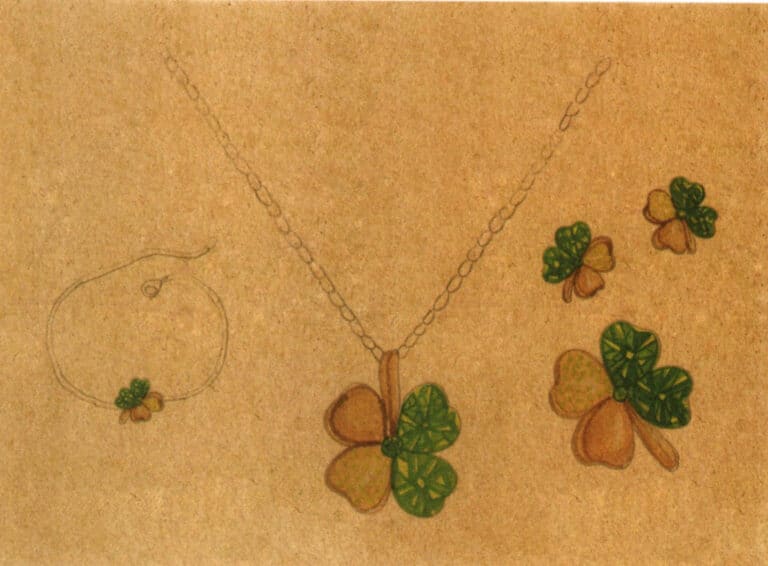
Step 09 Use a small watercolor brush with burnt umber to define metallic leaf shadows and thickness. Dot small diamonds’ base color with medium yellow and sap green.
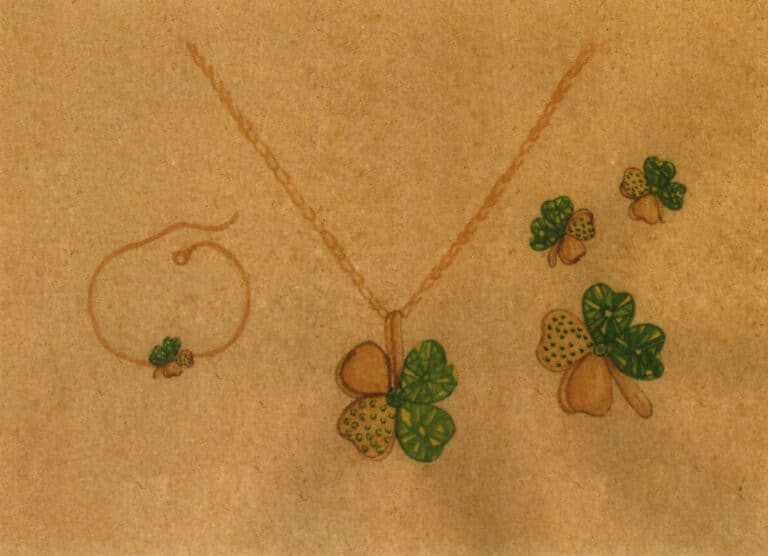
Step 10 Apply yellow ochre to necklace/bracelet chains. Accent small diamonds’ shadows with emerald green.
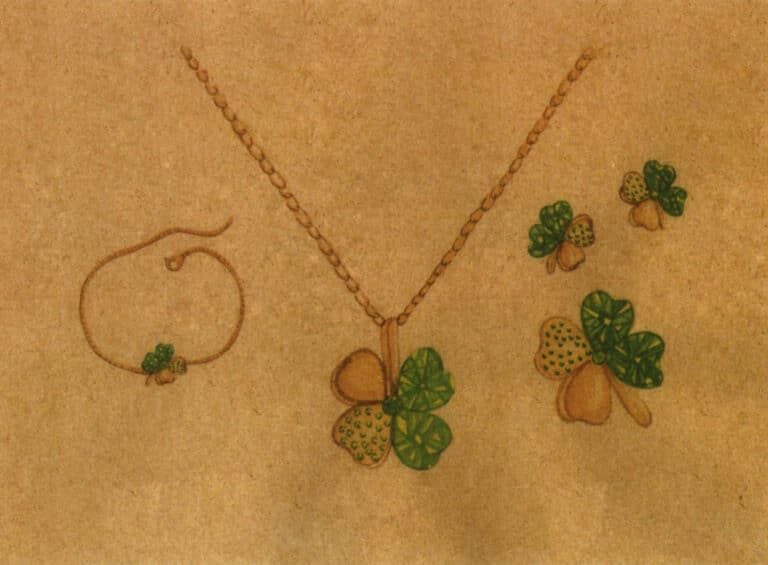
Step 11 Define metal chain shadows with burnt umber. Leave gaps in lines to suggest depth and spatiality.
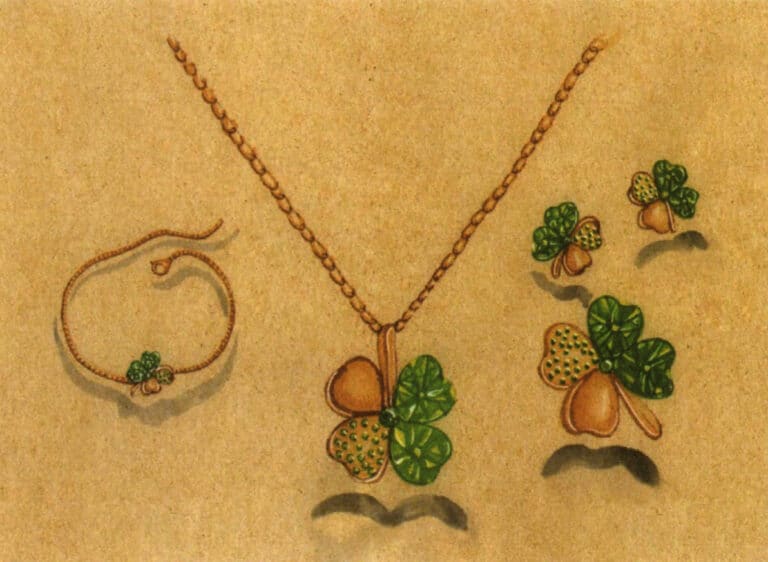
Step 12 Paint cast shadows with Payne’s grey. Highlight jewelry reflections with white pigment using a liner brush. Adjust and complete the artwork.
2. "Eternal" Theme Three-Piece Jewelry Design
2.1 Theme and Associations
“Eternal” refers to lasting existence, not perishing, expressing nostalgia and retention for beautiful things. It is a vivid and imaginative theme, allowing for a wide space for creative thinking. So, how should the “Eternal” theme be presented in jewelry design? Next, we will associate and analyze this theme to help everyone initially conceptualize the content they want to express.
Generally, beautiful things in nature easily deteriorate and disappear, cycling with time changes. Therefore, elements from the natural world are the best choice for the theme of “eternity.” It can be a certain type of flower, a certain type of fruit, or even a certain type of insect. The specific application can be determined based on the form and effect one wants to express, establishing the main design elements.
2.2 Theme Elements
These elements play a key role in jewelry design. They can influence jewelry design in shape, texture, color, craftsmanship, and emotional expression. They can systematically and comprehensively unify the design effect and style, making the work appear neither monotonous, chaotic, nor uninteresting, thus enhancing the visual experience.
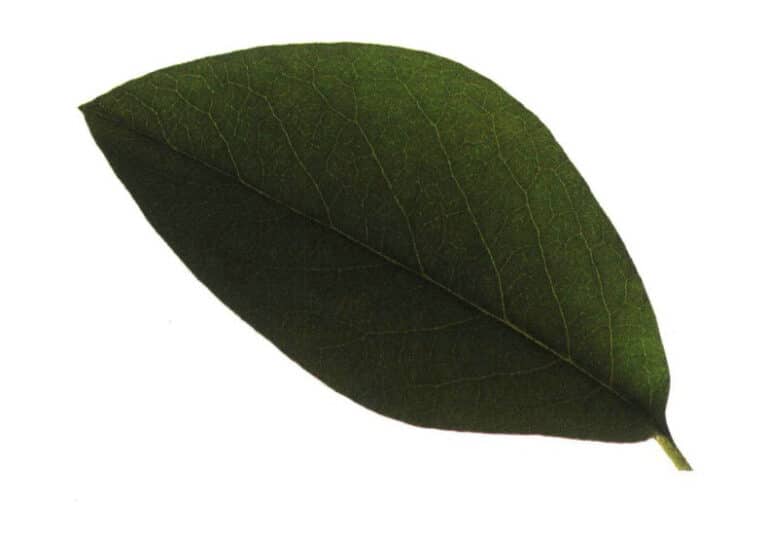
This case uses “leaves” as the theme element, adopting the shape of oval leaves, widest in the middle, with rounded tips and petioles. The leaf shape, symbolizing life, simplicity, dedication, and hope, is made into jewelry, allowing the beautiful meaning of the leaves to endure, thus echoing the theme.
2.3 Material Selection

2.4 Design Concept

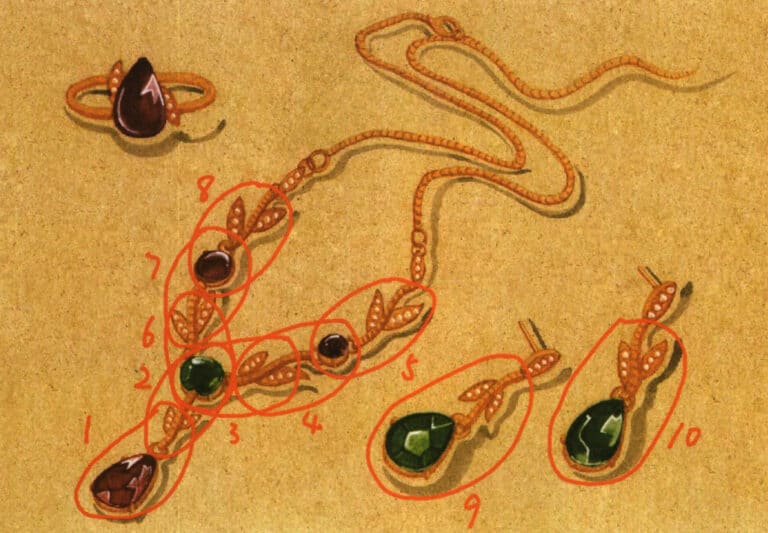
2.5 Size Specifications

2.6 Drawing Key Points
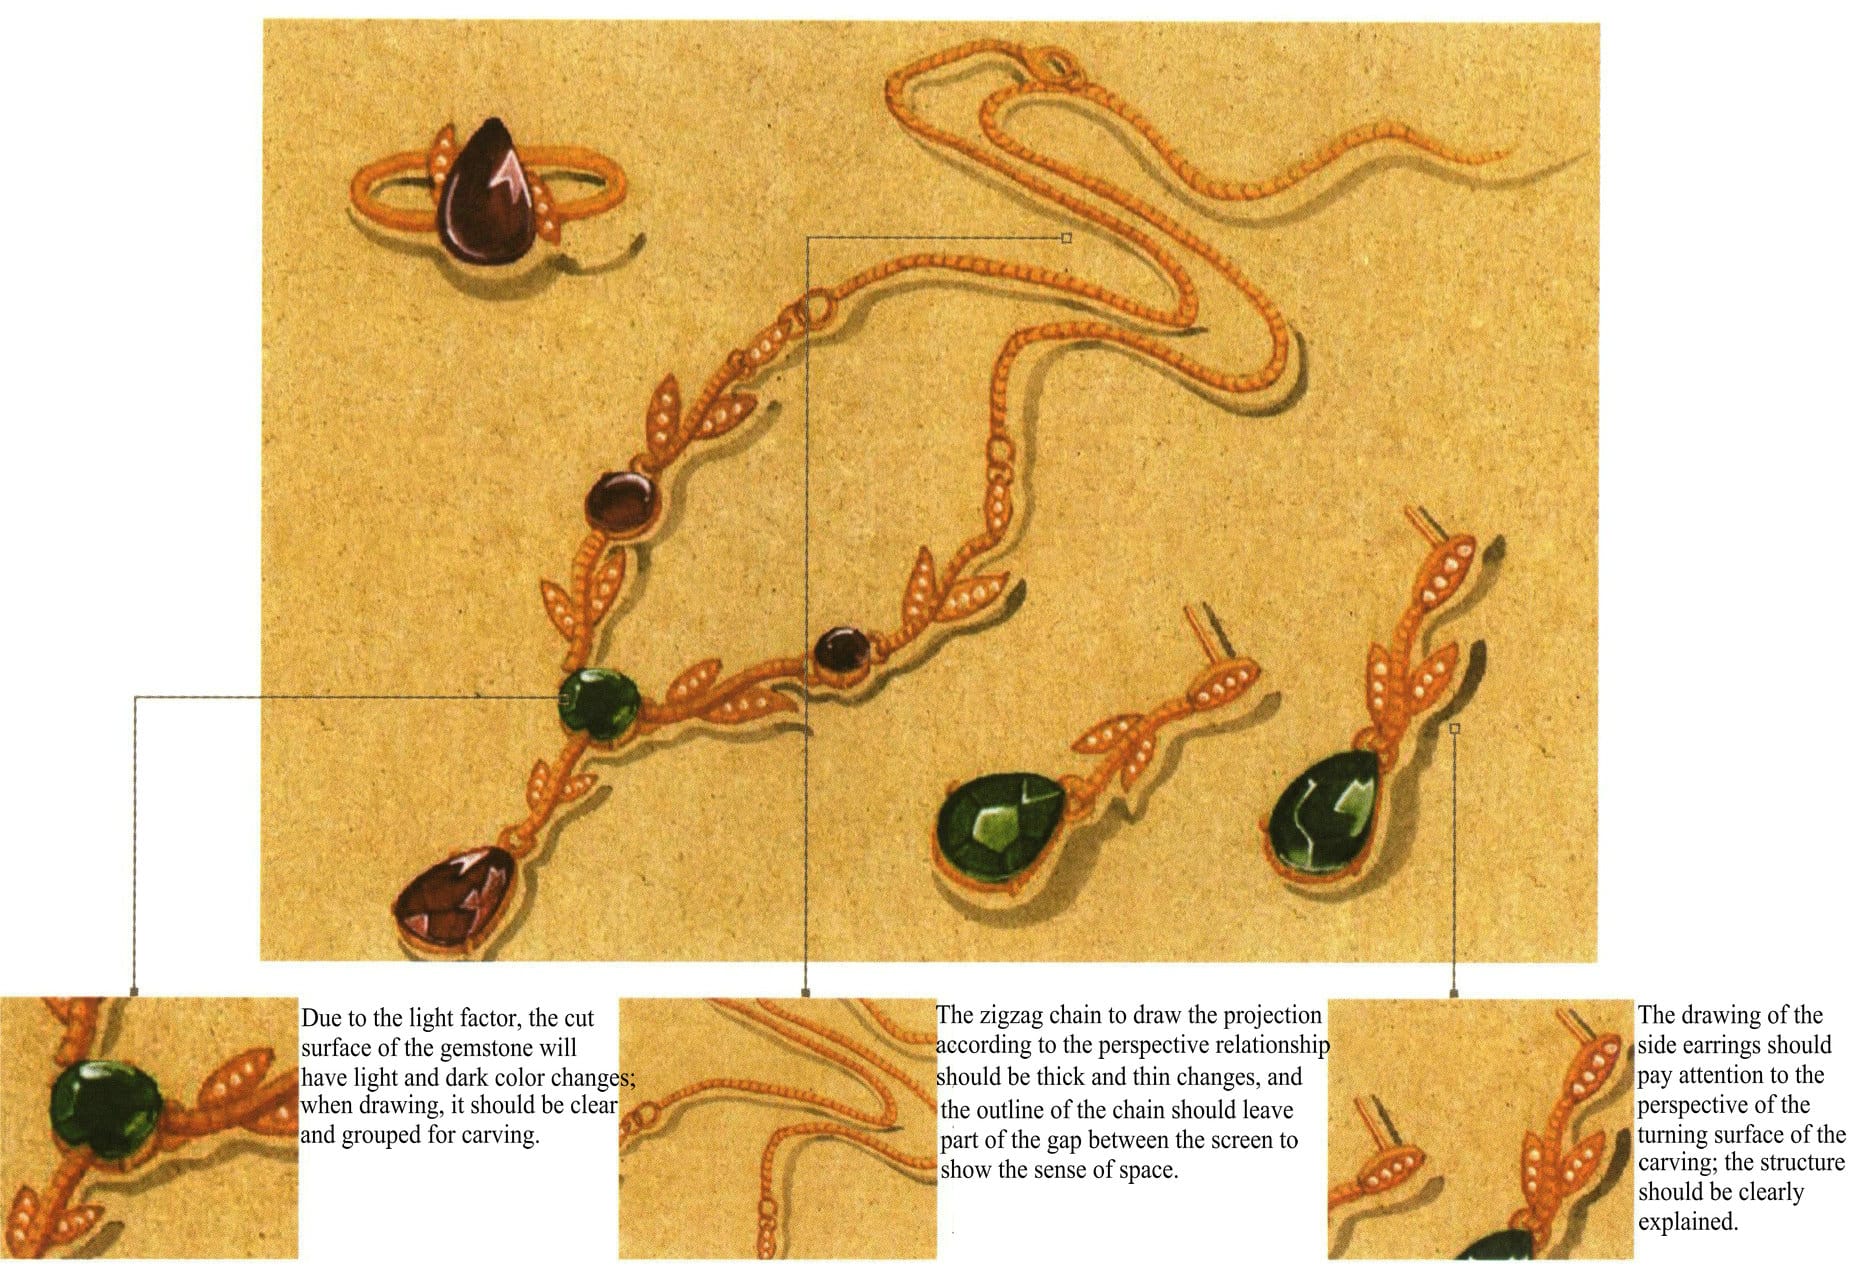
(1) Carefully observe and analyze the shape of the gemstone facets, the internal structure, and the relationship between light and shadow.
(2) Pay attention to grasp the external characteristics of jewelry, and the perspective relationship must be accurate.
(3) The direction of the leaves used on earrings and rings should vary; it should not be too uniform or similar. Otherwise, it will appear stiff.
2.7 Drawing Steps
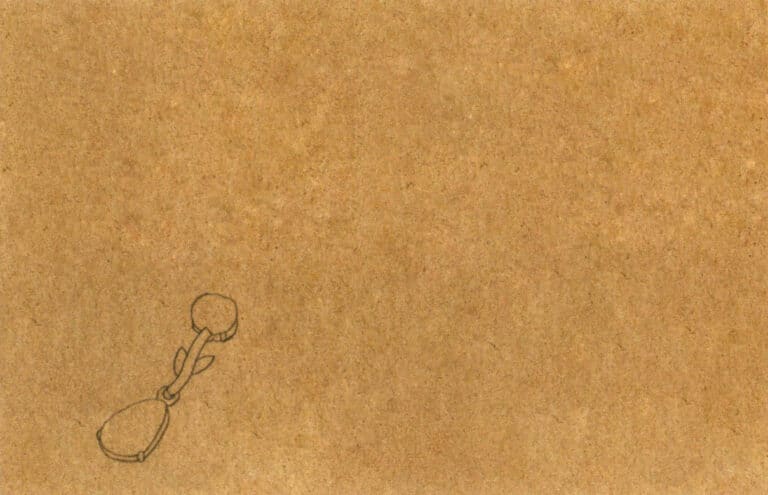
Step 01 Determine the necklace’s position on paper. Start from partial sections to sketch the pendant’s contour as reference.
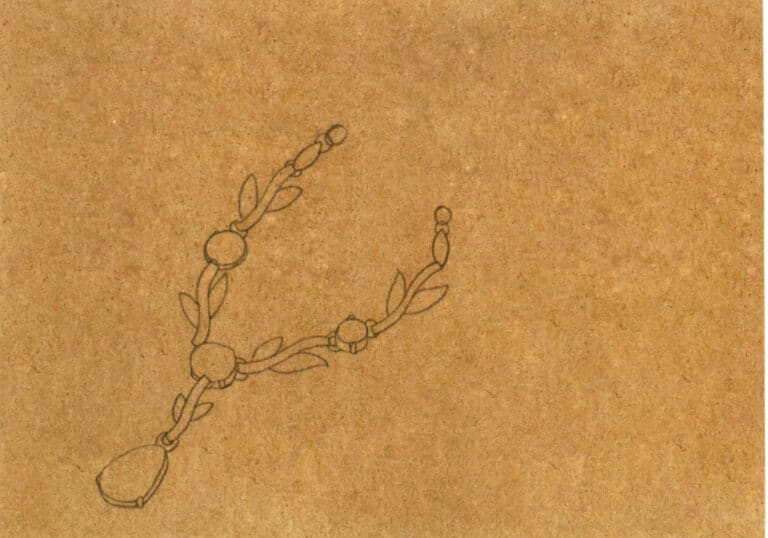
Step 02 Based on the pendant’s outline, draw floral branch contours with a pencil, maintaining characteristic shapes.
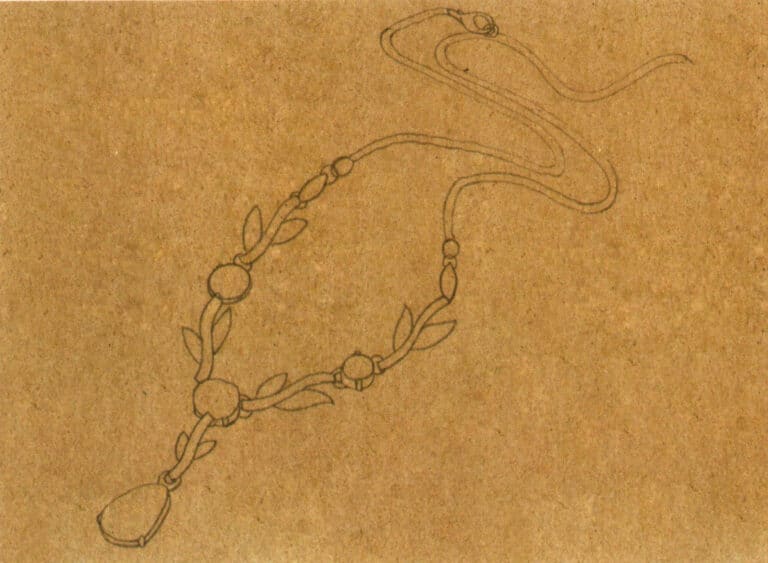
Step 03 Sketch the remaining chain with loose, dynamic curves for rhythmic beauty.
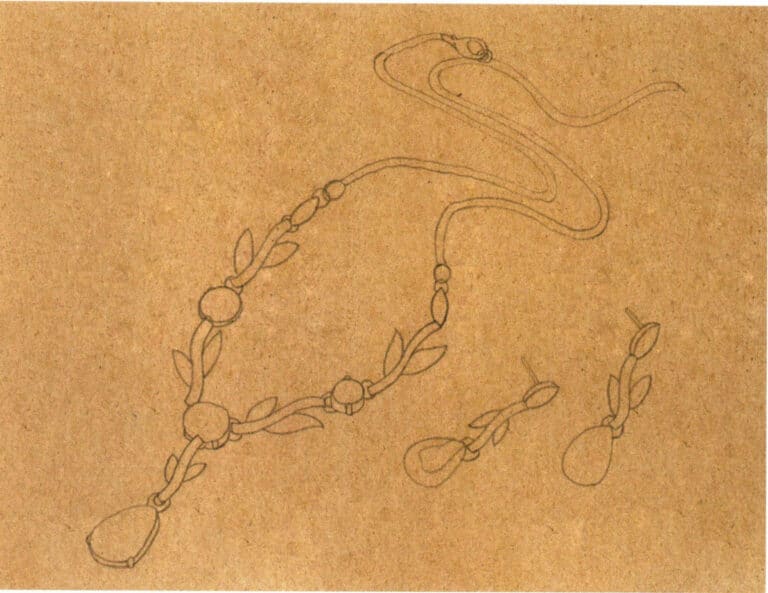
Step 04 Draw the earring’s contour in the lower-right blank area, adjusting perspective for lively composition.
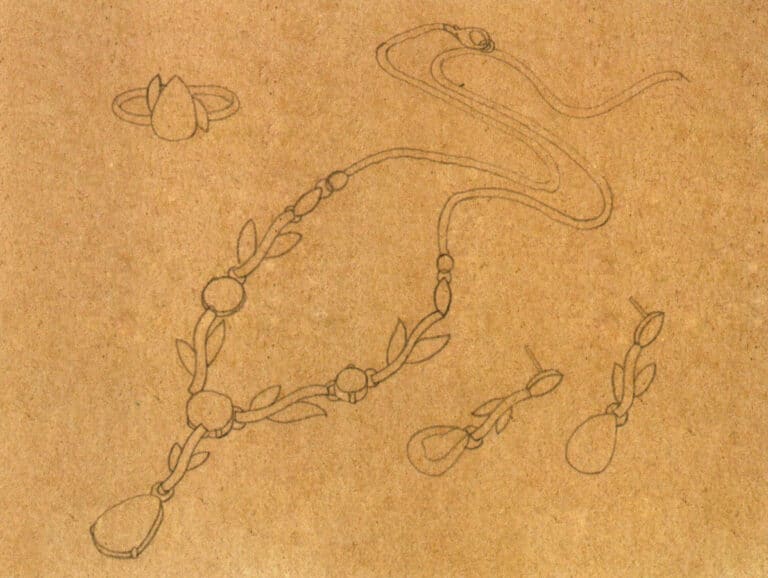
Step 05 Outline the gemstone ring in the upper-left blank area, ensuring accurate perspective and structural features.
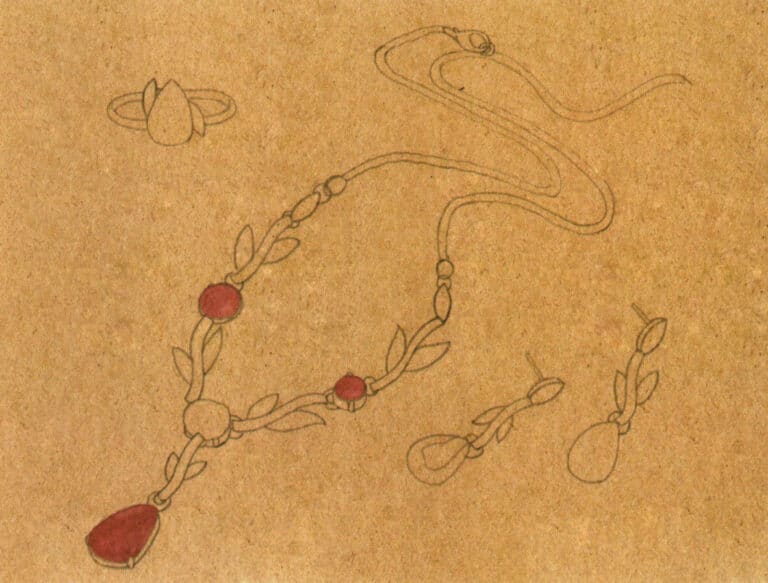
Step 06 Wet the ruby area. Apply the first layer with rose madder, ensuring smooth gradients.
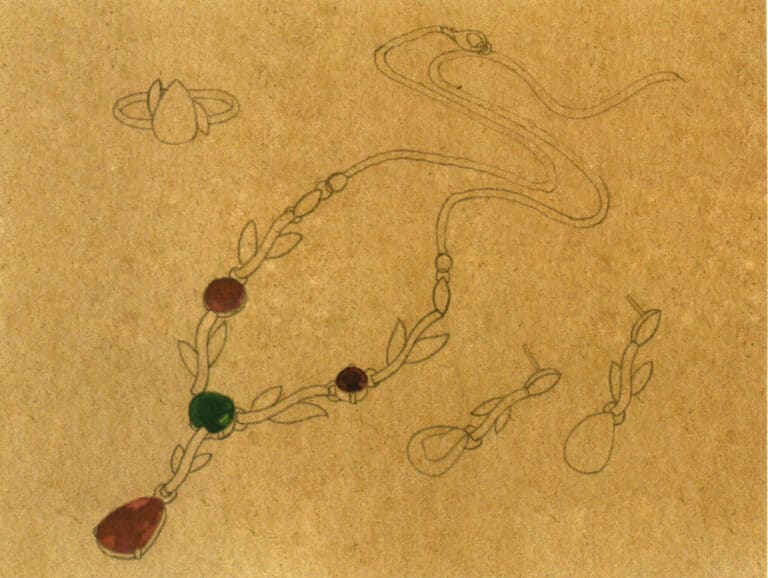
Step 07 Mix rose madder with violet to paint ruby shadows. Apply sap green to emeralds, then deepen shadows with emerald green for contrast.
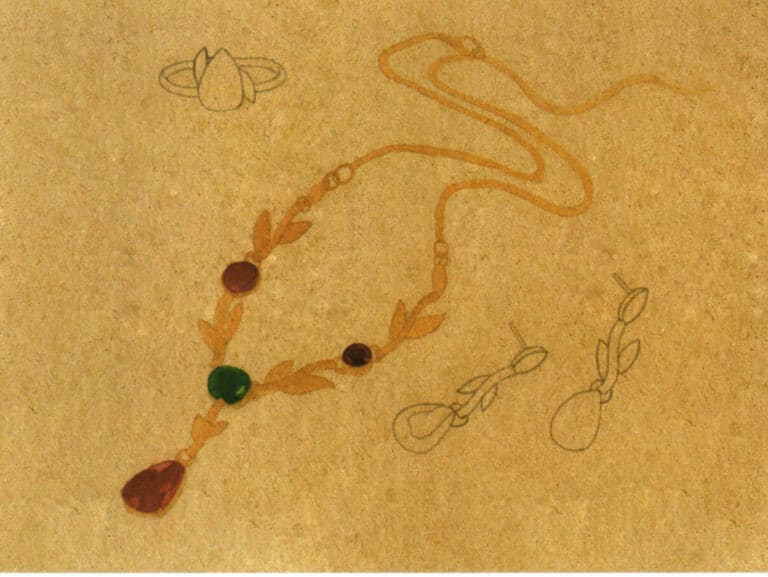
Step 08 Mix yellow ochre and flesh tone for the metal chain’s base layer, keeping colors within outlines.
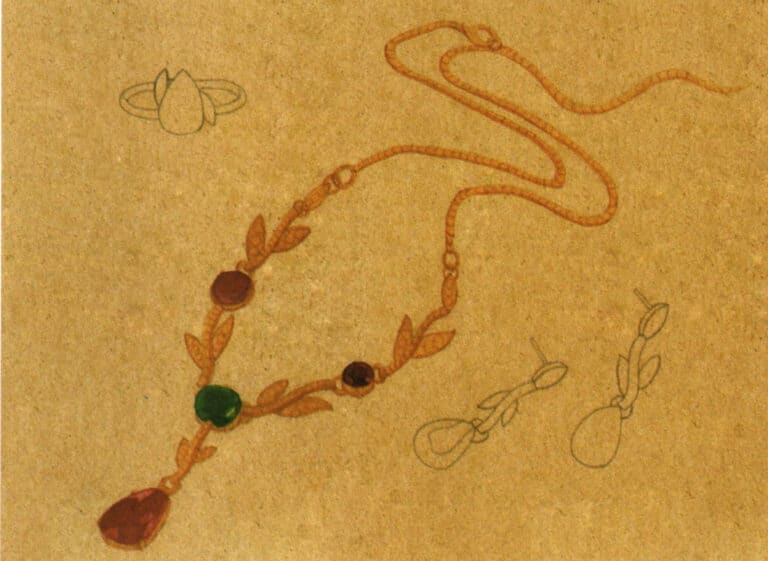
Step 09 Use a liner brush with burnt sienna to define chain shadows and details.

Step 10 Paint earring emeralds with sap green and emerald green. Avoid over-brushing to prevent paper fraying.

Step 11 Apply yellow ochre to the earring’s metal parts.
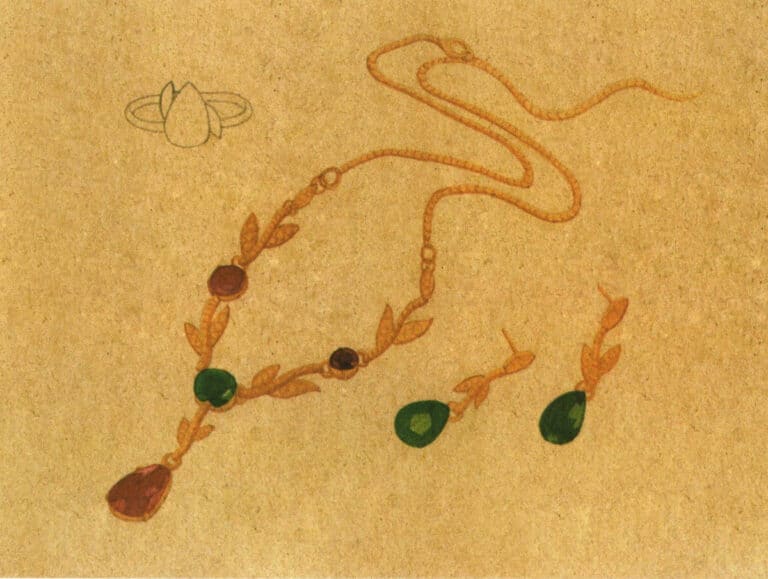
Step 12 Mirror the necklace chain method: use burnt sienna for shadows and details.
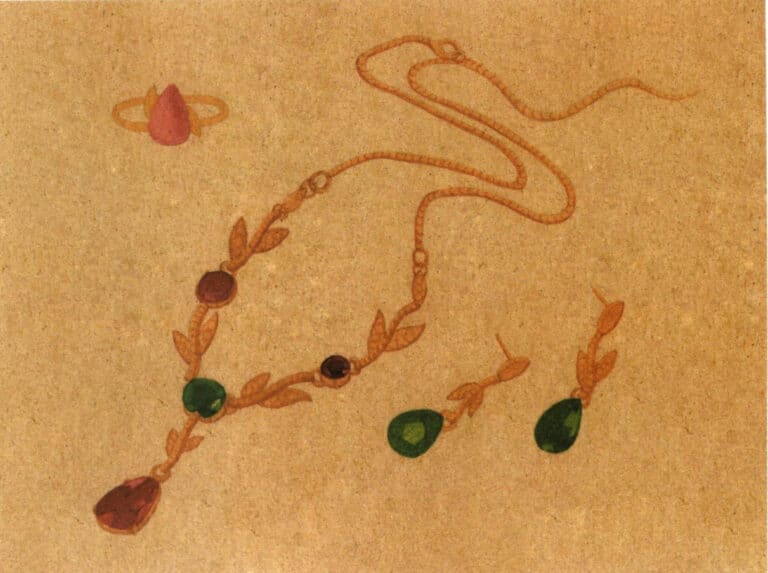
Step 13 Apply base layers to the ring with yellow ochre and rose madder, prioritizing structural mapping before shading.

Step 14 Blend burnt sienna, rose madder, and violet to refine ring shadows.
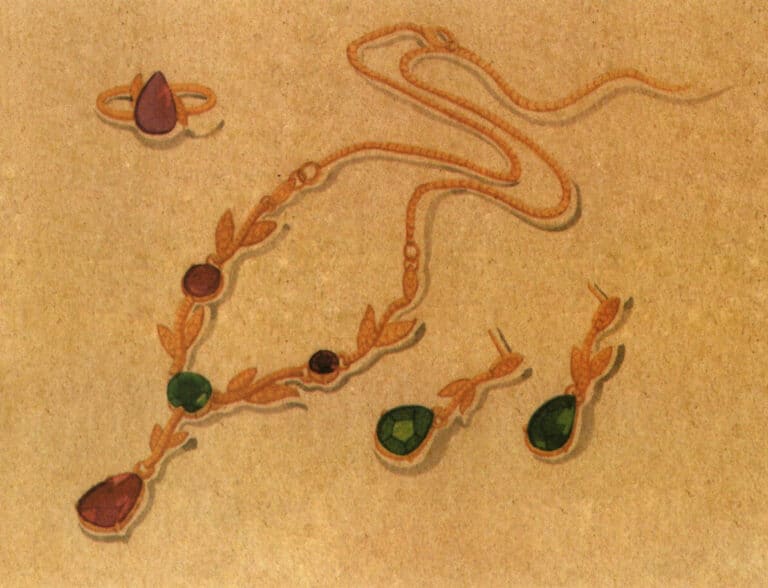
Step 15 Dilute raw umber with ample water to paint jewelry cast shadows, keeping tones subtle.
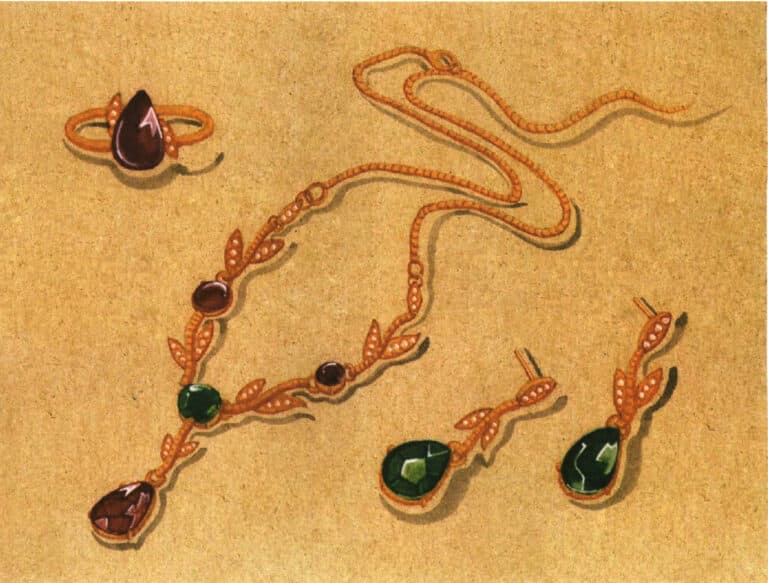
Step 16 Once fully dry, highlight gemstones with white pigment. Adjust and complete the artwork.
Tippek
Tips for getting the screen to dry quickly: use a hair dryer to dry the screen, or you can manually fan it with a piece of paper or a fan.


