What Are the Essential Tools for Metal Chiseling and Repoussé Work in Jewelry Making?
Tools Related to Chiseling and Relief Techniques
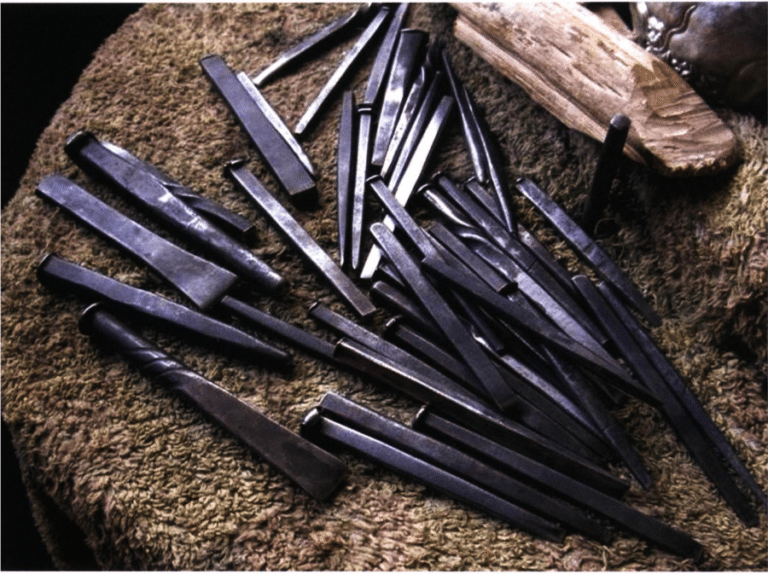
Table 3–1 Comparison of Chisel Names in the Beijing–Tianjin and Yunnan Regions
| Region | Names of Chisel |
|---|---|
| Beijing–Tianjin | Platform chisel, flat chisel, raised chisel, straight-knife chisel, curved-knife chisel, picking chisel, hammer-textured chisel, squeezing chisel |
| Yunnan | Punching head, form-establishing chisel, embossing chisel, linear chisel, curved chisel (nesting chisel), fast chisel, slow chisel |
Table 3-2 Comparison of Techniques in the Beijing-Tianjin and Yunnan Regions
| Region | Raising (Initial Forming) | Shaping | Flattening (detail refinement) | Hollowing |
|---|---|---|---|---|
| Beijing–Tianjin | platform activation, raising | picking, dropping | thread chisel, flying chisel | stripping, hollow chiseling |
| Yunnan | punching form | pressing floral patterns | line walking, jumping chisel, washing | peeling |
Obsah
Section I Chisels
1. Chisel Materials
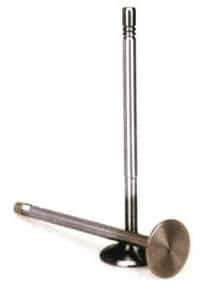
1) Valve steel
Valve steel (Fig. 3-1) is usually 40Cr, 4Cr9Si2, and 23-8N domestically. After quenching, valve steel gains increased stiffness and strength, making it more durable. It is commonly the first-choice material for gouging chisels.
Advantages: high strength, not easily rusted, low wear, suitable for making small, delicate “decorative work.”
Disadvantages: Prone to cracking, low toughness, and high demands on quenching technology.
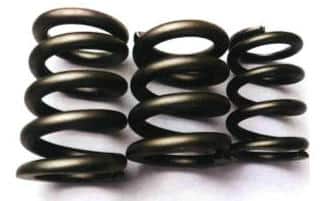
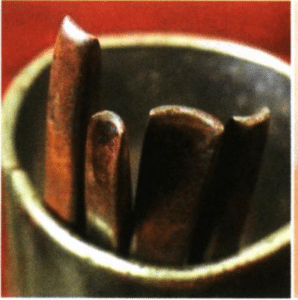
2) Carbon valve spring
Carbon spring steel (Fig. 3-2) commonly used grade is 65Mn and 60Si2CrA. Carbon valve spring has good machinability and, after heat treatment, can achieve high strength and good wear resistance, making it the preferred material for making chisels.
Advantages: Has excellent force-transmission properties and can withstand the heavy impact forces during forming.
Disadvantage: Prone to rust.
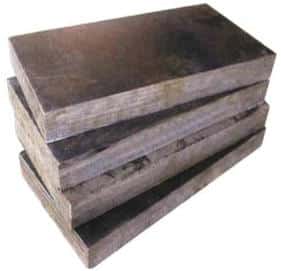
3) Steel plate
The steel plate (Fig. 3-3) is generally made of No. 45 steel. This steel is a high-carbon steel with essentially no alloying elements; the carbon content is generally 0.42%–0.50%, and the manganese content is 0.50%–0.80%.
Advantage: It is the most commonly used material for chase tools and is easy to quench.
Disadvantage: Easily rusts.
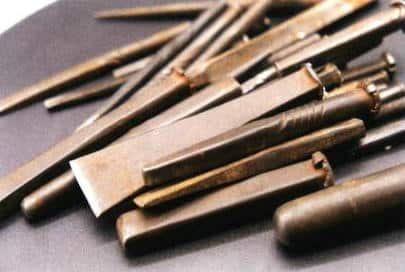
2. Classification of Chisels
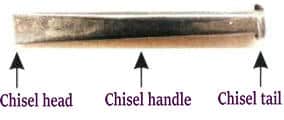
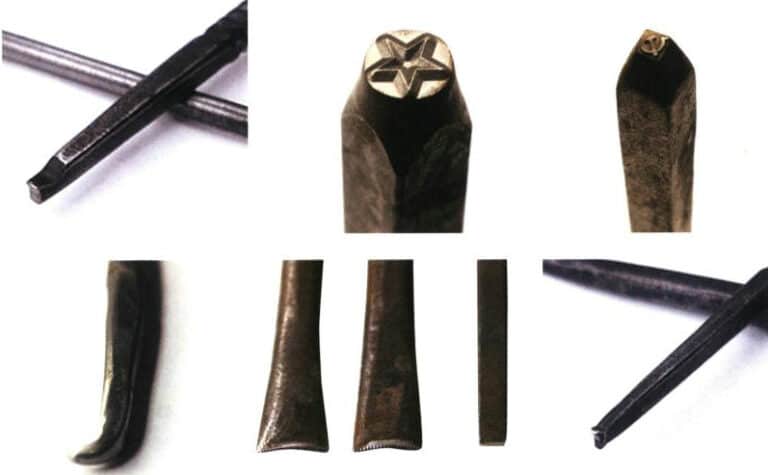
Chisel head: the part that contacts the surface of the metal being chiseled. Different chisel head shapes determine the chisel’s type and function.
Chisel handle: the hand-held part; its length depends on the user’s gripping habit and the size of the workpiece. Some craftsmen habitually shape the mid-to-rear part of the handle into a knob to increase friction between the fingers and the chisel during work.
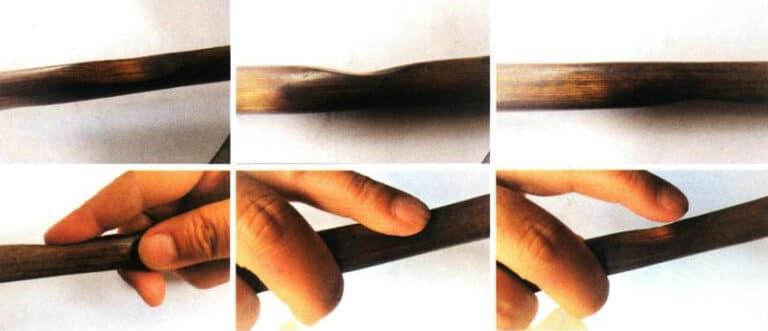
Chisel tail: the part struck by the hammer. By the degree of metal curling on the chisel tail, we can tell which chisels are used frequently and infer the techniques or styles the craftsmen excel at. When quenching chisels, the tail is generally not hardened to facilitate force transmission.
I have accordingly classified chisels to make them easier to understand. To craftsmen, chisels are part of their bodies; through long periods of working together, they gradually develop their own distinctive characteristics. Moreover, because of differences in engraving styles, cultural customs, and intended uses across regions, distinct regional chisel cultures have emerged. In addition, there are many chisels, and their names and techniques are varied and complex; this book collects them as comprehensively as possible and continues to refine that collection.
Here, I divide chisels into four main categories according to the workflow: chisels used to establish forms (form-establishing chisels), chisels used to shape forms (form-shaping chisels), chisels used for fine engraving (fine chisels), and chisels used for hollowing out (hollowing chisels). The differences among these four types mainly lie in the size, shape, and function of the chisel heads. But whether they are form-establishing, form-shaping, or fine chisels, their heads are basically variations on the three basic forms of “point,” “line,” and “plane,” which also conform to the basic principles of modeling.
1) Form-establishing chisels
Establishing the form is generally the first step in the engraving process. Form-establishing chisels are generally larger in size and can be used to create effects of high and low relief. Their heads are thick and rounded; the typical cross-sectional area is around 1 cm², with the maximum reaching about 3 cm².
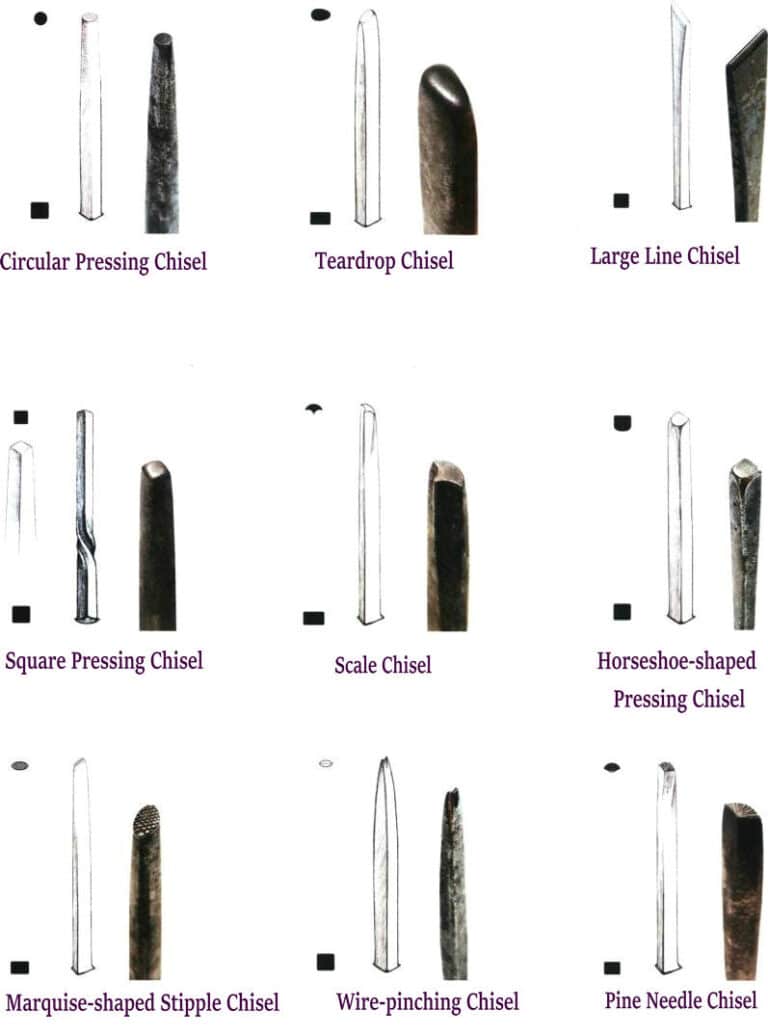
① Chisels with “dot” or “plane” as the basic shape include the round punch (Fig. 3-6), the teardrop chisel (Fig. 3-7), and the pillow-shaped stamping chisel (Fig. 3-8).
② Chisels with “line” as the basic shape include the slow-line chisel (Fig. 3-9) and the curved chisel (Fig. 3-10).
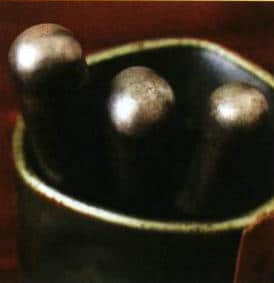
Figure 3-6 Round punch
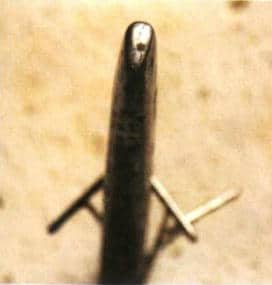
Figure 3-7 Waterdrop Chisel
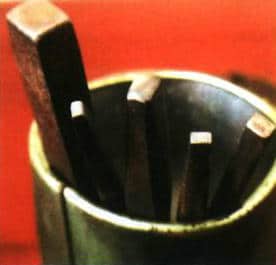
Figure 3-8 Pillow-shaped Press Chisel
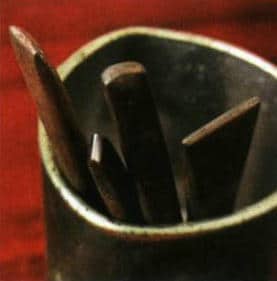
Figure 3-9 Slow-line chisel
2) Form-shaping Chisels
From shaping is usually the intermediate stage of the chasing technique; it is the phase of creating concrete forms. Therefore, shaping chisels are the type used for the longest time, most frequently, and in the greatest variety during the entire chasing process—mainly various shapes of embossing chisels. The cross-sectional area of shaping chisels is usually around 0.6 cm². Specific dimensions depend on the chasing style, so it is common to have chisels custom-made for a particular pattern’s shaping.
① Chisels with the “dot” as the basic form include dot chisels.
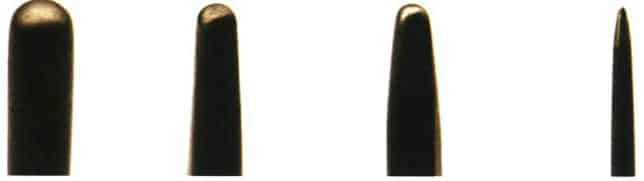
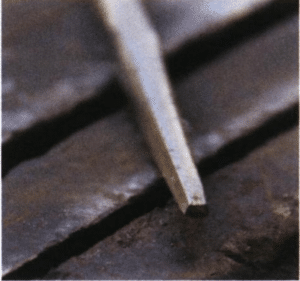
② Chisels with the “line” as the basic form include quick and slow line chisels (Figures 3–11, 3–12), and quick and slow curved chisels (Figure 3–13). “Quick” and “slow” describe the sharpness of the chisel head: the quicker, the sharper the head, and the clearer the formed shape when struck. When a quick chisel’s head edge is sharp, it can also be used for cutting out shapes, for trimming. Slow chisels have duller head edges—the slower, the blunter the head—producing fuller shapes when struck and making them less likely to damage the metal surface; they are often used for high-relief chasing.
③ Chisels with the “plane” as the basic form include various embossing chisels (Figure 3–14).
④ Gilding can use the angled chisel (Fig. 3-15).

3) Fine Chisel
Chisels used for fine chisel work are collectively called fine chisels. Fine chisels are generally used to chisel very delicate patterns or detailed modeling and are usually employed in the final stages of chased decoration. After the basic shaping of the ornament has been completed, the craftsman uses smaller, more elaborately shaped chisels to perform the final fine finishing of the details. The cross-sectional area of these chisels is generally around 0.3 cm². In the northern regions, chased decorative works are mostly exquisite and delicate; craftsmen consider the rendering of the ground pattern to be very important, and thus, many chisels with brocade-ground patterns on the heads appeared in the north, which can be called stamp chisels (brocade-ground chisels).
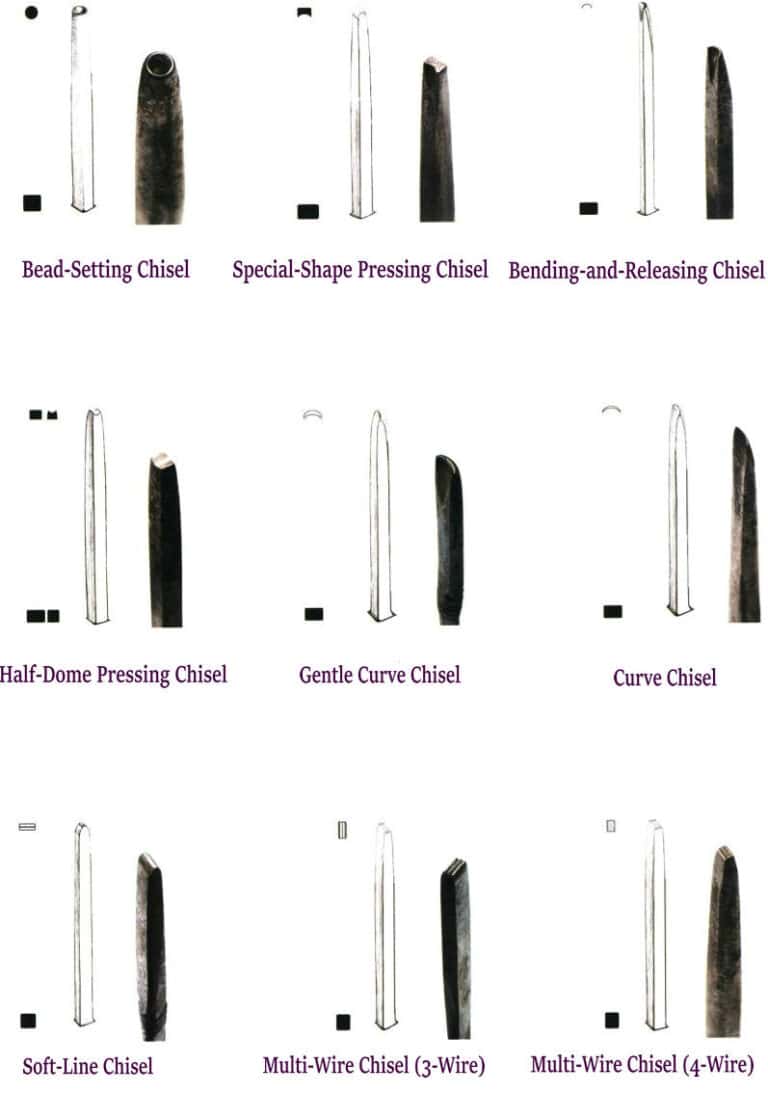
① Chisels with the “dot” as the basic form include the bead chisel and the dot chisel.
Bead chisel: In the north, this type of chisel is called yuzi di and is often used to work background patterns and to carve shapes such as eyes and water droplets (Fig. 3–16). Its chisel head outline is usually a perfect circle, recessed inward; the size varies depending on the subject being depicted. Modern chasing techniques are more diverse, and the bead chisel is no longer confined to carving specific patterns—it can also be used to render different textures and effects.
Dot chisel: Used to punch dots and create texture. The chisel head is point-shaped (Fig. 3–17).
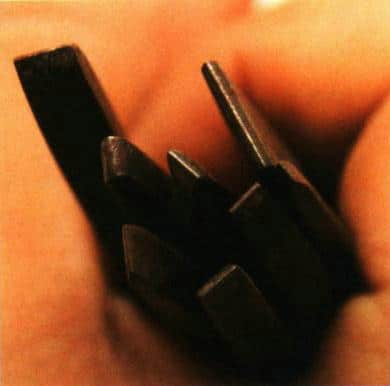
② Chisels with the “line” as the basic form include quick-line and slow-line chisels, quick- and slow-bent chisels (also called shape chisels), and grouped-wire chisels.
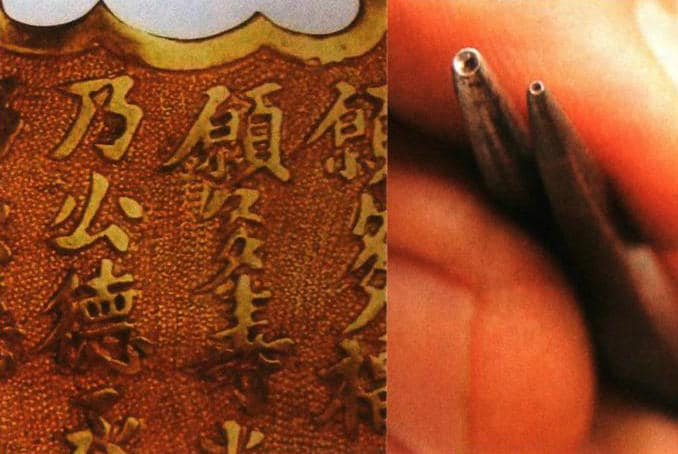
Multi-line chisels: These chisels are mostly used to shape multi-line forms. The chisel head generally has 3~4 ridge lines (Fig. 3–18), and can be called three-line chisels, four-line chisels, etc. Size depends on the specific subject being rendered; the minimum cross-sectional area is about 0.15 cm², and the fine lines cut by them resemble silk.
③ Chisels with a “flat” face as the basic shape include various embossing chisels and patterned chisels.
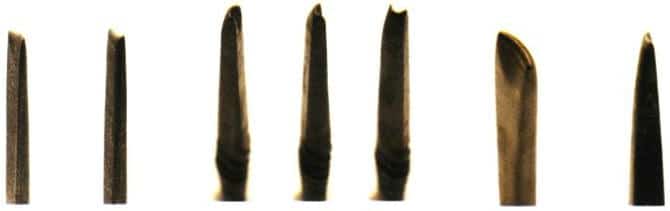
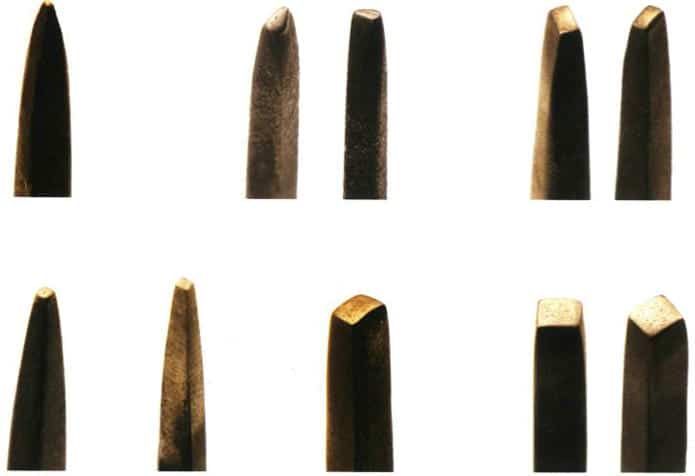
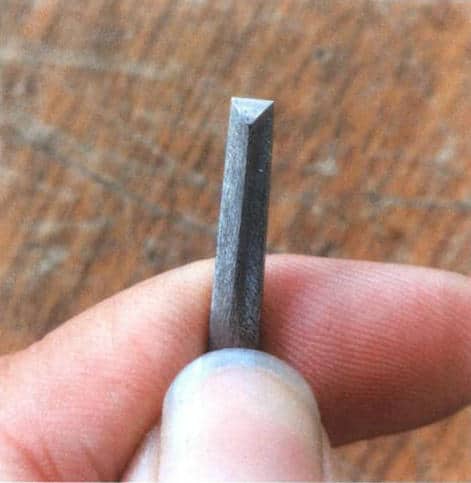
Embossing chisels: These chisels have plain heads without patterns and are frequently used for shaping forms. They come in different sizes; the cross-sectional area of the chisel head is 0.2 ~0.4 cm². Common types include trapezoidal embossing chisels (Fig. 3–19), slanted chisels (offset mouth, Fig. 3–20), marquise shaped stamp chisels (Fig. 3–21), and teardrop chisels (Fig. 3–22).
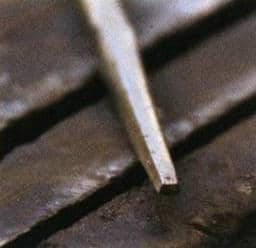
Figure 3-19 Trapezoidal embossing chisel
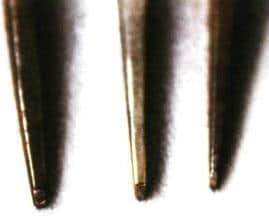
Figure 3-20 Slanted Chisel
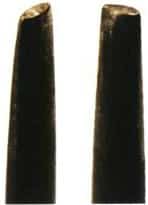
Figure 3-21 Marquise-shaped Punch
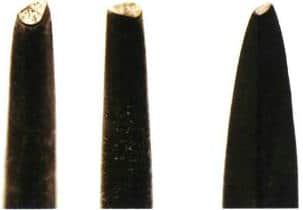
Figure 3-22 Teardrop Chisel
Common embossing chisels include clamp chisels (Fig. 3–23, Fig. 3–24), scale chisels, pine-needle chisels, seed-dot chisels, jujube-flower chisels, scroll-pattern chisels, and others.
Scale chisels (Fig. 3–25) are often used to depict the bodies of dragons or fish in traditional patterns; the size of the chisel head depends on the specific subject being rendered. In modern chiseling craft, scale chisels are commonly used to represent a variety of textures (Fig. 3–26).
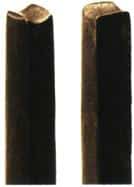
Figure 3-23 Chisel (large)
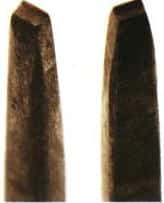
Figure 3-24 Chisel (small)

Figure 3-25 Scale chisel
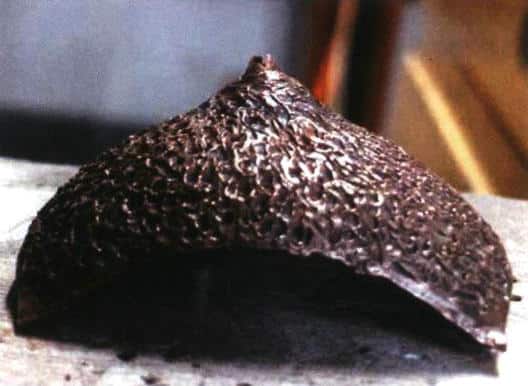
Figure 3-26 Texture rendered by the scale chisel
Pine-needle chisel (Fig. 3–27) is often used to depict the needles of pine trees in traditional motifs. Its chisel head is fan-shaped with ridge-line detailing and can also be used to create texture.
Seed-dot chisel (Figs. 3–28, 3–29) is used very frequently. The chisel head’s surface displays seed-like dots with variable outlines—circular, pillow-shaped, teardrop-shaped, marquise-shaped, willow-leaf-shaped, etc. Seed-dot chisels are mostly used in the final stages of highly undulating, multi-layered relief carving to finish the background. In multi-layered carvings, influenced by the rich surrounding forms, the background can inevitably suffer indentations during flattening that affect the overall craftsmanship. Traditionally, seed-dot impressions are used visually to both conceal blemishes and, through the diffuse reflection effect they produce, to set off the upper-layer focal elements.
Scroll-pattern chisel: the chisel and the carved pattern are shown in Fig. 3–30.
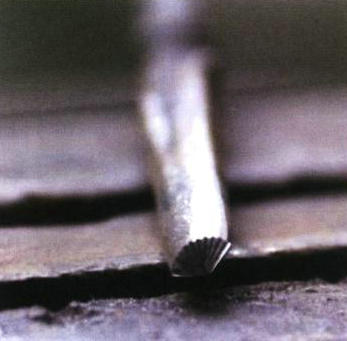
Figure 3-27 Pine-needle graver
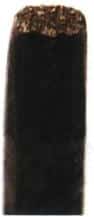
Figure 3-28 Seed-dot chisel (1)

Figure 3-29 Seed-dot chisel (2)
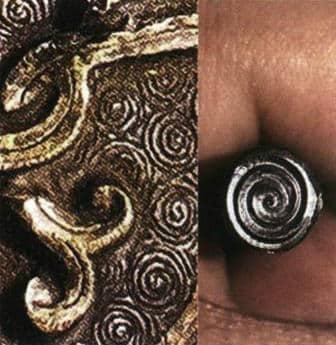
Figure 3-30 Scroll-pattern chiseling
Making Process of Jujube-Flower Chisels Video
4) Hollowing Chisel
These chisels (Figs. 3-31 to 3-33) are used for carving openwork patterns and trimming the edges of cut objects. The chisel heads are usually sharp, and their cross-sections may be straight, curved, circular, etc.
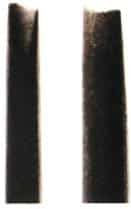
Figure 3-31 Curved-line hollowing chisel
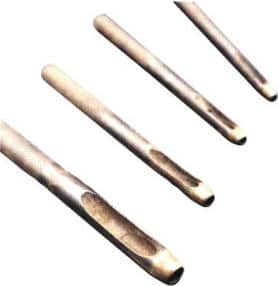
Figure 3-32 Hollowing chisel (round mouth)
Poznámky
A comfortably weighted chasing hammer can often be used for many years, while chisels are generally not only numerous and varied but also subject to wear. A chasing craftsman will often own hundreds of chisels; some may be rarely used, while others are used almost every day.
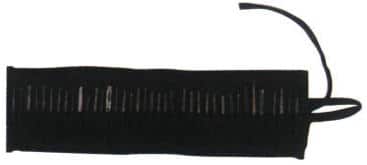
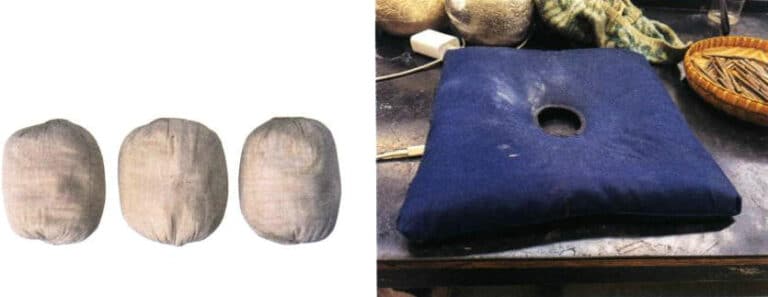
There are significant climatic differences between the north and the south. The south is relatively humid, and metals easily corrode, so effectively protecting the dies is crucial. You can use oil paper or moisture-proof cloth and similar materials to make custom bags to pack the dies (Fig. 3–36).
Kopírování @ Sobling.Jewelry - Výrobce šperků na zakázku, továrna na šperky OEM a ODM
3. Chisel Making Process
3.1 Method for making chisels
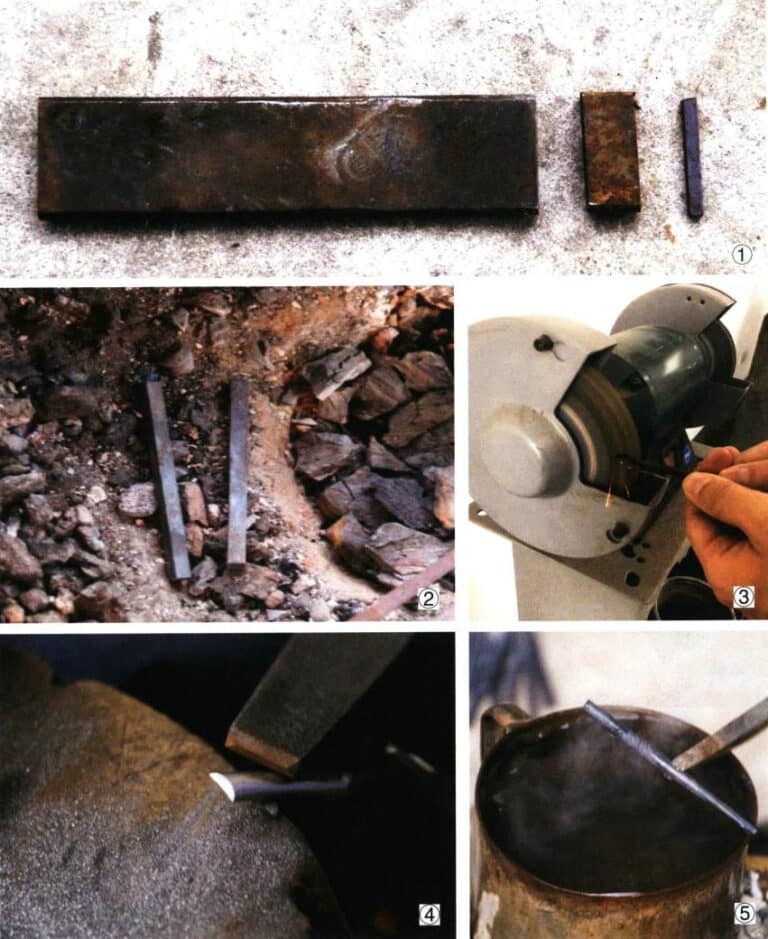
(1) Cut the selected steel plate into small sections (Fig. 3-37①). If it is spring steel, it must be annealed as a whole, straightened, and then the cylinder is forged into a square bar, with a length generally around 10 cm. Forming chisels are made somewhat coarse, while shaping chisels are finer and shorter.
(2) Anneal, and use a file or a grinder to create the rough shape (Fig. 3-37②③).
(3) Use fine files or chisels to refine the detailed shaping of the chiseled relief (Fig. 3–37④). For example, for water-wave chisels, seed-dot chisels, and small scroll chisels, the corresponding chisel is generally used to engrave the required texture onto the finished chisel blank.
(4) Quenching (Fig. 3–37⑤) and polishing.
3.2 Method for making the teardrop chisel
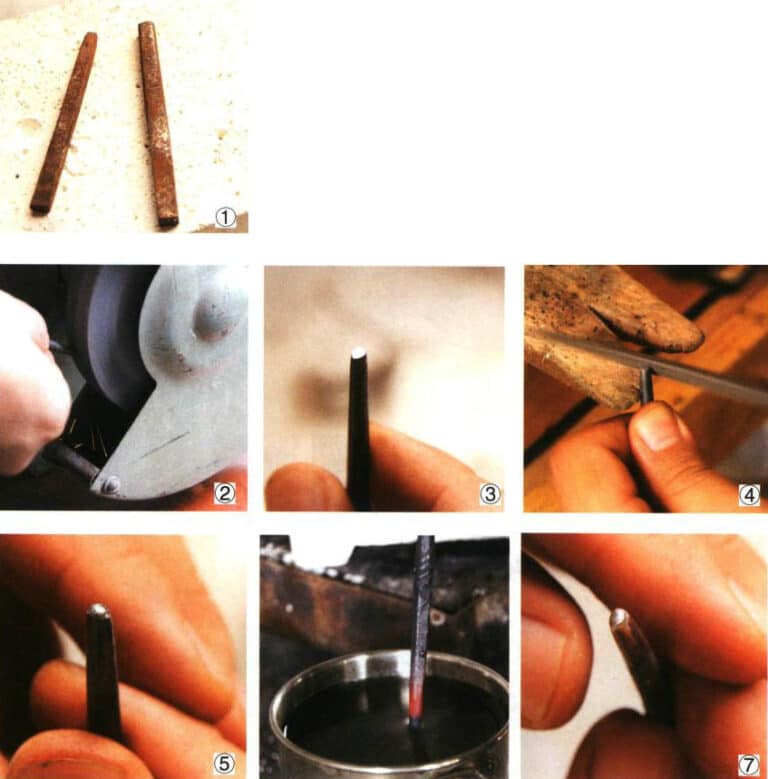
Using a teardrop chisel as an example to show the making process of a chisel.
(1) Select a steel bar of suitable length and thickness, cut it to about 10 cm long, and anneal it (Fig. 3-38①).
(2) Use a large file to flatten the thick end of the steel bar, and draw a teardrop shape on the cross-section of that end with a pencil.
(3) Perform rough shaping on a grinding wheel (Fig. 3-38②③), observing safe operating procedures.
(4) Refine the shape using coarse and fine files (Fig. 3-38④⑤).
(5) Quench and polish the chisel, then test it on a silver sheet (Fig. 3-38⑥⑦).
4. Annealing and Quenching
Annealing: Heat the steel workpiece to a temperature of about 700 °C until the metal surface appears dark red, then allow it to cool naturally; this heat treatment process is called annealing. The purpose of annealing is to relieve stresses in the material, reduce hardness and brittleness, increase ductility, and facilitate subsequent fine machining. Before chasing, the metal to be chased should be annealed to facilitate shaping the pattern. When making chisels, the metal material should also be annealed first.
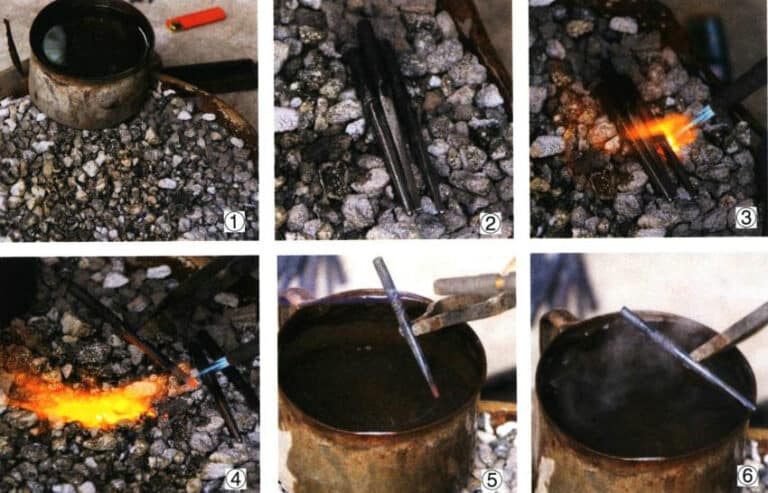
Quenching: After the chisel has been annealed, shaped, and polished to its final required form, it still does not have sufficient hardness and strength to withstand the prolonged impact of hammering and may deform or crack; therefore, the chisel head must be quenched to increase the hardness and wear resistance of the metal workpiece. The quenching steps are as follows.
(1) Prepare cold water or machine oil (Fig. 3-39①).
(2) Place the polished chisel on the workbench (Fig. 3-39②).
(3) You can grip the chisel with long-handled iron tongs and heat the entire chisel evenly at high temperature (Fig. 3-39③).
(4) After preheating the whole tool, concentrate heat on the chisel head until it turns bright white (Fig. 3-39④).
(5) Quickly place the chisel head into cold water or cold oil, keep it there for 2~3 seconds, then take it out immediately and inspect the chisel head; white or yellow, blue-green are preferable (Fig. 3-39 ⑤⑥). A white chisel head is the hardest, yellow is next, and blue-green has moderate hardness, making it the most suitable for chasing and relief.
(6) After the chisels have cooled evenly, they can be used.
(7) File the chisel head with a rasp; if you feel a smooth, unobstructed filing sensation, the quenching was successful.
Quenching Video
Poznámky
① When annealing the chisel, it mostly relies on personal experience; perception of temperature is mainly based on observing changes in the tool, so there’s no need to be fixated on a specific temperature. During annealing, heat until the metal of the blade turns a dark red; there’s no need to keep heating until it becomes bright red.
② When quenching, only the chisel tip needs to be heated to a bright white, like the bright white of a tungsten filament when a bulb lights. Once the tip turns bright white, it can be immersed in cold water or cold oil for quenching. The chisel shank remains annealed, which facilitates transmission of force.
Safety Tips
① When chisels are being annealed or quenched, people nearby should not disturb.
② During annealing and quenching, the chisels are at high temperature; the operator should carry out the entire procedure carefully, calmly, and cautiously to avoid injuring others.
③ After annealing and quenching, the chisels must cool naturally; the operator should inform those nearby to prevent someone from picking them up and getting burned.
Section II Backing and Padding Materials
1. Adhesive
The usage method of the adhesive is as follows.
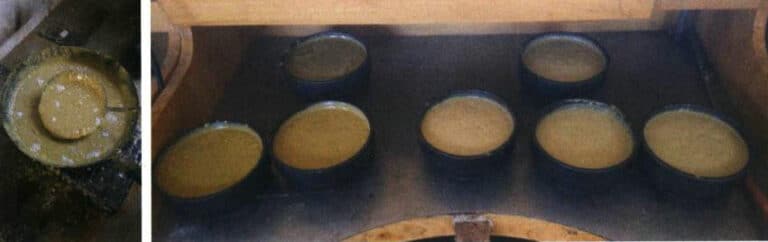
(1) Pour the melted adhesive onto the metal to be chased, and use a low flame to gently heat the metal bit by bit, bringing the metal surface to a certain temperature so the adhesive fully bonds to the metal, expelling air bubbles and preventing hollowness during chasing. For a three-dimensional form, pour the heated, paste-like adhesive into the vessel through its opening until it is filled (the adhesive is generally level with the opening). After the adhesive cools and solidifies, chasing can be performed on the vessel body. For a flat form, lay the gold, silver, or copper sheet onto the adhesive board.
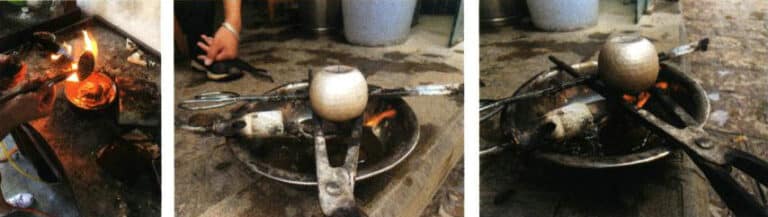
(2) After the chasing is finished, use a low flame or an oven to gradually raise the temperature of the chased metal. For three-dimensional forms, slowly heat the vessel’s opening (Fig. 3–41) so the adhesive gradually flows out through the opening.
2. Lead
Because lead is relatively soft and dense, it is often used as a backing pad in modern chasing and relief work. Still, it also has certain drawbacks: it volatilizes at high temperatures and can harm the human body. In addition, liquefied lead corrodes gold and silver, so a barrier such as lime powder or ink must be applied in advance to gold and silver surfaces. Therefore, lead is commonly used as a backing and fixing material when chasing on copper sheets. The methods of using lead as a backing and fastener are as follows.
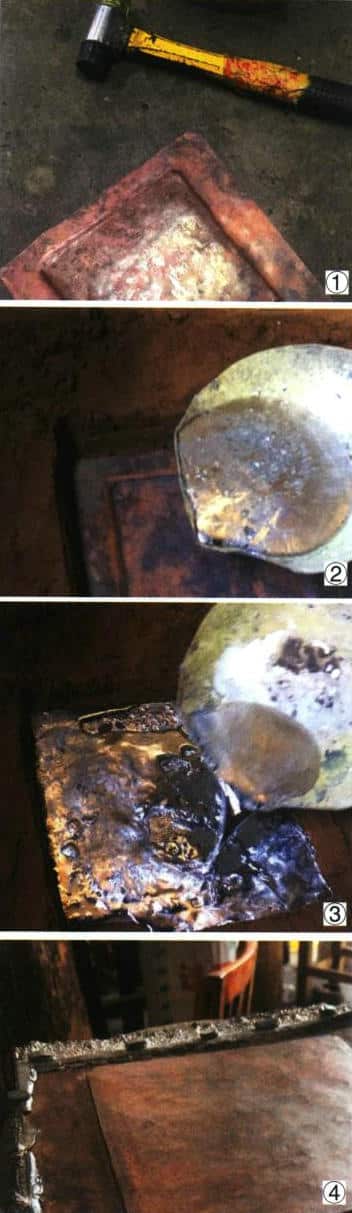
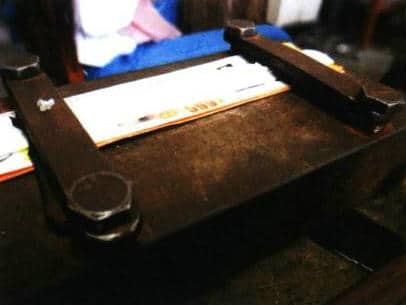
(1) Anneal the red copper sheet, use a forming chisel to punch out the shape to be chased (Fig. 3-42①), and trim the edges of the workpiece to be chased smooth.
(2) Put the lead ingots into the pot, apply high heat directly to the lead ingots, and melt them. Place the metal piece to be chased face up in damp fine sand, leaving some space so that a groove is formed between it and the sand.
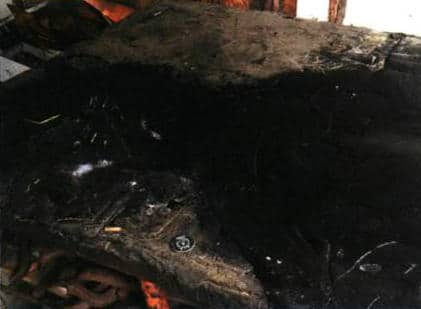
(3) Slowly pour the molten lead into the groove (Fig. 3-42②).
(4) Continue to pour the molten lead slowly until the sand groove is filled level (Fig. 3-42③).
(5) After the lead has cooled, remove it together with the copper sheet and set aside (Fig. 3-42④).
3. Sandbags, Steel Chasing Block, Asphalt
Section III Chasing Hammers
Chasing hammers (Fig. 3–46) come in various sizes and models; you can choose a size according to personal preference. Small hammers are usually around 200 g, while large ones are about 300 g. The hammer shapes differ considerably between East and West: the Western chasing hammer has a larger, nearly cylindrical head on the striking end and a smaller hemispherical head on the other end, whereas the traditional Chinese chasing hammer is not much different from a common hammer, except that the striking end may be either square-headed or round-headed (Fig. 3–47).
Square-headed hammers are typically used when forming the initial shapes in chasing or when forging some detailed forms. Round-headed hammers are generally used for chasing; when using them, you can lightly strike the metal with the rounded face or the side of the head to perform fine chasing. The angle between the handle and the head is a right angle but approximately 85 degrees.

Figure 3–46 Chasing hammers from East and West

Figure 3–47 Square-headed hammer, round-headed hammer
How to hold the hammer: There is no distinction between left and right hand, and no fixed grip; pay attention to the following key points.
(1) When holding the hammer, place your hand on the middle-to-rear part of the handle, using the lever principle with the wrist joint as the fulcrum, which makes it easier to exert force and control the striking strength.
(2) Do not grip the handle with all five fingers tightly together. Chasing and relief emphasizes the force and angle of the hammer head striking the chisel, much like holding a brush in calligraphy and relying on the fingers and wrist to guide the strokes. When holding the hammer, grasp the handle as shown in Figure 3–48, placing your fingers in the corresponding positions to master the angle and method of applying force, and sense the subtlety for yourself.
(3) “Hammer technique” in chasing and relief is very important; it has no fixed rules and depends entirely on experience. Therefore, you must master the speed and pressure of your strikes—urgent, slow, light, heavy—and avoid deliberately aiming at the chisel when striking. Chiseling requires coordination of both hands, steady breathing, clearing the mind, and attentively feeling the force and rhythm of the strikes.
Section IV Other Related Tools

Figure 3-49 Three-jaw scroll chuck
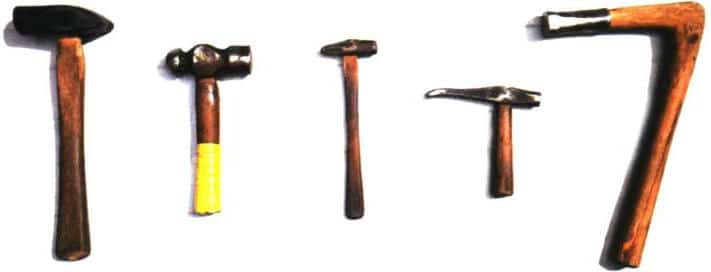
Figure 3-50 Various Common Hammers
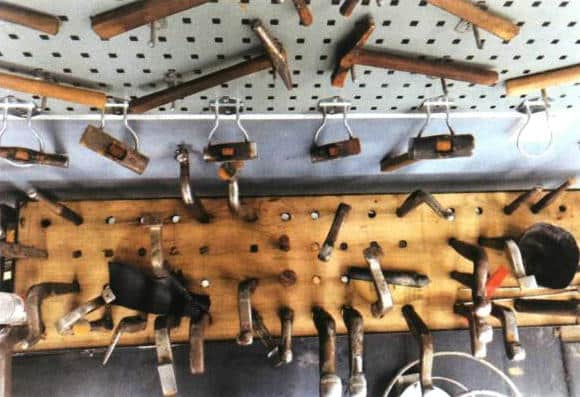
Figure 3-51 Different Types of Anvils
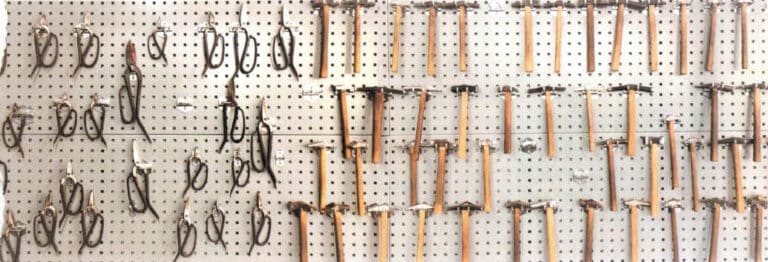
Figure 3-52 Tool Wall
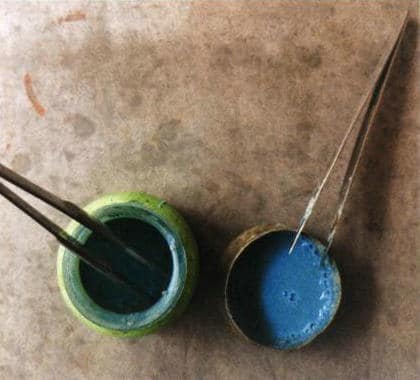
Figure 3-53 Flux
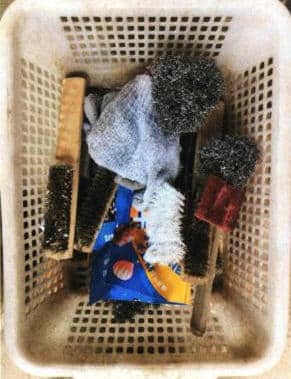
Figure 3-54 Cleaning tools
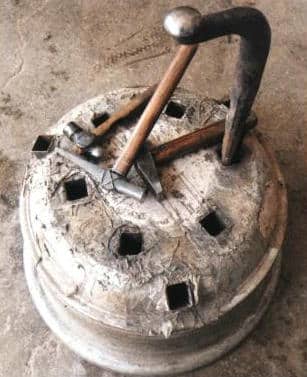
Figure 3-55 Homemade anvil and work post
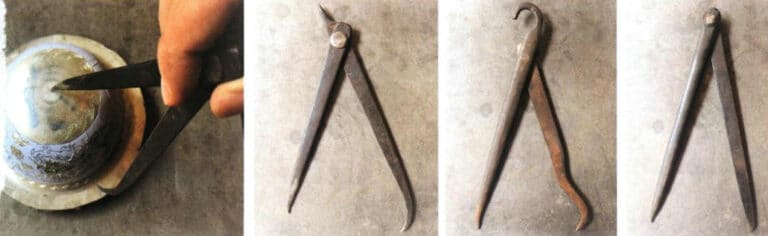
Figure 3-56 Compass
Poznámky
① Enhance empathy and respect for the craftsmen. Common chiseling tools, including chisels and hammers, are basically hand-made by the artisans and used for years. When a craftsman is working, observers should not touch their tools without permission. Every craftsman has their own way of working and rhythm, especially those with many years of experience. While working, they have the position of each chisel and the number of chisels printed in their minds; reaching for a chisel has become muscle memory. Unintentional movements or curiosity from outsiders can disrupt their working state.
② Use of solder. In chasing work, solder is generally used very little. If a chisel puncture or breakage is found, chiseling must stop immediately, and only after repairing it with solder can work continue. Unlike gilding, chasing relies on the metal’s ductility and the tensile forces generated in the metal; once there is a rupture, it destroys the internal tensile force of the metal and affects the shaping. Therefore, small cracks should be soldered promptly; if there is a hole, repair it by soldering in a metal patch of the appropriate size. At that point, you must not rely on solder to fill the hole.
Safety Tips
① When adhesive is used as the backing and padding for three-dimensional molds and objects, during the glue-removal process, be sure not to heat areas other than the outlet or parts without adhesive first, to prevent explosions caused by trapped heat from internally melted adhesive that cannot escape.
② The hammerhead is secured by the tension between the handle, the hammer, and the wood, and it can loosen after prolonged striking and vibration. If you find the hammerhead is loose, reinforce it promptly to prevent the hammerhead from falling off or being flung off, which could damage the work and endanger people nearby.
③ The adhesive mixture contains rosin and edible oil, so it cools slowly; when preparing the glue, do not touch it with your hands to test the temperature, otherwise the adhesive may stick to your skin and cause burns or tissue necrosis.
④ Operate according to regulations and wear appropriate clothing. When melting lead, wear long-sleeved clothing, long pants, and heat-resistant shoes to prevent molten lead from splashing onto your body and causing burns or lead poisoning.